In 2017 I wrote a two-part blog post titled “Level Up With Light Painting: Correcting the Color of Your Flashlight,” which discussed the color biases of flashlights and how to filter them to neutralize that color when shooting at different white balance settings.
In the first part I talked about the pros and cons of LED flashlights, color theory, white balance, testing your flashlight’s color and how to fashion your own custom filters. This all revolved shooting at Daylight white balance.
In the second part I followed up with how to filter Coast HP7R and HP5R flashlights to provide a neutral color when the white balance is set to 3200 K. This is a common setting for shooting in urban areas at night, as most streetlights and other city lights are rendered overly orange when white balance is set to Daylight.
In both of those posts I used a decidedly unscientific method of performing the color tests. While the results were close to accurate, this past summer I decided to look for more precision, so I set about running color tests with the aforementioned flashlights (my favorite two to use). Now I can paint with neutral light at any white balance.
The Sekonic C-800 SpectroMaster color meter.
The Color Tests
For this I needed a color meter. Admittedly, color meters are expensive and not generally used by the average photographer. They are, however, an invaluable tool in commercial/advertising photography and in the film industry. Since I don’t own one, the generous folks at MAC Group arranged to loan me a Sekonic C-800 SpectroMaster. (Thank you, MAC Group! Your gracious loan benefits us all.)
My goal for the tests was to determine the proper filtration for the HP7R and HP5R with a camera set to the white balances most often used for night photography. (For a rundown on these, see Matt’s post “How to Choose the Right White Balance for Night Skies” and my post “Making the Move to Manual White Balance.”) I tested each of nine white balance settings (5500, 5000, 4800, 4500, 4200, 4000, 3850, 3500 and 3200 K), with each flashlight set at both high and low power. I then determined which Lee Filters gels would neutralize the color while also adding a little warmth to the light.
Then we put all the results into a guide to assist other night photographers who would like to remove unwanted color casts from their Coast lights. You can download the guide by clicking here or on the image below.
While the chart is extensive, I would suggest not getting too wrapped preparing for all the options—it’s unlikely that you’ll be shooting at nine different white balances. For my kit, I created filters for 3850 K and 3200 K for each of my flashlights. This gives me enough flexibility for most situations I encounter.
When shooting on a white balance setting of Daylight, I use my 3850 K filter combination to add slight warmth to my flashlight. When setting my camera’s white balance to 3850 K, I use the 3850 K filter combo for a neutral light or the 3200 K filter combo for a warmer effect. Likewise, when using the 3200 K filter with the camera’s white balance set at 3200 K (i.e. Tungsten), the flashlight provides a nice neutral color.
Putting it into Practice
Let’s look at an example of this in action.
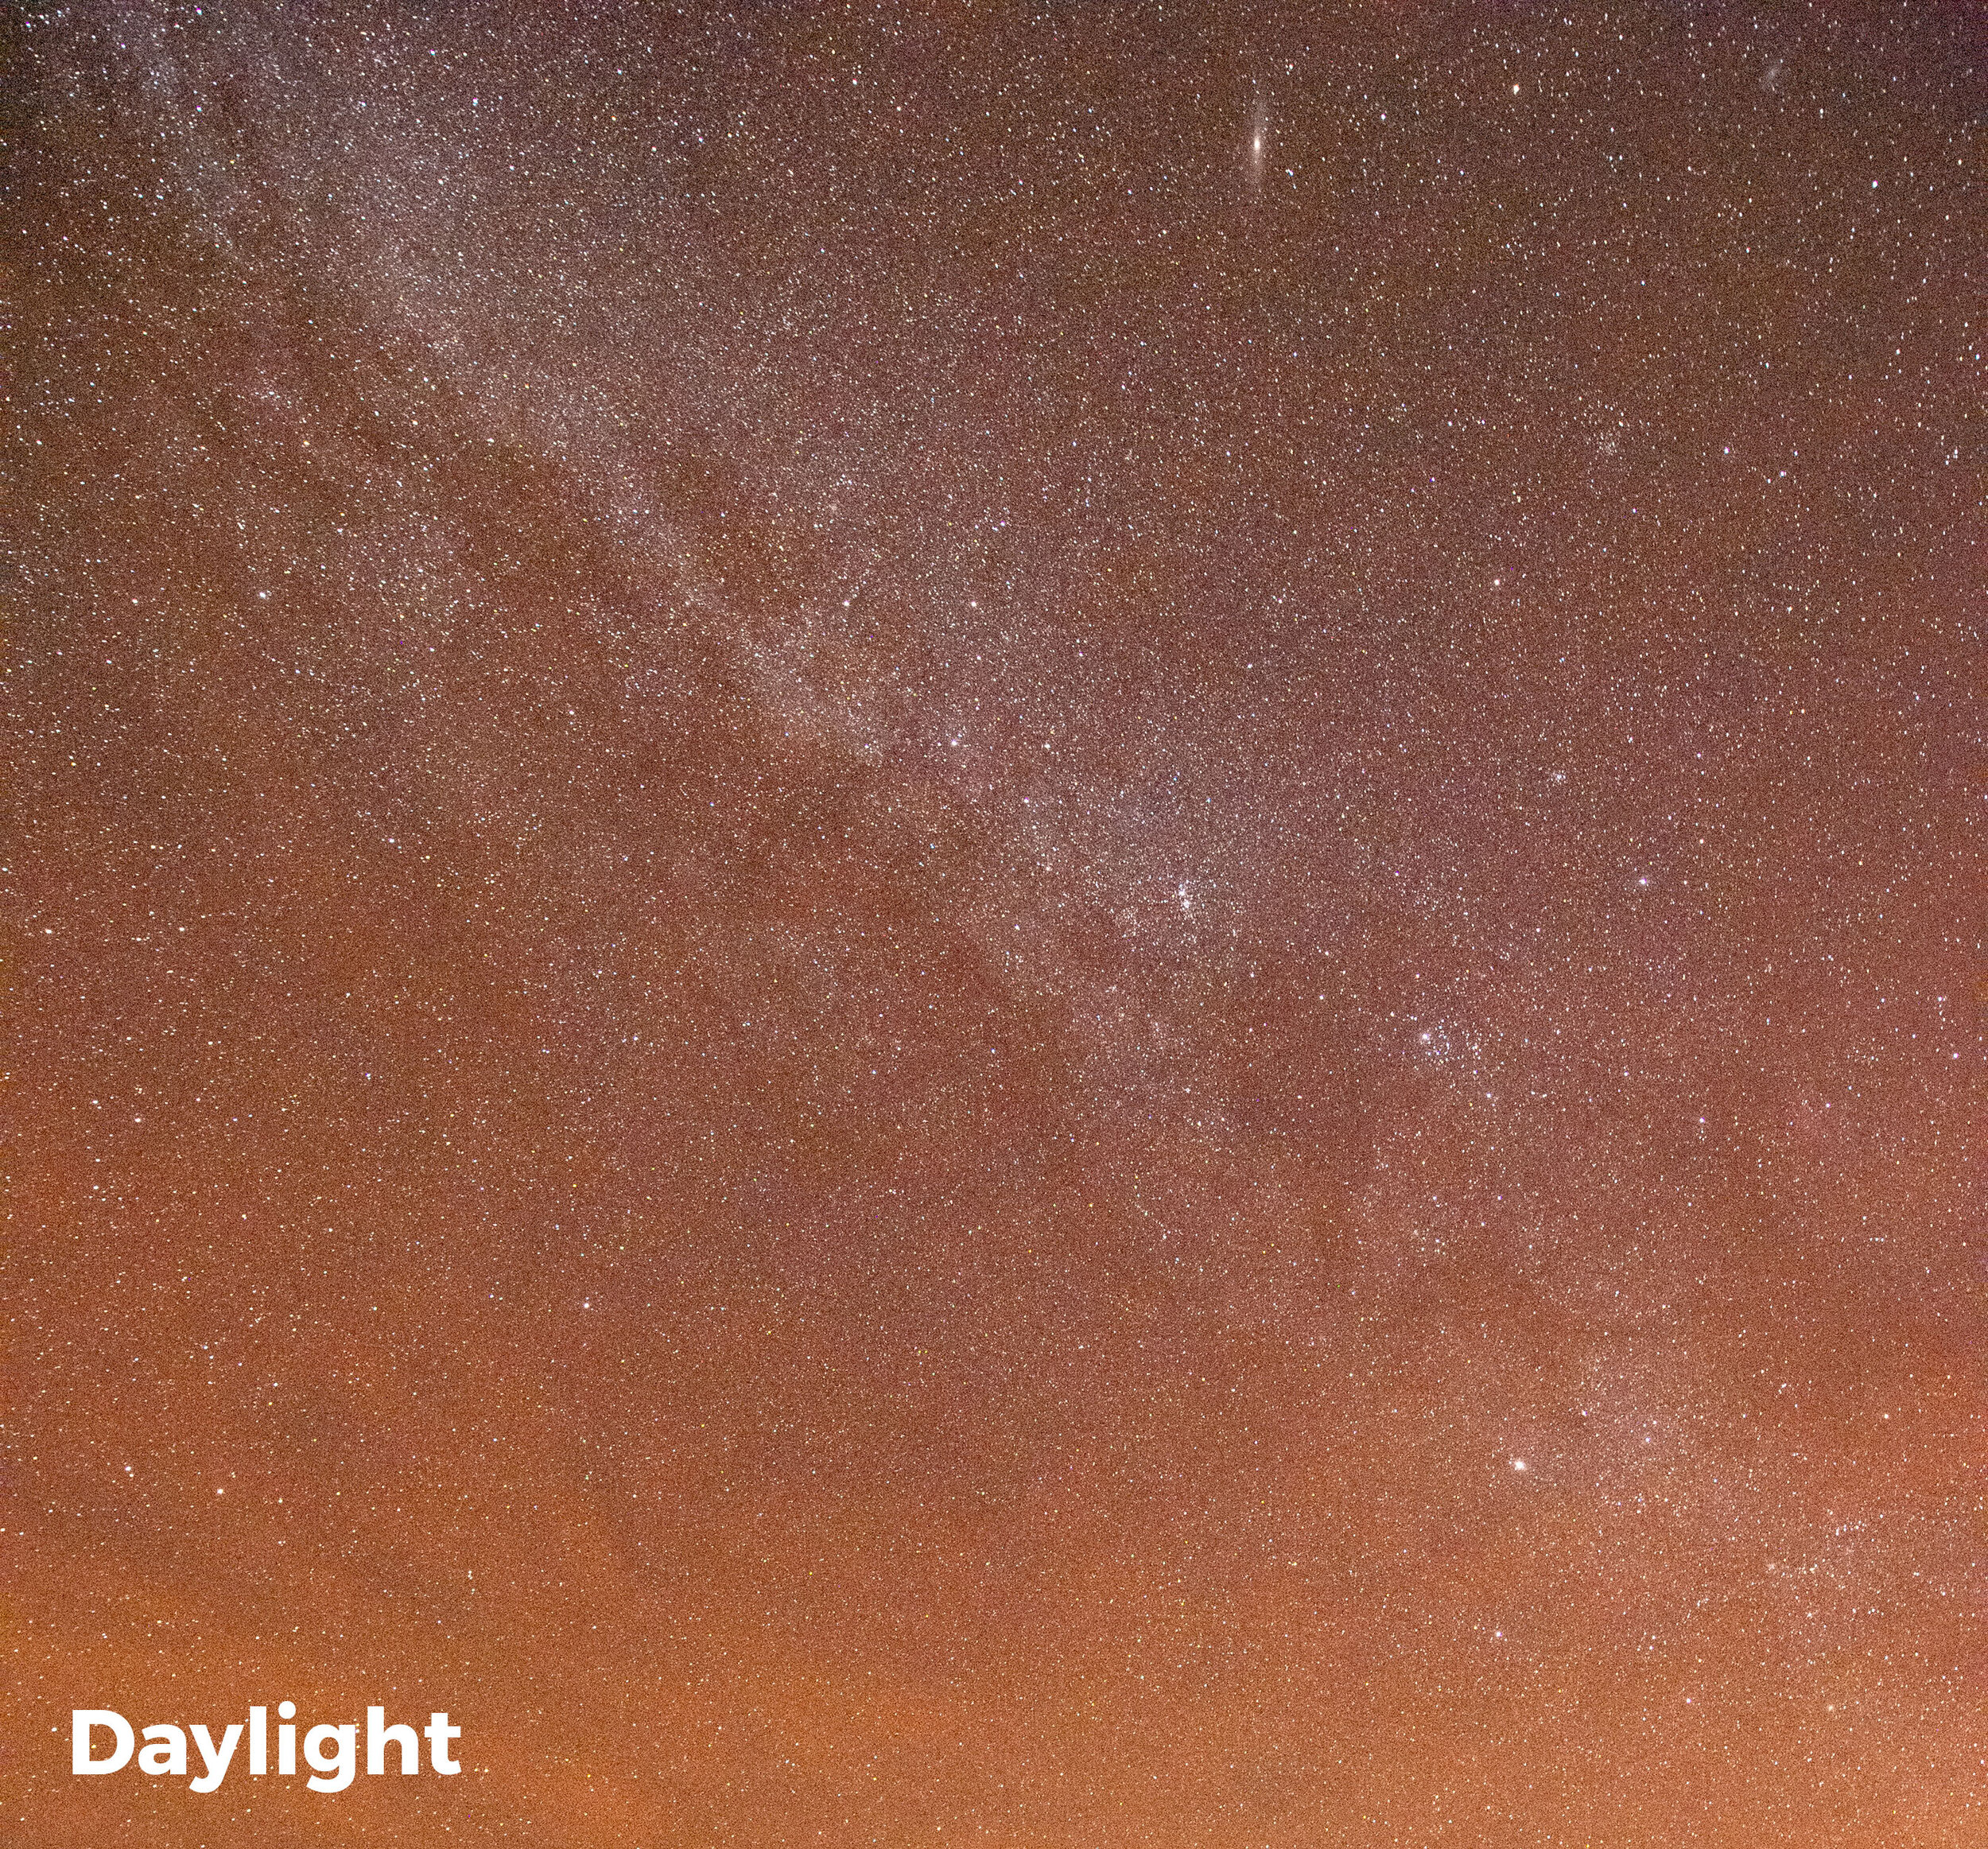
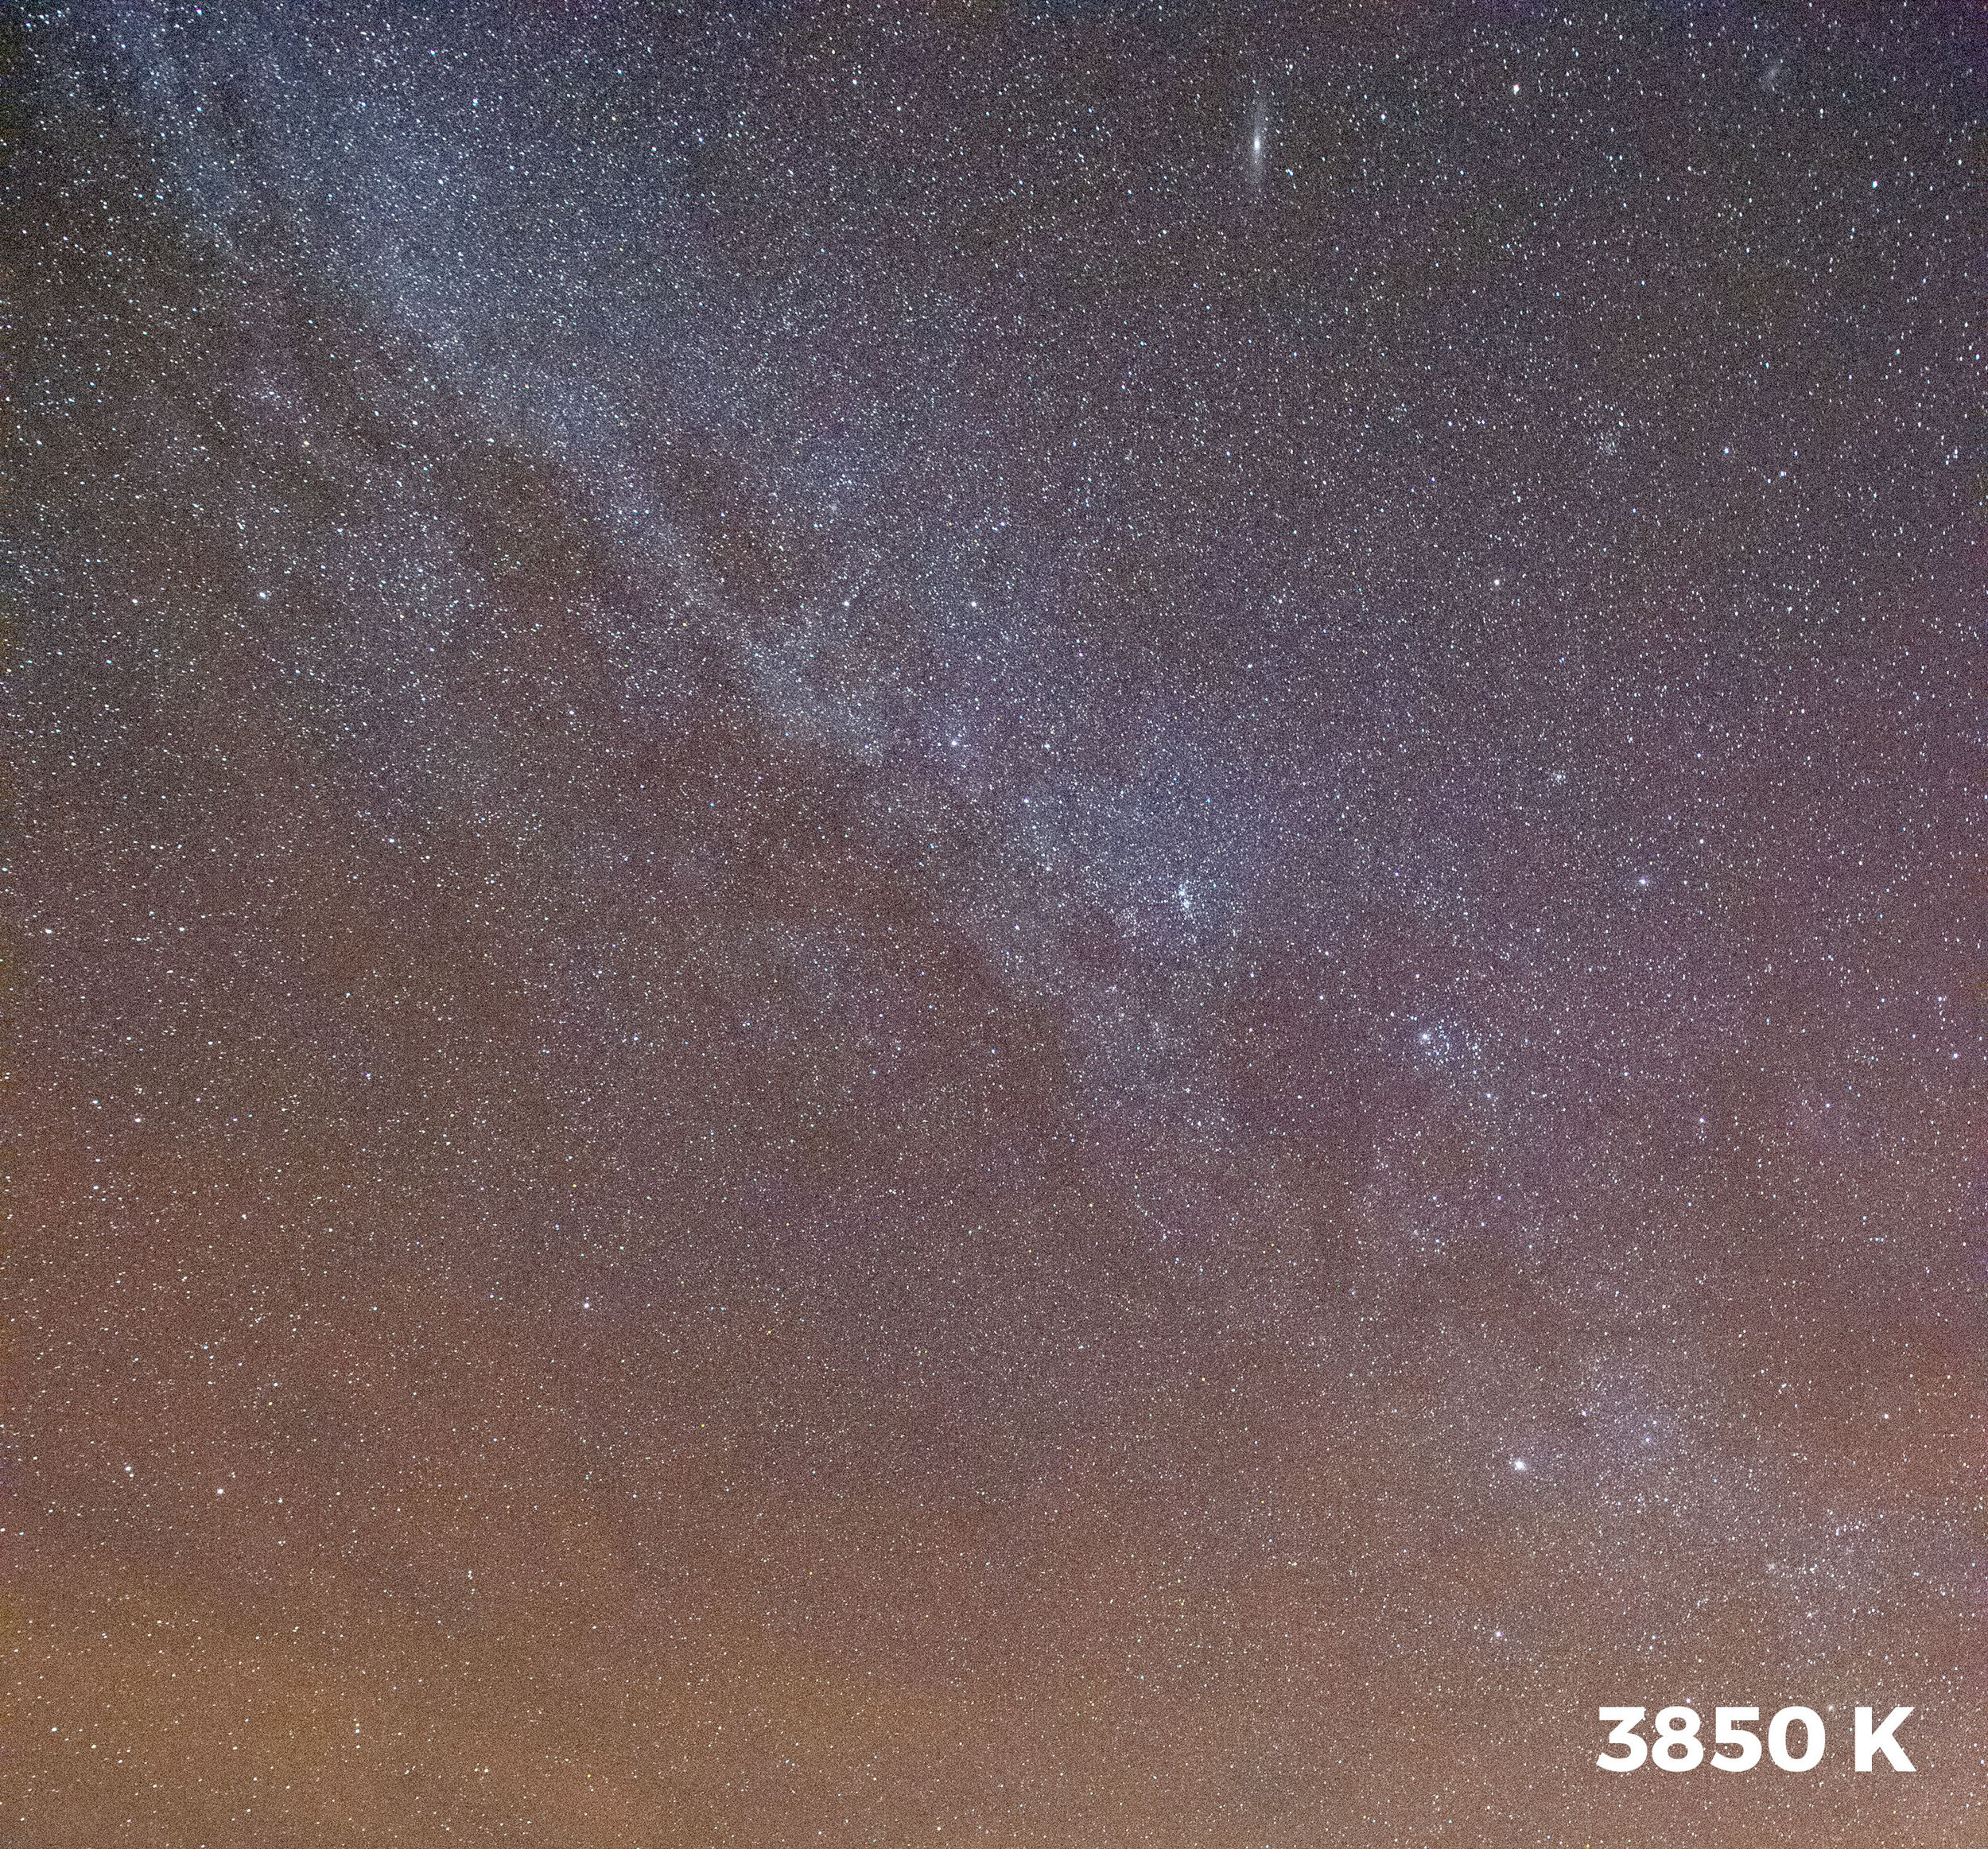
My favorite white balance for capturing the Milky Way is 3850 K. Why? Because when shooting night skies using Daylight (about 5500 K), even in dark sky environments it’s not uncommon for the resulting image to have an orange cast to it. Using 3850 K creates a cooler, more natural look to the sky while maintaining some warmth in the colors of the galaxy.
In Figure 1 you can see the result of shooting the Milky Way in Death Valley National Park with my white balance set to Daylight compared to 3850 K. The latter better represents how I want the night sky and the Milky Way to appear in a photo.
Figure 1. The color difference between shooting the Milky Way at a Daylight white balance versus 3800 K.
If shooting the Milky Way is all I wanted to accomplish, setting my white balance to 3850 K would provide great results. But for those who know me, you know I love light painting!
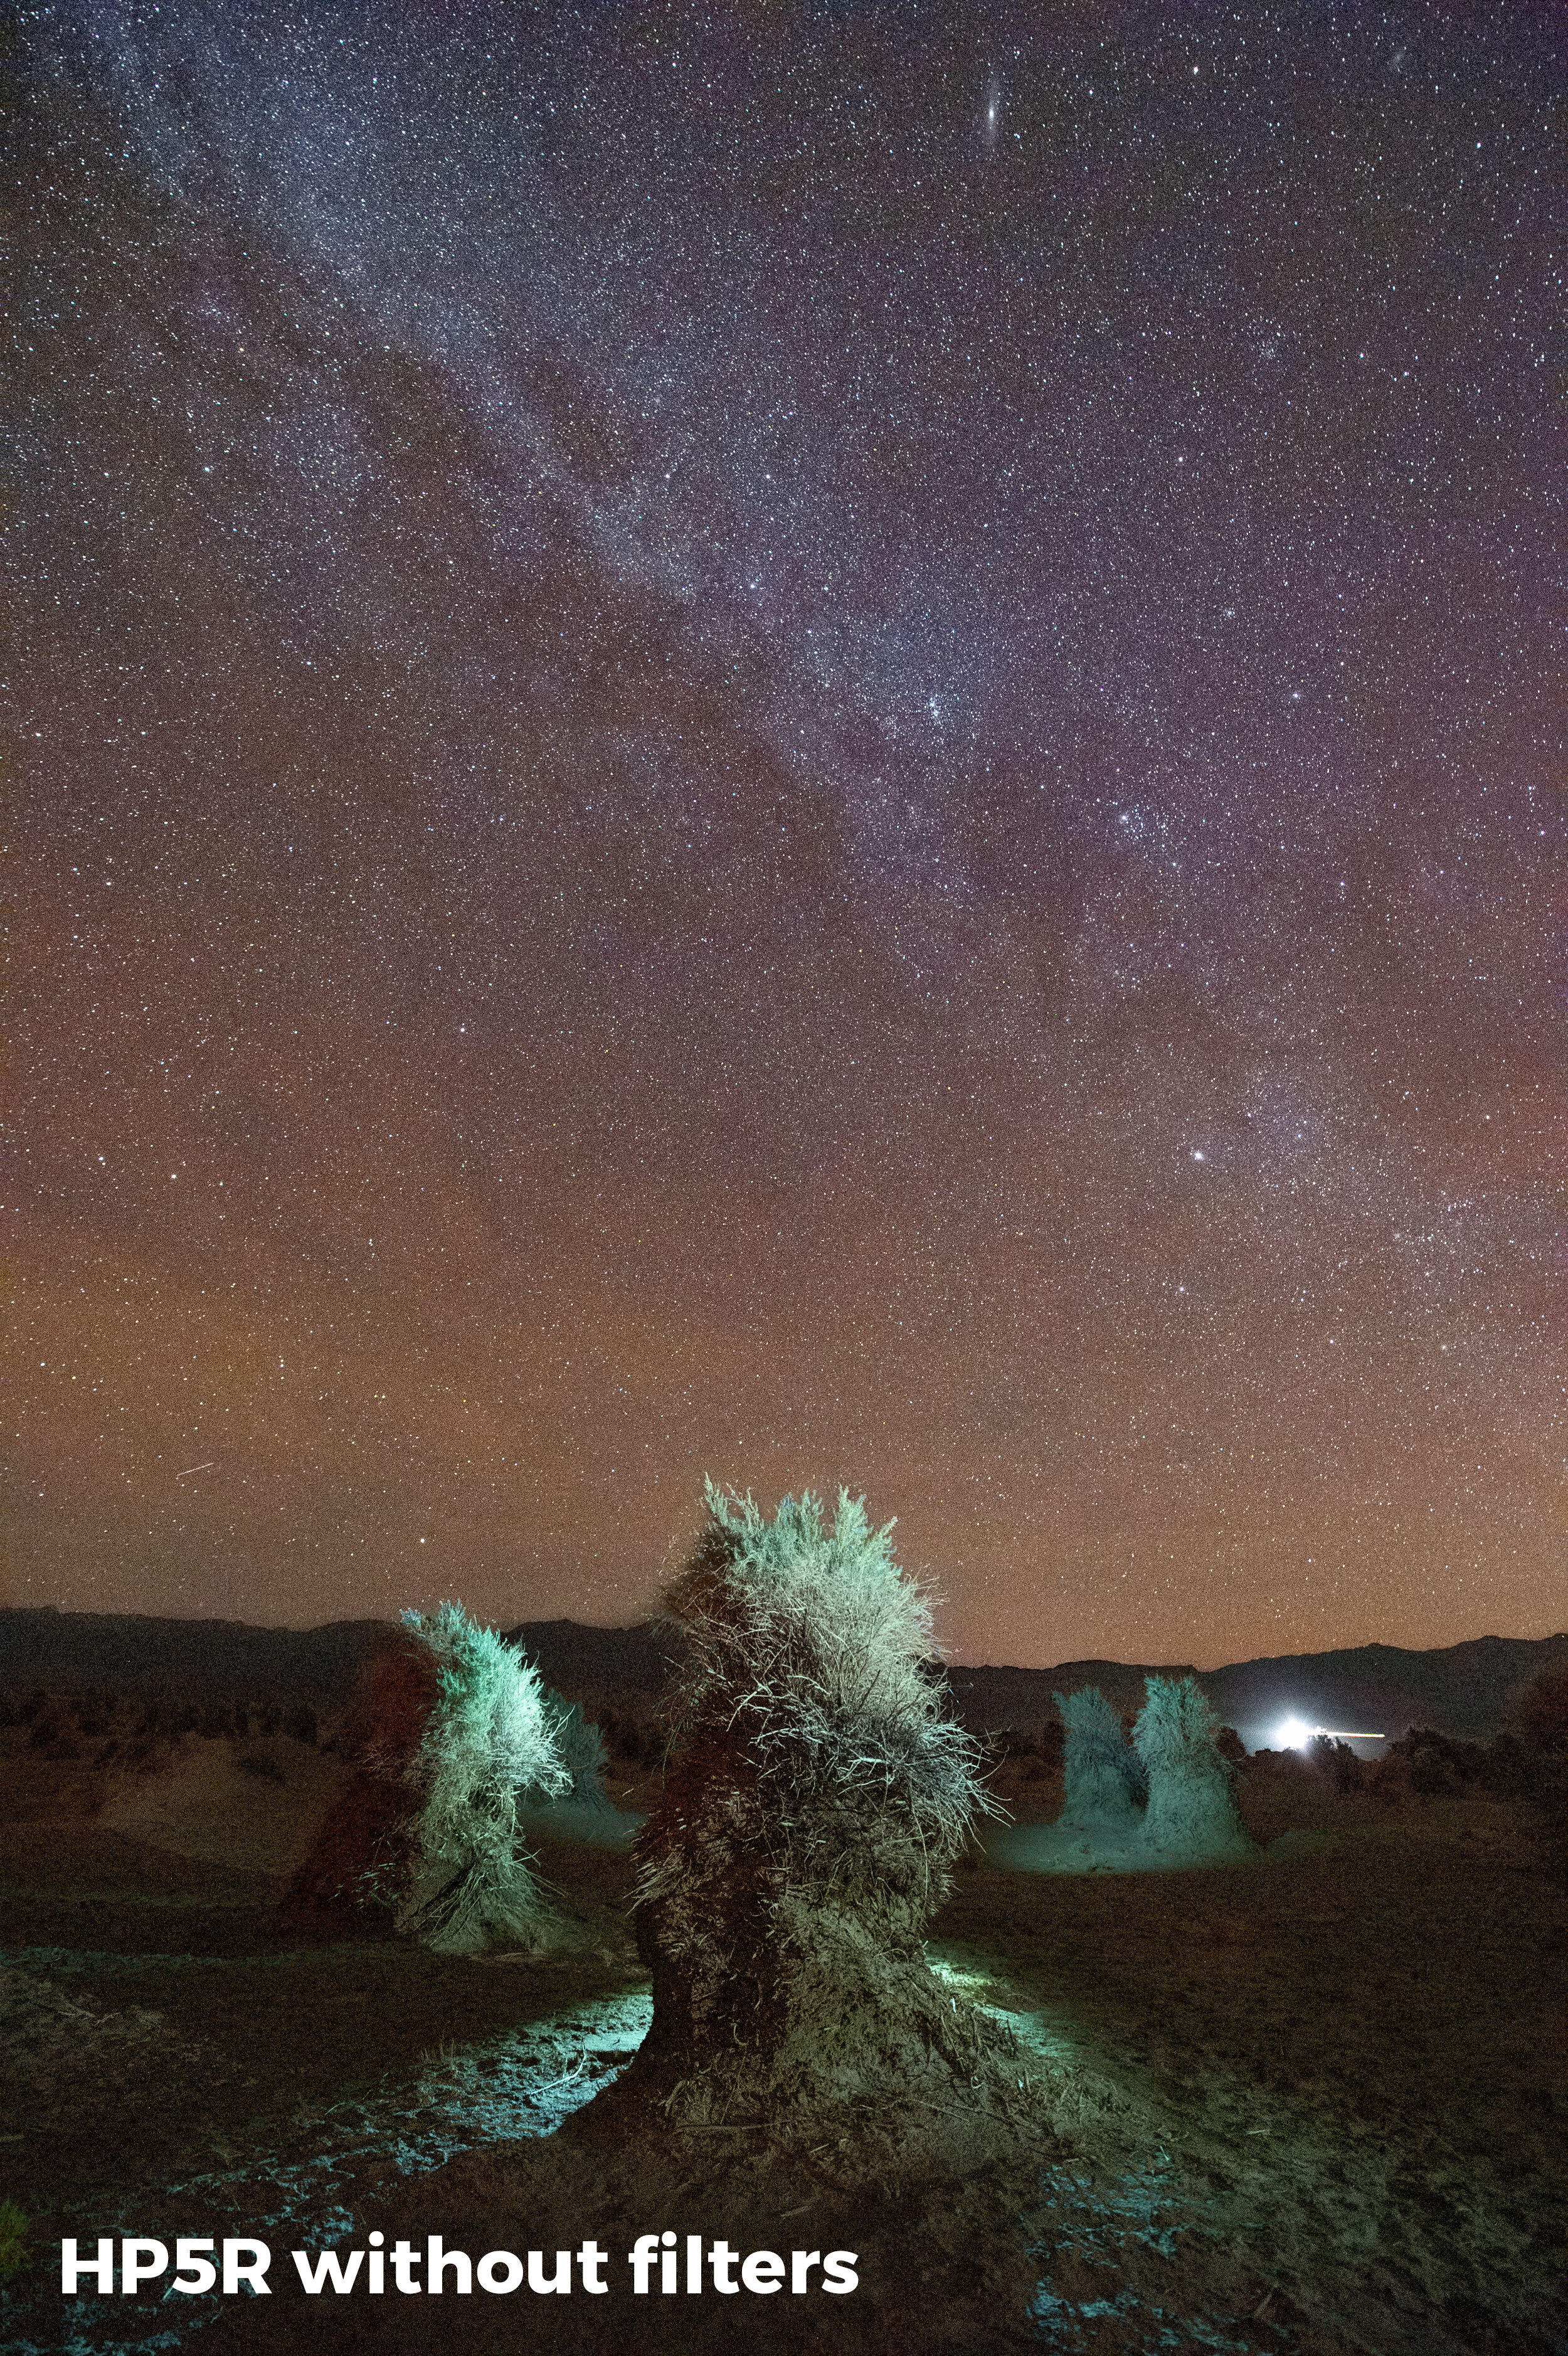
At Death Valley’s Devils Cornfield, I captured the first image (left) in Figure 2 with a white balance setting of 3850 K. For the light painting I used the low-power setting on my Coast HP5R. Notice the overly blue/green effect that the unfiltered flashlight created?
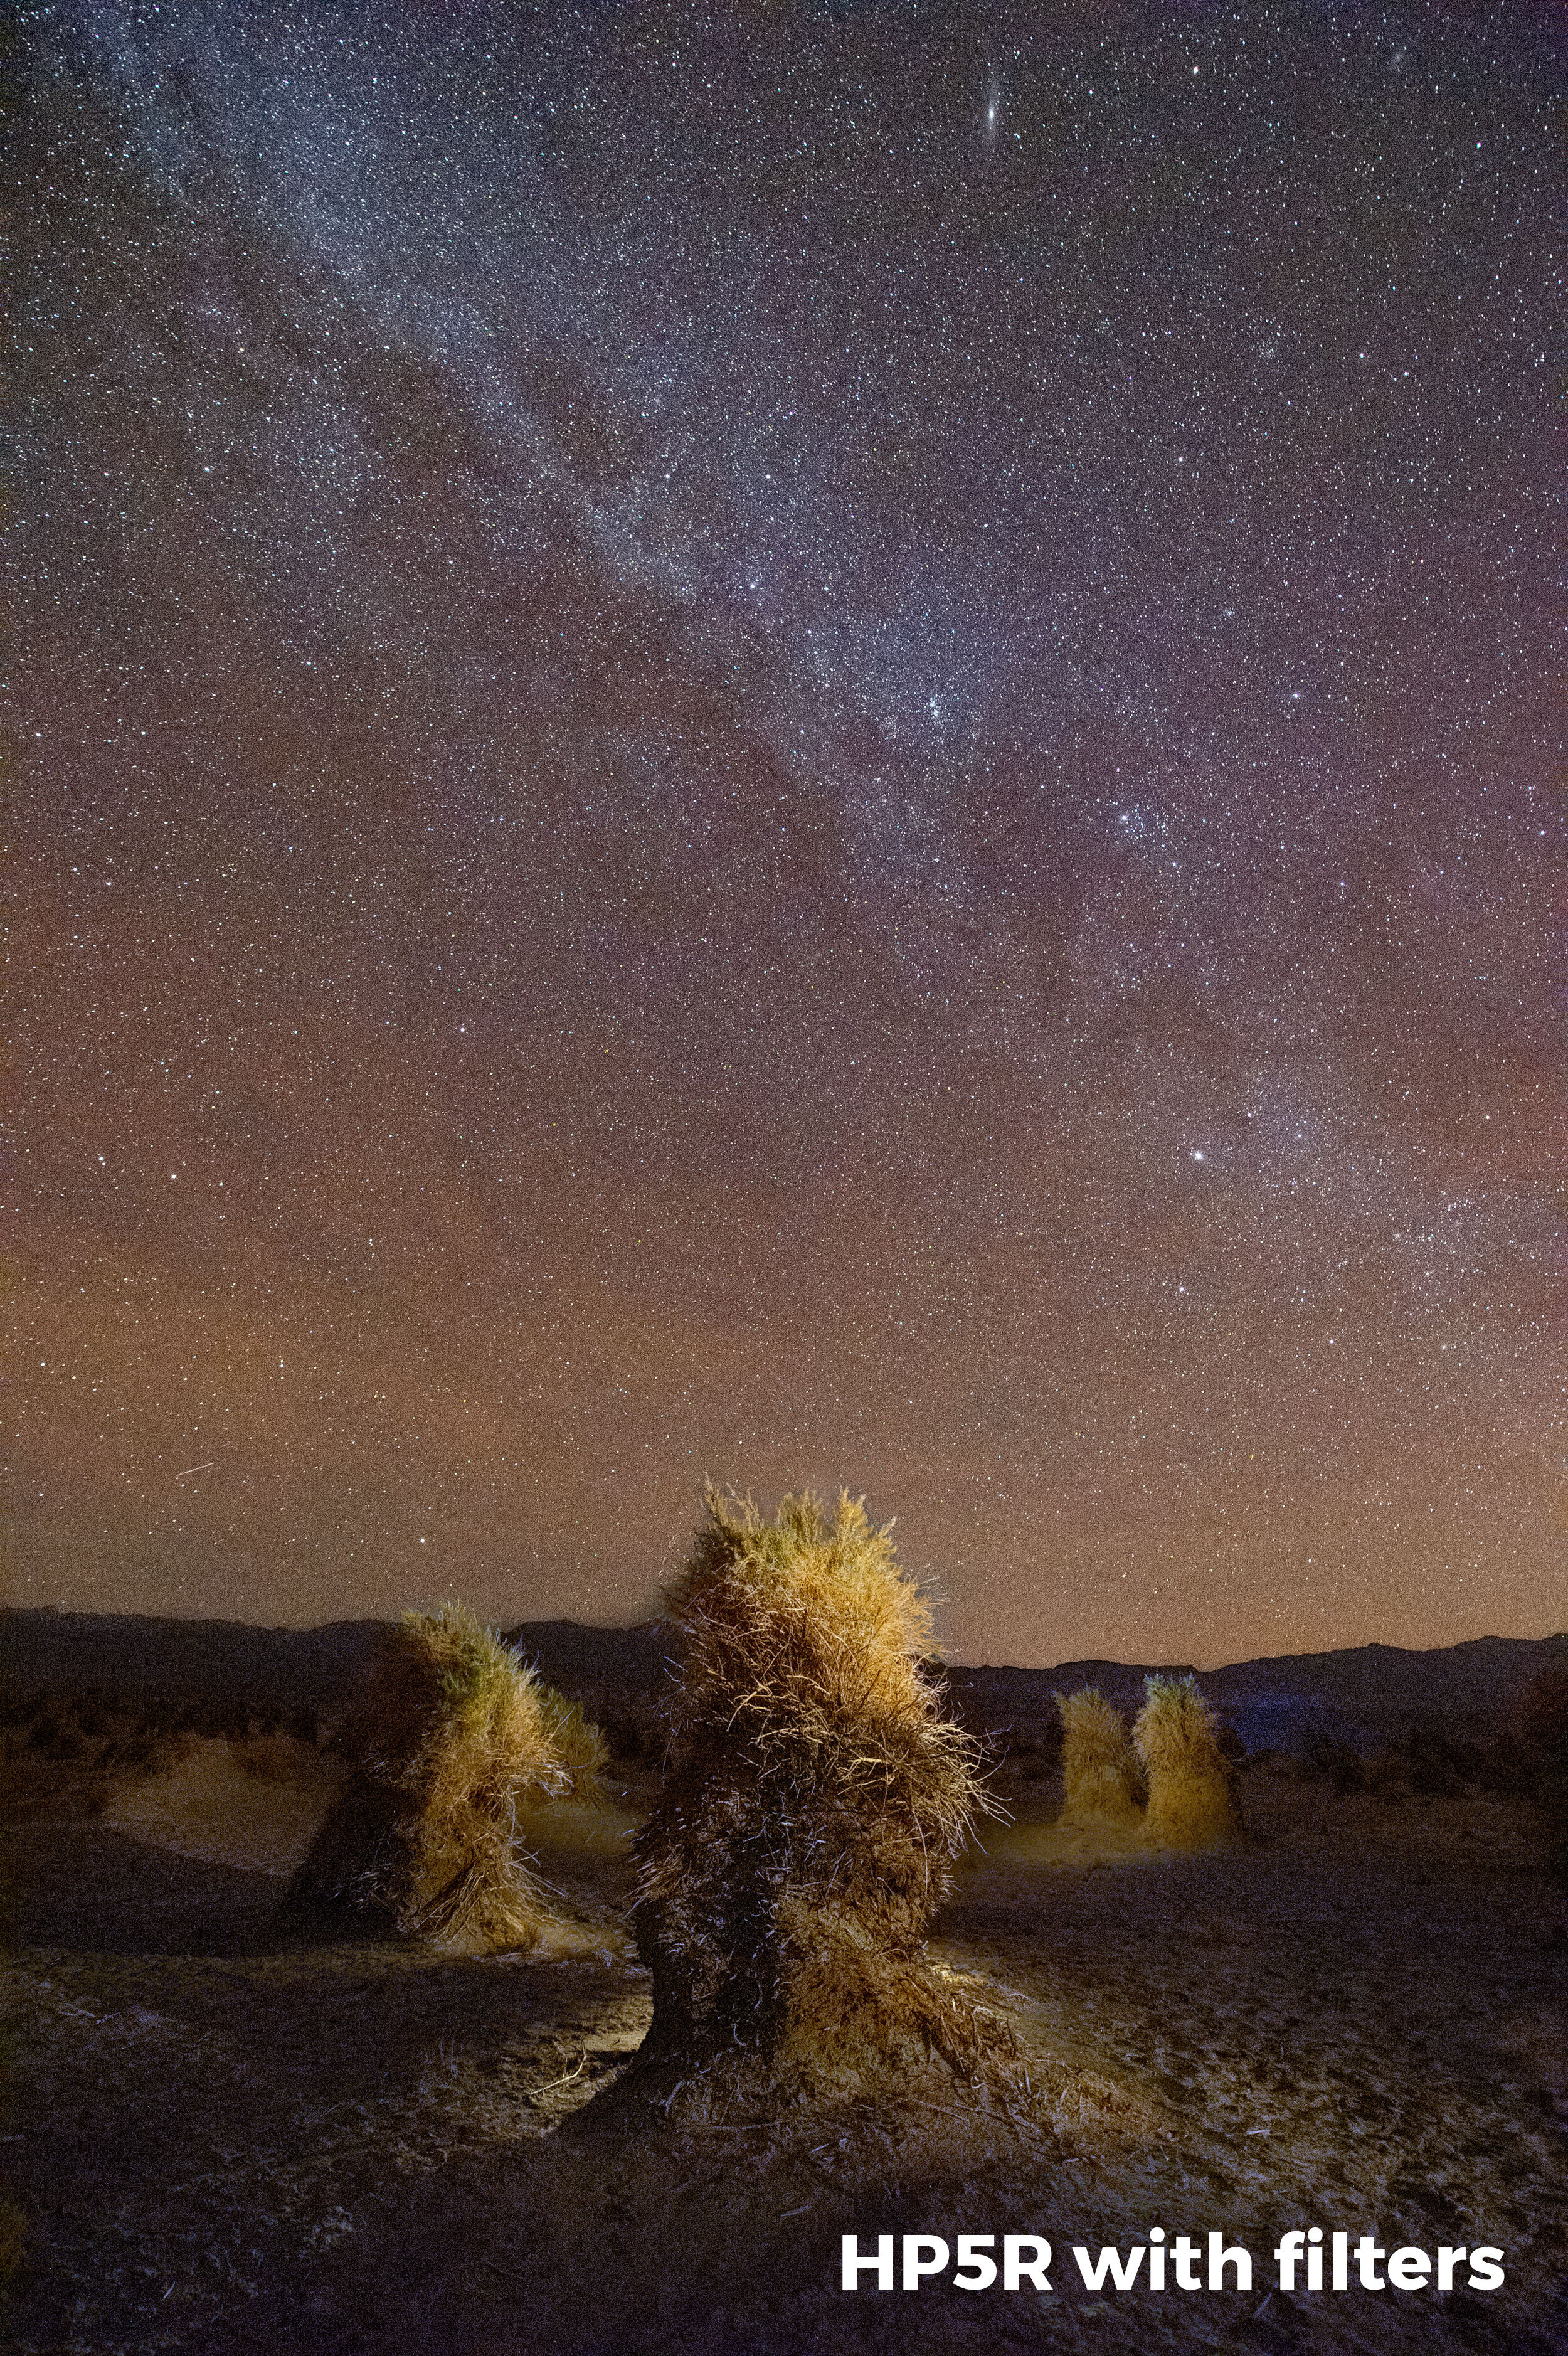
To get my added light to accurately render the colors of the scene, I filtered the flashlight to look good at that white balance of 3850 K. According to my test results, that meant I needed a combination of 1/2 CTO + 1/8 CTO + 1/4 Minus Green.
That fixed the incorrect color cast, but I really wanted my flashlight to put out a slightly warmer rather than neutral color, because I like the visual effect of warm light. So instead of using the filter combo for 3850 K, I used the combo for a 3200 K setting: 3/4 CTO + 1/8 CTO + 1/4 Minus Green + 1/8 Minus Green. That gave me exactly the color I was hoping for (Figure 2, right).
Figure 2. Devils Cornfield, Death Valley National Park. Nikon D4s with a Nikon 14-24mm f/2.8 lens. 20 seconds, f/4, ISO 6400, with a white balance of 3850 K. Light painted with a Coast HP5R unfiltered (left), and filtered (right) with Lee 3/4 CTO + 1/8 CTO + 1/4 Minus Green + 1/8 Minus Green gels.
One last point: It can be a bit tedious to hold filter gels in front of a flashlight while running around in the dark. The solution? I create a “disc” filter that attaches right to the front of the flashlight. To see how I do this, look back on Part I of this series.


