
Making portraits at night is one of the most creative and challenging applications of night photography. In this post, I'm revealing some of the hardest-won lessons I've learned while honing the craft.
Tip #1: Dilate time
Figure 1. "Gymnos at Gantry Park" (2012) from Night Paper. Nikon D700. 30 seconds, f/8, ISO 200.
What truly defines the difference between a picture of someone at night and a true night portrait is incorporating elements that show a clear passage of time. In Figure 1, the soft water from a 30-second exposure adds a subtle note about time passing.
I deliberately include the following things in my night portraits; they overtly or subtly show time passing:
water flowing
clouds passing
cars moving
trees or grass waving in the wind
star trails
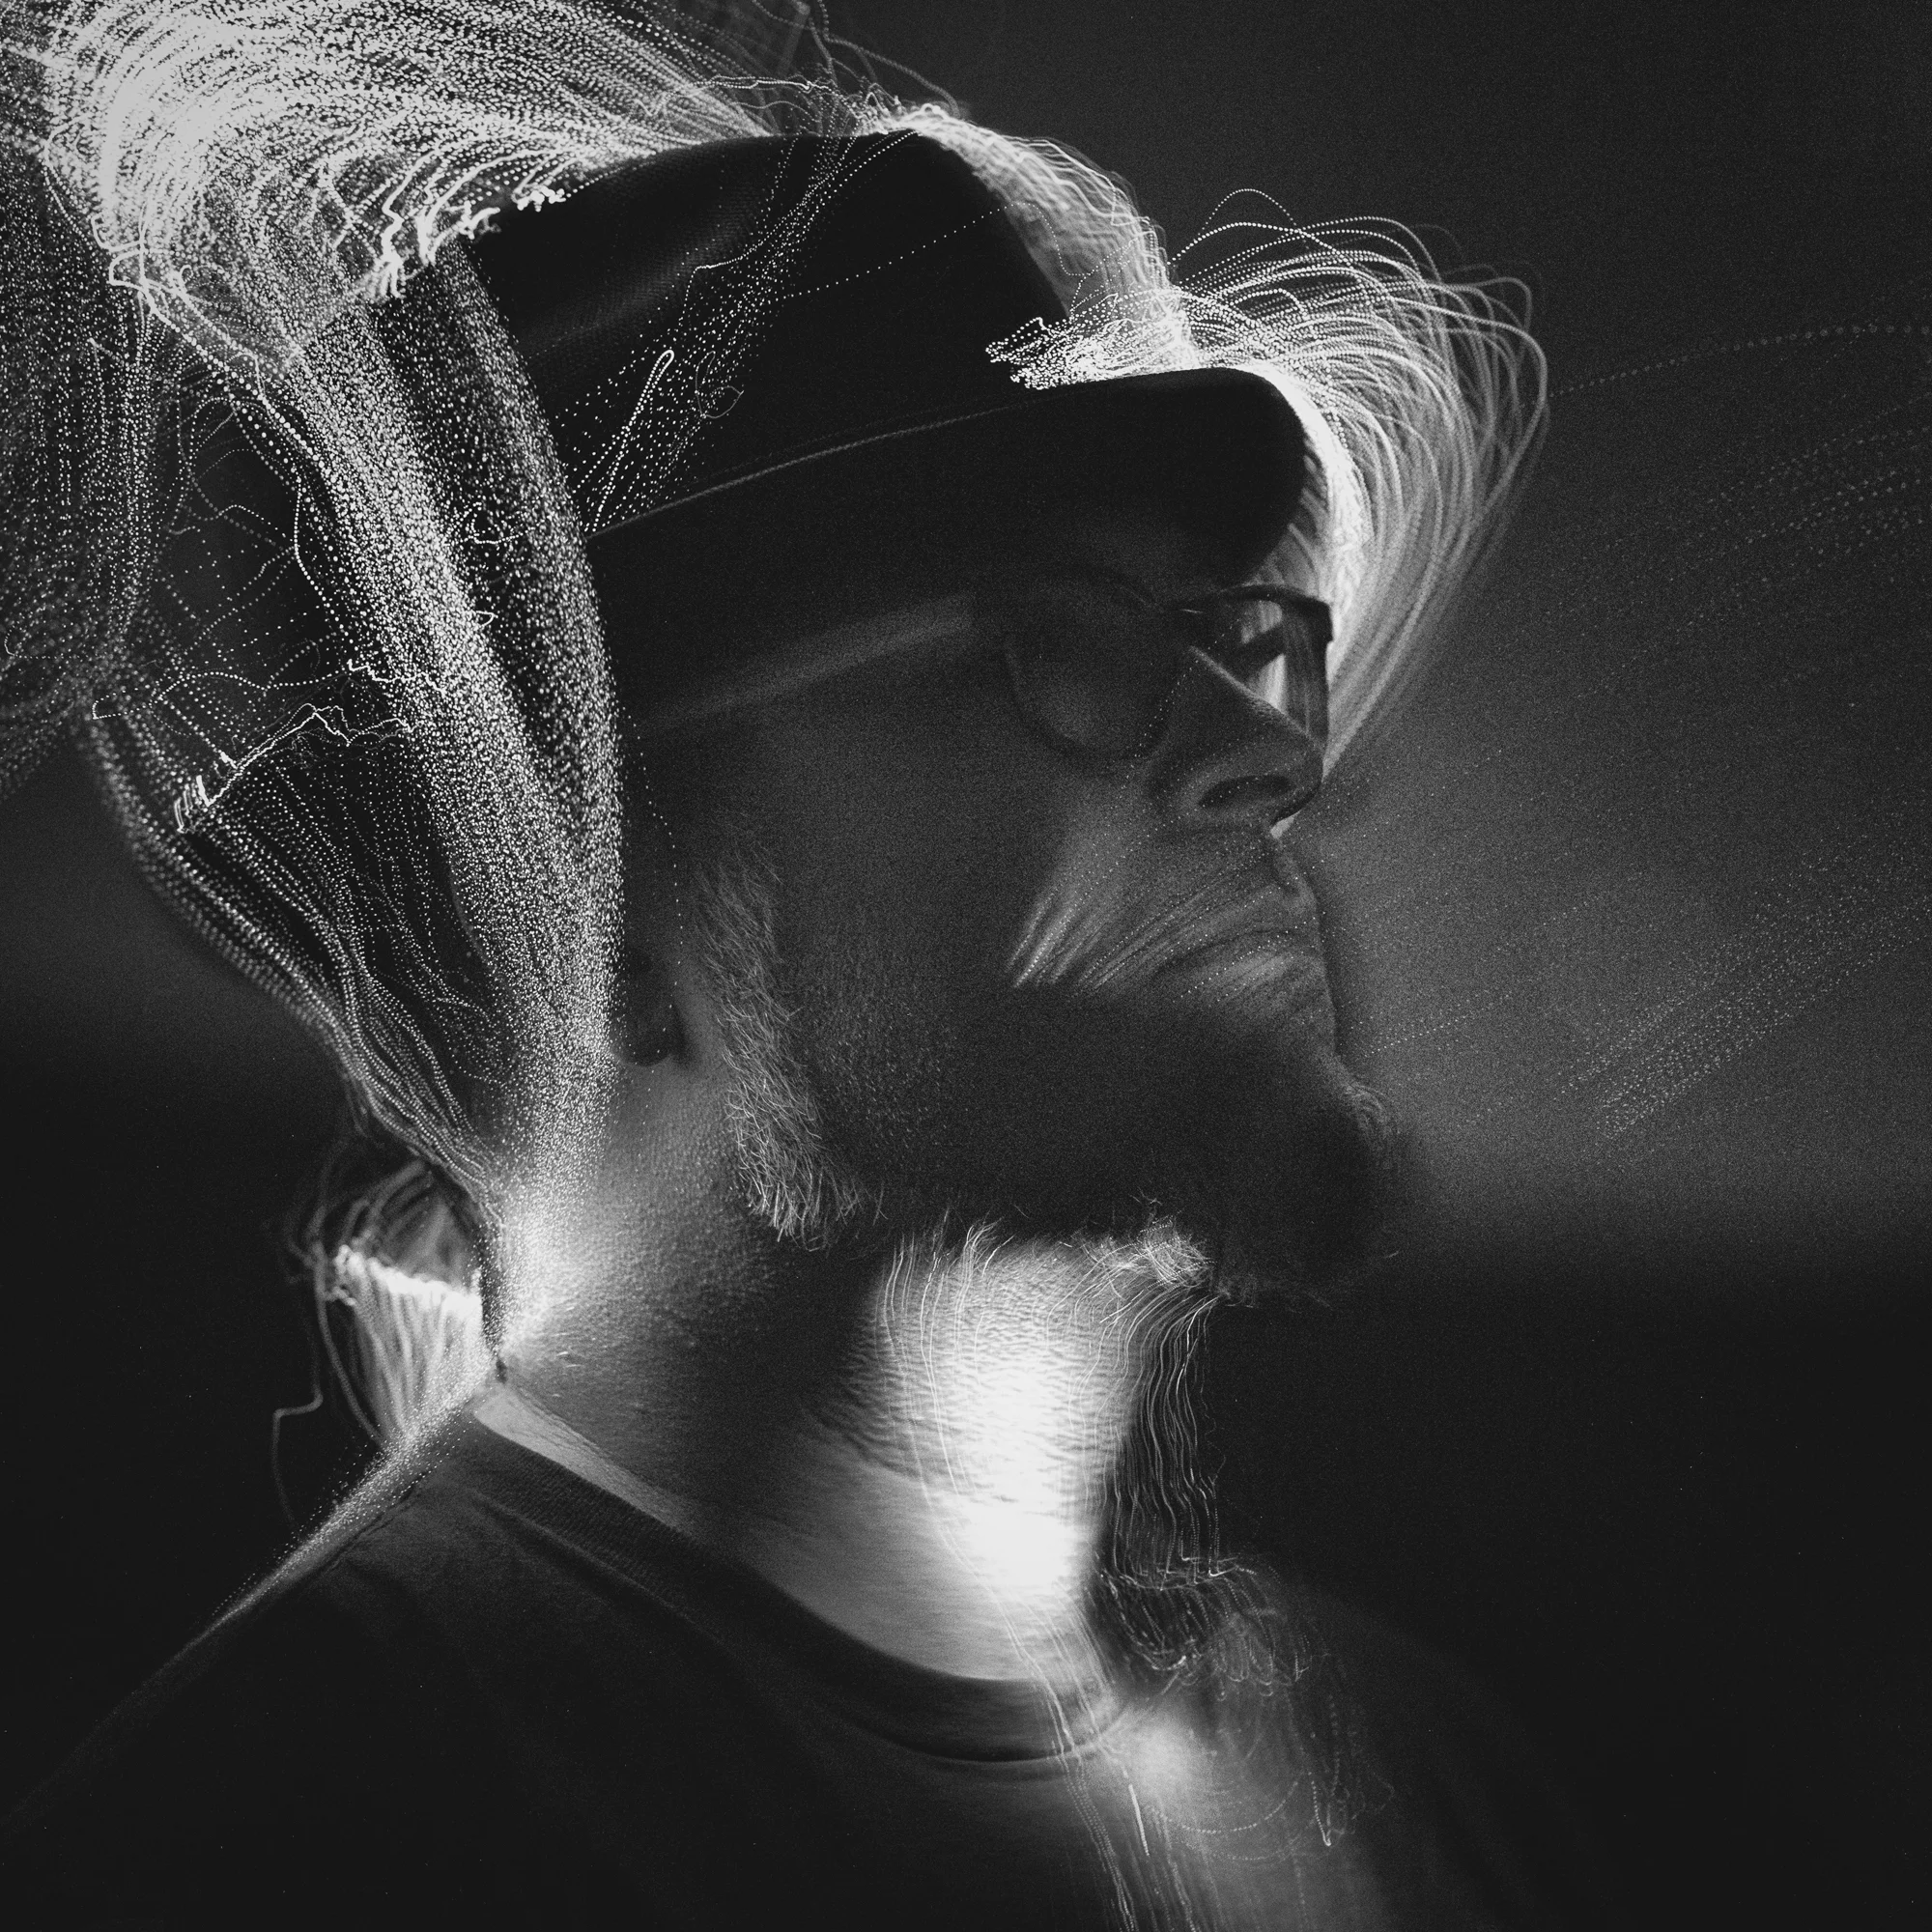
Figure 2: Skyler at Barr Lake State Park, Colorado (2012) from my Night Paper project. Mamiya 7 II. 60 minutes, f/11, ISO 200 (Ilford XP2).
Note the star and airplane trails in Figure 2. It's an extreme example, but drives home the point about dilating time.
What truly fascinates me about this is our brains are wired to comprehend only the moment we are in. We cannot see time as it compounds in a long photographic exposure. But somehow, we can comprehend the resulting photograph. So cool, right?
Tip #2: Do something That Would be impossible in daytime


Your unique advantage whilst making night portraits is the duration of your exposure. Daytime portraits have hard limitations—exposure are all a fraction of a second.

You have time—lots of time—to:
do some wicked cool light writing
execute some detailed and layered light painting
let your model stand nearly still, so the edges of their body blur
burn in star trails
expose a delicate net of stars arcing across the sky, including the Milky Way
Tip #3: Use scale to your advantage


Since I often shoot in National Parks and other wilderness areas, I choose to make humans small in scale versus imposing and inspiring landscapes. You can accentuate this by adding a flashlight or headlamp beam.
Tip #4: Use a flash for your model's face and continuous lights for the other parts


The most delicious night portraits I've made have crispy eyes and facial features. It's classic portrait technique. Where I depart from the traditional is keeping that shutter open and painting in from behind, underneath and the side to reveal things that move after the flash pops.
You can even have your model move away after the flash, achieving a "ghosting" effect by letting the light illuminating whatever was behind them to pass through the space once occupied by their body.
You may ask, "Matt, can't I just use a flashlight?" Sure, but I recommend flash because even a quick burst from a flashlight isn't crisp enough to create the look I am after. Try both and you'll see what works for you.

I strongly recommend that you get a flash meter to avoid the process of chimping your way to a proper flash exposure. It will save time, and batteries. TTL is OK, but I prefer something more consistent from one flash to the next. And not all TTL works well at night.
Tip #5: Stop thinking and experiment
Figure 8. A second camera set for behind-the-scenes captured this beautiful moment during our Great Sand Dunes workshop.
Our own expectations can get in our way. We can stifle our ability to make something unique by thinking too much and planning too hard.
One of my most successful methods is to say, "OK, I got something I liked, now try something weird or random."
Whatever I suggest here is likely to be my own taste and not yours. Find your experimental voice. And shout. Whisper. Cajole. Surprise yourself by letting the camera record what you cannot possibly see in a single moment.
Wrapup
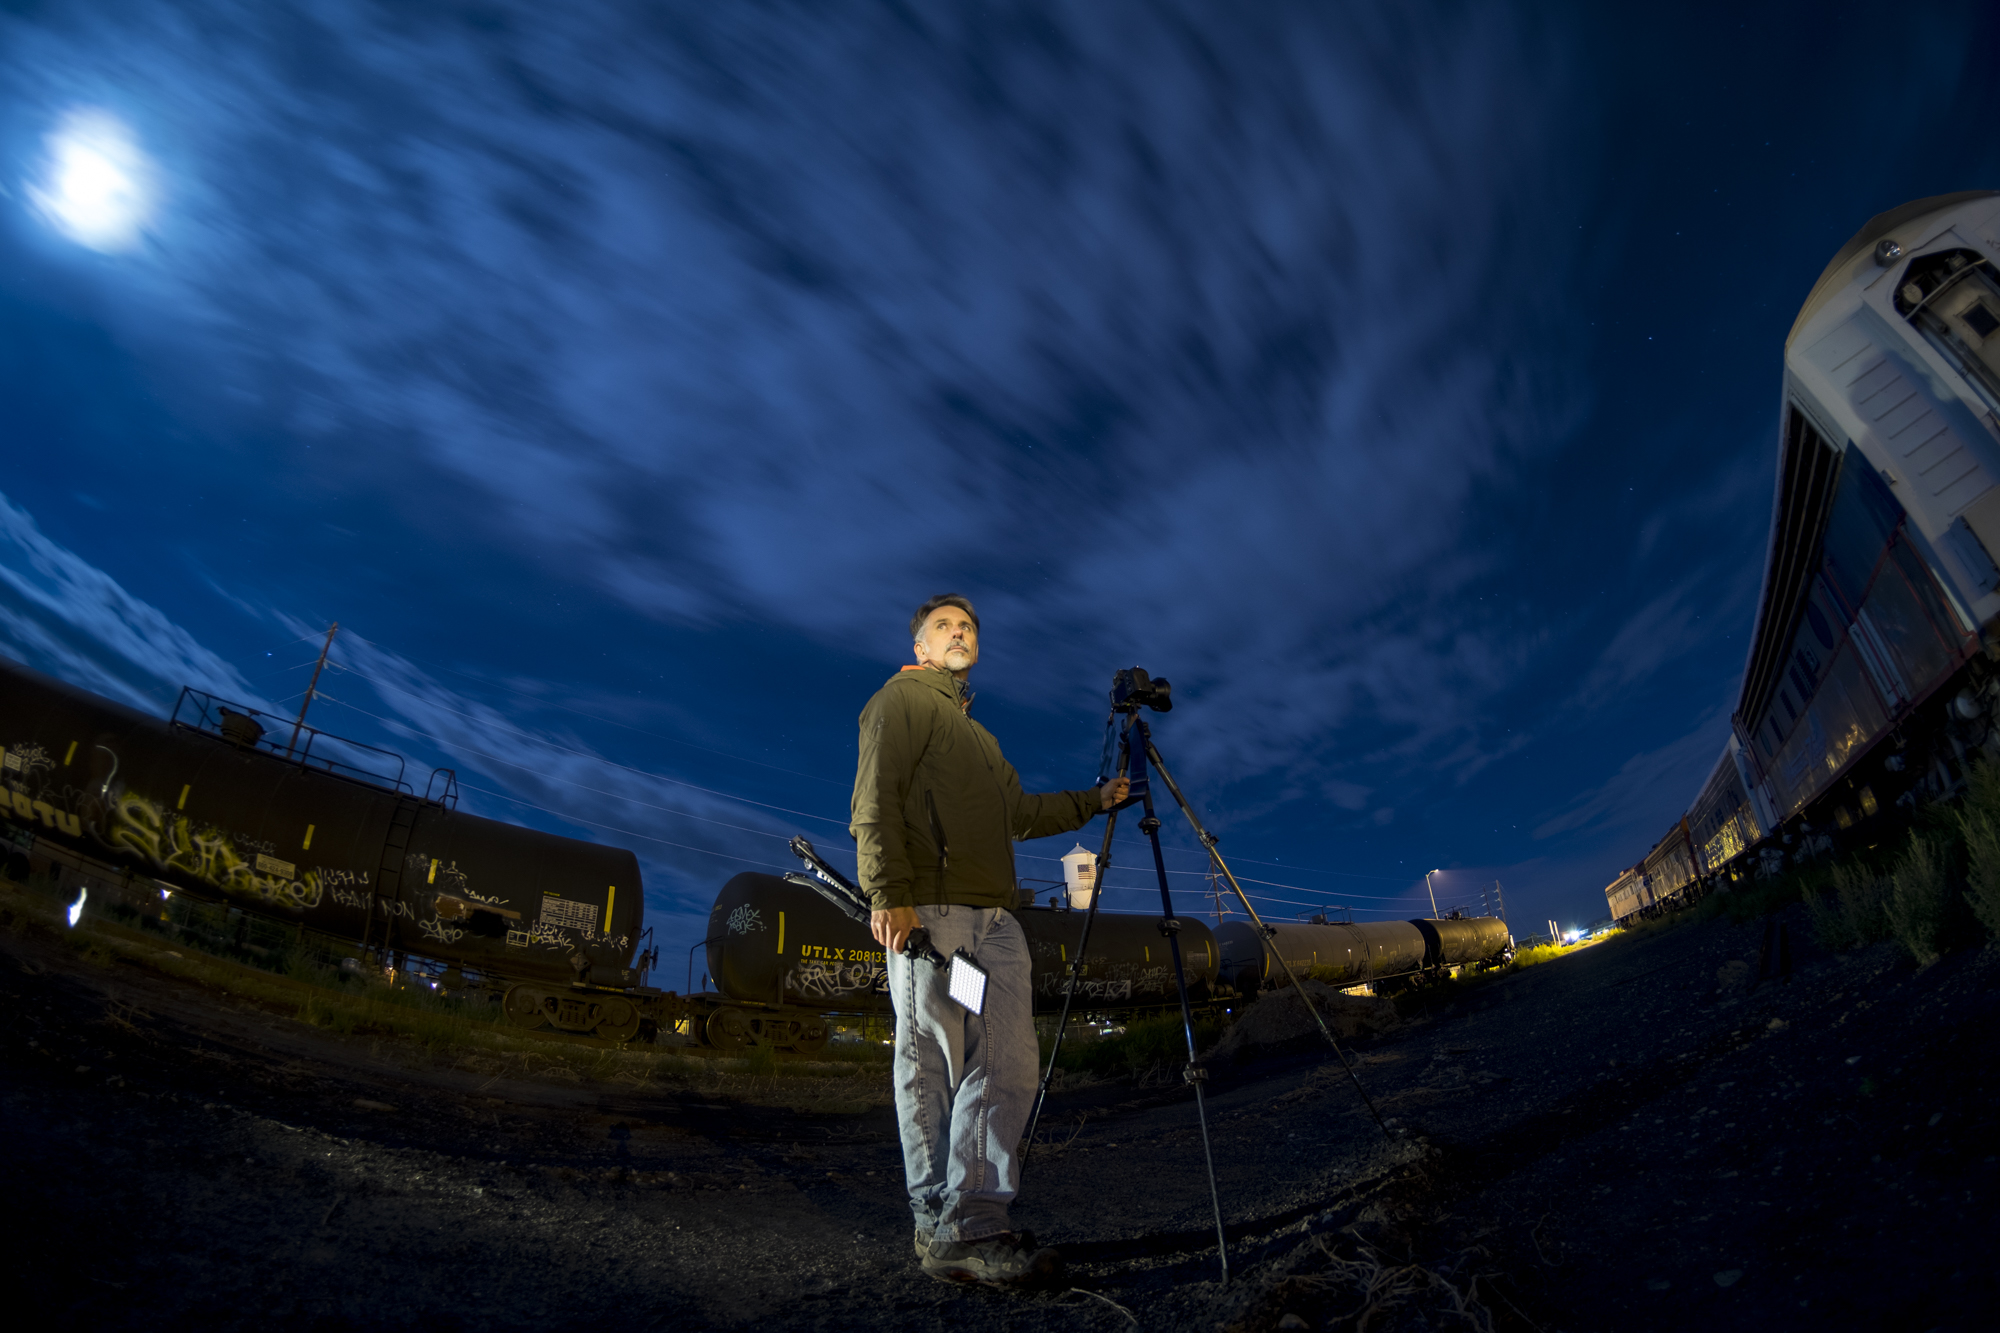
Figure 9. Michael Hollander from B&H using a telescope at the eclipse event in Oregon. Photographed with a Fuji X-T1 and a 7artisans 7.5mm Fisheye f/2.8 lens at 30 seconds, f/2.8, ISO 6400.
Night portraiture is difficult. No joke.
It requires mastery of the fundamentals of night photography, including focus, composition and exposure. You also need to have some knowledge of portrait lighting and how to use a flash.
You also need to have an ability to direct your models clearly (and in the dark). Practicing on your fellow night photographers is a great way to start. Work between their exposures.
Now that we've cleared the prerequisites, don't fret. You can learn simply by doing. Space on your memory card is free, so grab a friend and try it out.
Note: Wanna level up your night portraiture skills? Join me for intimate group sessions in April and October of 2018 in Catskill, New York.


