
Light painting is and can be many things. It can control the viewer’s eye. It can be a catalyst for creativity. It can bring life into the shadows of a composition. It can add drama to an otherwise ordinary scene. It can be an artist’s brush used to sweep strokes of illumination onto a landscape to allow us to see into the night in new and previously unimagined ways.
In other words, light painting is a versatile tool that can be a means to various ends. Below, all five National Parks at Night instructors share a way they have used light painting to enhance a nocturnal photograph.
You’ll notice that the examples included do not involve drenching a scene with buckets of untamed light to paint every crevice and fill every shadow. They also don’t involve dramatic re-representations of reality, wherein we let the light alter the authenticity of the world that’s in front of the camera. Rather, as Gabe says, we paint with shadows as much as we paint with light. And as Matt says, we let the light merely kiss the subject.
For each photograph, click or press on the slider, and drag it left and right to see how the light painting subtly but noticeably enhances the composition. Study the ways that the added illumination helps accomplish different tasks or helps solve problems of exposure, composition, etc. Then think about how you can apply those same ideas to your own night images.
More importantly, also think about how you may have illuminated these scenes differently. One of the amazing aspects of light painting is that it affords us an opportunity to create a completely different photograph than another photographer who may have the exact same composition.
Lance Keimig
Nikon D850, Irix 11mm f/4 lens, 15 seconds, f/5.6, ISO 3200.
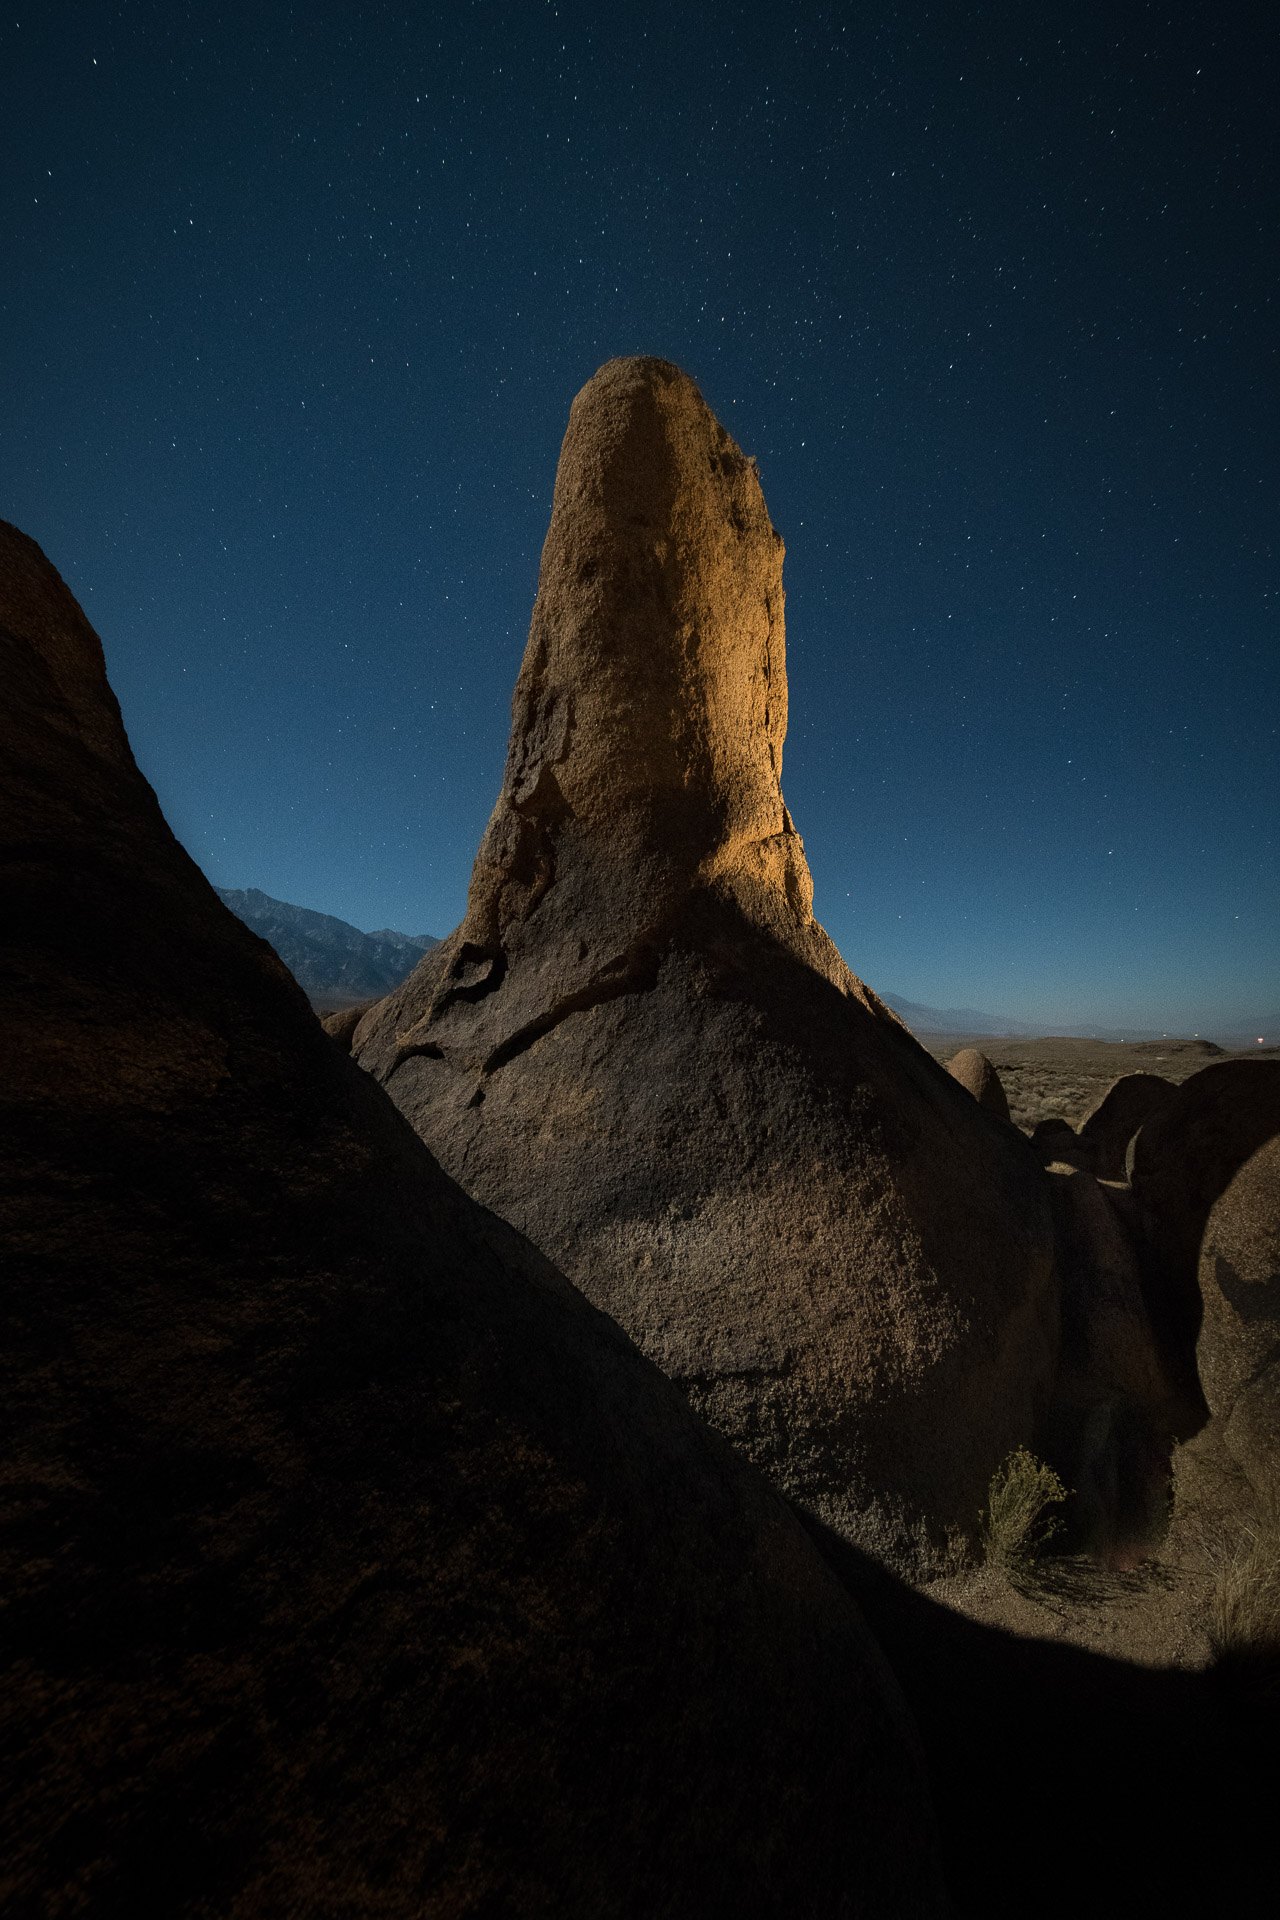
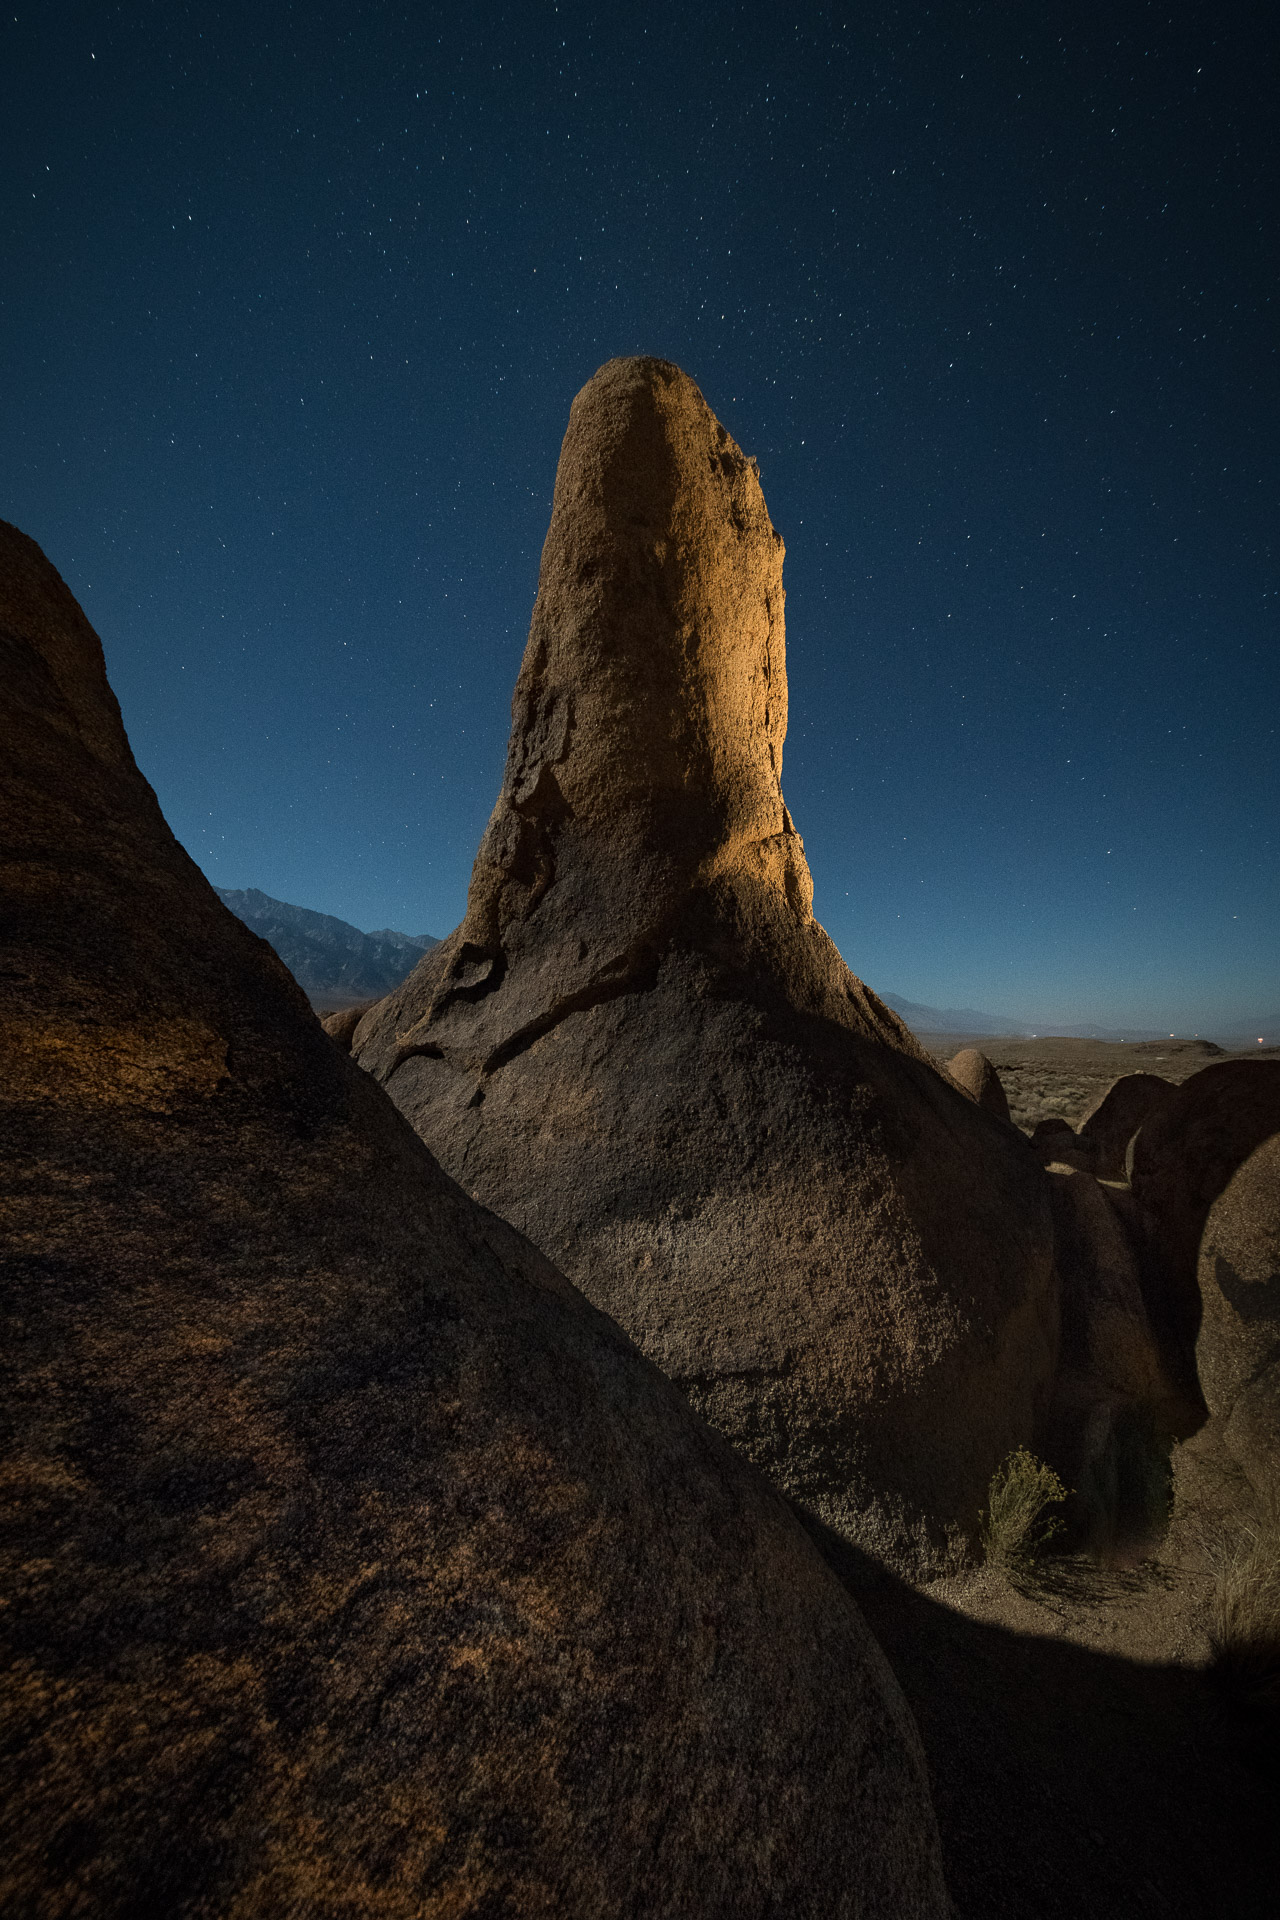
This image of the backside of Lady Boot Arch in the Alabama Hills of California’s Eastern Sierra was made at the end of a long night during our workshop there last November. I had photographed the arch many times before, and was looking for a unique vantage point. It’s a situation that I often find myself faced with––trying to make an image that I’ve never seen before in a familiar location.
Once I found this perspective, I knew that I had the shot. I just had to figure out how to light it. The moon was high in the sky to the west, illuminating the left side of the arch, and the foreground was deep in shadow. I lit the right side of the formation from behind with a warm-gelled Coast HP5R flashlight, which gave depth and texture to the arch, which from the rear looks more like a tower.
The light painting worked like this: The repeated diagonals from upper left to lower right created depth and drama. However, the dark mass on the left and bottom of the frame was too heavy, so I decided to add just a hint of fill light to this part of the frame. Anyone who has studied with me has heard the mantra to “not light from behind the camera,” but in this case, there really wasn’t much of an option. A quick swipe of the flashlight along the surface of the rock was all it took to bring out the texture and fill in the shadows.
The key was to rake the light along the surface of the rock rather than to light it straight on. The flashlight was a better choice for this than my Luxli Viola because I needed a strong directional source, as I was lighting from next to the camera. Low-level Landscape Lighting with the Luxli would have been much easier, as I had only 15 seconds to paint from both locations. But as it turned out, racing to get the lighting completed before the shutter closed was a fun challenge that served the additional purpose of keeping me warm after about eight hours out in the cool autumn air!
This image ended up being my favorite of 2017, not only for the image itself, but for the challenge of executing it all in one frame in just 15 seconds.
Tim Cooper
Nikon D4s, Nikon 14-24mm f/2.8 lens. 60 seconds, f/5.6, ISO 100.
Light painting is all about angles and shadows. More specifically, it’s about the angle of the light source to the subject, and the shadows that the light source subsequently produces. Painting a subject while you stand right by the camera always produces the most boring light. Why? Because it causes all of the shadows to fall behind your subject. But when you paint from an oblique angle, you produce a more interesting picture with tons of texture.
Texture, and in turn drama, is brought out when you paint your subject from the side or from behind. Painting your subject from behind causes all of your shadows to fall in front of the subject and toward the camera. This type of lighting can be really dramatic. It can also be difficult to pull off when you have to hide your light from your camera.
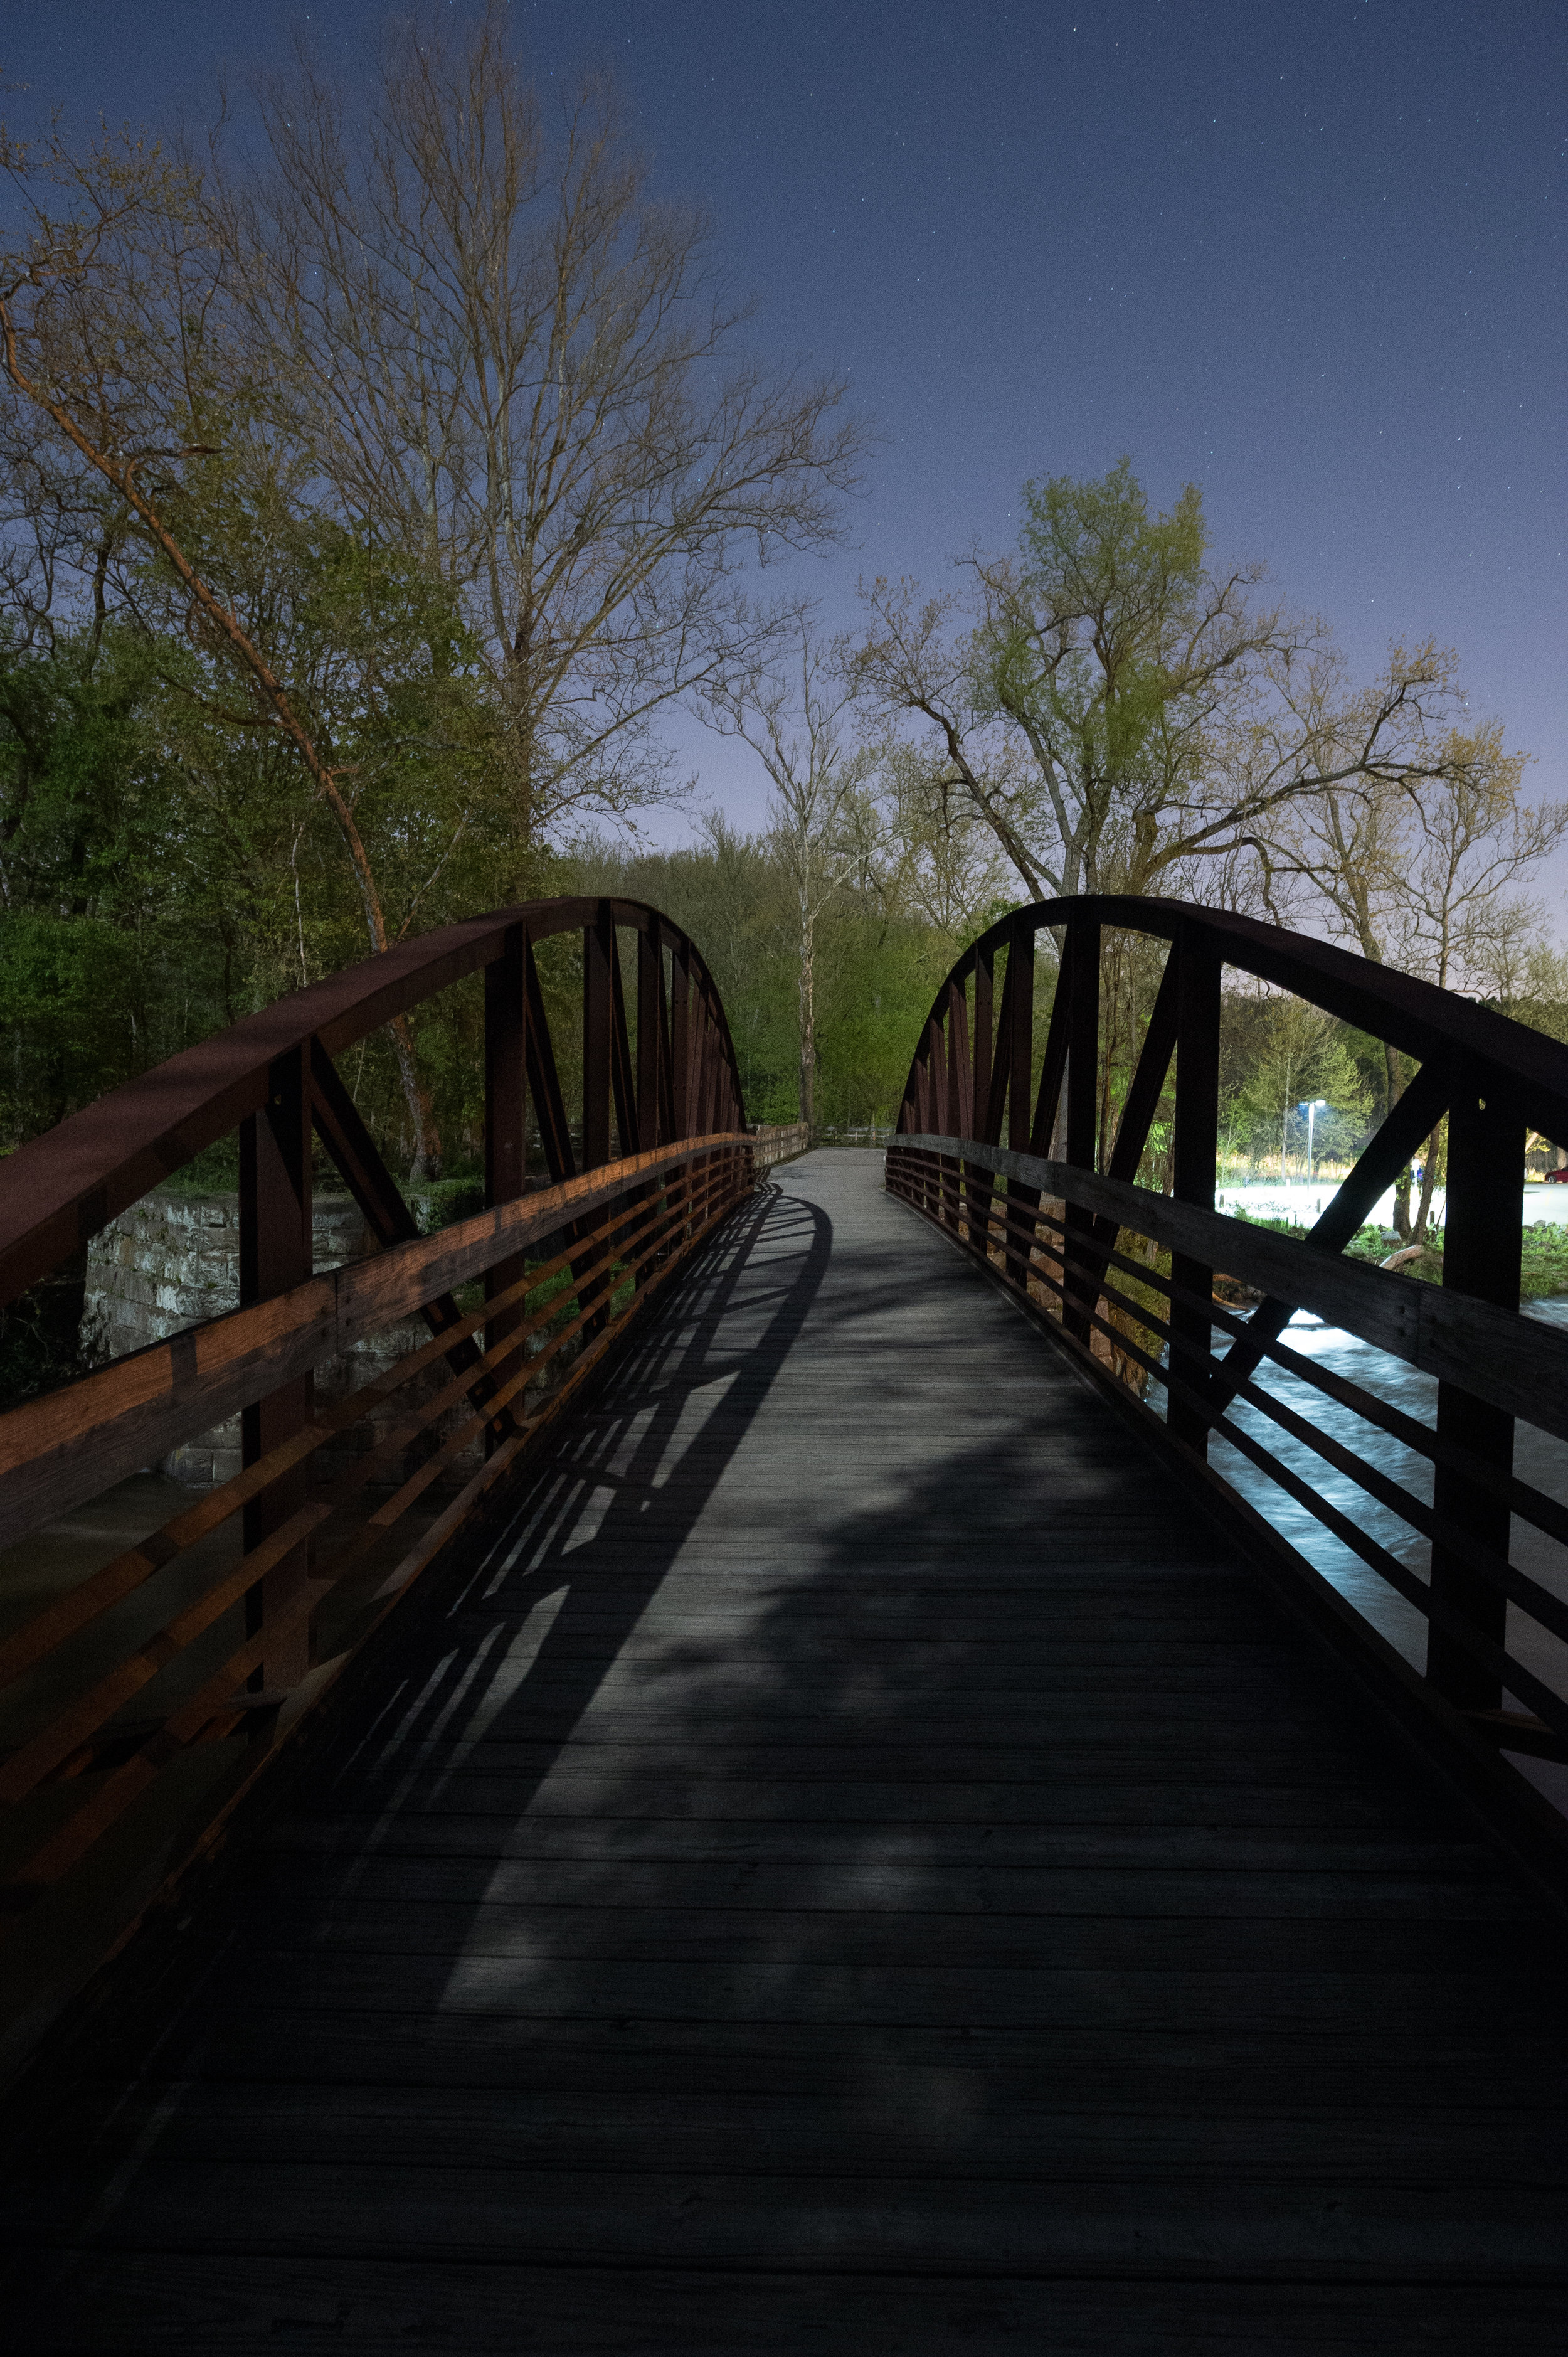
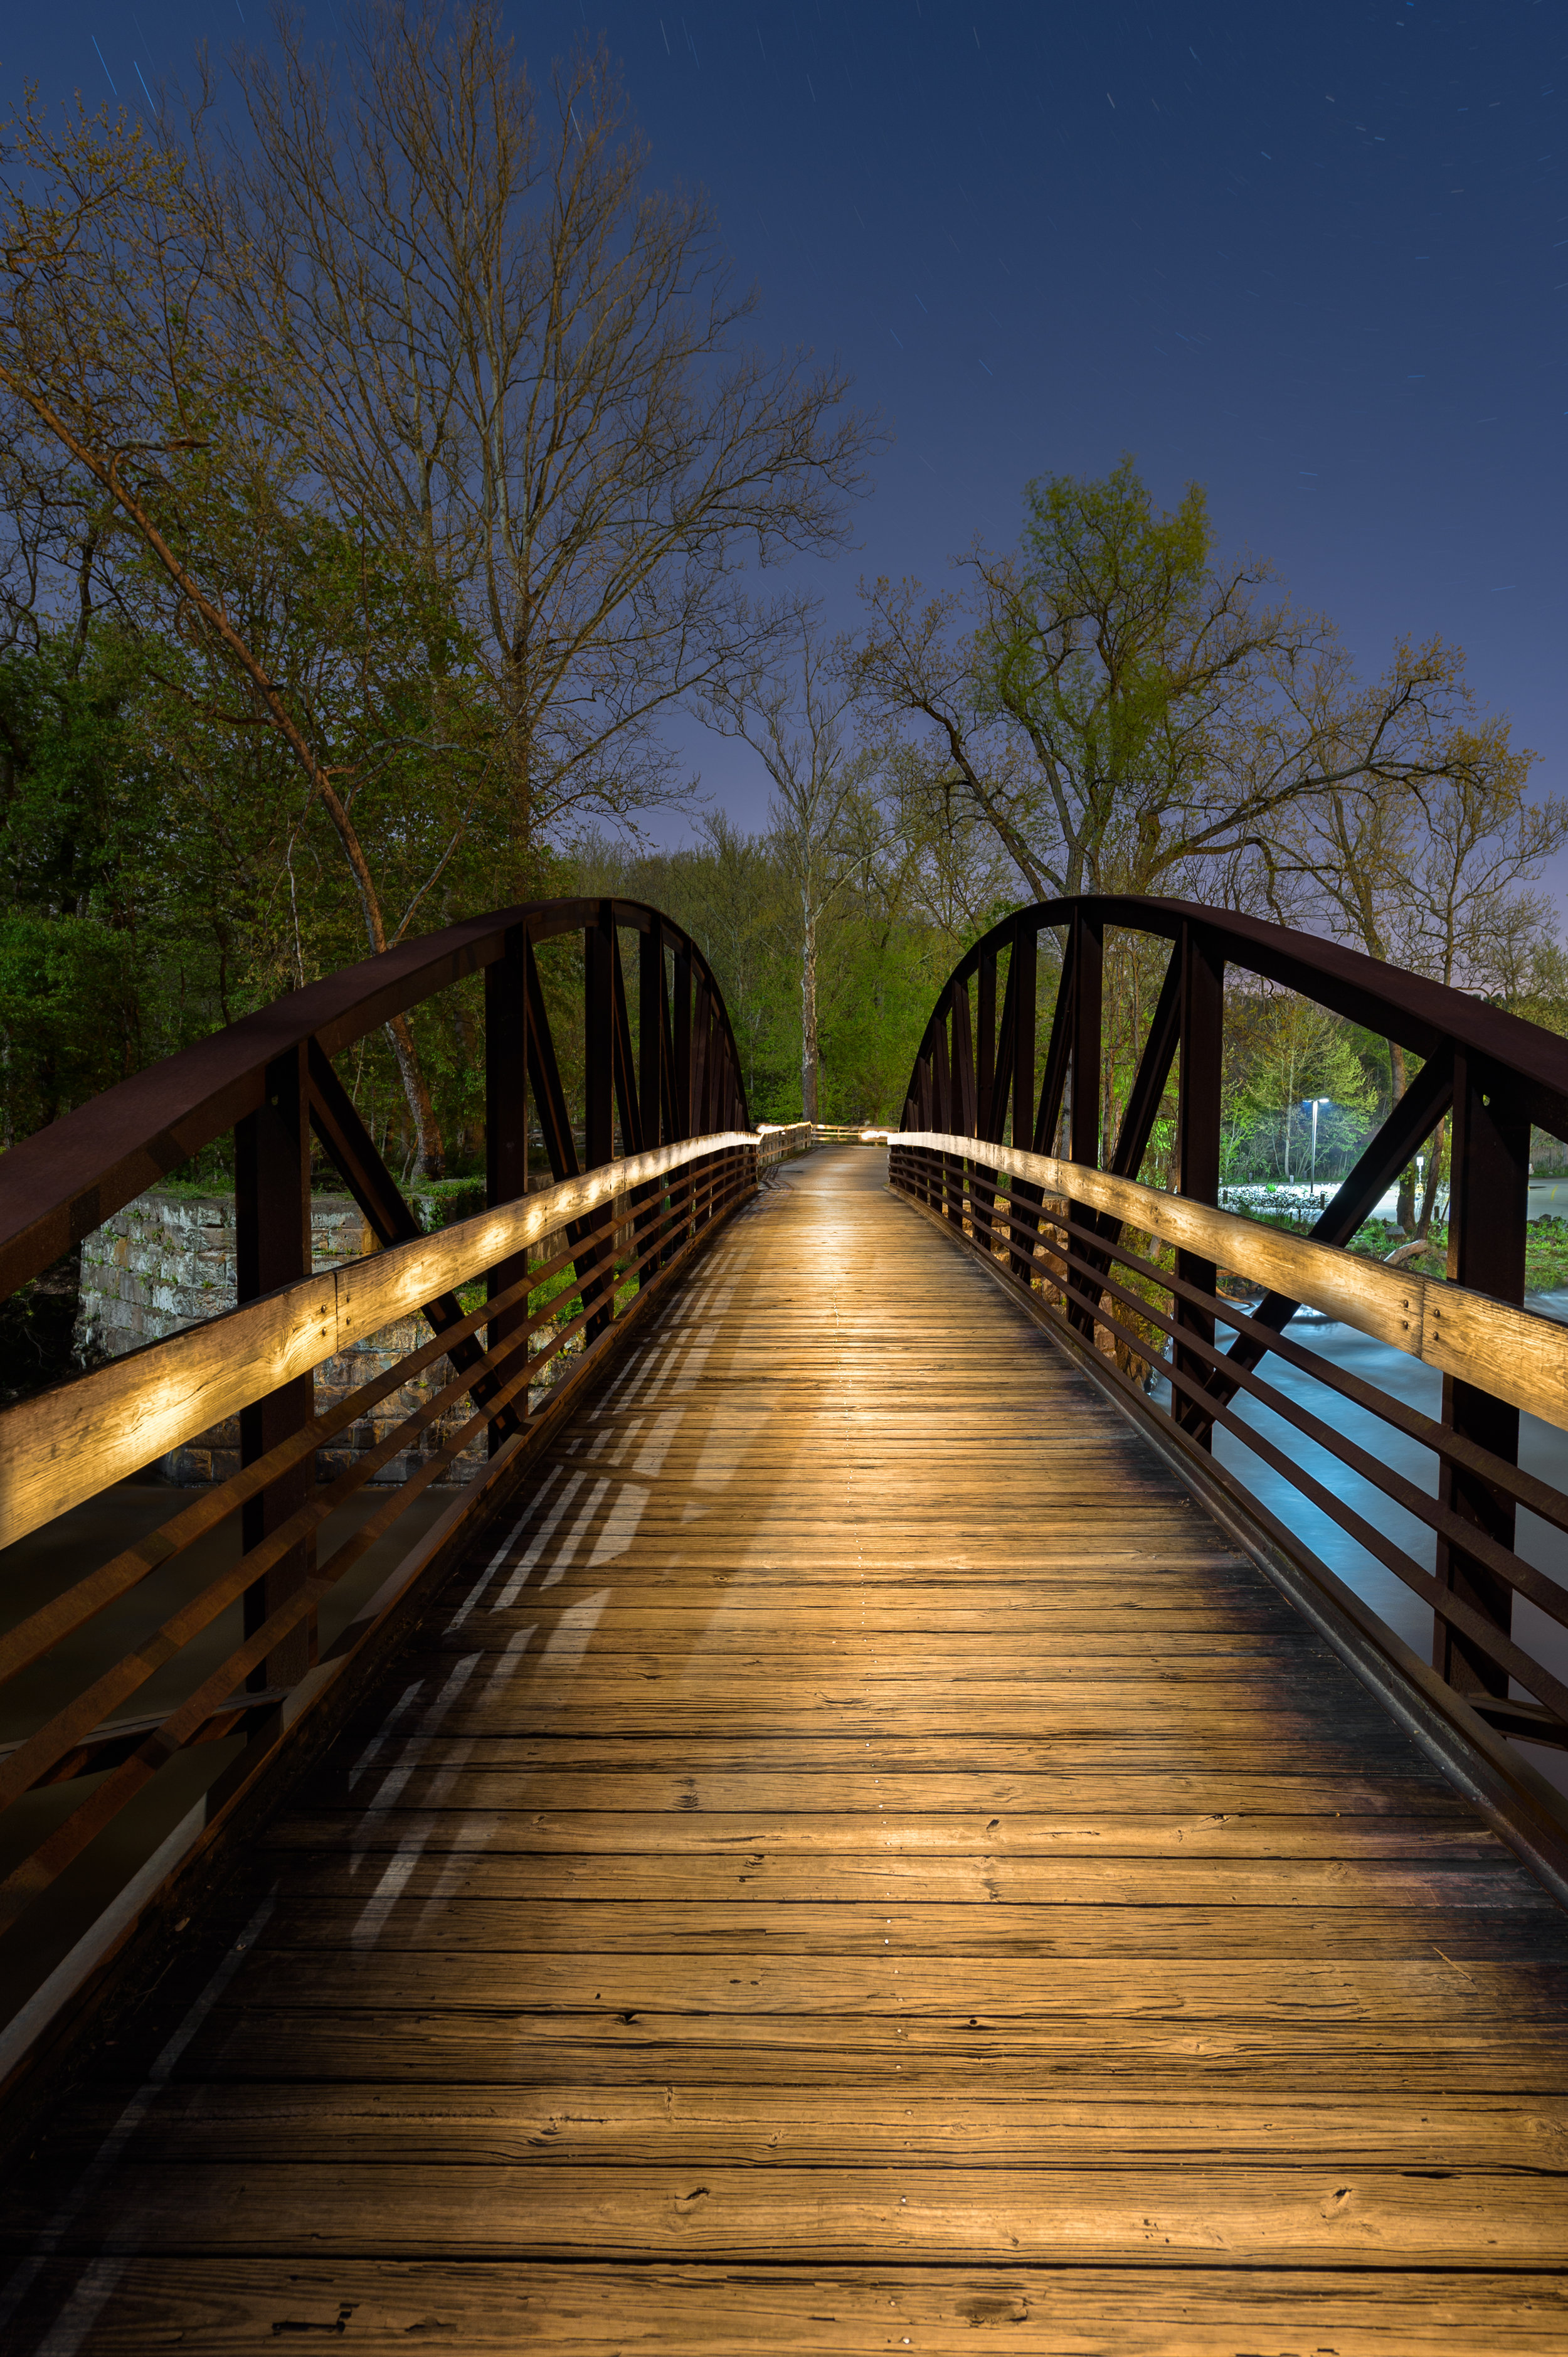
That was the case with this footbridge in Cuyahoga Valley National Park. I wanted to paint the railings and the walk, but I didn’t want the flat look of front lighting. So I tripped the shutter and hid the flashlight in front of me while I walked down the bridge pointing the flashlight backward at the left railing. When I reached the end, I walked backward and again hid the flashlight in front of me while I painted the right railing. Doing this kept the flashlight hidden from the camera the whole time.
The next and more difficult task was to light the walk. In this case I couldn’t walk away from the camera while painting with the flashlight in front of me, or my body would have blocked the camera’s view of what I was light painting. So I had to start at the far end of the bridge and walk toward the camera while painting the walk in between me and the camera. Painting in this manner brought out all of the texture in the wood decking.
Unfortunately, it also caused the problem of the flashlight being fully visible to the camera. That’s a big no-no in light painting. To solve this problem, I held my hat in my other hand and used its brim to hide the flashlight from the camera while I painted down at the walk. The diagram below shows the basics of this technique.
Remember to always hide the flashlight from the camera, and always wear dark colors so that the bounce light doesn’t illuminate your body!
Gabe Biderman
Nikon D5, 14-24mm f/2.8 lens at 24mm. 20 seconds, f/4, ISO 6400.
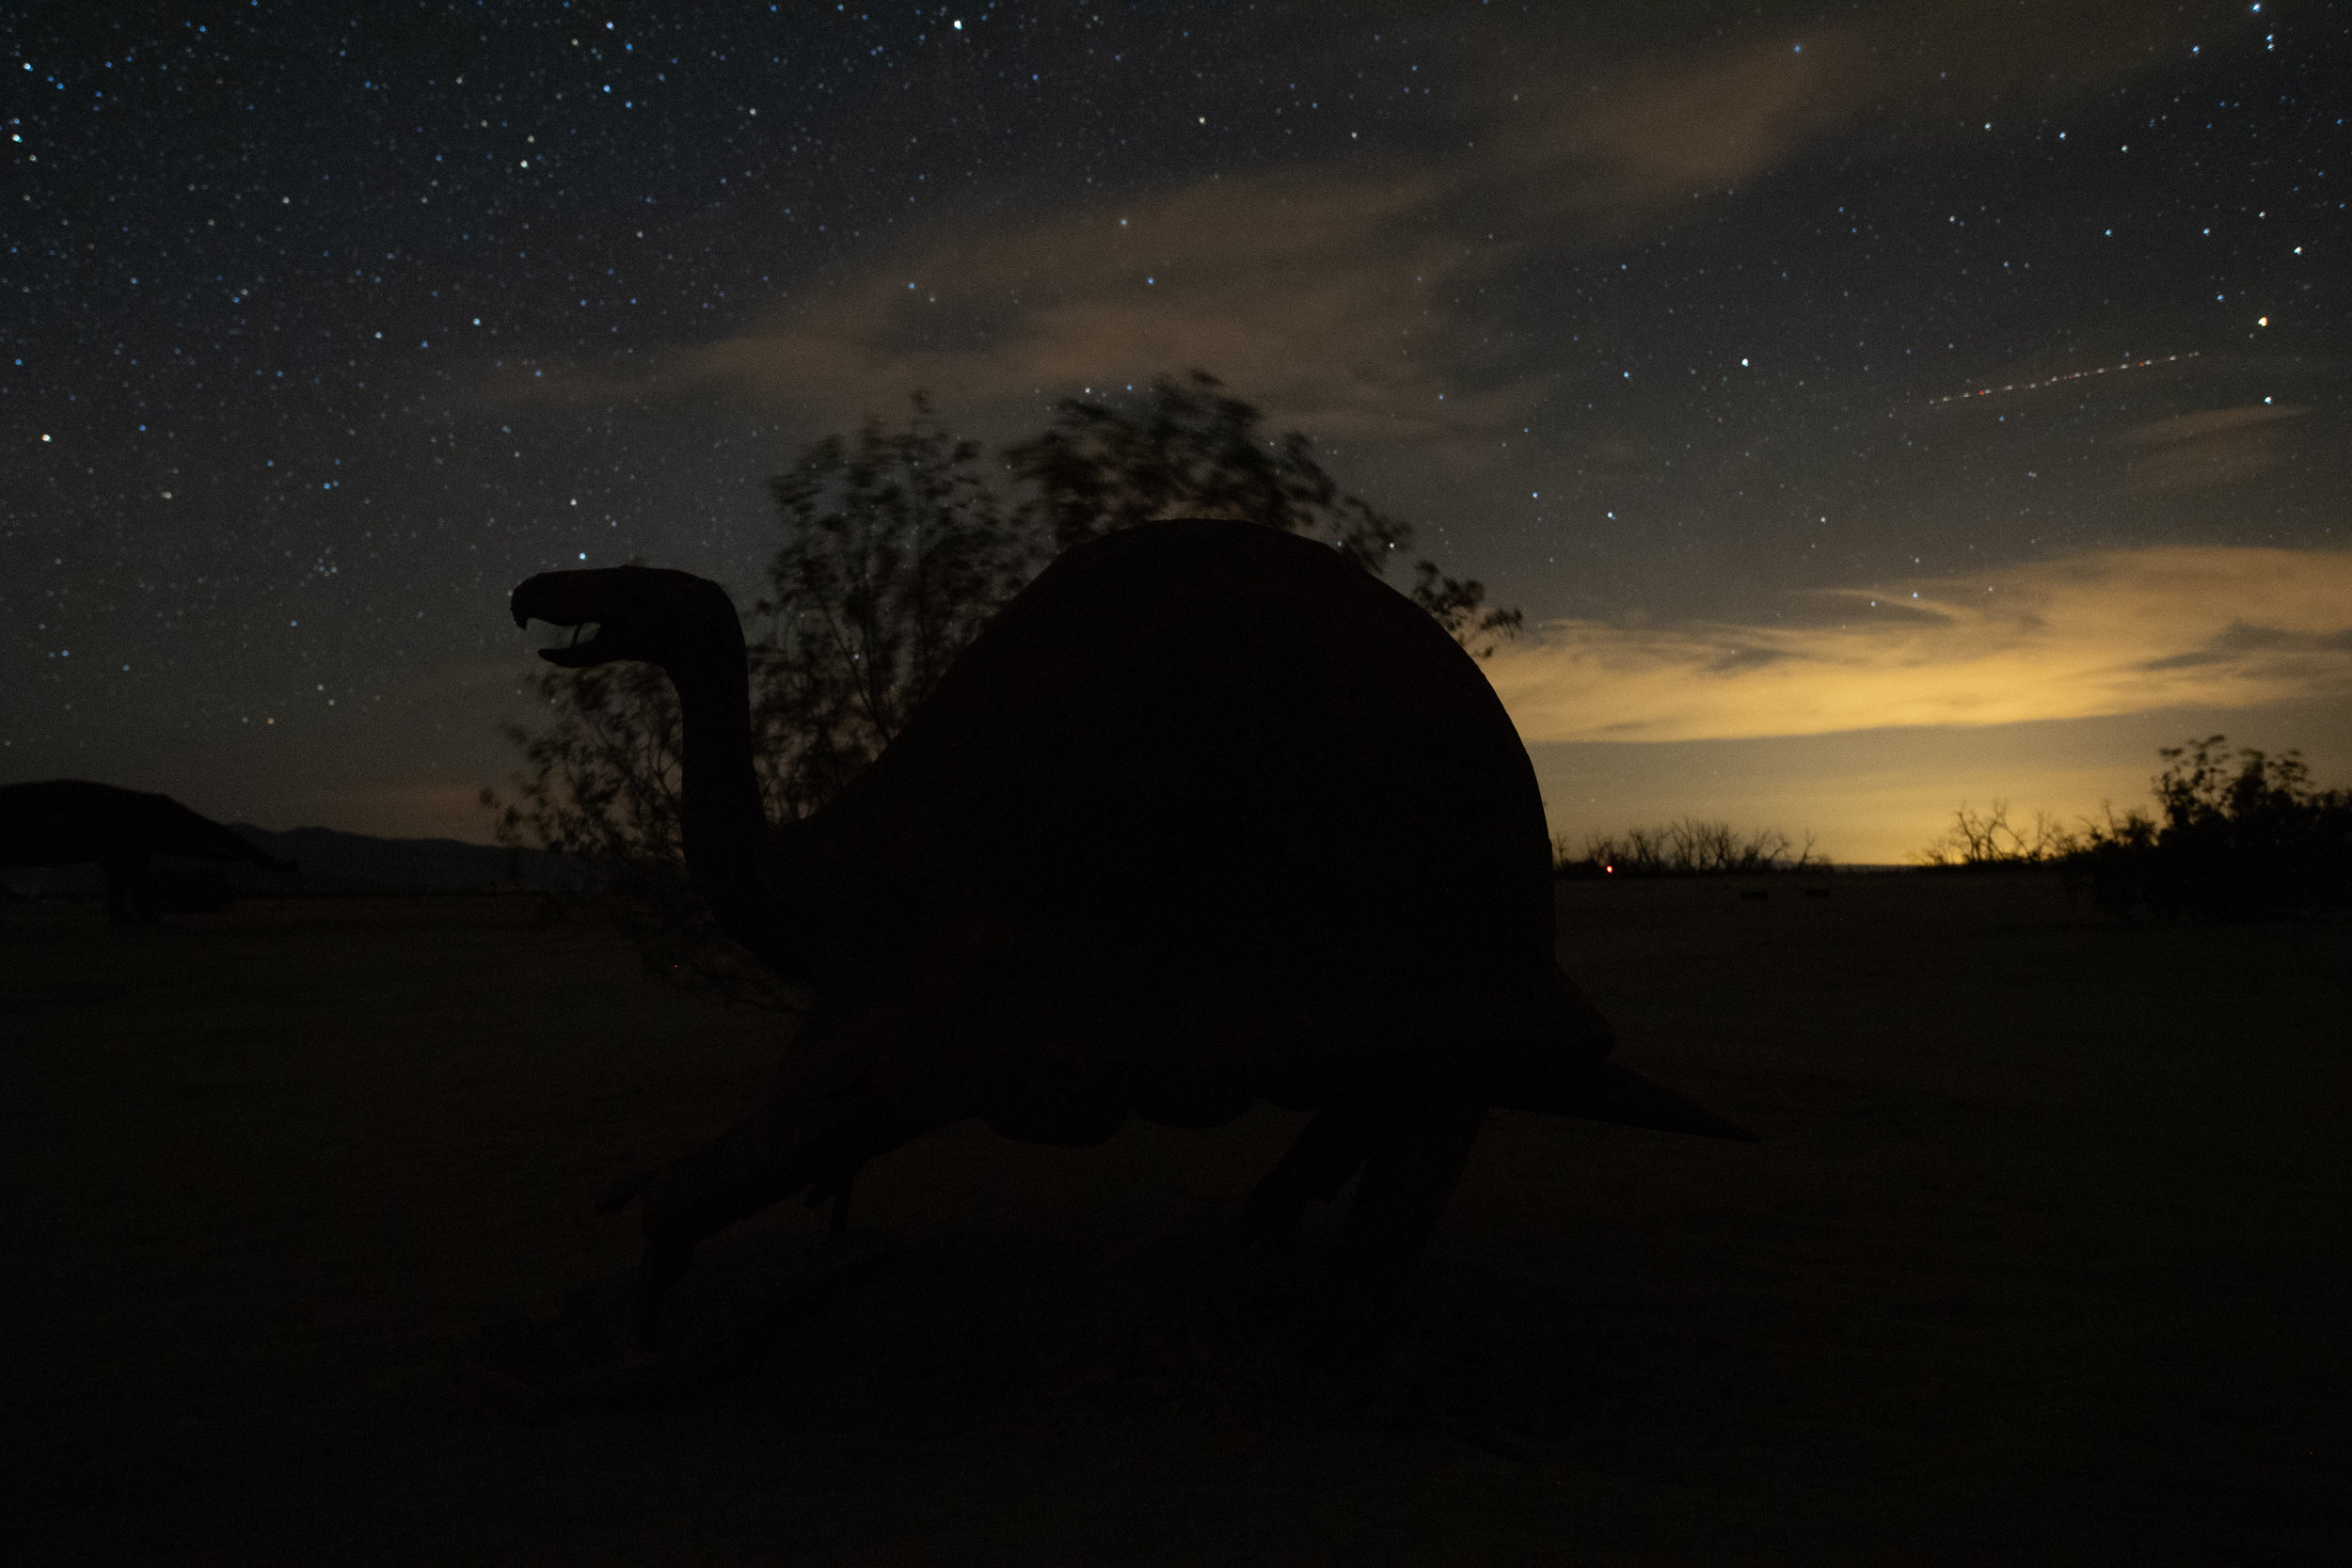
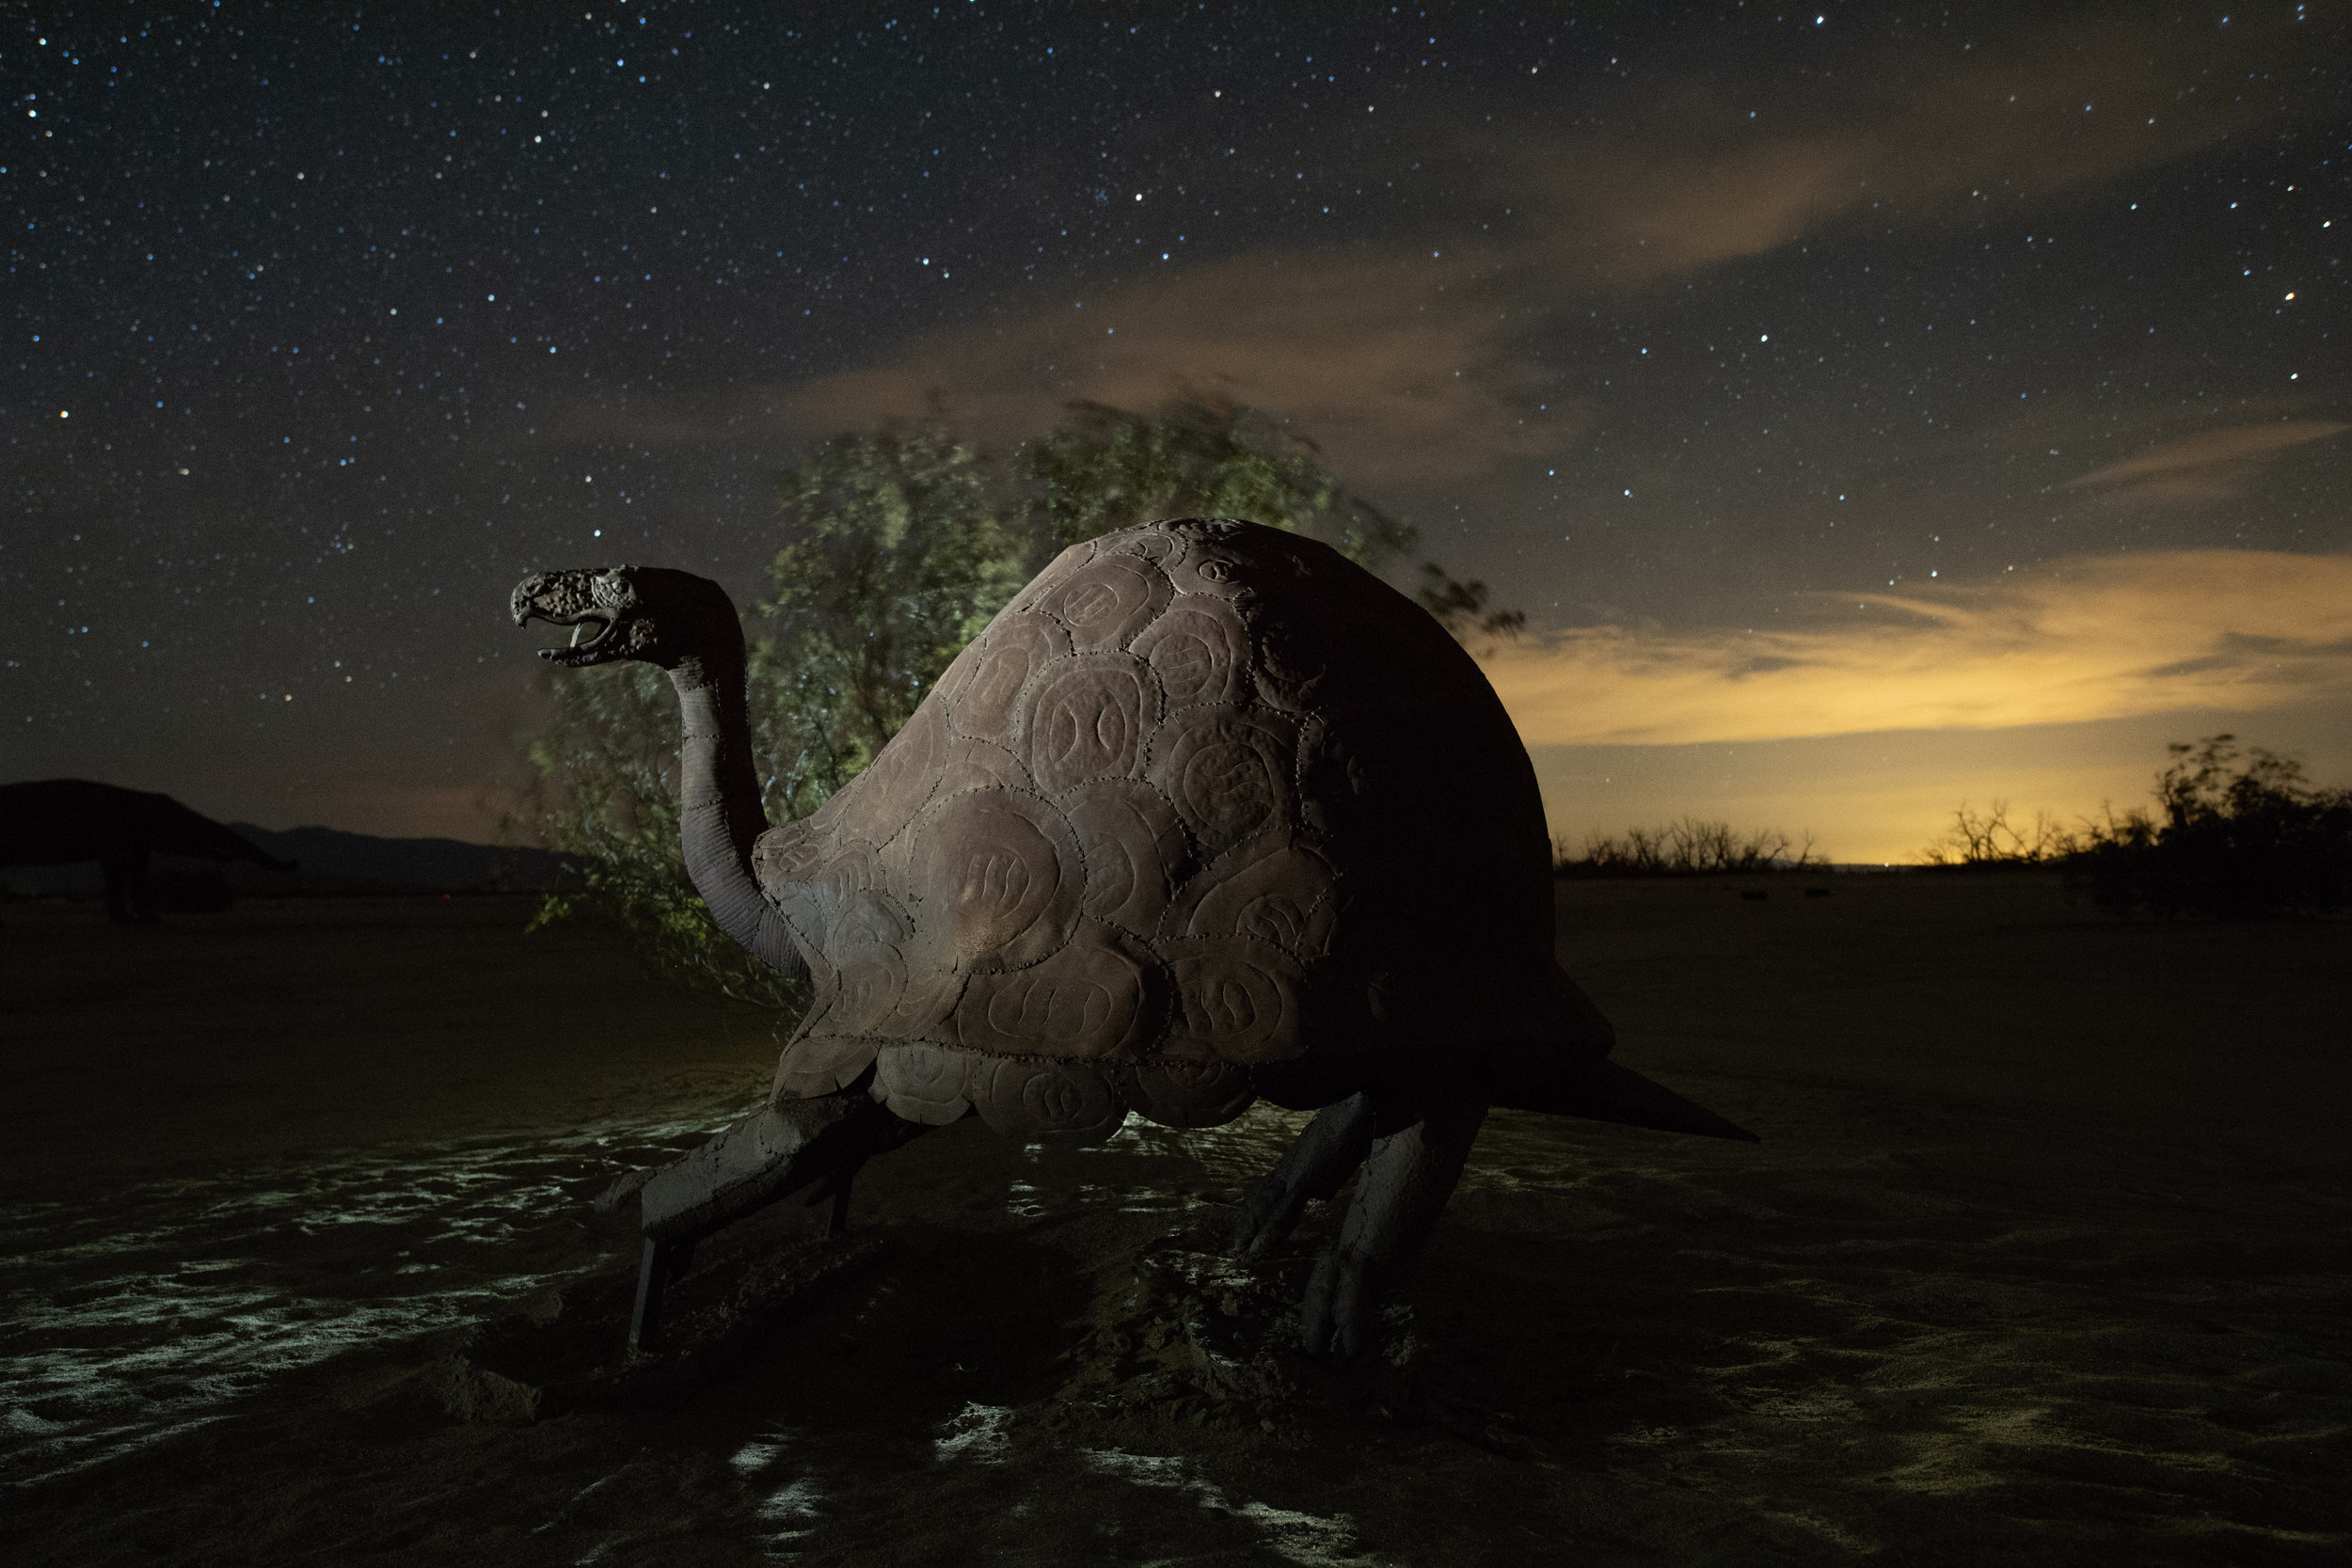
Light painting is a must when photographing close subject matter under dark sky conditions. We specifically chose a new moon time period for our first Ambassador Series workshop with Atlas Obscura at Borrego Springs. The focus was to revisualize the many surreal sculptures that surround the town against the billion-star backdrop.
Before I paint with light, I always take several test shots to help me see, compose and focus. This also helps me figure out where the light would create interesting shadows. We call it light painting, but I like to call it “shadow painting” because not only is it about revealing information, but it’s also about creating interesting textures and shadows! This can generally be achieved when our light hits the subject at a 45- to 90-degree angle from the camera.
I also love adding dramatic backlighting to scenes and I chose this composition specifically so that the bush would frame the turtle and I could cast light and shadows into the scene.
During the 20-second exposure I walked 10 feet to the left of the frame with my 1/2 CTO-gelled Coast HP5R flashlight. I did the side lighting at the lowest setting for 2 seconds. I was careful not to move my flashlight while it was on, which allowed me to create the dark shadows along the neck and back of the sculpture—i.e., the areas I shadow painted.
With the flashlight off, I then walked behind the bush, got low and out of view from the camera, and quickly turned the HP5R on and off while it was pointed back toward the turtle. This revealed so much texture in the sand and created an interesting mosaic of shadows reaching toward the viewer.
So give shadow painting a try!
Matt Hill

Fuji X-T1, 7artisans 7.5mm f/2.8 lens. 58 seconds, f/2.8, ISO 6400.
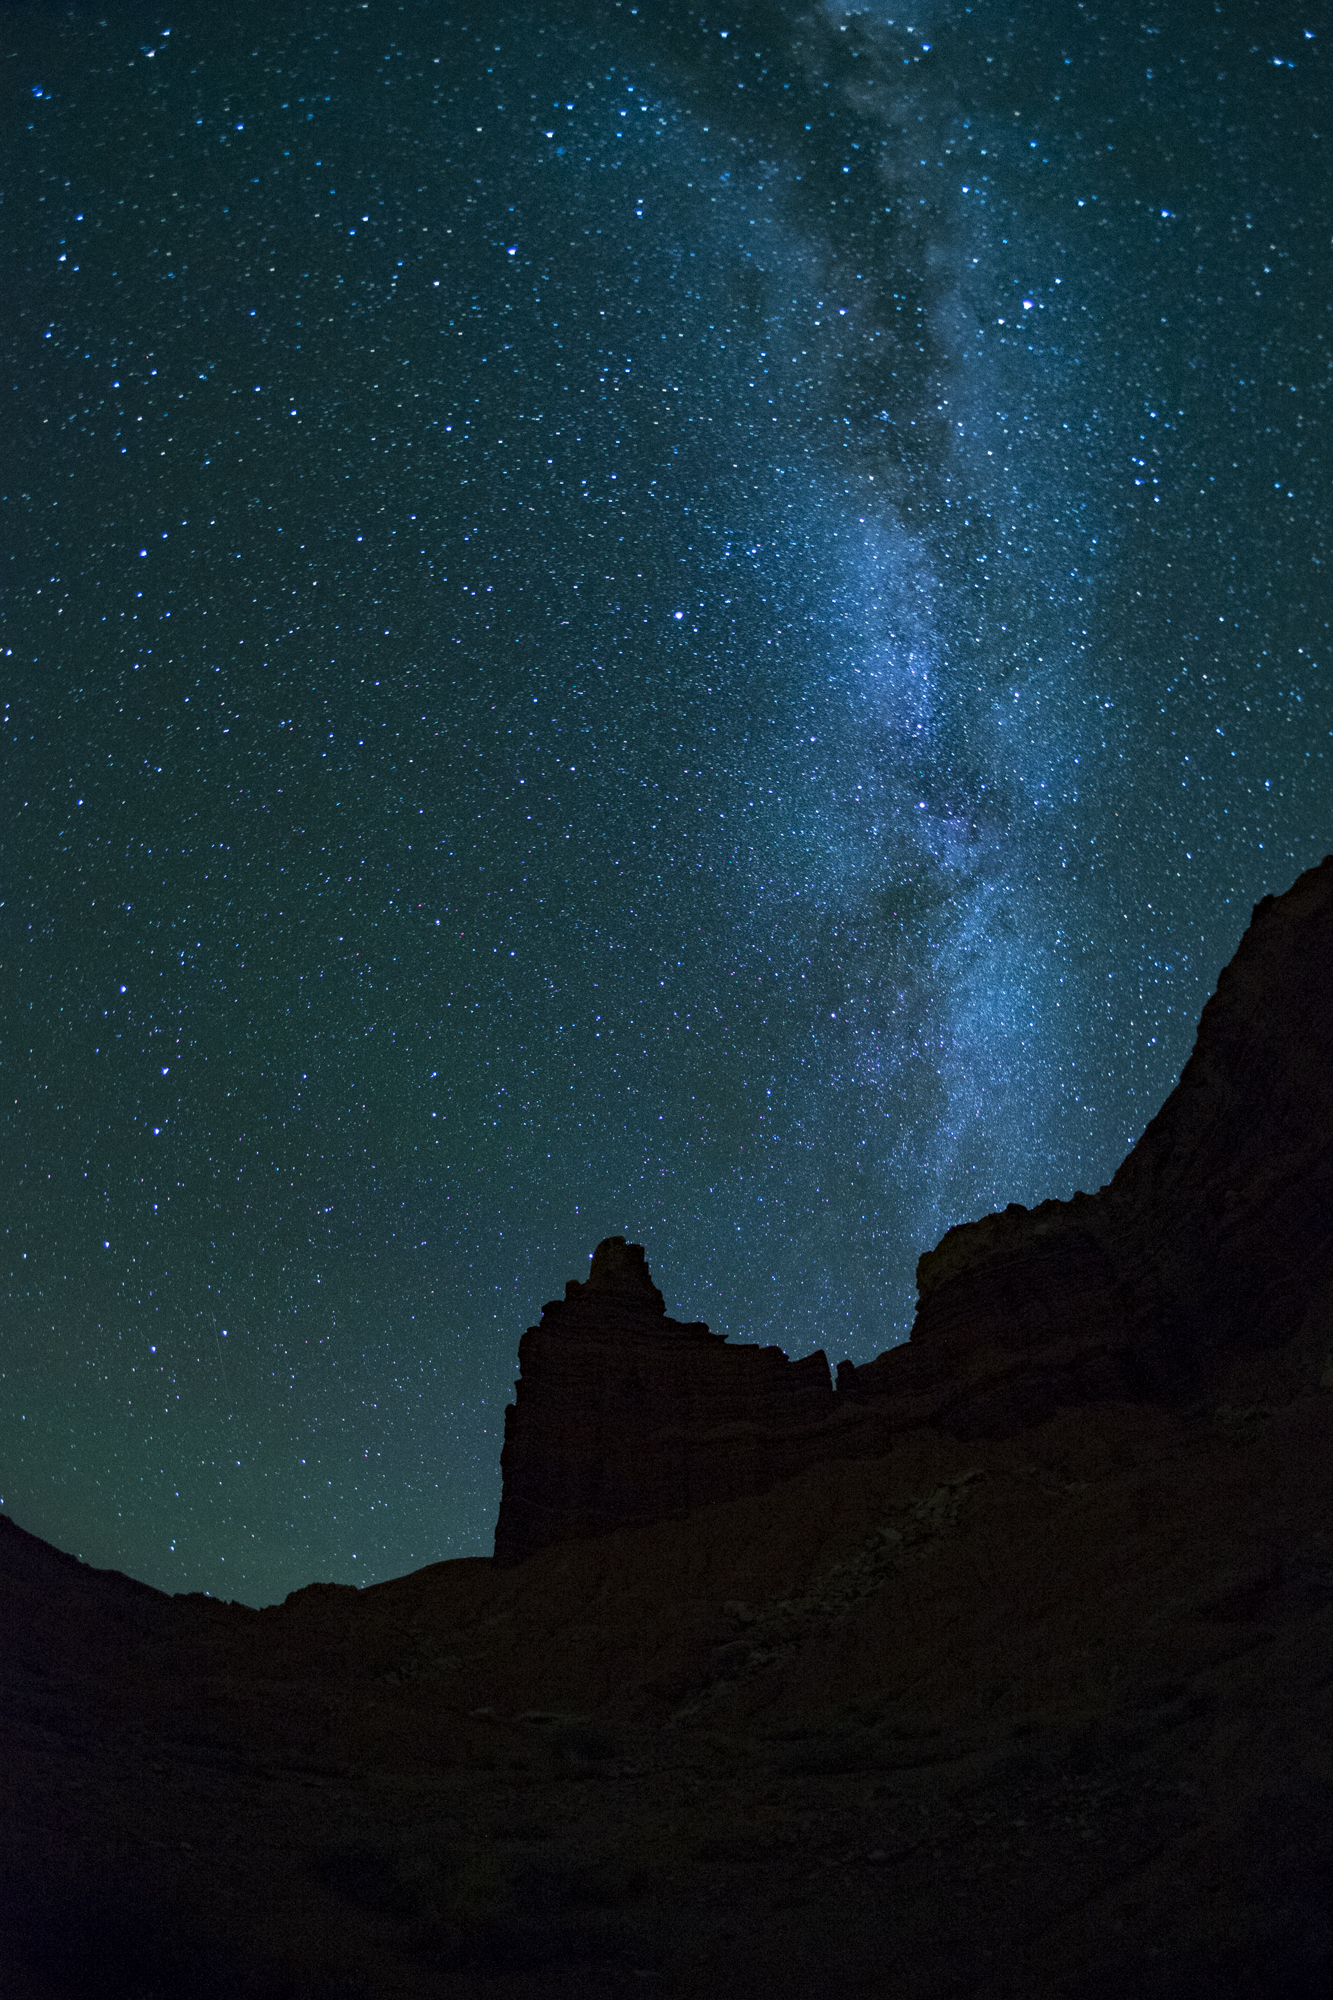
Sometimes light painting a 400-foot tall pillar of Moenkopi sandstone calls for bringing in the big guns. I was running a long star stack/time-lapse with some other students on our Capitol Reef National Park workshop earlier this year.
The stack started during moonset, which was very gentle, and beautiful. But according to PhotoPills, the tail end of the Milky Way wouldn’t be ascending the rock formation until we came back to collect our cameras over an hour and a half later. As we came back, student Karl Zuzarte asked what was already on my mind: “Can we light paint the last frame or two of the stack?” “Heck, yes,” I said.
Since it was a bit of a slog to get to our cameras, I asked Gabe to grab a radio and a Luxli Cello panel light (which is the new big brother to the Viola), and to head off about 1/4-mile away at an oblique angle similar to moonset.
Gabe set the Cello to 3000K and maybe 2 percent intensity. Unlike sweeping a flashlight around, which softens the shadow edges, the fixed position of the panel created the perfect strong kiss of light to cast crisp shadows. And its 72-degree beam angle covered the entire massive rock formation and grazed the tops of the vegetation on the desert floor.
Chris Nicholson
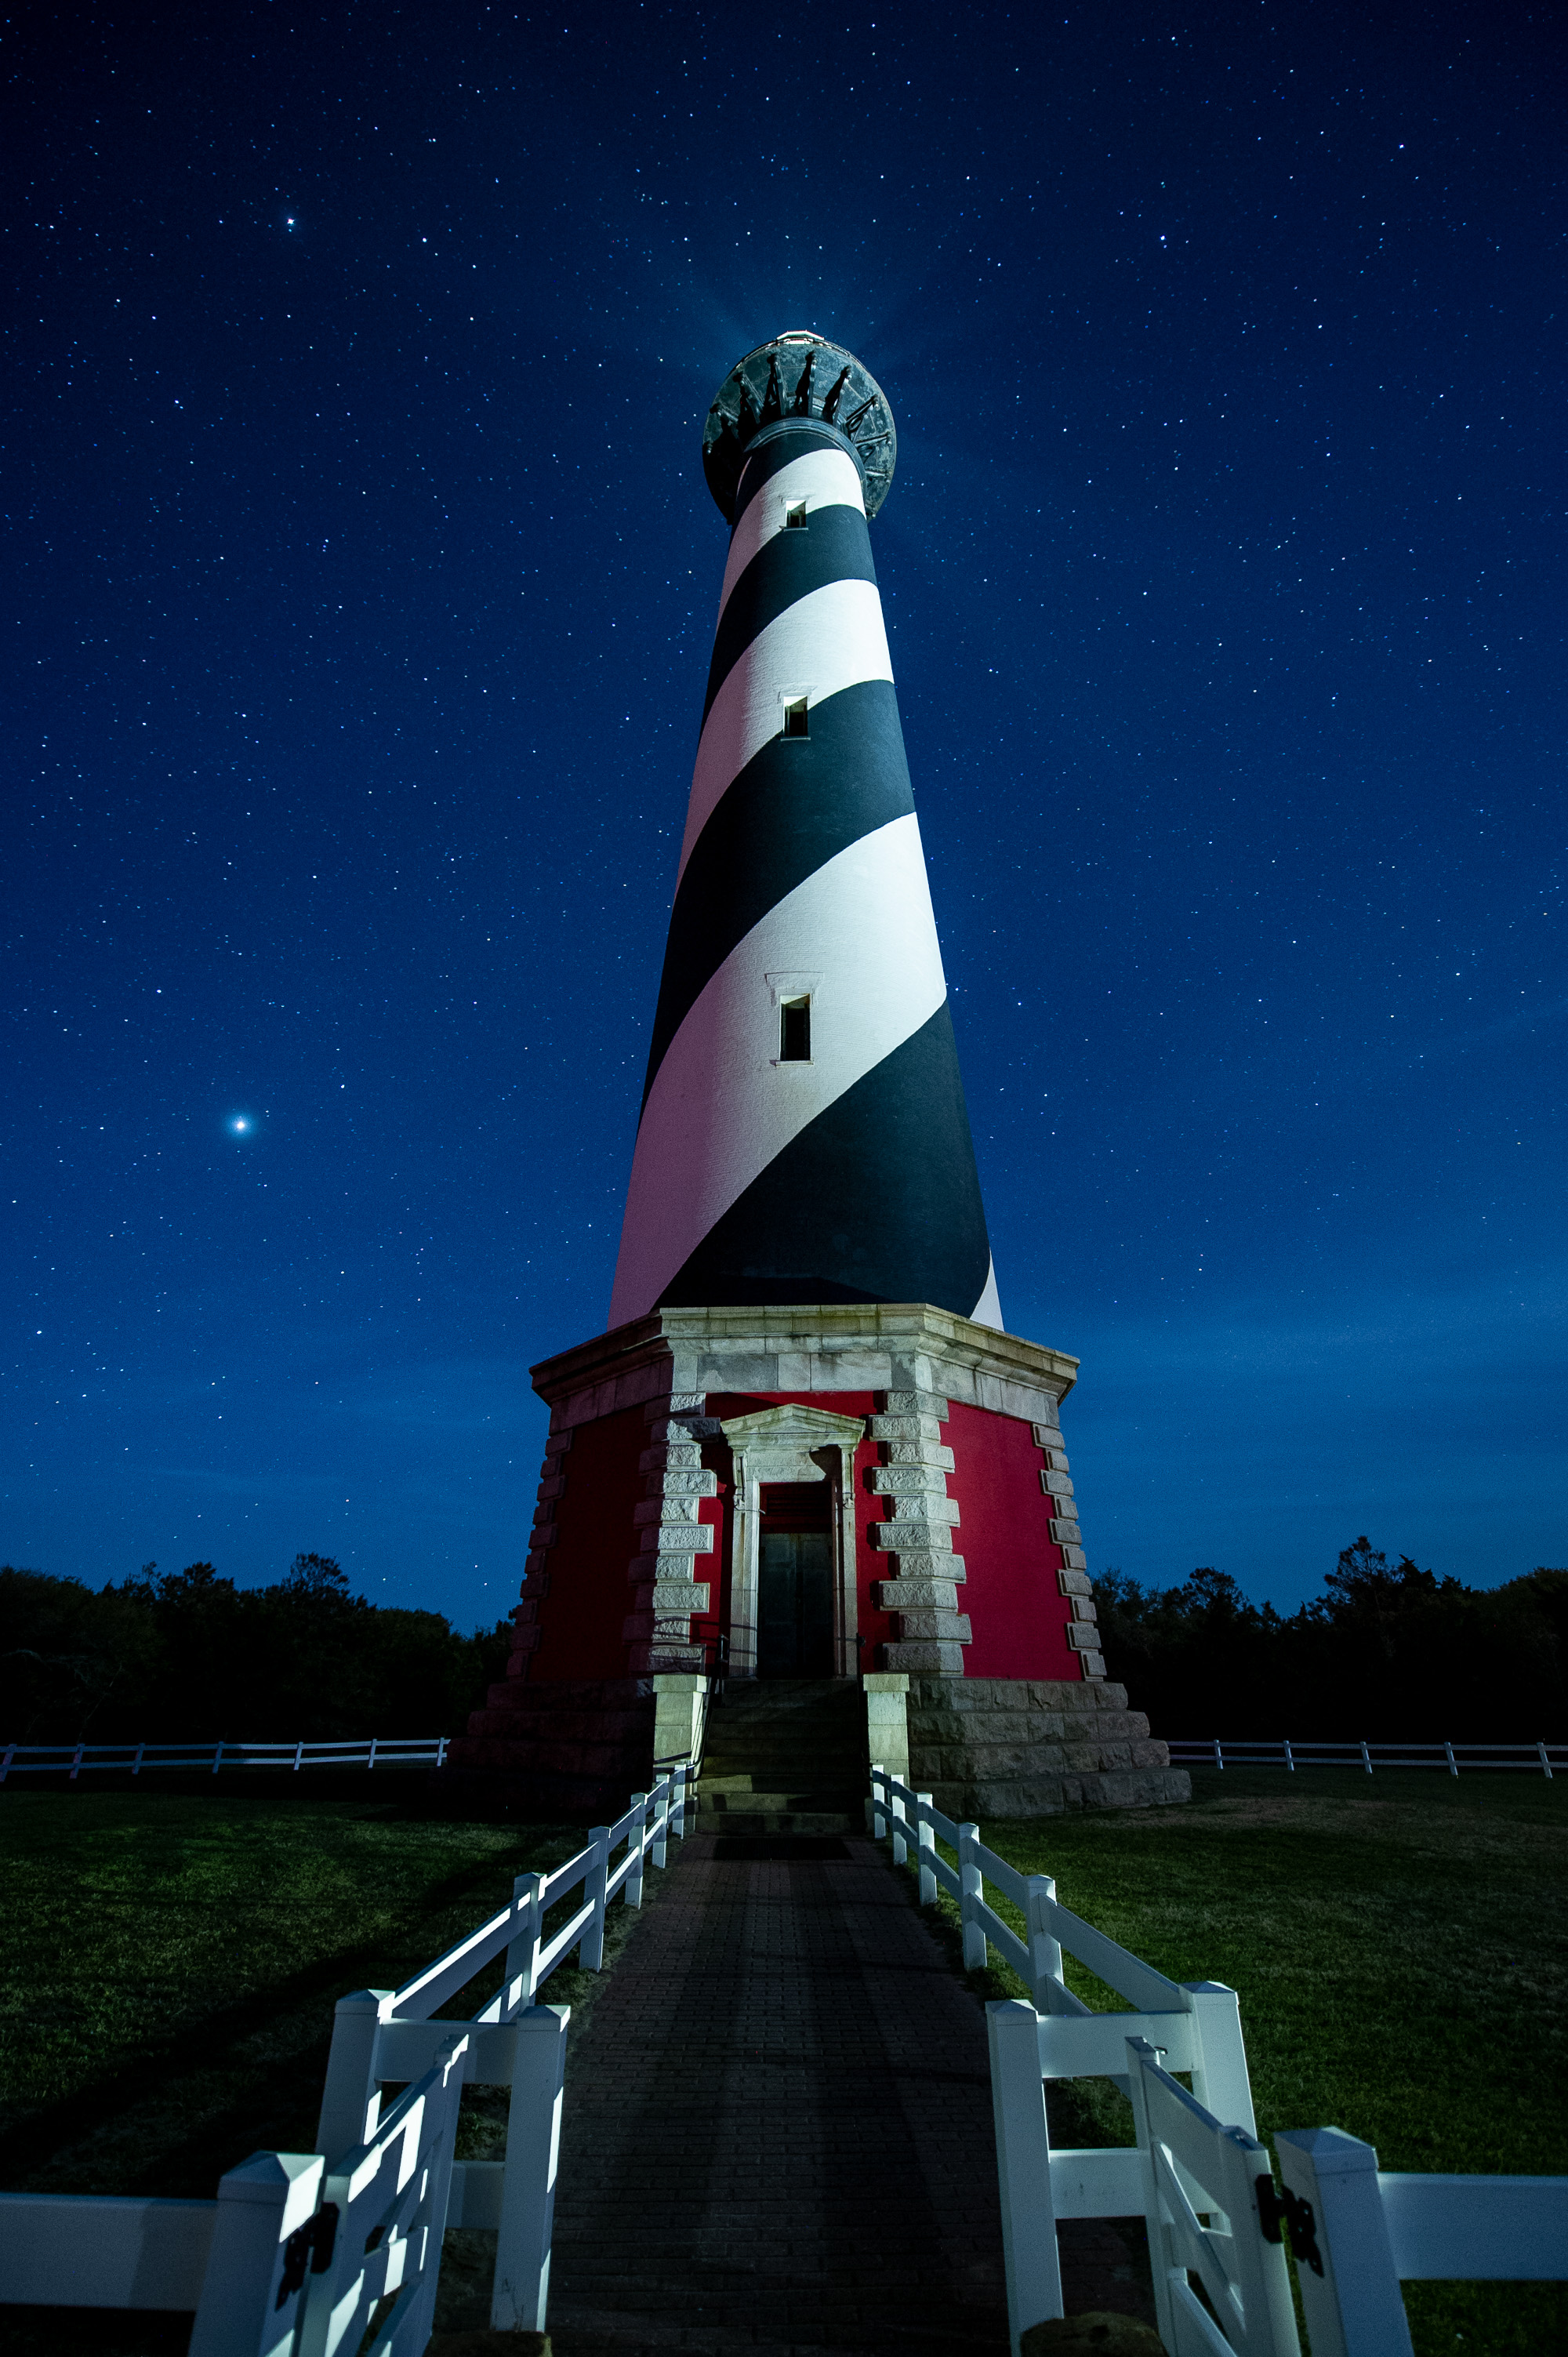
Nikon D3s, 14-24mm f/2.8 lens at 14mm. 15 seconds, f/2.8, ISO 2000.
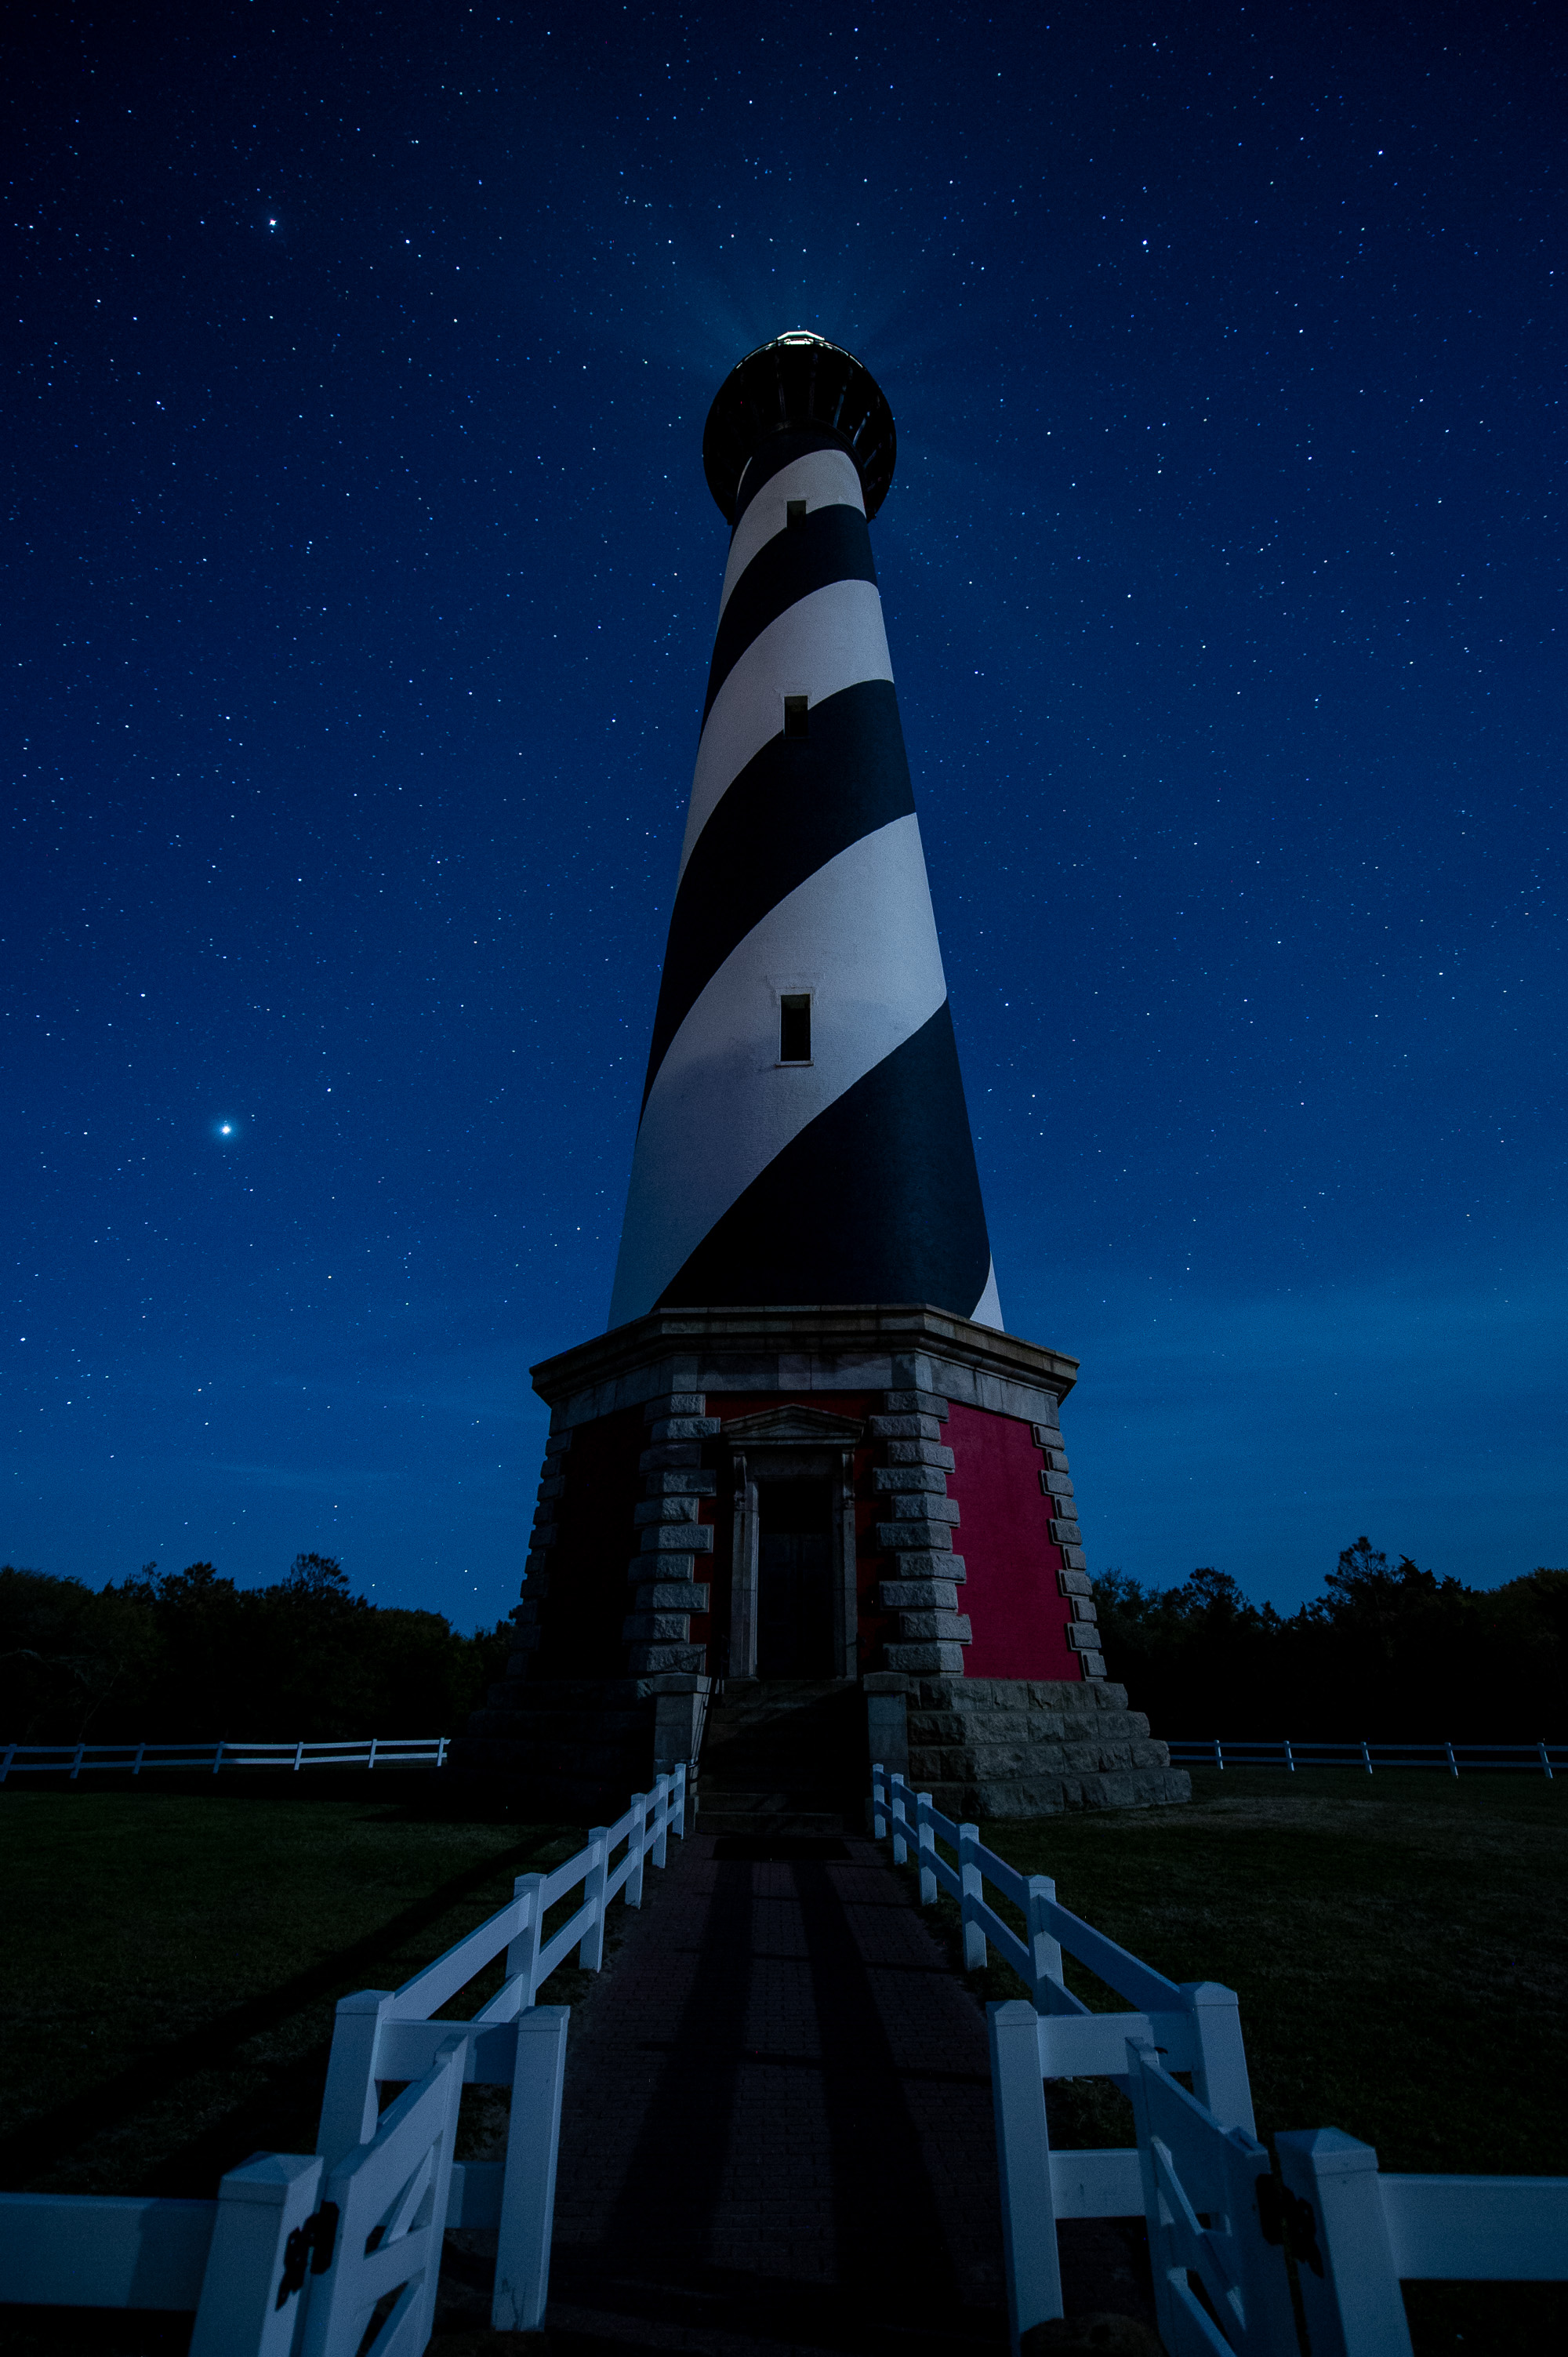
When shooting in Cape Hatteras National Seashore earlier this year, I was excited to tackle perhaps the most famous light house in the United States: the eponymous Cape Hatteras Light. I'd shot there only once before, in 2001 or so, and that was during daylight. This time, I got to do it with stars!
I went for a wide-angle composition, drawn by the symmetry of the scene, as well as by the low angle that allowed me to include as many stars as possible. I liked the framing, but felt the scene needed a little lighting to help emphasize the primary subject—i.e., the lighthouse. If I’d let the structure stay in relative silhouette, then the visual emphasis would have been on the sky instead.
For the light painting I used a lightly gelled (1/2 CTO) Coast HP7R flashlight. I stood to camera-right, beyond the out-of-frame fence, at almost 90 degrees from the lighthouse. I fired my shutter with a Vello Freewave wireless remote, then started light painting with a wide beam and a downward stroke, starting at the lantern and moving down to the stones and steps at the base. I then quickly focused the flashlight for a tight beam and side-lit the fence leading to the bottom of the frame, letting it catch just pieces of the fence here and there, but being careful not to light the grass.
Light it Up!
We hope this gives you some ideas about various ways you can light the night, and about some of the ways you can use light painting to overcome night photography obstacles.
There are of course many other examples, and I’m sure we’ll offer more in the future. In the meantime, we’d love to see your work. In the Comments section, please share some stories (with photos, of course) of how you have used light painting to help you seize the night!


