
Witnessing an aurora is one of life’s truly magical experiences. Watching the pulsating light and soaking in the surreal green glow fills you with excitement, awe and wonder. As photographers, however, we’re not content to just stand by and watch. We want to capture this spectacle, share it with others, and relive it again and again.
To help you do that even better, Lance, Gabe and I put together eight killer tips for seizing the northern (or southern!) lights.
(For a primer on this topic, read Lance Keimig’s February blog post “Capturing Clouds of Light: How to Photograph the Aurora Borealis.”)
15 seconds, f/3.3, ISO 3200. Shot with Nikon D750 and 24mm lens. © Lance Keimig.
Lance Keimig
1. Aurora Exposures
The correct exposure for an aurora can vary dramatically depending on both its intensity and movement. Sometimes there may be a relatively stable band of light in the sky that grows in intensity over time. This is easy to photograph, and usually does not change the exposure from what the normal landscape exposure would be.
For a static aurora, typical exposures are equivalent to landscape exposures based on corresponding moonlight or artificial light.
If you’re lucky, the band will grow into the magical dancing lights that can become so bright as to illuminate the landscape with green. To photograph a dancing aurora, it is important to keep the shutter speed as short as possible to prevent the crazy shapes from blending into electric pea soup.
For a rapidly changing aurora, try to keep exposures in the neighborhood of about 2 to 10 seconds. I recommend setting the ISO based on the ambient landscape light—i.e., not factoring the aurora into your exposure determination. So, for new moon conditions, shoot at ISO 1600 to 6400, and for full moon conditions, shoot at 400 to 800. From there, pick a wide aperture that gives adequate depth of field for the scene, usually stopping down 1 or 1 1/2 stops from wide-open, depending on the focal length and quality of your glass. Lastly, vary the shutter speed as needed to get a balance between a decent exposure and stopping the movement of the dancing lights.

6 seconds, f/3.3, ISO 3200. Shot with Nikon D750 and 14mm lens. © Lance Keimig.
2. Finding the Aurora: What the Camera sees Versus what You See
Because human eyes lose sensitivity to color in low light, an aurora may sometimes fool you into thinking it is just a cloud. The show often begins as a faint glow in one location in the sky, and it may not be very impressive. If there is a high probability of auroras, it’s a good idea to take test images of different parts of the sky while you are waiting in case there is something that your eyes don’t pick up.
If you live in—or will be traveling to—extreme northern or southern latitudes where auroras are commonly seen, it’s a good idea to have an app like Aurora Forecast (Apple, Android) or Aurora Alerts (Apple, Android) on your phone, and set notifications for specific activity levels. Auroral strength is measured on a scale of 0 to 9 Kp. In high latitudes like Alaska or Iceland, a Kp of 4 or higher indicates a high probability of photographable auroras. In middle latitudes like New England or the Pacific Northwest, a Kp of 5 means that you just might see something on the northern horizon. In mid-latitudes, a Kp of 6 or higher makes it worthwhile to seek out the lights.
In high latitudes, auroras may appear in any part of the sky. In middle latitudes, they are generally seen only as a faint green glow on the northern horizon.
Four-frame panorama shot at 20 seconds, f/4, ISO 6400. Nikon D750 with a 24mm lens. © Lance Keimig.
Gabriel Biderman
3. Keep Clicking and Make a Time-lapse
Bring two rigs and set up one for a time-lapse. If the auroras are really active, this is a great way to show off how much they dance in the sky. Once you figure out your exposure, use an intervalometer to make sure the camera keeps firing for at least 30 minutes. The longer you let it rip, the longer the “movie” will be.
Here’s a time-lapse I did of aurora in Iceland:
4. Look for Interesting Foreground and Subjects
When chasing after an aurora, look for interesting foregrounds to play against the dancing green lights. Trees, mountains and other landscape elements are common subject matter—so look for dramatic compositions to include them.
On our last workshop in Iceland, we were fortunate enough to have the ruins of an old herring factory, old boats and other striking buildings beautifully collide with the auroras. And on our recent workshop in Olympic National Park, Matt, Chris and the participants were able to photograph an aurora alongside a massive sea stack.
10 seconds, f/2.8, ISO 6400. Nikon D750 with a 14mm lens. © Gabriel Biderman.
5. Create an Aurora Portrait
Try to capture your experience under the northern/southern lights. There is such a sense of wonder and amazement when you are experiencing an aurora, so take a portrait of yourself or your friends under the night sky! A flash can be your friend for freezing the portrait with one pop, as your shutter speeds will generally be 2 to 4 seconds.
We had an amazing time taking our Iceland participants’ portraits during a night when the auroras just wouldn’t stop! My base exposure was 4 seconds, f/2.8, ISO 6400, so we just needed 1/64 power from the flash to make the night portrait complete.
Lance under an Icelandic aurora. 4 seconds, f/2.8, ISO 6400. Nikon D750 with a 14mm lens. © Gabriel Biderman.
Tim Cooper
We should always strive to get the perfect picture in-camera, and shooting the auroral lights is no different. Composition and exposure (f-stop and shutter speed) are crucial. Severe cropping and exposure changes will damage your photo, and fixing shutter speed or depth of field is impossible after the fact.
That being said, there are several things that can be altered in post-production that have no bearing on the initial capture. In fact, some of these things you can’t even accomplish in-camera.
6. Change Your White Balance
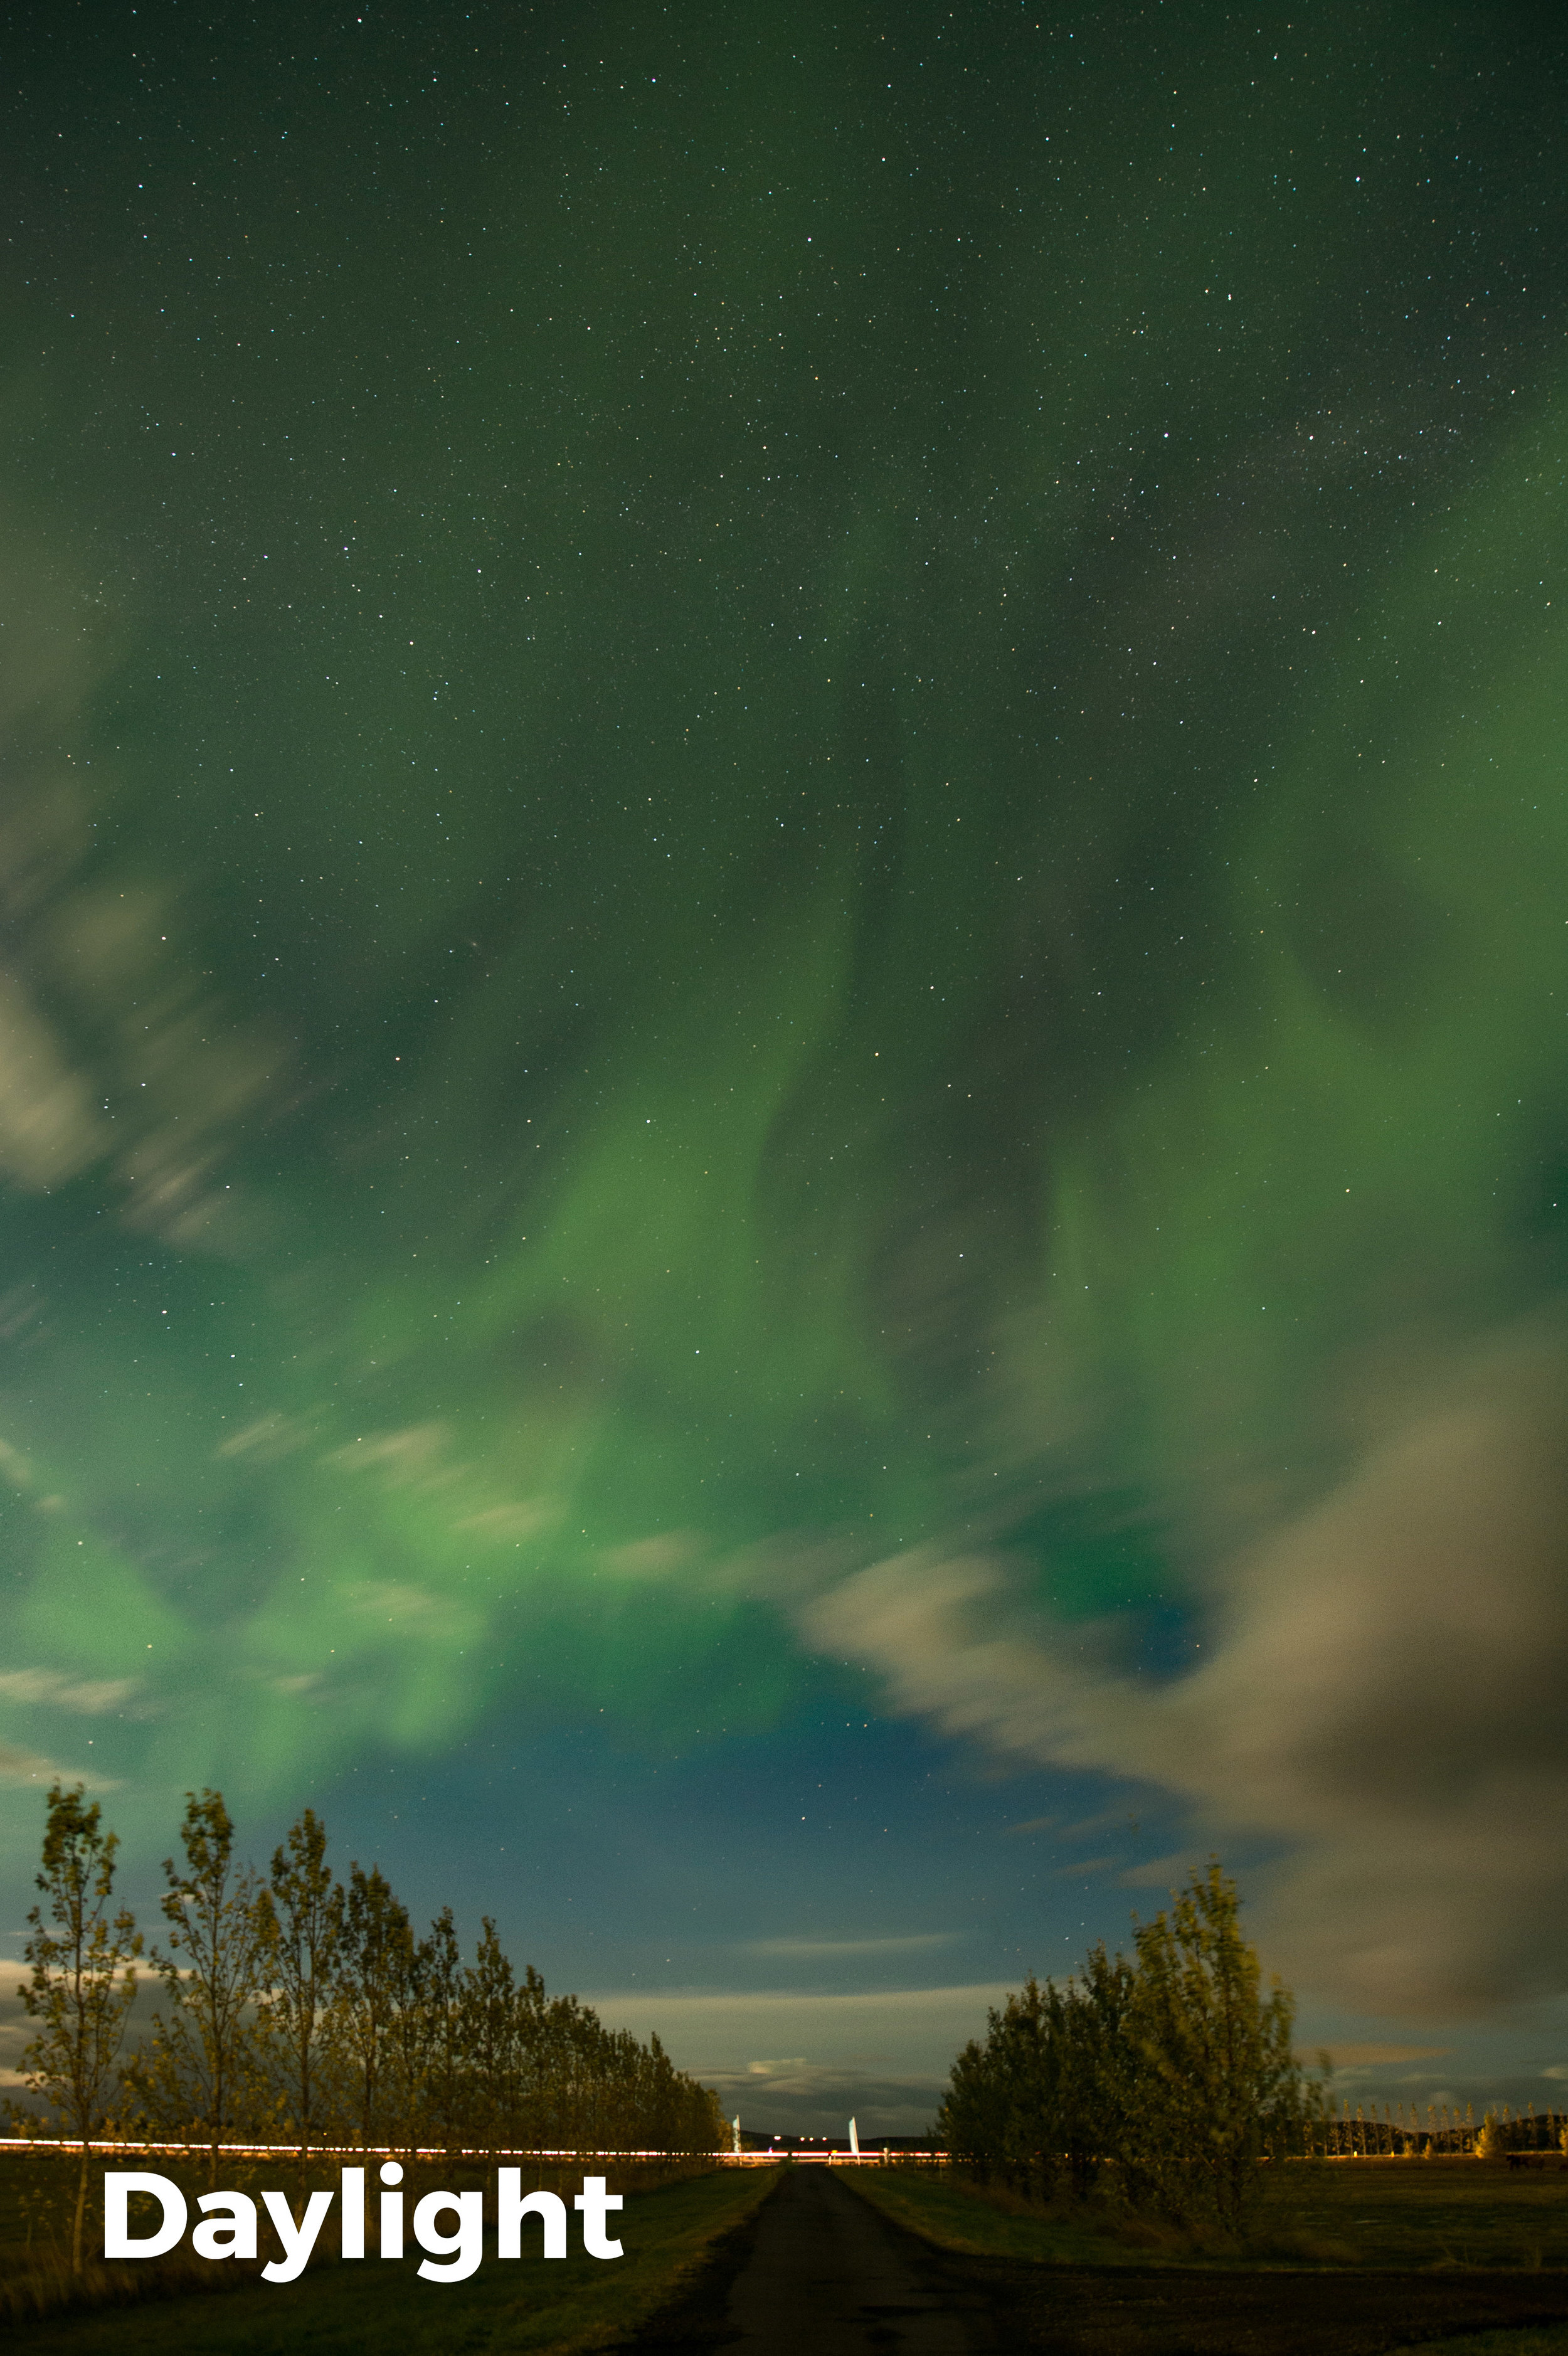
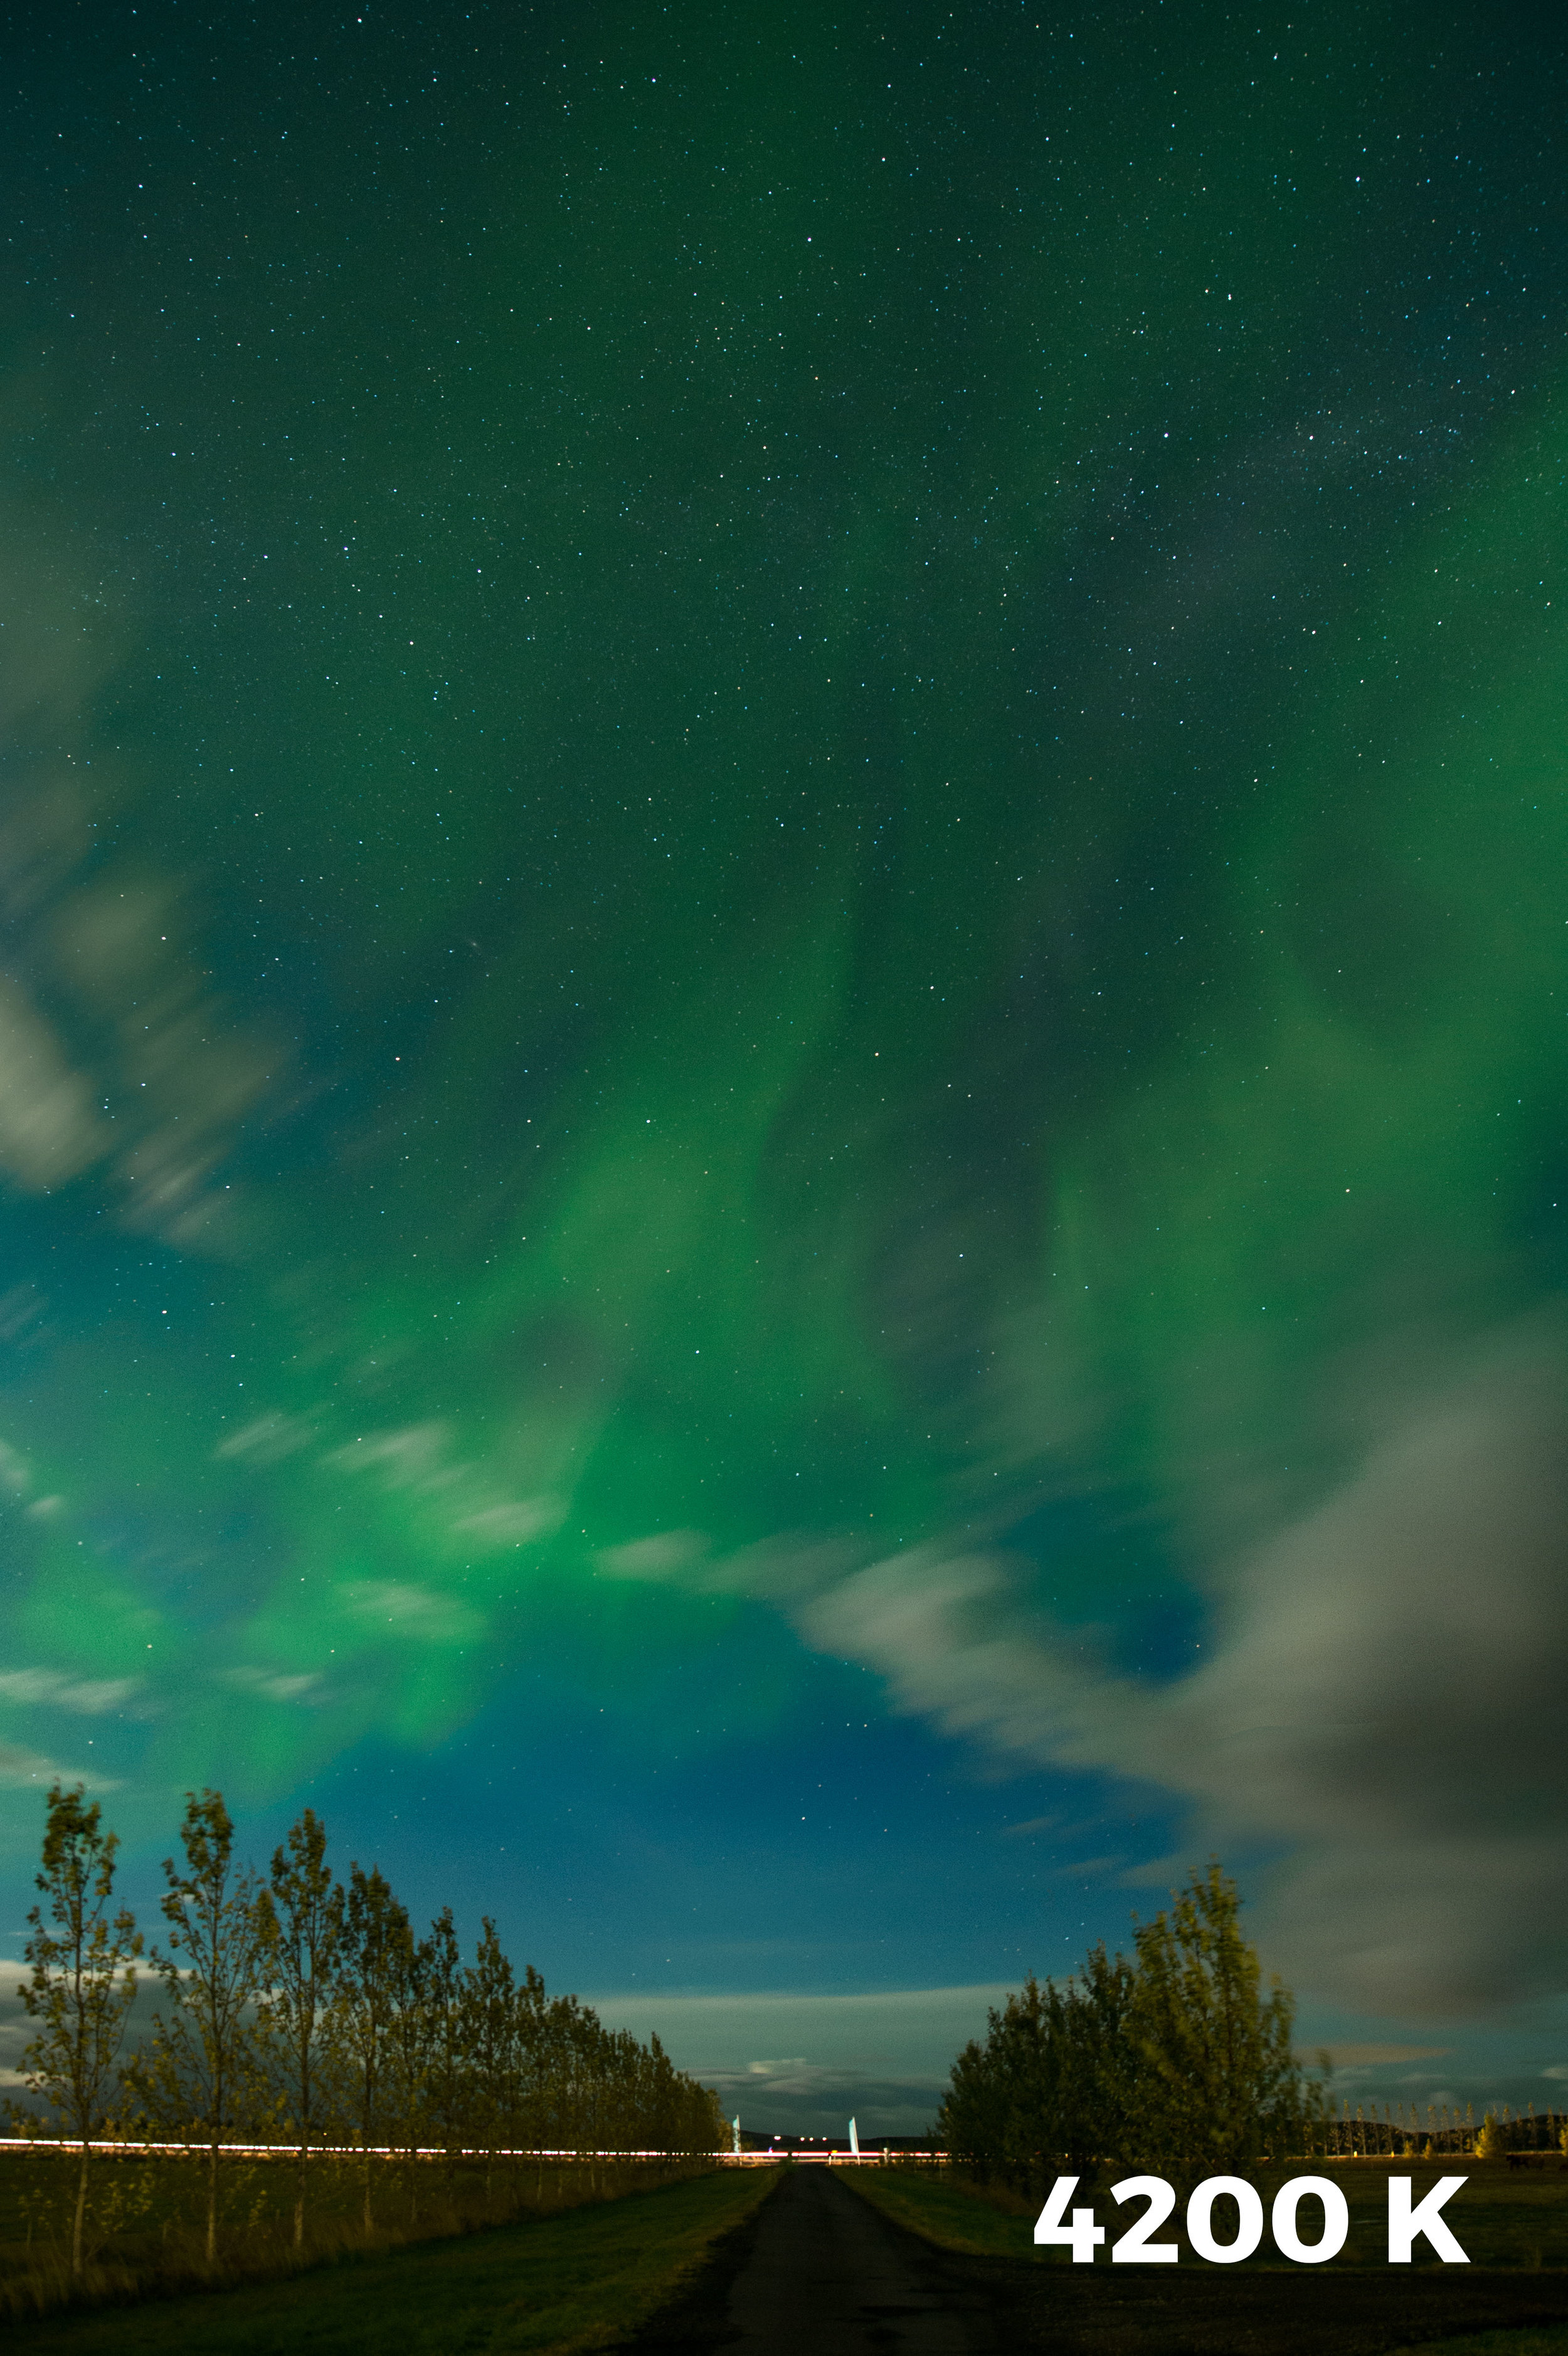
White balance can and should be set correctly for the initial capture. While it’s difficult to give an exact white balance setting for all situations, it’s safe to say that you’ll probably want to run a bit cooler than a typical Daylight (direct sun) setting. In the comparison below, the first image was made with a Daylight white balance, while the second was made at 4200 K. (Both images shot at 20 seconds, f/4, ISO 1600 with a 14mm lens.) Notice how the cooler white balance setting of 4200 K separates the color and makes the image feel more dynamic.
Experiment while out in the field to find the best look. If you find your images are too warm when back in Lightroom, slide the Temp slider toward the blue end.
7. Add Whites
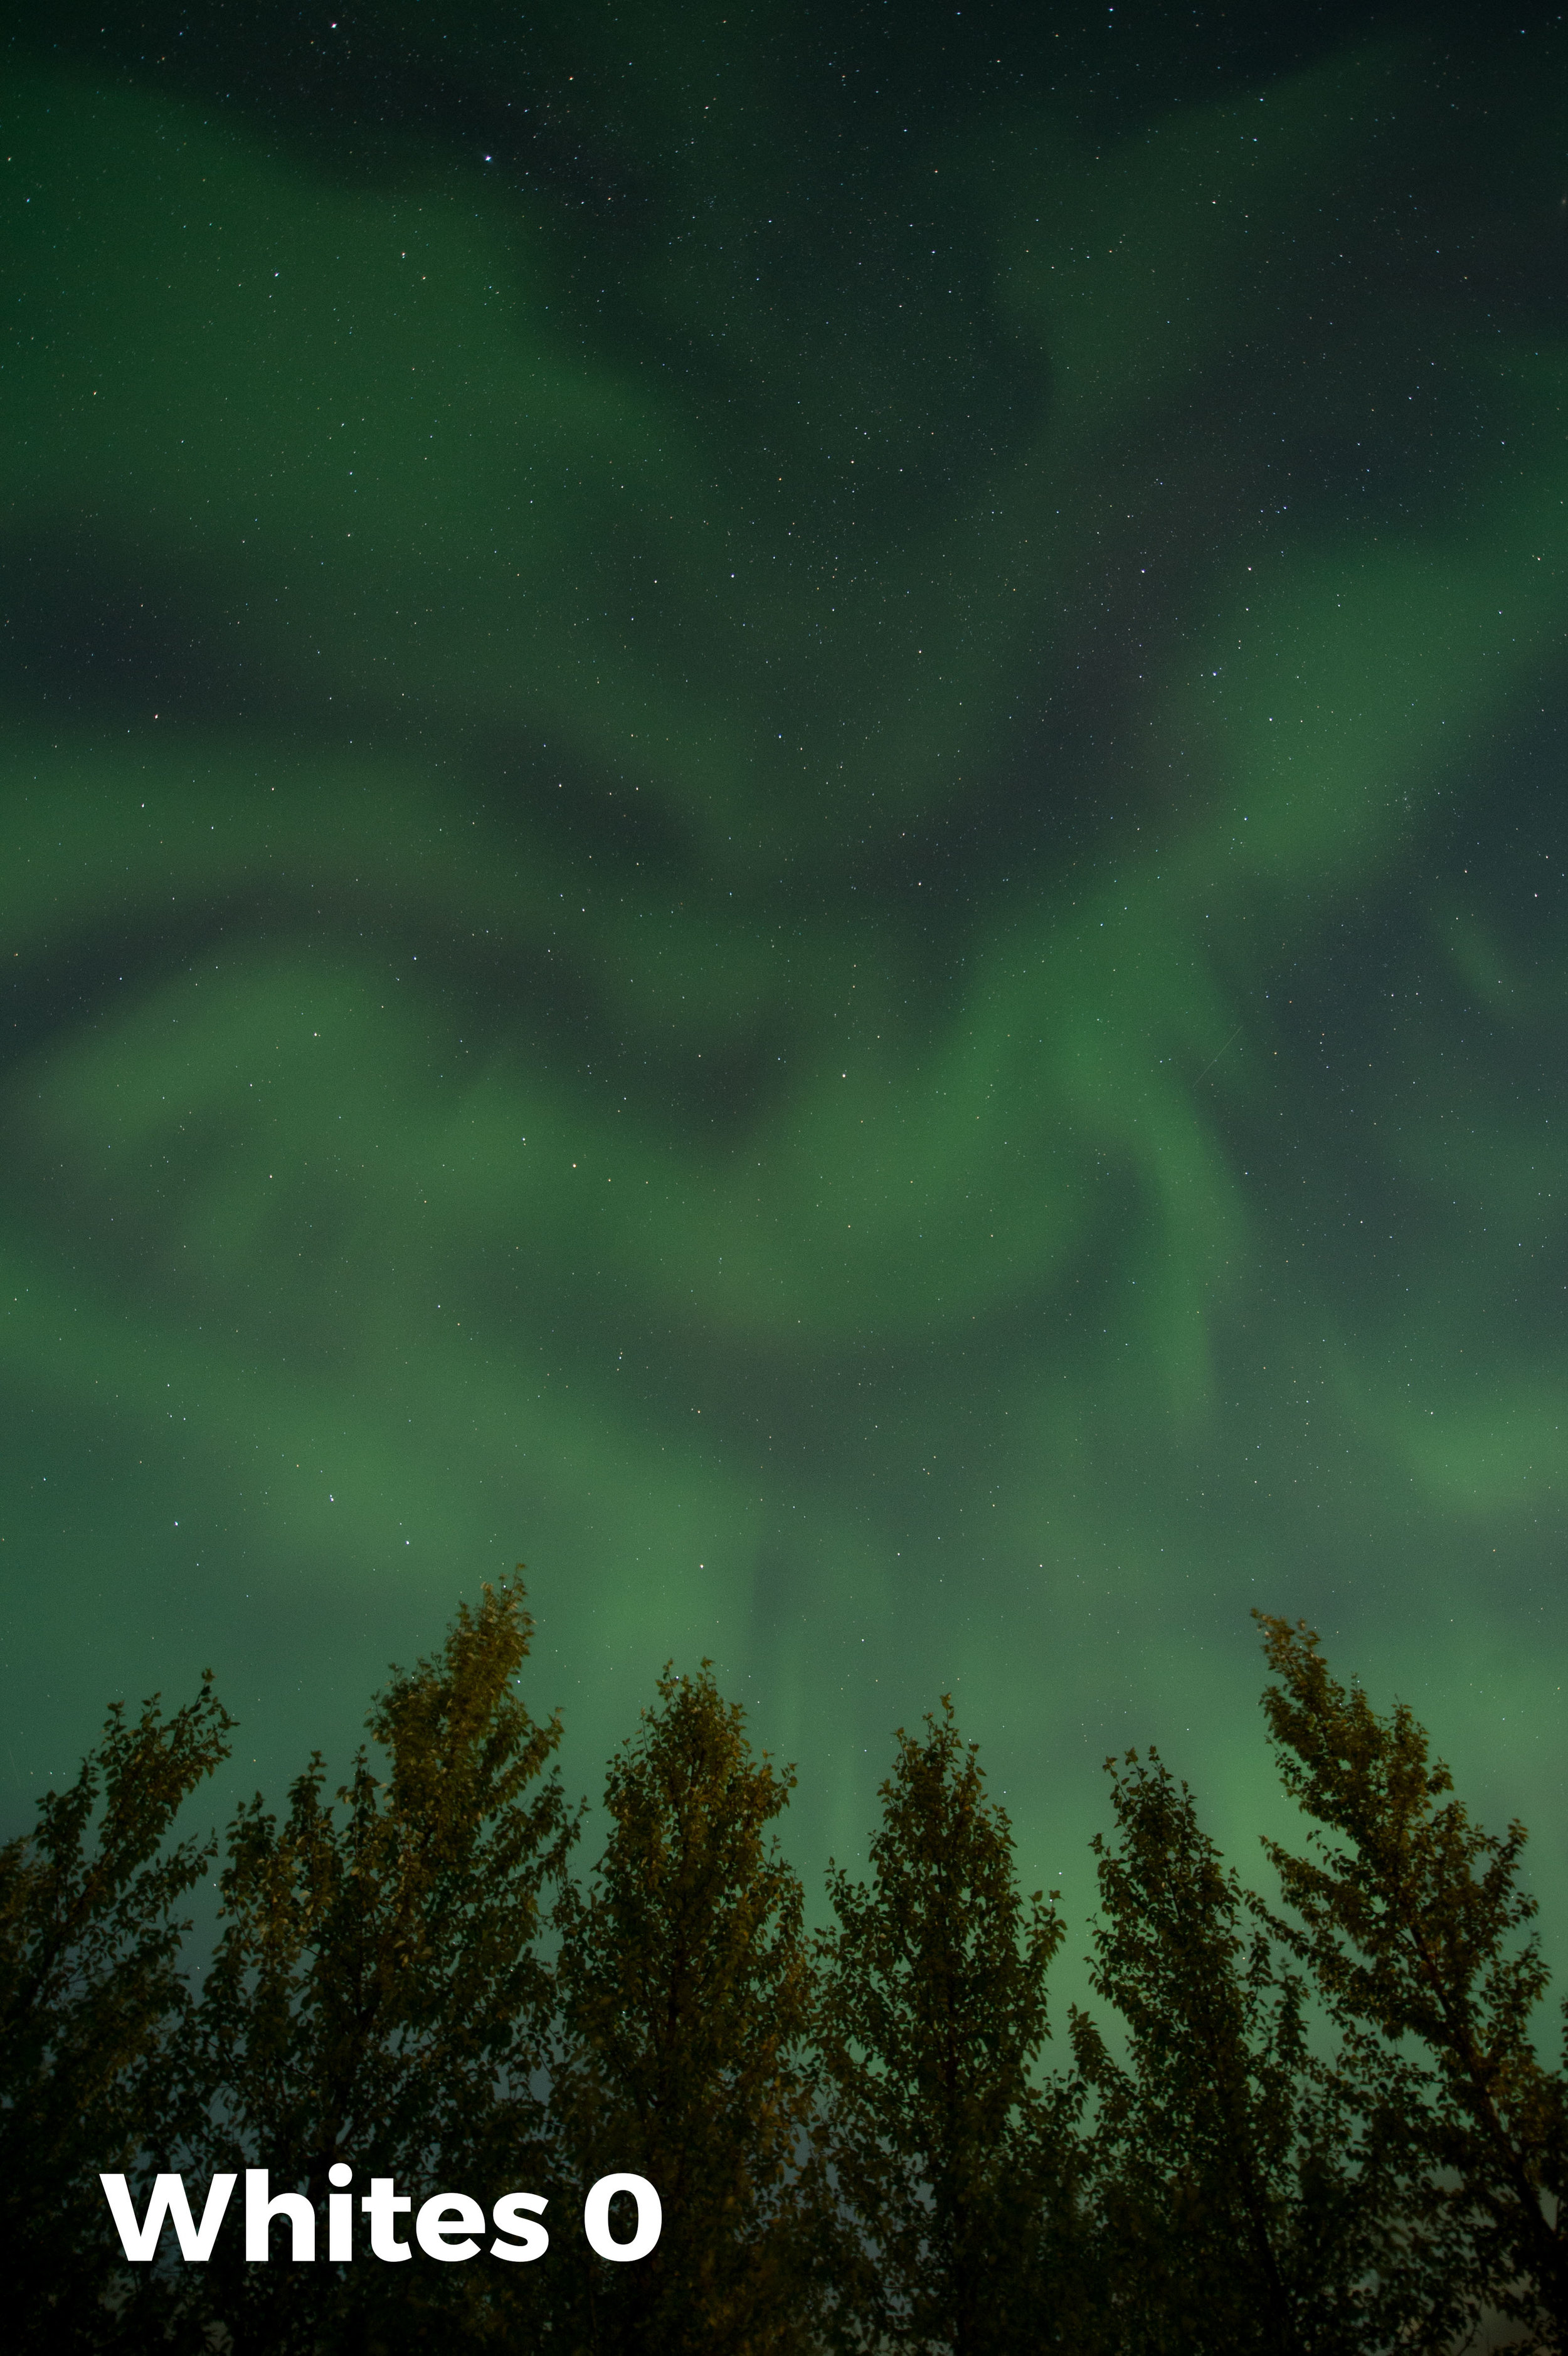
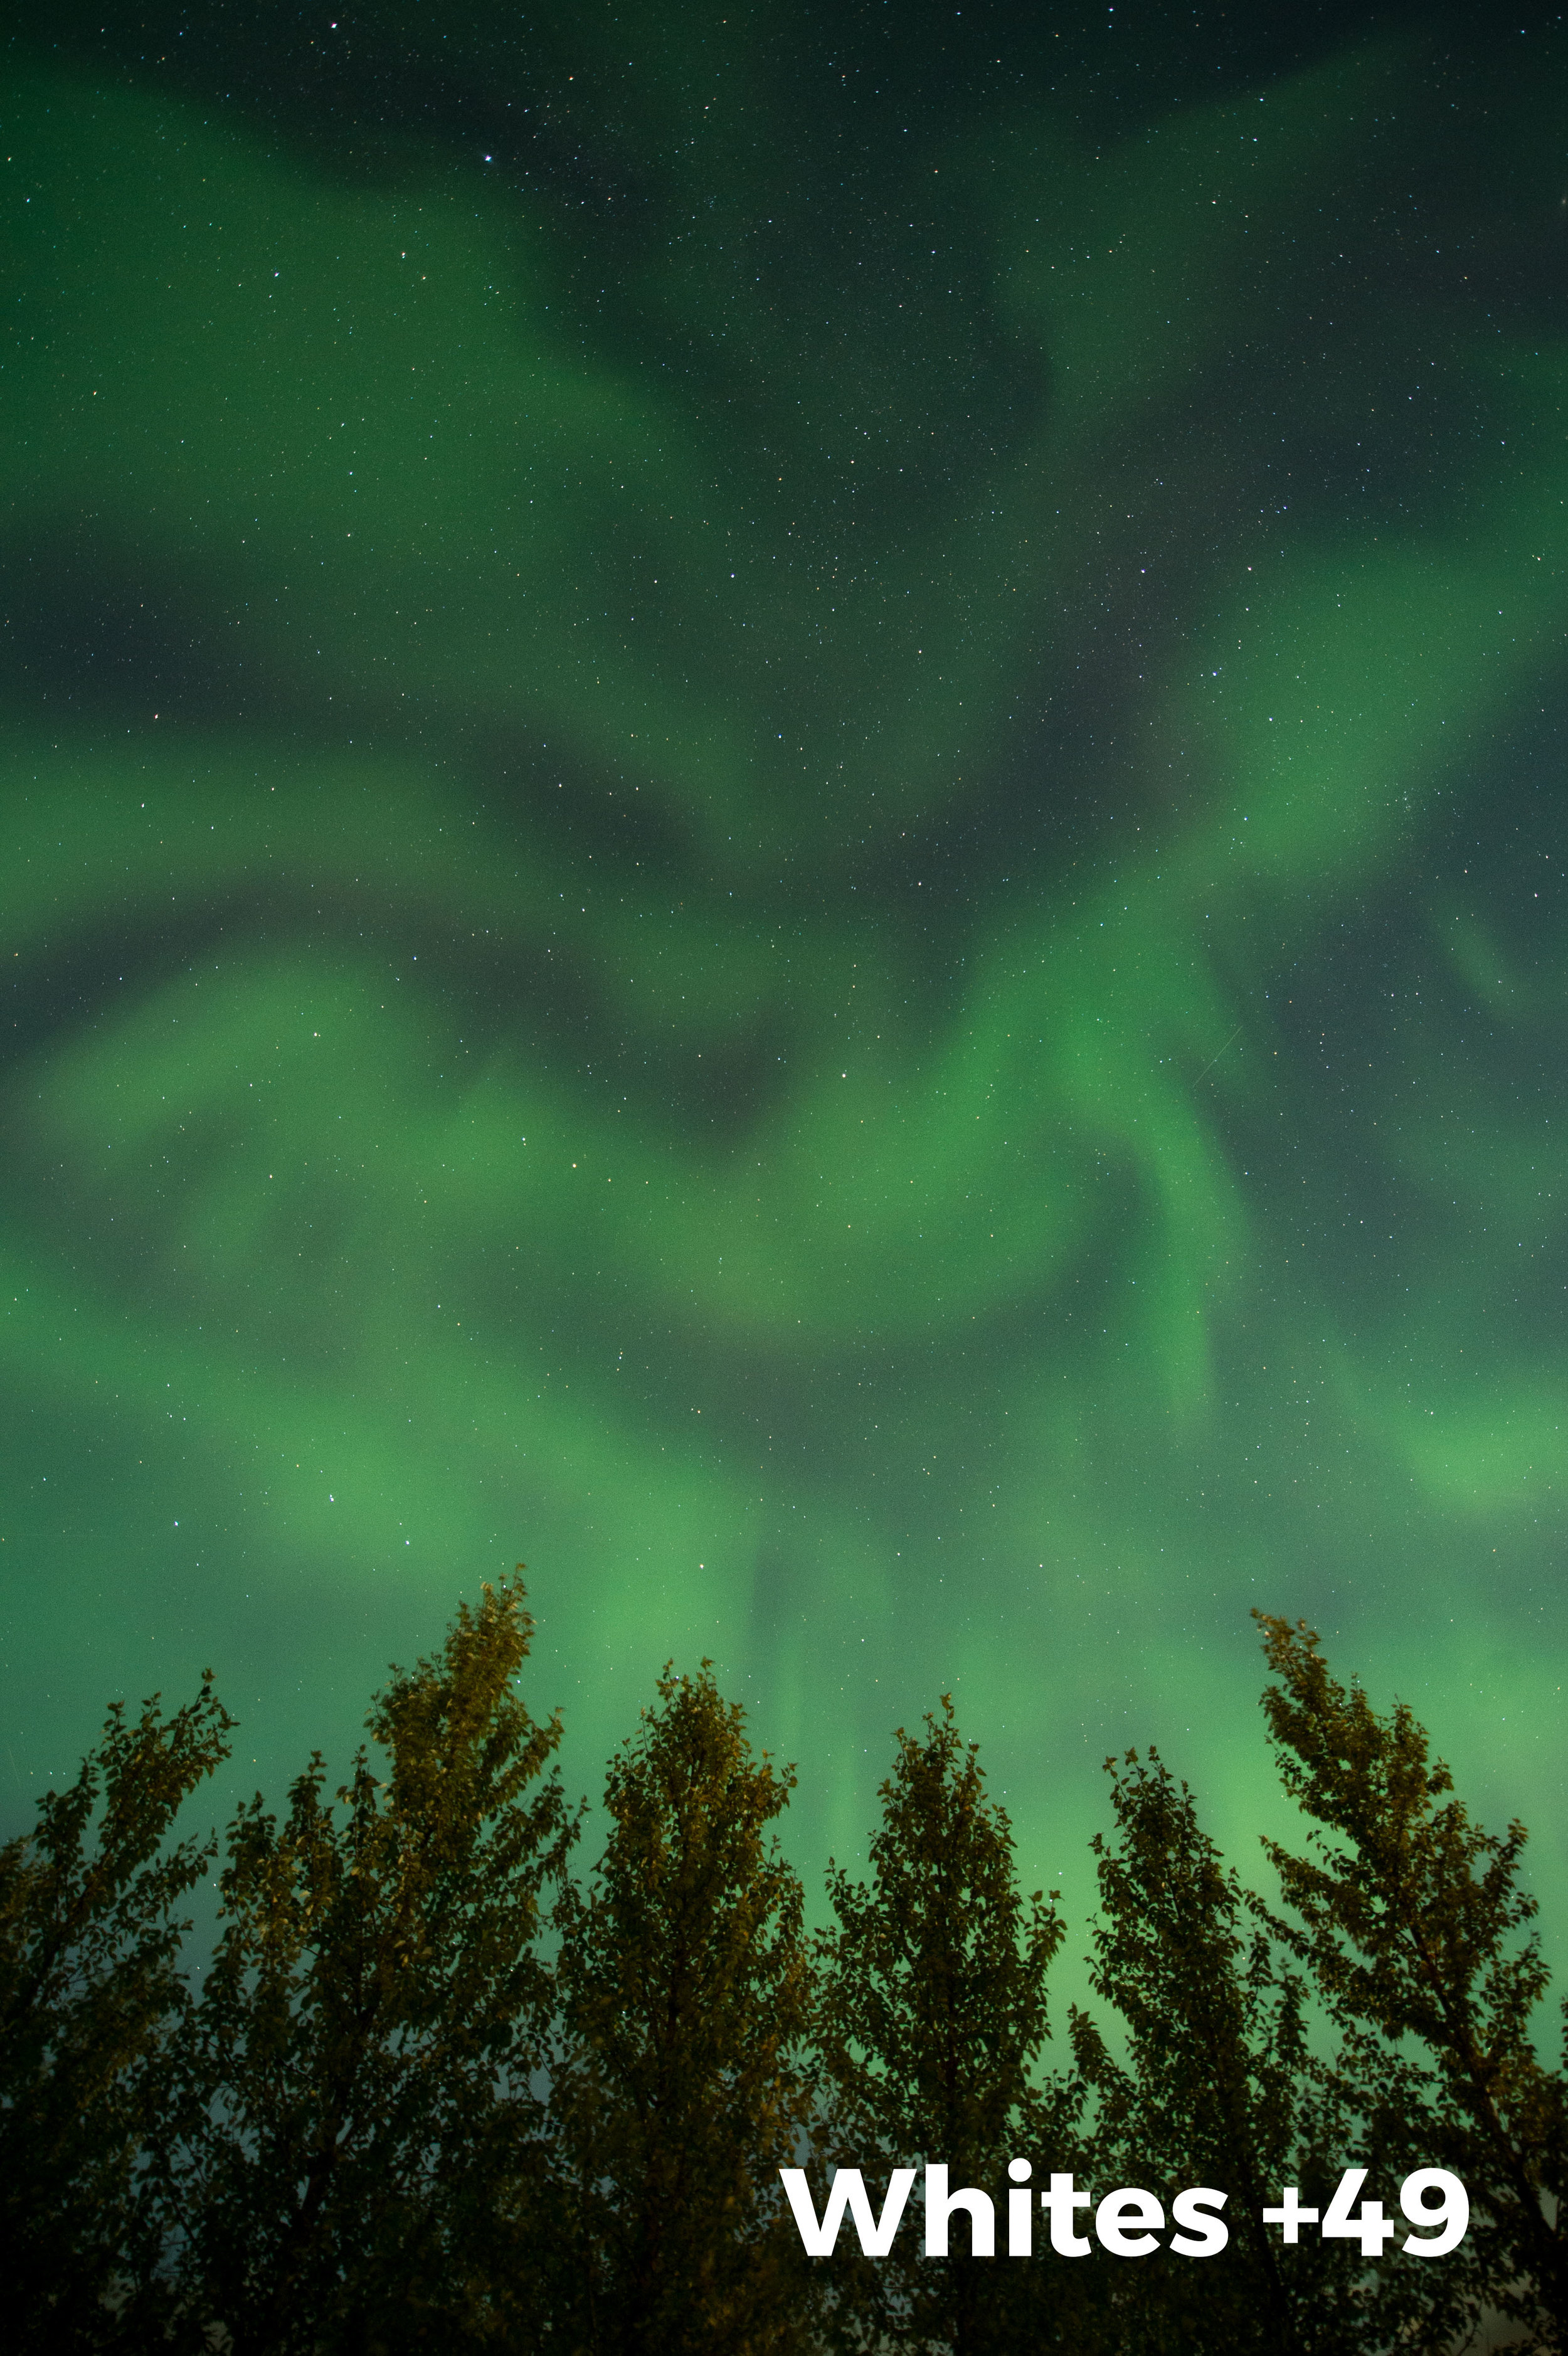
It would seem odd to address the Whites slider in Lightroom’s Basic panel while working aurora images, but it really works! This has to do with the underlying algorithm of the tool itself. Moving the slider to the right has the effect of increasing overall contrast, thereby adding more snap and pop to your images. In the comparison below, the first image (10 seconds, f/2.8, ISO 1600 with a 14mm lens) is as shot, while the second has been adjusted in Lightroom with Whites at +49, and therefore has more pop.
8. Add Dehaze
The Dehaze slider is the night photographer’s secret weapon. It increases contrast and saturation in the low-contrast portions of the image. Be careful here. This slider can be seductive. Adding too much can make your image look really fake. Start slow and add small increments at a time. Continue to compare your adjustments with the original by clicking on the before-and-after view (circled below).
We hope some of these tips will help make your aurora photographs even more stellar!
Are there any tips or techniques you’d like to share? How about some amazing aurora images? Feel free to post in the Comments section below!


