
Note: This post concludes with a video of Gabe walking through how to process a realistic-looking Milky Way. Want to jump straight to that? Click here.
Do you remember the first time you saw the Milky Way?
So few of us have access to starry skies that the wow factor was undoubtedly very high. What you saw on the back of your camera and then on your monitor was even more exciting, and in this excitement you probably pushed your post-processing to bring out the stars just a bit more … and just a bit more … and just a bit more … and. …
This is a very normal and common experience. However, taken too far, it also detracts from reality—many of the night images we see online simply do not reflect what the Milky Way actually looks like.
In this post, I aim to help you process your Milky Way shots in a more natural and realistic way.
Milky Way panorama. Nikon D750 with a Nikon 14-24mm f/2.8 lens at 14mm. Seven stitched frames shot at 30 seconds, f/4, ISO 6400.
Star Witnesses
If you search the 3 million images tagged #milkyway on Instagram, you’ll notice that over 80 percent of them are overprocessed.
What do I mean by that? In those images, the Milky Way looks very unrealistic—too contrasty, over-sharpened and full of colors that jump out at you. In short, it looks like no Milky Way we have ever seen in the actual sky.
Yet the likes and positive comments pile on! Why is this?
The general public is still unfamiliar with what the Milky Way really looks like. Their only experience with it is what they see online. The Milky Way still has a high wow factor, and as technology and post-processing techniques become more powerful, photographers can eke out all sorts of additional detail. The problem is that so many eke out every detail.
We want to bring a realistic vision back to the Milky Way. The Milky Way should be the chorus to your song, but all good songs have a gradual build: highs and lows that build to that chorus. A good photograph should guide us throughout the whole image with a similar tempo.
Below is an example of a Milky Way image that is processed naturally versus one overprocessed in a way that’s commonly seen on the web. Note that in the overprocessed version the tonal range is not as smooth, the colors are too punchy, and there is very little separation between the Milky Way and the stars that surround it.
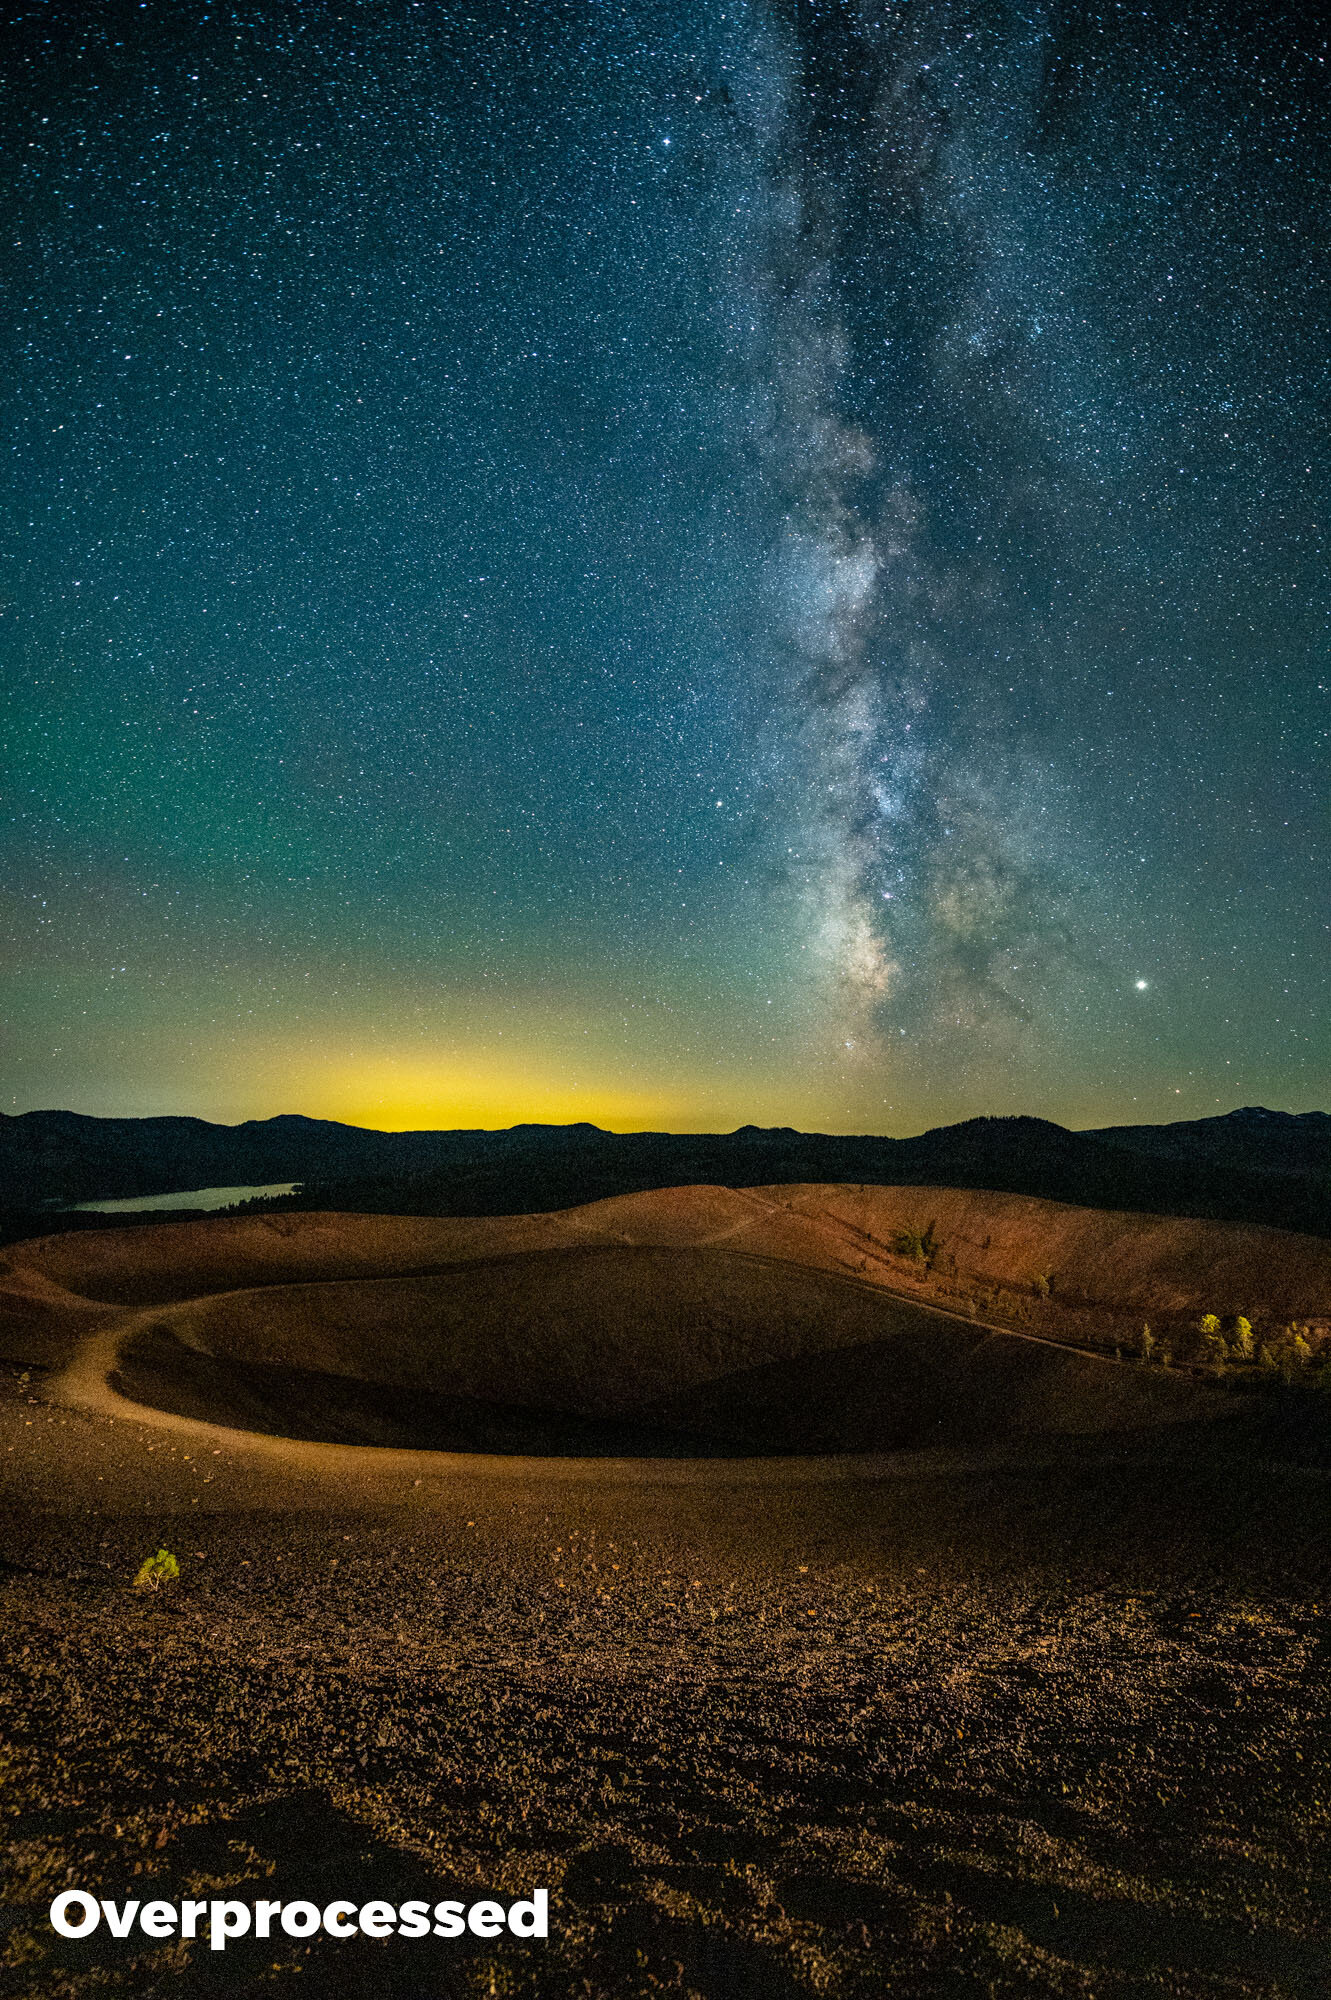

The left version might look "wow," but the right is closer to what the Milky Way actually looks like. Nikon Z 6 with a Nikon 14-24mm f/2.8 lens at 14mm. 15 seconds, f/2.8, ISO 12,800.
Avoiding Overprocessing
Most overprocessing pitfalls can be rectified by fewer global adjustments and more local adjustments. I know the global tools in Lightroom’s Basic module are right there and ready to use. But the astro-landscape photo is made of two different elements of exposure: the sky and the landscape. They often require different considerations on how to process them.
Globally applying Dehaze because it will successfully enhance your sky could very well have an adverse effect on the colors and shadows of your foreground. Unless your foreground is a silhouette, it’s best to think of your Milky Way image as two images and process them accordingly with local brushes and gradients.
If you are working under dark skies with little to no moonlight, you might even consider shooting two images: one correctly exposed for the stars and another longer exposure that reveals detail in the foreground. (I covered this type of blending of two images in my previous blog and video about Starry Landscape Stacker.)
An example of a blended image. First I shot a lower-ISO long exposure during civil twilight for the foreground, then a higher-ISO sharp-star exposure for the background, and layered the two in post-production. Being able to process the foreground and background separately allowed me to maintain a more realistic Milky Way. Hasselblad X1D with a Hasselblad 30mm f/3.5 lens. Foreground: 6 minutes, f/4, ISO 800; background: 23 seconds, f/4, ISO 6400.
Presence Sliders in Lightroom
Texture, Clarity and Dehaze are very attractive tools, as they can increase local contrast in a scene and really make an image pop. However, overusing them can lead to crushed shadows and unwanted shifts in color (as seen in the blog post linked above).
Think of these three adjustments as coming with great responsibility. To understand what they do, crank them to 100 percent, then slowly bring them back, and toggle between your full view and 100 percent to see how they fundamentally affect your image. Then when processing, use them judiciously.

Texture
The newest filter in Lightroom (and the one I am most enamored by) increases sharpness without amplified grain or saturation. However, when overused, every star is sharpened and jumps out in the sky. This can compete too much with the Milky Way as well as falsely make every star look as bright as the next.
Depending on the scene, I like to add 3 to 8 points of Texture to my Milky Way by using a brush to add the effect locally. If I go above 10 on Texture, I really need to examine the effect at 100 percent zoom to make sure I’m not overdoing it. (However, that threshold applies only to the sky. If I have a well-lit rocky landscape, Texture is just what the doctor ordered to enhance the granularity of those rocks—for that I might use anywhere between 20 and 60 points.)
Clarity
I often use Clarity in lieu of the Contrast slider. I’ll adjust my white and black points first. Then, if the Milky Way needs more punch, I’ll slide Clarity to anywhere from 5 to 25. However, I always keep an eye on the top corners of my image, as Clarity quickly heightens any vignetting and can make smooth graduations in the sky seem choppy.
Dehaze
Brings contrast and saturation to an image. The former is great for boosting the low contrast that is often found in night skies. But keep an eye on that saturation—that’s where blues get wonky real quick. I never apply Dehaze globally; I typically apply it only via the Graduated Filter tool. My Dehaze adjustments can vary depending on the scene, but they usually range between 10 and 30.
It is also very important when you are combining global and local adjustments to remember that they build on top of each other. If you’re not precise in your workflow, you might get stuck fighting back and forth between how your global and local adjustments overlap and affect each other, sending you down the road of overprocessing. To avoid this, hone your global adjustments first, and only then start with the local changes to your Milky Way.
Another important thing to keep in mind is that our editing tools grow and change over time. I love Texture, but just a few years ago that tool wasn’t even in my imagination. It didn’t exist until about this time last year! Be sure to always keep a lookout for innovations in Lightroom that you can use to make your images better and better.
For example, I recently revisited the very first successful Milky Way image I’d ever shot. I hadn’t overprocessed then, but I had processed it with Lightroom 3 (below, left). That was a great program for its time, but it had some limitations compared to what’s on my computer today. Now, using Lightroom Classic 2020 (below, right), I get some finer detail out of the file.

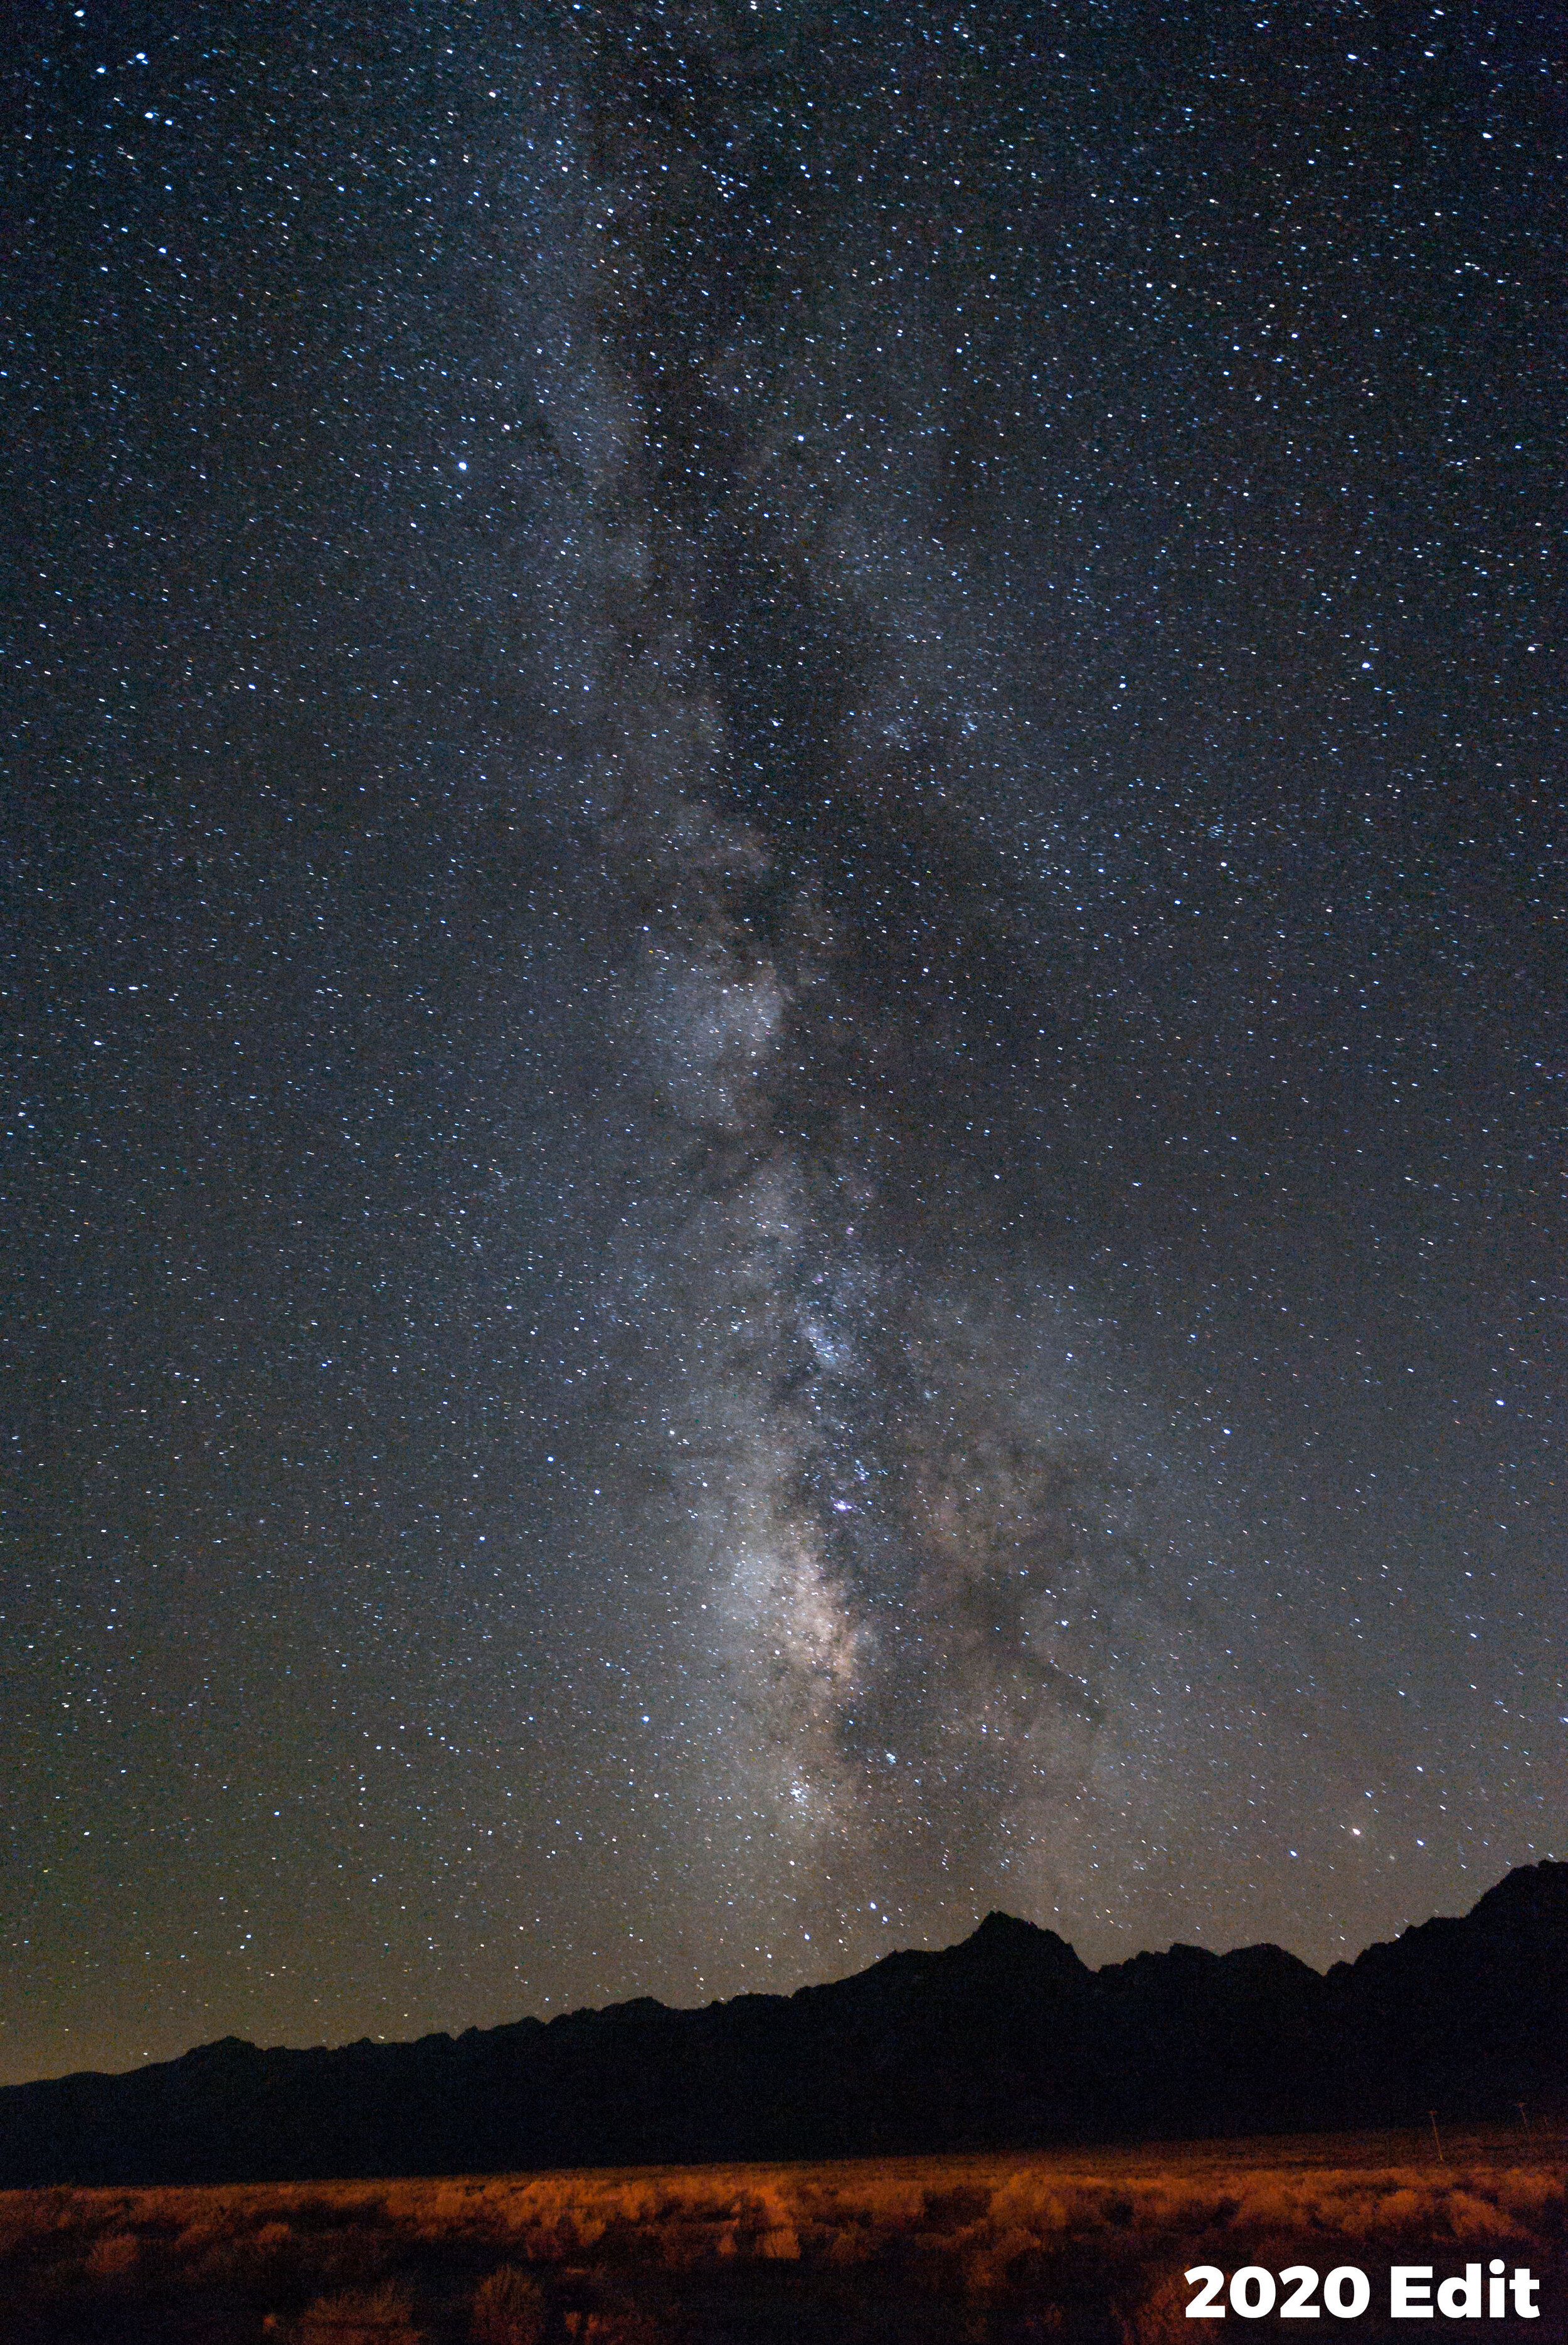
Shot in 2010 with a Nikon D700 with a Zeiss 21mm f/2.8 lens at 30 seconds, f/4, ISO 6400. Left: Processed in Lightroom 3 with +12 Clarity, +11 Vibrance and +20 Luminance Noise Reduction. Right: Processed in Lightroom Classic 2020 with more subtle local adjustments, less noise reduction and more magenta.
Putting it All Together
I made this video that walks through my considerations for processing the Milky Way in a more natural way. I point out the sliders that we might slip too far on, and I share my Milky Way brush technique for subtly bringing out the finer details.
Now, if you’re one of the overprocessing culprits … First, know that you have a lot of company. But second, know there’s a better way, and we’re happy to help.
Stop processing the Milky Way with a hammer and a bucket of paint, and then share your images with us below in the comments. Or, better yet, share them online on Facebook or Instagram! Tag @nationalparksatnight and let’s educate the world on what the natural Milky Way really looks like!


