Under I-80, Cuyahoga Valley National Park. © 2016 Tim Cooper.
The Location
Cuyahoga Valley National Park is a gem in our system of parks. It has a completely different flavor and feel than its western counterparts.
Being located so close to Ohio’s metro areas of Akron and Cleveland, it provides a host of photographic opportunities that other more remote parks may lack. Old train stations, bridge spans, barns, farms, railroad tracks and turn of the century towns all provide unique light painting subjects. This is one of the very many reasons I’m excited to be leading a night photography workshop in Cuyahoga Valley with fellow NPAN instructor Chris Nicholson next May.
During a recent visit I tried my hand at light painting the I-80 bridge span that floats over part of the park like a Roman aqueduct. I knew this would be a challenging shot that would require different white balance settings and multiple exposures to give me time to paint the entire underside of the bridge plus the headstock and piers. Here’s how it went …
Getting the Shot
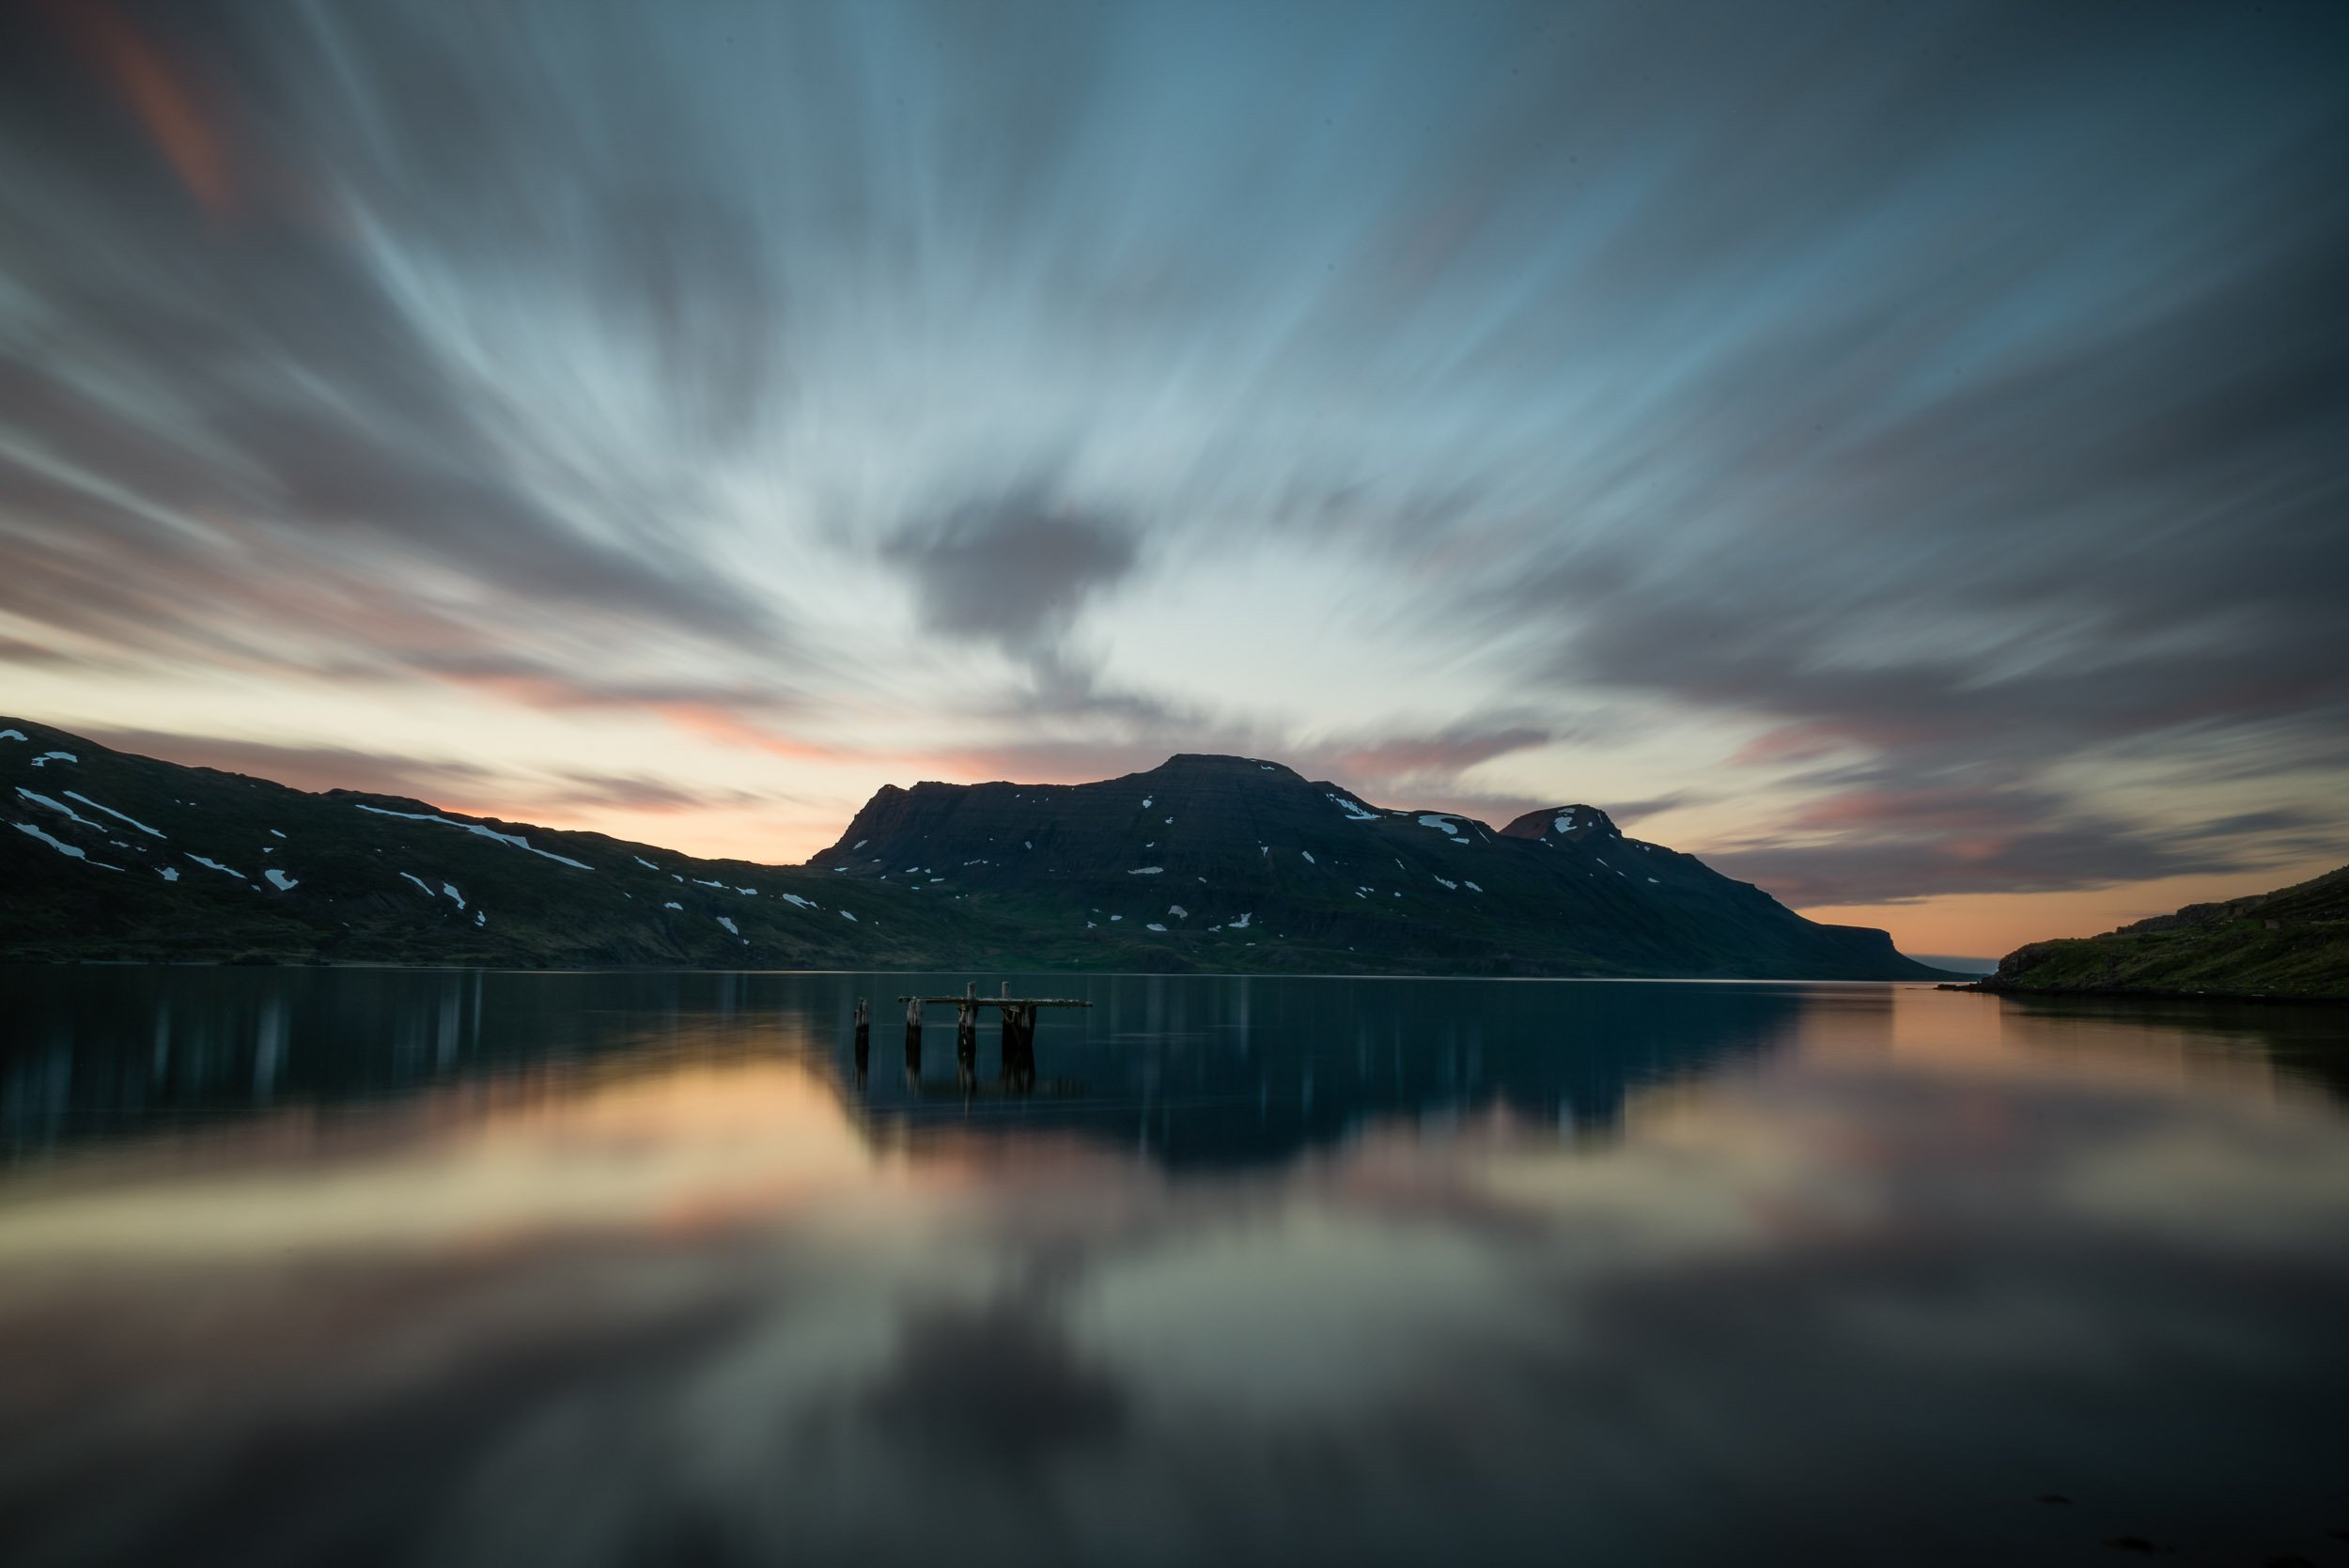
The first order of business was to determine a rough composition and exposure, so I arrived at the location just after sunset. This allowed time to focus and compose in the fading light. My initial exposure was at ISO 100 for 90 seconds at f/13 (Figure 1). I used my Nikon 24-70mm f/2.8G lens on my Nikon D4s. The overcast sky created a heavy blue cast that was apparent when I left my camera’s white balance set to daylight as seen in the image below.

Figure 1: Test shot to determine composition and sky exposure
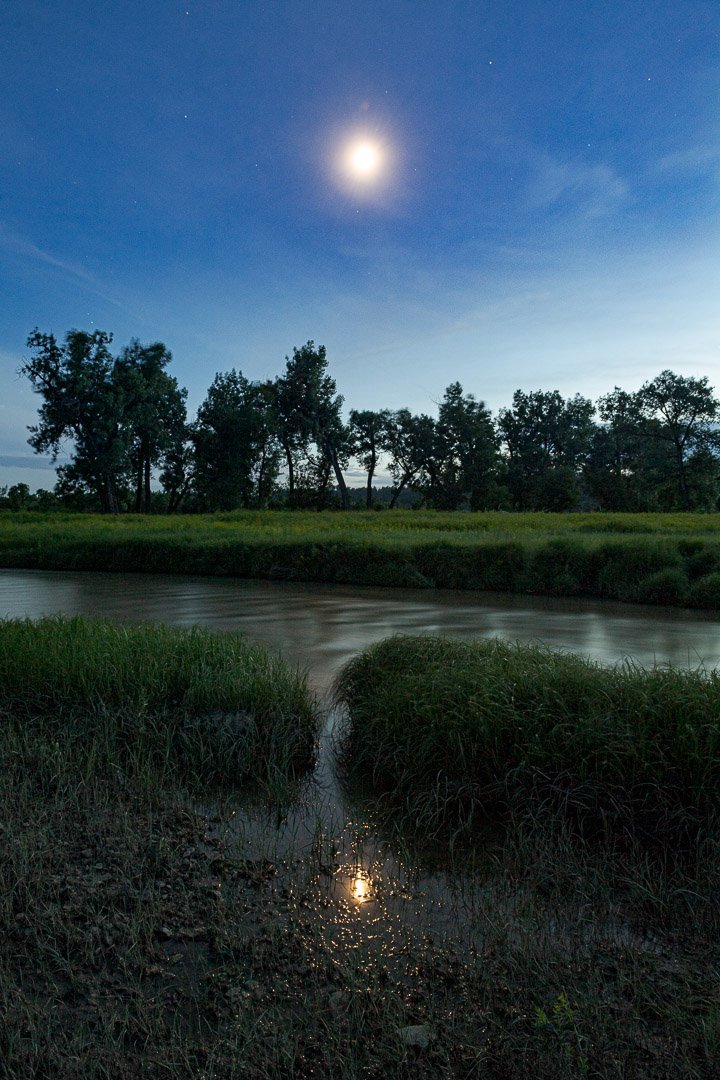
By the time I was finished fine-tuning the composition and settings, the scene became dark enough to begin light painting. I made my first exposure to capture the proper brightness and color of the night sky. The sky was a mix of low clouds that were picking up the pink/orange cast of the sodium vapor lights of nearby Cleveland, so I set my white balance to 3900 K to keep the color cast from being overly pink/orange.
The exposure was ISO 200, 5 minutes at f/8. This longer exposure would allow enough time for me to move around while painting the underside of the bridge. The image below (Figure 2) shows the night sky from this exposure, which is the sky I used in the final composition.

Figure 2: Sky exposure
The next order of business was to nail my light painting. I used my 300-lumens Coast HP7R flashlight to paint the underside of the bridge. I placed a warm gel inside of the Coast LF100 filter holder so that my bridge would have a warmer look than the sky. After some experimentation I decided that the gel I had with me wasn’t warm enough, so I changed the white balance setting on my camera back to Daylight (direct sun).
I began painting by moving about 100 feet to the right of my camera so that I could paint the bridge at an oblique angle. I was able to cover the entire right half of the bridge in about 2 minutes. After painting from this position I moved about 100 feet to the left of my camera and painted the other side of the bridge. During the remaining minute I crossed the road and shed a little light on the near bridge piers.
Notice in Figure 3 that the light on the underside of the bridge comes from both camera right and camera left. Working from so far off axis from the camera kept the painting on the underside of the bridge from looking flat.
After experimenting with light painting, I found that ISO 400, 5 minutes at f/8 provided the right amount of time and illumination for the underside of the bridge.

Figure 3: Light-painting underside of the bridge
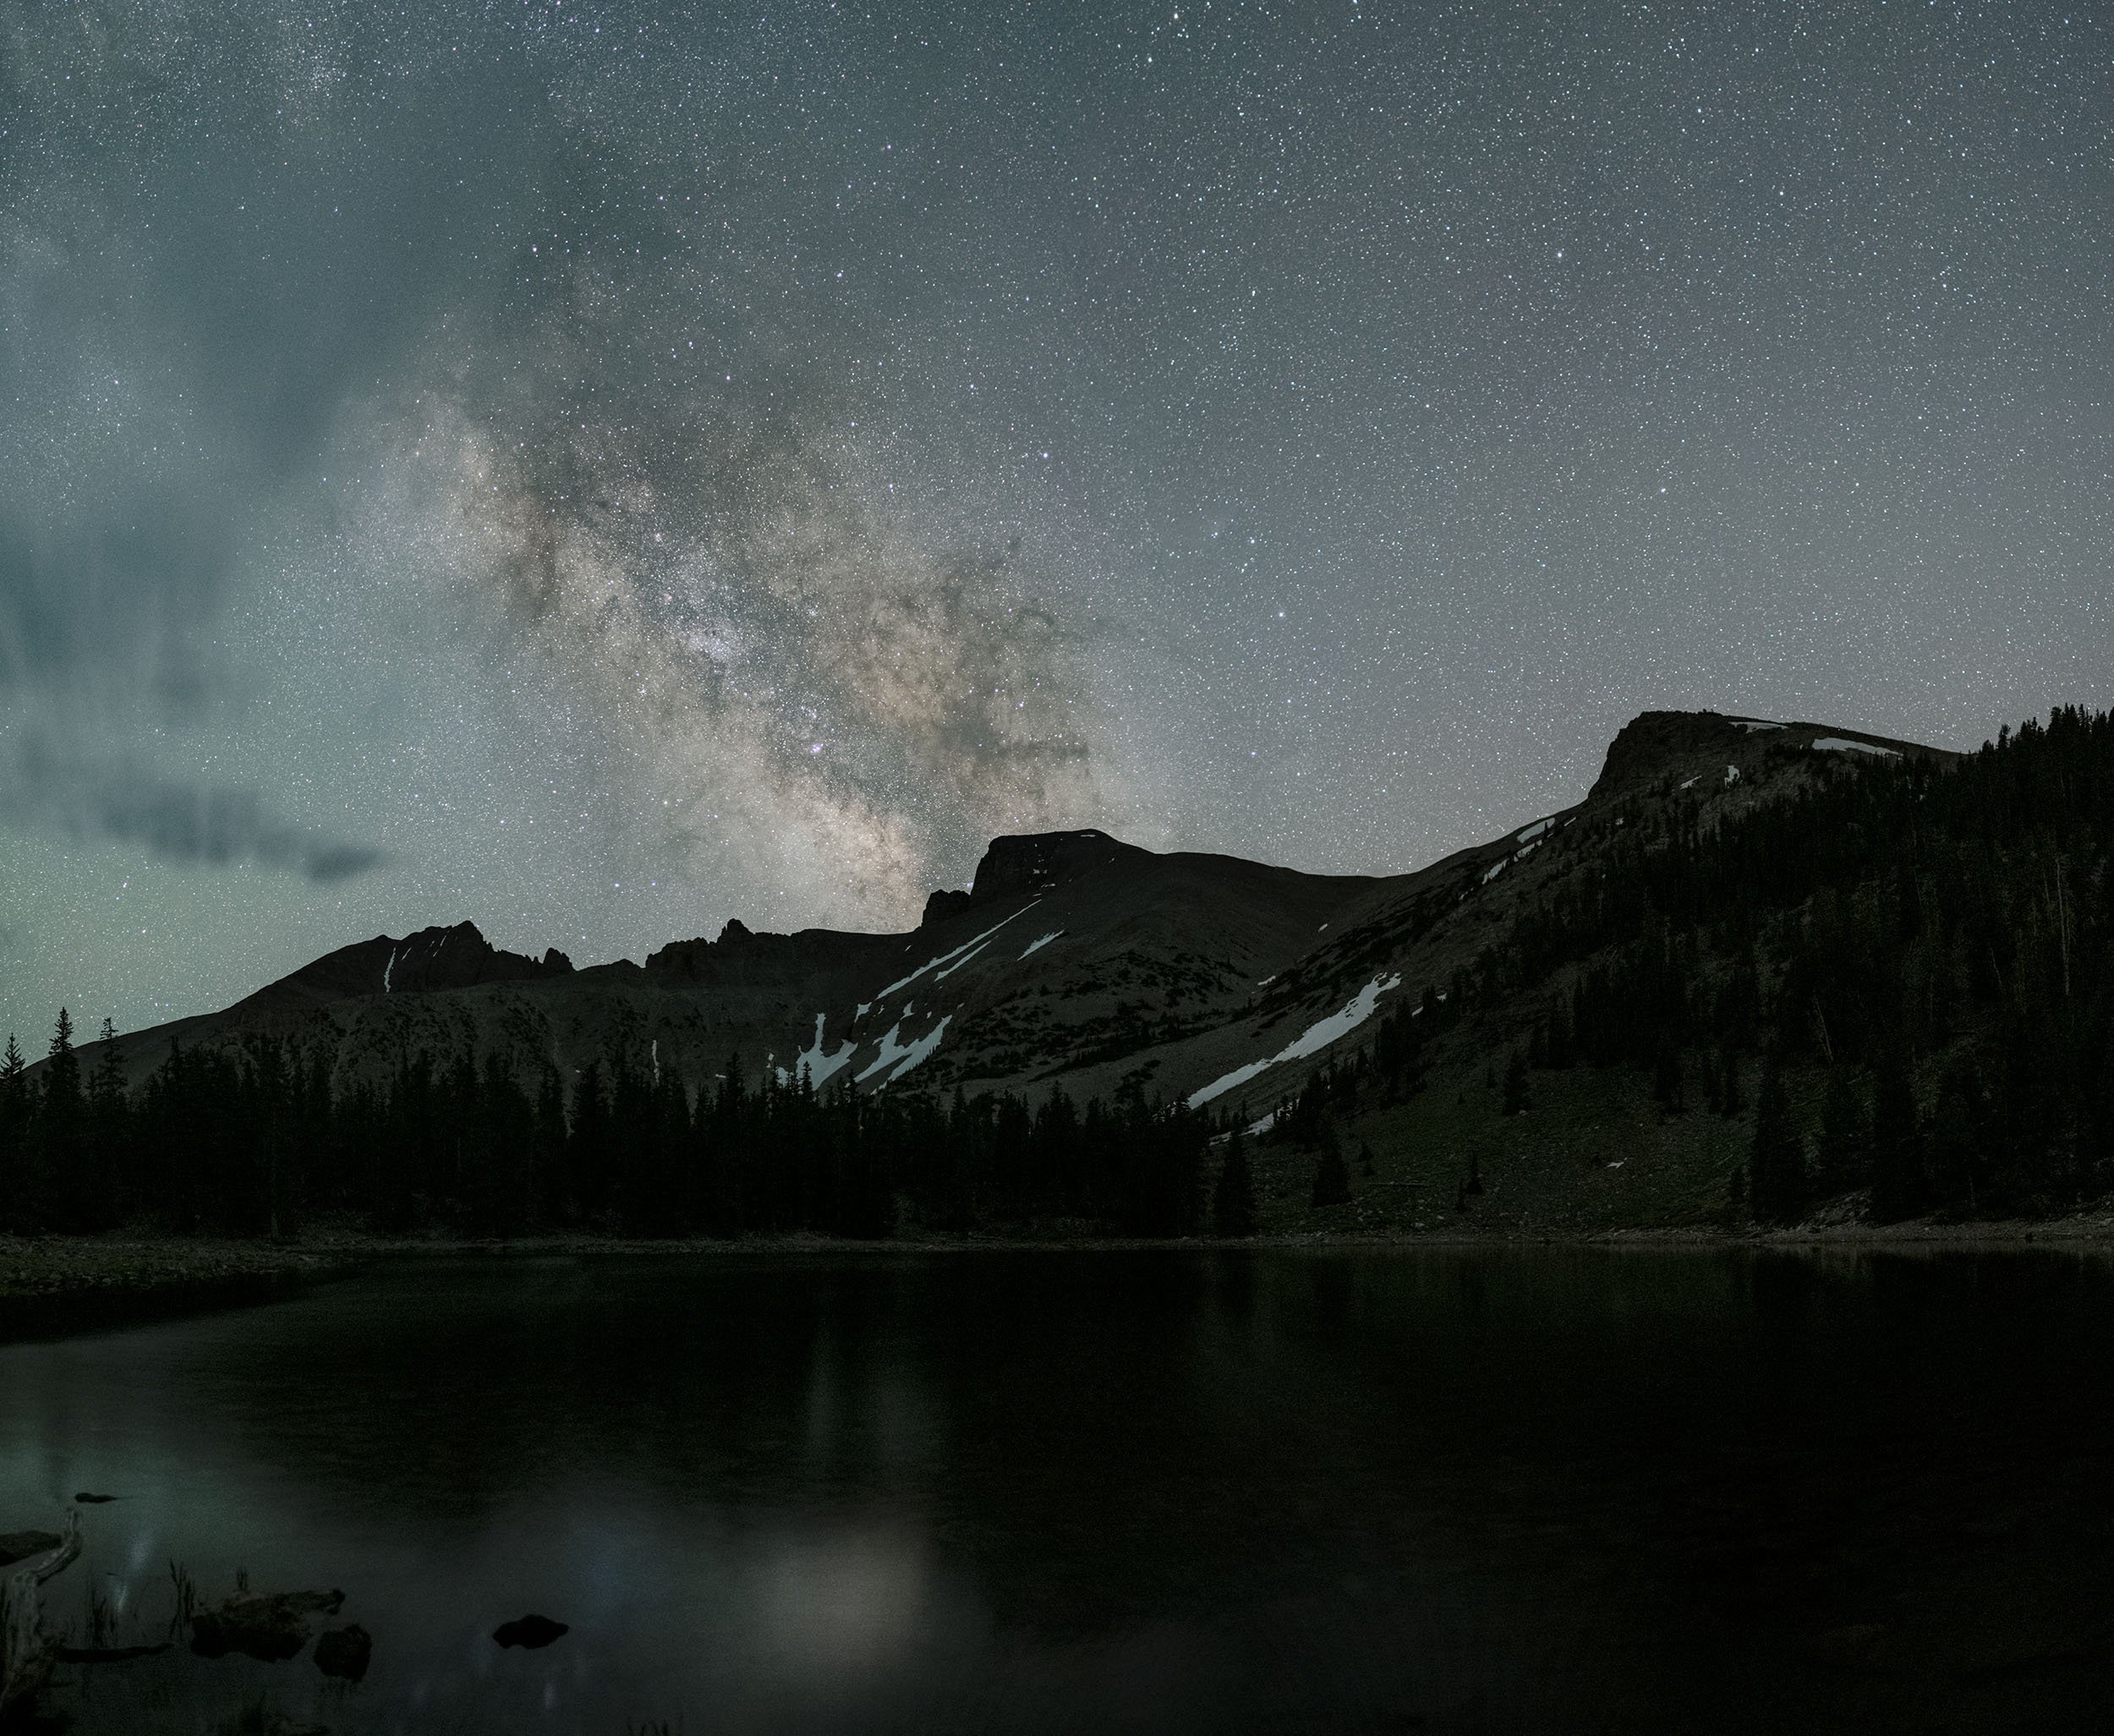
My first exposure (my first "real" exposure, not the test shot) from earlier provided the night sky. The second provided the illumination of the underside of the bridge. For the last exposure (which remained at ISO 400, 5 minutes at f/8), I focused my attention on the bridge piers (Figure 4).
Crossing the road, I again went off camera right and painted the nearest pier at steep angle. I then moved to camera left and painted the other pier. Painting at an angle to your subject always provides a richer, deeper image that reveals more texture in the subject. Due to the sheer length of the bridge I was unable to paint the distant piers from an angle so I had no choice but to paint them from the front. Light dims over distance so I spent the bulk of the exposure illuminating the far piers. The close piers received the same amount of light in far less time.

Figure 4: Light painting bridge piers
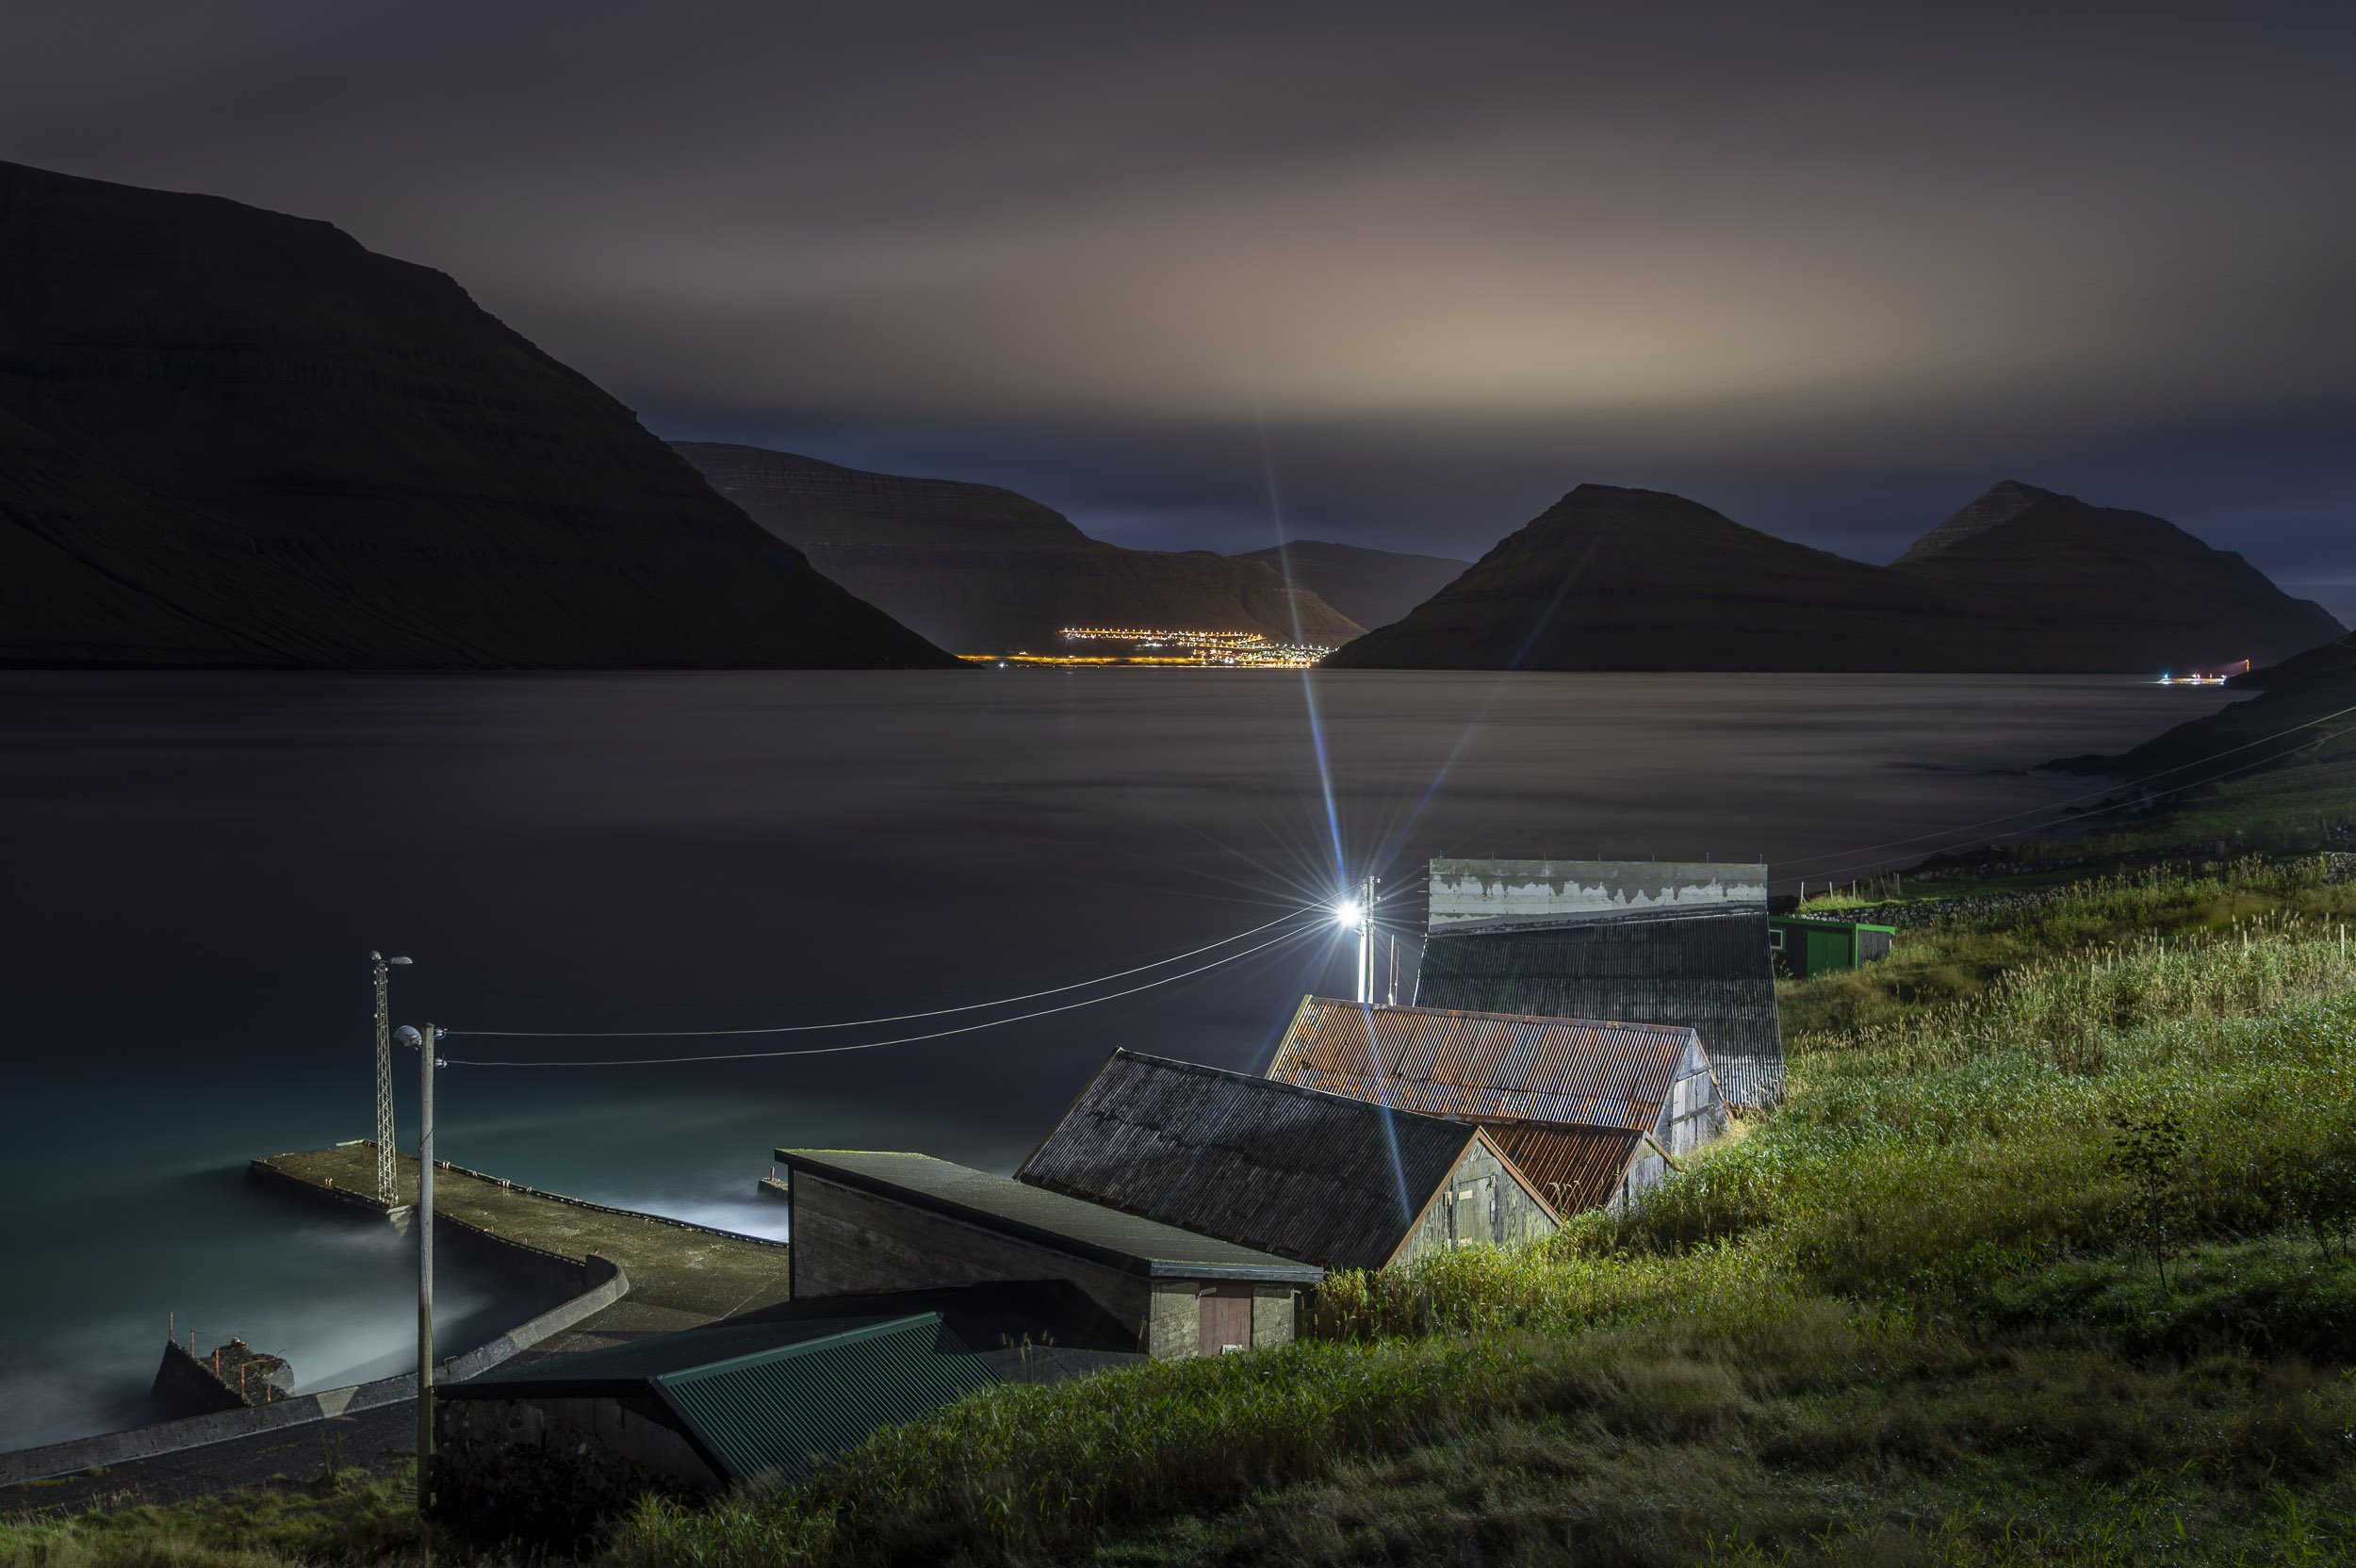
Sometimes our subjects are just a bit to big to paint in one exposure. In these cases, it’s helpful to know a little about post-processing. My final image (Figure 5) is a composite of the photos seen in Figure 2 for the sky, Figure 3 for the underside of the bridge and Figure 4 for the bridge piers. I used Adobe Lightroom for the initial tonal and color edits on the images, and then finished the composite in Adobe Photoshop.
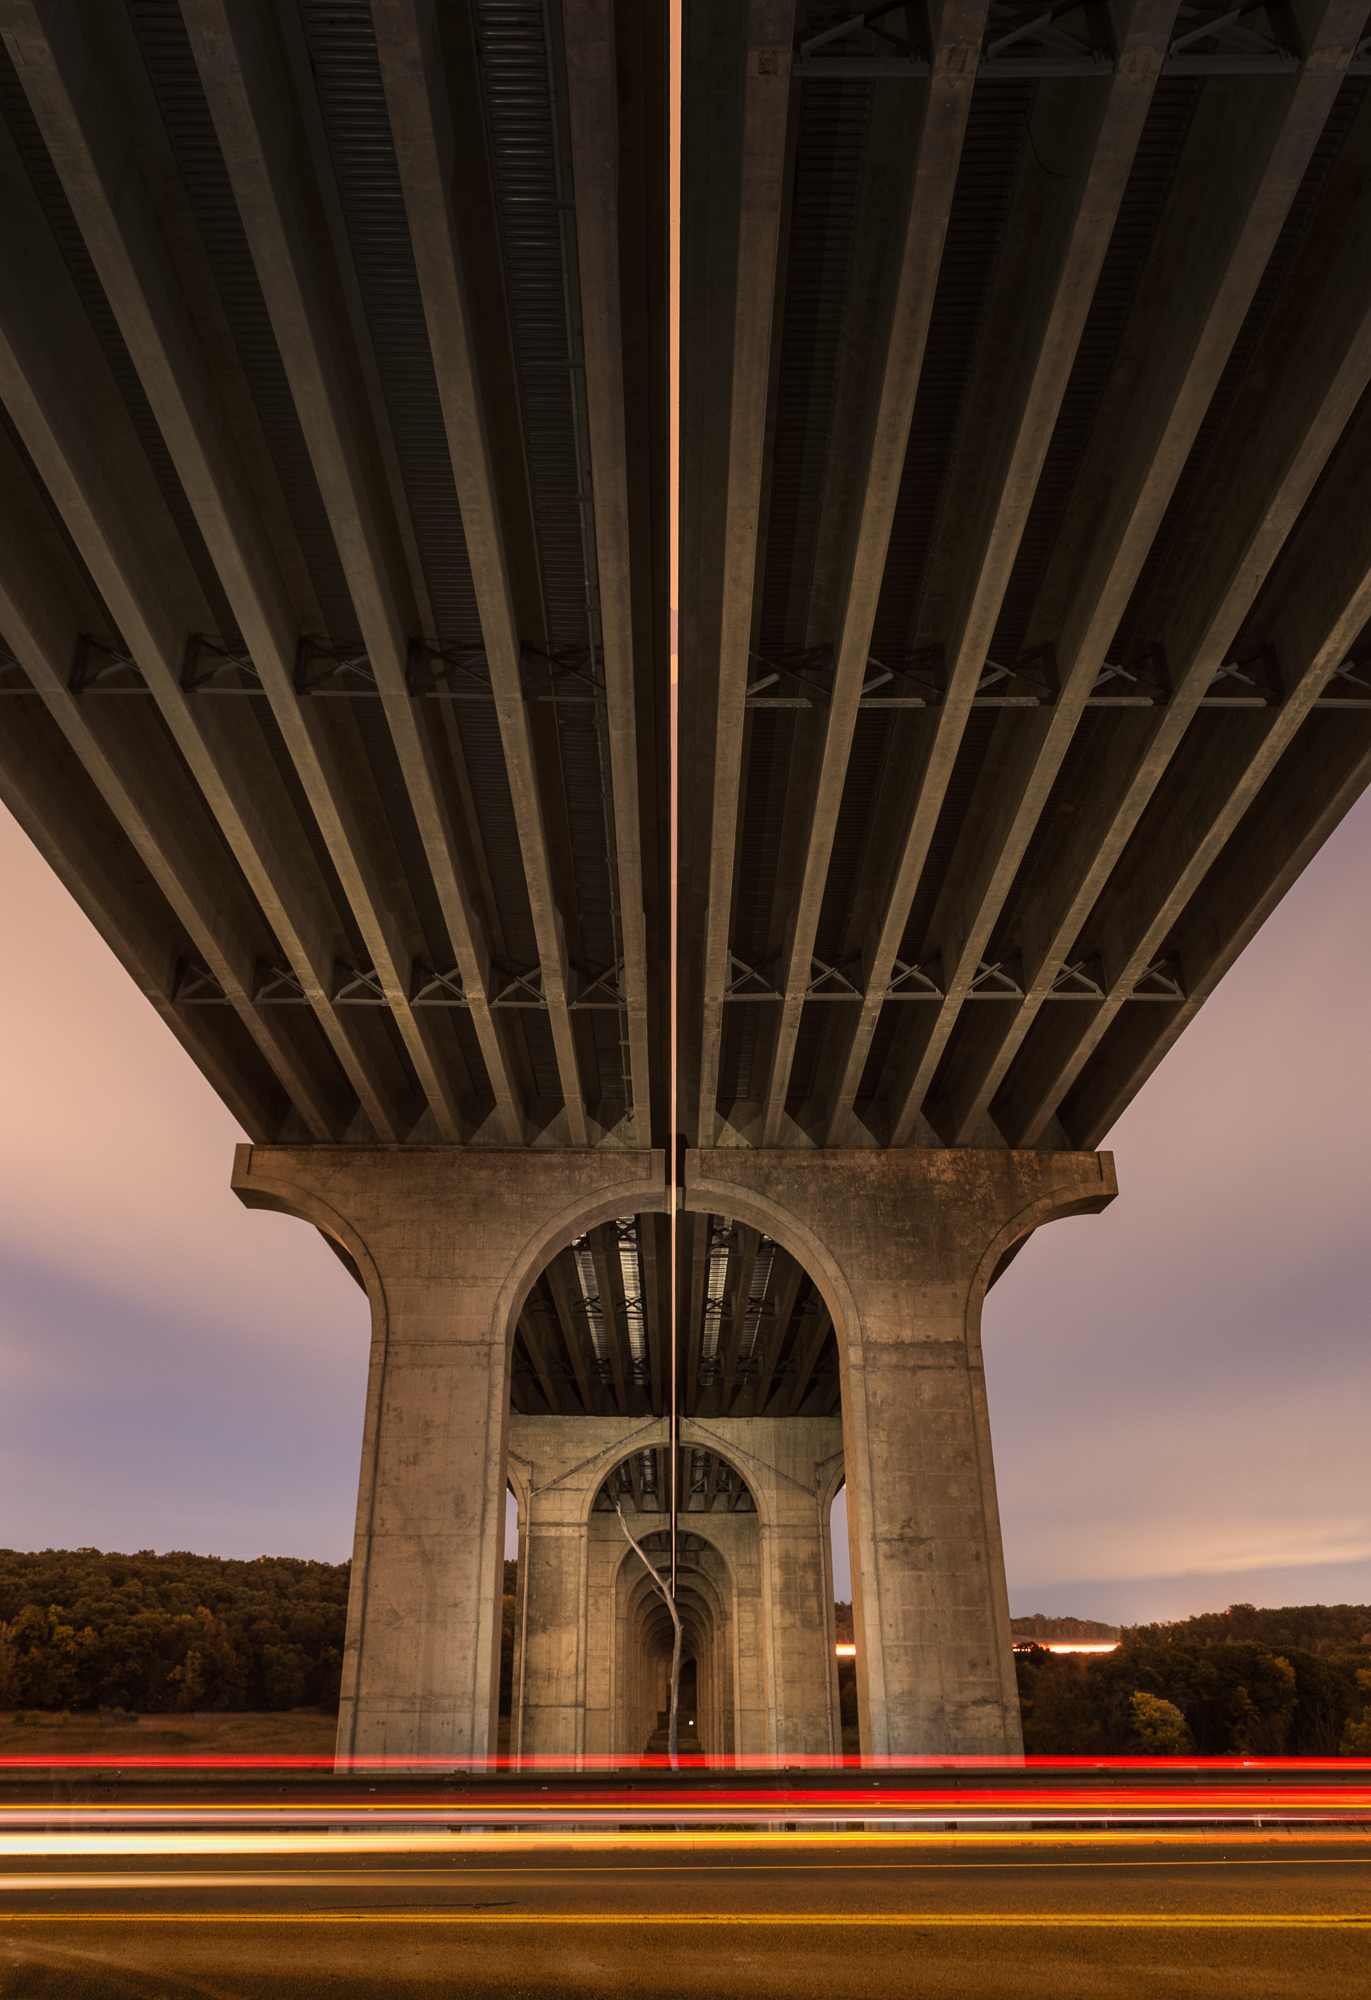
Figure 5: Final Image