
Did you know that Lightroom has a secret weapon for night photographers to make the Milky Way look fantastic? It’s way down toward the bottom of the Develop module: the Dehaze tool. In this post and in the video at the end, we’ll show you what this great tool was originally designed to do, plus how to use it to make stars sizzle!
The Dehaze slider was introduced in 2015 shortly after Adobe’s upgrades to their new cloud-based pricing structure. So, if you are still using an older standalone program (Lightroom 4/5/6) but want to take advantage of this awesome tool, then it’s time to update to Creative Cloud.
So what exactly is Dehaze? An official description from Adobe states, “Dehaze is a feature for removing haze/fog from pictures. It is based on a physical model that tries to estimate the amount of light transmission and how it varies across the picture. The user can then control how much haze to remove by adjusting a slider.”
Perhaps a less confusing way to think about it: Dehaze adds more contrast.
However, Dehaze is not like the Contrast slider. It adds contrast in a different way. A smarter way. The Contrast slider adds contrast mostly to the midtones and its affect tapers off in the highlights and the shadows. The Dehaze slider functions by targeting the lower-contrast areas of the scene and applying the bulk of its effect there. This means low-contrast areas of the scene get more of the effect than the higher-contrast areas of the scene. Brilliant! This is just what we need.
To apply the Dehaze filter, open an image, head to the Develop module and simply scroll down to the Effects panel. You’ll find the Dehaze slider at the bottom. Moving it to the right increases contrast, moving it the left decreases contrast.
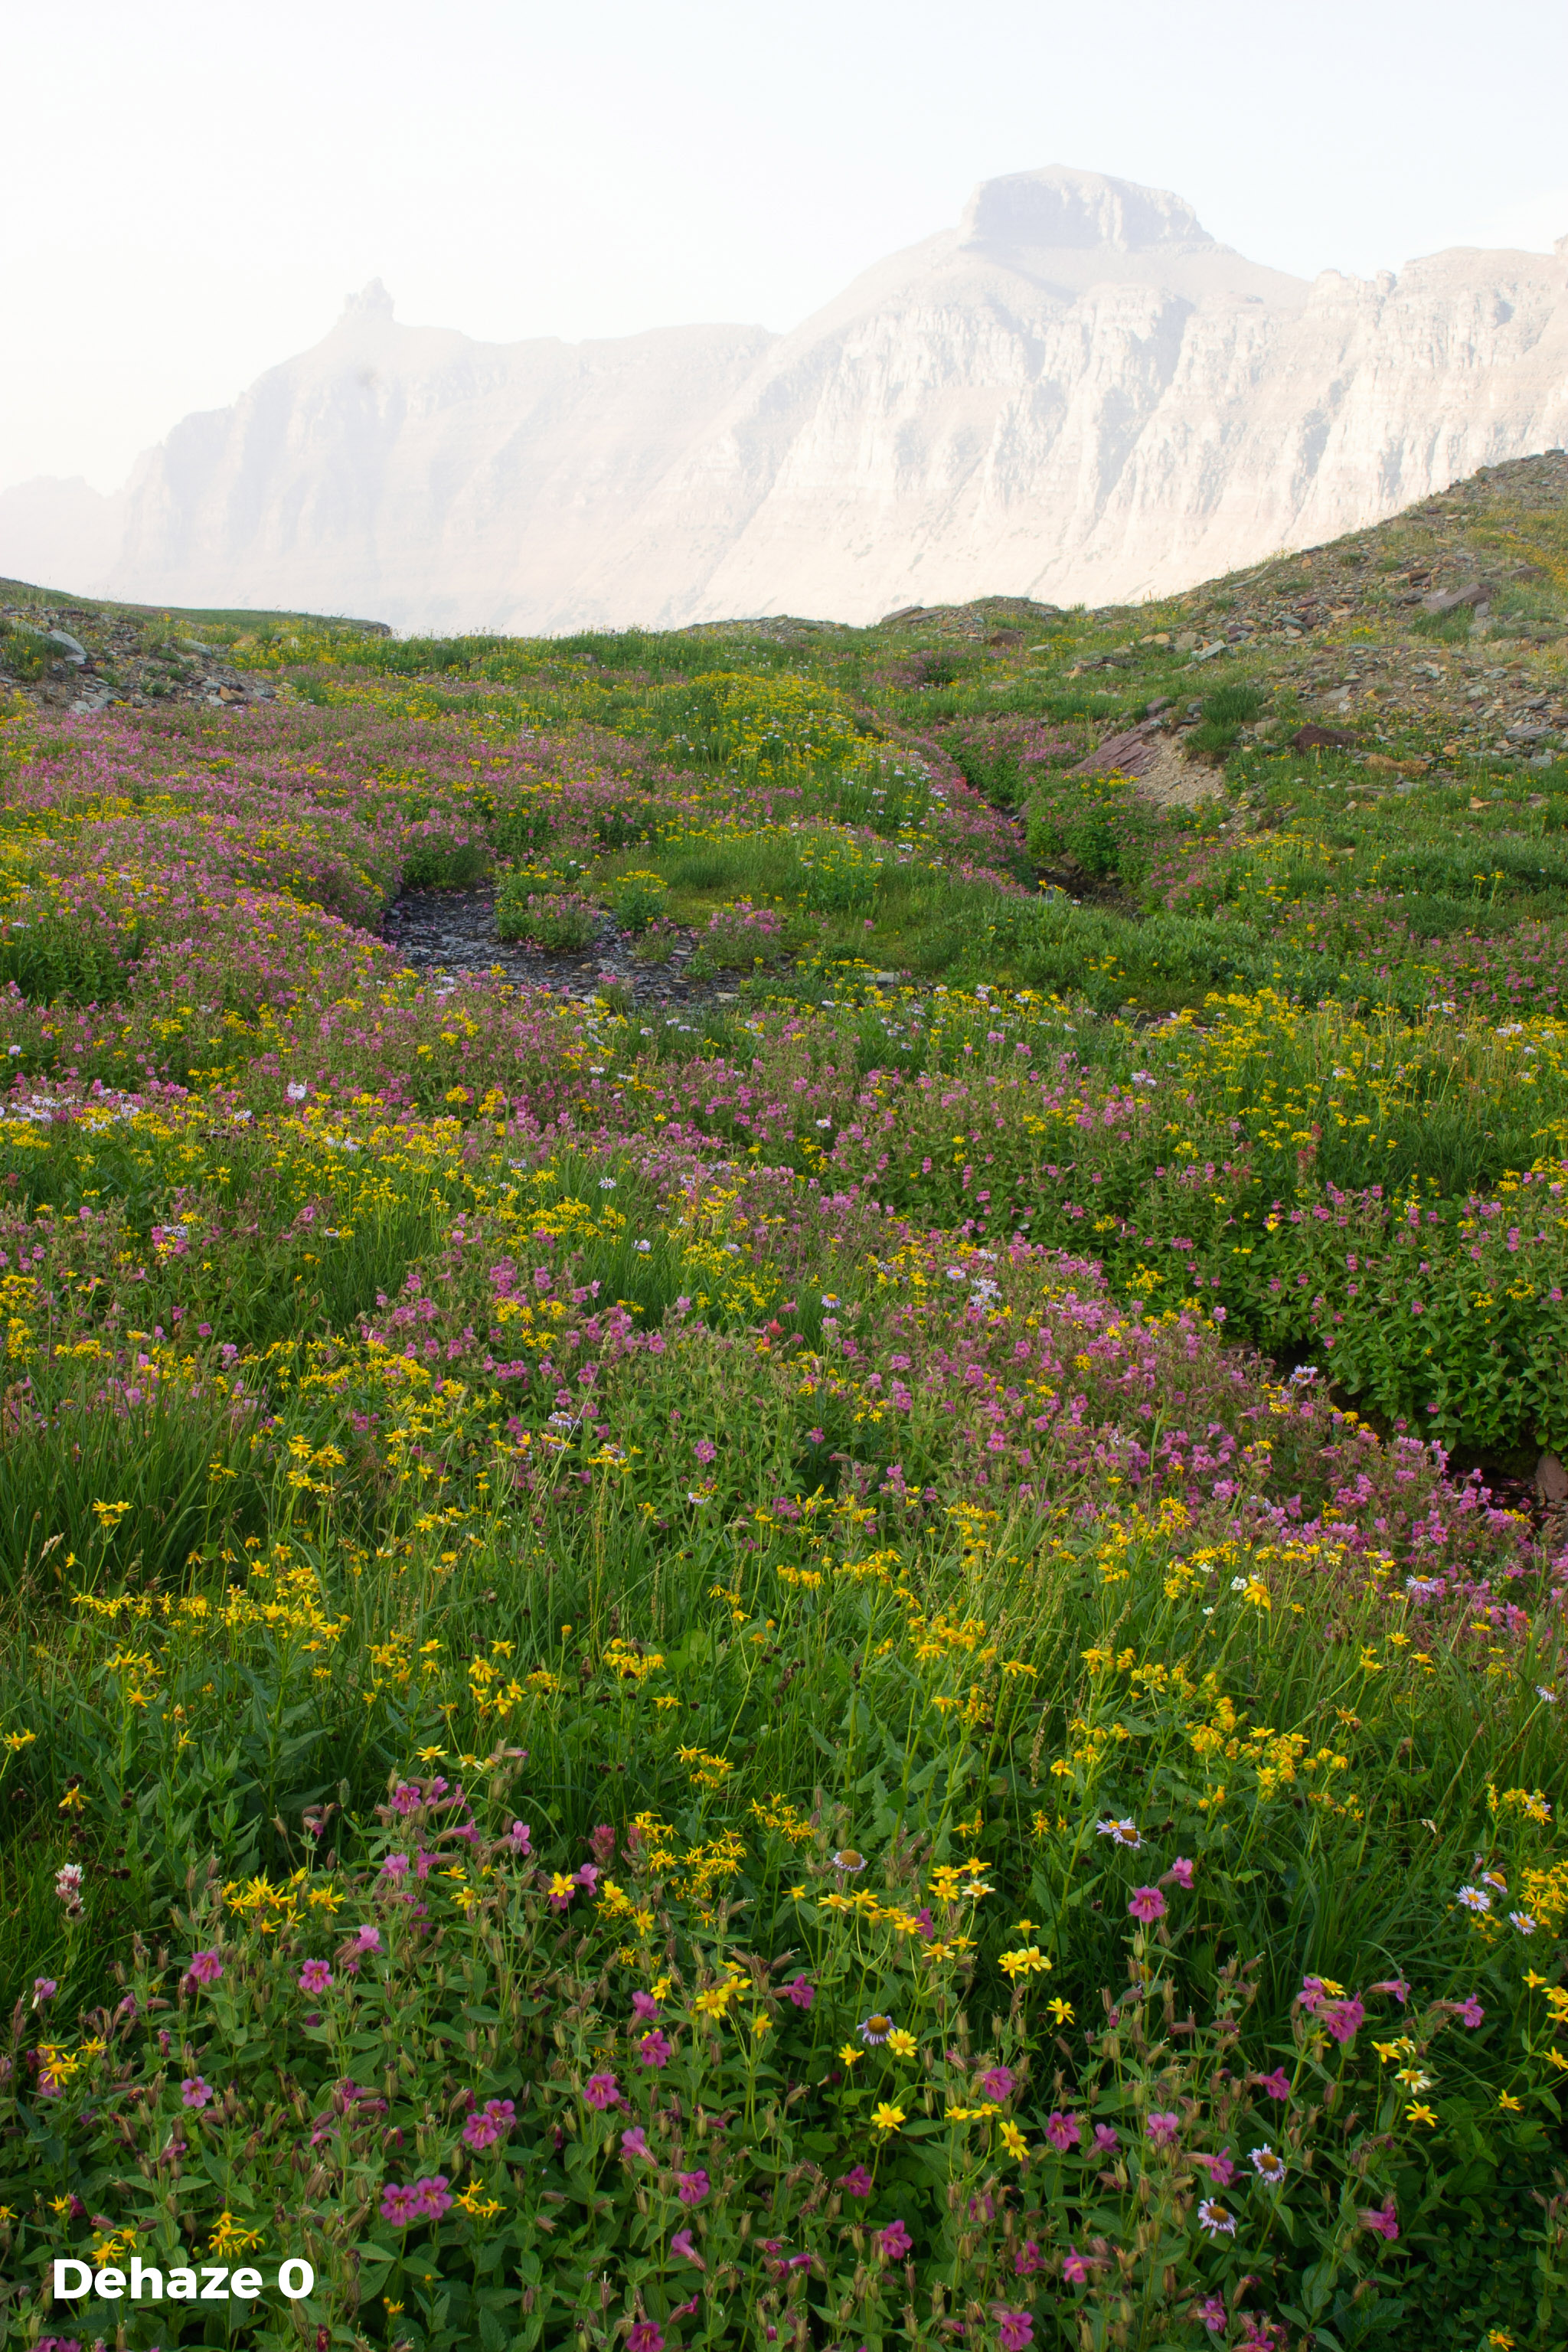
Figure 1.
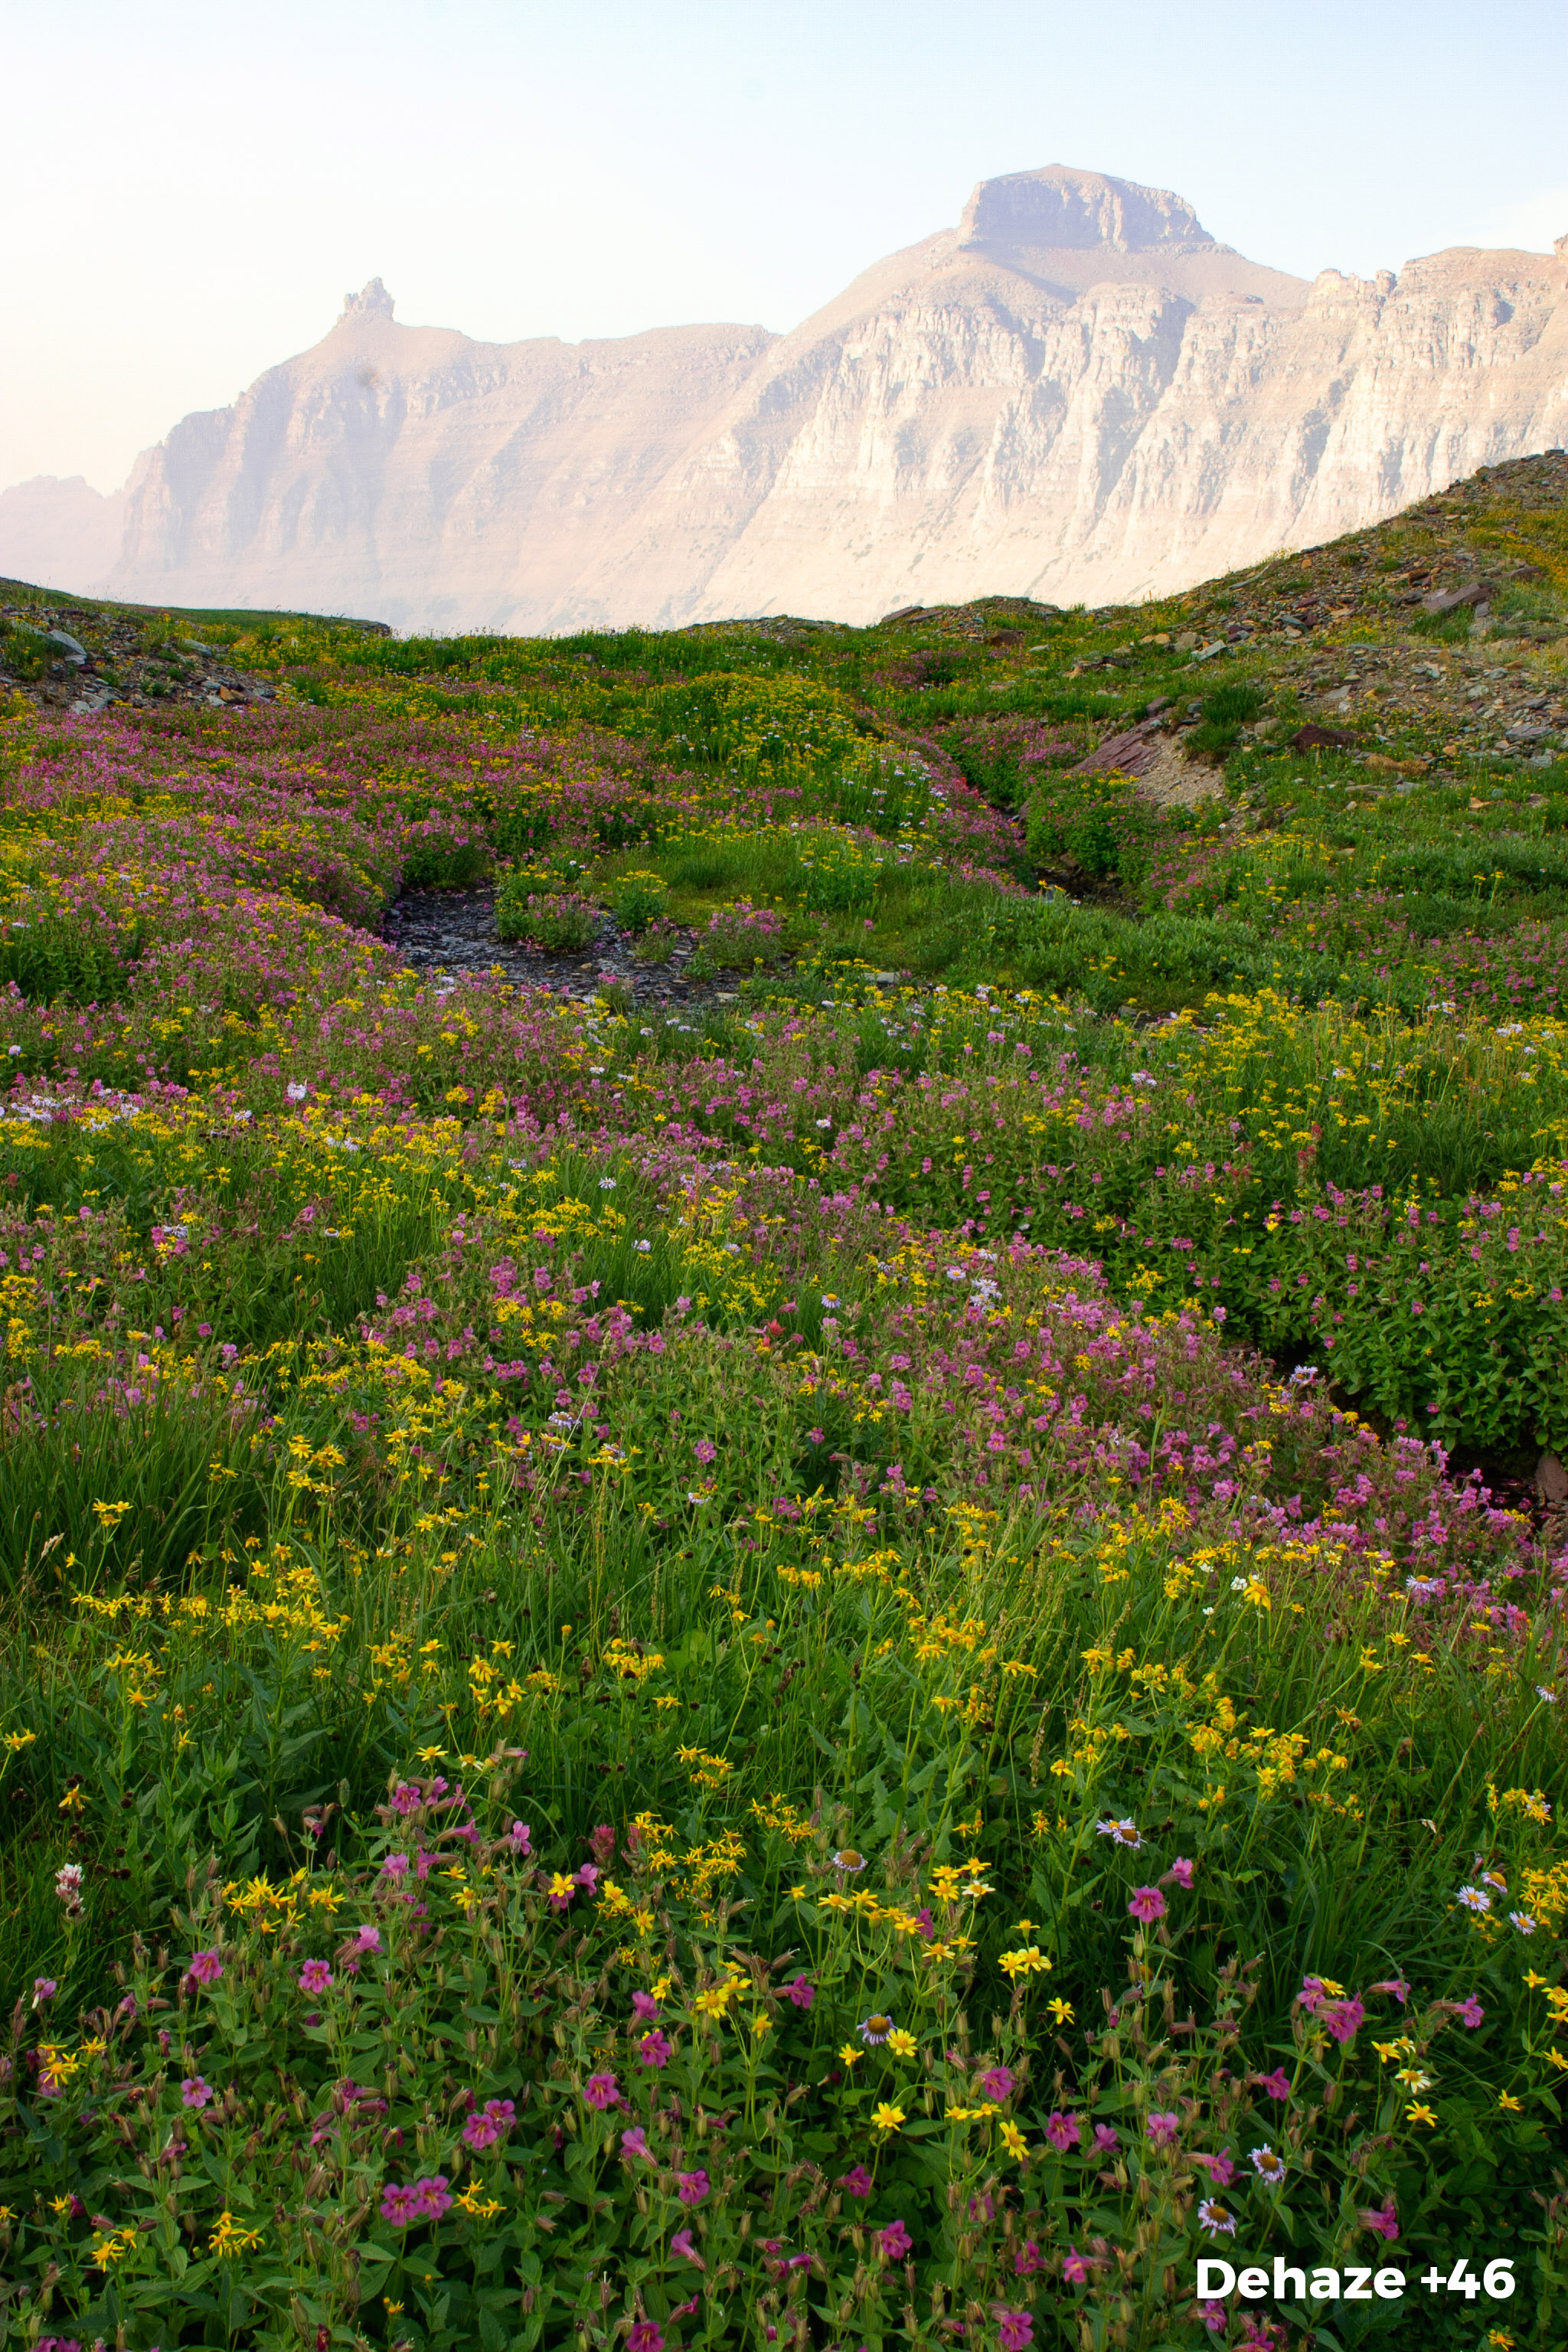
Figure 2 below shows a typical use of the Dehaze slider. Notice how moving the slider increases the contrast in the sky and mountains (which were lower-contrast to begin with) much more than it does in the flowers in the foreground (which were already higher-contrast).
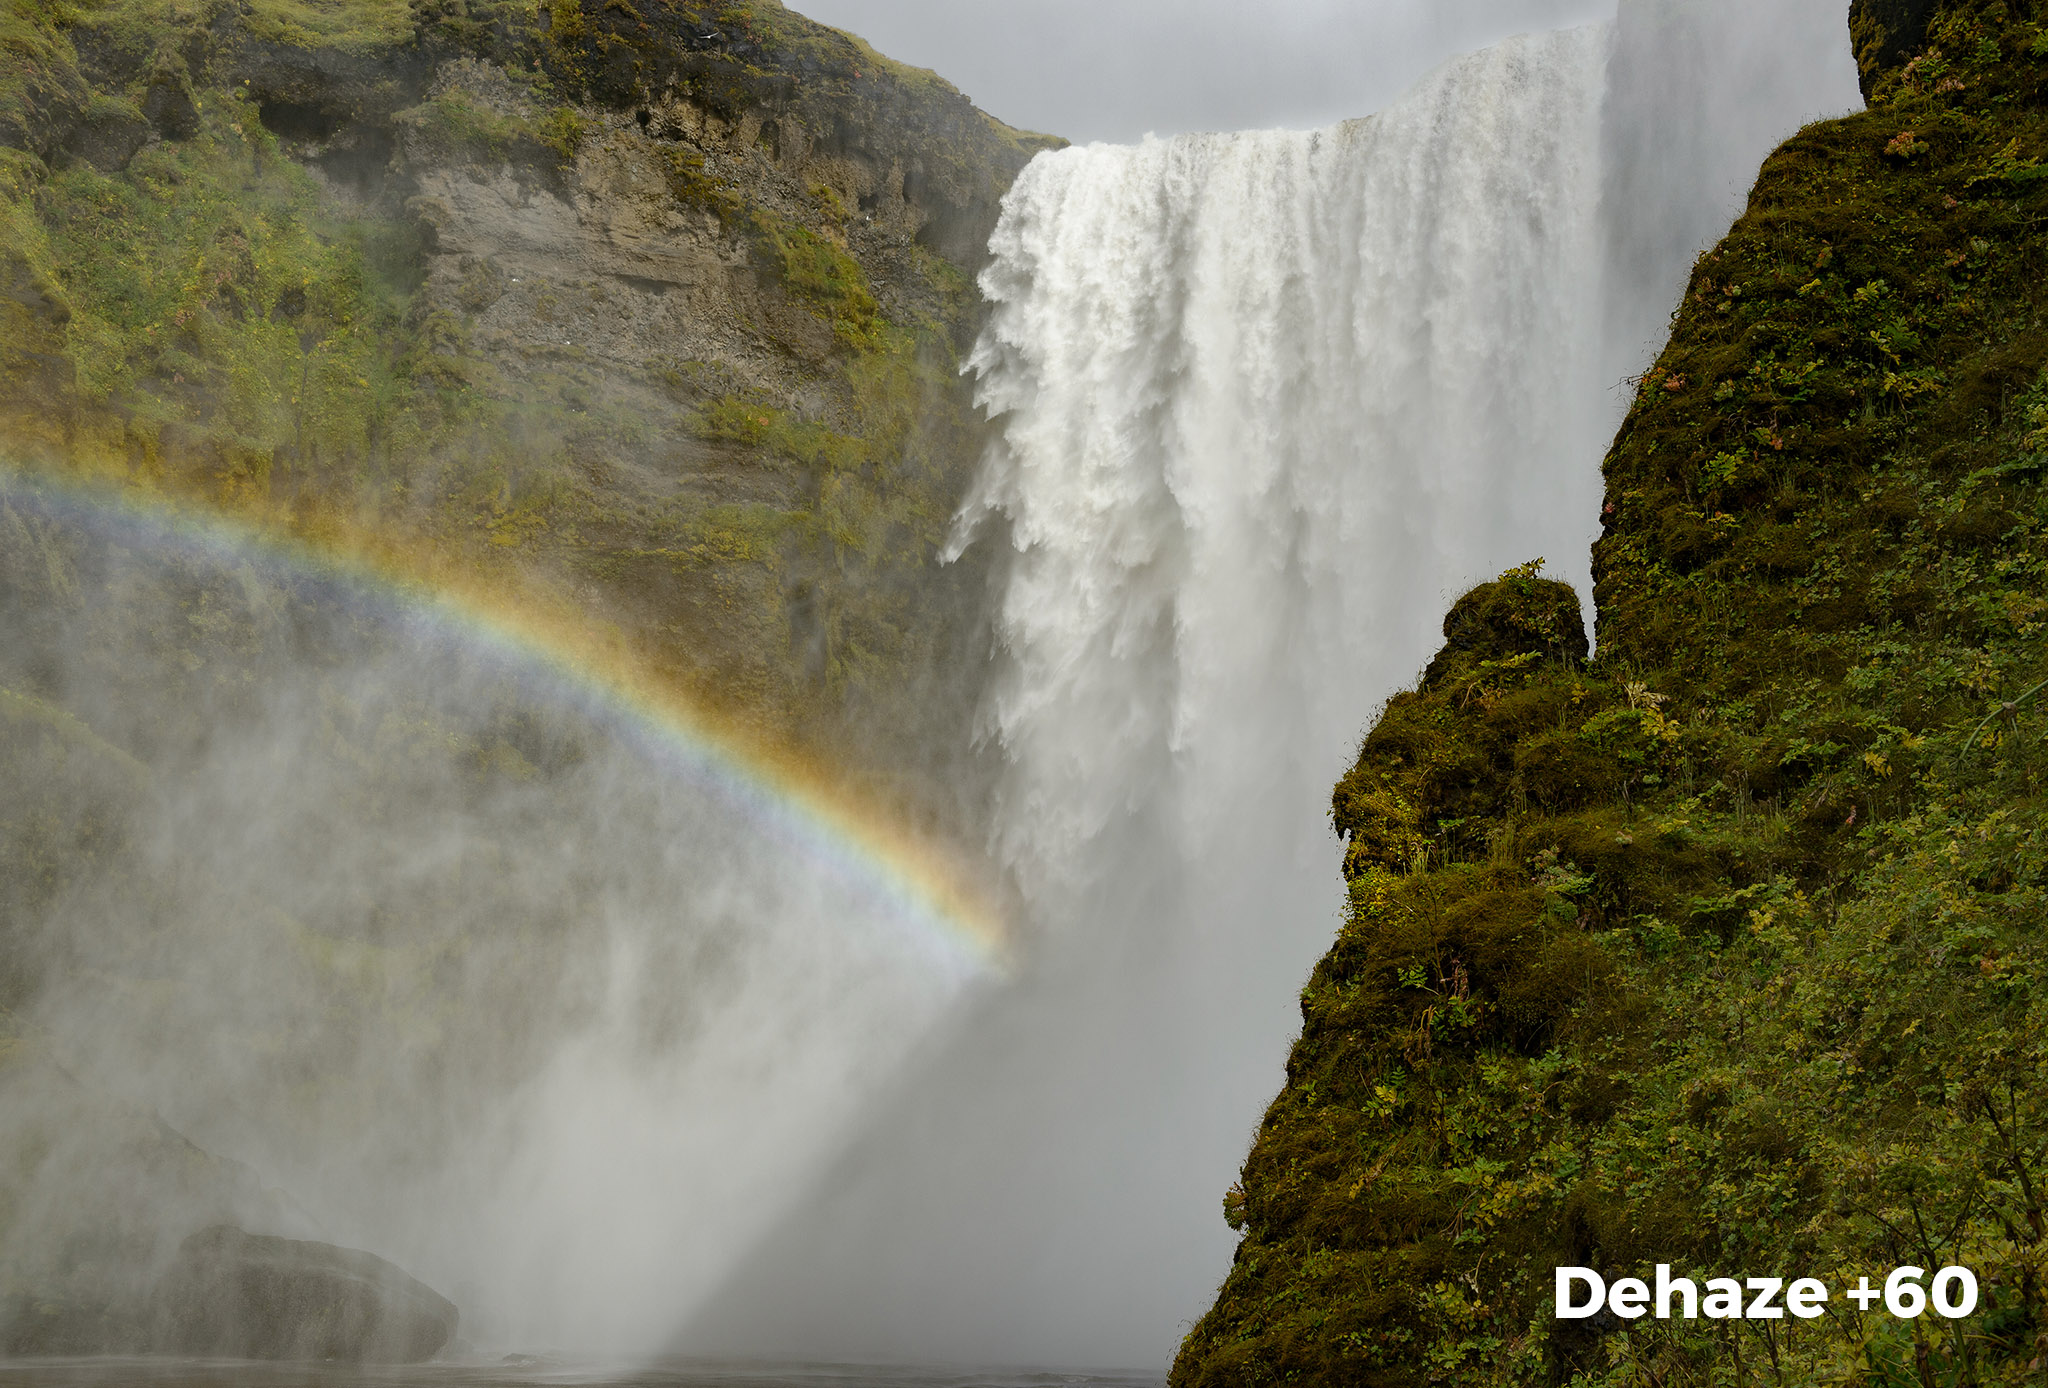
But, here’s some great news: The Dehaze slider works for more than just haze. Figure 3 shows how it can enhance a waterfall and the rainbow in its mist. Once again, notice the increase in the brighter and lower-contrast area of the scene. It’s receiving much more of the effect than the foreground hillside.

Care should be taken with this slider, though. In addition to increasing contrast, it also increases saturation, especially in the blues. Too much of an increase can produce an overly saturated, false-looking image. Figure 4 shows how the blue tones increase in saturation when the Dehaze slider is cranked up.

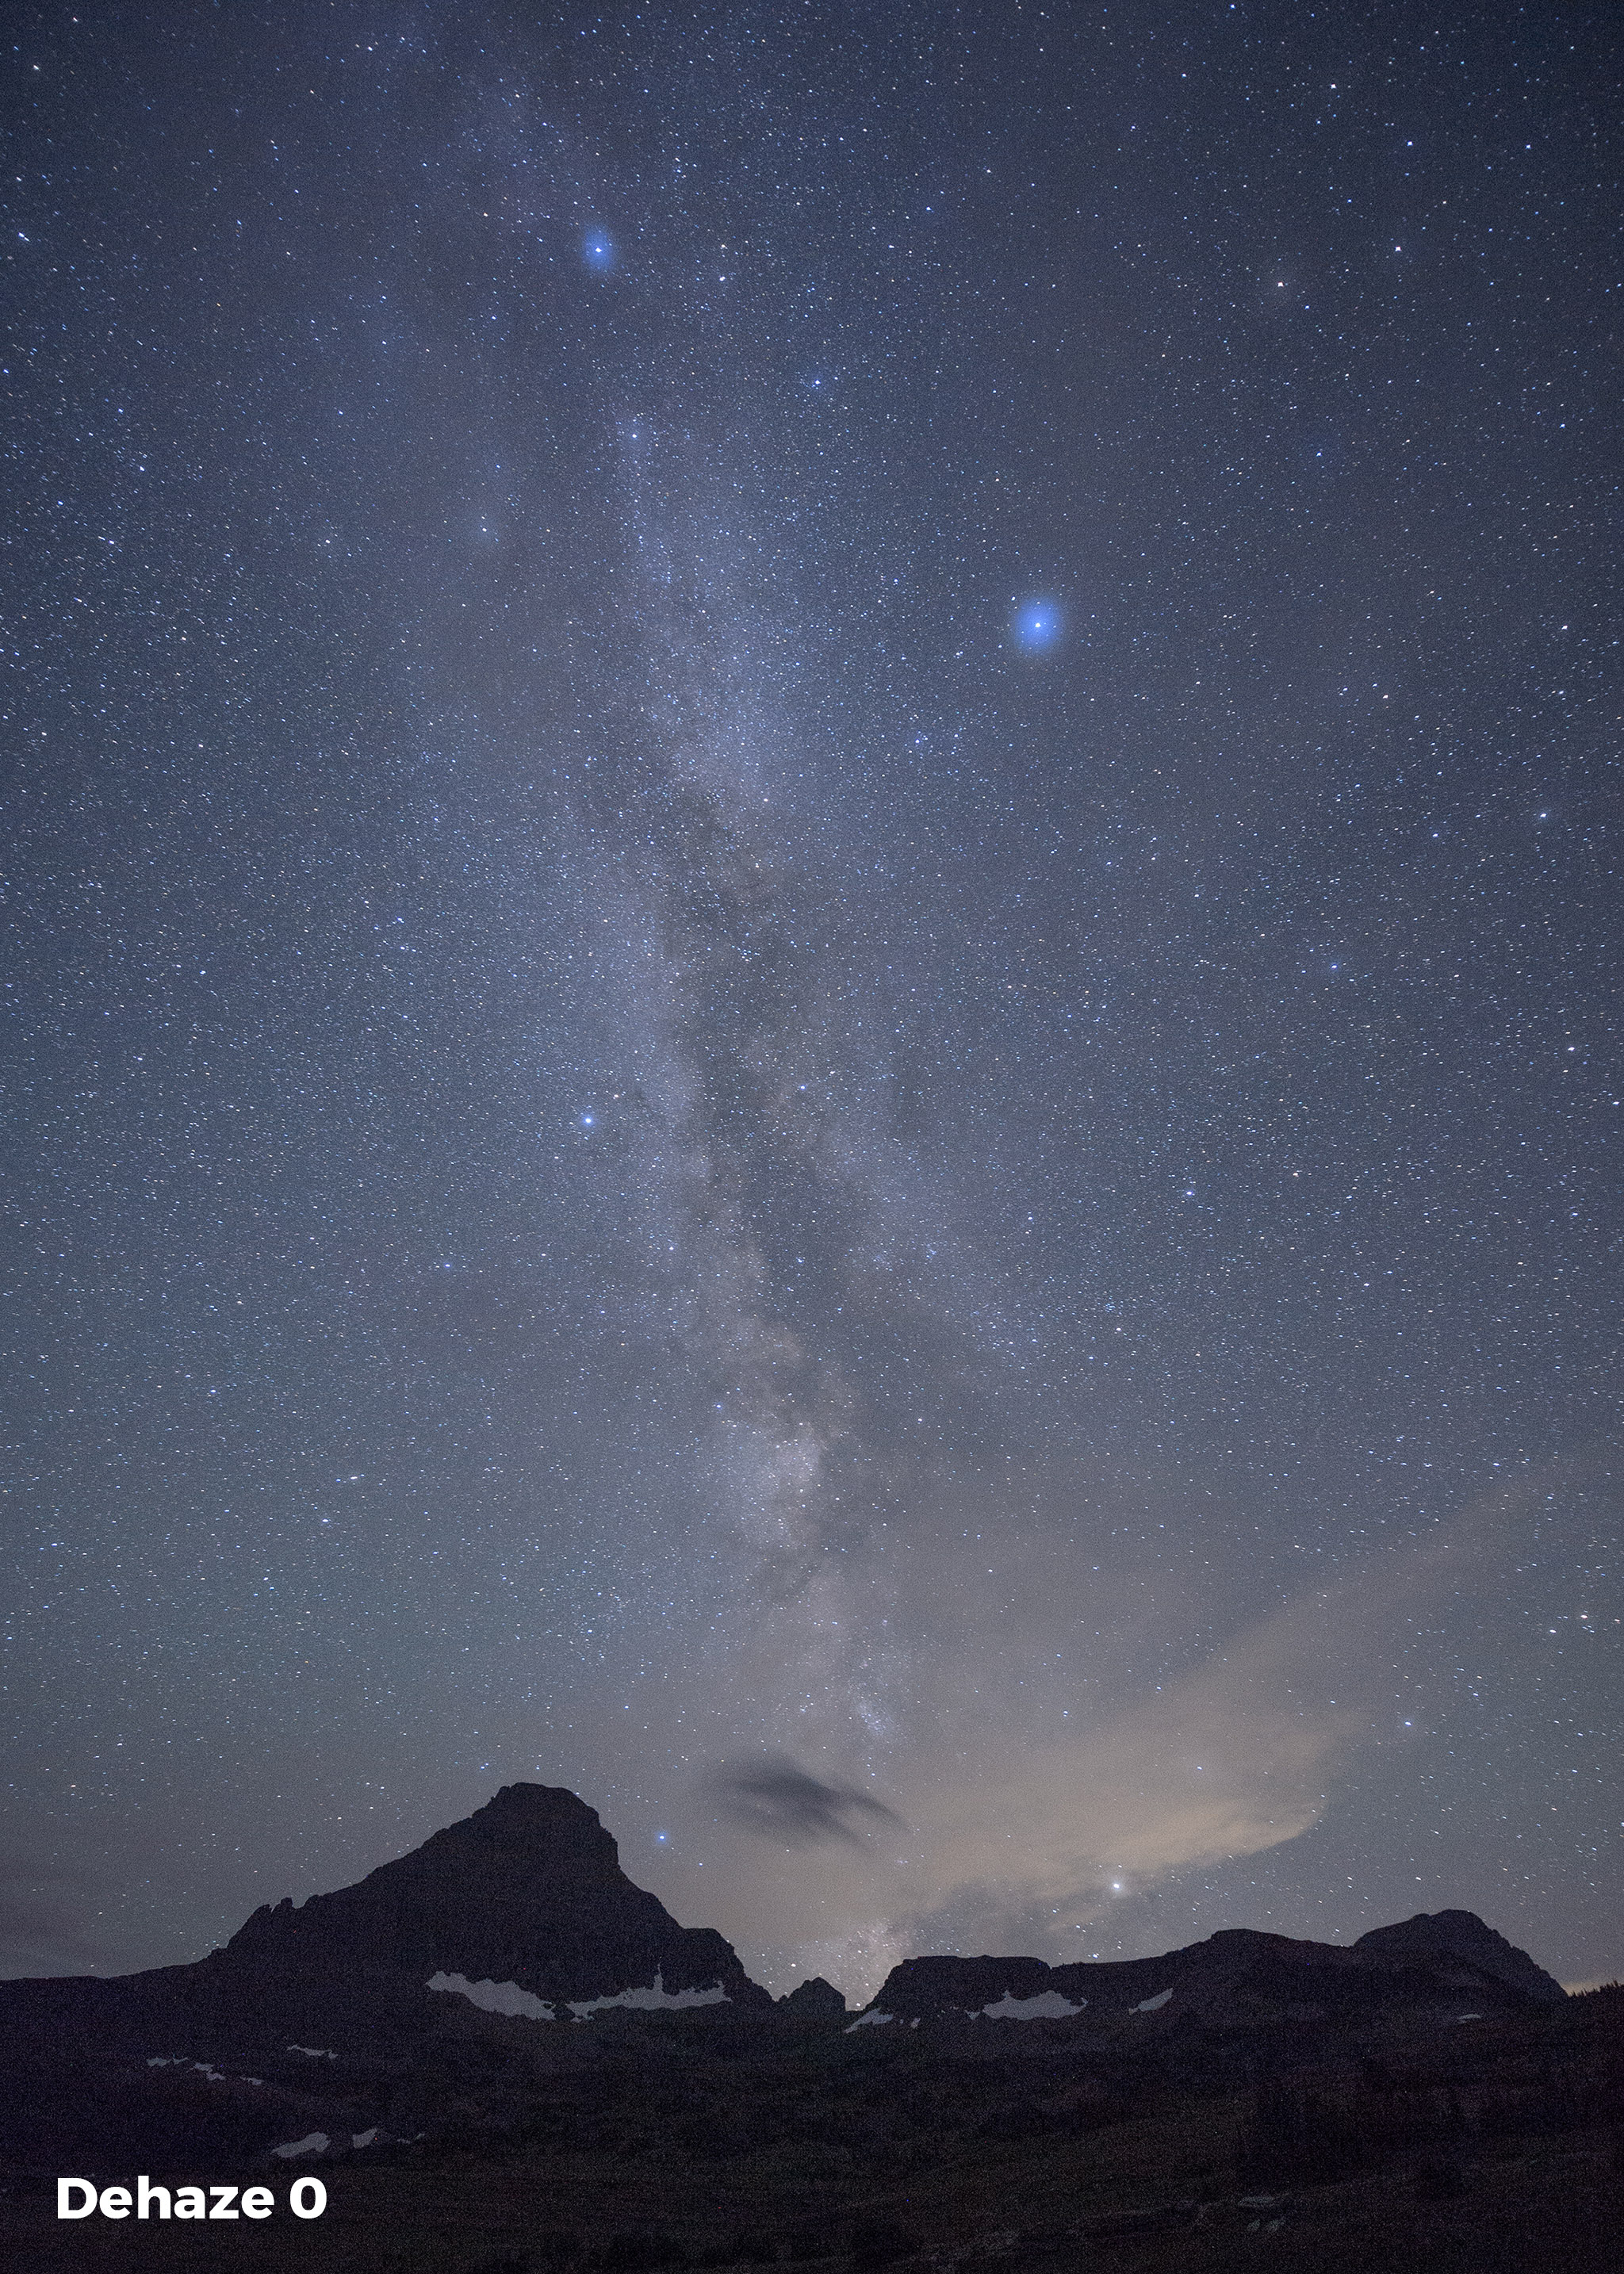
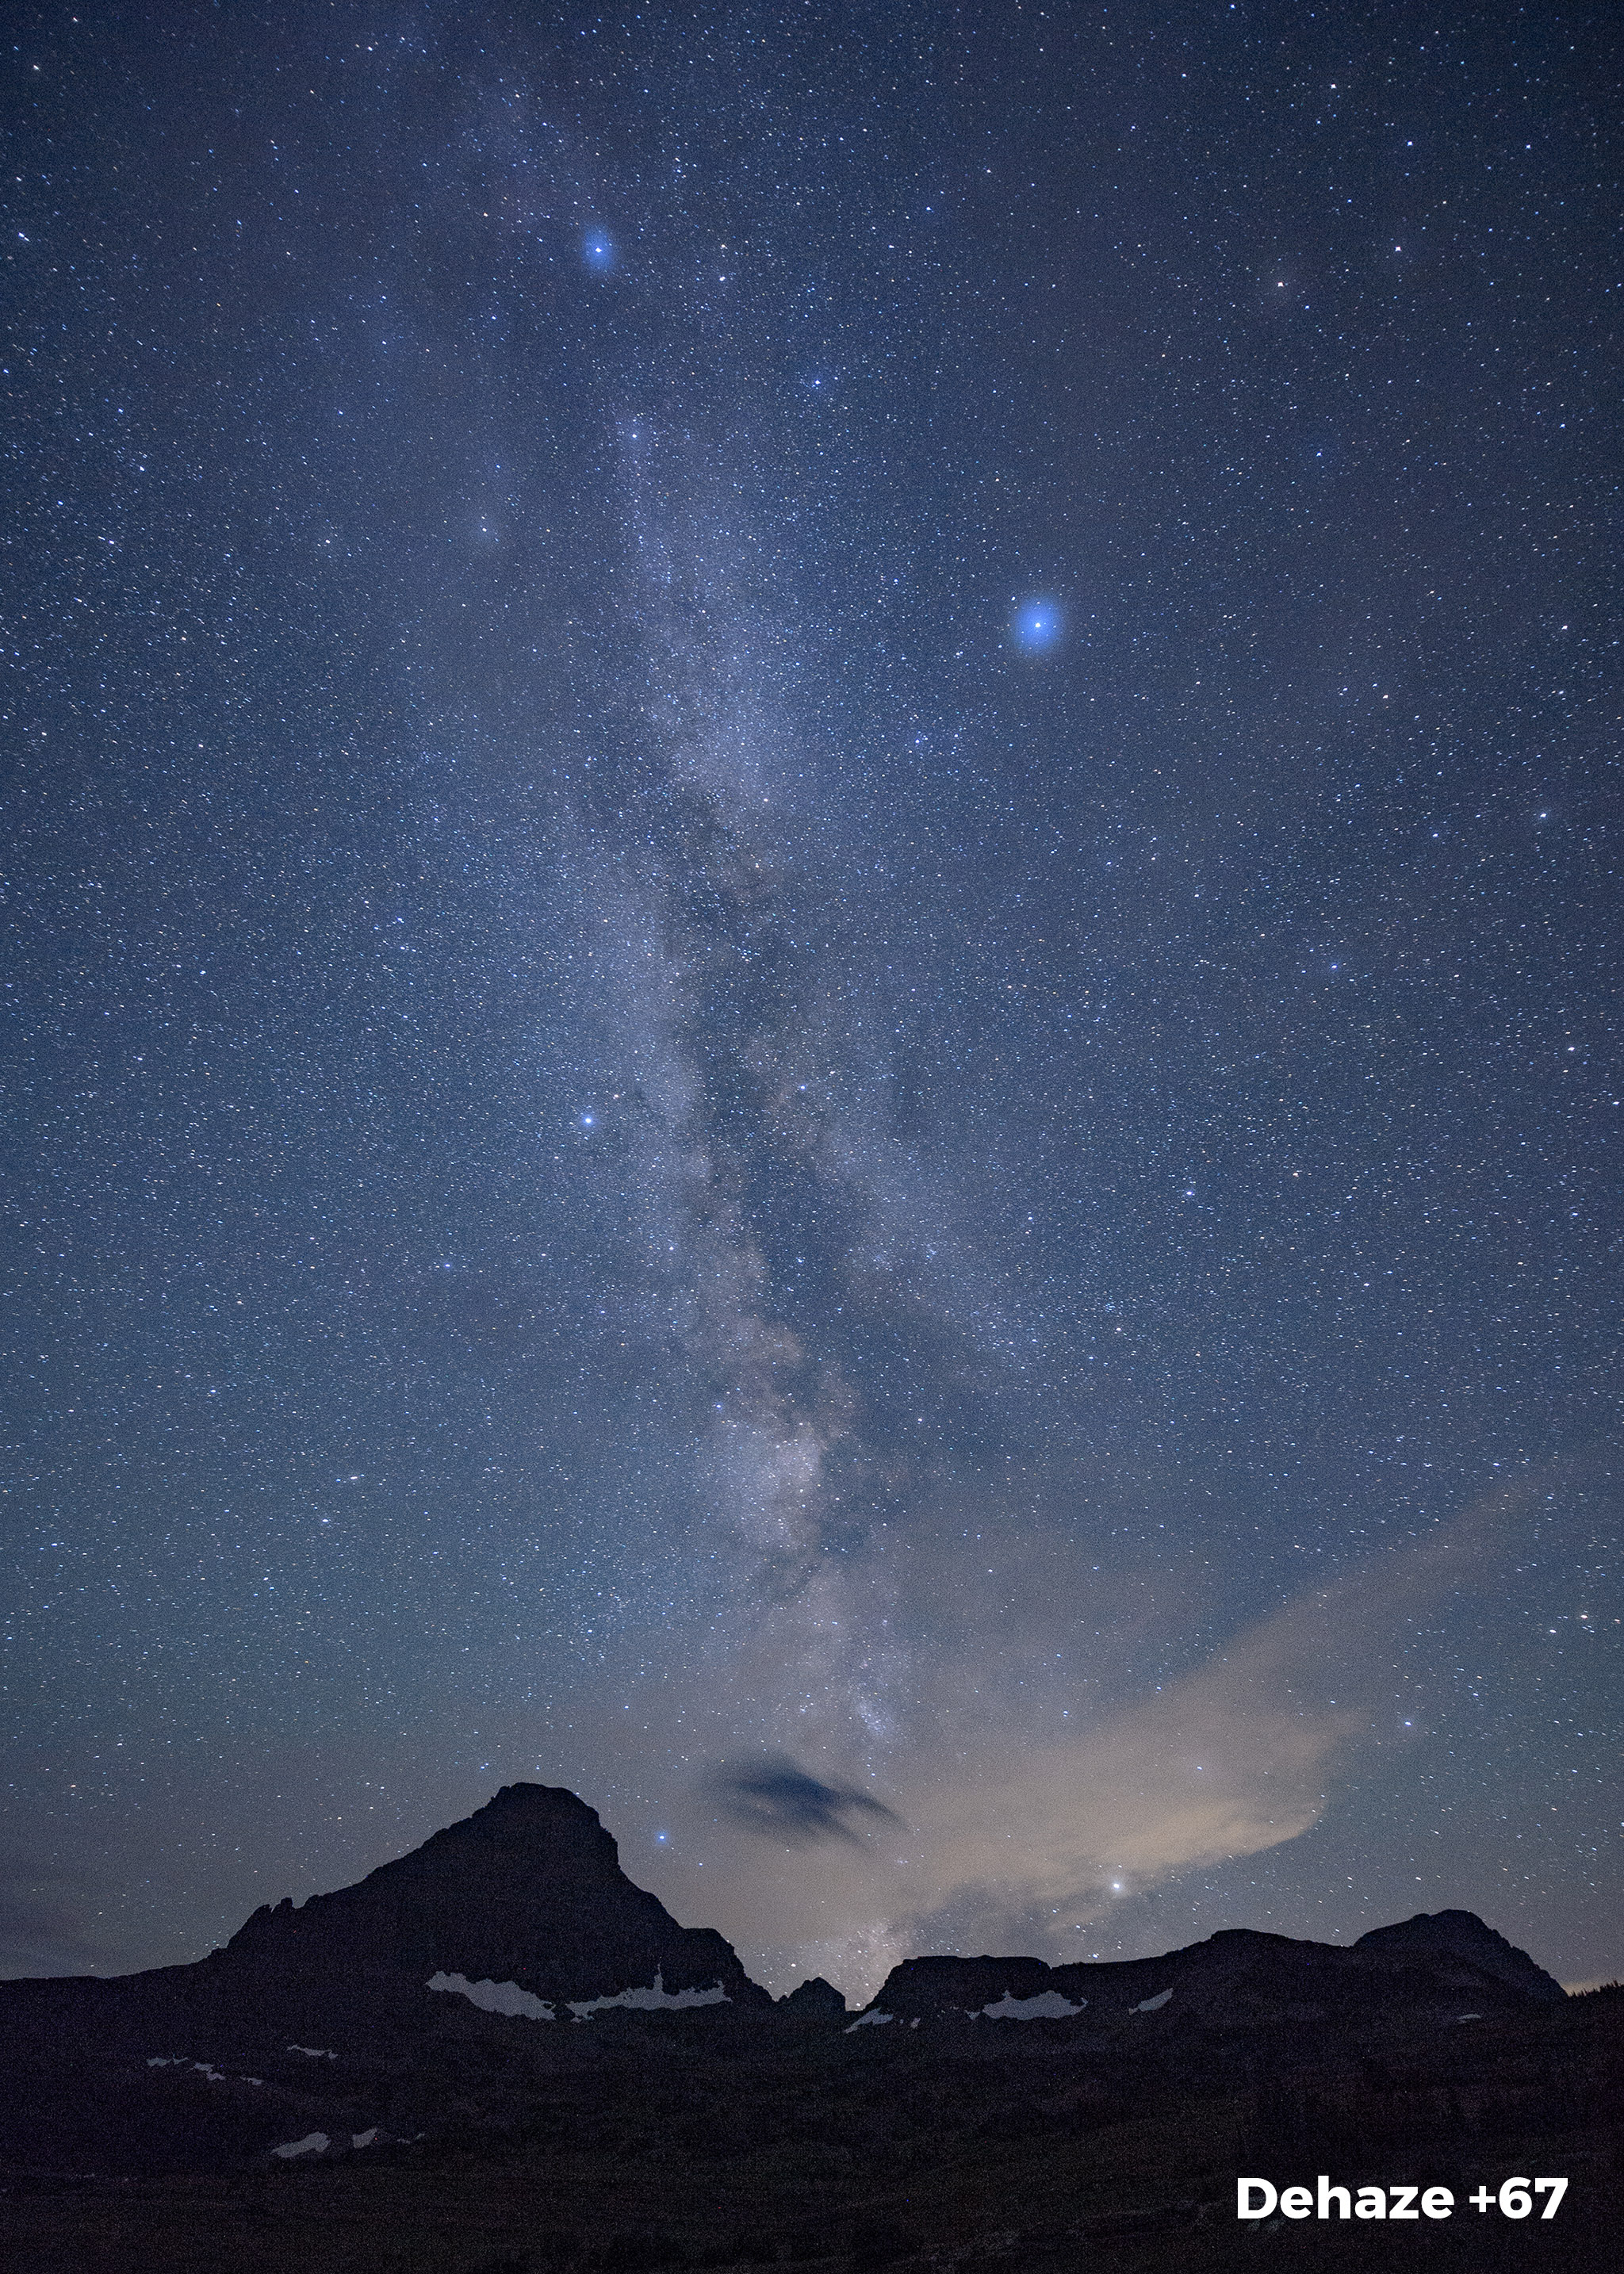
So how does all of this apply to night photography? Well, increasing contrast and saturation is precisely the way we emphasize our night skies and Milky Way! Figure 5 shows the before image of the Milky Way over Mount Reynolds in Glacier National Park and the same image after increasing the Dehaze slider to +67. Notice how the dimmer stars become more pronounced and the Milky Way seems to become more three-dimensional.
For a more complete description and more examples of how the Dehaze slider can improve your night photos, check out our 13-minute video below:
The next time you want to intensify and emphasize your night skies, visit the Effects panel in Lightroom and increase the Dehaze slider. Just remember: Kid gloves—use a light touch. A little goes a long way.
Note: For a comprehensive tutorial on Lightroom’s Library and Develop Module, check out Tim’s 33-part, six-plus-hour video on Vimeo.


