How I Got the Shot

How I Got the Shot: Bryce Canyon National Park with Chris and Gabe

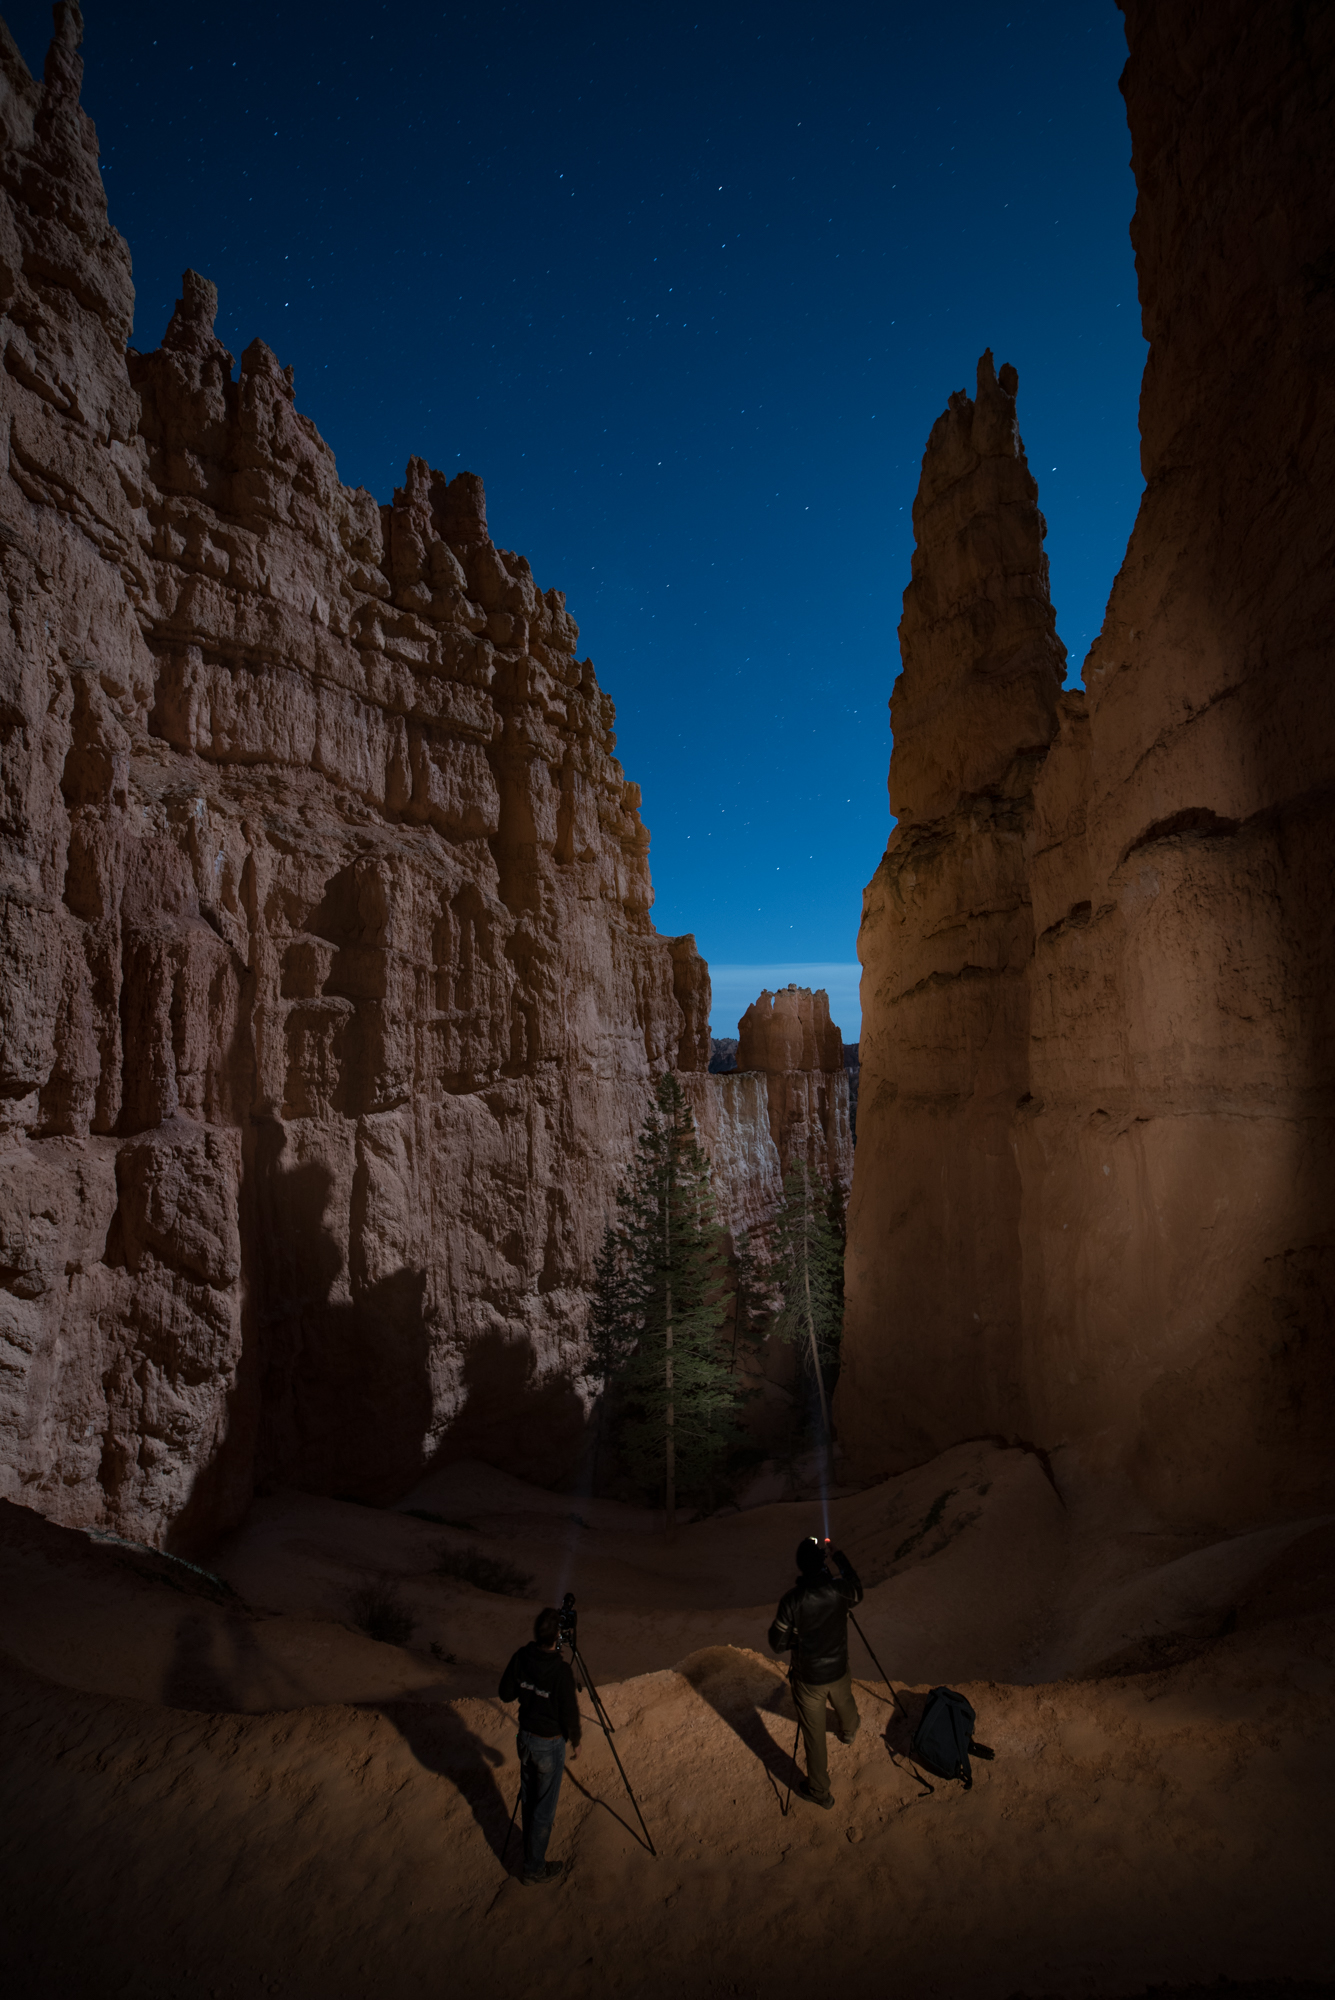
Light painting on the Navajo Loop Trail in Bryce Canyon National Park. 30 seconds, f/4, ISO 400. Nikon D750 with a Zeiss Distagon 15mm f/2.8 lens.

While shooting in Utah during National Parks Week in 2016, I made this image in cooperation with Gabe Biderman and Chris Nicholson. Wanna learn how? Read on.

The Location

First off, letโ€™s establish that Bryce Canyon is beautiful. The hoodoos rock me. Itโ€™s also at a pretty high altitude. Consider that if you hike down into the canyonโ€”you must also hike back up!

Top that off with something unique to our visit: One small leg of the loop trail was not open, forcing us to go the long way around to get to the hoodoos. Of course that meant we had to go all the way back around to get back up. Talk about a workout carrying 35 pounds of photo gear on my back. Iโ€™m savage with myself that wayโ€”I never want to miss a shot because I left something in the car. (Hint: Do what I say and not what I do if you value your enjoyment.)

Anyway, on to how I โ€œmade the sausage.โ€

Working the Scene

The final image, above, is a combination of ambient illumination by a full moon in a clear sky, complemented by light painting by Gabe and Chris within the lens frame, and light painting by me to camera-right.

I saw the photo as I was gasping my way up the canyon. (I am not as fit as I could be ๐Ÿ˜Š). To compensate, I was playing a game with myself: Walk until completely out of breath, plant the tripod and take a photo on the spot, no matter the view. It kept my mind off my physical condition โ€ฆ for 30 to 120 seconds at a time, anyway.

Figure 1 is an example of one of those shots. Meh. So is Figure 2. Less meh.

Figure 1. 30 seconds, f/4, ISO 400. Nikon D750 with a Zeiss Distagon 15mm f/2.8 lens.

Figure 1. 30 seconds, f/4, ISO 400. Nikon D750 with a Zeiss Distagon 15mm f/2.8 lens.

Figure 2. 30 seconds, f/4, ISO 400. Nikon D750 with a Zeiss Distagon 15mm f/2.8 lens.

Figure 2. 30 seconds, f/4, ISO 400. Nikon D750 with a Zeiss Distagon 15mm f/2.8 lens.

But when I stopped to make a photo of Chris making a photo (how meta), I started to think about how I love making night portraits. This photo is Figure 3, in which you can also see Gabeโ€™s flashlight in the distance. He was working on a masterpiece of light painting.

Figure 3. 30 seconds, f/4, ISO 400. Nikon D750 with a Zeiss Distagon 15mm f/2.8 lens.

Figure 3. 30 seconds, f/4, ISO 400. Nikon D750 with a Zeiss Distagon 15mm f/2.8 lens.

As it happened, I had a burst of energy and my next pit stop to breathe was above Gabeโ€™s position. See Figure 4.

Figure 4. 30 seconds, f/4, ISO 400. Nikon D750 with a Zeiss Distagon 15mm f/2.8 lens.

Figure 4. 30 seconds, f/4, ISO 400. Nikon D750 with a Zeiss Distagon 15mm f/2.8 lens.

As I observed Gabe light-painting and working on his image, I was struck with the thought, โ€œThis is the moment. People in a place I love doing the thing I love. Perfect moment for a portrait.โ€

I asked Gabe and Chris if they would indulge me, and somehow they seemed more than happy to stop climbing out of the canyon for a few minutes. We nailed it on the first shot, because Gabe had already been practicing for his photo, painting to the right. So I piggybacked on his hard work a bit. I asked Chris to paint the trees, and added my own twist by running to camera right and light-painting Gabe and Chris with short bursts of my flashlight (Figure 5). I took care not to sweep my flashlight, because I wanted a pool of light in the middle, with dark edges to the illumination.

Figure 5. Chris (left) is lighting the tree, and the arrows show where Gabe and I are light-painting.

Figure 5. Chris (left) is lighting the tree, and the arrows show where Gabe and I are light-painting.

Mission accomplished!

Figure 6, the final photo. 30 seconds, f/4, ISO 400. Nikon D750 with a Zeiss Distagon 15mm f/2.8 lens.

Figure 6, the final photo. 30 seconds, f/4, ISO 400. Nikon D750 with a Zeiss Distagon 15mm f/2.8 lens.

Details

Here are some more before/after details to spot how we added to the scene:

Figure 7. Painting distant hoodoo.

Figure 8. Light-painting trees takes more time since they are not reflective, but rather dark to begin with.

Figure 9. Gabeโ€™s gentle painting of the canyon wall to his right.

Figure 10. Detail with and without Chris in frame.

Matt Hill is a partner and workshop leader with National Parks at Night. See more about his photography, art, workshops and writing at MattHillArt.com. Follow Matt on Twitter Instagram Facebook.

UPCOMING WORKSHOPS FROM NATIONAL PARKS AT NIGHT

How I Got the Shot: Walkway to the Stars at Dry Tortugas National Park

Star stack over the moat wall at Florida's Dry Tortugas National Park. ยฉ 2016 Gabriel Biderman.

The Location

Last year, an amazing time-lapse video brought awareness to one of the most remote national parks in our country, Dry Tortugas. Three days after I watched that stunning piece, I was invited to come down and create my interpretation of the largest masonry structure in the Americas, under the night skies, all while doing prep work for our workshop in Dry Tortugas this coming July.

Dry Tortugas takes some effort to get to: Go as far south as you can in the continental U.S., then turn right and go 70 miles out into the sea. The fastest boat gets you there in just over two hours. As I walked around the deck of the boat, all I could see was an endless horizon in every direction. It was like looking at an infinite blank canvas, which can be thrilling and definitely a little daunting. Eventually a small red dot on the horizon turned into a larger box, then a brick rectangle, until โ€ฆ it finally became Fort Jefferson looming ominous above us.

I had a good eight hours to scout the fortress, which encompasses the whole island. I was immediately drawn to the walkway, which creates a moat around most of this engineering marvel. The fortโ€™s overall shape is hexagonal. I was paying attention to a few things as I made my way around the six-angled pathway. First, I noticed that at each turn, and at a low enough angle, the road seemed to meet the horizon.

This emphasized an infinite passage to the sky.

OK, I like that.

The next thing that came immediately to my mind: Does one of these paths point directly north? If we can blend that straight line to meet an epic circular star trail, I think we have a winner!

Lighting and Conditions

In an ideal world I would have planned this shoot around a new to half moon. It was summer and Milky Way season, plus the fort offers so many light painting opportunities. But the only time we could coordinate my visit was around a full moon, so I had to embrace the idea of lots of light. Fortunately the sky was clear except for some clouds that hovered over the far horizon.

Gear

Because I had only one night to scout, I brought a bunch of gear, including two rigs so that I could stay as productive as possible on a short summer night. The gear I used for this shoot was:

Test Shots

I always take two to 10 high ISO test shots to confirm focus, composition and exposure. Even though it was bright out with the full moon, our eyes adjust and see better than our viewfinder or LCD screen.

The first test shot (Figure 1) of 6 seconds, f/5.6, ISO 6400 was taken at a focal length of 24mm. The histogram showed that it was an average exposure with very little dark shadows and bright highlights.

Figure 1

The composition wasnโ€™t doing it for me. My main subject was the path, and it was not being given its due with that framing. I moved the rig to the middle of the walkway and went a little widerโ€”from 24mm to 20mm for the second shot (Figure 2).

Figure 2

Still needed some finesse. So I closed all the legs to the tripod and shot lower and wider, going from 20mm to 14mm. I was also observant of keeping the camera very levelโ€”I didnโ€™t want to distort or have converging lines in the fort by pointing at an oblique angle. I also wanted to include lots of stars and sky. Figure 3 is one of my few shots where the horizon is practically in the middle, but the strong foreground of the path plays nicely against the open sky.

Figure 3

I was almost there. Before I commit to an hour-plus exposure, it is very important to patrol those composition borders and make sure everything is there for a reason. I felt the entry point of the walkway was a little off. I wanted it to be coming in from both of the lower corners, so that path would fill the bottom of the frame and then fade off to infinity (Figure 4).

Figure 4

Using the Six-Stop Rule, I lowered my ISO from 6400 to 100 and then added the six stops to my shutter speedโ€”which turned 6 seconds into 6 minutes. However, the air temperature was about 75 F, too hot to rip a 6-minute exposure without inducing long-exposure noise. I felt safer using an ISO of 200 and a shutter speed of 3 minutes.

But something was nagging me: That histogram was too average.

I was about to create a dramatic 1- to 2-hour stack of exposures, and I didnโ€™t want it to be average-looking. So I shaved about one-third of a stop off the shutter speed, and set a final exposure of 2 minutes, f/5.6, ISO 250.

I set the camera to Bulb, turned off my LENR and set my Vello Shutterboss to 2 minutes, with a 1-second interval between shots, and an infinite number of frames. I set the timer on my phone and then went to the top of the fort to continue photographing with my other rig for a couple of hours.

Putting it Together in Lightroom and Photoshop

I ended up with 60 2-minute exposures that I was going to stack to create a 2-hour star trail. The exposure was similar across the 60 images, so in Lightroom I worked on one image, making simple Lens Profile corrections and slight adjustments to the Exposure (-45), Clarity and Vibrance settings, and then synced those adjustments to the other 59 images.

Then I selected all 60 frames and went to Photoโ€“Edit Inโ€“Open as Layers in Photoshop (Figure 5).

Figure 5

Depending on how big your file sizes are and how juiced your computer is, this can open in 1 to 2 minutes or 1 to 2 hours. (I recently stacked 600 shots and it took my poor MacBook Air close to 4 hours. Guess who is upgrading their travel computer!)

When my Dry Tortugas image opened in Photoshop, I selected all the layers and changed the blend mode to Lighten. And voila, all the stars connected to create a nice long star trail.

However, the caveat with this post-processing technique is that the Lighten blend mode also stacks any other highlights in the sceneโ€”such as, in this case, the white clouds. Photoshop blended all the clouds into one, which was a bit too much for my liking. (Figure 6).

Figure 6

I turned different layers on and off to find the clouds that I didnโ€™t want in the scene. I unfortunately identified that the first 45 images had clouds cutting right through the middle of the star trail. My two options were to go in and touch up 45 layers, or cut them out completely and go with a shorter star trail. I choose the latter strategy, keeping the last 15 layers and settling for a 30-minute trail with fewer clouds. The remaining first layer had two small clouds that I wanted to remove, so I added a layer mask and used a black brush to paint them out (Figure 7).

Figure 7

Once I finished editing in Photoshop, I flattened the layers to keep the file size from exploding, and then did final cropping, sharpening and touch-up in Lightroom (Figure 8).

Figure 8: Here is the difference between the fully stacked image (right) and one edited down to remove the intrusive clouds.

I do love the blue and green colors in the scene, but to heighten the drama and stay true to how old this building is, I converted the photo to black and white in Silver Efex Pro 2.

Which do you preferโ€”the color or B&W? Feel free to add your thoughts in the comments section below.

Be one of the few people to experience Dry Tortugas and Fort Jefferson at night during our upcoming workshop in July. See our Dry Tortugas National Park page for more information.

Gabriel Biderman is a Brooklyn-based fine art and travel photographer, and author of Night Photography: From Snapshots to Great Shots (Peachpit, 2014). During the daytime hours you'll often find Gabe at one of many photo events around the world working for B&H Photoโ€™s road marketing team. See his portfolio and workshop lineup at www.ruinism.com.

UPCOMING WORKSHOPS FROM NATIONAL PARKS AT NIGHT

How I Got the Shot: Ryan Ranch Ruins in Joshua Tree National Park

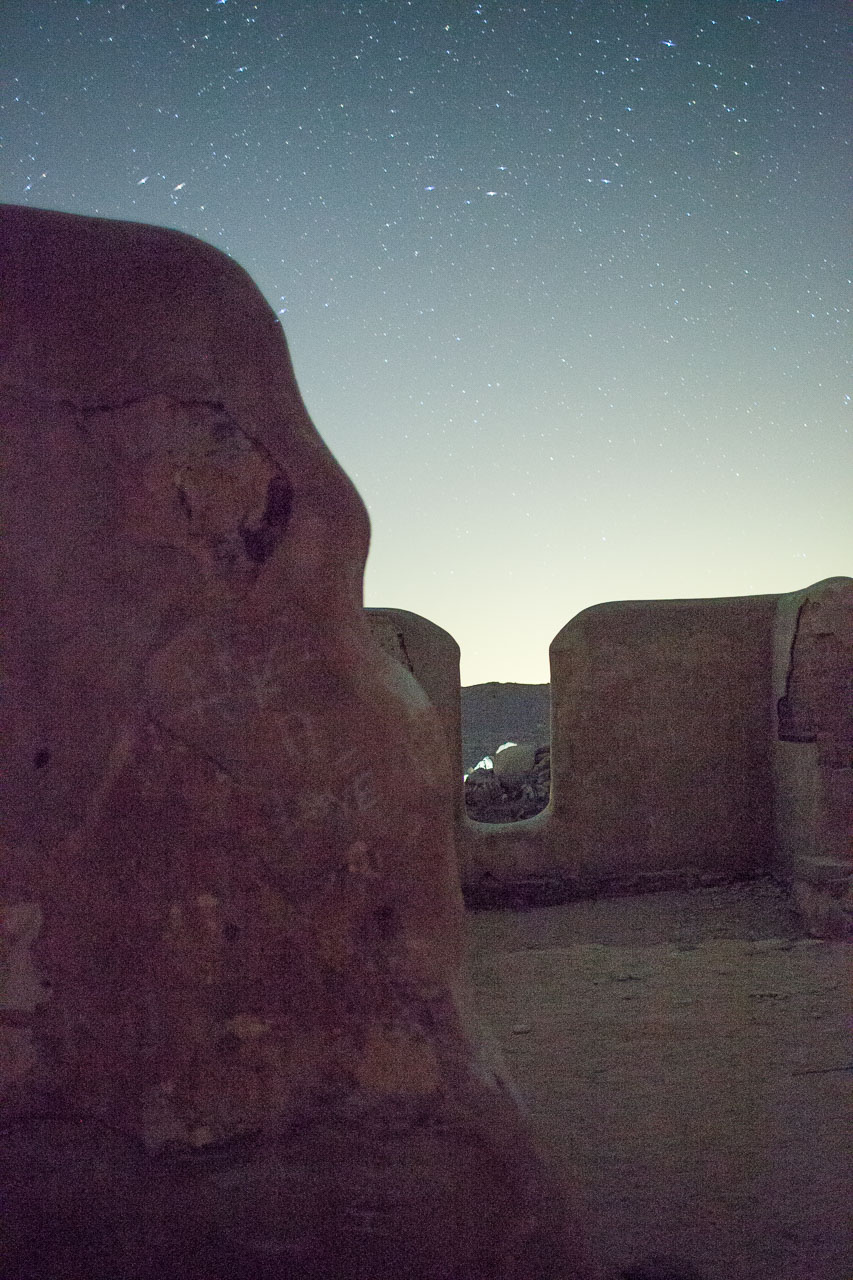
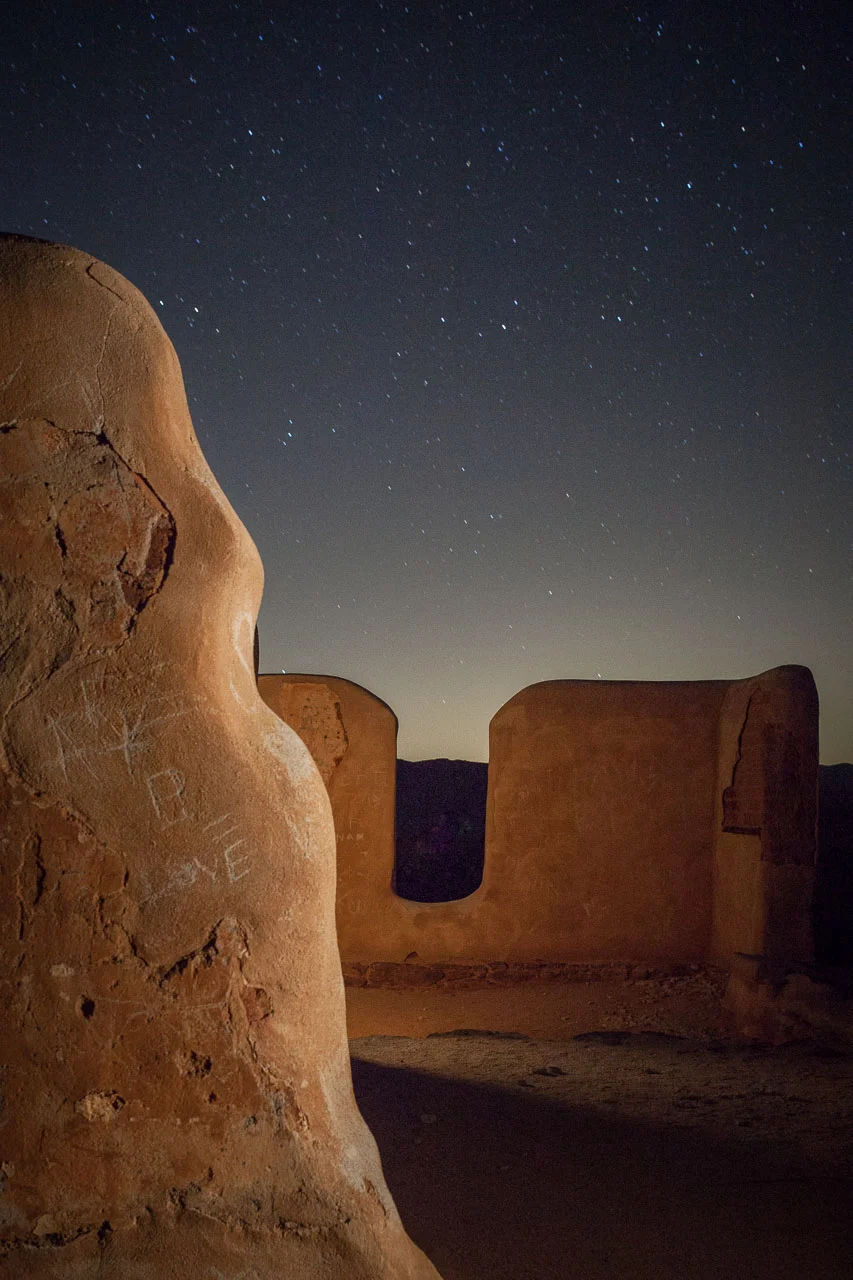
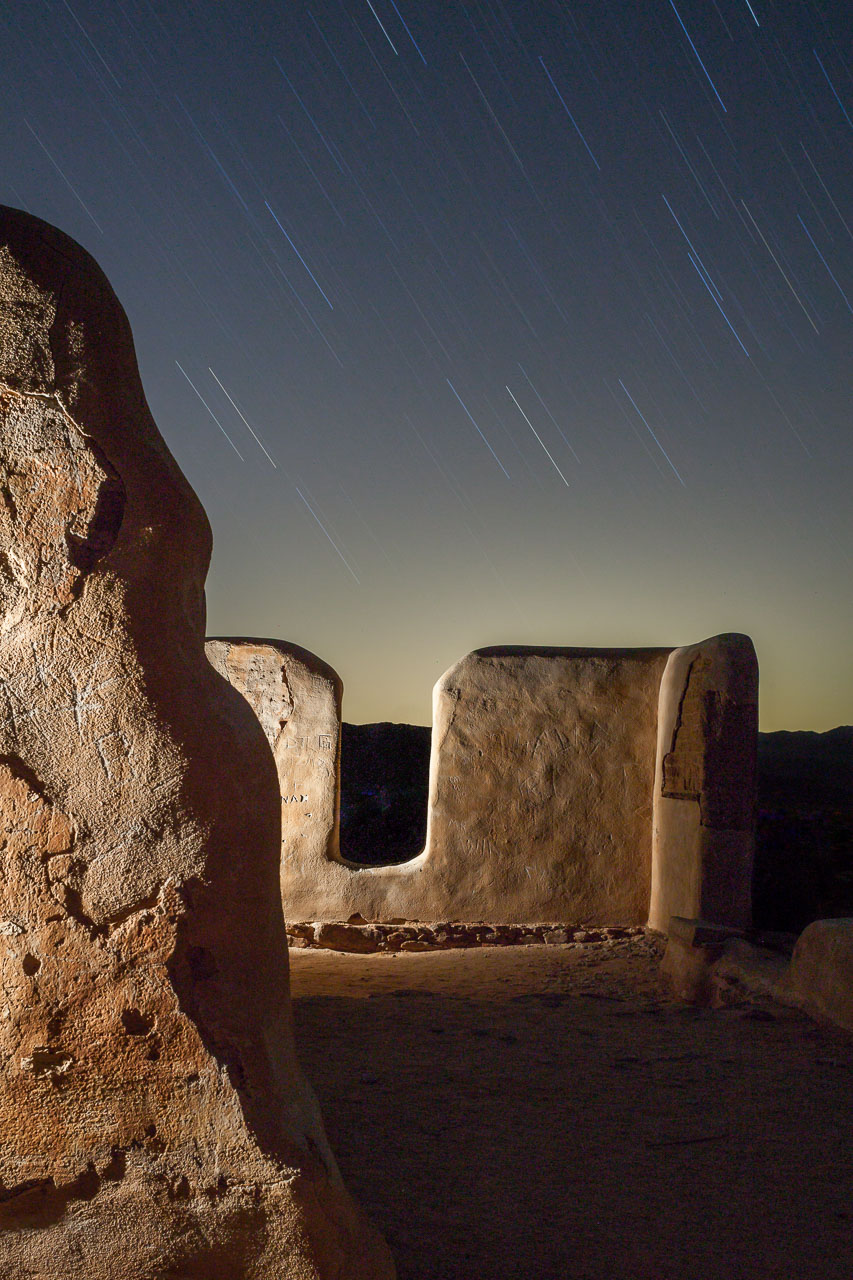
Ryan Ranch Ruins in Joshua Tree National Park, ยฉ 2016 Lance Keimig

Ryan Ranch Ruins in Joshua Tree National Park, ยฉ 2016 Lance Keimig

The Location

Last September I spent a week in Joshua Tree National Park, and stayed in five different campgrounds within the park during that time. It was a great way to get to know this gem of the California desert a bit better. I had visited before, but I wanted to dig a little deeper before leading a workshop to Joshua Tree this year.

Joshua Tree is a large park in Southern California that lies in both the Colorado and Mojave deserts. The lower, hotter and drier Colorado Desert makes up the eastern half of the park; the higher, wetter and slightly cooler Mojave Desert makes up the western half, which is home to the famous, wily trees.

Over the years, I have developed a field workflow that I follow for every image I make.

One of my favorite spots turned out to be the adobe ruins at Ryan Ranch, one of the smaller, less popular campgrounds. Ryan Ranch and the adjacent well supplied water to the nearby Lost Horse mine. The house was destroyed in a fire in 1978. The remains have been stabilized, and make excellent subject matter for light painting, and in particular a great opportunity to work on a series of lighting variations.

Scouting and Prep

For this shoot, I scoped out the ruins earlier in the afternoon after setting up camp. I saw a westward-facing composition that included two different structures that played well off of each other, and would be easy to light independently. This was going to be fun.

I set up my shot as it was getting dark, and planned to make good use of the very last bit of daylight on the western horizon.  Over the years, I have developed a field workflow that I follow for every image I make. By using a standardized method with consistent, repeatable steps, I have a high success rate with relatively few images lost to technical problems. The steps that I follow are:

  1. compose
  2. focus
  3. expose
  4. light
  5. adjust
  6. repeat

In this case, I saw the composition almost immediately. Iโ€™ll often begin with high ISO, hand-held shots to rough out a composition, but in this case, I already knew what I wanted to do. I went right to the tripod and made my first exposure. I still used a high ISO and wide aperture to keep the exposure time short, as I was interested in only the composition at this point.

High ISO test for compositionโ€”20 seconds, f/3.5, ISO 6400

High ISO test for compositionโ€”20 seconds, f/3.5, ISO 6400

The biggest challenge would be achieving critical focus using hyperfocal distance, because my foreground element was quite close to the cameraโ€”less than 10 feet away. As it was an important part of the composition, it had to be sharp. I hadnโ€™t yet decided if this would be a star-point or star-trail shot, but either way, I also wanted the stars to be tack sharp.

Using the Field Tools app, I concluded that f/6.3 would give me sufficient depth of field when focused at the hyperfocal distance of 16.5 feet. (For more information on how I did this, see โ€œUse Hyperfocal Distance To Maximize Depth Of Field At Night.โ€) I measured the distance from the back of the camera to a spot on the ground in the scene by taking five and a half big steps. I then put a flashlight at that spot, returned to the camera, focused on the light, and shot a test image to confirm that both the foreground structure and the stars were sharp.

Next, it was time to figure out the ambient exposure. By this point, it was almost completely dark, with just a hint of glow left on the western horizon. I used the high ISO testing technique, and came up with 30 seconds for my ambient exposure with an ISO of 6400 and my preselected aperture of f/6.3.

At this point, I had composed using high ISO shots, focused using the Field Tools app to determine the hyperfocal distance, and determined the exposure with high ISO testing. Then I decided to stick with 6400 for the time being to maintain star points. It was time to play!

Getting the Shot

Using a Coast HP5R flashlight with a full CTO gel, I stood about 3 or 4 feet in front of the middle-ground structure, out of the frame behind the foreground structure, and swept the surface of the adobe with one quick pass of the light at low power, and also lit the ground toward the camera with a momentary flash of light.

Next, I stood out of frame camera-right in the foreground, and did a very quick pass with the flashlight along the vertical edge of the foreground element. Because I was using ISO 6400, it didnโ€™t take much light to get the job done.

Variation #1โ€”30 seconds, f/6.3, ISO 6400

Variation #1โ€”30 seconds, f/6.3, ISO 6400

After doing several variations, I decided to try something different. For the next exposure, I chose to go long. The equivalent exposure to the previous one would have been 16 minutes at ISO 200, but I instead decided to go for 20 minutes just to get some longer star trails.

Aside from the star trails, the main difference between the short and long ambient exposures was that the extended time allowed for the last bit of twilight to build up on the horizon. The star trails created leading diagonal lines that paralleled the slope of the foreground element.

The light painting differed in that I moved closer to the rear wall, which had the effect of making the light harsher and more directional, and it brought out the texture of the surface. For the foreground wall, this time I lit from camera-left, scraping the light along the surface of the wall, leaving the edge in shadow.

Variation #2โ€”20 minutes, f/6.3, ISO 100

Variation #2โ€”20 minutes, f/6.3, ISO 100

For the final frame, I used a variation of the lighting technique from the first shot. I adjusted the exposure to an equivalent 3 minutes, f/6.3, ISO 800โ€”mainly because I wanted more time to light than I was allotted in the 6400 ISO version, and as this photograph was meant mainly as an experiment in lighting, I was less concerned about having long star trails.

For the light painting in the rear, I moved further from the wall until I was standing just behind the foreground wall, pointing back to the other structure. Notice how the light is softer and more even, and spreads across a larger area of the ground. The light on the foreground wall is similar to the first lit version, but is cooler because I removed the CTO warming gel from the flashlight. I also took a step back away from the camera (i.e., toward the scene), which had the effect of keeping the camera-facing surface of the front wall in shadow, which emphasized the curved line rather than the texture of the surface. I made a few other variations, but these are the ones that I liked the best.

Final variationโ€”3 minutes, f/6.3, ISO 800

Final variationโ€”3 minutes, f/6.3, ISO 800

Chris Nicholson and I will be leading a workshop in Joshua Tree National Park from April 21 to 26, as will Gabriel Biderman and I the following week. Both weeks will include this location as well as the historic structures at Keys Ranch, an area that is usually off-limits at night. Iโ€™m looking forward to returning to these spots then to see how our NPAN workshop participants work with these fun and playful structures, and also to see how a year and a half has changed the way I see them.

Note: The second week is sold out, but we have a few spots remaining for the first week of the Joshua Tree workshop. As is the case with all of our Passport Series workshops, weโ€™ll be teaching here only once. We hope you can join us!

Lance Keimig has been photographing at night for 30 years, and is the author of Night Photography and Light Painting: Finding Your Way in the Dark (Focal Press, 2015). Learn more about his images and workshops at www.thenightskye.com.

UPCOMING WORKSHOPS FROM NATIONAL PARKS AT NIGHT

How I Got the Shot: Under the Bridge in Cuyahoga Valley National Park

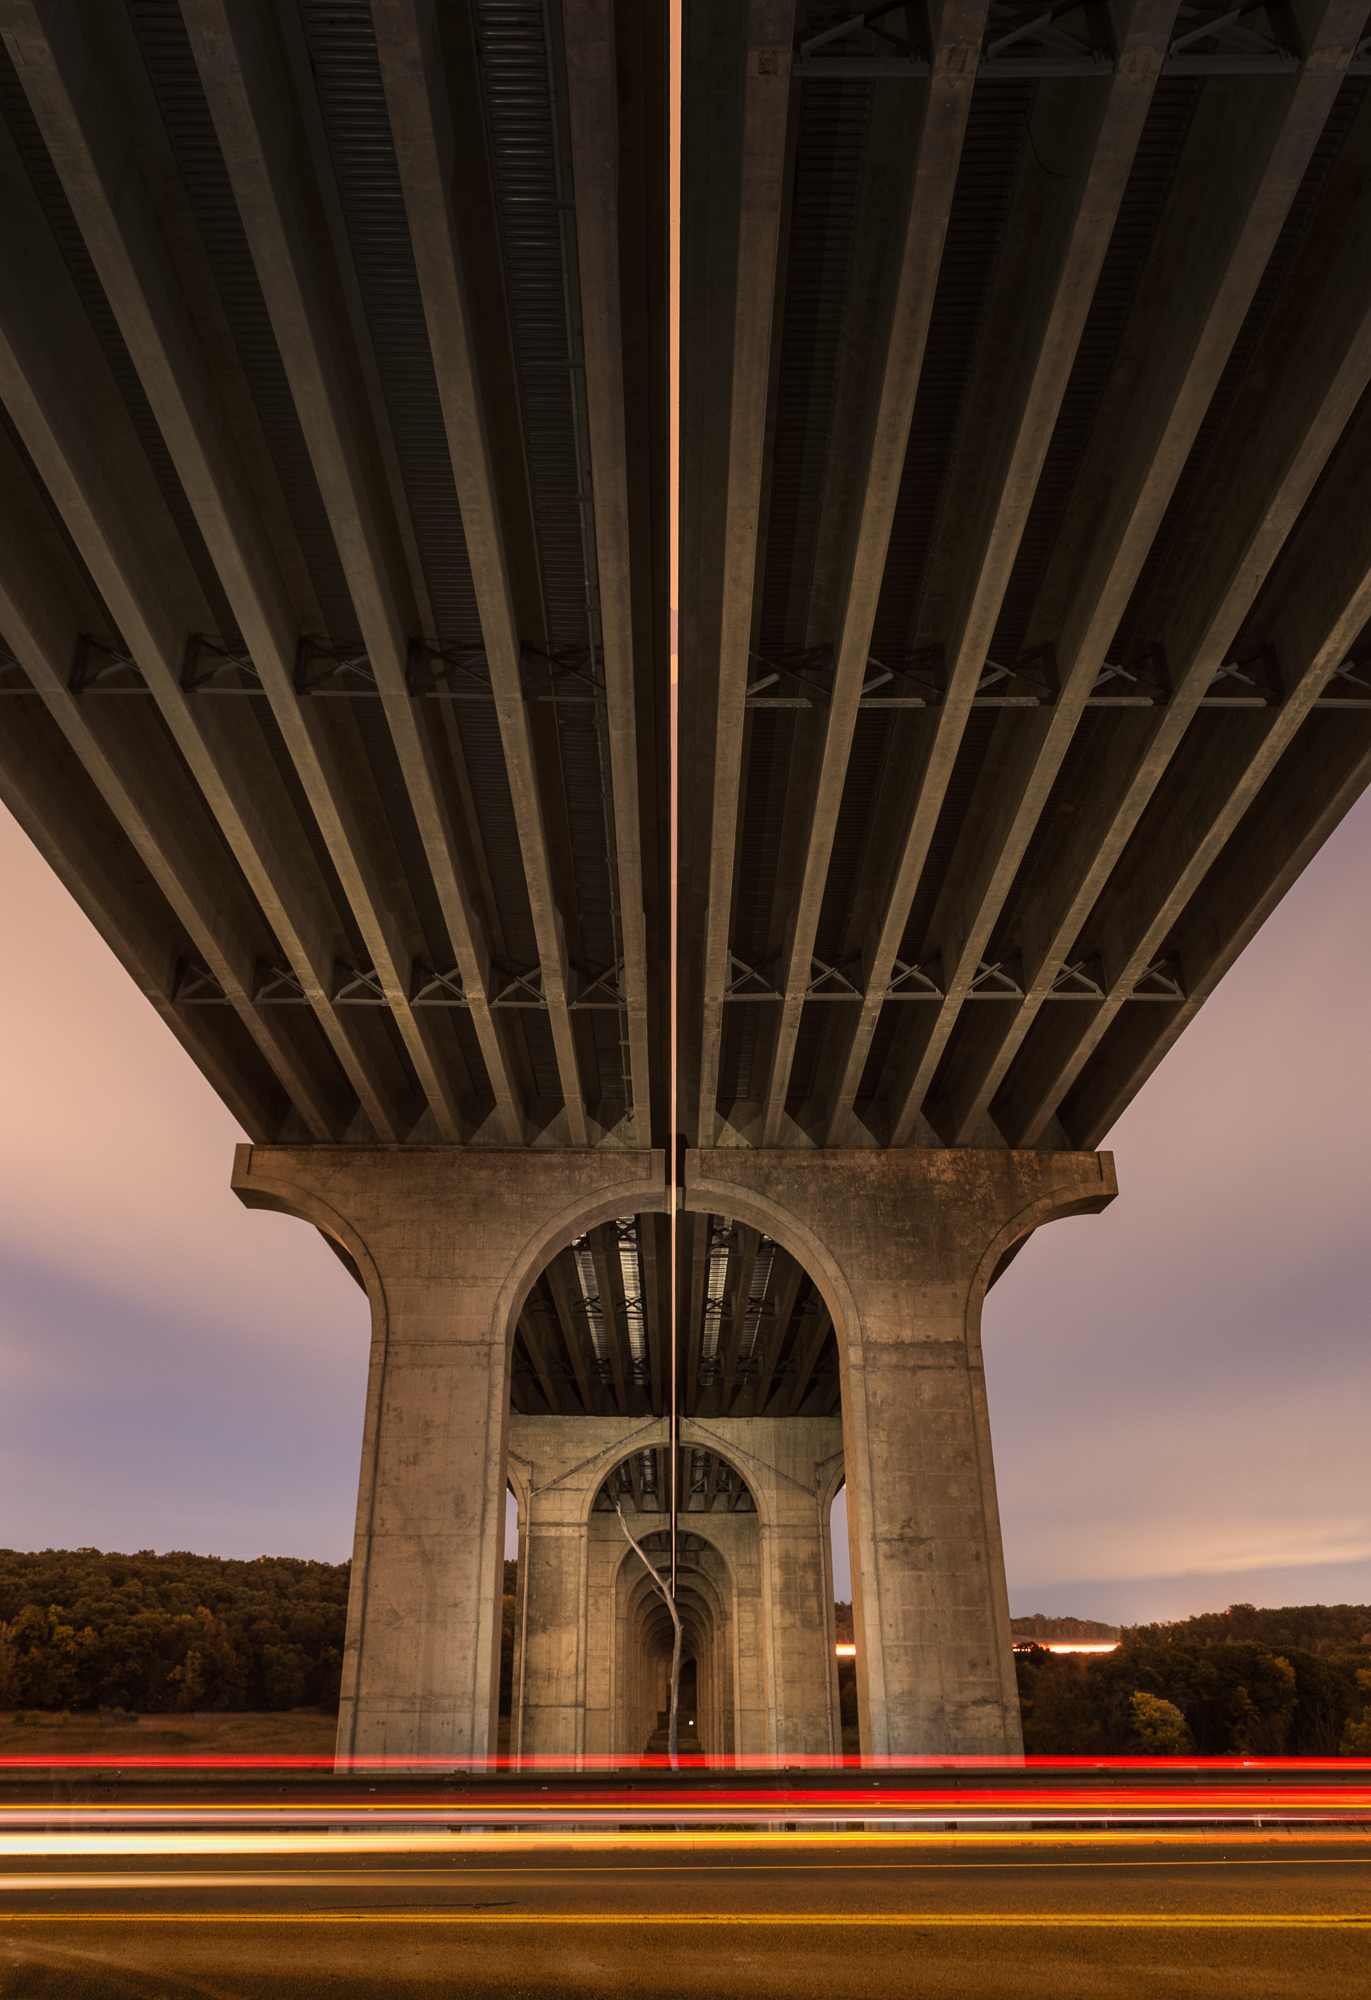
Under I-80, Cuyahoga Valley National Park. ยฉ 2016 Tim Cooper.

Under I-80, Cuyahoga Valley National Park. ยฉ 2016 Tim Cooper.

The Location

Cuyahoga Valley National Park is a gem in our system of parks. It has a completely different flavor and feel than its western counterparts.

Being located so close to Ohioโ€™s metro areas of Akron and Cleveland, it provides a host of photographic opportunities that other more remote parks may lack. Old train stations, bridge spans, barns, farms, railroad tracks and turn of the century towns all provide unique light painting subjects. This is one of the very many reasons Iโ€™m excited to be leading a night photography workshop in Cuyahoga Valley with fellow NPAN instructor Chris Nicholson next May.

During a recent visit I tried my hand at light painting the I-80 bridge span that floats over part of the park like a Roman aqueduct. I knew this would be a challenging shot that would require different white balance settings and multiple exposures to give me time to paint the entire underside of the bridge plus the headstock and piers. Hereโ€™s how it went โ€ฆ


Getting the Shot

The first order of business was to determine a rough composition and exposure, so I arrived at the location just after sunset. This allowed time to focus and compose in the fading light. My initial exposure was at ISO 100 for 90 seconds at f/13 (Figure 1). I used my Nikon 24-70mm f/2.8G lens on my Nikon D4s. The overcast sky created a heavy blue cast that was apparent when I left my cameraโ€™s white balance set to daylight as seen in the image below.

Figure 1: Test shot to determine composition and sky exposure

Figure 1: Test shot to determine composition and sky exposure

By the time I was finished fine-tuning the composition and settings, the scene became dark enough to begin light painting. I made my first exposure to capture the proper brightness and color of the night sky. The sky was a mix of low clouds that were picking up the pink/orange cast of the sodium vapor lights of nearby Cleveland, so I set my white balance to 3900 K to keep the color cast from being overly pink/orange.

The exposure was ISO 200, 5 minutes at f/8. This longer exposure would allow enough time for me to move around while painting the underside of the bridge. The image below (Figure 2) shows the night sky from this exposure, which is the sky I used in the final composition.

Figure 2: Sky exposure

Figure 2: Sky exposure

The next order of business was to nail my light painting. I used my 300-lumens Coast HP7R flashlight to paint the underside of the bridge. I placed a warm gel inside of the Coast LF100 filter holder so that my bridge would have a warmer look than the sky. After some experimentation I decided that the gel I had with me wasnโ€™t warm enough, so I changed the white balance setting on my camera back to Daylight (direct sun).

I began painting by moving about 100 feet to the right of my camera so that I could paint the bridge at an oblique angle. I was able to cover the entire right half of the bridge in about 2 minutes. After painting from this position I moved about 100 feet to the left of my camera and painted the other side of the bridge. During the remaining minute I crossed the road and shed a little light on the near bridge piers.

Notice in Figure 3 that the light on the underside of the bridge comes from both camera right and camera left. Working from so far off axis from the camera kept the painting on the underside of the bridge from looking flat.

After experimenting with light painting, I found that ISO 400, 5 minutes at f/8 provided the right amount of time and illumination for the underside of the bridge.

Figure 3: Light-painting underside of the bridge

Figure 3: Light-painting underside of the bridge

My first exposure (my first "real" exposure, not the test shot) from earlier provided the night sky. The second provided the illumination of the underside of the bridge. For the last exposure (which remained at ISO 400, 5 minutes at f/8), I focused my attention on the bridge piers (Figure 4).

Crossing the road, I again went off camera right and painted the nearest pier at steep angle. I then moved to camera left and painted the other pier. Painting at an angle to your subject always provides a richer, deeper image that reveals more texture in the subject. Due to the sheer length of the bridge I was unable to paint the distant piers from an angle so I had no choice but to paint them from the front. Light dims over distance so I spent the bulk of the exposure illuminating the far piers. The close piers received the same amount of light in far less time.

Figure 4: Light painting bridge piers

Figure 4: Light painting bridge piers

Sometimes our subjects are just a bit to big to paint in one exposure. In these cases, itโ€™s helpful to know a little about post-processing. My final image (Figure 5) is a composite of the photos seen in Figure 2 for the sky, Figure 3 for the underside of the bridge and Figure 4 for the bridge piers. I used Adobe Lightroom for the initial tonal and color edits on the images, and then finished the composite in Adobe Photoshop.

Figure 5: Final Image

Figure 5: Final Image

Learn more techniques from Tim Cooperโ€™s book The Magic of Light Painting, available from Peachpit.

UPCOMING WORKSHOPS FROM NATIONAL PARKS AT NIGHT