In the Bag: Packing for a 3-Week Night Photography Trip

Note: As mentioned in the post below, Matt is about to embark on a 3-week night photography trip with Gabe. Follow their adventures via our next three installments of “NPAN Conversations” on the National Parks at Night Instagram account.


This is gonna be some trip! I’m about to leave for 3 weeks in the American southwest, where I’m co-leading a night photography workshop, attending a night photography conference, scouting some new locations, and creating some photo and video content in the field. And I need to pack for all of that in one bag.

What goes into one bag to cover all of that for one trip? Today I’m going to share that with you!

With all the uncertainties of the past year and of the next few weeks, it’s still exciting to curate and cull my gear for a trip. To be more specific about my needs, the following are my goals for the trip and the events I’m packing out for:

With all that on the plate, how do I pack smart, and how do I pack so that my bag is light enough to walk with for a few miles?

The first step: the bag. Introducing my new backpack, the Shimoda Action X50—aka “the Kitchen Sink 2.0.”

There’s a ton of surprises inside. So I made a video walk-through/breakdown of my gear and why it made the cut:

(a few hours later…)

Whew! Thanks for watching. On YouTube, there is a complete gear list with links, or you can download it here:

How are you gearing up for your next trip? What is essential? What did you leave by the wayside and why didn’t it make the cut? Let us know in the comments or on our Facebook page.
Matt Hill is a partner and workshop leader with National Parks at Night. See more about his photography, art, workshops and writing at MattHillArt.com. Follow Matt on Twitter Instagram Facebook.

UPCOMING WORKSHOPS FROM NATIONAL PARKS AT NIGHT

Five Questions: Super Resolution, Ghosts, Intervalometers and More

If you have questions, we have either answers or opinions, and we’re not shy to share either.

This installment of our “Five Questions” series features inquiries about Adobe’s new Super Resolution, the work of Alexey Titarenko, Milky Way lenses for the Nikon Z 7, intervalometer recommendations, and the efficacy of carrying two Coast flashlights.

If you have any questions you would like to throw our way, please contact us anytime. Questions could be about gear, national parks and other photo locations, post-processing techniques, field etiquette, or anything else related to night photography. #SeizeTheNight!


1. Seeing Quadruple

Question:

Regarding your post about Adobe’s new Super Resolution feature, I was surprised to see the headline mention “quadruple” enlargements. I thought the new feature was “2X.” Did I read it wrong or misunderstand the feature announcement? — Robyn

Answer:

It’s just a math thing. You are correct that Super Resolution doubles the pixel count of an image in both the horizontal and vertical linear directions. For example, a 200 x 300 image would become 400 x 600.

That results in the total area of the image being quadrupled. In that same example, the resolution would go from 60,000 square pixels to 240,000 square pixels—i.e., quadruple, or four times the number of pixels. See the image above for a graphical representation. — Chris

2. Ghosts in the Composition

Question:

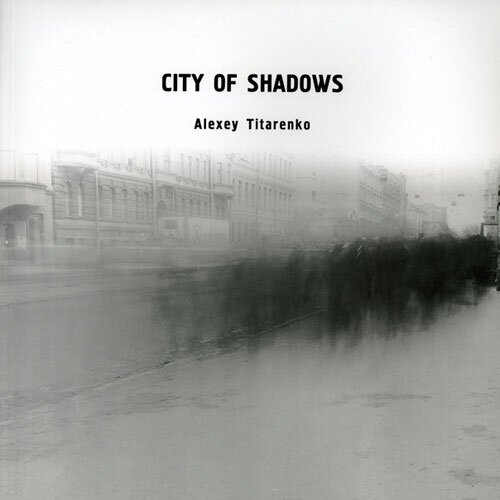
I am trying to mimic Alexey Titarenko’s work, especially the movement he puts in. I used native ISO, an appropriate aperture and a long shutter. Would you mind giving me help in this type of work? — David C.

Answer:

I assume you are talking about Alexey’s “City of Shadows” series. Interesting human movement happens in exposures from 1/15 to 15 seconds, because most people can’t hold truly still for more than 1 to 2 seconds.

In order to create the “ghosts and shadows” effect that Alexey is getting during daytime, you need to use a 3-, 6- or 10-stop neutral density filter to allow for a long enough exposure. Operating under overcast skies will help, as will lots of experimentation.

A lot depends on how much stillness you want to show in the chaos of movement. That is important. For example, for Alexey’s shot of the handrail, it was critical that the rail remain sharp amid the mass of bodies moving past. It works beautifully. However, many of his other photographs feature just a little movement, which allows him to capture a “soul” that is still.

On the other hand, reaching longish shutter speeds like that at night is easy, because you’re already working with minimal light. In fact, the challenge in dark conditions is actually adding light so you can see the human subjects in all that darkness. For more info on how to do that, see my blog post “Photographing Phantoms.” — Gabe

3. Z 7 Milky Way Glass

Question:

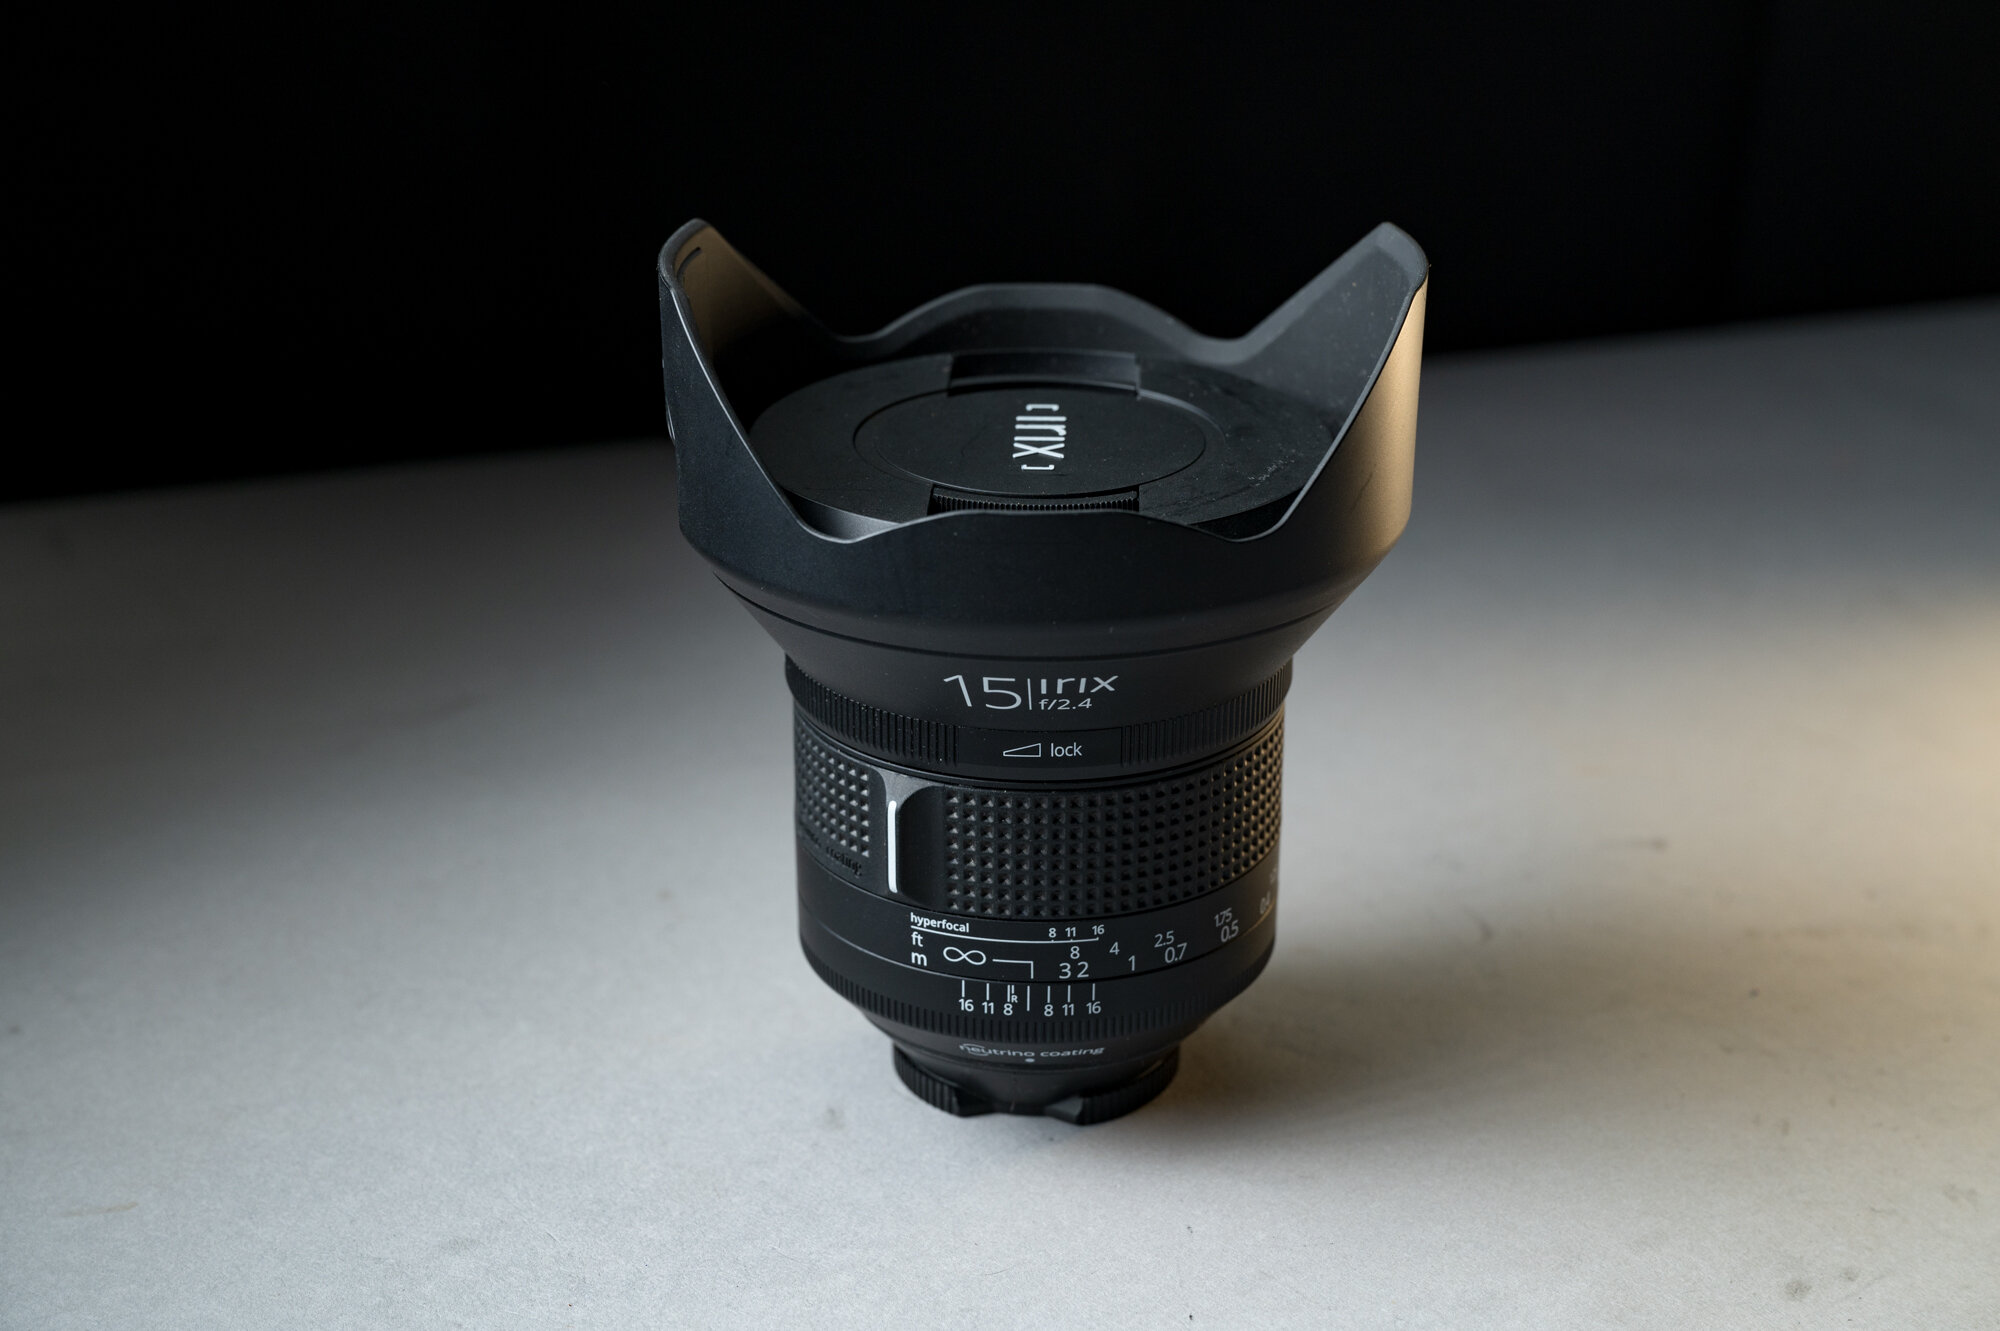
I have a Nikon Z 7 and would like to try Milky Way photography this summer. I have the Nikon Z 14-30mm f/4 S lens and believe the f/4 aperture will not be fast enough to prevent star streaking. Would the Nikon Z 20mm f/1.8 S or the Irix 15mm f/2.4 be an acceptable alternative? — Jerry

Answer:

You’re right that the f/4 lens will be very limiting for star-point images in general. They would require you to shoot at an ISO of 12,800, which I would not recommend with the Z 7 unless you’re planning to stack multiple frames in software such as Sequator or Starry Landscape Stacker. Since you have a Z 7, I suggest going with a native Z lens. Though I haven’t shot with most of them, word is that they’re all truly outstanding.

I have not shot with the Z 20mm f/1.8,  but I love that focal length for Milky Way. So I think that either that lens or the more-expensive Nikon Z 14-24mm f/2.8 would be your best bets.

The Irix lenses are excellent, though they require an adapter to use on a Z-mount camera. (Irix will no doubt release Z-mount lenses in the future, but we don’t know how near that future is.)

If you’re still stuck about which lens to buy, you could always rent to try before committing. We can recommend Borrow Lenses or Lens Rentals. — Lance

4. Intervalometer Recommendation

Question:

I just reviewed your 2017 article on wired versus wireless intervalometers. Are you still recommending the wired Vello Shutterboss II? — Hadley

Answer:

Yes, it’s still on the recommended list for wired intervalometers. Though it does share the one weak spot of all wired intervalometers, which is the connection point to the unit, which often wears down over time.

If you’re open to a wireless solution instead, my favorite intervalometer overall is the Phottix Aion. Not only does it not suffer from that weak spot, but it also allows for exposures of fractions of seconds, which is useful when shooting with NPF Rule shutter speeds.

To learn more about the Aion, see my post “A Better Intervalometer.”

Though I do champion my favorite, either of the above options will suffice. You really can decide based on your personal priorities and be happy and successful either way. — Matt

5. Are Two Coasts Better Than One?

Serpent—Borrego Springs. Nikon D4s with a Nikon 14-24mm f/2.8 lens set at 24mm, light painted at close range with a Coast HP7R flashlight. Three exposures at 15 seconds, f/4, ISO 6400.

Question:

I notice that you guys seem to all have both Coast HP7R and HP5R flashlights. I want to buy a more powerful small flashlight than I have now. Do you own both because the HP7R is too powerful for some applications? If you were to buy just one, which would it be? — Mark

Answer:

Yes, we all own both the HP7R and the HP5R because the difference in power is useful for different applications. The HP7R is a very bright flashlight (300 lumens), while the HP5R is less bright (185 lumens). Both have a second power setting that drops the output by 90 percent, so the combination essentially gives us four different lumen options.

How do we use this versatility? One example: If we’re shooting the Milky Way under a new moon (pitch black, no moonlight at all), then our apertures are very wide (f/2 or f/2.8) and we are using very sensitive ISOs such as 3200 or 6400. That makes 300 lumens overkill and more difficult to control, whereas 185 lumens can be very effective. You just don’t need a powerful flashlight for that kind of sensitive exposure.

An opposite example is when we’re shooting under the much brighter conditions of a full moon, when our apertures may be set to f/5.6 or f/8 and the ISOs to 100 or 200. These less-sensitive exposures require a stronger flashlight to paint the scene.

The different flashlights can also be more or less useful when considering the distance of the subject from where you’re light painting. A rock formation 100 yards away obviously requires a more powerful light than a flower 2 feet in front of you.

So yes, it’s nice to have both models to cover all the possible situations. But if you are looking to purchase just one, I would recommend one of these strategies:

  1. Purchase the more powerful HP7R and use some neutral density gels to knock down the power when needed. You can get a sample pack that contains all you might need for less than $10.  Remember, you can always make a bright flashlight dimmer, but you can’t make a dim flashlight brighter.

  2. Decide which conditions you favor for night photography. If you mostly shoot under a new moon, get the HP5R. If you find yourself doing a lot of work under brighter conditions (full moon, city scenes), purchase the HP7R.

Either way, both of these Coast flashlights are excellent night photography tools that are worth every dollar you spend on them. — Tim

Chris Nicholson is a partner and workshop leader with National Parks at Night, and author of Photographing National Parks (Sidelight Books, 2015). Learn more about national parks as photography destinations, subscribe to Chris' free e-newsletter, and more at www.PhotographingNationalParks.com.

UPCOMING WORKSHOPS FROM NATIONAL PARKS AT NIGHT

Pixel Perfect: 3 Workshops (1 Brand New!) for Leveling Up Your Processing Skills

Post-production. It’s the second rail of photography. But so many photographers chug along knowing only the very basics, honing just enough skill to get images off the camera and onto social media.

It’s understandable. In the film days, most people didn’t develop their own negatives nor make their own prints. So the transition to do-it-all-yourself in digital might not have been an obvious jump, nor even desired. Or maybe it’s that most modern photographers were introduced to post-processing via early versions of Photoshop, an anvil of software that’s hard and heavy to comprehend. Or maybe some photographers are just new to the game and haven’t yet had time to learn the keystrokes and mouseclicks that turn a series of 0s and 1s into an artistic masterpiece.

Regardless of the reason, plenty of folks with a great photographic eye could use more assistance learning how to turn RAW files into great photographic images.

National Parks at Night is here to help:

  • Since 2016 we’ve published post-production blog posts.

  • In 2019 we launched and ran our first Post-Processing Intensive workshop.

  • In 2020 we launched our first Lightroom Live online courses.

  • And now, in 2021, we are thrilled to announce our first Photoshop Live online course!

Here’s a rundown of all the post-production courses and workshops we’re running over the next few months. Want to level up? Come join us!


Photoshop Live

This sentence constitutes the very first time we’re publicly mentioning this brand new course—Photoshop Live: The Next Step in Post-Processing. This summer and fall, on a computer screen near you, we’ll teach how to take precise control of your images with skills such as:

  • understanding the architecture of Adobe Photoshop, including the different editing and selection tools

  • the strategy and best practices of using layers

  • mastering advanced local adjustments and masking

  • creating and editing star trail photographs

  • stacking light-painted images

  • blending Milky Way shots with blue hour foregrounds

  • and more!

We’re capping each session of the course at 12 attendees, so each will have a good amount of personal attention to their questions. And as a bonus, each attendee will receive one hour of one-on-one time to with an instructor.

tim promo benq.jpg

We’ll be running this course in sessions of four classes, each 2 hours long, on Tuesdays and Thursdays for two consecutive weeks. As of now, we’re offering three sessions:

Session 1: July 13, 15, 20 and 22 (waitlist only)

Session 2: October 19, 21, 26, 28

Session 3: December 7, 9, 14, 16

This Photoshop course is a perfect successor to our Lightroom Live course, the next session of which will be held in May (see below). So you could take both courses and—in just 16 online sessions—become proficient in these two pillars of digital photography!

For more information, see our Photoshop Live webpage by clicking here:


Lightroom Live

We launched this course last spring, and we ran three sessions of it in 2020. Now we’re offering it again—an online course designed to teach Adobe Lightroom, the most important piece of software for photographers, focused on the two most important modules, Library and Develop.

Learn everything from how to import and organize your images, to how to develop them with both basic and advanced tools and techniques. We’ll cover:

  • understanding the Lightroom catalog

  • making full use of the Library module in Lightroom, including keywords and collections

  • gaining a complete understanding of Lightroom’s Develop module

  • mastering advanced adjustments using the local adjustment tools

  • and more!

Again with this course, the session will be capped at 12 attendees in order to ensure personal attention. Each attendee will also receive one hour of one-on-one time to with an instructor, plus a free copy of our video Lightroom: Correcting Your Catalog Chaos.

Just like with Photoshop Live, we’ll be running Lightroom Live in four classes, each 2 hours long, on Tuesdays and Thursdays for two consecutive weeks. The dates are May 18, 20, 25 and 27.

For more information, see our Lightroom Live webpage by clicking here:


Post-Production Intensive: Seattle

If you want a really deep dive into both Lightroom and Photoshop, in a vibrant and beautiful location, then join us in Seattle this July for the only Post-Production Intensive workshop we’re running in 2021.

While the online courses mentioned above each entail 8 hours of total instruction, the Post-Production Intensive workshops involve 6 full days of on-site, hands-on instruction in Lightroom and Photoshop.

Moreover, on at least a couple of nights, we’ll head out as a group to photograph the urban scenery of the Seattle waterfront. That’ll be pretty easy to get to, as we’re staying in a gorgeous hotel right on the city shores of Puget Sound, in walking distance from great shoot locations, scrumptious food and plenty of baristas pressing that famous northwest espresso.

For more information, see our Post-Processing Intensive: Seattle webpage by clicking here:


Other Opportunities

We also have other ways to learn about post-processing! Including:

Night Photo Summit Replays

In February we ran the very first online conference dedicated to night photography, the Night Photo Summit! All 43 presentations from the online conference are available as streaming videos with the purchase of a Replays ticket.

Of those 43 presentations, half a dozen are heavy on post-production, from basics such as “Capturing and Processing the Milky Way” by Tim Cooper and “Noise-Reduction Strategies for Night Photography” by Michael Frye to more advanced topics such as “Blue Hour Blends & Composites” by Jess Santos and “Creating a Basic Time-Lapse Video” by David Marx.

Meteor Shower e-Book

Four meteor showers in 2021 will rate as decent to excellent for photography, including the Eta Aquarids in May! Do you know how to shoot and process a meteor shower radiant? You can learn in our e-book Great Balls of Fire: A Guide to Photographing Meteor Showers.

Blog POsts that were and Will Be

As mentioned earlier, we’ve written a few blog posts on post-production, all available to read for free anytime you want. Some examples:

To see what we’ve done in the past, here’s a link to all our posts. Scroll down to the Post-Production section to see the 22-and-counting titles we’ve written about the topic.

And … you caught the “and counting” part, right? We have more on the way! (Tips on printing, anyone? How about using Sequator for sharp stars? Keep your eyes peeled right here.)

Chris Nicholson is a partner and workshop leader with National Parks at Night, and author of Photographing National Parks (Sidelight Books, 2015). Learn more about national parks as photography destinations, subscribe to Chris' free e-newsletter, and more at www.PhotographingNationalParks.com.

UPCOMING WORKSHOPS FROM NATIONAL PARKS AT NIGHT

Supersize Me: Adobe Brings Us High-Quality Quadruple Enlargements

This week we’re showcasing an exciting new feature from Adobe. Want to learn even more about developing your digital photographs? Join Tim Cooper and Chris Nicholson on the Seattle waterfront this July for a weeklong Post-Processing Intensive workshop, including night shooting along the city shores of Puget Sound.


The folks at Adobe have done it again. They’ve taken a good process and made it even better. This time they have made use of advance machine learning to drastically increase the quality of enlarged images in a new process called Super Resolution.

If you’ve been paying attention to news in the photography world this past week, then you already know all of that. But what we wanted to know is this: How well does Super Resolution work with night photos?

Let’s have a look …

What is Super Resolution?

Super resolution is a new process that enlarges your image files while maintaining (creating!?) an extremely high level of detail. (For more info, see Adobe’s explanation.)

Over the years, Adobe has done a great job of tweaking and creating new algorithms for enlarging image files, but this time they have outdone themselves. A direct side-by-side comparison of enlarged photographs shows the superiority of this new process, even in finicky long-exposure and high ISO images. You can see the difference between the newer Super Resolution files and the same files upsized with Adobe’s previous enlargement algorithm, Preserve Details (enlargement), in Figures 1 through 3. (These are best viewed on a larger display to more clearly differentiate the results.)

Figure 1: Lighting painting, ISO 200. This shows an upsized image at 100 percent (actual pixels), enlarged with both the old method and with Super Resolution. (Click to enlarge.)

Figure 2. Milky Way, ISO 6400. The traditionally upsized version appears a slight bit sharper, but the Super Resolution version shows much better grain structure. It’s always easier to add a bit of sharpening as opposed to trying to reduce noise, so again Super Resolution wins. (Click to enlarge.)

Figure 3. Moonlit landscape, ISO 6400. In this comparison the Super Resolution version shows better sharpness and a smoother sky.

As you can see in the above examples, overall the new process produces better detail and smoother gradients in the areas with less detail. Super Resolution does seem to add a bit more color noise in the shadows, but that’s easily remedied.

Who Needs Super Resolution?

While this is an awesome new feature, you may not have to use it all that often. You typically need to enlarge images only when making prints. Even the resolution of older cameras exceeds what’s needed for posting on websites and social media. So when you’re Instagramming, you don’t need this. But if you are making large prints from your files, you might want to use Super Resolution to upsize the file before you send it out or send it over to your home printer.

Another possible use would be upsizing images that have been dramatically cropped. I’m not talking about trimming a bit around the edges or cropping your image into a square, but rather a severe crop (you know, the kind of crop that you feel guilty about). Super Resolution can get those files back up to a more usable size.

How to Use Super Resolution

At the time of this writing, Super Resolution is available only through Adobe Camera Raw (ACR), but will soon be available in Lightroom as well. (We’ll keep you up to date. Be sure to watch our Facebook channel for the announcement.)

1. Launch Photoshop and choose File > Open.

2. Navigate to the desired RAW file and choose Open. This will open the image into the ACR editor (Figure 4).

Figure 4. Resulting ACR dialog after opening your RAW image in Photoshop.

3. Control-click (Mac) or right-click (PC) on the image and choose Enhance (Figure 5).

Figure 5.

4. In the resulting dialog, choose Super Resolution and then click Enhance in the lower right corner (Figure 6).

Figure 6. The Enhance Preview dialog.

5. Photoshop will create a new image from the original RAW file that is twice as tall and twice as wide as the original. Click on the resulting image to highlight it, then click Open in the lower right corner (Figure 7) to open the image into Photoshop.

Figure 7.

At this point you are back in Photoshop with an image that has four times as many pixels as the original, and is ready to be edited or printed.

Now What?

If you are ready to print through Photoshop, you are all set. File > Print will bring up all of the necessary dialogs for you to make a print on your home printer.

If you want to send out this file to a professional print house such as Bay Photo Lab, simply choose File > Save. A dialog will offer options of file type and location. I suggest saving the file in Photoshop format (i.e., PSD, for future use) and as a JPG to send to the lab. To keep things organized, save the file back into to its original folder.

At this point, Lightroom may not be aware that a new photo has been created from the original. If you would like to be able to access the image via Lightroom, open your catalog and navigate to the folder with the newly created file. In the Library module, Control-click (Mac) or right-click (PC) on the folder in the Folders panel and choose Synchronize Folder. Lightroom will see your new image and make it accessible.

If you want to just make a print, you can simply navigate (outside of Lightroom) to the folder with the new file, select the image and upload it to the printer of your choice.

The Long and Short of Super Resolution

Super Resolution is awesome—for making large prints. It is not a tool that is needed on a day-to-day basis. If you want to upsize an image to make a large print (say, 20x30 inches or larger), this should be your go-to tool. Likewise, if you have an image that has been severely cropped, Super Resolution can be a good way to regain the resolution needed to display the image as you envisioned.

Note: This blog post is a quick reference on how to use Photoshop’s new Super Resolution upsizing algorithm. It begs a lot of related questions, such as, “When is your current resolution not enough?” or even “What is upsizing?” For a deeper dive into understanding resolution and upsizing, keep an eye on our blog.

Tim Cooper is a partner and workshop leader with National Parks at Night. Learn more techniques from his book The Magic of Light Painting, available from Peachpit.

UPCOMING WORKSHOPS FROM NATIONAL PARKS AT NIGHT

Resharp Your Lens: How to Calibrate Infinity Focus on the Irix 15mm and 11mm

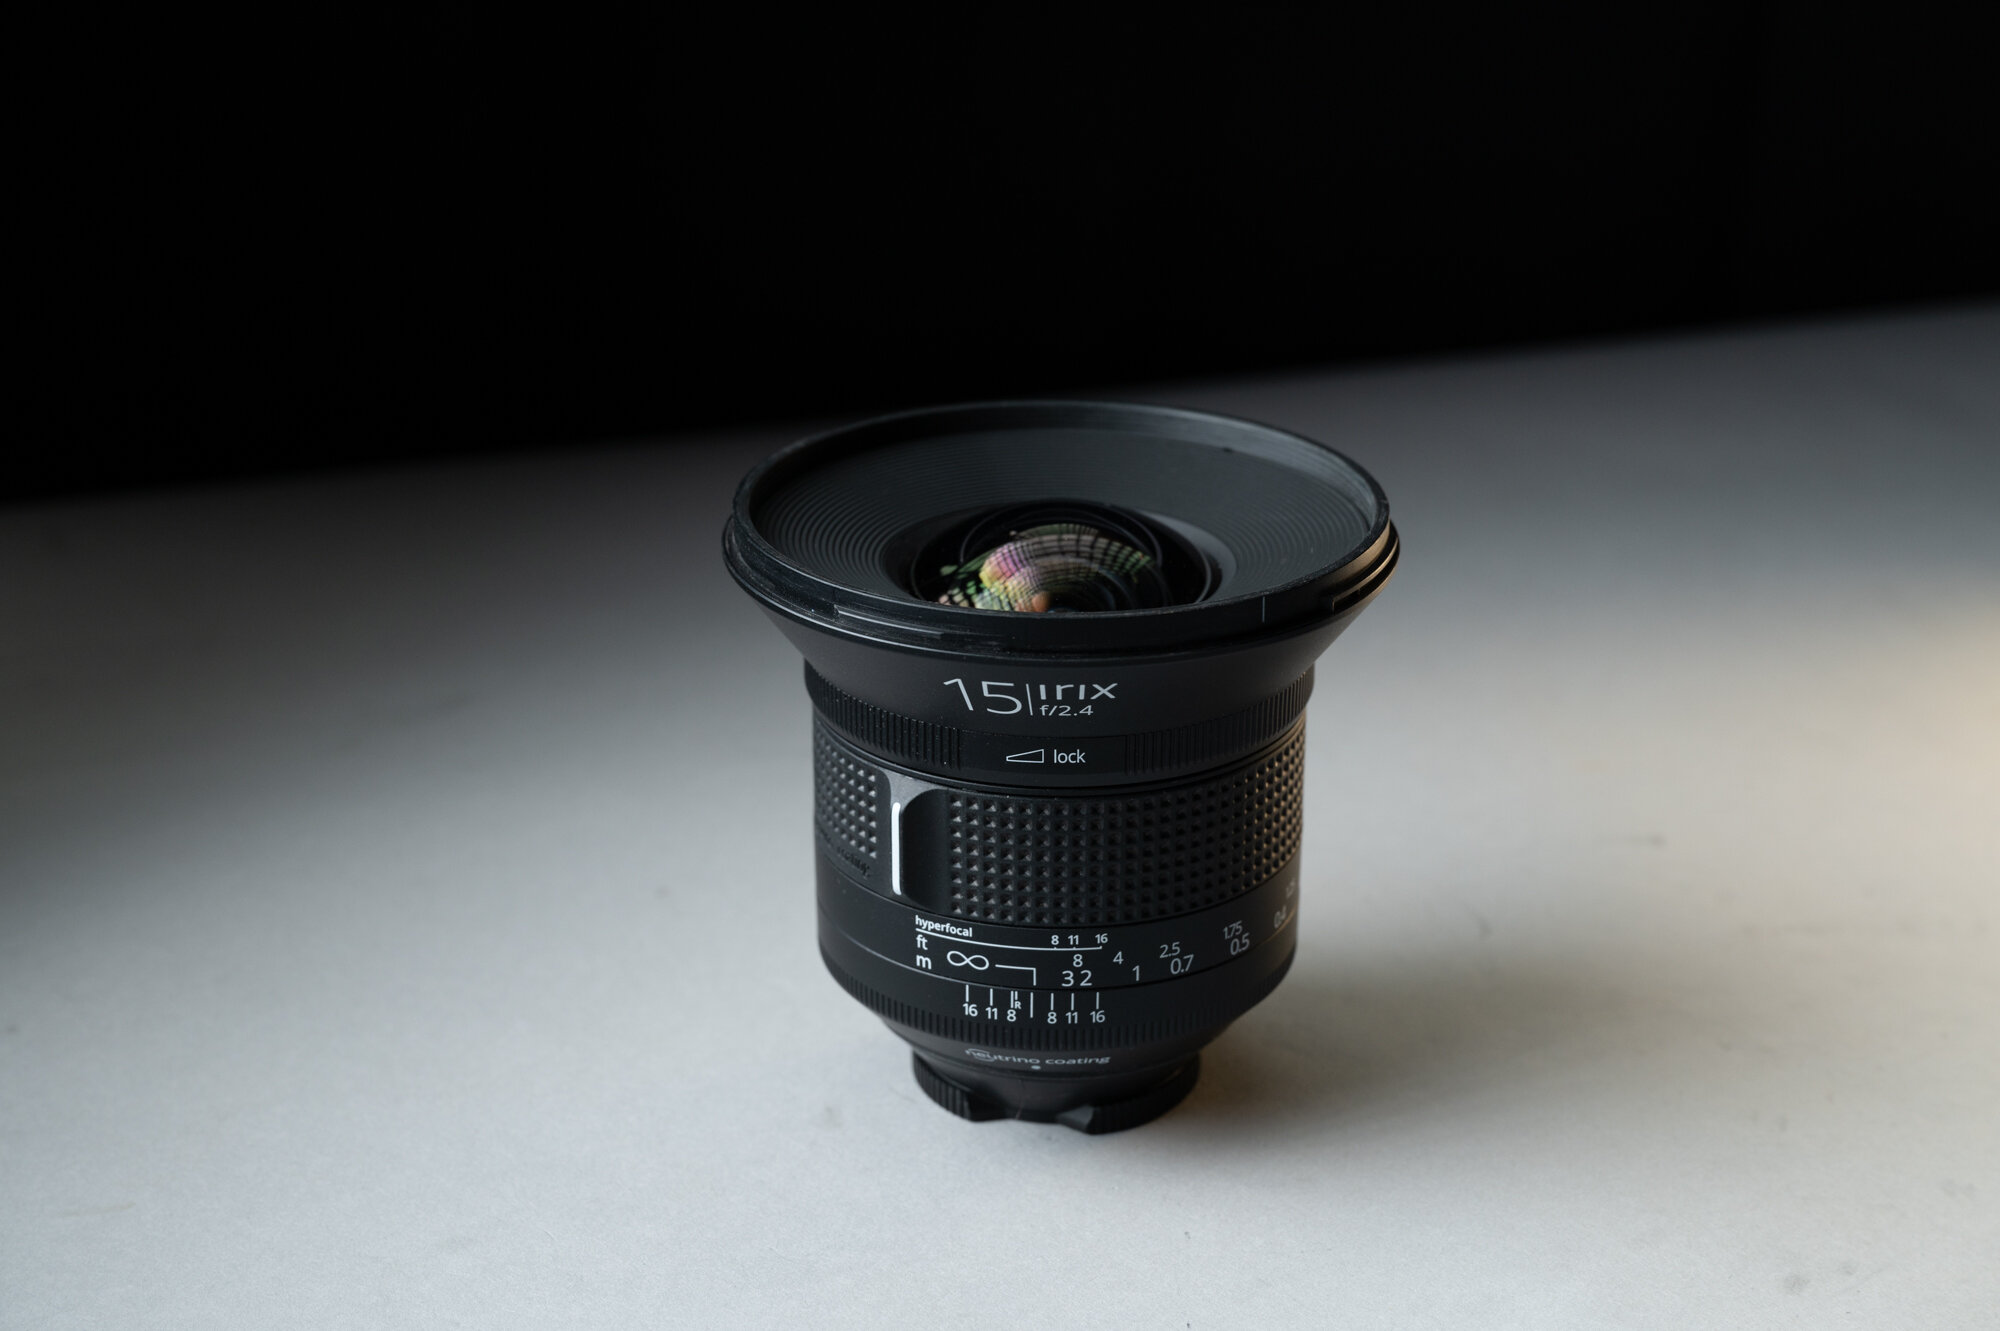
Irix 15mm and 11mm lenses are very popular among the National Parks at Night instructors and our workshop attendees. There are multiple good reasons for that, all of which have to do with sharpness, including:

  • The lenses have very little coma.

  • They’re sharp as heck.

  • The focus ring clicks into place at infinity, giving you tactile feedback for focus, which is so helpful in the dark.

Put all those together, and you pretty much have a guarantee that your stars will be sharp.

Irix has another feature that will allow you to stay sharp too: If you find that the infinity mark is off, you can calibrate it at home.

Why would you need to do this? Our experience is that the focus is perfect as received from the factory. But, as time passes and your lens gets jostled around during travels, it’s possible the focus can drift. It happens to the best of lenses. But with most brands you need to send such lenses to a repair technician, while Irix superwides enable you to self-fix this relatively quickly.

If you own an Irix 15mm f/2.4 wide angle lens or 11mm f/4.0 rectilinear wide angle lens, you can follow the instructions below to calibrate your own infinity focus.

Note: If you have really poor eyesight or your fingers aren’t nimble, you may consider sending it in to Irix instead.

The Irix Calibration Process

What you will need:

  • camera

  • tripod

  • torx T6 screwdriver with a magnetic tip

  • standard slotted 1/16-inch or 1.5mm screwdriver with a magnetic tip

  • a clean, dust-free, well-lit space with a white or very light surface

  • daylight

I used a computer repair kit I bought at a local home improvement store. If you don’t have a set like this, you can find one at B&H Photo or Amazon.

Step 1: Remove the lens hood.

You use the lens hood, right? You should, for protecting that slightly bulbous front element from bumps and scratches, if nothing else. Anyway, time to remove it, for just a few minutes.

Step 2: Lock to infinity.

As mentioned before, infinity focus is easy with an Irix. Just turn the focus ring until you feel it click into the infinity detent.

lock Itrix 15mm.jpg

Then turn the focus lock ring all the way to “lock.” I use two hands for this and I move slowly so that the focus ring doesn’t move while locking it down.

Step 3: Open the calibration window.

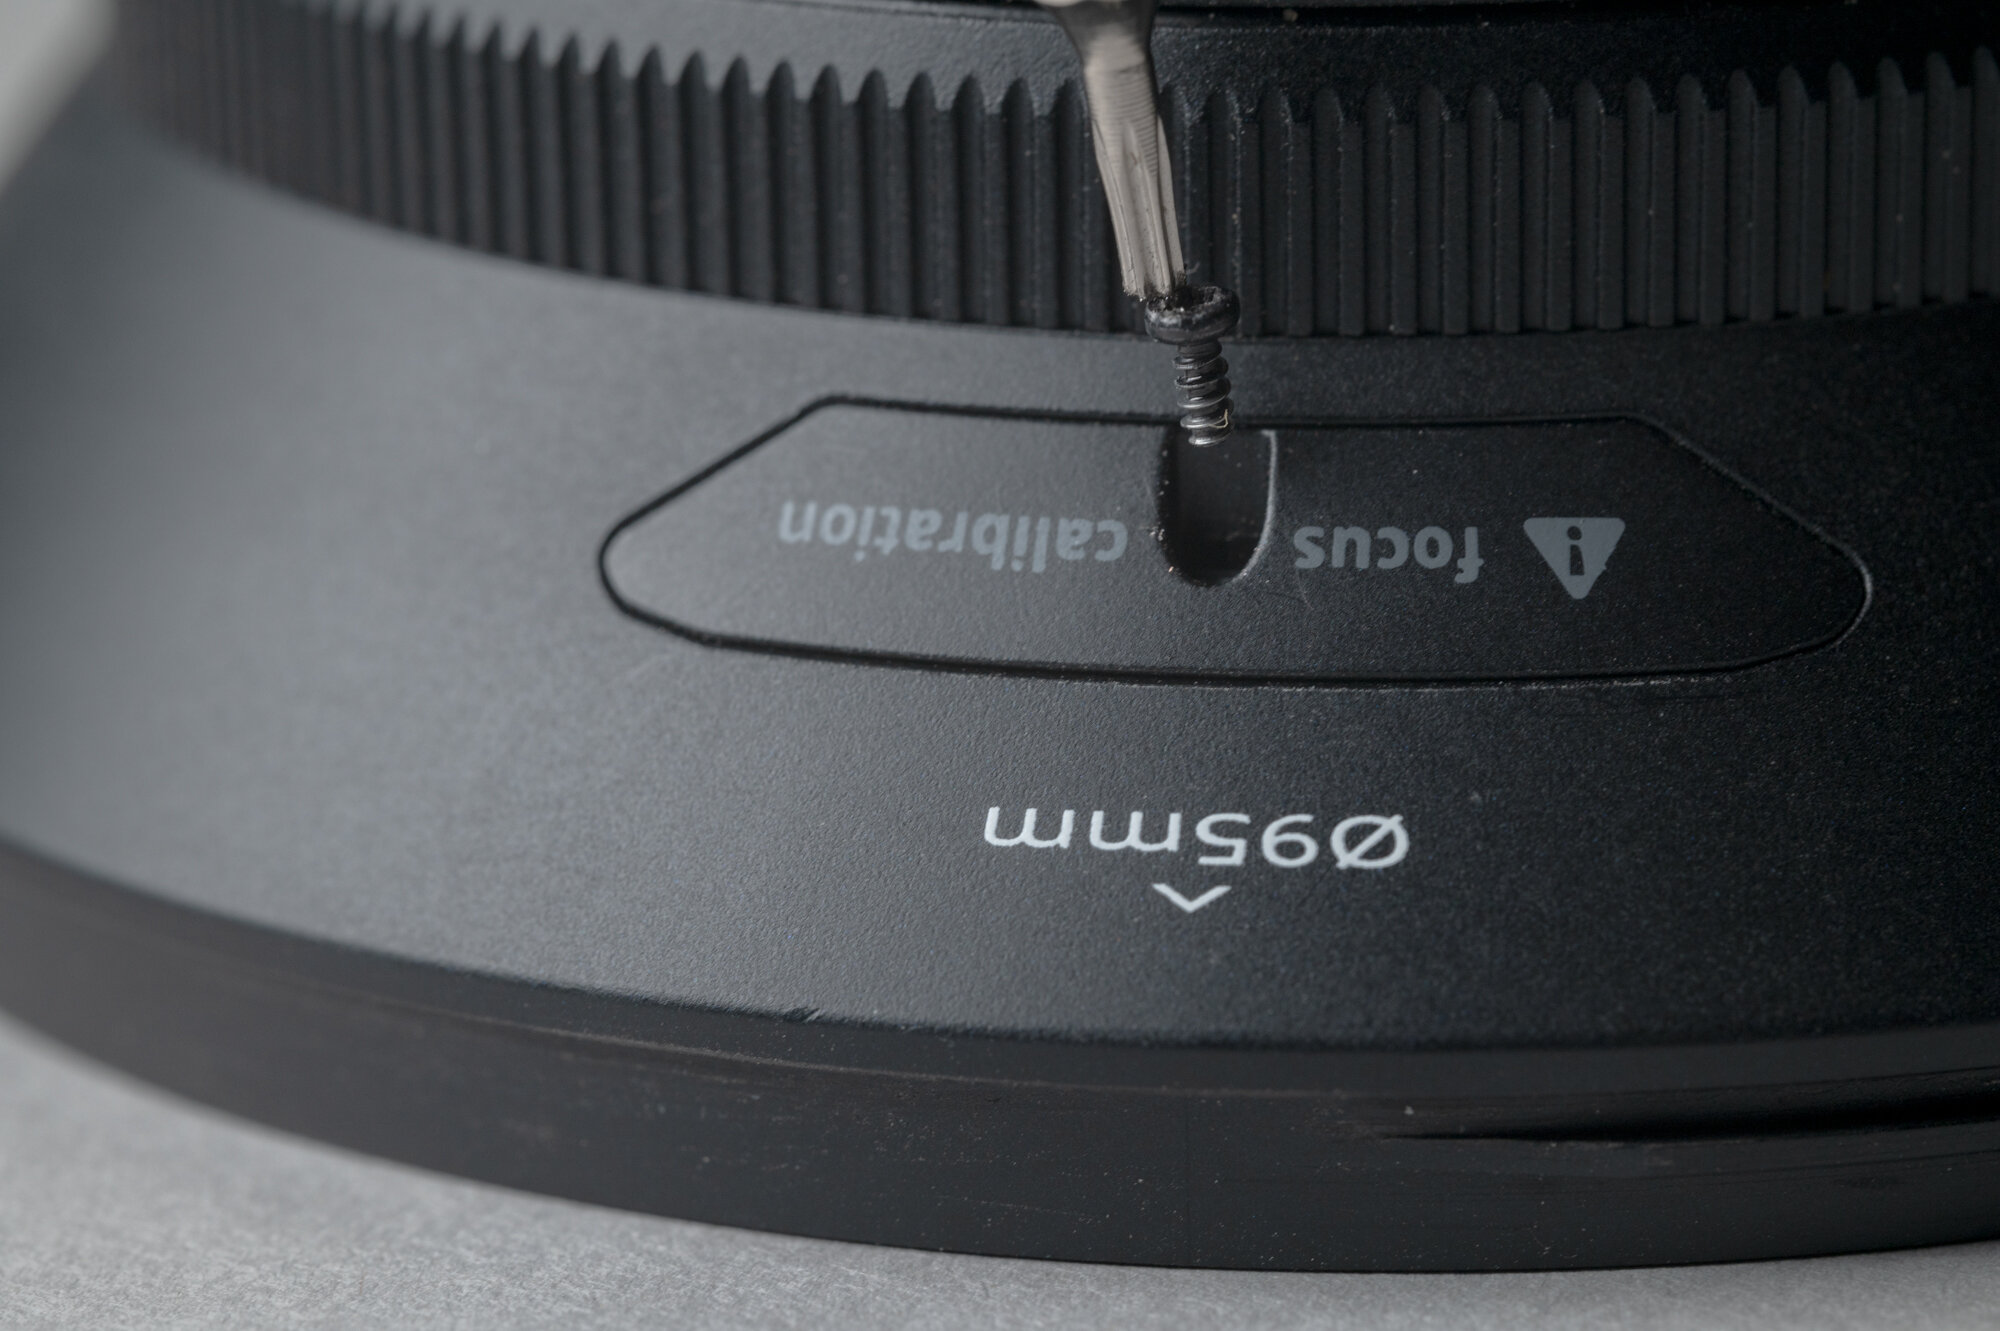
Use a Torx T6 screwdriver to open the calibration window by removing the screw entirely. Set the screw and cover aside in a safe place, such as a small plastic bin.

Carefully slide out the plastic cover labeled “focus calibration” (the head of the Torx screwdriver is convenient for lifting the cover away).

Step 4: Find the interior locking screw.

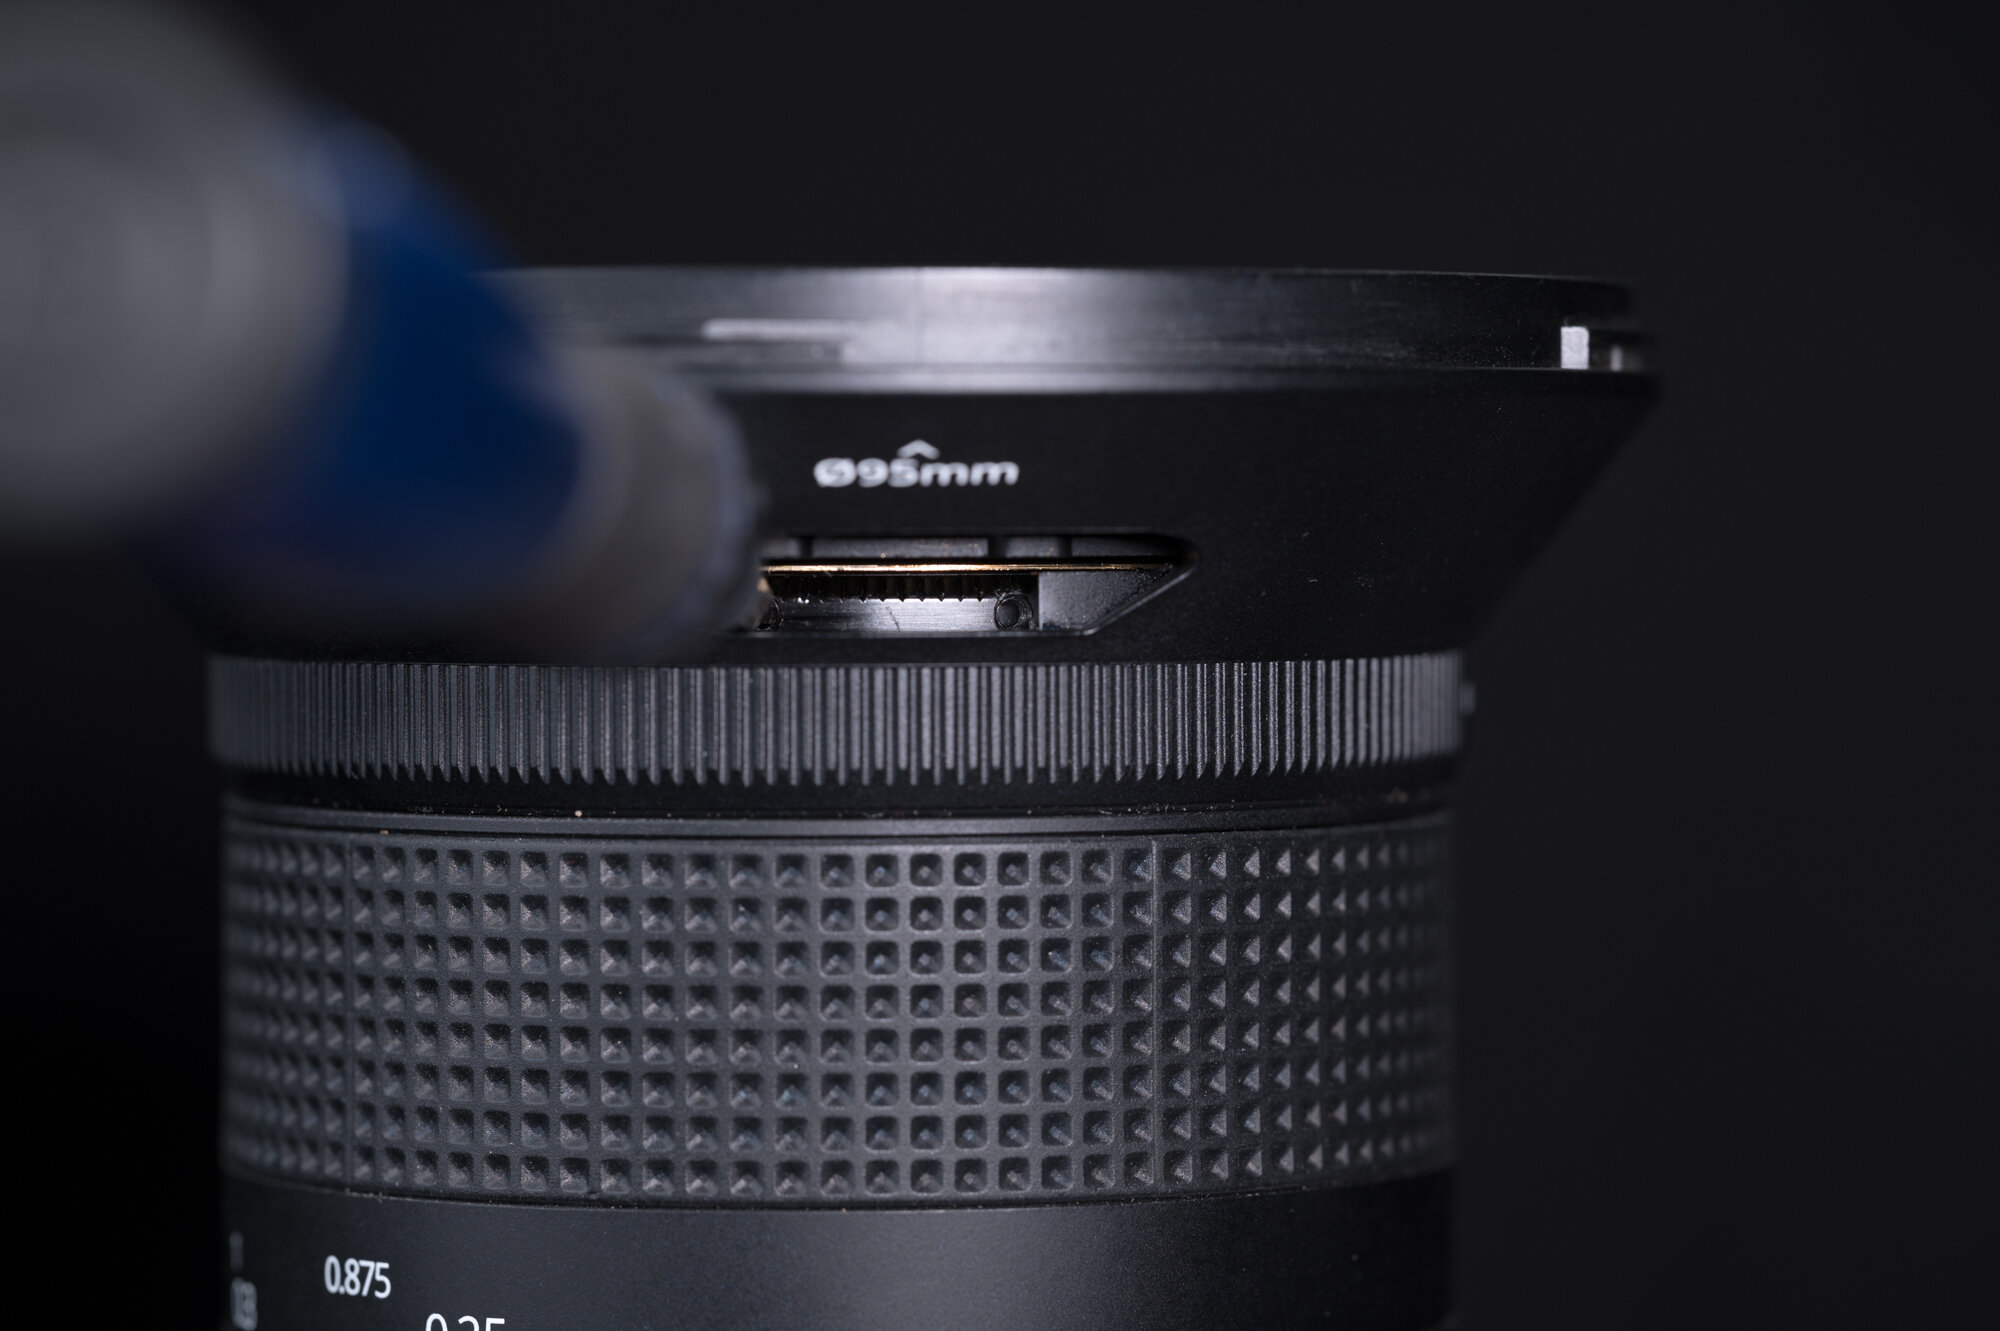
Look inside at the calibration ring, and find a slot screw. If you don’t see one, slightly turn the focus lock ring until you see the screw.

Note: You’re looking for the small slot screw, as opposed to the larger screws that keep the calibration ring in place. You absolutely do not want to unscrew the latter.

Step 5: Unlock the focus

Using a 1.5mm slotted screwdriver, fully remove the small locking screw from the calibration ring and set it aside in a safe place.

Note: This is where it’s vital you have a magnetic head on your screwdriver. You do not want to lose that screw inside the lens barrel.

Step 6: Set the lens.

Mount the lens on a camera and mount the camera vertically on a tripod. Make sure you have easy access to the calibration window.

Go outside in daylight and point the camera at a distant object (at least 36 feet away) with good contrast. Orient this object in the center of the frame and set your focus point to the exact center.

Set the aperture to the widest setting—i.e., f/2.4 for the 15mm or f/4 for the 11mm.

Step 7: Zoom in.

Activate your camera’s live view and zoom in to maximum magnification.

Step 8: Adjust the focus.

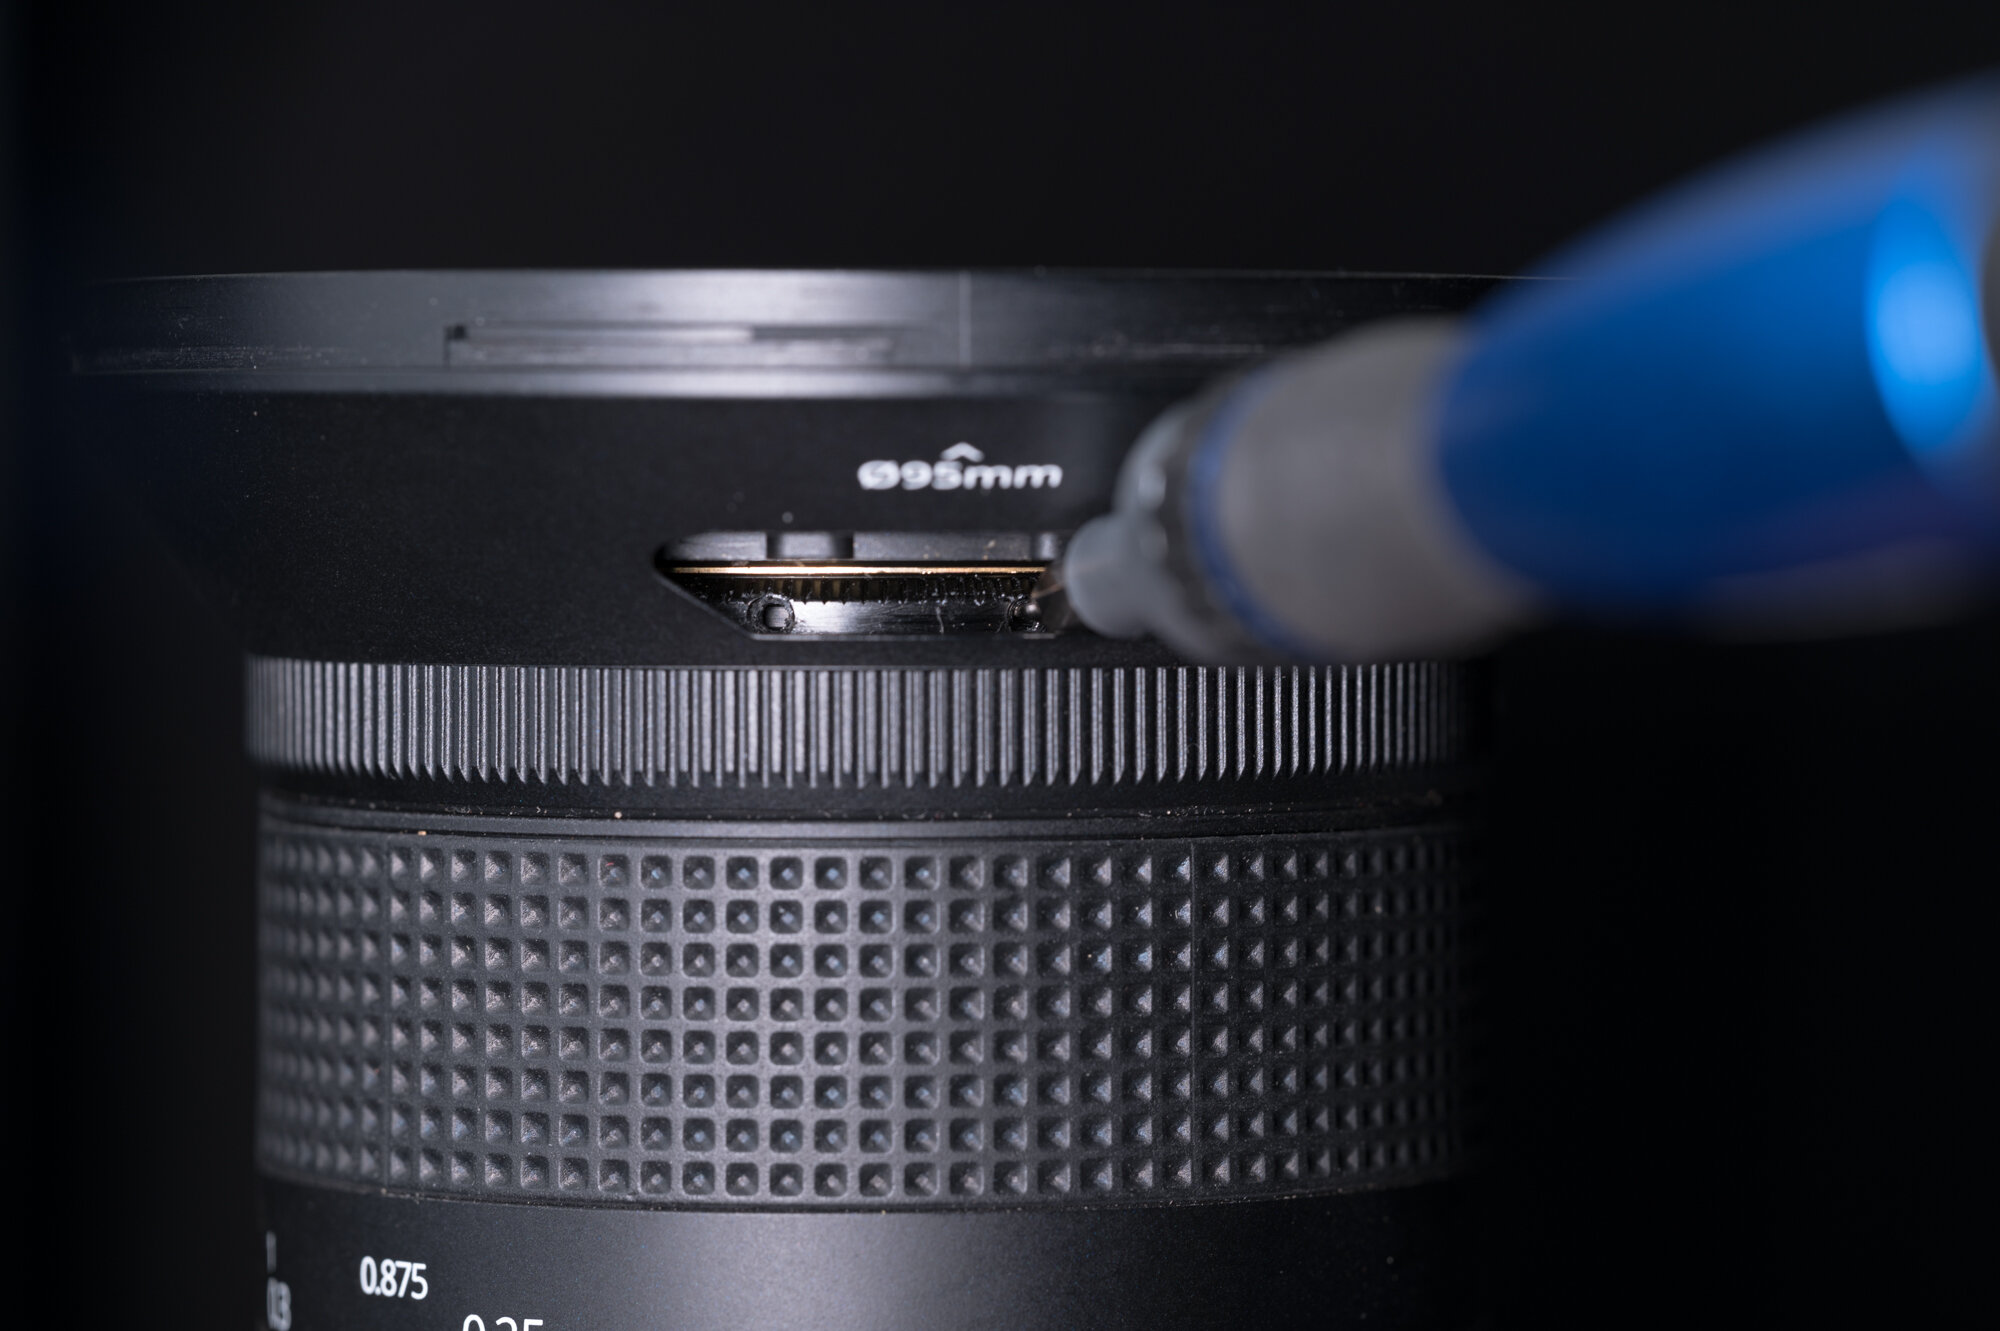
Insert the slotted screwdriver into one of the holes in the calibration ring, and then rotate the ring slowly back and forth. (As you adjust, you may need to choose a new hole.)

Keep rotating until the objects at infinity (36 feet away or further) become as sharp as possible on your rear LCD screen or when viewed in your EVF. It’s a very slow process. Take your time. If you have one, use a focusable loupe (such as the Hoodman HoodLoupe) to help you see the changing sharpness even better.

Step 9: Lock it Down.

Once focus is achieved, go back to your work area inside. Remove the lens from your camera.

Look for an open spot to thread the small locking screw back into the calibration ring. Depending on how much you adjusted the focus, that may not be the same hole you removed the screw from earlier.

Using the slotted screwdriver, carefully insert the screw and turn until firmly finger-tight. Do not over-tighten.

Step 10: Close things up.

Slide the plastic “focus calibration” cover back in, then secure it using the Torx screw and the T6 screwdriver.

Unlock the focus lock ring.

That’s it—you’re done! You now have a perfectly calibrated Irix lens for photographing amazing star images. I recommend heading out that night and shooting a few test images of the stars just to be sure.

For those who like to watch, here is Irix’s video version of this tutorial:

Matt Hill is a partner and workshop leader with National Parks at Night. See more about his photography, art, workshops and writing at MattHillArt.com. Follow Matt on Twitter Instagram Facebook.

UPCOMING WORKSHOPS FROM NATIONAL PARKS AT NIGHT

/*Disables table links opening in new tab on S11 page*/