
Note: This is the first in a three-part series about creating star trails with the stacking technique. Part I, below, covers how to shoot the raw materials. Come back soon for Part II, in which Tim goes over the required post-production, followed by Part III, in which he shows how to clean up the artifacts of the technique (such as plane trails).
To learn more about night photography techniques that involve photographing with processing in mind, attend our Shoot for the Edit: Colorado workshop in September 2022!
Night photographers are fortunate to have many ways to interpret a subject. The night sky can be captured with a stunning Milky Way core, or as a deep sea of stars that register as thousands of points of light. We can illuminate the foreground to give the sky a sense of place, use filters to give the stars a fantasy look or use longer exposure times to render the stars as trails across the sky.
Star trail photos are fun to shoot, and they bend reality by dilating time in a way that humans can’t otherwise perceive. Yet, shooting star trails is rife with potential obstacles, from camera limitations to stray light and more.
In a series of blog posts that starts today, I’ll show you how to create star trails by using a special technique that works around those potential problems: star stacking. In this first post I’ll discuss how to shoot for star stacking, in the next post I’ll cover how to process the images, and then in a third post I’ll teach how to rid your stacks of plane trails and other artifacts of the process.
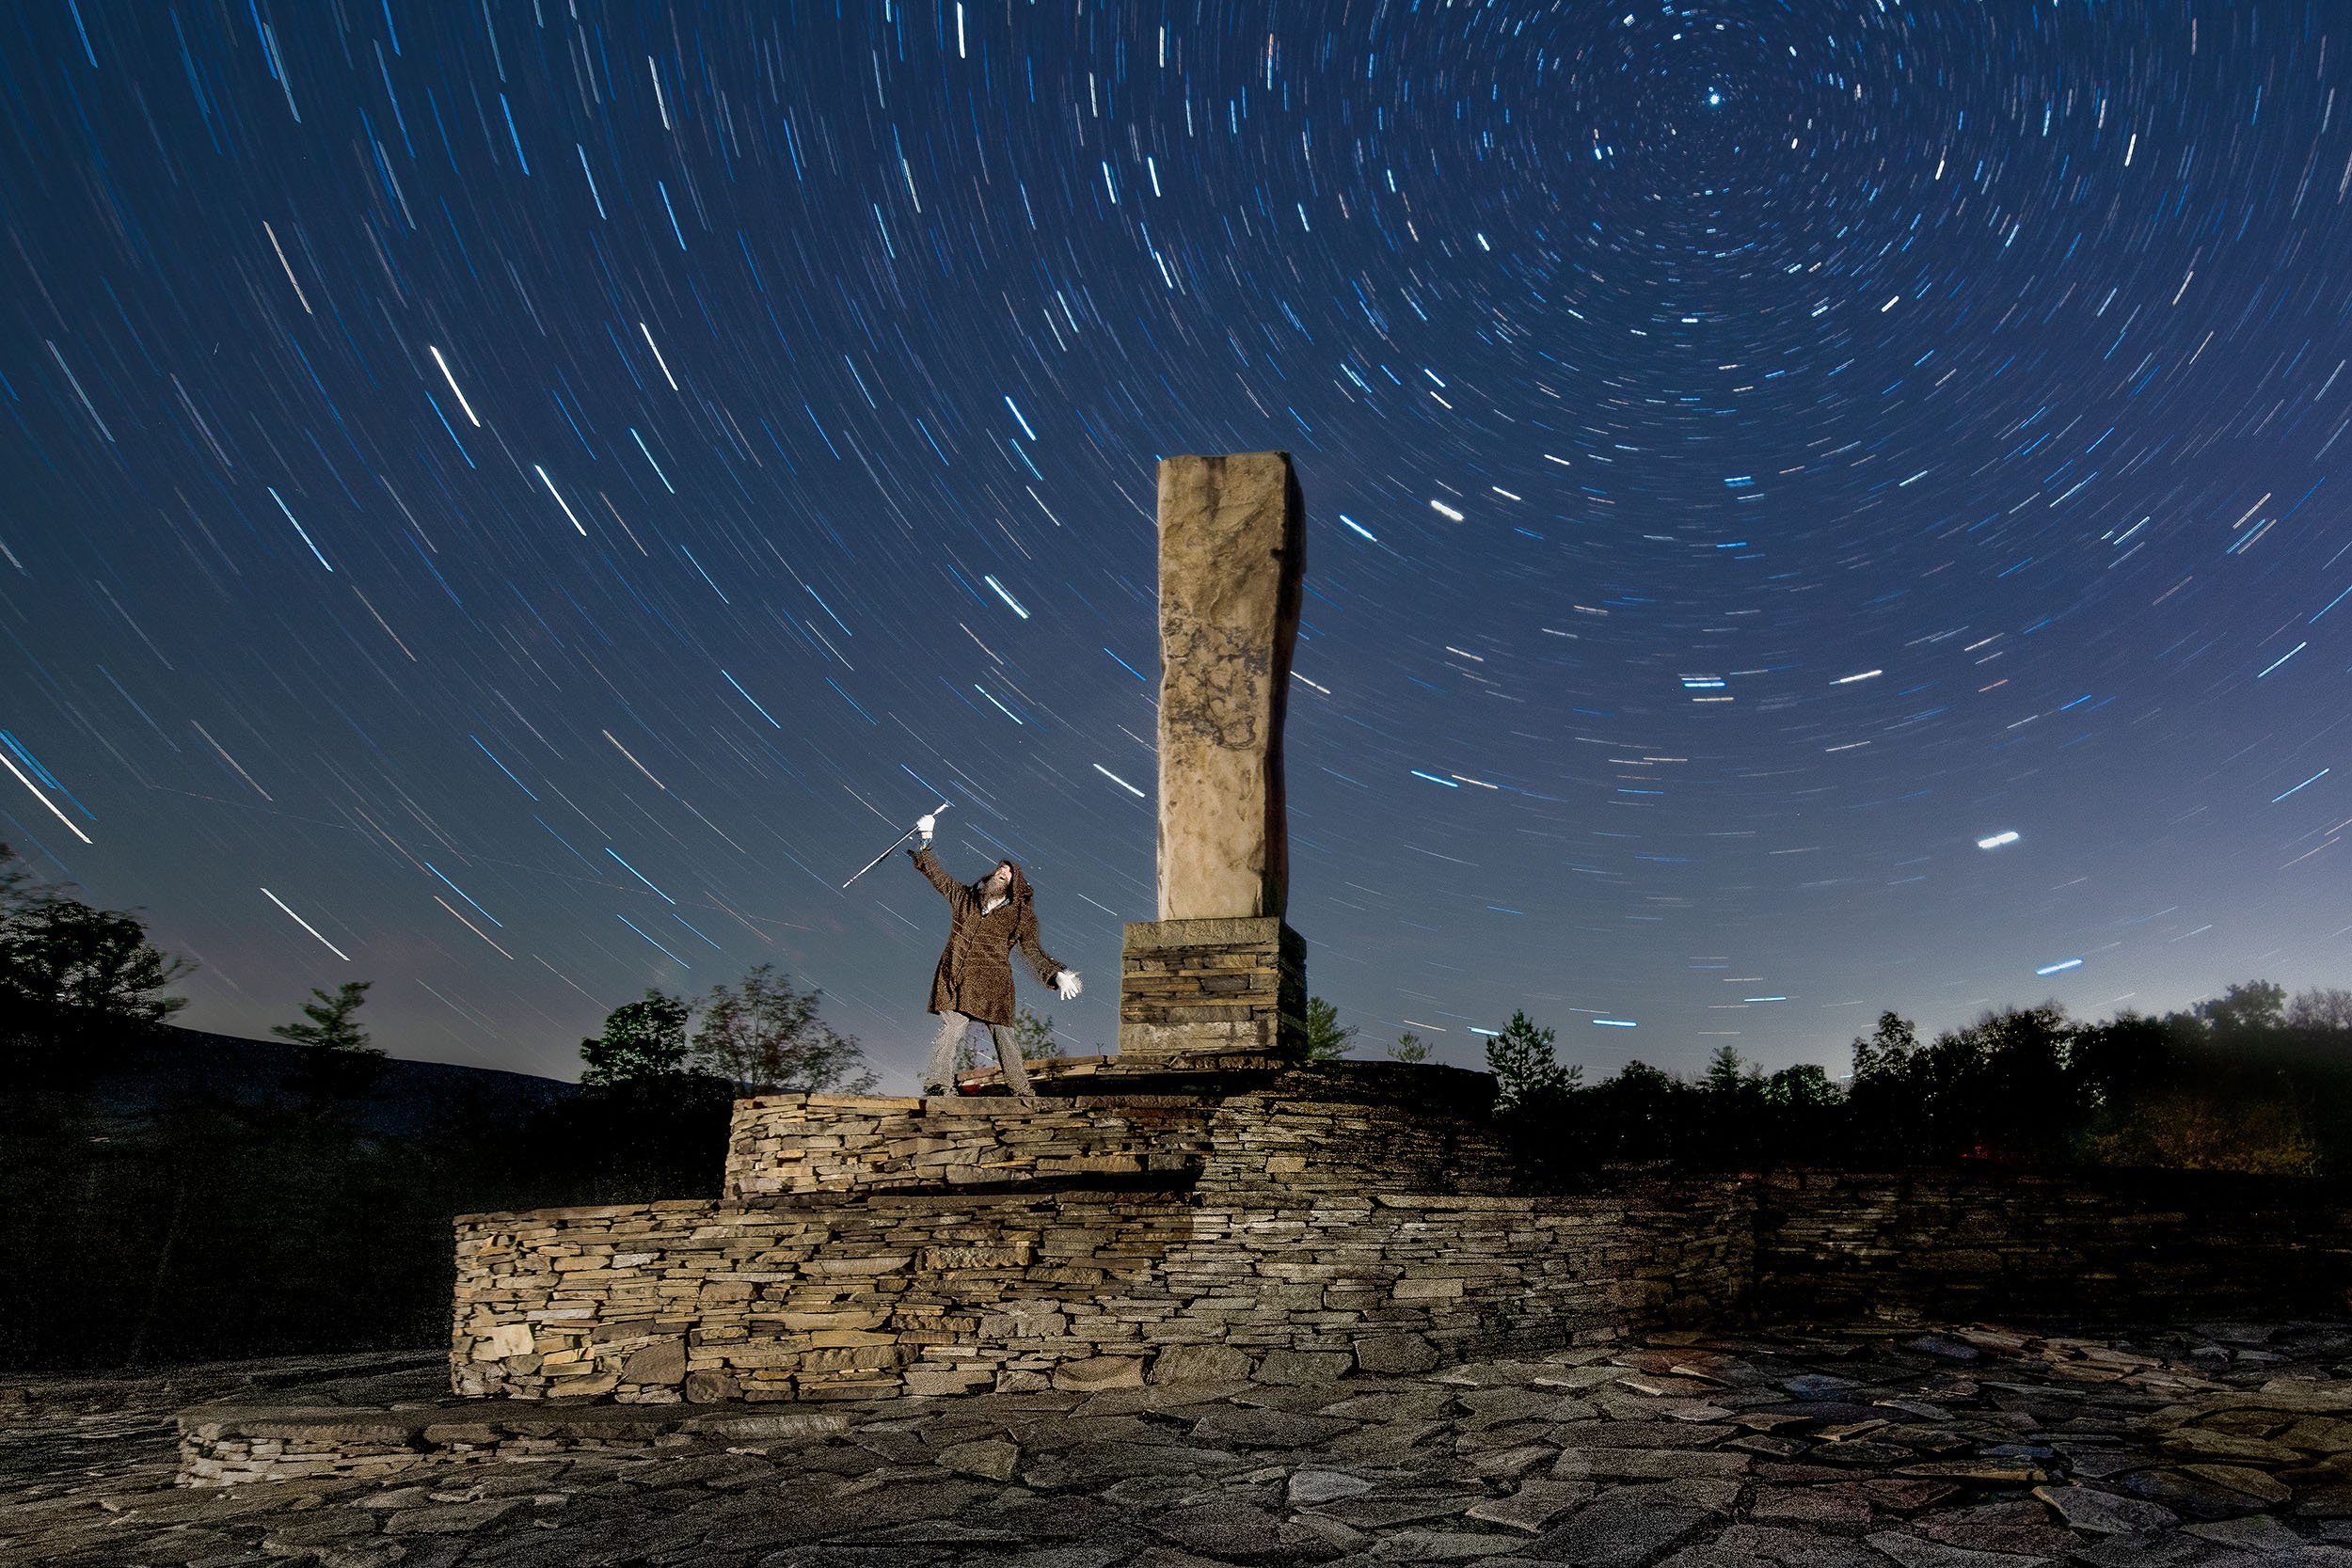
Woodstock, New York. Nikon D850 with a Nikon 14-24mm f/2.8 lens. 3 frames shot at 25 seconds, f/4, ISO 100, stacked in Photoshop.
Why to Stack
There are two primary methods of creating star trails: capturing one long exposure or capturing many short exposures and stacking them together in Photoshop or other similar programs. The latter involves more post-production work, so why would we choose that? Let’s take a look at the pros and cons of each method:
One Long Exposure
Advantages:
No need for post-processing to create the star trails. All the trails are in the one image.
No fussing with a complicated intervalometer. Simply plug in a cable release, set your camera to Bulb, press and lock your cable release, and mark your watch. Turn off the cable release when the time is up. Easy.
Disadvantages:
You’ll need to use Long Exposure Noise Reduction (LENR). This is the feature that we turn on when shooting very long exposures (i.e., more than a few minutes). The problem is that this setting renders most cameras unusable for twice the exposure time. Setting your camera to shoot an hourlong exposure renders your camera unusable for anything else for 2 hours!
You may not always be able to shoot long exposures when there is a lot of moonlight or artificial illumination, because all that light can blow out your exposure.
With one long exposure you risk having your image ruined by any number of lighting mishaps. Someone could walk through your scene with a flashlight. Cars could illuminate parts of the landscape you preferred to be dark. The list goes on and on.
Multiple Shorter Exposures
Advantages:
No need for LENR. (In fact, you can’t even use it, because turning on the feature would create gaps in your star trails in the final stacked image.)
It’s easier to remove unwanted lights from any individual frame, or to mask in just one clean foreground.
It can be easier to incorporate light painting into your image without the worry of ruining your entire shot. In fact, you could even shoot different takes on your light painting and mask in your favorite.
Disadvantages:
Slightly harder to set up the exposures. You’ll need to use either your camera’s built-in intervalometer or purchase a separate corded or cordless intervalometer.
It requires more time in front of the computer.

Yellowstone National Park. Nikon Z 6 with a Nikon 14-24mm f/2.8 lens. 8 frames shot at 5 minutes, f/4, ISO 400, stacked in Photoshop.
The decision to shoot one long exposure or shoot many shorter exposures and stack them together during post-processing is often a matter of circumstances rather than a simple preference. You simply can’t make superlong exposures when there is a lot of moonlight. Also, if a lot of other people are around, you’d be wise to break up the total exposure time into smaller segments just to safeguard against accidents.
All in all, shooting shorter exposures and stacking them is now the more common way of creating star trails.
Shooting Star Stacks Step by Step
Capturing the night sky can be complex, with many different considerations to create the final image, and shooting a star stack certainly doesn’t make it simpler. Here’s a basic outline of necessary steps:
Set White Balance.
Set ISO.
Determine and set aperture and shutter speed.
Turn off noise reduction.
Compose.
Focus.
Run a high ISO test.
Calculate the final exposures.
Program your intervalometer.
Shoot.
Camera Settings
With any type of photography—day or night—we need to adjust our camera’s settings to suit the situation. Figure 1 shows a good general place to start for your nighttime test shots:
Figure 1.
High ISO Test Shots
Once your camera is set, you have a composition and you’ve focused your stars (see Chris Nicholson’s great post “8 Ways to Focus in the Dark”), it’s time to make some test exposures. The test exposures will help you fine-tune your composition and ensure your stars are sharp. We run these tests at high ISOs so that we can run them faster—we don’t want to waste time running tests that are 5 minutes each!
It’s easiest to start with a shutter speed that will render the stars as dots rather than dashes. This will help you determine if the stars are actually sharp. (It will also render a usable star point or Milky Way shot, so you’ll have that in the bag too!)
Calculating the proper shutter speed is best done using the night photographer’s best friend, PhotoPills. Open the Spot Stars pill (Figure 2). First, near the top right, choose the camera you’re using. (You can set the default in Settings, which is a great shortcut if you use PhotoPills a lot.) Then input your focal length and aperture.
Figure 2.
Figure 3.
PhotoPills will make its calculations and supply you with an ideal shutter speed according to the NPF Rule. This will be the maximum time you can open your shutter and still keep your stars as dots rather than dashes. For example, with my Nikon Z 6II and a 14mm lens, the NPF Rule tells me that I shouldn’t shoot any longer than 18.48 seconds (Figure 3). For the purpose of these test shots, I would round up to 20 seconds. (But if I was shooting for the Milky Way, I would round down to 15 seconds.)
At this point, you can fire a test shot. Zoom in on your LCD to ensure your stars are sharp.
Once your test exposures have determined that you have good focus, you no longer have to adhere to the NPF rule—after all, our eventual goal is to get those stars to trail. If test shots reveal sharp stars but an underexposed image, then increase your shutter speed since, again, trailing stars are your goal anyway.
Calculating Shutter Speed
Our aim is to star-stack, but we need to know how long in total we want to shoot. It’s best to start by figuring what one long exposure would be, and then work back to break it up into individual exposures.
Let’s assume the camera is now set to 30 seconds, f/2.8, ISO 6400. Let’s turn those points into some trails. To do that we’ll need to increase the shutter speed, and to compensate we’ll lower the ISO.
The Six-Stop Rule (Figure 4) is an easy way to make these changes. This rule states that for a given exposure, the amount of time in seconds at ISO 6400 equals that amount of time in minutes at ISO 100. (The difference between ISO 6400 and 100 is six stops, thus the name of the rule.) In our example exposure from above, 30 seconds at ISO 6400 translates into 30 minutes at ISO 100.
Figure 4.
Of course, maybe we don’t want to keep the shutter open for 30 minutes. That’s OK. The Six-Stop Rule has given us our base long exposure, and we can work our way up from there. Again sticking with our same example exposure from above, other usable equivalent exposures can be seen in Figure 5.
So if you wanted one long exposure to capture star trails you could use 30 minutes at ISO 100. If you wanted a longer exposure, you could stop down your aperture one stop and keep your shutter open for an hour. But for this tutorial on star stacking, we want more, shorter exposures.
Figure 5.
Calculating Shutter Speed for Stacking
You’ll use the same test shot data to calculate exposures for stacking.
Our initial test exposure of was 30 seconds, f/2.8, ISO 6400. This means we could shoot any of the following combinations and get the same overall brightness:
30 minutes at ISO 100
15 minutes at ISO 200
8 minutes at ISO 400
4 minutes at ISO 800
2 minutes at ISO 1600
1 minute at ISO 3200
The shorter of those combinations by themselves would not produce very long star trails. But when we shoot a lot of frames and stack them together later, these combinations will create trails as long as we want them to be. For example, to make an hourlong trail, you could:
shoot 15 4-minute exposures at ISO 800
shoot 30 2-minute exposures at ISO 1600
shoot 60 1-minute exposure at ISO 3200
You’re really free to choose whatever combination works best to achieve your vision.
Just keep one thing in mind: Because you can’t use LENR with this technique, you’ll want to keep your shutter speed short enough to avoid long exposure noise. This limit is different for different cameras in different conditions, so it’s a good idea to test your camera to learn how it behaves. But as a benchmark, a 2-minute shutter speed is safe for many cameras in most situations. If you don’t know for sure that your shutter can stay open longer without resulting in long exposure noise, then just stick with that 2-minute limit and you should be OK.

Death Valley National Park. Nikon Z 6 with a Nikon Z 14-24mm f/2.8 lens. 53 frames shot at 30 seconds, f/2.8, ISO 160, stacked in Photoshop.
Shooting the Raw Materials
We’re finally ready to make pictures!
When shooting the series of shorter exposures, you’ll want to shoot them consecutively with as little time in between each shot as possible. To achieve this you’ll take two steps:
Turn off Long Exposure Noise Reduction. Again, LENR takes time after each exposure, which would create gaps in your stacked trails.
Program your intervalometer. (Matt Hill has an excellent video on setting up an intervalometer.) If your camera has a built-in intervalometer and you’re comfortable using it, then of course you may do that. But we find that external intervalometers are usually a little easier to use, and they don’t have the shutter-speed limitations that the internal ones do. A key is to set the interval between your frames to as short as possible in order to minimize those gaps. For most intervalometers, the minimum interval is 1 second, which is short enough to get the job done.
In terms of how many frames to shoot, that depends on how long you want your trails to be. If you want an hour and you’re shooting 5-minute exposures, then you’ll need 12 frames. In that case, you can program your intervalometer to fire 12 times. Or you can set your intervalometer’s number of shots to infinity, and just stop it manually when you feel like you have enough to work with.
Once the intervalometer is set, click the start button, sit back and enjoy the night sky.
And while you’re at it, be sure not to touch your tripod! If your tripod moves even a smidge, your frames won’t align in Photoshop later. That can be fixed, but it’s best not to cause the problem to begin with.
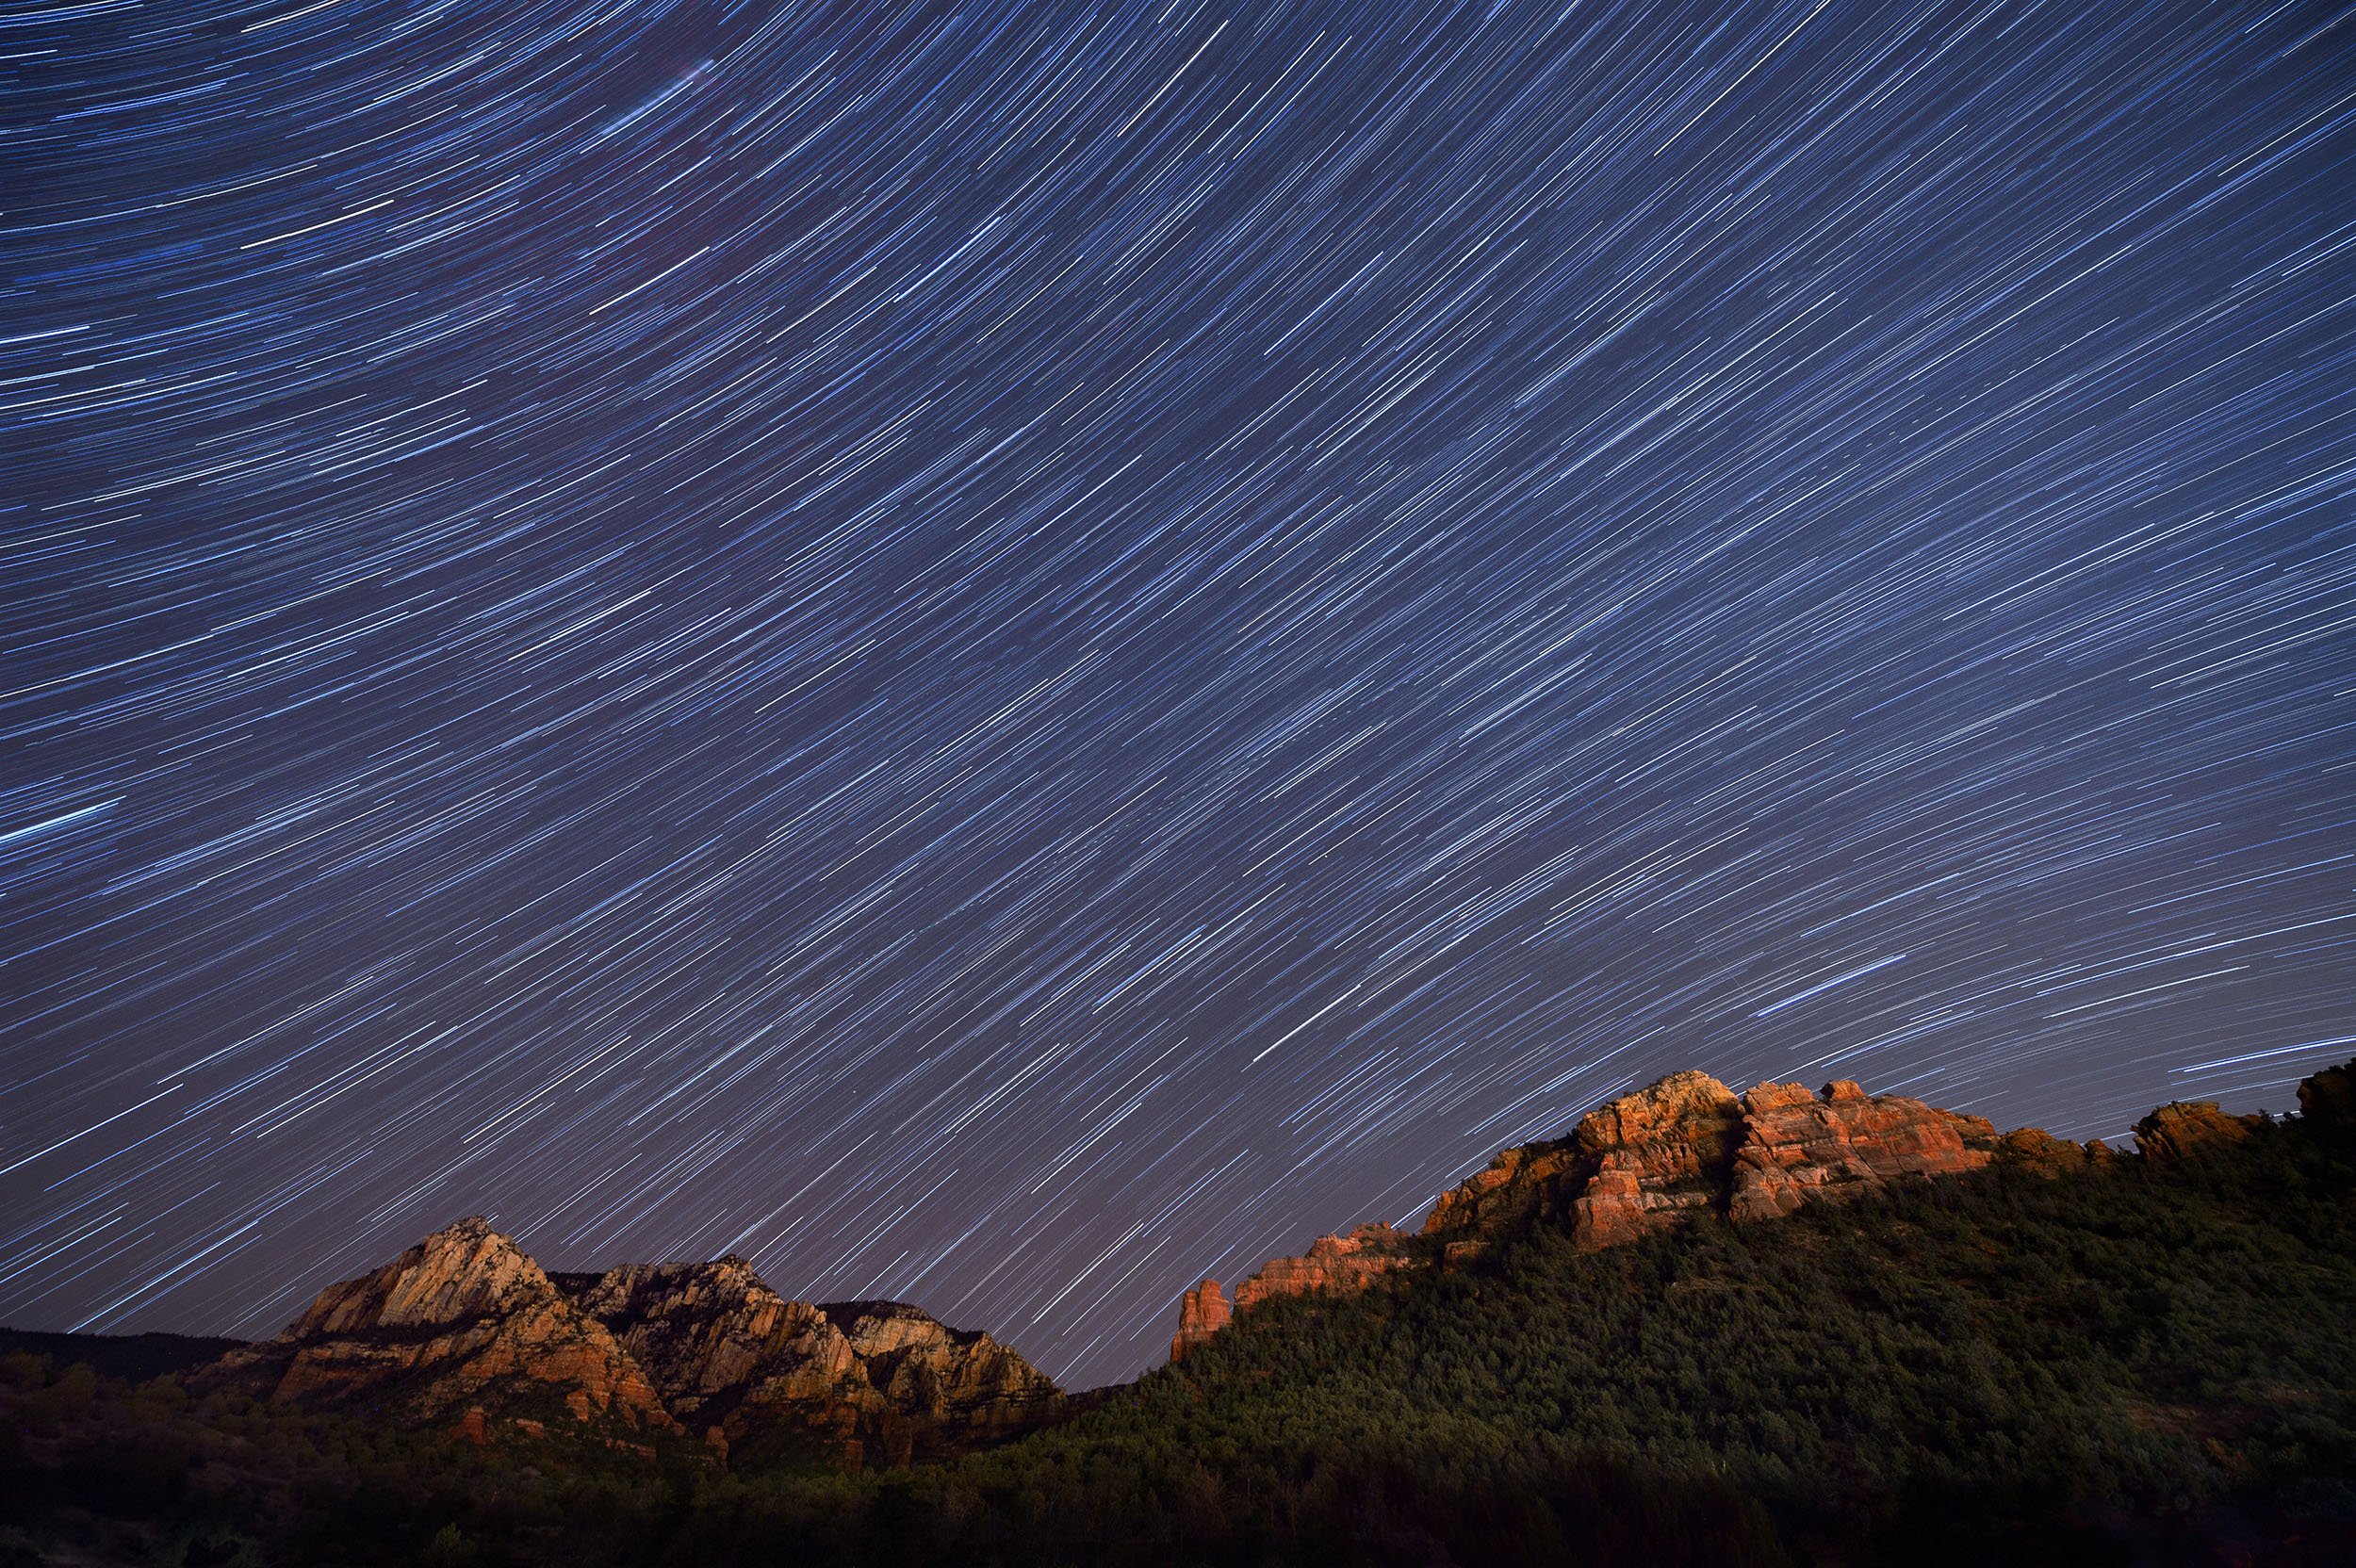
Sedona. Nikon D4s with a Nikon 14-24mm f/2.8 lens. 8 frames shot at 8 minutes, f/4, ISO 200, stacked in Photoshop.
Putting it All Together in Post-Production
Once your images are made, you’ll want to get to the computer to stack them into star trails. That’s the next step in your process, and it’s the next blog post we’ll publish. Stay tuned for Part II, coming soon.
Want to learn more about shooting for star tracking and then editing those images into trails? Join us for our Shoot for the Edit workshop in Colorado next month!


