Equipment

Guiding the Light: Our Friend Improves Luxli LED Panels

Since the moment they were created and released, we have been quite partial to the Luxli Fiddle and Viola LED light panels, for both light painting and Low-Level Lighting. We feel that Luxli panels are the tools that offer the most precise control over added lighting for the type of night photography that we do.

However, until recently, that precision was mostly about the brightness and color temperature of the illumination. Photographers also need to be able to control light diffusion and spill. Originally Luxli provided a means for the former, in the form of diffusion screens that spread their already wide light sources even wider. Then last year Luxli introduced a grid attachment that narrowed the spread of the light from the Fiddle by about half and reduced the light intensity by about a third.

The Story

Fast forward to August 2023, and our 100th workshop celebration in New York City, which was attended by Josh Fischer from Luxli, as well as our good friend Jeff McCrum.

Josh is our primary contact at Luxli, and the person who goes to bat for us when we have feature requests or suggestions. It’s a tough job, as the kind of work we do with Luxli lights is quite different from what they were originally designed for, and the features that are important for us are not even on the radar of most people who buy them. (Not many videographers use the lights at 1 percent brightness, let alone .1 percent!)

Jeff is a New Jersey-based lighting designer for Fisher Dachs Associates, one of the world’s leading theater planning and design consultants. He’s also an avid night photographer. Most of us at National Parks at Night have known him for a long time––I first met Jeff the same day that I first met Matt at Sleepy Hollow Cemetery when I was leading a workshop there, years before the birth of NPAN.

Sloss Furnaces National Historic Landmark, Birmingham, Alabama. Lit with a flashlight raked across the rear wall from camera left, as well as by three Luxli Fiddle panels with grids. The one illuminating the wheel in the lower right corner has Jeff’s tighter grid. Nikon D780 with an Olympus Zuiko 24mm f/3.5 shift lens. 60 seconds, f/11, ISO 400.

At our celebration in New York, I was chatting with Jeff when Josh came over to say hello. We talked about the Fiddle, and how much we (NPAN) appreciated the new grid, but that we had some ideas about how to improve it. I explained that we often used Cinefoil or Blackwrap to try to further tighten the beam of light, but that it wasn’t easy to achieve the desired effect.

I asked Josh if Luxli would consider making a tighter grid that narrowed the light beam even more. Josh seemed receptive to the idea, and said he would share our suggestion with the engineers. Encouraged, I mentioned another issue we’ve experienced with the fiddle: the power switch being inadvertently activated in the camera bag, which not only leads to unexpected dead batteries but is also a potential safety issue due to heat buildup.

I didn’t give the conversation much further thought until I received a mysterious package in the mail from Jeff about 5 or 6 weeks later.

Upon opening the package, I was stunned to find a redesigned Luxli Fiddle grid that addressed exactly the issue I had spoken with Josh about! It was thicker, with a deeper honeycomb grid, meaning the light beam from the Fiddle would be narrower and dimmer, both of which would be useful to night photographers. Moreover, the back side of Jeff’s grid extended to cover the edges of the light, which is a culprit of light leakage in the original grid. In short, Jeff had reverse-engineered the Luxli grid, and changed it in such a way that it was now tailored specifically for us night shooters.

Figure 1.

Figure 2.

The above examples show the light intensity and beam size with (from left to right) the Fiddle alone, the Luxli grid and the Lanceli grid. Figure 1 shows the light pointed up, and Figure 2 shows the light directed straight ahead. (Settings were the same for all images to show the light reduction as well as light distribution.)

According to Jeff, the Fiddle by itself has a 102-degree light spread. The Luxli grid reduces the light output by 23 percent and limits the light spread to 58 degrees. His version, which I’m both embarrassed and humbled to say is named the Lanceli, reduces the light output by 39 percent and brings the beam down to 36 degrees.

The loss of light is not a problem—because we work in dark conditions, we often use these LED panels at 1 percent power or less. The net effect is that with Jeff’s custom-built solution, we now have much more precise control over where the light falls, making it easier to isolate added light to a localized area or a small object in the scene. It’s another tool in the toolbox, and I’m glad to have the option to use either or both of these grids as different needs arise. As both grids are pure black, they have no impact on the color of the light.

The Lanceli grid for the Luxli Fiddle.

The Lanceli grid was not the only thing in the package! I also found a small, strangely shaped piece of plastic that solves the problem of the Fiddle switch being inadvertently turned on in transit––the Luxli Switch Protector! This cleverly designed little gadget attaches securely and unobtrusively over the switch to ensure that it doesn’t get accidentally activated. Not only that, but it is made of glow-in-the-dark material, making it easy to find at the end of the night when you are packing up to go home.

If that wasn’t enough, Jeff also designed a grid system for the Luxli Viola, called the Hex Stack. Luxli does not make a grid for the Viola, so this is an entirely new product. As the name implies, the Hex Stack can be combined in multiples to further reduce the light spill by about 20 degrees per piece.

As with the Fiddle grid, the Hex Stack fully hides the edges of the light source by overlapping the outside of the fixture. Each piece added to the stack also decreases the intensity from the original output by about one stop. The Hex Stack is held solidly in place by sliding into a slot in the panel itself from either side.

Lit with three Luxli Fiddle panels with grids. The one illuminating the round tank end in the lower center has Jeff’s tighter grid. Nikon D780 with an Olympus Zuiko 24mm f/3.5 shift lens. 60 seconds, f/11, ISO 400.

Lit with two Luxli Fiddle panels. The one illuminating the wheel has Jeff’s tighter grid, and the one lighting the ground is unmodified. Nikon D780 with an Olympus Zuiko 24mm f/3.5 shift lens. 30 seconds, f/11, ISO 400.

Jeff was pretty nonchalant about the effort that he must have put into creating these tools, but they are incredibly well designed, durable and super-functional. Grids have been used to modify the light on studio strobes for decades, but creating one for an LED light unit that has over 100 individual emitters is a couple of orders of magnitude more complex. Each cell in the grid has to align precisely over an emitter in order to maximize both the effect and the output. All of these tools are made with a 3D printer using non-toxic PLA plastic.

Despite the name of the grid, Jeff didn’t make these tools for just my benefit. He’s sharing them with the night photography world! You can purchase the Lanceli (comes with a Fiddle Switch Protector) or the Hex Stack from Jeff’s website.

Much Ado About Lighting

Why is this a big deal, you might ask? Back in the day, when most light painting was done with a handheld flashlight––often one with a narrow, focused beam–– it was relatively easy to direct the light exactly where it was needed, even onto a small area in the scene. The challenge with flashlights is getting consistent, repeatable results, and not being able to see the cumulative effect of your lighting in real time. With Low-Level Lighting, using LED panels in fixed positions, both of those problems are solved, but the wider spread of the light beam makes it more difficult to get the light exactly where it’s needed, and nowhere else.

This image takes advantage of two Luxli grids to control the warm light in the background and the cool light in the middle ground, and the tighter focus of the Lanceli grids on the left and right sides of the gear and framework that make up the focal point of the image. Nikon D780 with a Nikon 24-120mm f/4G lens at 50mm. 2 minutes, f/7.1, ISO 800.

Honeycomb grids, snoots and barn doors are all light modifiers designed for that purpose. We are fortunate to have the Luxli-designed grid that narrows the light beam by about 50 percent, and now the Lanceli grid that reduces the beam width to about one-third of the original width. The Hex Stack for the Viola is the only grid available for that light, and the ability to stack multiple units makes it super versatile. I should note that it’s useful to have both versions of the Luxli grid, as well as at least two of the stackable Viola grids to meet the needs of the situation at hand.

It’s been exciting to observe and participate in the birth of a new style of lighting over the last few years, and truly exciting that Luxli and other companies have stepped up with groundbreaking products we can use, even if they were not designed specifically for night photographers. On top of that, we have thoughtful and creative people like Jeff working to make these tools even better.

Lance Keimig is a partner and workshop leader with National Parks at Night. He has been photographing at night for 30 years, and is the author of Night Photography and Light Painting: Finding Your Way in the Dark (Focal Press, 2015). Learn more about his images and workshops at www.thenightskye.com.

UPCOMING WORKSHOPS FROM NATIONAL PARKS AT NIGHT

Diggin' Gear: Announcing a Brand New Blog to Help Solve Your Night Photography Problems

Photographers love gear, and many photographers love talking gear. The reason isn’t a mystery. What’s in our bag are the tools we use to pursue our passion, and they are an integral component of our ability to create the work we envision.

Of course, not all gear is “necessary.” If you have a camera, a lens and a medium, then you can make photographs. And if you can make photographs, then creativity is really the only additional speed bump on the road to photographs that are fulfilling to craft.

Still, many other pieces of gear ease the process in different ways, and that’s advantageous. It’s not because we’re lazy and need the process to be faster—it’s because easing some of the challenging aspects of photography frees up time and energy that can be better used on expanding that creativity.

In short, good gear solves problems.

Between the five of us here at National Parks at Night, we’ve found a lot of gear to solve a lot of night photography problems. Every now and then we write a blog post when something disruptive comes along, such as the Nikon Z 6, or the Luxli Viola, or the Phottix Aion. But we haven’t had a space for sharing the nearly endless stream of other products we experience and adopt into our kits and workflows.

Until now!

Today we are announcing the National Parks at Night Gear Blog.

This blog will feature short posts about tools that solve night photography problems. We’ll post not on a predetermined schedule as we do with our main blog (where you are reading this), but rather whenever some cool product piques our interest. That might be once per month, or could be several times in a week.

We’re starting today, with reviews on five pieces of gear, a few of which we’ve loved for a while and a few of which we’ve discovered recently:

  1. the Coast HP7R flashlight

  2. the Focus on Stars focusing tool

  3. the Gitzo GIGT2545T Traveler Series 2 tripod

  4. the Ledlenser P6R Work flashlight

  5. the PhotoPills app

You can find them all on our:

Over the next few months we’ll give you tastes of other equipment we believe in: bags, lights, software, lenses and whatever. We’ll let you know on our social media channels every time we post something new. Then once we’ve shown you enough of what this will all be about, we’ll give you a way to opt in to subscribe to these posts too.

In the meantime, we hope you enjoy the beginning of this practically endless exploration of the gear we love to work with.

Chris Nicholson is a partner and workshop leader with National Parks at Night, and author of Photographing National Parks (Sidelight Books, 2015). Learn more about national parks as photography destinations, subscribe to Chris' free e-newsletter, and more at www.PhotographingNationalParks.com.

UPCOMING WORKSHOPS FROM NATIONAL PARKS AT NIGHT

Buzz Off! … Or, Mitigating Mosquitos While Photographing on Spring and Summer Nights

Photographing in the wilderness at night is always a wonderful experience. You’re standing under a dark sky pinpricked with starlight, breathing clean air, enjoying the soul of nature flowing through your … Ouch! … Freakin’ mosquito!

OK, I admit: Photographing in the wilderness at night is mostly a wonderful experience. One of the few downers can be those darn mosquitos, particularly in spring and summer. They buzz, they bite, they bother.

The mosquitoes in Congaree National Park can get so overwhelming that the park maintains a “Mosquito Meter” outside the visitor center.

Mosquitoes also populate some of the most amazing places to photograph at night. We surely don’t want to miss the experience of making night art in spaces such as Acadia, Yellowstone and Yosemite, right? So how can we mitigate the mosquito dilemma?

Recently I had a great opportunity to find out. In April we ran a workshop in Everglades National Park, which is home to about a bajillion of these little buggers. Fortunately we were there during mosquito low season, but in Everglades that just means their numbers are fewer, not zero. Plenty of these pesky critters buzz around at any time of year—enough to drive a night photographer to bed early, if you’re not prepared.

The Anhinga Trail in Everglades National Park is a beautiful place to photograph, night or day. But gosh yes, it has mosquitoes. Nikon D5 with a Nikon 24-70mm f/2.8 lens, boardwalk light painted with a Luxli Viola. 30 seconds, f/2.8, ISO 2000.

In the weeks ahead of the Everglades trip, I gathered what research told me were the best ways to keep mosquitos from ruining an outdoor experience. I brought them all with me, intending to test each in the marshy wilds of deep-south Florida.

The risks were great. Any product failure meant certain misery.

Here’s what I learned:

DEET

Ah, DEET. (Better known as diethyltoluamide.) This stuff has a dichotomous reputation. Many people use it as their go-to defense, but many others worry and wonder, “What does DEET kill first, the mosquito or me?” (To be fair, the EPA says not to worry about it.) Those in the middle make the compromise of using products with only a mild percentage of DEET, but the problem therein is that only more robust concentrations are effective for extended periods.

DEET.jpg

A few of our Everglades workshop attendees used DEET and they didn’t have much trouble with mosquitos. Good for them. Great for them! But I’m in that group that prefers not to put this stuff on. I don’t like using bug spray anyway—don’t like the smell, don’t like having it on my hands, don’t like applying chemicals to my skin. So DEET wasn’t even an option for me. Ideally I don’t want a mosquito barrier on my skin, I want a barrier that keeps mosquitos from getting to my skin.

If you’re in the camp of people who don’t mind using DEET, that’s fine, no judgement here. But let me leave you with this warning: After applying it to your body, wash your hands well. You don’t want that stuff getting on your camera gear. It can eat it.

Picaridin

Lance Keimig was running the Everglades workshop with me, and before traveling to Florida he read about picaridin. He liked the idea of the product because while it is a synthetic, it’s a synthetic version of a natural substance. It’s also purportedly effective in lower concentrations than DEET, repels a wider range of pests, is neither greasy nor odorous, and won’t damage plastics (i.e., pieces of photo gear). He liked the idea of picaridin so much that we went to four or five stores to try to find it, finally scoring a bottle at a Bass Pro Shops an hour from the park.

Lance used picaridin throughout the week, and he found it mostly effective—not amazing, but effective enough to keep using it. He was a little leery of the list of warnings accompanying the directions: Don’t get it near your eyes, nor on your lips, nor much on your ears, nor on cuts or skin irritations. Not exactly the worry-free product we’d hoped for, and not viable as whole-body protection, but Lance remained relatively uneaten.

Off Botanicals

I first bought Off Botanicals plant-based wipes while in Badlands National Park with Matt in 2019. We were night-shooting there during a particularly bad mosquito year, and these wipes were the most skin-friendly option I was willing to try. They worked just OK in Badlands, and for only an hour or so. In Everglades they performed the same. Mosquitos stayed away awhile, but Off Botanicals lost its effectiveness way closer to the beginning of a night shoot than to the end.

Badlands National Park can get a good number of summer storms, and with that rain can come massive mosquito problems, as Matt and I experienced in 2019. Nikon D5 with a Nikon 24-70mm f/2.8 lens. 1.5 minutes, f/8, ISO 800.

Badlands National Park can get a good number of summer storms, and with that rain can come massive mosquito problems, as Matt and I experienced in 2019. Nikon D5 with a Nikon 24-70mm f/2.8 lens. 1.5 minutes, f/8, ISO 800.

Thermacell

After a recommendation from a workshop alum and further information from credible sources, I had high hopes for Thermacell. This technology, available in devices of different sizes and shapes, forms a non-odorous cloud shield of about 15 feet in diameter, in which mosquitos can’t fly. If they try, they fall to the ground.

Thermacell’s reputation is that it’s the most effective method available for keeping mosquitos away. (The reputation is solid. I read one article about the top four mosquito repellents, and Thermacell was three of them.) Moreover, you don’t put it on your body—you put it near your body and just stay relatively close by.

But I proactively encountered a few problems that made Thermacell a nonstarter for night photography trips, at least for me:

1. You have to fuel up locally.

You can’t fly with the butane cartridges that fuel almost all of the Thermacell models. The company recommends packing everything but the butane, then buying that when you get on location. That’s more than I want to deal with on a trip. My midlife goal is for fewer logistics, not more.

(The Radius Zone and E55 models run on a battery, but they’re also a little larger than what most people would want to travel with, and they’re best used on flat surfaces. Also, if your shoot is in driving distance, this caveat won’t apply anyway.)

2. Stay away from water.

The active ingredient, allethrin, is harmless to every living thing besides mosquitos. Except that it’s also toxic to aquatic life. Do you know what you find a lot of in the Everglades, and in many, many of the natural settings I work in? Aquatic life. Do you know what I am personally evolved from? Aquatic life. Do you know where to find mosquitos most often? Near water.

Of course, I could still use Thermacell if I’m set up more than 15 feet from shore, but when I’m working around a big body of liquid, I often want to be right next to it, whether for photographing reflections, composing an angle up the coastline, getting as close as possible to an alligator, etc.

A good example of a bad place to use Thermacell—right next to Nine Mile Pond in Everglades National Park, which is full of aquatic life, including the alligator you can see if you look closely. Nikon D5 with a Nikon 14-24mm f/2.8 lens. 22 stitched frames shot at 6 seconds, f/2.8, ISO 5000 and 20 seconds, f/2.8, ISO 5000.

3. Stay still!

Here’s the big one: The 15-foot mosquito-free bubble takes 15 minutes to create, and is stationary. If I move to a different spot, then I need to move the Thermacell unit and then wait another 15 minutes to create another bubble.

That’s not a deal breaker alone, but the above also means that if I start wandering during long exposures (as I’m wont to do), or if I traipse about while light painting, or if I meander to talk to whomever I’m photographing with, then I’ll lose my protection. (On the other hand, I could maybe charge admission for others to meander to me?)

All of that together summed to this: I never took my Thermacell paraphernalia out of its package. (And because Amazon won’t accept return shipments of butane products, I lost the $80 I spent on it. I’m thinking this Thermacell kit will become a gift for someone who has a patio, where I’m sure it will live a long, happy, mosquito-free life.)

RynoSkin

RynoSkin is a clothing base layer that mosquitos (as well as ticks, no-see-ums and other biters) purportedly can’t bite through. I bought a full outfit: shirt, pants, socks and gloves. I was lookin’ snazzy.

I was skeptical, mostly because I had read several Amazon reviews that reported mosquitos bit right through the RynoSkin layer with no problem. But I tried it anyway, and was mostly happy—just not happy enough for this to be my favorite solution.

While wearing RynoSkin, I did not have a problem with mosquito bites, despite being surrounded by them on the Anhinga Trail, a real mosquito haven of the Everglades. Not one bite in 6 hours.

However, while wearing RynoSkin, I was warm. After all, it’s a base layer, in warm weather. RynoSkin did a decent job of not being as warm as it could be, but it was still a little too warm for comfort. I was constantly aware that I was wearing it.

There’s one positive caveat, however: The gloves worked great, and I can’t think of a better solution for keeping my hands bite-free. Hands are important in photography—we use them a lot—for changing lenses, for adjusting camera settings, for picking up Nikon lens caps off the ground. With the RynoSkin gloves on, I could meddle with my gear as much as I wanted without mosquitos being able to bite the hands that would otherwise swat them. The RynoSkin gloves get a permanent home in my bag.

Netwear

A screen keeps bugs out while letting air in. It does it well for a house, and it does it well as clothing. Yes, you can buy a net to cover your whole person. You can go from snazzy to dapper in one quick-change.

I didn’t test this option, because I didn’t want to. I figured it would be effective, but I prefer couture with a tighter weave, I like quick access to pockets (where I keep my flashlights and stuff), and I’d be concerned about the net catching on plants, tripod parts, python teeth, etc. So I made neither the financial nor time investment in a net suit. One of our Everglades attendees did, and she remained comfortable, mosquito-free and happy for the whole workshop.

However, I do own, and did use, a mosquito-net head covering. There’s just no viable alternative, in my opinion. RynoSkin does make a face mask, but that doesn’t seem like a comfortable option to me, and it also leaves the skin around the eyes exposed.

The head net, on the other hand, does not uncomfortably hug my skin, allows plenty of room for breathing and keeps mosquitos from reaching my face. Two potential irritations:

  1. It tends to hang right on your nose and cheeks, which I find uncomfortable—so I wear a ball cap under it, and the brim keeps the net a few inches away from my face. (You can also buy a head net attached to a hat, but I didn’t.)

  2. A head net reduces visibility a bit. Not the best thing when you’re working at night, particularly in places where you could potentially trip over a prehistoric creature. But if there’s anything Everglades has more of than gators, it’s skeeters, so I wore the thing.

Permethrin

Ah! I found my sweet spot, and I knew it almost immediately—after I hawed and hemmed about it for a few days.

Permethrin was recommended by another workshop alum who insisted I try it—as in, she sent a bottle to me even after I said no thank you. But now? Thank you!

You spray permethrin on your clothes, allow it to dry for four hours, and then go about wearing those clothes as you normally would. You don’t need to re-treat the clothes terribly often, as the application lasts for about six washes, or about 6 weeks.

I was skeptical. I didn’t want to be spraying bug repellent on my clothes—especially bug repellent that sticks enough to survive modern laundry detergent and a super-speed spin cycle.

But the alum and my research assured me that once permethrin dries, it’s completely nontoxic to everything, including mosquitos. So … wait, what? If it’s nontoxic to mosquitoes, then how does it prevent them from biting me? Because mosquitoes won’t land on permethrin-treated fabric. And if mosquitoes won’t land, then they can’t bite. It’s the mosquito barrier to the skin that I mentioned earlier.

Permethrin is available as a spray that you use to treat everything from shirts to pants to socks to shoes. (And I suppose gloves, now that I think about it.) You probably don’t want to apply permethrin to everything you own, but you could select one or two outfits of outdoorswear, treat them, then set them aside to change into when working in mosquito territory. After half a dozen washes or weeks, repeat.

I liked the permethrin solution for these four reasons:

  1. My treated clothes didn’t smell.

  2. I didn’t need a base layer.

  3. I didn’t need to carry any extra paraphernalia.

  4. Mosquitos never landed on me.

Permethrin in its liquid form does happen to be toxic, so you’ll want to wear rubber gloves and safety glasses when applying it, and you’ll want to work in a well-ventilated space, such as outside. If you prefer not to apply it yourself, you can buy pre-treated clothing at specialized outdoors stores such as REI and Amazon. This option comes with an additional advantage: the professional application lasts about 10 times as long.

My Final Strategy

Going forward, at least for now, I’ll be employing a mix of the above solutions in my effort to photograph at night without mosquitos bites. Namely:

bloodsucker-2028617_960_720.png
  • I bought a pre-treated permethrin shirt from REI. I like how it fits, so it has become part of my travel kit when photographing in places where I might encounter mosquitoes.

  • I self-applied permethrin to my favorite hiking pants. I may treat other clothing in the future, but for now I’m happy with one mosquito-proof outfit (i.e., these pants plus the aforementioned shirt). I don’t wear it all day; I keep it in my accessories bag (with my rain gear, first aid kit, etc.) to change into when needed.

  • I wear a head net on top of a baseball cap.

  • I keep RynoSkin gloves in my bag for when the mosquitos are active enough to go after my hands.

I haven’t worried about mosquito-proofing my trail shoes because, though I know it’s possible, I’ve never been bitten through them. However, permethrin also wards off ticks, so I’ll consider treating a pair of shoes the next time I’m heading into tick country.

And that, my fellow photographers, is how I’ve been staying free of mosquito bites while out on night shoots. I hope something in here helps you do the same. If you have any further tips or strategies that work for you, feel free to share them in the comments below or on our Facebook page.

Chris Nicholson is a partner and workshop leader with National Parks at Night, and author of Photographing National Parks (Sidelight Books, 2015). Learn more about national parks as photography destinations, subscribe to Chris' free e-newsletter, and more at www.PhotographingNationalParks.com.

UPCOMING WORKSHOPS FROM NATIONAL PARKS AT NIGHT

In the Bag: Packing for a 3-Week Night Photography Trip

Note: As mentioned in the post below, Matt is about to embark on a 3-week night photography trip with Gabe. Follow their adventures via our next three installments of “NPAN Conversations” on the National Parks at Night Instagram account.


This is gonna be some trip! I’m about to leave for 3 weeks in the American southwest, where I’m co-leading a night photography workshop, attending a night photography conference, scouting some new locations, and creating some photo and video content in the field. And I need to pack for all of that in one bag.

What goes into one bag to cover all of that for one trip? Today I’m going to share that with you!

With all the uncertainties of the past year and of the next few weeks, it’s still exciting to curate and cull my gear for a trip. To be more specific about my needs, the following are my goals for the trip and the events I’m packing out for:

With all that on the plate, how do I pack smart, and how do I pack so that my bag is light enough to walk with for a few miles?

The first step: the bag. Introducing my new backpack, the Shimoda Action X50—aka “the Kitchen Sink 2.0.”

There’s a ton of surprises inside. So I made a video walk-through/breakdown of my gear and why it made the cut:

(a few hours later…)

Whew! Thanks for watching. On YouTube, there is a complete gear list with links, or you can download it here:

How are you gearing up for your next trip? What is essential? What did you leave by the wayside and why didn’t it make the cut? Let us know in the comments or on our Facebook page.

Matt Hill is a partner and workshop leader with National Parks at Night. See more about his photography, art, workshops and writing at MattHillArt.com. Follow Matt on Twitter Instagram Facebook.

UPCOMING WORKSHOPS FROM NATIONAL PARKS AT NIGHT

Resharp Your Lens: How to Calibrate Infinity Focus on the Irix 15mm and 11mm

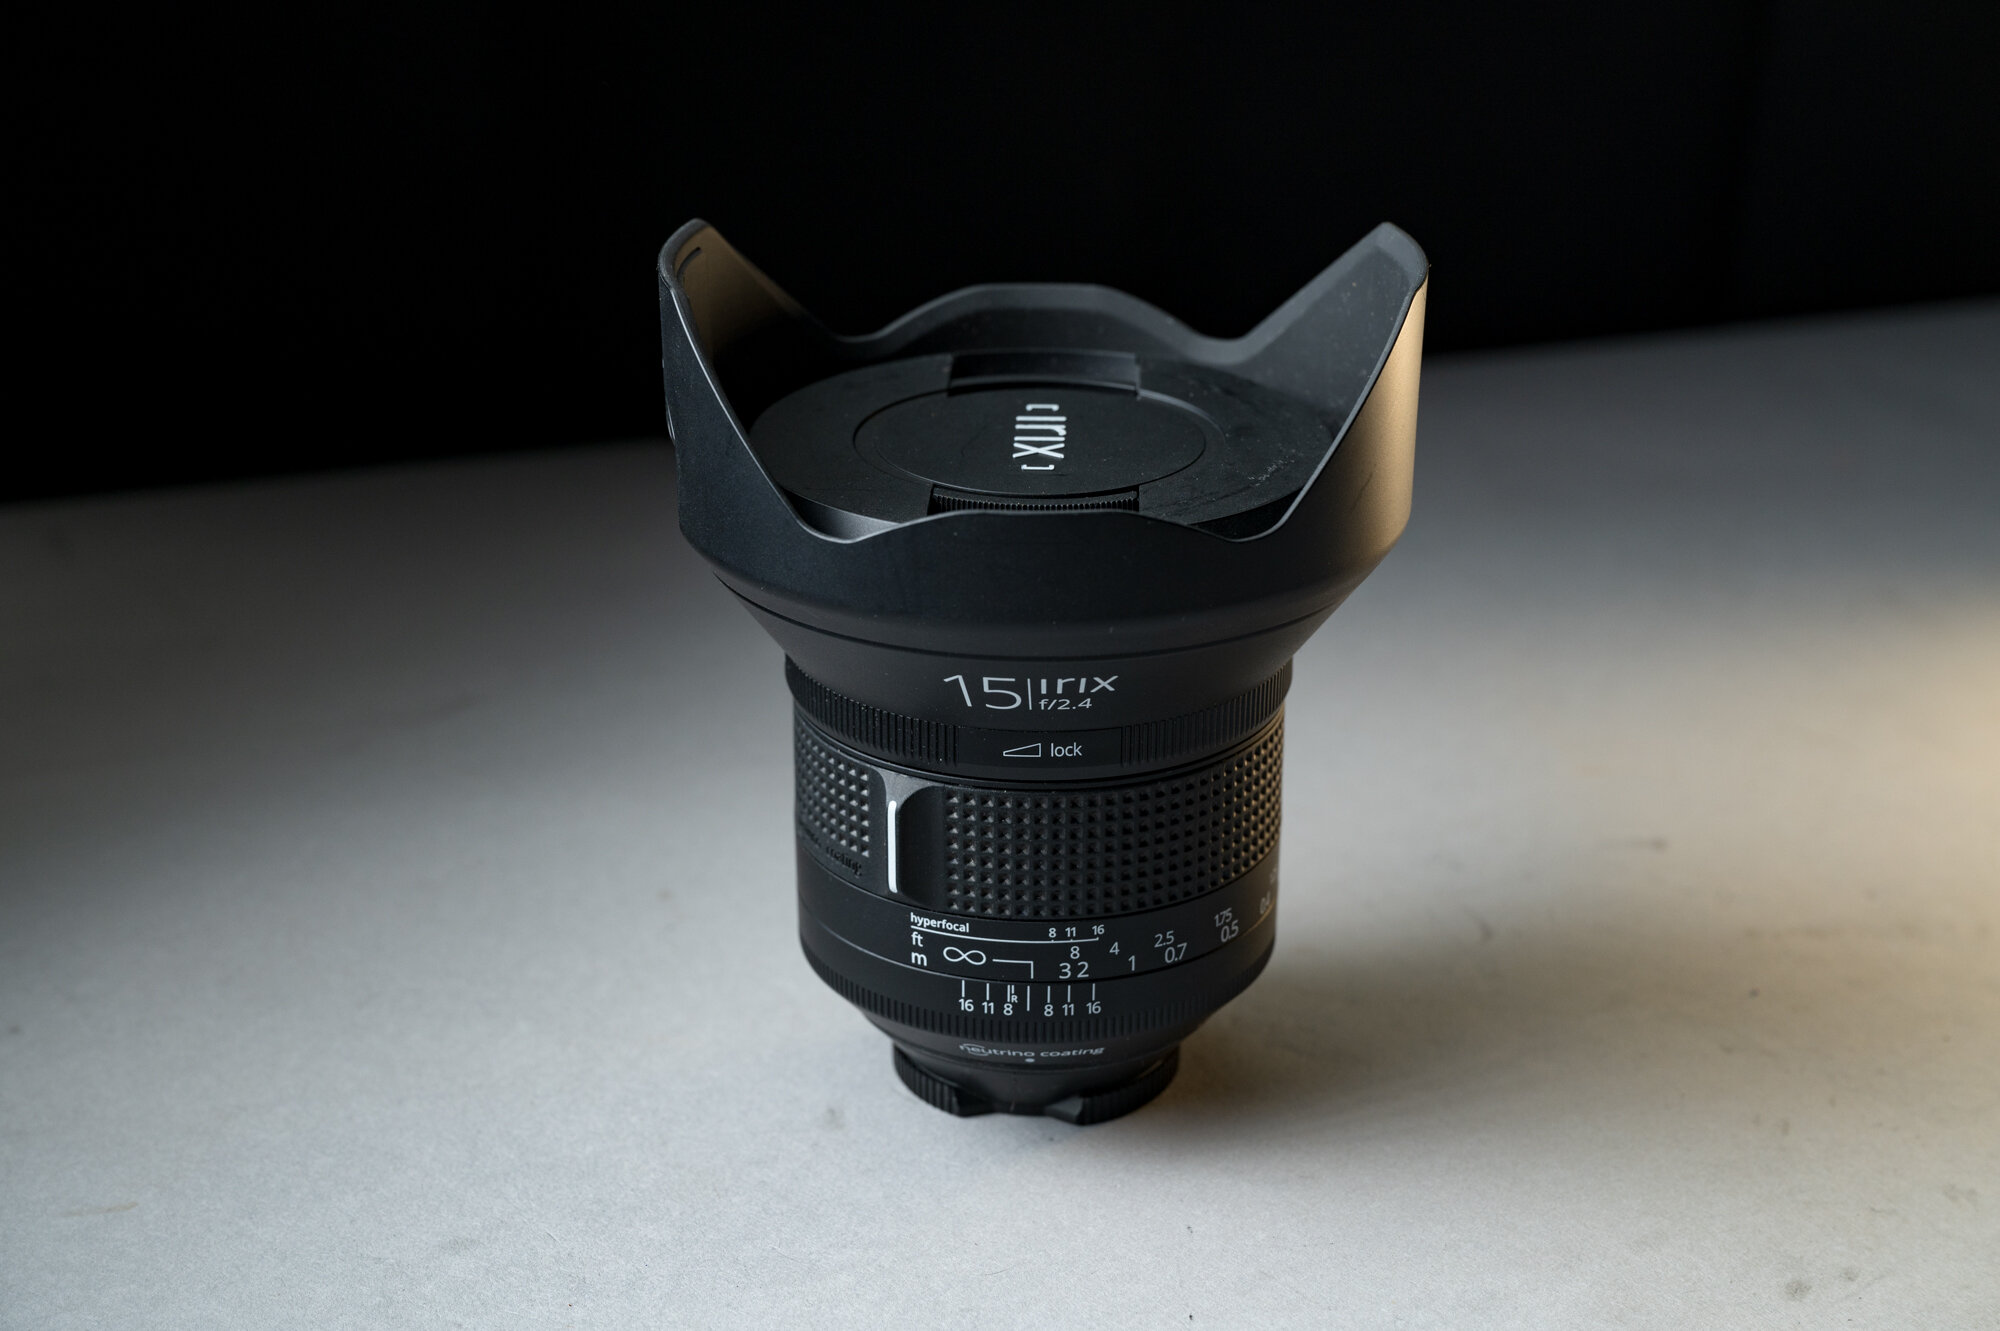
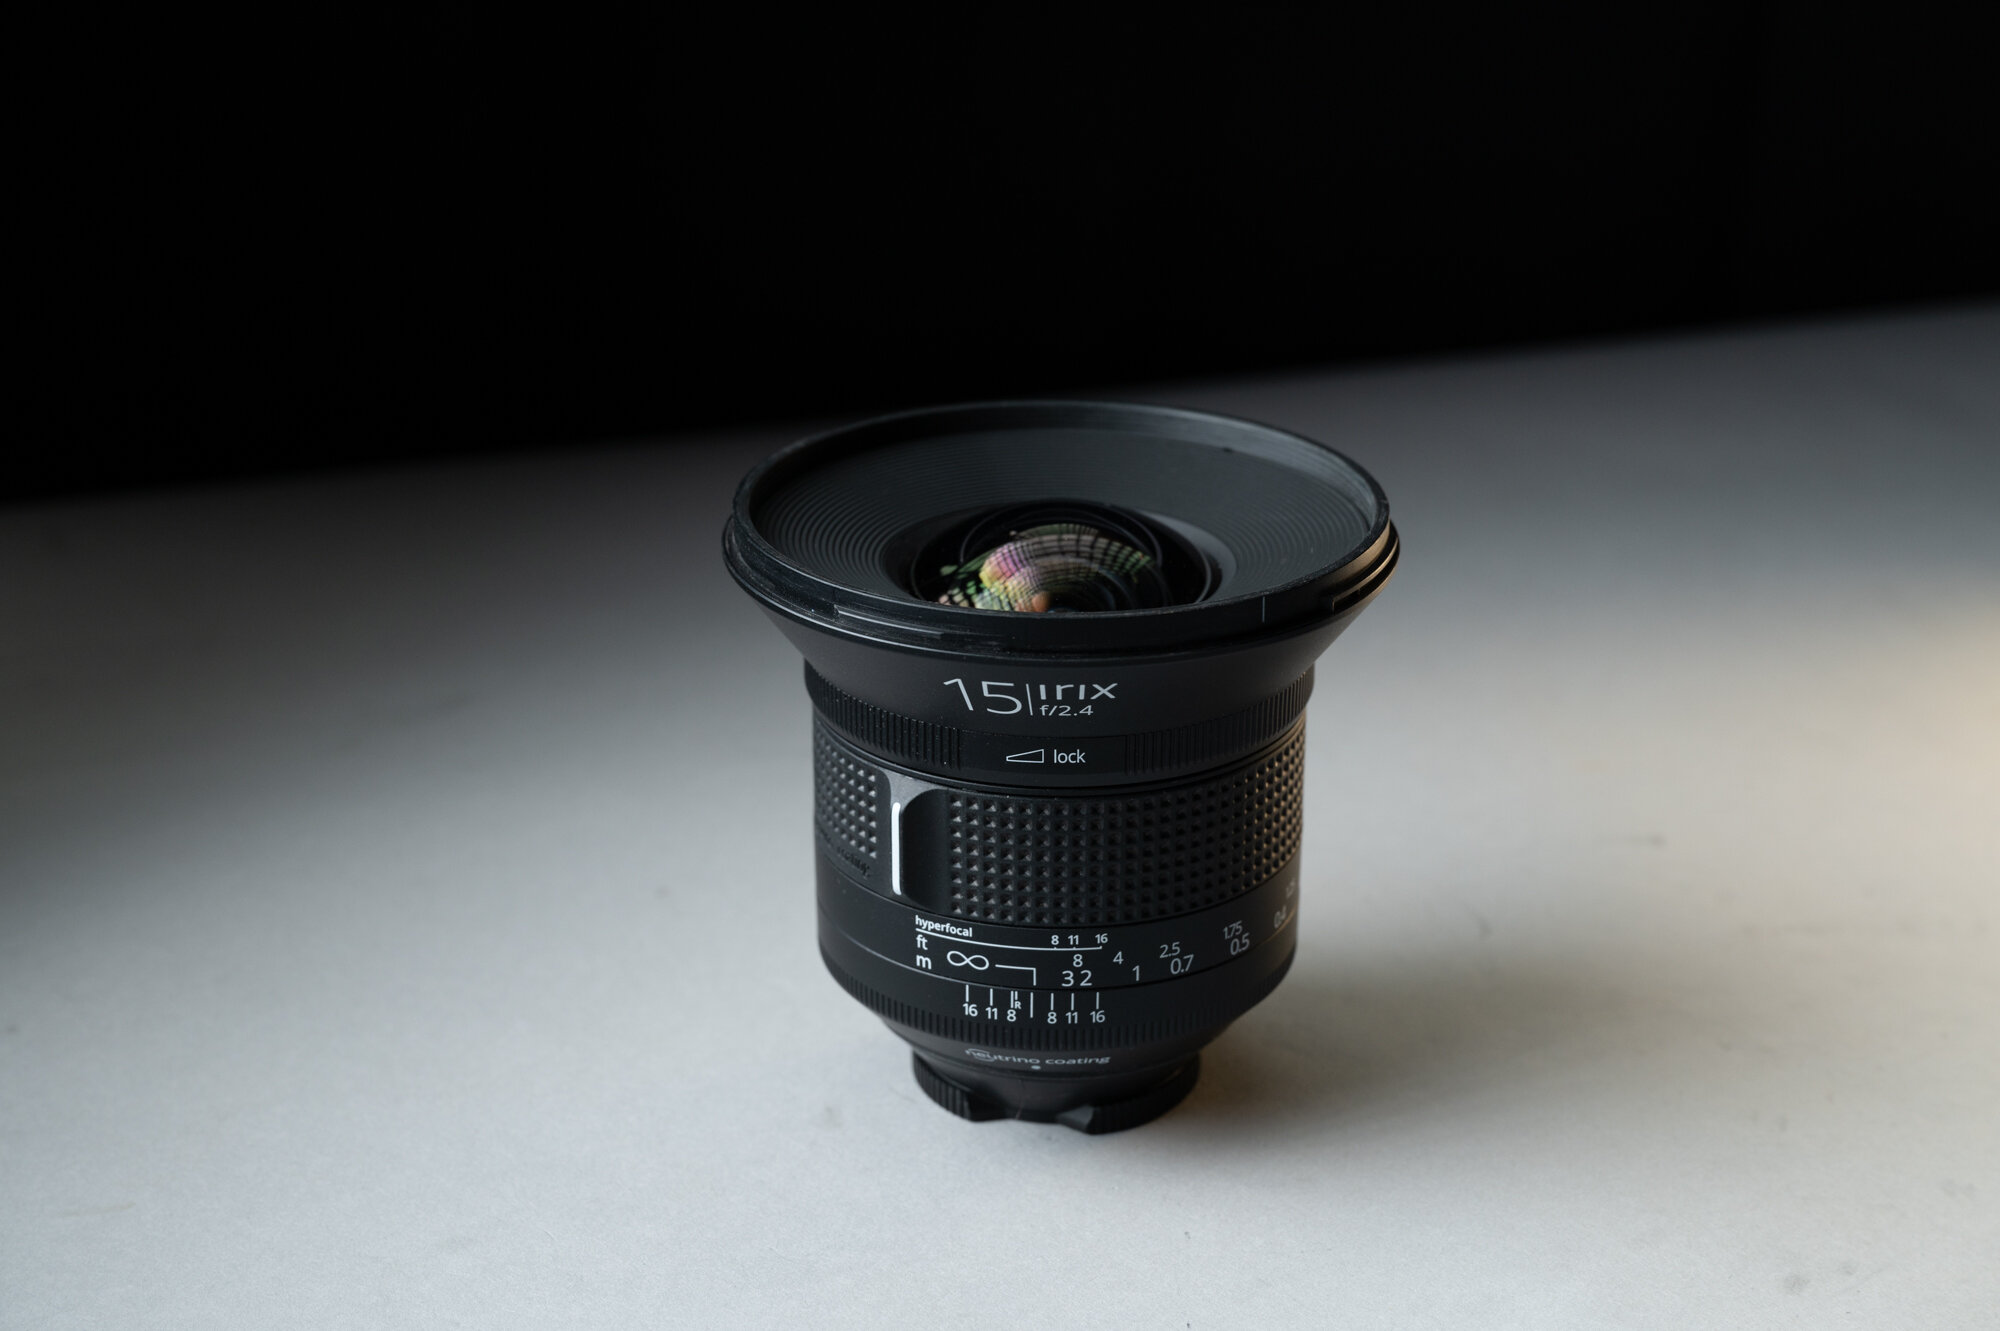
Irix 15mm and 11mm lenses are very popular among the National Parks at Night instructors and our workshop attendees. There are multiple good reasons for that, all of which have to do with sharpness, including:

  • The lenses have very little coma.

  • They’re sharp as heck.

  • The focus ring clicks into place at infinity, giving you tactile feedback for focus, which is so helpful in the dark.

Put all those together, and you pretty much have a guarantee that your stars will be sharp.

Irix has another feature that will allow you to stay sharp too: If you find that the infinity mark is off, you can calibrate it at home.

Why would you need to do this? Our experience is that the focus is perfect as received from the factory. But, as time passes and your lens gets jostled around during travels, it’s possible the focus can drift. It happens to the best of lenses. But with most brands you need to send such lenses to a repair technician, while Irix superwides enable you to self-fix this relatively quickly.

If you own an Irix 15mm f/2.4 wide angle lens or 11mm f/4.0 rectilinear wide angle lens, you can follow the instructions below to calibrate your own infinity focus.

Note: If you have really poor eyesight or your fingers aren’t nimble, you may consider sending it in to Irix instead.

The Irix Calibration Process

What you will need:

  • camera

  • tripod

  • torx T6 screwdriver with a magnetic tip

  • standard slotted 1/16-inch or 1.5mm screwdriver with a magnetic tip

  • a clean, dust-free, well-lit space with a white or very light surface

  • daylight

I used a computer repair kit I bought at a local home improvement store. If you don’t have a set like this, you can find one at B&H Photo or Amazon.

Step 1: Remove the lens hood.

You use the lens hood, right? You should, for protecting that slightly bulbous front element from bumps and scratches, if nothing else. Anyway, time to remove it, for just a few minutes.

Step 2: Lock to infinity.

As mentioned before, infinity focus is easy with an Irix. Just turn the focus ring until you feel it click into the infinity detent.

lock Itrix 15mm.jpg

Then turn the focus lock ring all the way to “lock.” I use two hands for this and I move slowly so that the focus ring doesn’t move while locking it down.

Step 3: Open the calibration window.

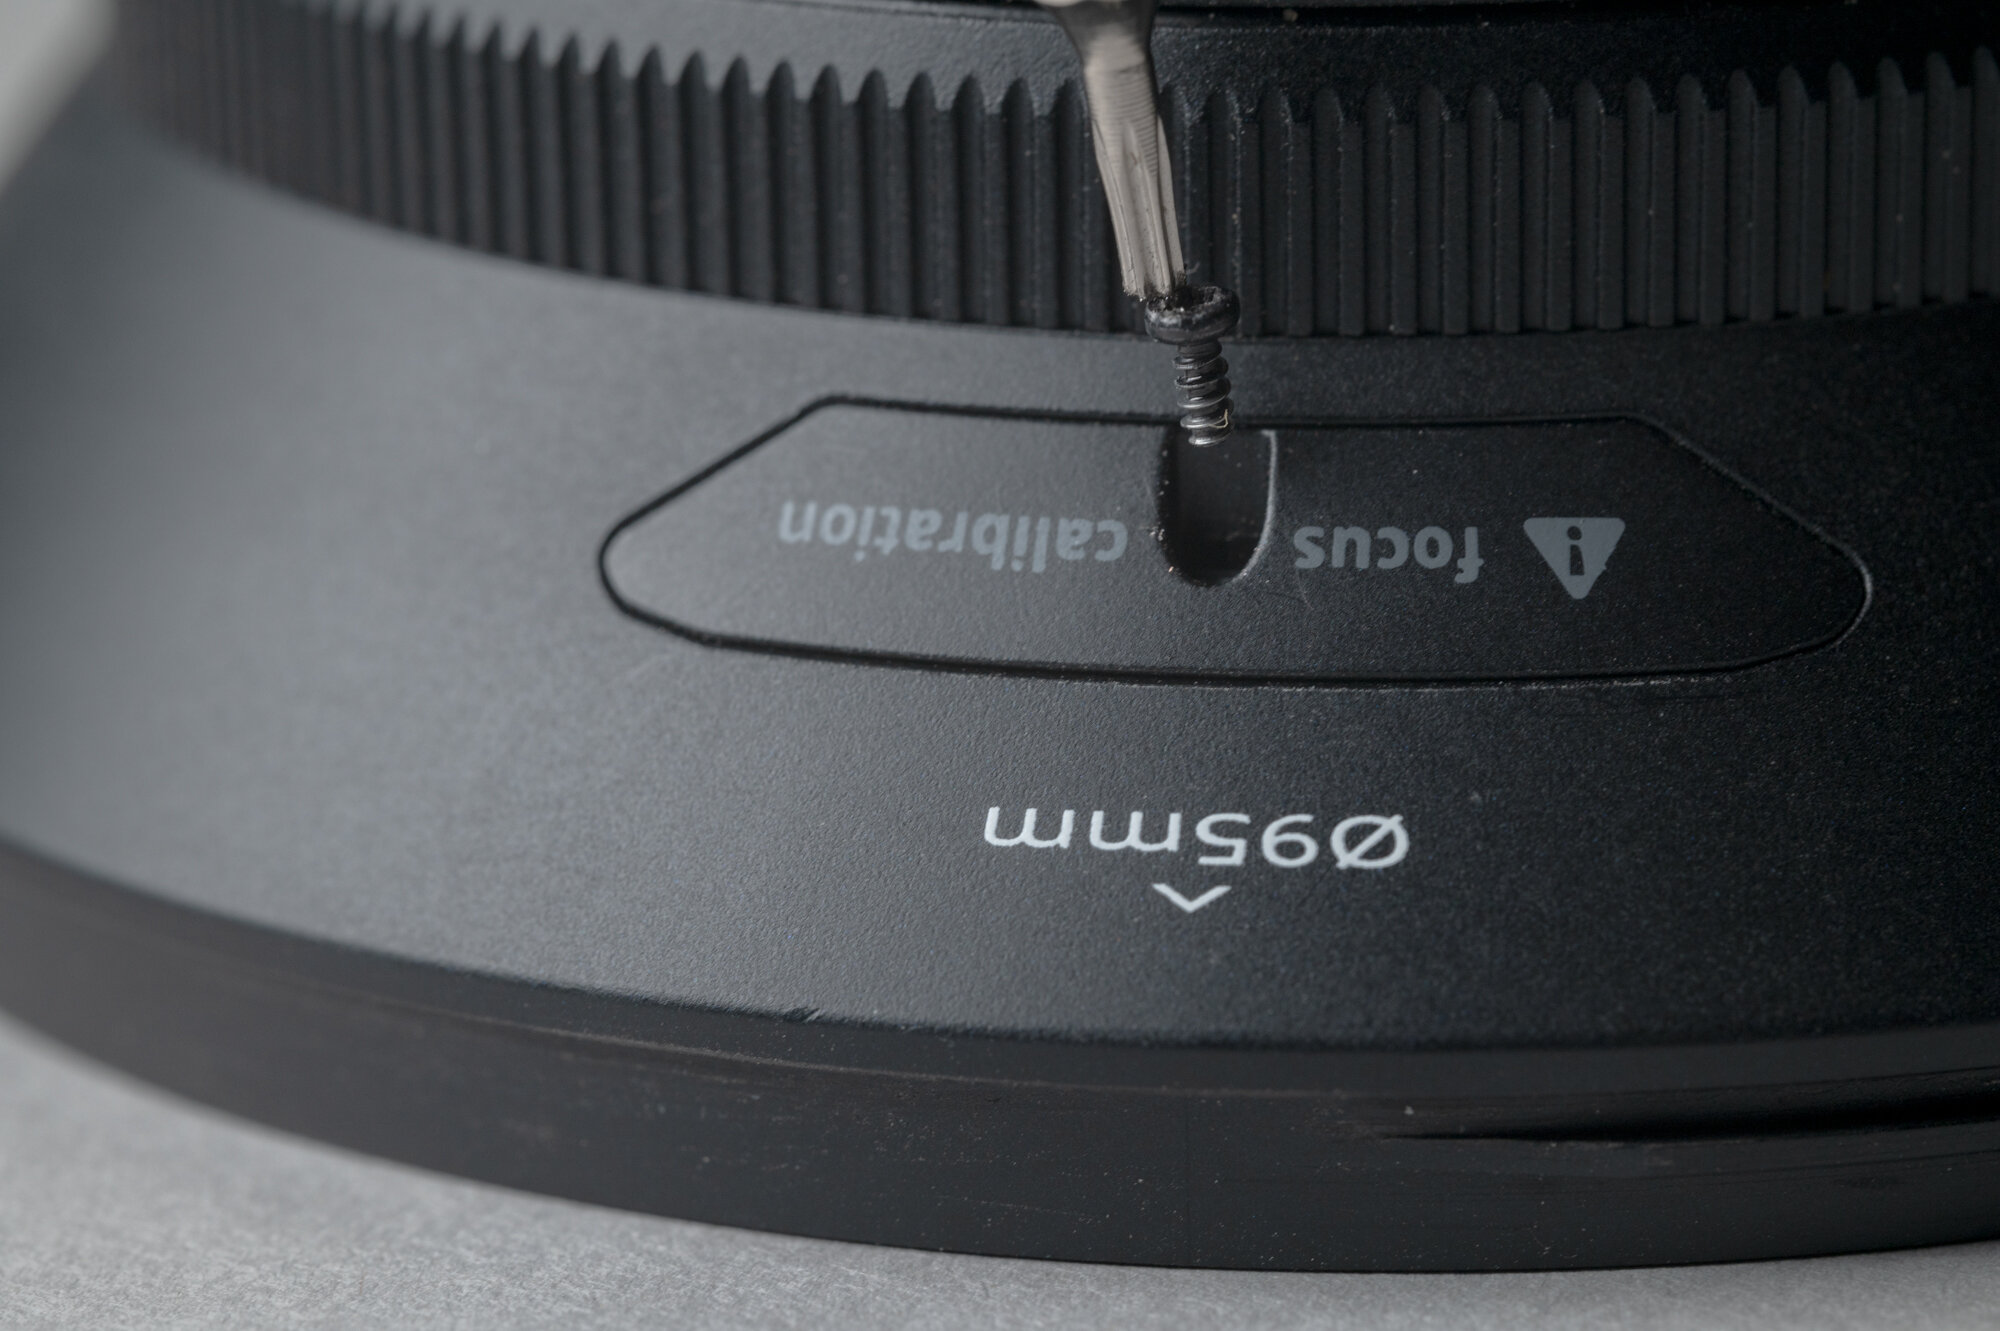
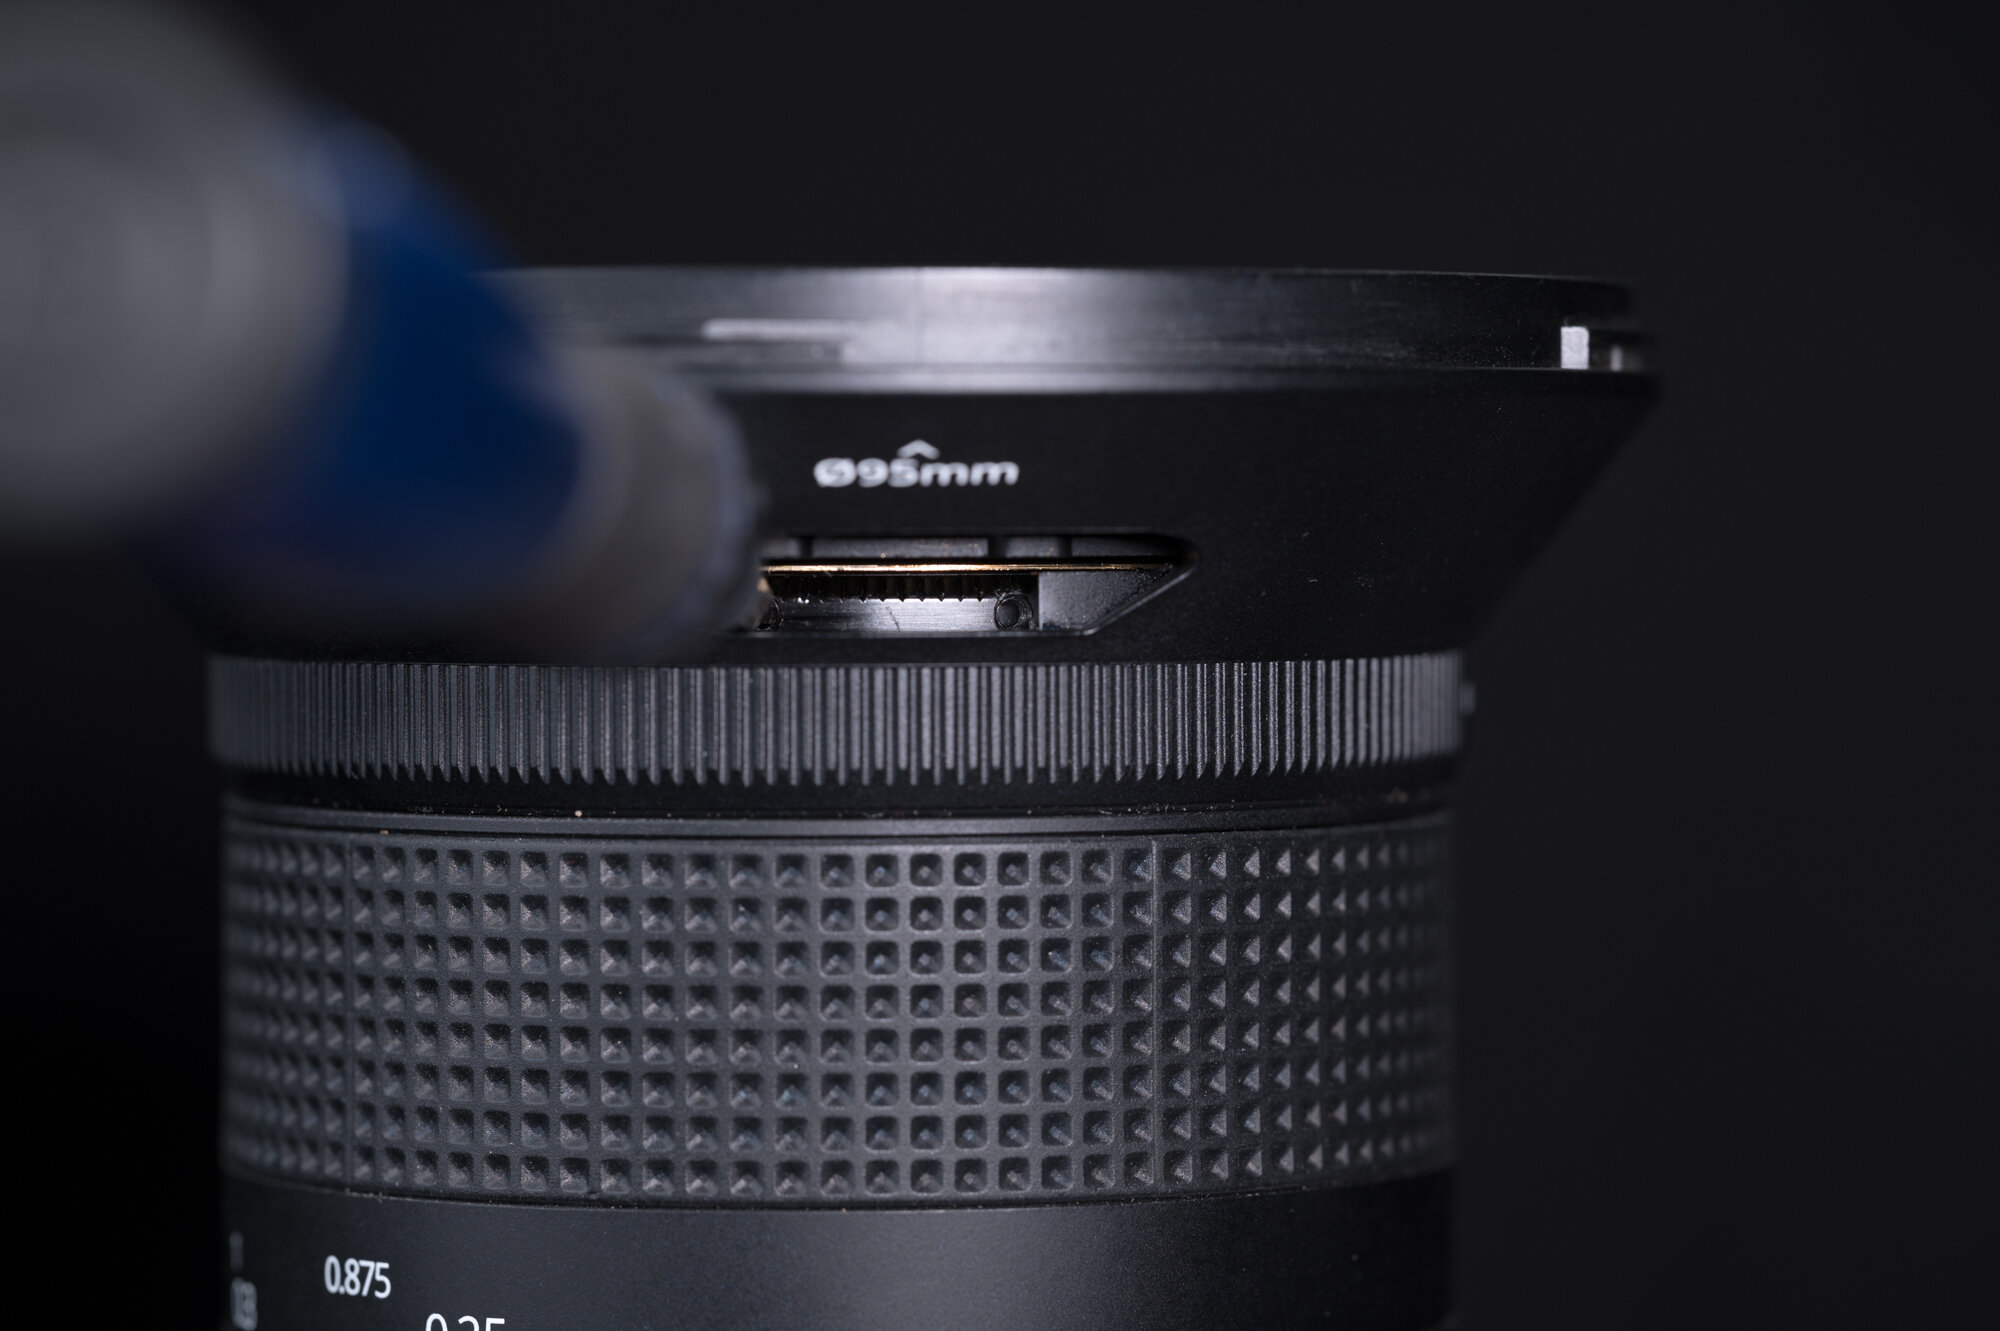
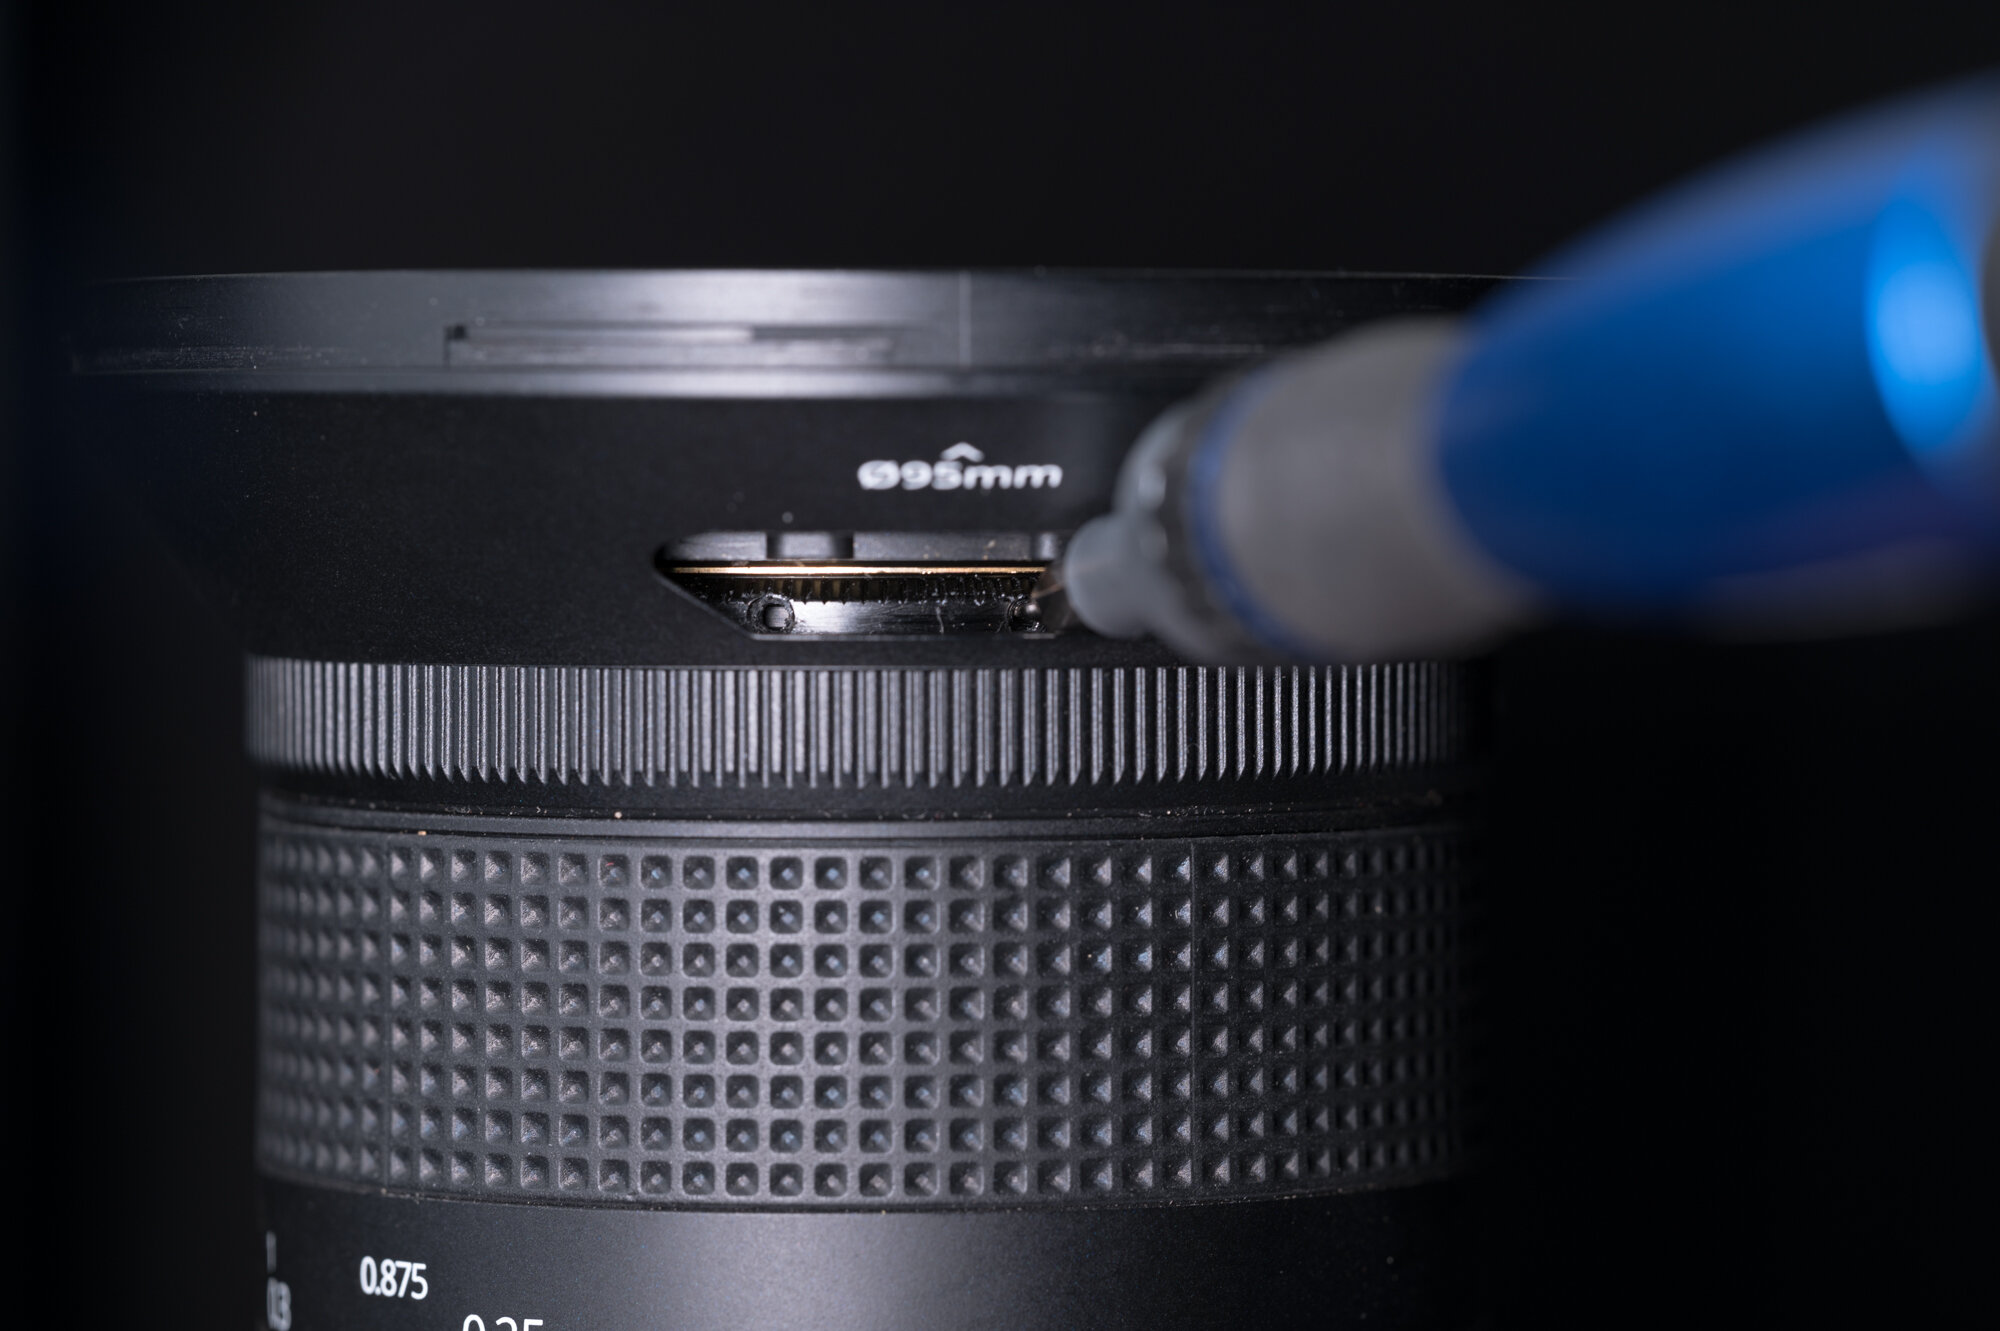
Use a Torx T6 screwdriver to open the calibration window by removing the screw entirely. Set the screw and cover aside in a safe place, such as a small plastic bin.

Carefully slide out the plastic cover labeled “focus calibration” (the head of the Torx screwdriver is convenient for lifting the cover away).

Step 4: Find the interior locking screw.

Look inside at the calibration ring, and find a slot screw. If you don’t see one, slightly turn the focus lock ring until you see the screw.

Note: You’re looking for the small slot screw, as opposed to the larger screws that keep the calibration ring in place. You absolutely do not want to unscrew the latter.

Step 5: Unlock the focus

Using a 1.5mm slotted screwdriver, fully remove the small locking screw from the calibration ring and set it aside in a safe place.

Note: This is where it’s vital you have a magnetic head on your screwdriver. You do not want to lose that screw inside the lens barrel.

Step 6: Set the lens.

Mount the lens on a camera and mount the camera vertically on a tripod. Make sure you have easy access to the calibration window.

Go outside in daylight and point the camera at a distant object (at least 36 feet away) with good contrast. Orient this object in the center of the frame and set your focus point to the exact center.

Set the aperture to the widest setting—i.e., f/2.4 for the 15mm or f/4 for the 11mm.

Step 7: Zoom in.

Activate your camera’s live view and zoom in to maximum magnification.

Step 8: Adjust the focus.

Insert the slotted screwdriver into one of the holes in the calibration ring, and then rotate the ring slowly back and forth. (As you adjust, you may need to choose a new hole.)

Keep rotating until the objects at infinity (36 feet away or further) become as sharp as possible on your rear LCD screen or when viewed in your EVF. It’s a very slow process. Take your time. If you have one, use a focusable loupe (such as the Hoodman HoodLoupe) to help you see the changing sharpness even better.

Step 9: Lock it Down.

Once focus is achieved, go back to your work area inside. Remove the lens from your camera.

Look for an open spot to thread the small locking screw back into the calibration ring. Depending on how much you adjusted the focus, that may not be the same hole you removed the screw from earlier.

Using the slotted screwdriver, carefully insert the screw and turn until firmly finger-tight. Do not over-tighten.

Step 10: Close things up.

Slide the plastic “focus calibration” cover back in, then secure it using the Torx screw and the T6 screwdriver.

Unlock the focus lock ring.

That’s it—you’re done! You now have a perfectly calibrated Irix lens for photographing amazing star images. I recommend heading out that night and shooting a few test images of the stars just to be sure.

For those who like to watch, here is Irix’s video version of this tutorial:

Matt Hill is a partner and workshop leader with National Parks at Night. See more about his photography, art, workshops and writing at MattHillArt.com. Follow Matt on Twitter Instagram Facebook.

UPCOMING WORKSHOPS FROM NATIONAL PARKS AT NIGHT