Moon Shots: What We Learned from Photographing the 2019 Lunar Eclipse

While lunar eclipses arenโ€™t as jaw-droopingly exciting as total solar eclipses, they are still an amazing thing to witness, as well as to capture as photographs. And a lunar eclipse comes with a big benefit: totality lasts much longer than during a solar eclipse, so you have more time to get creative as well as not stress out!

I had last shot a lunar eclipse in 2014, which was a very special time. That blood moon was the second of a tetrad, a series of four consecutive total eclipses that occurred in approximately six-month intervals. The next time that will happen will be in 2032-33. I wonder how we will capture it then! Technology made a major leap from 2014 to 2019, so who knows how it will leap in another 13 years. Maybe we will be able to witness those lunar eclipses from the moon!

The next lunar eclipse will occur in two years, on May 26, 2021. In the meantime, we wanted to share a few tips that we learned this year to help you better prepare not only for the next eclipse but for shooting the moon in general.

And by โ€œwe,โ€ I mean a few more people than usual. First Iโ€™ll talk about my experience shooting the eclipse this week, and then Matt will add some thoughts from his experience. Finally, we have invited six of our National Parks at Night workshop alums to share their images and lessons learned.

Onward โ€ฆ to the moon and beyond โ€ฆ

11 Tips and Tricks from the 2019 Lunar Eclipse

1. Do your research.

Understand the location you will be in to capture the moon. Will you be in an urban or rural environment? How can this location help tell your story? I saw lots of wonderful lunar eclipse phases placed over breathtaking landscapes, buildings, etc. You could do the same in an urban location.

For this yearโ€™s lunar eclipse, I was in Atlanta, a city I wasnโ€™t that familiar with and had little time to scout. I was inspired by the skyline I saw while driving into the city, and I noted that there were plenty of overpasses that could provide a good vantage point.

2. Ascertain the elevation of the eclipse.

The 2019 super blood wolf moon (aka the lunar eclipse) over Atlanta. Foreground: 35mm lens, 25 seconds, f/16, ISO 200; background (moon): 600mm lens, 1/2 second, f/5.6, ISO 3200.

You want to foresee what foreground you can include in a single shot. I was really taken aback by how high in the sky this lunar eclipse was. It was very difficult to introduce foreground into the scene unless you were really far away or made a composite.

In hindsight, I could have gotten under the Skyview Atlanta Ferris Wheel downtown and probably made a pretty cool shotโ€”but my last photo of a lunar eclipse (in 2014) included a Ferris wheel and I didnโ€™t want to be known as that guy! This did make me realize that figuring out the problemโ€”i.e., the height of the moon in the skyโ€”can lead to unusual solutions like actually getting under your foreground to get the shot!

3. Go with two rigs.

The lunar eclipse lasts approximately 4 to 5 hours. Give yourself more options to create! It could be wide and telephoto rigs, or short-exposure and long-exposure setups.

4. Be ready for that close-up!

That big olโ€™ blood moon, 2019.

This is advice for shooting the moon any time of the year: Use a telephoto lens. The more you can fill your frame, the better. Higher-resolution cameras will also allow us to crop into the image more with minimal loss in detail.

This year I used a 100-400mm lens, which when zoomed in all the way was the equivalent of a 600mm with my APS-C sensor. I still cropped into the moon in post and would have preferred an effective focal length of 800mm to 1000mm in the field. While those lenses might seem expensive and out of reach, consider using crop-sensor cameras with 200-500mm or 150-600mm lenses. Also, you could adapt a telescope to fit your camera and can easily get to 1000mm.

When using a super-telephoto lens and aiming it high in the sky, watch out for lens creep, which is when your lens zooms slightly during the exposure. I once found this to be the culprit of a soft image, when my Fujifilm 100-400mm lens wouldnโ€™t lock down at one focal length. Eventually it stayed put, but the problem was a bit frustrating and ruined several of my shots. Always zoom in and review your images.

 5. Donโ€™t forget your wide lens.

Telephoto lenses get most of the love during the eclipses, but wide-angle lenses can offer better storytelling. They can tell something else about where the image was shotโ€”just think about what other elements of the scene you want to combine with the moon. Two rigs gives you that option.

6. Allow plenty of time to play.

We mentioned that the lunar eclipse lasts a while. The totality, or umbra period, can last 1 to 2 hours. Thatโ€™s a lot of blood moon! While the umbra phase can be the most exciting, start clicking as soon as the penumbra starts, when the moon remains white but starts to show all its phases as Earth casts its shadow.

7. Try a moon trail!

High Roller & Lunar Moon Trail, 2014. 55mm focal length, 15 minutes f/8, ISO 400.

With so much time, why not set up one rig dedicated to shooting the entire eclipse and then stack it together for a very unique moon trail? The beam will be wide and bright during the penumbra period but get skinnier and a little dimmer during the umbra period. Iโ€™ve seen only a few images using this technique, and I definitely want to give it a go next time!

Given the length of this long exposure, youโ€™ll definitely want to make sure you have plenty of power in your camera. Iโ€™d at least want to add a second battery and attach a power gripโ€”but for even more power and reliability Iโ€™d hook up the camera to a Tether Tools Case Relay or ONsite power solution.

8. Do a time lapse or capture some video.

Iโ€™m a still photographer, but moving images can help tell a story in more detail. This could be especially helpful if you are battling clouds or weather. Dedicate that second rig to video and keep that powered up with the Tether Tools solutions listed above.

9. Zoom while exposing.

I slapped my hand against my head when I saw these images pop up on social media. I love this technique for neon signs and buildings but it didnโ€™t cross my mind with the moon! Especially during the dimmer umbra phase, you can get exposures of 3 to 8 seconds. Use a telephoto lens zoomed all the way in, then midway into the exposure zoom to the widest end and leave it there. Two moons for the price of one!

10. Include the moon with other night elements.

Match up that moon with car trails or other bright things that move. We often default to the telephoto close-up of the moon, but how else can we tell the night story? Emphasize movement in your image! In my image from Atlanta, I really wanted car trails and the lunar eclipseโ€”I wanted those leading lines taking us to the moon! Perhaps you could shoot the moon next to moving water, or add star trails surrounding the moon.

11. Composite away!

Full moon and eclipse photography are techniques that totally lend themselves to creative and fantastic composites. Show us all the phases of the eclipse in an interesting pattern. Place the moon anywhere in the world! Compositing imagesโ€”taking elements from multiple shots and combining themโ€”can totally unleash a new fantasy location.

My advice on compositing is to have a clear vision and stay true to it. Larger-than-life moons make a viewer realize the moon โ€œdoesnโ€™t belongโ€ in the scene, however if the rest of the image is pure fantasy then it is totally acceptable. In my image from this week, the moon is bigger than it normally would have been but still has a somewhat realistic feel.


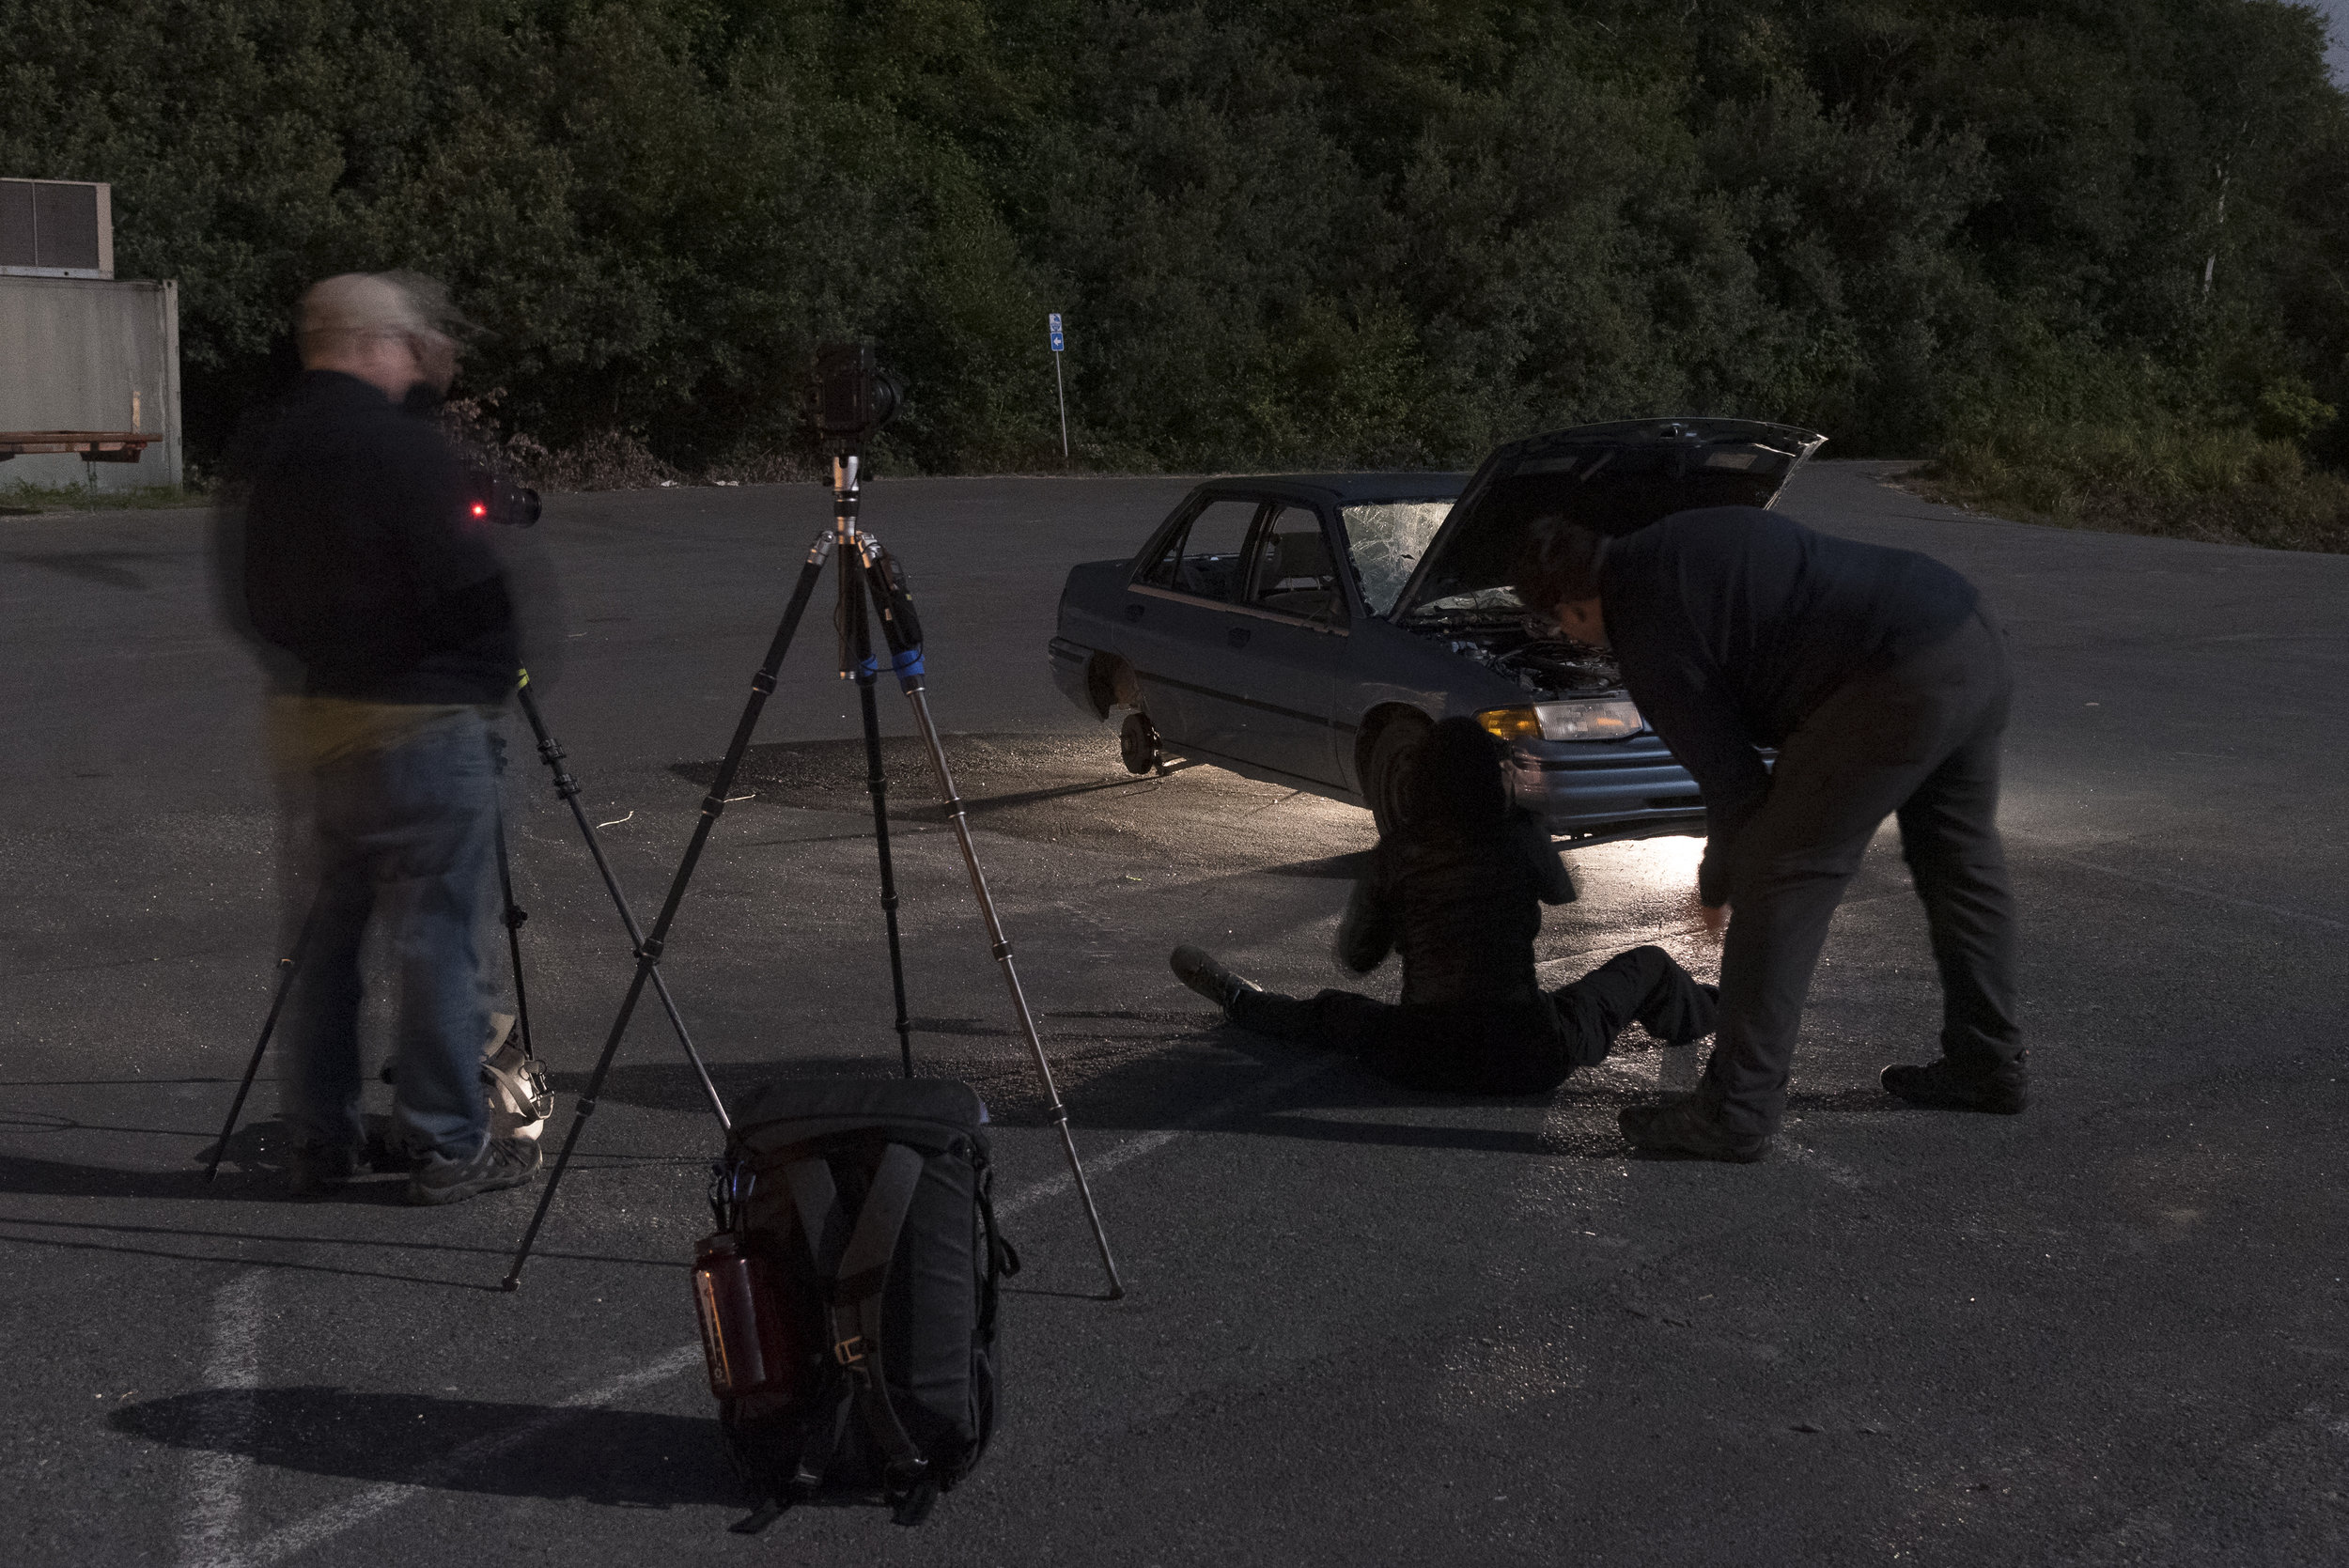
Photographer vs. Freezing Temps

by Matt Hill

The night of the lunar eclipse, it was frigid in Catskill, New York. I mean cold. 3 degrees F cold. (Interpret the โ€œFโ€ how you want.)

Also, I was feeling really under the weather. But I really wanted to grab some frames of the eclipse, despite all these roadblocks.

So I popped open PhotoPills and saw that the super blood wolf moon would be arcing right between the houses by my studio. I decided to shoot it from the tiny deck outside the studio door.

The Weather Underground app (left) and PhotoPillsโ€™ eclipse and Night AR features provided all the info needed about where and when to shoot the eclipse in Catskill, New York.

For about 2.5 hours, I popped in and out, trying to avoid frostbite, and I worked through an image sequence that got me fully into totality.

And then, for kicks, I ran through optimizing exposure length versus ISO during totality. I mean, it was an hour long, right? The worst thing I could get was frostbite.

I settled on shooting at 1/2 second and ISO 100. I liked it better than any of the images I shot at higher ISOs. I made this sequence of images from the set:

Nikon Z 6, Nikon 300mm f/2.8 lens. 1/125, f/14, ISO 100 (full moon); 1/2 second, f/4.5, ISO 100 (totality).

Then I thought it would be great to run one more experiment to see at what shutter speed a 300mm lens would make the moon too blurry to be seen clearly. Itโ€™s easy to do with a full moonโ€”but I wanted to have this to show people what it looks like during an eclipse:

Honestly, I thought the 1/2 second exposure was the sharpest that was acceptable to me. Either way, note that the chart above is for a 300mm lens. Results will be even more restrictive with a longer lens, such as a 600mm. Itโ€™s important to bracket and test in the field.

Exhausted and tired, I put my gear inside and rolled into bed around 1 a.m.โ€”after downloading and inspecting my images, naturally. ;-)


Eclipse Stories from NPAN Alums

For several days this week we saw some of our workshop alumni post incredible images on social media. We asked a few if theyโ€™d share their stories and lessons learned, and we were thrilled that they are happy to do so.


by Gary Domrow

ยฉ 2019 Gary Domrow, instagram.com/gsdpic. Canon 5D Mark IV, Canon 100-400mm f/4.5-5.6 lens with teleconverters. 1/2 second, f/8, ISO 1600.

I set up the tripod up in my driveway here in Austin, Texas. I had hoped to do a sequence but the first part of the eclipse was obscured by clouds, so I took pictures for just about 15 minutes on either side of the beginning of totality. I shot them using the Canon 100-400mm, some with the Sigma 2X teleconverter and some with the Canon 1.4X, set up on a Really Right Stuff tripod and ball head. I used the โ€œlive view and zoom inโ€ method to focus, and actually remembered to try a few different settings for ISO, shutter speed and aperture.

Despite using that lens and teleconverter combination, I must not have been zoomed in quite all the way because the focal length is 525mm according to the EXIF data. So I cropped the final image. What you see is maybe 30 or 40 percent of the original frame. Finally, I did some minor tweaking in post with Lightroomโ€”Exposure, Contrast, Noise, Clarity.

I guess I canโ€™t say I learned anything new. I just practiced and reinforced the techniques that I have, which is also a good thing.

Well, I did learn later that some people are really luckyโ€”did you see this article about the meteor hitting the moon during the eclipse? I guess as long as you are out shooting the night sky, thereโ€™s always a chance youโ€™ll catch something unique or interesting or unexpected.


by Heather Cunningham Wendelboe

ยฉ 2019 Heather Cunningham Wendelboe, bolo-photo.com. Nikon D750, 20mm f/1.8 lens.

Iโ€™ll pretty much always have a story, because every time I go out on one of my โ€œautomotive astroscape shoots,โ€ I set myself up for a major mistakeโ€”since I always want to try something I donโ€™t know how to do! So hereโ€™s the whole story of my disaster.

I had planned for one my usual automotive astroscape shoots. My intention for my final image is always to share a vision as if you had looked out a window and watched the whole experience through the nightโ€”to inspire someone to go on a late-night road trip out there in the middle of nowhere. A secondary intention is to showcase my passion for driving these cars the way they were meant to be driven and not just hoarding them in a garage.

This was my first attempt at a lunar eclipse. I wasnโ€™t thinking about what would be different than other night photos Iโ€™ve done, so I composed like I normally would. The focus and exposures actually turned out pretty good, considering the haze in the sky and the lens fogging up, not to mention the microscopic size of the moon with a 20mm lens! The main problem was that at the time I started shooting the moon, it was in the middle of my frame, and there was not enough room at the top of the frame to fit the entire sequence of exposures as planned. So, right about the time of maximum totality, the moon just dropped off the edge of the composition!

I wish I had set up the camera to shoot the entire sequence of the eclipse, and then I could have done a second setup for the composition and foreground exposure, since the final image would have to be a composite anyway.

When it came to editing, I cropped out about two-thirds of my frame to make it a vertical, which helped get rid of a lot of the vertical line distortion and placed the moons in a better position from side to side. But with the vertical orientation, looking from top to bottom, I ended up with literally the middle third of my frame being blank sky. I posted that version to the National Parks at Night Alumni Facebook group. After talking with several people in the comments about all our lunar eclipse photos, I decided to try a re-edit: I moved the moon sequence lower to fill the blank sky, then I cropped it back to horizontal.

Moving the moons to an inaccurate position in the sky bothers me, because no one who could have been there watching that scene would have seen it this way. But the resulting composition is acceptable.

Lesson learned: You canโ€™t recover what you didnโ€™t shoot. And if you mess up what you did shoot, you owe it to yourself to salvage it, because your failed attempt required the same effort that a successful one would have. It wasnโ€™t your work, only your decisions, that made the difference.


by Randy Christ

ยฉ 2019 Randy Christ, MovingImagesPhotography.com. Canon 5D Mark IV, Canon 100-400mm f/4.5-5.6 with 1.4X teleconverter, on an iOptron SkyGuider Pro EQ Camera Mount. 20 seconds, f/8, ISO 100.

The photograph is a single imageโ€”no HDR, no compositing, no Photoshop. All the editing, cropping, etc. was done with Lightroom.

Image stabilization was turned off, and focus was set to manual. The camera was mounted on an iOptron SkyGuider Pro EQ mount, which was configured to track the moon precisely. The 20-second exposure time was chosen to hold in check the star trails that would occur due to the moon and stars moving at different rates in different directions. Also, this shutter speed allowed for the settings of ISO 100 and f/8, which are the sweet spots of this camera and lens.

This was my first attempt at shooting with an EQ mount, and the comedy of errors I made kept rolling all evening. Talk about lessons learnedโ€”as well as just some bad luck. But I also had some good luck, and came away with some shots I am pretty happy with.

I decided to process this particular image in the series because it caught the fleeting moment when the moon was just about to leave the umbra shadow of Earth, ending totality. During totality, the light that reaches the moon travels through the inner layers of Earthโ€™s atmosphere, which passes along the longer-wavelength orange and red light. This is why the moon turns orange during totality. In the moments just prior to reaching the end of totality, some light reaches the moon after having passed through Earthโ€™s ozone layer, which passes along blue, shorter-wavelength light. This results in a small strip of purple trim on the leading edge of the moon. It is a unique and splendid moment that occurs for only a brief moment in time.

Note: If youโ€™d like to read more about how Randy created this image, see his blog post โ€œTotal Lunacyโ€”Photographing the Total Lunar Eclipse.โ€


by Martha Hale

ยฉ 2019 Martha Hale, instagram.com/marthahale. Canon 5D Mark IV, Canon 70-200mm f/2.8 lens.

I was fortunate enough to shoot the solar eclipse of 2017 with National Parks at Night, so I knew I wanted to give this lunar shot a foreground element. Using PhotoPills, I scouted numerous skyline and landscape possibilities around town, only to realize this event was going to be happening straight up in the sky far away from the horizon. Change of plans. I scouted taller locations such as the statue of Vulcan in Birmingham, but newly installed multicolor LED lighting was going to be a challenge. I pondered Sloss Furnaces National Historic Landmark, but without NPAN, would they let me in that late again and turn off all the lights? Slim chance.

At the entrance to my neighborhood is a rather large replica of the Statue of Liberty. I couldnโ€™t resist. I ended up liking a composition from directly beneath the statue with my lens aimed straight up, shooting with a Canon 5D Mark IV and a 70-200mm lens. I bounced all night between that and a Fuji X-T3 setup with a 100-400mm f/4.5-5.6 lens plus 2X extender. I was struggling with the loss of stops at f/9 with the Fuji, and with chasing the moon to keep it in the frame (should have used my star tracker from the previous eclipse), and with having to bump up the ISO so much once we were in totality.

I was getting frustrated, so when my husband came to check on me, I was ready to pack it up. But first I handed him a flashlight and asked him to point it at the face of the statue. I went back to my Canon and decided to do one final composition with my focal point on the statue, and just to be sure, took the time to do one more shot focusing specifically on the moon. Iโ€™m so glad I took that extra step, because when I got back to the full screen of my computer, the moon was slightly out of focus in all the earlier shots! I stacked the two shots in Photoshop for the win!


by Susan Wales

ยฉ 2019 Susan Wales, susanwales.ca. Nikon D810, Sigma 150-600mm f/5-6.3 lens.

I did not do a time lapse, but rather only took individual frames and put them together in Photoshop later. It would have been hard to do a time lapse because the settings changed a lot from the beginning to the end of the eclipse.

I did not realize that the color of the moon would change so dramatically from white at the start until the blood moon color developed with the full eclipse. That was fascinating to watch.

I pre-focused to infinity, locked my focus down and then shot in manual mode. I started to photograph at 8:50 p.m. (in British Columbia) and finished at 10:09 p.m. when the clouds moved in. I started with an exposure of 1/6 second, f/5.6, ISO 64 and finished at the height of the eclipse at 1.3 seconds, f/5.6, ISO 2000. I adjusted my camera settings manually as the light changed on the moon. 


by Steve Winker

ยฉ 2019 Steve Winker, whereswinker.com. Canon 6D, Tamron 150-600mm f/5-6.3 lens.

๏ปฟI shot the eclipse from the RV Park Iโ€™m staying at in Tucson, Arizona. Unfortunately, my site is right next to a 40-foot wall separating the RV park from Interstate 10. So there wasnโ€™t any decent foreground. Plus, thereโ€™s a very tall bank of lights right there.

The main thing I learned was that I shouldnโ€™t have set up so close to a very strong light source high in the air. At totality, it was almost impossible to see the moon thru the haze created by the light. The strong haze also caused my photos of the moon at totality to be a little hazy.

I really didnโ€™t learn too much else this time. But I had shot a lunar eclipse in 2014 and I applied what I had learned from that shoot to this one. Based on that shoot and the fact that I didnโ€™t have a foreground to use, I made the decision to zoom in and make a composite using several stages of the eclipse.

I did no cropping. I just took the five frames into Photoshop as layers, masked out the sky in each layer, and then moved the five layers so that the moons lined up.


Wrapping Up

Thank you to those six fantastic alums for sharing their images and their stories! Weโ€™re continually inspired by the photography we see coming from the fine folks we get to work with throughout the year.

So, whoโ€™s next? How about you? Weโ€™d love to see your photos of this weekโ€™s lunar eclipse, and to hear the stories behind them and the lessons you may have learned. Please feel free to share them in the comments section below or on our Facebook page.

Gabriel Biderman is a partner and workshop leader with National Parks at Night. He is a Brooklyn-based fine art and travel photographer, and author of Night Photography: From Snapshots to Great Shots (Peachpit, 2014). During the daytime hours you'll often find Gabe at one of many photo events around the world working for B&H Photoโ€™s road marketing team. See his portfolio and workshop lineup at www.ruinism.com.

UPCOMING WORKSHOPS FROM NATIONAL PARKS AT NIGHT


Muses from the Past: A. Aubrey Bodine, Baltimoreโ€™s Photographer Laureate

Analyzing classic photographs can be an effective way to progress in oneโ€™s own work. The key is not to simply mimic someone elseโ€™s great ideas, but to use the knowledge that comes with reproducing the work of masters and move on to create something new. With this in mind, National Parks at Night's Lance Keimig offers this ongoing series highlighting some of the early masters of night photography. We'd love to see any photographs you create after learning more about the pioneers of this nicheโ€”please share in the comments section!


I grew up in Baltimore and discovered night photography there in 1986. Some of my earliest imagesโ€”two of which I still regard as decentโ€”were made downtown on West Read Street, just a few blocks from A. Aubrey Bodineโ€™s studio, and where he made many of his best night images.

As a Baltimore native son, it was hard not to be aware of Bodineโ€™s photographs and his connection with the Baltimore Sun. I was introduced to his images during a photography class at the local community college early in my career, but I didnโ€™t know that he had made a large number of night images. Thatโ€™s a discovery I made only quite recently on a family visit to my hometown.

Pratt Street and Long Dock, 1959.

Bodine began working for the Baltimore Sun newspaper in 1920 at age 14, was promoted to commercial photographer at 18, and became the Sunday Sun feature photographer at 21. He became the photographic director of the Sunday Sun magazine when it was created in 1946. The exposure he enjoyed through his position at the newspaper brought a level of celebrity, and he was well-known and admired as a result.

First Presbyterian Churchyard, c.1950.

In addition to being employed by the Sun for 50 years, Bodine also exhibited at photo salons both nationally and internationally, and he won many awards. He was made an Honorary Fellow of the Photographic Society of America (PSA) in 1965, as one of the first 20 photographers to be awarded this highest honor along with Edward Steichen, Alfred Stieglitz and Edward Weston. Bodine was a founding member of the National Press Photographers Association (NPPA) and was the first photographer to have a fellowship in both PSA and NPPA.

Tyson Street, c. 1950.

Although he photographed at night between about 1935 and 1960, most of Bodineโ€™s nocturnal images were made in Baltimore around 1950. The Mount Vernon neighborhood was a favorite subject. Itโ€™s the location of the Washington Monument, featured in many of those images. He also photographed Baltimore Harbor at night, which is a much different place today after major revitalization that began in the 1980s.

Like many night photographers, Bodine learned early on that bad weather makes for great night photos. His night images were made in urban environments with high-contrast lighting, which requires a very different approach than photographing the Milky Way in a national park. He wrote, โ€œNever attempt night photography when the night is clearโ€”always choose a rainy, foggy or snowy night. You will then be able to catch the street reflections and outline the buildings.โ€ Thatโ€™s good advice for shooting in cities at night, similar to what Iโ€™ve been teaching workshop participants for two decades, and something that English photographer Paul Martin figured out way back in 1896.

Bodine advised exposing for four to five times the normal exposure length, and using a fast panchromatic film. In those days, that typically meant the equivalent of ISO 100. The real secret to the success of Bodineโ€™s night images was his modified film developer. In his 1987 biography of Bodine, Harold Williams wrote, โ€œWhat Bodine did in his darkroom he taught himself by experimentation; much of what he did was unorthodox. He mixed chemicals by intuition that came from experience, not by following directions on the container.โ€

Bodine used a weak developer and an extended development time, the tried-and-true method for controlling highlights in high-contrast night scenes in film photography. The results were often spectacular, even showing detail in the gaslights that illuminated many of Baltimoreโ€™s neighborhoods.

Bodine was a master printer, which was a little unusual for a newspaper photographer of that era, but he felt that exhibiting his work greatly contributed to his development as an artist. He made large exhibition prints of many of his imagesโ€“โ€“the archive of which his daughter Jennifer has managed since 2000. (You can view the archive at aaubreybodine.com.)

Excerpts from the Mallinckrodt Photo Bulletin No.71 from 1955, which featured the night nhotography of A. Aubrey Bodine, along with his advice for developing black and white film shot at night.

Iโ€™ve been fortunate to exchange a series of emails with Jennifer about her fatherโ€™s work, and she has invited me to meet with her and view firsthand some of his prints and writings the next time I visit Baltimore. Needless to say Iโ€™m thrilled for the opportunity, and will report back in a future post. Just the thought has me scheming to pull out my view camera and try to find some of the locations of Bodineโ€™s images.

For todayโ€™s digital night photographer, one of the most important lessons we can learn from Bodine is that experimentation and breaking the so-called โ€œrulesโ€ can lead to solutions to the challenges we encounter in the field. Itโ€™s just as true today that trial and error and careful observation of the results is the best way to address the challenges of night photography.

My research into his work and career has also reminded me of the importance of printing and exhibiting our images, something Bodine did throughout his career, independent of his newspaper work. (If youโ€™ve been wanting to print your images, but arenโ€™t quite sure how to begin, check out Gabeโ€™s recent blog post โ€œMake Printing Part of Your Process.โ€)

Note: To read more about early night photographers, you can read the first chapter of Lanceโ€™s book, Finding Your Way in the Dark.

Lance Keimig is a partner and workshop leader with National Parks at Night. He has been photographing at night for 30 years, and is the author of Night Photography and Light Painting: Finding Your Way in the Dark (Focal Press, 2015). Learn more about his images and workshops at www.thenightskye.com.

UPCOMING WORKSHOPS FROM NATIONAL PARKS AT NIGHT

The First Steps to Processing Milky Way Images in Lightroom

Capturing the Milky Way is one of the great joys of night photography. But why do some photos of this celestial phenomenon look better than others?

Post-processing your photos can really make the difference between a grab shot and a masterpiece. The good news is that you donโ€™t need a doctorate in Photoshop to bring out the brilliance. A few simple tricks in Lightroom can go a long way in making your stars and Milky Way stand out.

In This Video

In the video below, I illustrate several tips, including:

  • adjusting white balance to make skies look more like โ€œnightโ€

  • using Dehaze to boost the look of the Milky Way

  • applying local adjustments to target effects

  • HSLing the image to nail the color

  • brushing some punch into the galaxy

So open up an image and follow along with the video to learn how to process your Milky Way images in Lightroom!

Note: Did you like that video, and think youโ€™ll like more? Please consider subscribing to the National Parks at Night YouTube channel to get notified about all our new videos when they come out.

Tim Cooper is a partner and workshop leader with National Parks at Night. Learn more techniques from his book The Magic of Light Painting, available from Peachpit.

UPCOMING WORKSHOPS FROM NATIONAL PARKS AT NIGHT

Tales of Two Photos: Our Favorite Pairs of Images from 2018

For one last moment, as a group, weโ€™re taking time to reflect on the incredible journey we embarked on in 2018. We visited even more destinations and had even more adventures than the previous year.

All in all, itโ€™s a moment where I say, โ€œI am so proud to be doing this with these people.โ€ That not only includes my esteemed National Parks at Night partners and fellow educators, but also the workshop attendees who make this all worth it. Bravo and brava to all of you for inspiring us to be more and to do more every day.

And now, the hardest assignment of them all: The five of us choose only our two favorite images each from the entire year, and tell the stories behind their births.

This is our final look backโ€”and then itโ€™s all 2019, baby!

Gabriel Biderman

Reality is Outside the Skull. Nikon D750, Nikon 14-24mm f/2.8 lens. Light painting exposure: 80 seconds, f/2.8, ISO 1600, painted with a Coast HP5R; star exposure: eight frames at 15 seconds, f/2.8, ISO 10,000 blended in Starry Landscape Stacker.

I love revisiting locations to search for new visions. Iโ€™ve been very lucky to travel to one of our favorite dark sky parks, Joshua Tree, for each of the last two years. The first time is always the discovery phaseโ€”getting to know the place. You can do all the research prior, but nothing beats being on location, and for Joshua Tree you feel like you are in a Dr. Seuss book.

This year, for me, the park was all about the rocks. On one of our scouts during the day I had discovered this wide-open area that had tons of smaller but randomly wonderful rock formations. I found so many scenes to get lost in! When I happened upon this โ€œskull rockโ€ with its eye open to the southeast, I immediately went to the Night AR in PhotoPills to confirm the orientation of the formation. Indeed, I could see that on that night the core of the Milky Way could be placed inside the โ€œeye of the skull.โ€

The scene reminded me of the George Orwell quote from 1984: โ€œReality is inside the skull.โ€ However, in this case the breathtaking reality of the Milky Way is outside and available to all.

It was a very challenging shot because I needed to position the camera about 3 to 4 feet from the skull. Hyperfocusing wasnโ€™t a viable solution because the foreground subject was just too close. I was shooting with my favorite rig: the Nikon D750 and 14-24mm f/2.8 lens at 14mm, low to the ground. After a few test shots it seemed like my best option was to do a focus blendโ€”take one shot focused on the close rock formation and then a second shot with the focus on infinity to keep the stars sharp.

The light painting was added to an exposure of 80 seconds, f/2.8, ISO 1600 with two passes of a Coast HP5R flashlight from an oblique angle. I then refocused and took eight shots for the stars at 15 seconds, f/2.8, ISO 10,000. I stacked those images in Starry Landscape Stacker to get a cleaner, sharper sky with minimal star movement. That result was then blended as masked layers in Photoshop with the light-painted frame. It took a while to finesse this image, and even though I shot it eight months ago, it is an image that Iโ€™ve cherished but not shown until recently.

Ironically this image had gotten inside my skull, from original concept, to complex capture and blend, to finally being able to release it to the world. A reminder that a wonderful reality can be found just outside our mind.

Fire Island Lighthouse. Nikon D750, Irix 15mm f/2.4 lens. Multiple exposures at 1/2 second, f/2.4, ISO 6400.

When we were preparing for our New York Night Photography Summit shoot at the Fire Island lighthouse, one of the main questions was, โ€œWhat if we have bad weather?โ€ The obvious tendency is to get disheartened when youโ€™re expecting stars and then the clouds cover the sky.

However, we love all the challenges of the night. Well, maybe not 60 mph winds mixed with rain, sleet and snow, but there are many opportunities to create unique images in inclement weather. So many that we decided to teach a class on it at the summit, and it totally prepared us for the first night!

When we arrived at Fire Island, our minds were blownโ€”the light precipitation was capturing the light beams and extending them out to the farthest reaches of the ocean. Our previous clear nights of photographing this location were good, but this was awesome! The light beams on a clear night donโ€™t have the added benefit of passing through particles and clouds that reflect the light back. An overcast night is actually the perfect time to shoot a lighthouse, as the beams are truly defined and the lighthouse effect is remarkably enhanced!

On this particular night, everyone who had been so bummed to be shooting in the rain and under the clouds was now elated with this new heightened experience. There wasnโ€™t a bad angle to capture the ever-reaching beams, but this symmetrical angle ended up being my favorite. I worked together with a group of friends to light paint the foreground and to get the timing of the beams down. (Iโ€™ll be sharing a more in-depth capture-and-post breakdown of this image in a โ€œHow I Got the Shotโ€ blog this winter, so stay tuned.)

In the end, the โ€œbadโ€ conditions were a boon. Iโ€™m now excited to go shoot in the fog, snow and overcast conditions more than ever. I hope this inspires you too!

Lance Keimig

Raufarhรถfn, Arctic Henge. Nikon D750, Nikon 24-120mm f/4 lens. Lit by four Luxli Viola lights controlled remotely via the Luxli Conductor phone app. 30 seconds, f/4.5, ISO 5000.

For the second year in a row, one of my favorite photographs is from Iceland. Last yearโ€™s was a simple image of a familiar place, and what made me choose it was how it transported me back to Djupavik, one of my favorite places on the planet.

This yearโ€™s image is a different story altogether. It was made in a place I had never been before, and one that required determination, spontaneity and flexibility on the part of the group I was traveling with, along with a significant amount of expectation management. If you read our 2018 first-half workshop wrap-up, you may remember that our plans in Iceland were derailed by some truly awful weather, and that the group came together with clarity and force to reorganize and change our itinerary midway through the trip.

That change of plans made for some serious logistical hoop-jumping, but in the end it was truly worth the effort as we saw some wonderful aurora, we mostly avoided the horrid weather, and when we did encounter some, we were able to work with it.

Once we had changed course and wandered into uncharted territory in the north of Iceland, we came across images of Arctic Henge in the far northeast of the country. We were intrigued.

The aurora forecast called for a level of 5 Kp, meaning a very high probability of seeing the northern lights. We were starting from 4-plus hours away, but guided by the seemingly boundless spirit of our group, we decided to make the drive and see what this henge thing was all about. Through hour after hour of lonely road, and mile after mile of increasingly overcast skies, our confidence was wavering. But the weather forecast insisted we would have clear skies, so we doggedly soldiered on, despite what our eyes (and windshield wipers) were telling us.

We arrived at the beginning of twilight to find an enormous but only partially finished stone henge. And it was moist. Very moist. The tiny nearby village was shutteredโ€”there were no open shops, hotels or (most importantly for some) bathrooms.

Moreover, there was no clear sky. So we made do, and adjusted our expectations. Out came the Luxli lights, and we made a few images, many of them looking more like a Las Vegas spectacle than a pagan ritual site. As the natural light faded and the sodium vapor lights from the village a few miles away began to lend their orangeness into our images, a magical transformation occurred. The spaceship appeared in the sky above the henge, and a lone alien life form was transported to the surface, conveniently positioned in front of our cameras.

Nah, Iโ€™m kidding. Chris walked into the scene and positioned himself in front of the light from the nearest Luxli, and history was made.

Marshall Point Lighthouse, Port Clyde, Maine. Nikon D750, Tamron 15-30mm f/2.8 lens at 15mm. 110 seconds, f/4, ISO 400 for the foreground, plus a second exposure at 20 seconds, f/4, ISO 100 for the lighthouse. Light painted with a Luxli Viola at about 20 percent brightness, swept across the foreground to illuminate the dark rock.

Just like the Arctic Henge image, this one required a bit of luckโ€“โ€“being in the right place at the right time. In the opposite of the way that the world conspired against our Iceland group to create a perfect storm of challenges, this night at Marshall Point Lighthouse in Maine presented a perfect storm of photographic opportunities.

I was at the lighthouse with a class from Maine Media Workshops. Itโ€™s a place I always bring my classes to when I teach in Maine. Marshall Point is a fixed beam lighthouse, meaning that the light is always on. Not flashing, pulsing, rotating or anything else. It just shinesโ€”and oh, does it shine.

A couple of years ago the old incandescent light was replaced with a far brighter and cooler LED light that makes it more difficult to photograph. In order to get a good shot of the Lighthouse without majorly blown highlights, one has to get almost directly below the tower, which obscures the light source from the camera. This is a precarious activity, as it requires crossing a rocky beach thatโ€™s covered with slimy, seaweed-encrusted round stones. You have to be there at low tide, and you have to be sure-footed.

Luckily for us, conditions were perfect. The tide was receding, and there was enough moisture in the air to show beams of light around the lighthouse, exaggerated by the shadows of the lighthouse window frames. There was a small tide pool in the foreground where I was able to position myself in such a way to get the lantern room reflected in the water, the tower with its glorious beams, andโ€”the icing on this maritime cakeโ€”a lightning storm in the distance seen below the bridge that leads from the shore to the lighthouse. Boom!

I did have to make a second, shorter exposure for the light to complement the longer exposure. The latter allowed enough time to light paint the dark foreground stones, and to capture the rest of the scene and a few bolts of lightning. But the image came together quickly and easily once I found the right spot.

Tim Cooper

Serpentโ€”Borrego Springs. Nikon D4s, 14-24mm f/2.8 lens set at 24mm. Three exposures at 15 seconds, f/4, ISO 6400.

Two years ago, I had never heard of Borrego Springs, California, or of Ricardo Breceda, or of the art he has created. Even after I heard about all of this, I was not prepared for the scope of beauty and sheer volume of the installation. So, I thank the intrepid explorers at Atlas Obscura and our NPAN partner Gabriel Biderman for introducing me to this truly unique collaboration of earth, man and sky.

I was lucky enough to visit the area with 14 curious photographers during our 2018 Ambassador Series workshop with Atlas Obscura titled Dark Skies, Desert Beasts. With over 130 free-standing metal sculptures in the desert surrounding Borrego Springs, it was hard to choose a favorite. But I did really like the serpent.

I chose this as one my favorites for the year for several reasons. The first is that the photograph was a collaborative effort on the part of the workshop participants and myself. Taking turns as director of the shoot and working together on light painting is a great way to learn and use the many hands to help bring a vision to life.

The second reason is the serendipity of the cloud mimicking โ€œsmokeโ€ coming from the serpentโ€™s mouth. Sometimes you just get really lucky. I could go back there a hundred times and never see it like this again.

The last reason is the serpent itself. As a lover of light painting, Iโ€™m always looking for interesting subjects to illuminate against the night sky. I couldnโ€™t have asked for a more detailed, textured and beautifully sculpted subject. Couple that with the clear dark skies of the desert, and youโ€™ve got a recipe for night of fun!

(FYI, we just announced new dates for another Dark Skies, Desert Beasts workshop with Atlas in 2019.)

Star Trails over Golden Gate Bridge. Fuji X-T2, Fuji XF 10-24mm f/4 lens set at 10mm. Sixty exposures, each 30 seconds, f/4, ISO 200.

San Francisco is set in one of most beautiful locations in this country. The headlands, the bay, the shoreline and the city are all just simply gorgeous. I also really, really like The Bridge. I canโ€™t say why, precisely. Perhaps itโ€™s the engineering. Maybe it's the color. Or most likely a combination of those things plus its location. Whatever the reasons, I canโ€™t go to San Francisco without visiting the headlands and making images of the bridge as the sun goes down.

I canโ€™t count how many times Iโ€™ve stood in this spot and contemplated the view as I made image after image. Most of the time, however, I was there only for dusk and blue hour. Rarely did I get a chance to stay well into the night, and when I did the skies were not conducive to star trails.

This night proved to be different. All of the elements came together for a star trail shot. The trick here was to capture the stars without overexposing the city and the bridge. When you give enough exposure to reveal the stars, the bridge and city lights completely blow out. If you limit the exposure to make the city look good, the stars are barely visible. To address this dichotomy, my plan was to break up the exposures into separate ones for the bridge and city lights and ones for the sky and the star stack.

After focusing, I took several test shots and settled on a focal length, composition and initial exposure. I found that using an ISO of 200 for 30 seconds at f/4 produced an exposure that made the stars visible, but overexposed the bridge. A 15-second exposure at the same ISO and aperture retained highlight detail in the bridge and city. I made these two images and proceeded to the next step.

I set the intervalometer on my Fuji X-T2 to shoot 60 images at 30 seconds with a 1-second delay between frames. Once I plunged the shutter, I sat back for half an hour to enjoy the view.

When I returned to the computer, I opened all 60 frames in Photoshop, selected all of the layers and then chose the Lighten blend mode to create the star trails. My next step was to flatten the file to minimize its footprint on the hard drive. I then opened the 15-second exposure and copied it onto a layer in my first file. This darker image allowed me to mask in the properly exposed city lights and bridge while keeping the lighter sky with the stars.

Shooting star trails near cities takes a little planning and some post-processing work, but itโ€™s also a ton of fun. I canโ€™t wait to return to San Francisco this year with Gabriel Biderman to run our Golden Gate National Recreation Area & San Francisco Workshop in November!

Chris Nicholson

Boathouse near Campbeltown, Scotland. Nikon D5, Nikon 24-70mm f/2.8 lens. Light painted with a Luxli Viola. 30 seconds, f/4, ISO 2000.

Iโ€™m an ardent believer in the idea that a good photograph should not be just of something, but also about something. And this image is definitely about something important to me.

When I was four years old, I lived in Scotland for about half a year because the U.S. Navy stationed my father at the Royal Air Force Machrihanish base at the tip of the Kintyre peninsula. We lived in nearby Campbeltown, and I still carry a fair number of memories from the experience.

So when National Parks at Night began scheduling a night photography tour of The Hebrides for the spring of 2018, I knew for sure that I wanted to work it. I hadnโ€™t been to Scotland since my family left in 1976, and this was an excellent chance to revisit one of my childhood haunts. So it was that Lance and I jumped over the pond a few days before our tour began and drove up to the Kintyre peninsula.

The couple of days I got to spend in Campbeltown were incredible. I found our old apartment on Queen Street, traced the steps I used to make to the nearby beach, and drove downtown past my old playground and along the fishing port. We stayed overnight at an old captainโ€™s house we found on Airbnb, and thatโ€™s where we based our night shoot.

I focused all my attention on this old boathouse. I set up the camera on a jetty, and walked back onto the land atop some rocks to light paint the structure and water with a Luxli Viola. My goal was to mimic the warm tones of the light with the warm twilight sky, and to illuminate the crashing waves just enough to capture some motion and reveal some detail.

I liked the resulting photograph enough so that it truly is one of my favorites of 2018. I like the light, the color, the composition. But the most important part of the image for me is the experience of those two days: reconnecting with memories of my mom, who I talked to several times while strolling the streets, and with memories of my dad, who passed in 2006, and with memories of who I was 42 years ago as a little boy in a faraway land.

Moonlight in Santa Elena Canyon, Big Bend National Park. Nikon D850, Nikon 14-24mm f/2.8 lens at 17mm. 20 seconds, f/2.8, ISO 5000.

If youโ€™ve ever been to Big Bend National Park and photographed Santa Elena Canyon, you know that the light at this amazing location can work well at both ends of the day. You can shoot in the morning when the sunrise light hits the face of the canyon, or you can shoot at the end of the day when the setting sun bounces into the canyon and reflects off the walls. The latter is a more challenging exposure, but often results in more satisfying creative options.

So when I saw in PhotoPills that the moon would be setting behind the canyon during my winter 2018 trip to the park, I had the idea to use that same late-day strategy for shooting there at nightโ€”having no idea if it would work well or not.

Well, it worked splendidly. The night was perfectly clear, which allowed for a spectacularly starry sky, and the setting moon did exactly what I was hoping: It bounced into the canyon, lighting up the 1,500-foot cliff face that flanks the Rio Grande.

Shooting from a low angle with a wide lens portrayed the magnitude of Santa Elenaโ€™s size. It alsoโ€”for me, anywayโ€”inspired another adventure. Looking at the moonlight spilling into the canyon, I could imagine the thrill of canoeing the river at night. Next time, perhaps?

Matt Hill

Zig When They Zag. Nikon D500, Nikon 50mm f/1.4G lens. 30 seconds, f/2, ISO 125.

My two favorite images of 2018 reflect my developing tastes in composition and motion. And they both happened at Rocky Mountain National Park.

After hiking up the Tundra Communities Trail, I faced west (to catch my breath). Whilst helping workshop attendees, I saw the switchback leading toward the visitor center in the distance, and my eyes were drawn to the car traffic there.

I popped on my Nikon 50mm f/1.4G lens for a nice composition of thirds that allowed me to pit the energy of the cars passing to and fro against the stars angled almost perpendicular against this zigzag of light. After shooting four frames at 30 seconds each, I knew I had enough car trails to make the stack and moved on to another breathless scene. You know, the air is really thin up there. ;-)

Moonset Over Tyndall Gorge. Nikon D850, Sigma 35mm f/1.4 Art lens. Ten frames at 10 seconds, f/5, ISO 6400.

The second Rocky Mountain image was from the hike down from Emerald Lake during our add-on adventure a few nights later. We got to this spot just in time to see the setting moon scraping across this vast valley and mountain range.

After fiddling with my circular polarizer experiment for a bit, I saw that the moon would soon set in the trees to my right, so I hustled to swap in my Sigma 35mm f/1.4 Art lens, go vertical, level out the Acratech GP-ss head on the leveling base and throw on the nodal rail.

This is a 10-frame pano stitch, with each frame shot at 10 seconds, f/5, ISO 6400, then assembled in Lightroom Classic CC. At the time, I did not see the crazy cool things the clouds were doing. I was, after all, a bit exhausted from the 650-foot-in-1.5-mile ascent at altitude while wearing โ€œthe kitchen sinkโ€ (my Shimoda 60L backpack full oโ€™ gear). During the edit, I was simply astounded by the soft yet kinetic cloud movements and so darn happy that Iโ€™d timed it just right to get the moonset in the tree line.

Your Turn!

Now that youโ€™ve seen our favorite photos from 2018, weโ€™d like to see yours! Join us in the fun and post your favorite night photography image from the past year in the comments section below or on our Facebook page, and tell us a little about it. And if youโ€™re on Instagram, give us a follow. We will soon be announcing a contest of your best night shots of 2018!

Next, start 2019 strong. Put on your mittens (or shorts if youโ€™re in the Southern Hemisphere) and get shooting. Letโ€™s make 2019 the biggest year for night photography yet.

With stars in our eyes and gratitude in our hearts, thank you from the entire National Parks at Night team. Hugs.

Matt Hill is a partner and workshop leader with National Parks at Night. See more about his photography, art, workshops and writing at MattHillArt.com. Follow Matt on Twitter Instagram Facebook.

UPCOMING WORKSHOPS FROM NATIONAL PARKS AT NIGHT

Finishing What We All Started: Wrapping Our 2018 Workshops

About two weeks ago I bid farewell to eight workshop attendees in Death Valley, who were all part of National Parks at Nightโ€™s second Ambassador Series adventure with Atlas Obscura. Why do I mention this? Whatโ€™s the significance? Because those farewells marked the end of our 2018 campaign of leading eager night photographers into some of the most fantastic and fascinating destinations in the U.S. and abroad.

Over the past 12 months weโ€™ve led workshops in six national parks, two national historical parks, a national scenic byway, a western outdoor art garden, and three countries. Back in June we recapped the adventures from the first half of our year in the blog post โ€œSo Far, So Good.โ€ Now, to round out our coverage, we recap our second half. Below youโ€™ll find words, images and videos that reveal the journey we enjoyed with our attendees in 2018.

Capitol Reef National Park

June 17-22
by Matt Hill

Deep in southern Utah is one of the lesser-known jewels in a majestic crown of the stateโ€™s beautiful parks: Capitol Reef. Featuring gold-tier dark skies and an impressive geologic scale, it was an ideal place to host a June workshop.

Gabe and I began with our first-ever backcountry experience. A smaller group traveled out to the Temples of the Sun and Moon to camp overnight. With 4x4 high-clearance vehicles and a sense of adventure, we conquered the remote northern tip of Capitol Reefโ€™s Cathedral Valley.

The main workshop began a day later, with a full complement of eager night photographers. Itโ€™s hard to say which location was my favorite, so check out the above slideshow with images from Sunset Point, Fruita Orchard, Chimney Rock, Capitol Gorge and more.

We covered a lot of ground, including star points, star trails, light painting, light writing and night portraiture. All in all, we had an amazing, tight group of people who came together in the desert to make beautiful images and to enjoy the natural and gargantuan scale of Capitol Reefโ€™s features.

Redwood National and State Parks

June 25-30
by Lance Keimig

In June, we held a very special workshop at Redwood National and State Parks, which coincided with the national parkโ€™s 50th anniversary.

In 1968, Congress protected lands adjacent to three California state parks with the creation of Redwood National Park. In 1994, the California Department of Parks and Recreation and the National Park Service concluded that joint management of the four-park area would be the best way to protect the fragile resources of the Redwood Coast.

There are not many experiences that can compare to the awesomeness of walking in a redwood forest. Trees as tall as football fields are long, and sometimes 15 feet or more in diameter, have a way of clearing oneโ€™s mind and soothing oneโ€™s soul. They also tend to be rather difficult to photograph, in part due to their sheer enormity and in part because it can be difficult to work with your jaw dragging on the ground. Itโ€™s truly a breathtaking experience, similar to standing above the chasm of the Grand Canyon.

Our workshop was based at the historic Requa Inn in Klamath, California, which we had reserved in its entirety for our group. The small boutique hotel and restaurant proved to be the perfect base to explore the parkโ€“โ€“it was welcoming, comfortable and convenient, being situated more or less in the middle of the long stretch of shore that encompasses the redwoods and coastline that we were there to admire and photograph.

Because we had the run of the entire hotel, we were able to set the cooking schedule to our needs, with a late breakfast and early supper, enabling us to both sleep in and to get out into the forest to photograph while there was still some available light to work with. Did I mention it was dark in the forest? Only 3 percent of sunlight penetrates the canopy and filters down to the forest floor, so theoretically, the same goes for moonlight and starlightโ€”so yeah, it was dark in there.

Chris and I arrived a couple of days early and determined that the best strategy for the group would be to arrive in the forest before sunset and figure out a composition or two while we could still see our cameras on the tripod in front of us. Light painting was a critical component of every shot, and workshop veterans and newbies alike were both challenged and inspired.

While the true stars of the park are the trees, the coastline of far-northern California is spectacular in itself, and we divided our time between the two. We spent a night outside of the park at the outstanding beach in the small town of Trinidad. And one of the highlights of the workshop occurred on the last night when two of our veteran participants led an impromptu light writing extravaganza for everyone at the aptly named Big Tree. It was a great way to end a spectacular week.

Blue Ridge Parkway

July 29-August 4
by Chris Nicholson

This summer we embarked on our first road trip, cruising along about two-thirds of the 469-mile Blue Ridge Parkway, stopping both day and night to photograph the rolling hills, the winding road, the tunnels, the bridges, the farmland, the landscape and more.

We also photographed rain. Quite a bit, in fact. Precipitation fell almost every day of the trip, at some hour. It started on the second night, as we were planning to shoot Mabry Mill; not much was lost, as we returned the next day and shot it under perfect overcast conditions. The third night rain washed us out once more, but again not much was lost, as we retreated to the hotel meeting room for a two-hour tethered demo on light painting.

The fourth night, the rain retreated long enough for a great shoot at the Moses H. Cone mansion. Large holes opened in the clouds, revealing beautiful starry skies, and we light-painted the whole mansion with Luxli Viola LED panel lights. Alas, on the fifth night rain came again, but the group was not to be deniedโ€”we all donned rain gear, and one participant bought a portable picnic tent from a nearby Walmart that protected about half a dozen camera setups, and for about three hours we photographed car trails through one of the parkwayโ€™s iconic tunnels.

On the last night, the group ventured dry and highโ€”all the way to the Richland Balsam Overlook, at 6,053 feet, the highest point on the Blue Ridge Parkway. We finally had a wonderfully clear night, and were able to photograph the Milky Way spanning over the landscape.

Our road trip was not all about photography, though. We shared a great many experiences, including dinner at the Peaks of Otter Lodge, brunch at the Mabry Mill Restaurant, bluegrass music in the breezeway at the Blue Ridge Music Center, BBQ in Asheville, and more. See ya on the road!

Rocky Mountain National Park

September 15-20
by Chris Nicholson

When we first scheduled our Rocky Mountain National Park workshop for September, one of the things we hoped for is that we might catch some fall foliage. Itโ€™s hard to predictโ€”you know the foliage will turn, but trying to figure out which week it will, over a year ahead of time, is an exercise in silliness. So you just take a shot and hope for the best.

Well, boy did we nail it. Right as the workshop was beginning, the aspens of Rocky Mountain started lighting on fire with fall color, and our workshop attendees were all over it.

Of course, thereโ€™s much more to this park than autumnal color. So much more. And we photographed all of it.

We photographed the valleys, the waterfalls, the lakes, the ponds. We made a day-trip to Grand Lake, where we had a group BBQ lunch, then hiked to and photographed the beautiful East Inlet. We braved the night cold of the tundra, where we photographed a lightning storm skimming the horizon. We made Milky Way images at the edge of mountain meadows, where we could hear the bugling and the clashing antlers of elk in the darkness.

Then after the main part of the workshop ended, it was time for the optional backcountry add-on. We hiked about 2 miles up into the woods with five attendees to Dream Lake and Emerald Lake, two of the most scenic places in the park. We reached Emerald Lake in daylight, ate a picnic dinner, then started shooting as night fell. In the darkness, we slowly worked our way back down the mountain, photographing at each successive amazing location along the way, finally ending our night with one of the most stunning valley views in all the national parks, bathed in moonlight on a clear Colorado evening.

Chaco Culture National Historical Park

September 23-26
by Lance Keimig

As you likely know, there are a number of designations for National Park Service properties: national parks, national monuments, national seashores, national recreation areas, and national historical parks, among others. Matt and I led NPANโ€™s first workshop to a historical park in September, at New Mexicoโ€™s Chaco Culture, the site of the densest collection of ancient Puebloan structures in the world.

Photography at Chaco is all about the massive pueblos, as well as how they fit into the landscape. The various archeological sites at Chaco Canyon range from about 800 to 1,000 years old, and are the most significant feats of engineering from the ancient world in the American Southwest. We arranged for special nighttime access to the sites, which are closed to the public at sunset.

Many of the parks we visit are remote and hard to get to, and Chaco is no exception. The nearest accommodations are well over an hour away, but there is a campground at the edge of the park. In order to minimize travel and get the most out of our time at Chaco, we elected to base ourselves at the campground and to use one of the spaces at the parkโ€™s visitor center for our classroom. Many of our participants opted to bring an RV, but a good number decided to rough it and go for tent camping.

Our workshop coincided with this dark sky parkโ€™s annual astronomy festivalโ€”which was ironic because we were there during the full moon, specifically so that we had moonlight to illuminate the landscape while we focused on light painting the structures. Dr. Erica Ellingson and Nick Conant were there from the Fiske Planetarium at the University of Colorado at Boulder to present Ellingsonโ€™s Ancient Light program on Chacoan astronomy in their mobile planetarium, and we were able to arrange an extra presentation of the program for our group.

Chris and Matt had just completed their Rocky Mountain National Park workshop, and they drove to Chaco from Denver so that Chris could join us for the first couple of days and nights.

Of particular note was a high level of coordination and cooperation among the workshop participants, which proved essential while working in the tight quarters of the archeological sites. Thatโ€™s not really a big surprise, because our groups are amazing, and we are truly fortunate to work with such great people on a regular basis.

This was my last workshop of the year, and it was a great way to end it. Thank you to my partners at National Parks at Night and to all of the wonderful workshop participants Iโ€™ve had the pleasure to work with over the year.

Catskills Night Portraiture (Fall Session)

October 12-14
by Matt Hill

I co-led our second night portraiture workshop in Catskill, New York, with Tim. Over one intense weekend we worked with two local models, Rip and Galaexius, to make iconic and creative portraits in the Hudson River Valley and some cool locations in the Catskill Mountains.

During the daytime, we did hands-on learning with lighting and posing models, as well as studying how to build up to a properly balanced exposure. In the evenings, we applied that knowledge in the field down at the river, as well as at the nearby natural art installation, Opus40.

Our models were the bomb, and our attendees really stretched themselves to do the complicated task of not only making a great photograph at night, but also a thoughtful and deliberate portrait.

We liked the experience so much, weโ€™ll be bringing the idea back in a five-night format. Stay tuned โ€ฆ and on the mailing list. ;-)

Sloss Furnaces National Historic Landmark

November 15-18
by Gabriel Biderman

Our last workshop of the year was in an incredibly unique location, the Sloss Furnaces National Historic Landmark. Located in Birmingham, and built in 1880 and operated until 1970, Sloss is the only 20th century blast furnace in the U.S. being preserved and interpreted as a historic industrial site. And we were the first group to lead a dedicated night photography workshop there!

Our focus of the workshop was to interpret the location in black and white and to add a heavy dose of light painting. We had a diverse group of attendeesโ€”including several locals from Birmingham as well as people from Germany and both U.S. coastsโ€”who came to explore the site with us.

We were also thrilled to work very closely with Sloss. They gave us a private tour of the whole site to kick things off, and they worked very closely with us through the whole process.

One of the big things that made this workshop so different for us was that we could return to the same location each night. The preserved footprint of Sloss is one-third of what it used to be, but itโ€™s packed with a vast amount of subject matter. Participants could focus on a different subject each night, or they could revisit, reinterpret or finesse the same.

That flexibility of repetition was especially helpful for honing our light painting skills The variety of ways that we could interpret Slossโ€”wide overall exterior shots, tons of abstract details, and rooms that were pitch darkโ€”offered infinite opportunities to create by adding light to the scene.

An unexpected surprise was the amount of stars that could be seen above the Furnaces. We could really heighten the sense of time against this timeless machinery. And because of the unseasonably cool temperatures, we were able to set up rigs to get 1-hour-plus exposures without much concern for long exposure noise in our images.

Our classroom time was spent discussing black and white techniques, as well as sharing one anotherโ€™s work. Each day we were eager to get back to Sloss and cover more ground. We were fortunate enough to witness an iron pour one night, as Sloss continues to operate a workshop area for educational purposes.

We always end our workshops with a slideshow of our images, typically shared in our classroom. However, Sloss offered to have us showcase our images at their visitor center. The event was open to the public and showcased a nocturnal look at the site. We were also invited to have our work in a group show later in 2019. Rumor has it that weโ€™ll be returning to Sloss as well as exploring other historic industrial sites in the near future!

Death Valley After Dark: Astronomy and Photography in the Backcountry

December 5-8
by Chris Nicholson

Our second partnership with Atlas Obscura was also a departure for us, in that this workshop was about not only night photography, but also astronomy. Out in the field with us day and night was Tyler Nordgren, astronomer and author of the book Stars Above, Earth Below: A Guide to Astronomy in the National Parks.

The workshop was an experience of photographing and exploring the night skies of the parkโ€™s most remote fascinations, including Racetrack Playa, Eureka Sand Dunes and the Wildrose Charcoal Kilns. We also visited some spots that are easier to access but are just as amazing, including Badwater Basin, Salt Creek Flats and Ubehebe Crater.

And that was only the tip of the adventure iceberg. We rented red Jeeps from Farabeeโ€™s for hours upon hours of backcountry driving, we camped at the Racetrack, we enjoyed fresh-cooked chili at the tent site, and we shared an outdoor pancake and coffee breakfast on a very cold desert morning (after a very cold desert night).

In addition to the night (and day) photography, Tyler continually waxed poetic about the universe above us. We learned about constellations and nebulae, we looked through his telescope and image-stabilizing binoculars at galaxies and a comet, and he taught us more than we could have imagined about the Milky Way and zodiacal light.

Weโ€™re looking forward to many more opportunities to seize the night with both Tyler and Atlas Obsura.

Astronomer Tyler Nordgren powered his telescope with one of the ONsite recharging packs that Tether Tools provided for our Death Valley backcountry workshop.

Partner Participation

Weโ€™ve said it before, and weโ€™ll say it again: When we form brand partnerships, we look for the relationship to benefit our workshop attendees too. Nikon, Coast Portland, B&H Photo, Peak Design, Light Painting Brushes, X-Rite, BenQ, Bay Photo, Irix Lenses, Valleret, PhotoPills, Tether Tools and Luxli all offered loaner gear, discounts, gifts and other perks at various locations. As always, our gratitude is unending.

Looking Forward

Wow. 2018 was amazing. And we couldnโ€™t have done it without all the photographersโ€”ranging from 16 to 80ish, male and female, from night photography rookies to veteransโ€”who attended and made these workshops and tours so memorable.

It makes us want to do it again! And do it again we shall. If anything gets us more excited than our memories of 2018, itโ€™s our anticipation for 2019. Weโ€™re heading to six national parks: Big Bend, Bryce Canyon, Glacier, Great Smoky Mountains, Grand Canyon and Lassen Volcanic. Weโ€™ll also be visiting Cape Cod, Devils Tower, the Outer Banks, San Francisco and Valley of Fire. Weโ€™re venturing overseas again too, to Morocco, Easter Island and Cuba. And weโ€™re running two firsts: a Post-Processing Intensive in Catskill, New York, and a multinight backcountry backpacking adventure to Shi Shi Beach in Olympic National Park.

Several of the 2019 workshops still have seats available. As for the sold-out experiences? You can still sign up for the waitlist for any workshop at no cost and with no risk. If a spot opens up, weโ€™ll invite you to apply.

So come join us, to seize the night!

Chris Nicholson is a partner and workshop leader with National Parks at Night, and author of Photographing National Parks (Sidelight Books, 2015). Learn more about national parks as photography destinations, subscribe to Chris' free e-newsletter, and more at www.PhotographingNationalParks.com.

UPCOMING WORKSHOPS FROM NATIONAL PARKS AT NIGHT