Remote Question: Wireless or Wired Intervalometers for Camera Triggering?

One of night photography's essential toolsthe intervalometerhas two main variants: wired and wireless. Which is better? When? Let's explore that.

In this post, I will refer to "classic" intervalometers. We'll cover the Bluetooth and WiFi ones in a future post. Let's quickly establish the tools covered in this post:

Wired Intervalometer

An external camera shutter control device that is hard-wired and plugs into your camera.

Vello Wired Shuterboss II

Vello Wired Shuterboss II

Wireless Intervalometer

An external camera shutter device that has a transmitter (the intervalometer) as wells as a receiver that plugs into your camera.

Vello Wireless Shutterboss II

Vello Wireless Shutterboss II


Now let's get down to the nitty-gritty and understand where they shine ... and where they do not.

Wired Pros

Two AAA batteries last a long time!

  • One set of batteries generally lasts a long time (over a year for me).
  • Only one piece means fewer failure points.
  • About half the price.
  • Sometimes simpler softwarefewer options means fewer variables to set and navigate.
  • If the batteries run out, you can always use the sliding and locking Bulb button to manually open and close your shutter.

Wired Cons

  • If you don't strap it down to your tripod leg or use a caddy, the weight of the intervalometer may damage the connection to your camera body.
  • To get in front of the camera to light-write or light-paint, you have to set a delay and listen for the camera shutter, or if the subject is too far away, count in your head or use another timer (such as a watch or smartphone).
  • Same scenario aboveno feedback about the exposure ending except for listening for the shutter (if you're close enough) or running another timer.
  • If you upgrade your camera body and the connection is different, you have to get another intervalometerthe cables are hard-wired and not interchangeable.

Note the wired has only the top row of functions, while wireless has both top and bottom rows of functions. (click/tap for larger view)

Wireless Pros

No stress on top of the camera!

  • Having the intervalometer with you at all times allows you freedom to trigger and walk away while still seeing the total exposure time/total exposure count.
  • You can trigger from the safety (and warmth or coolness) or your car or tent.
  • The receiver traditionally sits atop your hot shoe, which means no stress on the connection to your camera body; even if not on your shoe, it's usually very lightweight.
  • You can trigger with great precision when doing light writing, light painting or getting crazy with a Pixelstick, catapulting glow sticks or whatever your genius brain devises.
  • The wireless version usually can be plugged directly into a camera without using a receivera nice option to have when you just want to stand by your camera.
  • Because of the wireless design, you can get one intervalometer and many different cablesthis can be useful if you upgrade your camera body, or want to loan it to a fellow night photographer.
  • If the batteries run out, you can always use the sliding and locking Bulb button to manually open and close your shutter.

Wireless cons

Switch-hitter: Swap cables when changing cameras!

  • If you happen to walk too far away from your camera, the exposure program stopsOOPS! Why? Because the transmitter is constantly broadcasting shutter control information to the receiver.
  • Two sets of batteries to maintain, which also may drain at different speeds, and may even be different types (e.g., alkaline, NiMh, etc.).
  • Since the transmitter broadcasts information all the time, plus has to operate a radio, the batteries don't last as long as with a wired intervalometer.
  • Some wireless intervalometers have two sets of menus, and the default is what I call "daytime mode"when you want to get to the part of the menu for long and interval exposures, you have to remember (every time) to use the cross pad to get to it.

Wrapup

There are many tools to fit many situationsnever one perfect tool. So choose wisely when gearing up for your night photography, including which intervalometer to purchase or to bring along.

On that note, I use only wired intervalometers. I prefer them for many of the pros listed above. And at half the price, a backup isn't a painful investment.

Want to learn more about intervalometers? Check out our blog post/screencast about mastering them.
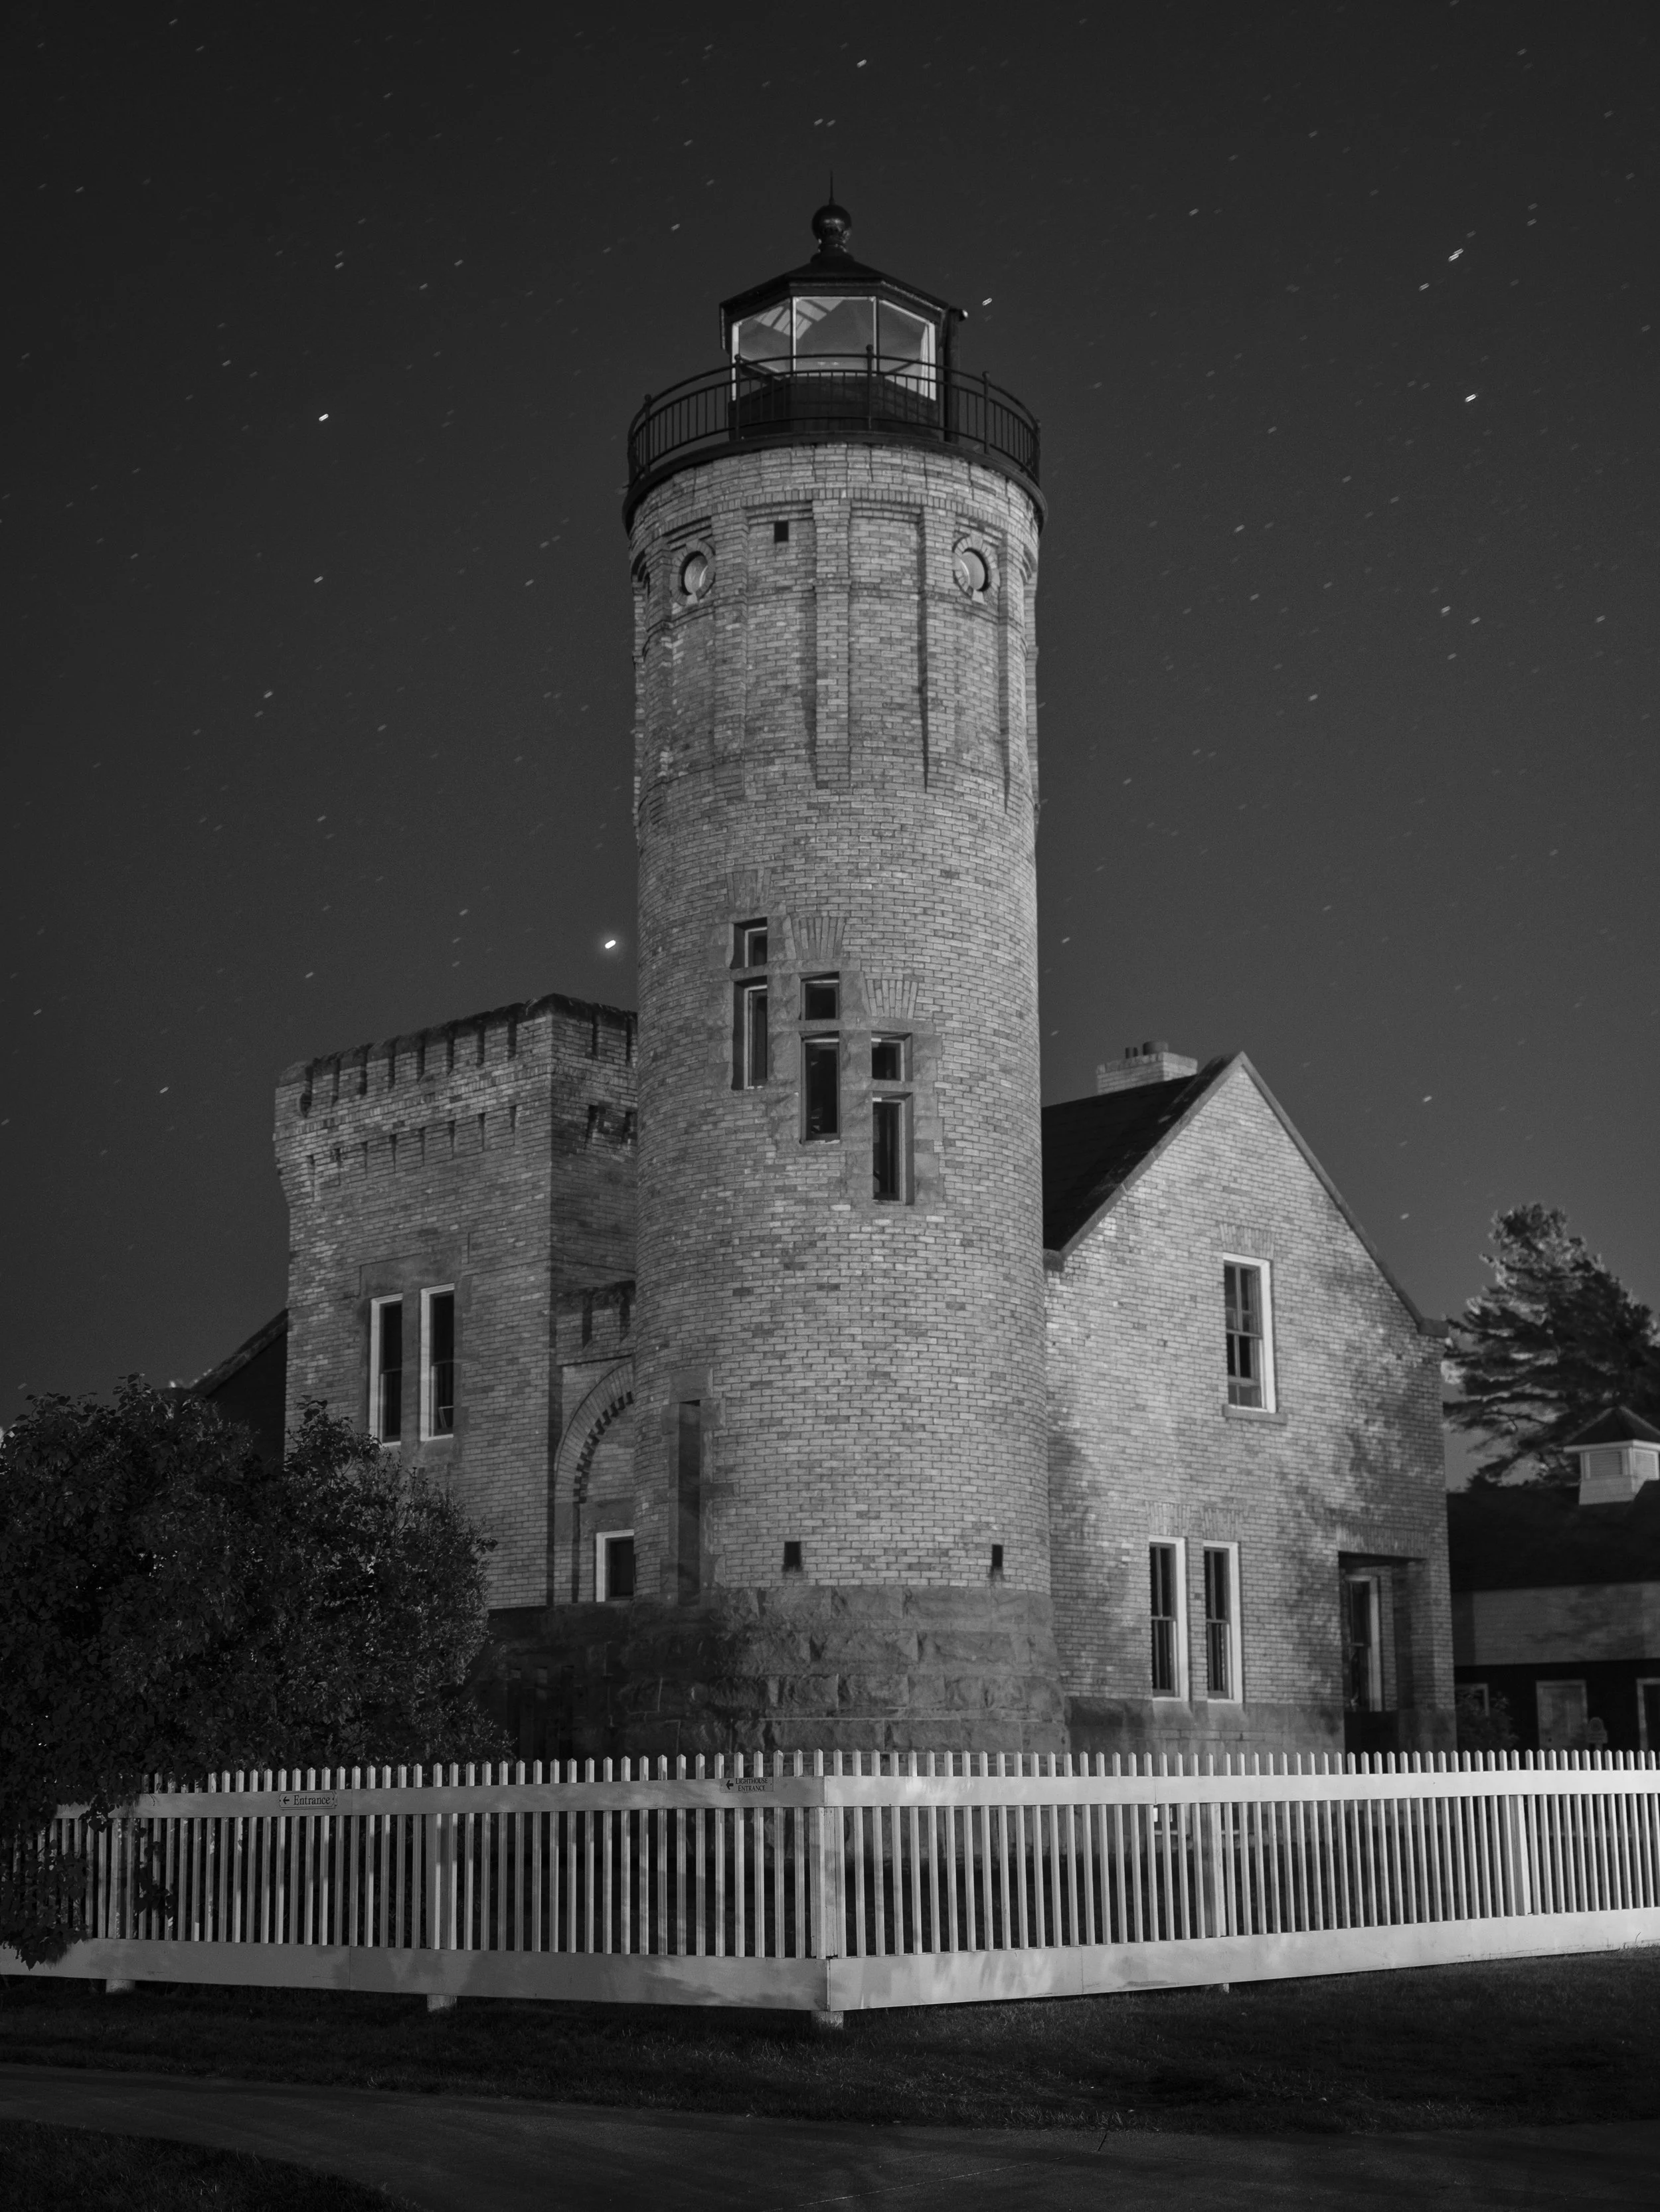
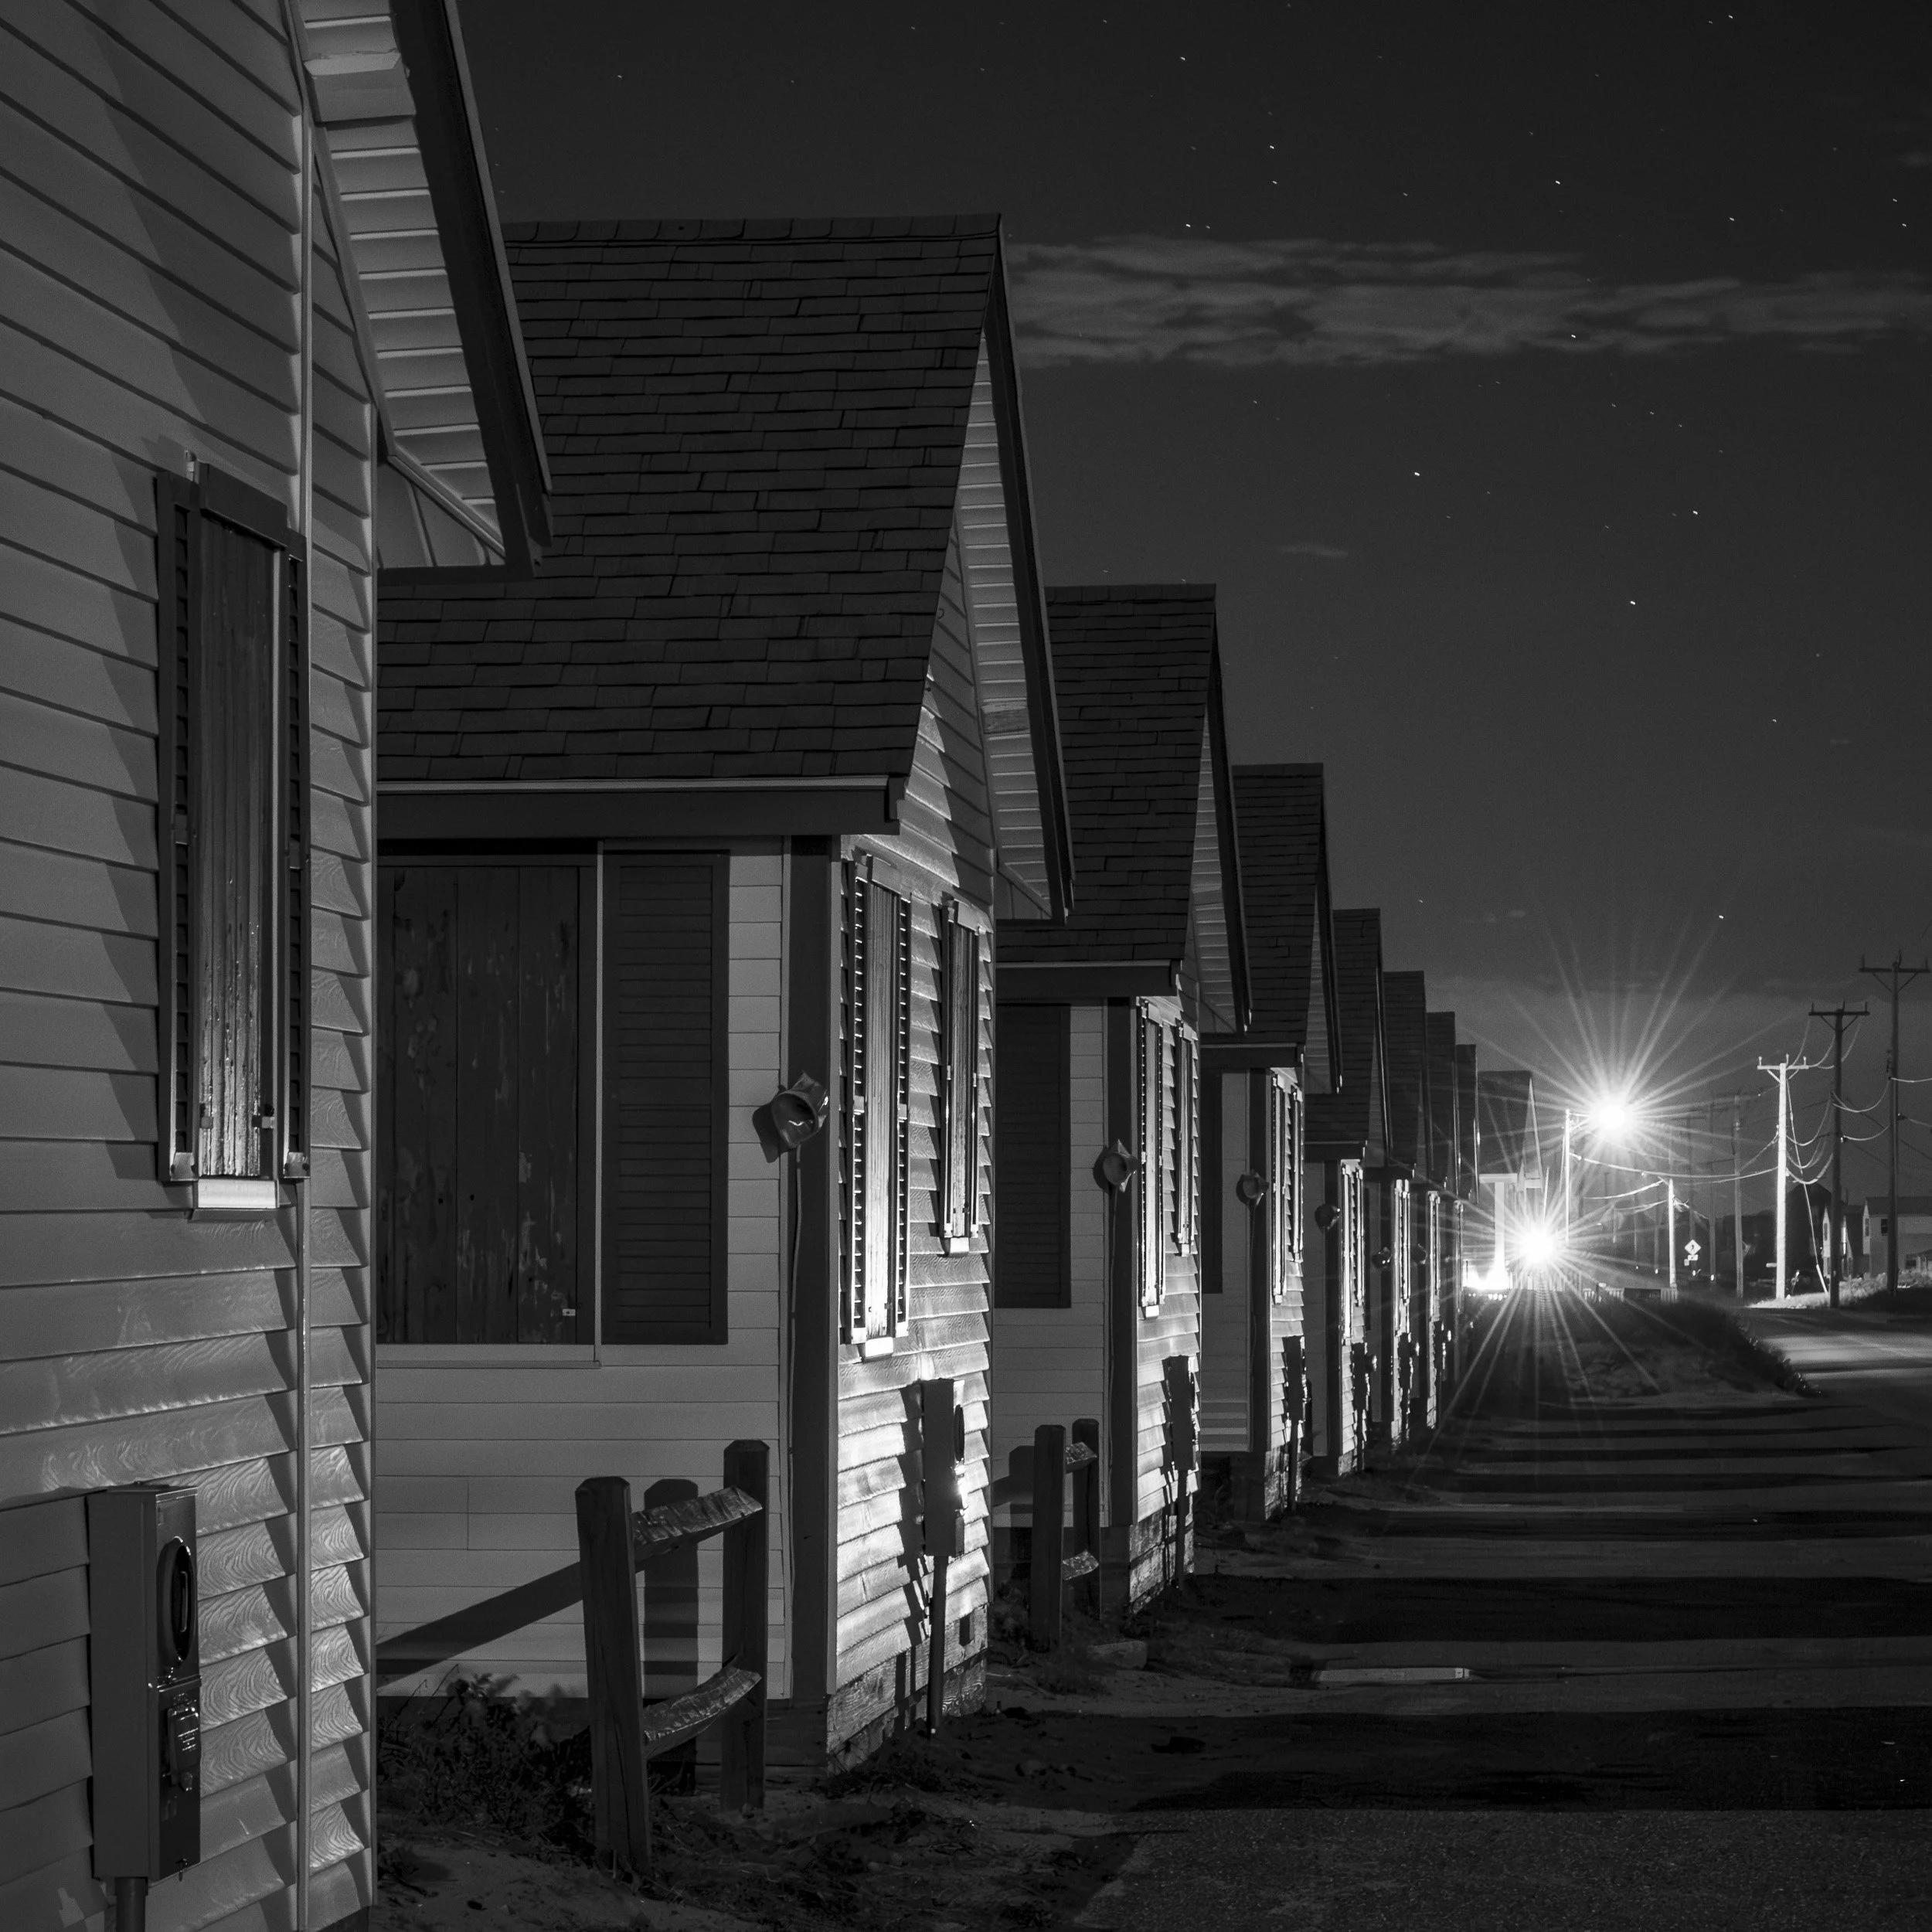
See more about Matt's photography, art, workshops and writing at MattHillArt.com. Follow Matt on Twitter Instagram Facebook.

Upcoming workshops from National Parks at Night

Level Up With Light Painting: Correcting the Color of Your Flashlight (Part I)


For the photographer who enjoys light painting, the flashlight (or “torch,” if you are a Brit) is your most basic tool. However, all flashlights are not created equal. They come in a wide variety of intensities, beam patterns and color variations. In this post I’ll deal with that last variable, and show you how to control the color of this essential tool.

Defining the Color Problem

While incandescent flashlights have been the norm for a very long time, today the most commonly found flashlights use LED (light emitting diode) technology. The LED is superior in many ways. LED flashlights are more resistant to shock, are easily dimmable, and last much longer than a typical incandescent bulb.

The downside is that LED flashlights rarely have the nice warm color that was so common in our old household Everyready or Maglite. Most LEDs produce a cooler blue or even greenish color. For photographers working in black and white, this is a non-issue. But color photographers might want to determine their flashlight’s color cast so they can add the proper filtration to obtain a desired color temperature.

Measuring the Discrepancy

Like most folks, I don’t own any special color meter equipment, so I set up a simple test using the tools that I had on hand: My Nikon D4s and Gitzo Series 2 Traveler carbon fiber tripod, an X-Rite ColorChecker color-test chart, Adobe Lightroom, and my Coast HP7R flashlight. (I should note that the HP7R is an amazing light, one of the workhorses of my kit—the fact that I’m using it for this test does not denote a shortcoming with this model in particular, but rather with the LED technology as a whole.)

I set up the color test chart in a dark room. With my camera on the tripod and white balance set to Direct Sun (Daylight on a Canon), I illuminate the test chart with my flashlight and take a picture. Notice the cool color cast of the resulting image in Figure 1? The daylight white balance of the camera shows us the natural bluish cast of the flashlight.

Figure 1. Bluish color cast of the Coast HP7R flashlight, typical of many LED flashlights.

Figure 1. Bluish color cast of the Coast HP7R flashlight, typical of many LED flashlights.

To determine the exact color cast, I import the image into Lightroom and open it in the Develop module. The area at the top of the Basic panel displays the image’s white balance setting.

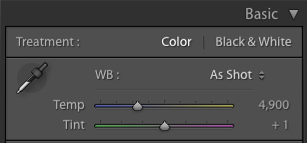
When shooting your camera with a white balance setting of Daylight, you would expect this reading to be 5500 on the blue-yellow axis and 0 on the green-magenta axis. The numbers we see here, however, are Adobe’s interpretation of my camera’s file. Adobe sees my camera as 4900 on the blue-yellow axis and +1 on the green-magenta axis. The fact that these numbers (Figure 2) don’t match the traditional daylight Kelvin temperature of 5500 is not a big deal; remember, this is just Adobe’s interpretation.

Figure 2. Adobe’s interpretation of my camera’s white balance when shooting with the unfiltered HP7R.

Figure 2. Adobe’s interpretation of my camera’s white balance when shooting with the unfiltered HP7R.

Next I grab the White Balance Selector tool (circled in red in Figure 3) and click on one of the light gray patches of the color checker chart.

Figure 3. The White Balance Selector tool.

Figure 3. The White Balance Selector tool.

The White Balance Selector is a great tool for color-correcting when you have a known neutral color in a scene, such as the gray areas of this chart (which I carry with me for times when I need to get precise color correction under artificial lights). When you click on an area of the image with this tool, Lightroom tries to balance that area to a neutral color, resulting in no color cast. Figure 4 shows the image after I click on the light gray patch. Notice how the cool cast is removed from the image, resulting in neutral grays.

Figure 4. The chart after using the White Balance Selector.

Figure 4. The chart after using the White Balance Selector.

Figure 5 shows a magnified section of before and after the Lightroom adjustment.

Figure 5. Natural light of my Coast HP7R (top) and the color-corrected version (bottom).

Figure 5. Natural light of my Coast HP7R (top) and the color-corrected version (bottom).

Also after clicking on the chart, the numbers on the sliders change to reflect the new white balance (Figure 6).

Figure 6. Original white balance (left) and the corrected white balance (right).

Figure 6. Original white balance (left) and the corrected white balance (right).

At this point I am not overly concerned with the actual numbers. The real information I am looking for is which way the sliders moved. Figure 6 shows us that Adobe color-corrected by adding a bunch of yellow. This is the important thing for me to note, because it means that in order to correct my flashlight, I need to do the same thing!

Fixing the Flashlight

The next step is to begin experimenting with filtration. A common form of filtration for the photographer is a thin, heat-resistant, polyester filter that’s often called a “gel.” Gels come in a staggering number of variations and are used to enhance the color of light or to color-correct it. Gels also come in different sizes, but the ones typically used for on-camera flash units and flashlights are about 1.5 by 3 inches. Figure 7 shows how this size is neatly bundled into a swatch book. For the small investment of $2.50, the Roscolux Swatchbook is must-have for light painters.

Figure 7. Roscolux Swatchbook.

Figure 7. Roscolux Swatchbook.

Knowing that I have to cancel out blue, I open my swatch book and find a common gel called a CTO (color temperature orange). It comes in several strengths, with designations such as 1/4 CTO, 1/2 CTO and Full CTO (the strongest). By tearing out the gels from the swatch book, I can cover the flashlight, illuminate the color chart and begin taking pictures of the color chart again.

After making some test shots, I load them into Lightroom and visually compare the charts with the original and color-corrected versions. After several experiments I find that the 1/4 CTO does a pretty good job of neutralizing the blue cast.

However, I also want to add a bit of warmth to my light, so I up the strength of the CTO to 1/2. This works well, but it does impart a bit of green, so I add a 1/8 minus green filter which adds some magenta. Figure 8 shows the color-corrected chart on the top and the chart illuminated by my Coast HP7R gelled with Rosco 1/2 CTO and 1/8 minus green filters.

Figure 8. Color-corrected chart on top, filtered version on the bottom.

Figure 8. Color-corrected chart on top, filtered version on the bottom.

This test is by no means superscientific, but it gets you in the ballpark. Taking the time to experiment with a few filters will allow you to paint with confidence out in the field and will save you a ton of time color-correcting in Lightroom and Photoshop. Of course, if you use the Coast HP7R, you don’t have to run any tests at all, because I just told you the results! A Roscolux 1/2 CTO and a 1/8 minus green combo work nicely. It’s also a good combination for the lower-powered Coast HP5R, another of my favorite flashlights.

Putting This Into Practice

Once you’ve determined which gels you need, it’s time to attach them to your flashlight. This can be accomplished in many different ways. The easiest is to simply fold the gel(s) over the end of the flashlight and wrap a rubber band around it. This certainly works, but is not overly elegant and may result in lost or damaged gels over time.

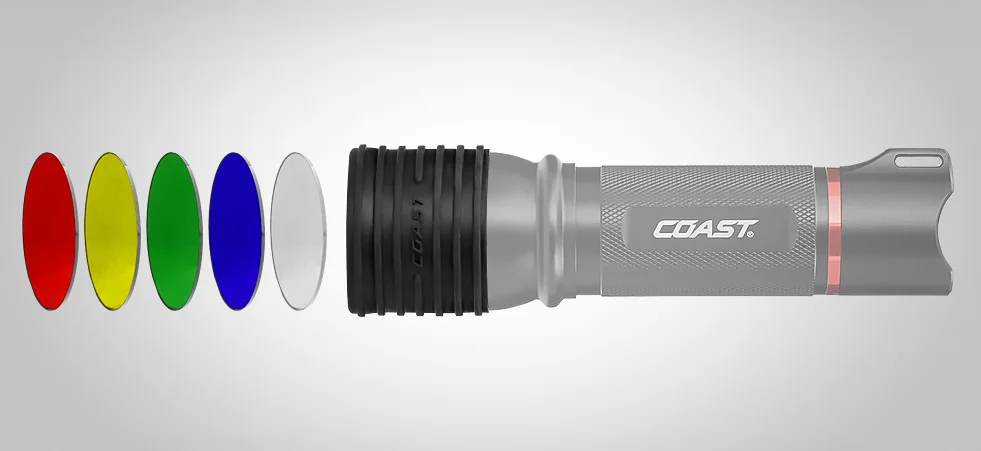
For my gels, I purchased the $4.99 LF100 Lens Filter Kit from Coast. Figure 9 shows how the rubber bezel cover can hold any of several colored or clear plastic filters that are included with the kit.

Figure 9. LF100 Lens Filter Kit from Coast.

Figure 9. LF100 Lens Filter Kit from Coast.

I used a filter from the kit to trace and cut my 1/2 CTO and 1/8 minus green filters, then simply taped them to the clear filter. Voila. Perfect color and no hassle of taking filters on and off out in the field. The LF50 Lens Filter Kit does the same job on the smaller HP5R flashlight.

Figure 10. A rusty fence light-painted with just the Coast HP7R (left), and with the same flashlight modified with the 1/2 CTO and 1/8 minus green filters (right).

However, while my test has provided the desired color from my flashlight, it works only when I am using Direct Sun (daylight) white balance. In Part II of this topic, I’ll address the issue of filtering your flashlight when you are using the common nighttime white balance setting of 3200 K.

See the continuation of this article: “Level Up With Light Painting: Correcting the Color of Your Flashlight (Part II).”

Learn more techniques from Tim Cooper’s book The Magic of Light Painting, available from Peachpit.

UPCOMING WORKSHOPS FROM NATIONAL PARKS AT NIGHT

A Year of Shooting in the Dark: Reflecting on Our Fave Photos of 2016

A new year always brings the promise—or the hope—of change. And such is the case with the National Parks at Night blog. With a quick look at your calendar, you’ll know for sure that today is not Tuesday, but Saturday. The former was our new-post day since we launched this blog last January, but 48 posts later, we’re changing to the latter. We hope the weekends will afford you more time to relax with the words we write.


The end of the year is always a nostalgic time to look back and reflect on your accomplishments. 2016 officially marked National Parks at Night’s first year in business, and we couldn’t be happier with how it went! We sold out all of our workshops, collectively explored over 20 parks, spoke at five major conferences, presented at countless camera clubs, and taught one of the most popular classes of the year—Night Photography Week—on Creative Live. And in between, we have been scheming to offer even more experiences and opportunities to learn with us in 2017!

As 2016 wraps, we’re also doing what many photographers do at this time of year: We’re reflecting on our creative endeavors, seeing ways we developed, and looking through our catalog to spot our favorite images. So join us for a stroll through 2016 as we share our favorite night photos from the year.

Matt Hill

While on our workshop in Arches National Park, Tim Cooper and I were finishing up at Balanced Rock when the clouds started to break. I thought about how wide my lens was and said to myself, "I have a feeling about this—let's see what happens." Looking over my shoulder when the image came up on the LCD, Tim said, “You’re a cloud whisperer now!” Boy, did I feel good. Sometimes experience helps you make better decisions, like placing the moon behind something, watching skies and manually closing the shutter just as the moon crests the edge. And sometimes fortune smiles on you. Thus goes the magic unpredictability of night photography. · Nikon D750 with a Nikon Fisheye 16mm f/2.8 lens; 7.5 minutes, f/5.6, ISO 100.

This is my favorite image of the year, because it captures everything I feel about what we do. Exploring, creative risk-taking, appreciation for national parks and collaboration. I shot this in Capitol Reef National Park during our National Parks Week road trip in April. We were hiking back through Capitol Gorge after an epic night of photographing at The Tanks, when I turned around and saw the possibilities for this composition. Everyone was tired (and concerned about some weather rolling in), but they still were happy to pose and to help light-paint the rock face. · Nikon D750 with a Zeiss Distagon 15mm f/2.8 lens; 30 seconds, f/2.8, ISO 3200.

Tim Cooper

This shot made in Zion National Park was created with the idea of mixing the motion of car trails with the motion of the moving stars. To keep the western sky from overexposing, I was limited to a 10-minute shutter speed, so I chose to shoot multiple exposures to stack later in post-processing. I made three test shots to determine the overall exposure and test for time and intensity with light painting. The final image combines four different exposures of 10 minutes each with light painting in various areas with the Coast HP7 flashlight gelled with a Bastard Orange Filter. · Nikon D4 with a Nikon 14-24mm f/2.8 lens; four 10-minute exposures, f/5, ISO 400.

Before I even landed in Arches National Park, I knew I wanted to create a composition with this tree that my friend Doug Johnson had pointed out to me years earlier. The brilliant light of full moon illumination meant that I had to keep my exposures to a maximum of 3 minutes so that the overall scene would not become too bright. Because I had envisioned the North Star and its “rings” through the trees, I set my Vello ShutterBoss intervalometer to shoot 17 separate images at 3 minutes each. The old tree received extra illumination via my Coast HP7 flashlight gelled with a Bastard Orange filter. · Nikon D4s with a Nikon 14-24mm f/2.8 lens; 17 3-minute exposures, f/5.6, ISO 100.

Lance Keimig

This image of the Mexican miner’s cemetery in Terlingua, Texas, is one of my favorites of the year for multiple reasons. First, Terlingua and the Big Bend region in general are unique in so many ways, including geology, geography and especially character. It’s one of my favorite places to visit, and this image is special to me because it is a remake of one that I created on my first visit to the area in 2007. The first time there, conditions were very different—the moon was full, and it was just before La Dia de los Muertos, the biggest day of the year in any Mexican cemetery. The original image was my favorite from the first trip, and the new one from this past March turned out to be my favorite from the 2016 trip. The composition is very similar, but the lighting and the sky were completely different. I was also working with my newly found friend, Hal Mitzenmacher, who was one of the workshop participants. The two of us worked together on the shot for about an hour, and I think Hal would agree that this hour was the highlight of the journey. · Nikon D750 with Nikon 24-120mm f/4.0 lens; 30 seconds, f/4.5, ISO 6400. Light painting from behind and from left with a Coast HP5R flashlight, as well as from both sides on the fence in front.

This image from Death Valley National Park exemplifies what I love about night photography. It’s simple, yet powerful. The lone streetlight that illuminates the dirt road leading up to the employee dormitories behind the Furnace Creek Inn takes the strange and beautiful natural landscape and turns it upside down. Why is there a streetlight in the middle of nowhere? It just adds thick layers of mystery and surrealism. As I walked up the pathway and crested the hill, the light came into view and I immediately saw the shot. I made several different versions, but this was my favorite. I love the quiet simplicity of the scene, and the secret knowledge of what lays outside the frame makes it special to me. · Nikon D750 with Nikon 24mm f/1.4 lens; 30 seconds, f/8, ISO 400. Lit with existing streetlight and moonlight.

Chris Nicholson

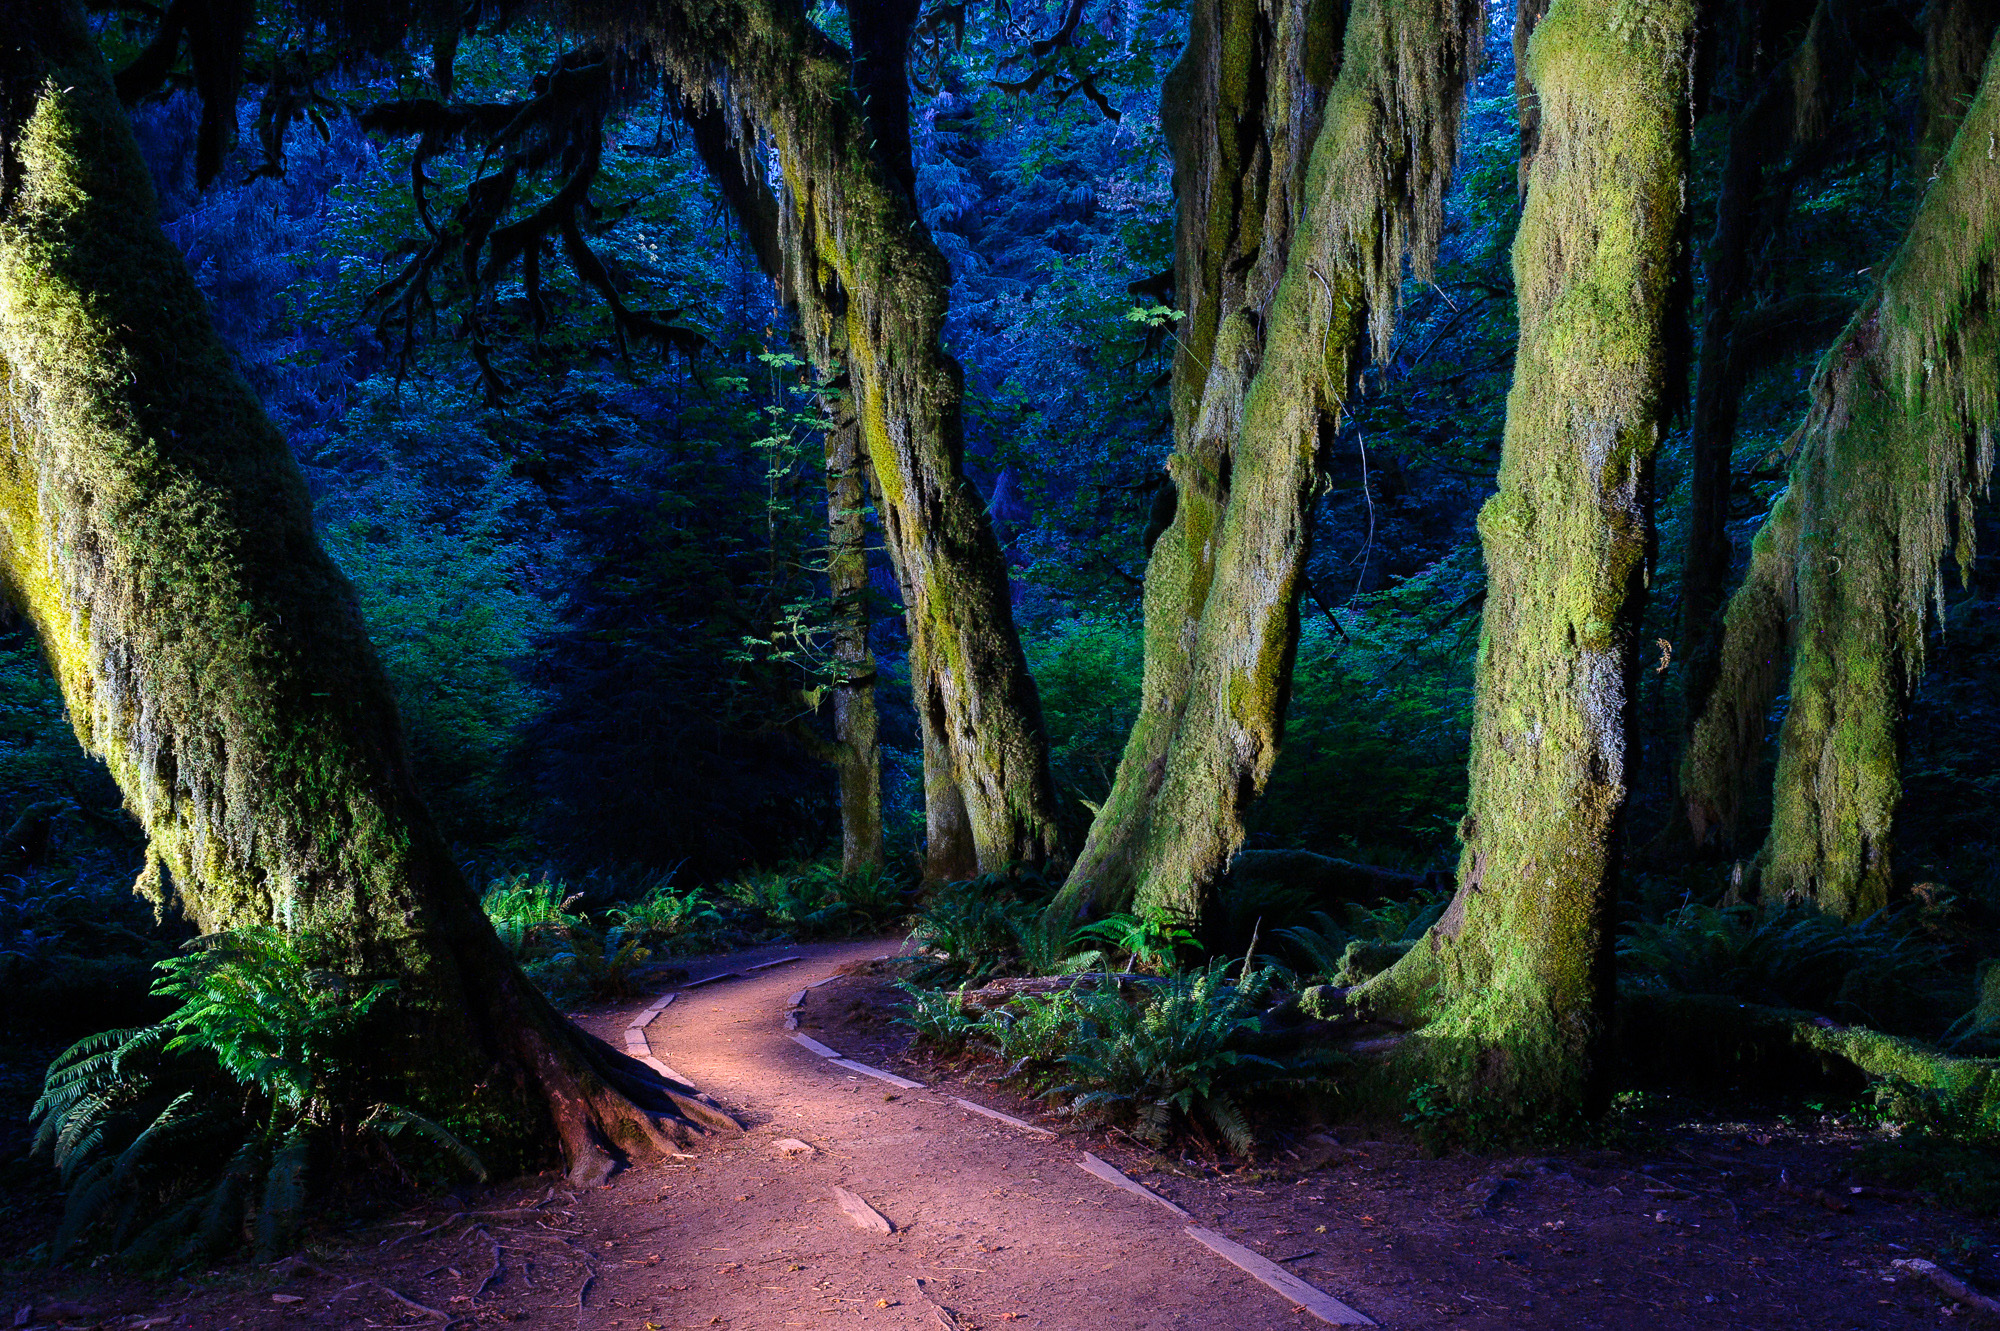
One of my favorite spots to photograph in Olympic National Park is the Hoh Rain Forest. But until this year, I'd never tried it at night. This image required a few hours of work (including hiking!) and employing all the best practices of night photography. I needed to scout the location during the day, including setting up the composition and tripod placement, and walking through the scene to see how I could move around safely in the dark to various points for light painting. The final exposure was made hours later toward the end of twilight, using a Coast HP7R flashlight and 1/2-cut CTO gel. · Nikon D3s with a Nikon 28-70mm f/2.8 lens; 4 minutes, f/16, ISO 1600.

During our Death Valley National Park workshop, we spent an entire evening on the Mesquite Flat Sand Dunes, shooting under black skies for a couple of hours until the moon rose. When the moon finally made its appearance, everyone was in awe; walking among the dunes under the light of a full moon is one of the best experiences in the park. At one point I saw attendee Karen taking a break from shooting and enjoying a moment to savor the experience. I quickly planted my tripod, composed, focused and called out, “Karen, please stand still for ten seconds!” I light-painted her from the side with just a quick swipe of my Coast HP5R. This image, I think, speaks to all we do as national park night photographers, and to all the five of us do as night photography instructors. It’s not just about the photography, it’s also about the experience. · Nikon D5 with a Nikon 17-35mm f/2.8 lens; 10 seconds, f/5.6, ISO 3200.

Gabriel Biderman

I’m constantly looking for new ways to interpret the night and have been playing with 360-degree cameras for several years now. 2016 was the year that the 360 technology took a leap forward for long exposures! This image was taken on the last night of our first workshop in Acadia National Park. I knew I wanted to get the Milky Way and myself as a “Little Prince” on the world. I was walking away and previewing the proper distance I needed to be and I loved how the red light turned me into a mysterious silhouette as well as lit up the tiny planet perfectly. · Ricoh Theta S Spherical Digital Camera; 1 minute, f/2, ISO 800.

I was suffering from shooter’s envy as all the other NPAN guys were teaching workshops in Arches & Death Valley national parks during the supermoon on November 14. So I called out an impromptu moon shoot with some fellow local nocturnalists in NYC. We used the PhotoPills app to figure out the best location to capture the moon rising over the trifecta of iconic NYC bridges. The challenge was that we had only about a four-minute window to see and shoot the moon before it was completely hidden behind thick blanket of clouds. I used a super telephoto lens to create a tight composition that emphasized the car trails over the bridges as well as the super size of la luna! · Nikon D750 with a Sigma 150-600mm f/5-6.3 lens; 1/2 second, f/11, ISO 400.

Your Images

Now that we’ve shown you some of our favorite night photographs from 2016, we’d love to see yours! Head over to the National Parks at Night Facebook page and share the best shot of your year, along with some info about how you made it. We can have fun seeing one another’s work, then we can all get back out into the night to start creating our 2017 portfolios!

We hope that you had a creative and productive year, and look forward to sharing more adventures with you in 2017!

Gabriel Biderman is a Brooklyn-based fine art and travel photographer, and author of Night Photography: From Snapshots to Great Shots (Peachpit, 2014). During the daytime hours you'll often find Gabe at one of many photo events around the world working for B&H Photo’s road marketing team. See his portfolio and workshop lineup at www.ruinism.com.

UPCOMING WORKSHOPS FROM NATIONAL PARKS AT NIGHT

Casting Out Shadows: When HDR is the Right Choice for a Night Scene

The acronym HDR stands for High Dynamic Range. The term can refer to a computer program, or a photograph that has been processed by an HDR program, or the technique of taking multiple photographs with the intention of blending them together in an HDR program.

Let’s begin with the phrase “dynamic range.” Dynamic range refers to the amount of separation between the brightest and darkest parts of a scene. A scene low in dynamic range has a limited range of brightness tones (as seen below).

Example of a low dynamic range photo, from Death Valley National Park.

Example of a low dynamic range photo, from Death Valley National Park.

On the other hand, a scene such as this Moraine Lake photograph (below) contains a large range of brightness values. This huge difference between values is what makes a scene high in dynamic range. (“High contrast” is another phrase used to describe such a scene.)

Example of a high dynamic range photo., of Moraine Lake in Canada'a Banff National Park.

Example of a high dynamic range photo., of Moraine Lake in Canada'a Banff National Park.

The problem, of course, is that even the best cameras cannot capture a scene with an extreme amount of dynamic range. In the example of the Moraine Lake photo, to reveal the detail in all of the tones, I made five different exposures of the scene by using different shutter speeds (1/125, 1/60, 1/30, 1/15 and 1/8—all at f/11) and blended them together in an HDR program called PhotoMatix.

Final image created by blending five different exposures.

Final image created by blending five different exposures.

Night Applications

While HDR is a common technique in daytime photography, the definition of high contrast certainly describes many nighttime scenarios. Not all night scenes are high in contrast, though. A landscape illuminated by a full moon, for example, can be fairly low in dynamic range.

Low-contrast scene illuminated by the full moon, in Zion National Park.

Low-contrast scene illuminated by the full moon, in Zion National Park.

But any scene that contains deep shadows and very bright highlights is a candidate for the HDR process—even if it's after dark. This scenario is especially common at night when we mix deep shadows and man-made light sources, such as city lights or car trails.

High-contrast scene mixing Las Vegas city lights and deep shadows.

High-contrast scene mixing Las Vegas city lights and deep shadows.

Below is a final image I made in Las Vegas after shooting three separate exposures of 1 second, 2 seconds and 4 seconds (all at f/11) and blending them together in PhotoMatix. This process reveals details in the dark shadows while allowing the city lights to retain texture while remaining bright.

Final image after HDR treatment.

Final image after HDR treatment.

Cuyahoga Case Study

I don’t use the HDR process for every nighttime image, but when confronted with deep shadows, bright city lights or brightly lit buildings, I’ll certainly consider it. This is exactly what happened to me while scouting and shooting for our upcoming night photography adventure workshop in Cuyahoga Valley National Park. I wanted to take a picture of the rail crossing and station at Boston Mill. In order to capture detail in the "Boston Mill" sign on the depot, I had to use an exposure of 8 seconds, f/8 at ISO 100.

At Cuyahoga Valley, an exposure of 8 seconds, f/8 at ISO 100 recorded detail in the highlights.

At Cuyahoga Valley, an exposure of 8 seconds, f/8 at ISO 100 recorded detail in the highlights.

However, this exposure left the sky and foreground very dark. Therefore, it was time for HDR. I needed to create a few more exposures that were brighter so I could get some detail in the darker areas of the image. Varying only the shutter speed to alter exposures left my f-stop constant, which in turn created the same amount of depth of field in each image.

Exposures of 15 seconds at f/8, 30 seconds at f/8, and 1 minute at f/8.

After viewing the histogram of the 1-minute exposure, I decided that the shadows had received enough light, and I didn’t need to open them up any more. Later, I took all four exposures and blended them together in PhotoMatix.

HDR blend of the four exposures.

HDR blend of the four exposures.

Blending the images together kept the highlight detail of the Boston Mill sign intact while brightening up the shadow portions of the image.

At this point I had all the exposures necessary to reveal the desired detail, but I had not captured the car trails that I was hoping for. Leaving my camera in position, I waited for more traffic and made a few more exposures. To create the final image (below), I used Photoshop to add a few more exposures with car trails to the HDR blended image above.

The final image of the HDR frame (four exposures combined) layered with car-trail exposures.

The final image of the HDR frame (four exposures combined) layered with car-trail exposures.

When making images at night, we’re faced with all sorts of challenges. In the case of the Boston Mill shot, the difficulty lay in the extreme contrast between the lit sign, the dark foreground and even darker sky. By taking multiple exposures and blending them together in HDR I was able to control that high contrast.

Like with any photography discipline, a firm grasp of the basics and being familiar with your gear will carry you through many situations. Knowing a few cool techniques like HDR, however, can greatly expand the possibilities.

For more information about shooting and processing HDR images, check out Tim Cooper’s books The Realistic HDR Image and HDR Photography: From Snapshots to Great Shots. If you are interested in using Tim’s HDR program of choice, click for a 15% discount on PhotoMatix.

UPCOMING WORKSHOPS FROM NATIONAL PARKS AT NIGHT

Be Out in the Cold: Why Winter is Great for Night Photography

'Tis the season to photograph at night!

There is a reason we call it a winter wonderland. Snow can cover the world as we know it and turn it into something white, pure and surreal.

Most of us dread snow, as it can become a deterrent to get from point A to B. But remember, it was only a few years ago that we would dream of winter weather cancelling our schools so we could stay home and create people, igloos and all sorts of fantastical things in the snow and ice. There has been a recent uptick in ice castles made by farmers, ski resorts and cold-region locals who for one or two months during the winter open these spectacular ice worlds that are often lit up at night!

So as we get ready to celebrate the longest night of the year, I wanted to share some tips to hopefully inspire you to bundle up and create some wonderful winter wonderland images.

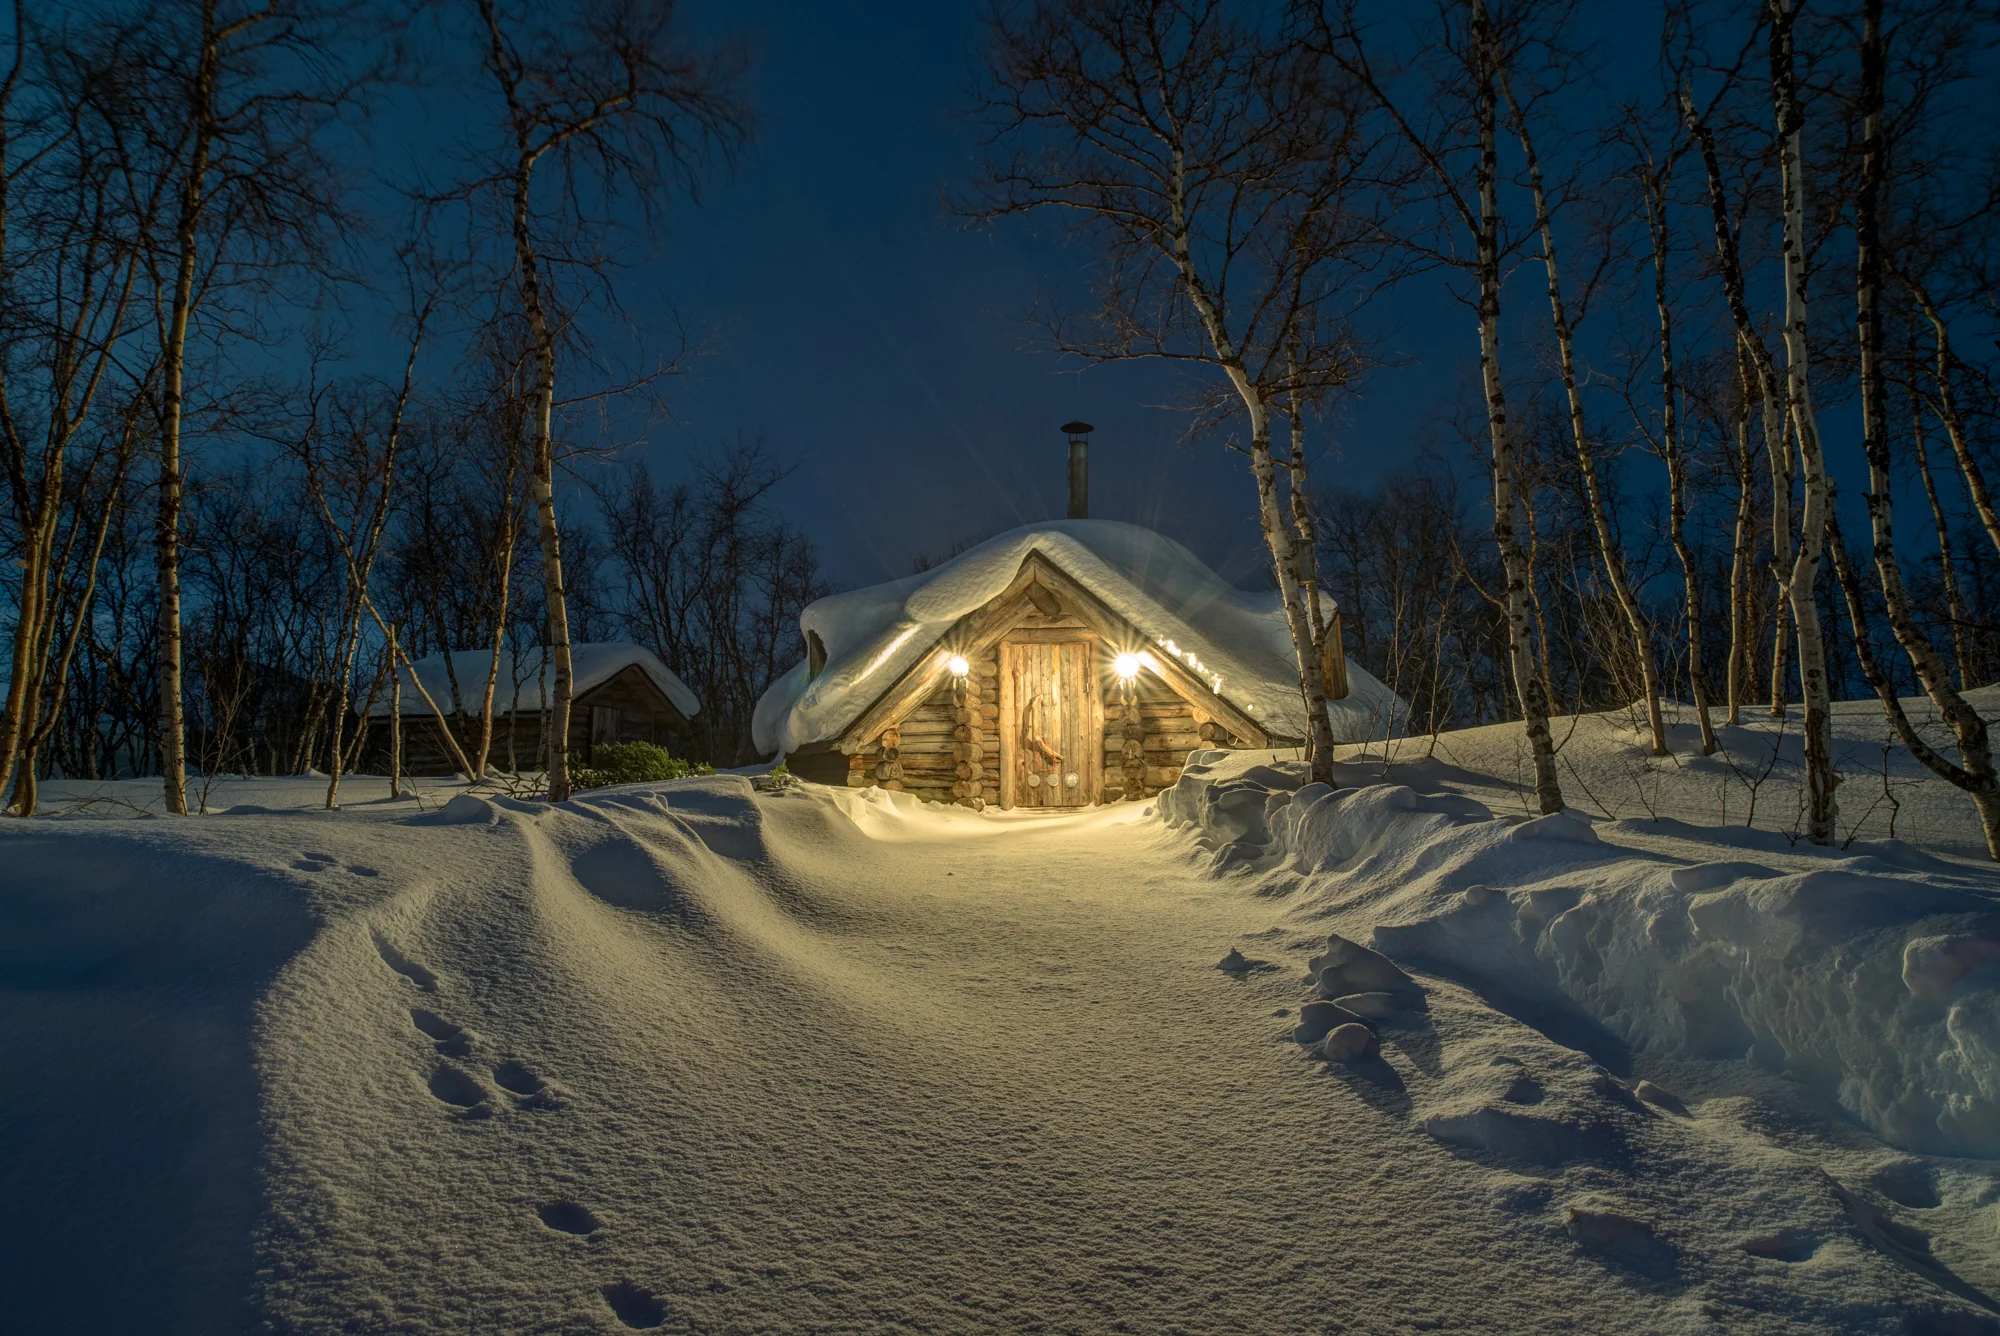
This was taken of a kota, or warm hut, in the Lapland region of Finland. I passed by this perfect scene a few times, but when I saw the animal’s footprint in the fresh snow I ran and grabbed the gear. I shot at a low angle to emphasize the footprint…

This was taken of a kota, or warm hut, in the Lapland region of Finland. I passed by this perfect scene a few times, but when I saw the animal’s footprint in the fresh snow I ran and grabbed the gear. I shot at a low angle to emphasize the footprint and make the hut seem a little larger than life.

1. Find a new way to photograph the holiday lights

If you drive or walk around your neighborhood, you’ll see lots of outdoor lights covering the many streets and houses. These can be fairly simple to photograph, especially when they are also under the streetlights, but try to find a new way to interpret them.

With your camera on a tripod, zoom your lens during the exposure to add motion, or perhaps go in close for a detail shot that throws the rest of the scene out of focus. The holiday lights that hang across the streets look better when we have car trails going through them. Places like Rockefeller Square in New York City can be difficult to shoot because of the mass amounts of people—good luck setting up a tripod! Look instead for quieter, neighborhood scenes that also epitomize the holiday cheer.

In an age when people can certainly overdo the holiday lights, I really was drawn to the simplicity of the paper bag luminarias that this house put out. I shot low and angled myself so the full moon was casting the dramatic shadow of the trees towar…

In an age when people can certainly overdo the holiday lights, I really was drawn to the simplicity of the paper bag luminarias that this house put out. I shot low and angled myself so the full moon was casting the dramatic shadow of the trees toward me.)

2. Get out there and play in the snow!

I still act like a kid when I see snowflakes falling. I can’t sled as fast as I used to but the snow adds such an added dimension to both day and night images—you have to shoot it!

Obviously be careful with your gear if you are shooting while it is snowing. Either have an umbrella or a camera/lens wrap with you to protect your equipment from getting too wet.

A few ideas:

  • If the snow isn’t blowing too badly, shoot under an awning of a house that offers protection. Set up a time-lapse that shows the snow accumulating around the environs.
  • Try to freeze the snow with flash as well as play with shorter exposures like 1/4-second to 2 seconds to create more confetti-like snow.
  • Once the snow stops falling, head out to the park ASAP to try to capture some pristine snow -covered scenes. That fresh snow can add white-sand-dune-like surreality to an otherwise normal place. Shoot at a low angle to emphasize that rolling blanket of snow.
  • Look for animal or human footprints and compose them to tell more of a story.
  • Remember to overexpose by 1 to 1 1/2 stops to properly capture the white snow—otherwise our camera meters will turn the snow gray.
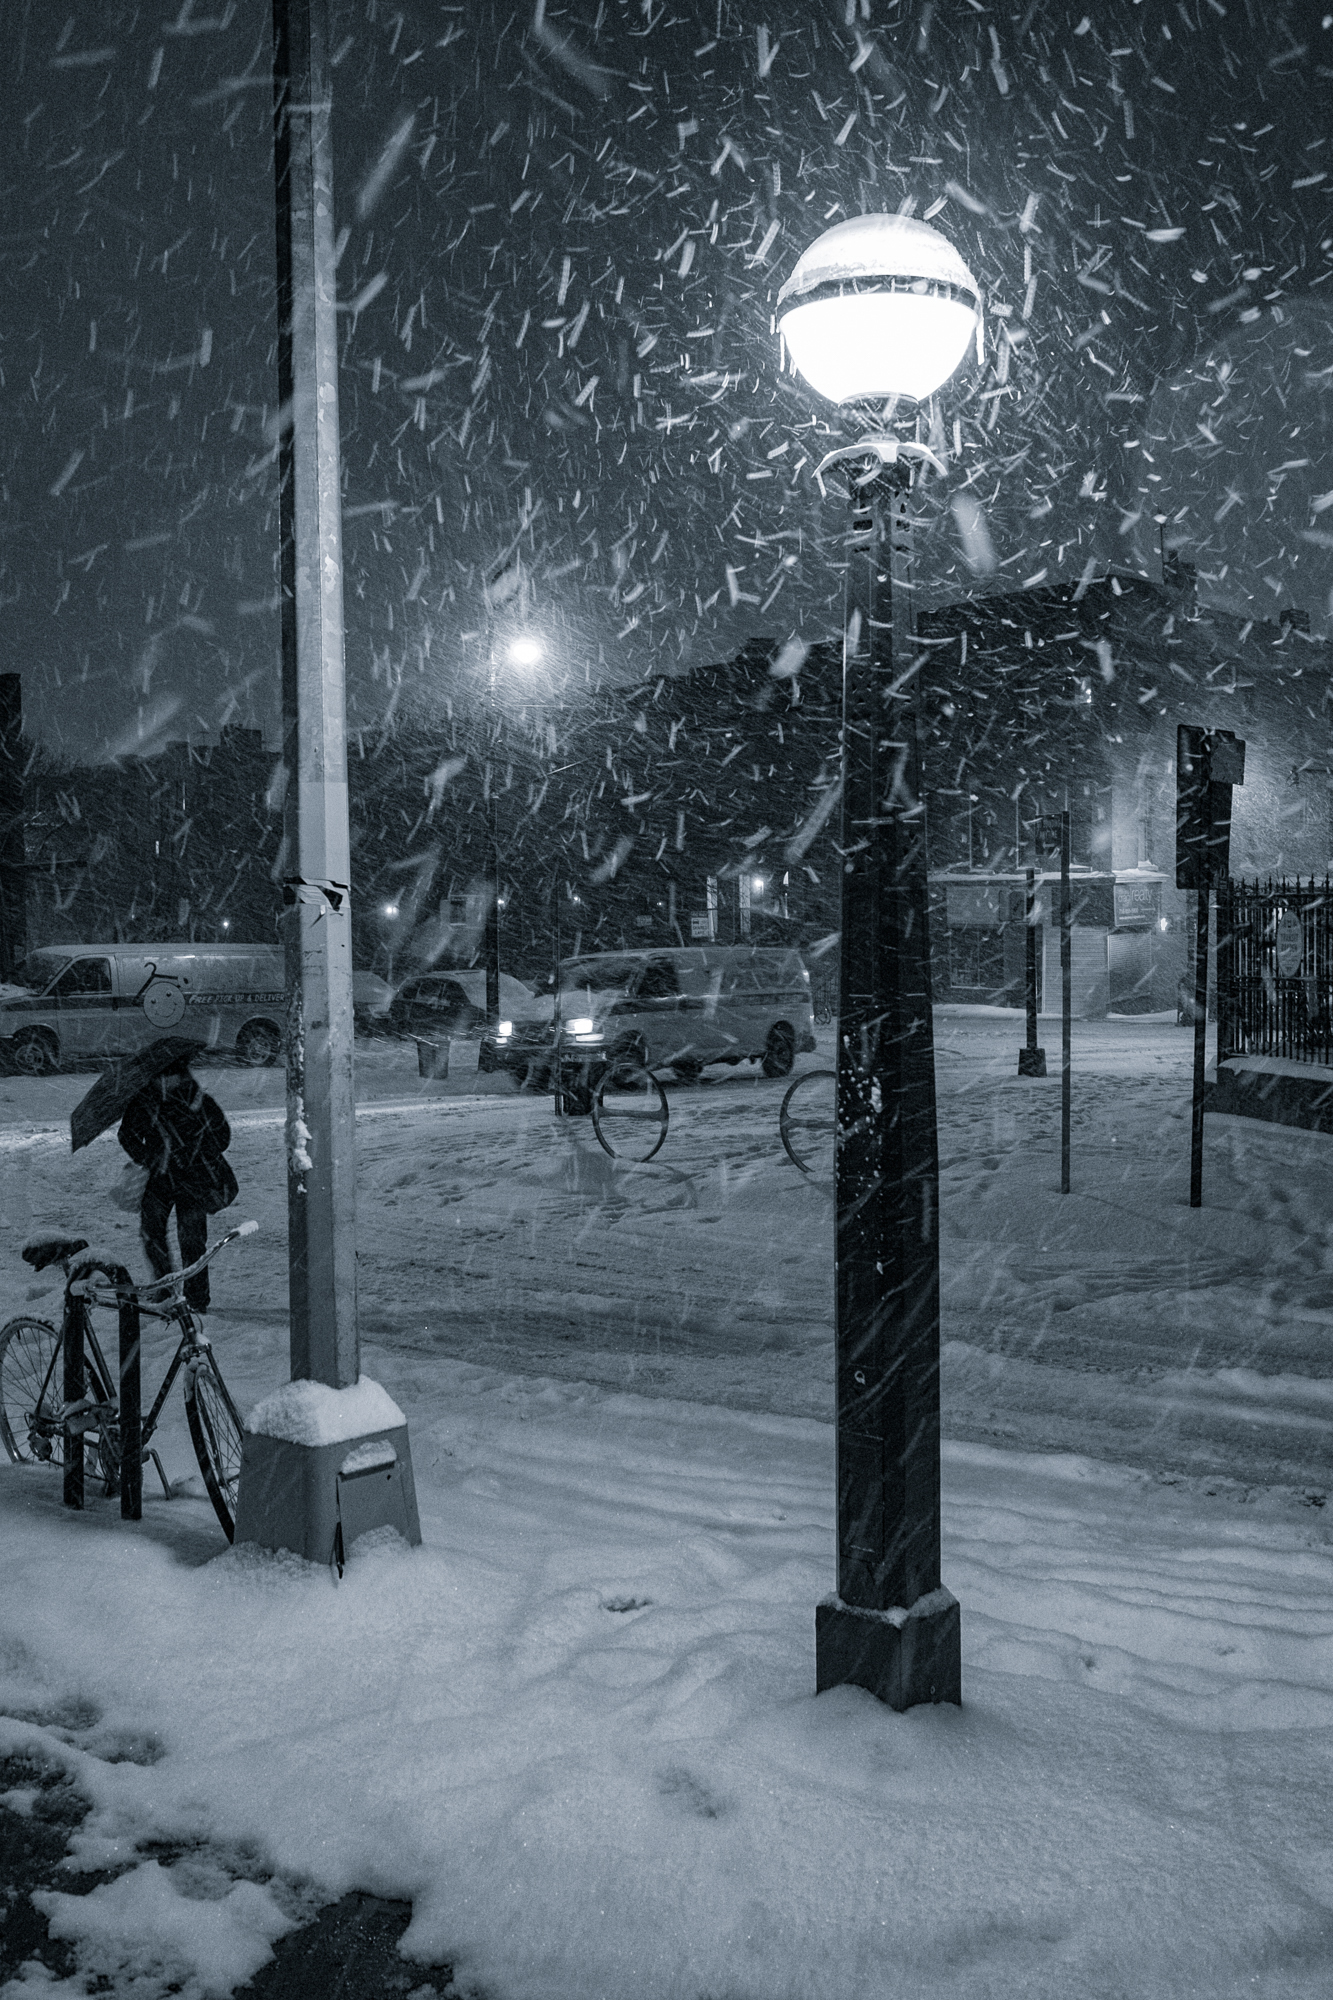
One of my all-time favorite snow scenes. Shot with a point-and-shoot camera as I came out of the subway in NYC. I stayed under the awning and leaned against the wall, turning myself into a tripod. I put the camera on burst mode and shot exposures be…

One of my all-time favorite snow scenes. Shot with a point-and-shoot camera as I came out of the subway in NYC. I stayed under the awning and leaned against the wall, turning myself into a tripod. I put the camera on burst mode and shot exposures between 1/4-second and 1 second. Of the 50-plus frames I took, 6 or 7 were sharp enough to use, with this one being the winner. The person and the umbrella became the final pieces to the composition.

3. Be more productive

The biggest reason I love the winter is because I can start shooting night scenes earlier and still go to bed at a reasonable time! With the sun setting around 5 p.m. for most of the continental United States, you can skip out of work early and do a quick 1- to 2-hour shoot and still be home for dinner with the family!

Or plan longer/weekend shoots with friends where you can really take advantage of the time. If you are comfortable with your night skills, bring two kits and be incredibly productive in the field! The ultimate would be to visit Alaska between December and February and have 20 hours of night photography per day!
I went out to Central Park with Chris Nicholson last year after the NYC blizzard. It was hard to find many snow scenes that weren’t walked through but I loved this classic shot of the San Remo building reinterpreted with the trodden snow, blowing cl…

I went out to Central Park with Chris Nicholson last year after the NYC blizzard. It was hard to find many snow scenes that weren’t walked through but I loved this classic shot of the San Remo building reinterpreted with the trodden snow, blowing clouds and city night lights. And we were both home in plenty of time to get a full night's sleep!

4. Keep warm and safe

The No. 1 reason most people don’t like to photograph in the winter is the cold. Add the cooler nighttime temperatures and you have nixed probably 80 percent of photographers, if not more.

But shooting in winter doesn’t need to be a physically miserable experience. Bundle up with layers, and wear wool instead of cotton.  The former will wick the sweat off your body. I’m a big fan of Smartwool products, especially for socks and a base layer.

Also, protect extremities like your feet and fingers—they get colder first. We just started using these amazing new Vallerret photography gloves. They are made in Norway and have a pocket to place hand warmers to ensure you can keep on clicking no matter what the temperature!

Whatever gloves you use, bring several hand warmers that you can put inside for added warmth.

Boots that have a great tread are also important. You don’t want to slip on ice and take a spill. Walk carefully and use your tripod as a walking stick if need be—without the camera on it of course! And if you’ll be working around a lot of ice, Chris Nicholson swears by Ice Trekkers to keep you on your feet and your gear off the ground.

5. Experience the northern lights!

Summers have lighting storms and tumultuous thunderstorms, but the most spiritual and jaw-dropping weather phenomenon to photograph are the aurora borealis, or northern lights. It’s definitely on most people’s “bucket list,” and rightly so!

However, the northern lights are difficult to predict and of course generally located in the colder regions of the Arctic Circle. Alaska is probably the easiest location for most Americans to find the phenomenon, but you’ll still want to travel a good distance from Anchorage to really experience them at their best.

I’m a big fan of the northern Scandinavian region that includes Norway, Sweden and Finland. The fjords and Lofoten Islands in Norway offer incredible landscapes and water for the northern lights to reflect and bounce off. Don’t forget the trending glass igloos where you can stay indoors and watch the dancing green fairies in the comfort of your bed all night long!

Iceland is a close second and definitely has plenty of epic landscapes, but because it is located on the Gulf Stream, a lot of weather and clouds can cover the night skies. The Arctic Circle has fewer weather patterns and offers a reliable amount of crisp and clear nights throughout the winter months.

A big misnomer about the auroras is that they can be photographed only during a new moon. In reality, the lights are definitely bright enough to shoot and see under a full moon, plus you get the benefit of the moon lighting your foreground! If you shoot the auroras only under a new moon, you will have a lot of the same shots—silhouetted foregrounds and vibrant northern lights. I’d rather shoot during a partial moon—so I get some silhouettes, some light painting and some moonlit scenes at different times of the night.

The full moon rising with the aurora borealis dancing all around it—proof that you can shoot the northern lights during a full moon. ‘Nuff said.

The full moon rising with the aurora borealis dancing all around it—proof that you can shoot the northern lights during a full moon. ‘Nuff said.

So throw another log on the fire and layer up for a productive winter wonderland. And remember, there’s a bonus; This is the best season to enjoy a cup of hot chocolate after a long night out exploring!

Gabriel Biderman is a Brooklyn-based fine art and travel photographer, and author of Night Photography: From Snapshots to Great Shots (Peachpit, 2014). During the daytime hours you'll often find Gabe at one of many photo events around the world working for B&H Photo’s road marketing team. See his portfolio and workshop lineup at www.ruinism.com.

UPCOMING WORKSHOPS FROM NATIONAL PARKS AT NIGHT