PhotoPills

PhotoPills, National Parks at Night Partner for Two Masterclasses

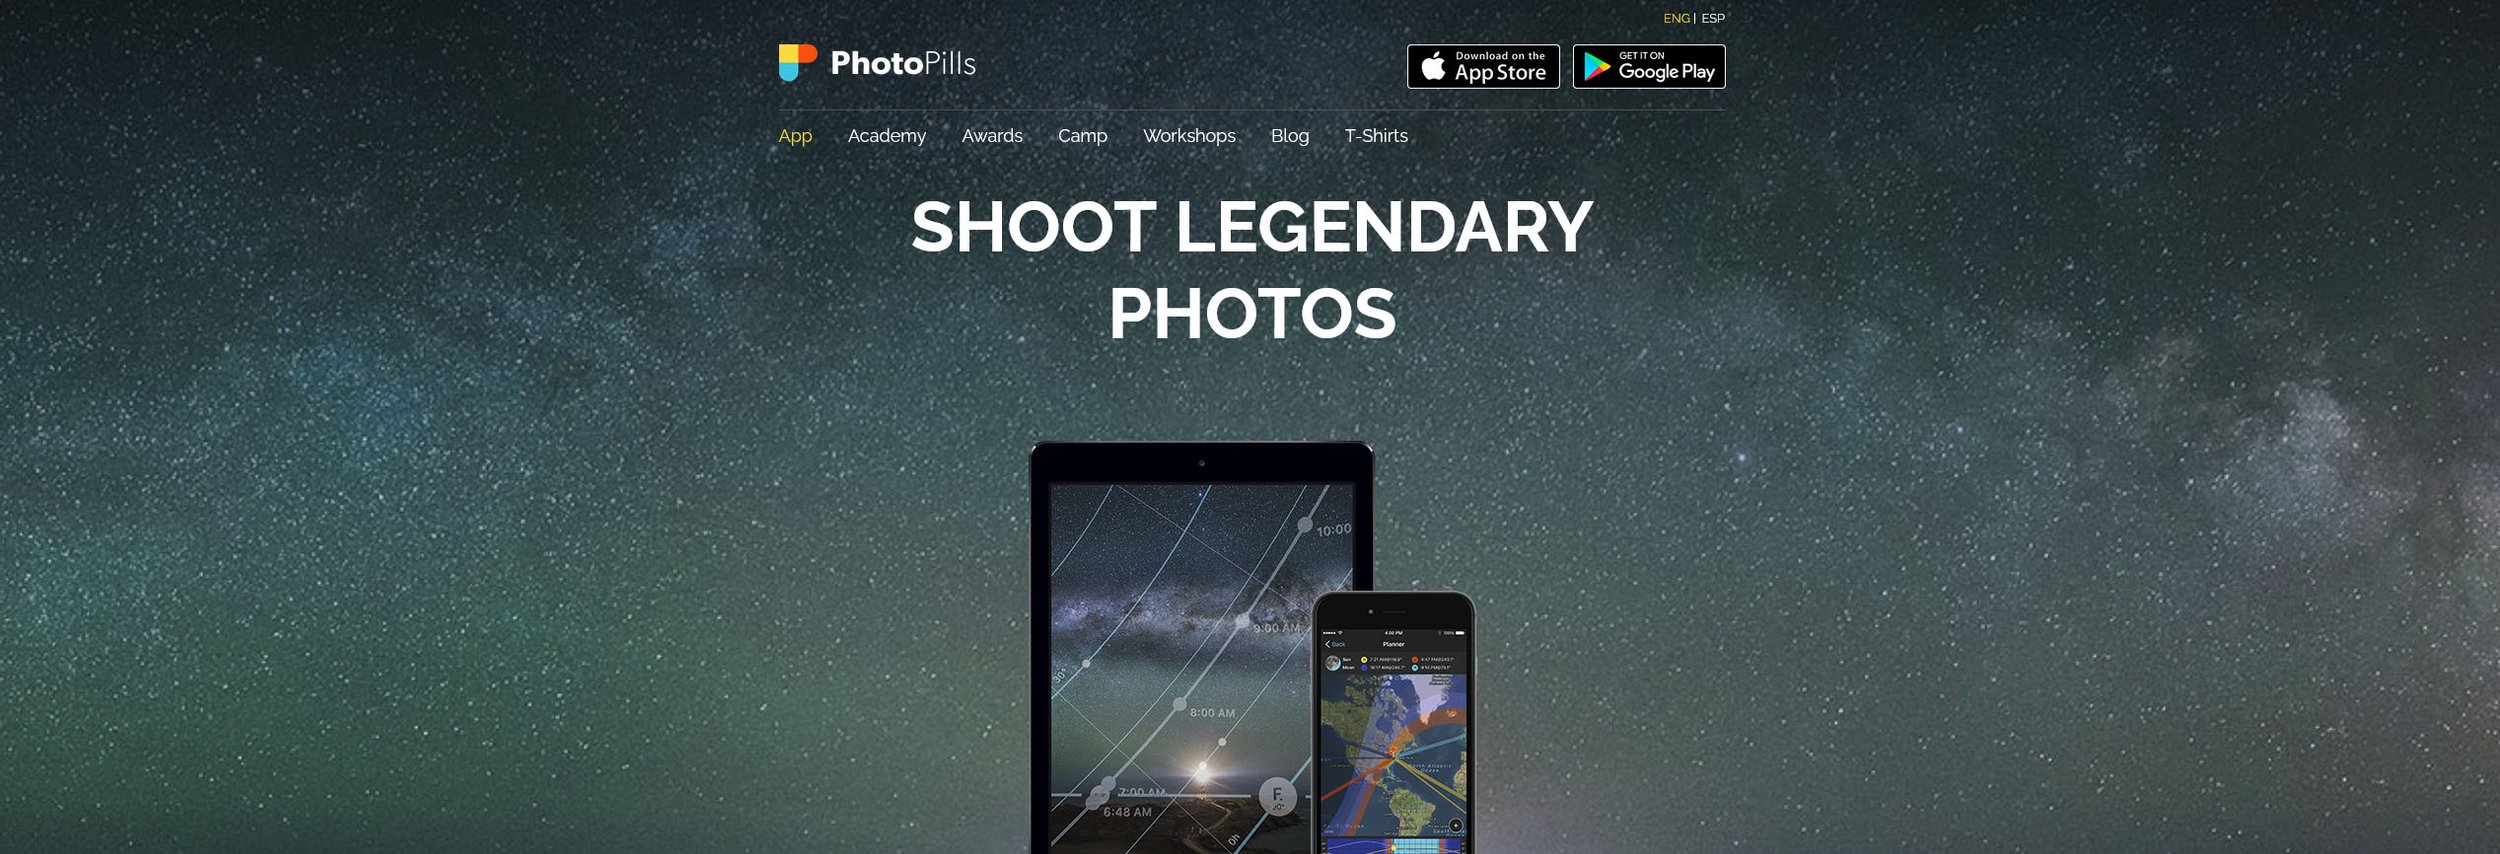
As most of you know, we love the PhotoPills app. It is packed with tons of useful information for photographers. We use it to plan locations from home, scout the stars during the day, figure out exposures, calculate hyperfocal distances, visualize star trails and much, much more.

Earlier this year Chris Nicholson wrote a great article on “The Many Ways That PhotoPills Helps A Night Photographer,” which zeroes in on several key features that are essential to his workflow. Tim Cooper always says that PhotoPills is the best $10 investment he’s ever made in photography, and the rest of us definitely agree.

Yet PhotoPills is much more than an app. The team behind it also offers a lot of education to support their mantra of “Imagine. Plan. Shoot.” Why? Because their goal is to help people become better photographers.

National Parks at Night embraces that same philosophy, and we have partnered with PhotoPills often to collaborate. In 2018 we invited Rafael Pons, also known as The Bard of PhotoPills, to speak at our very first conference, the New York Night Photography Summit, and he also spoke at our Night Photo Summit online conference in 2021 and 2022. We’ve even run four PhotoPills Bootcamp workshops, with a fifth coming next year. 

This past May, Chris and I were instructors at PhotoPills Camp, a much-sought-after international gathering of PhotoPillers hosted on the Mediterranean island of Menorca, Spain. It was an amazing experience, and we finally met the entire PhotoPills family on their home turf!

Shortly thereafter, Rafael invited Chris and I to present as part of their Masterclass series on YouTube. Both of those masterclasses were livestreamed in the past two weeks.

I spoke about star trails and Chris taught about how to photograph lighthouses at night. We are very passionate about these subjects and have been honing classes about them for years. But given the chance to speak on the PhotoPills Masterclass platform, we knew we had to share every bit of information we knew, and then some. So we hit the books, pushed the stars and lighthouses beyond anything we had tested before, and voila!

Both classes are now posted on the PhotoPills YouTube channel for you to watch at your leisure.

It was a great thrill to see so many friends and workshop alums among the livestream visitors (thank you!), and we’ve been enjoying reading the positive comments in the chat.

Please leave any questions you might have in the comments for each video. Chris and I will be monitoring them for the next few weeks and want to make sure you are ready to Seize the Star Trails and Lighthouses in the near future.

What other night topics are you interested in learning more about? Drop them in our comments below and #staytunedformore.

Gabriel Biderman is a partner and workshop leader with National Parks at Night. He is a Brooklyn-based fine art and travel photographer, and author of Night Photography: From Snapshots to Great Shots (Peachpit, 2014). During the daytime hours you'll often find Gabe at one of many photo events around the world working for B&H Photo’s road marketing team. See his portfolio and workshop lineup at www.ruinism.com.

UPCOMING WORKSHOPS FROM NATIONAL PARKS AT NIGHT

The Many Ways that PhotoPills Helps a Night Photographer

It’s been not even a week since Gabriel Biderman and I returned from teaching at PhotoPills Camp on the beautiful Mediterranean island of Menorca, and I still think about the adventures and the camaraderie with new friends and colleagues.

I’ve also been thinking a lot about how much knowledge PhotoPills provides to night photographers. The app has become so ubiquitous in my workflow that I’d come to take it a little for granted. Spending a week with people who are learning to master it—and seeing their wonderment at the creative options the app enables—made me consciously appreciate again all that this tool can do.

It also reminded me of a blog post idea that’s been sitting in a corner of my mind for years: “The Many Ways that PhotoPills Helps a Night Photographer.” That’s what we’re covering below.

Know When Darkness Will Fall

Anticipating darkness can be relatively important for night photography. PhotoPills tells you when the sun will set, when the different phases of twilight will begin and end, and when the sky will finally be as dark as it can be. Then it tells you all that info in reverse, all the way to the next sunrise. And it does this for any day of any month of any year, for wherever on Earth you want to shoot.

Want to shoot in Bryce Canyon National Park tonight? PhotoPills tells you all you need to know about sunset, moonrise, astronomical twilight, Milky Way visibility times and more.

Find the Milky Way

PhotoPills’ most famous feature is probably its ability to help you visualize where in any given scene the Milky Way will appear, whether tonight or any night in the future, whether you’re on location or scouting from half a globe away.

You can use the Planner to scout ahead of time, or use the Augmented Reality (AR) mode to overlay the Milky Way right on the scene that’s in front of you. Find where and when it will be for the photo you want to create, then just be there.

In a daytime scout in Death Valley National Park, Night AR showed exactly where the Milky Way would be at 10:04 that same night. Or, more importantly, it showed what time the Milky Way would be exactly where I wanted it for this composition. Nikon D5 with an Irix 15mm f/2.4 lens. 20 seconds, f/2.8, ISO 6400.

Find the Moon

PhotoPills helps you do the same with the moon. I love photographing in moonlight, as well as including the moon in a composition when it’s relatively near the horizon. The Planner, the Moon and the Night AR pills all help with that.

The moon can move around in the sky quite a bit from night to night, and might not appear in the same place at the same time for half a decade. That makes guesswork just a little more than hard, but PhotoPills makes guesswork unnecessary.

In Acadia National Park, Night AR showed precisely where the moon would rise over the Atlantic coast. Nikon D3s with a Nikon 24-70mm f/2.8 lens, light painted with a gelled Coast HP7R flashlight. 4 seconds, f/5.6, ISO 800.

Find an Eclipse

Every now and then the moon creeps into Earth’s shadow, and every now and then the moon blocks sunlight from reaching us. You’re probably more likely to win the lottery than to catch an eclipse by happenstance, so if you want to photograph one, you need inside information. PhotoPills gives it to you.

Want to photograph an eclipse sometime in the next few decades? PhotoPills holds eclipse data, for both the solar and lunar varieties, through the next 28 years. So there’s no excuse to miss the annular solar eclipse on May 31, 2049, nor the total lunar eclipse on October 29, 2050.

The eclipse information in the Planner helped me anticipate this total lunar eclipse composition over Price Lake on the Blue Ridge Parkway. Nikon D5 with a Nikon 24-70mm f/2.8 lens. Three blended frames: 15 seconds (sky), 30 seconds (foreground); 1/4 second (moon), all at f/2.8, ISO 6400.

Find a Pole Star

If you’ve been doing night photography for more than a minute, then you probably know how to use the Big Dipper to find Polaris, or how to use the Southern Cross to find Sigma Octantis, so that you can photograph star circles. (If not, join us for a workshop and we’ll point you in the right direction.)

However, if you’re scouting in daylight, none of those stars will help you find anything, because you can’t see them. So turn on Night AR, the PhotoPills feature that plops a sky map over anything your device’s camera is aimed at. Included in that overlay is the point in the celestial sphere that all the surrounding stars appear to revolve around, allowing you to strategize star-circle composition hours before the sky is dark enough to shoot them.

In Menorca (during PhotoPills Camp!), Night AR showed that the North Star would center right above this stone wall that I’d had my eye on. Nikon D5 with a Nikon 14-24mm f/2.8 lens. Sky: 8 stacked frames shot at 8 minutes, f/8, ISO 1600. Blue-hour foreground: 30 seconds, f/8, ISO 400.

Envision Star Trails

Not all star trails are circles—some are curved or diagonal lines that stretch across the skies of our non-pole-star compositions. If you’re experienced and have a good optical imagination, you may be able to visualize which way those stars will appear to be moving based on which direction your camera is facing. Or you can look at PhotoPills.

In Night AR, all those lines that appear over your scene are the celestial arcs that stars will be moving along during long exposures. You can see exactly which way those stars will trail, and discern whether that might help or hinder your composition.

This view of Moro Rock in Sequoia National Park faces southeast, and the arcs of the lines in Night AR mimicked the shape that I could expect from star trails in the frame. Nikon D5 with a Nikon 14-24mm f/2.8 lens. Sky: 18 stacked frames shot at 5 minutes, f/5.6, ISO 1600. Blue-hour foreground: 10 seconds, f/5.6, ISO 400.

Calculate a Long Exposure

When you’re setting up a star-trail photo, your exposure (or your cumulative exposure, if you’re stacking) will be relatively long—perhaps only five minutes, or perhaps a few hours. But testing a 2-hour exposure to see if it’s correct takes way too long, which is why we recommend running a high ISO test.

Once you know your high ISO exposure, how do you convert it to an equivalent long exposure? You can use the Six-Stop Rule as a shortcut for simple conversions, or you can use PhotoPills’ Exposure calculator for more complex ones. You have a good test shot at 10 seconds, f/2.8, ISO 25,600? In a fraction of a second, PhotoPills will tell you that your 45-minute exposure should be at f/8 and ISO 400.

In Colorado’s Uncompahgre National Forest, I was able to use the Exposure pill to quickly calculate a 15-minute exposure with better depth of field based on a test exposure shot wide open at ISO 6400. Nikon D5 with a Nikon 24-70mm f/2.8 lens. 15 minutes, f/5.6, ISO 250.

Calculate a Shorter Exposure

When you don’t want your stars to trail—even a smidge—you need to know the maximum shutter speed you can use before that happens. The 400 Rule is a useful shortcut to that information, but it’s not entirely accurate and doesn’t account for every variable that can affect the result.

What does? The enormously complex algorithm known as the NPF Rule. Use that, and your stars will stay as tiny little dots in the dark sky, just like you want them to. No one is doing NPF calculations in their head—you need a calculator, and PhotoPills has one in its Spot Stars pill.

For this Milky Way photo in Joshua Tree National Park, I used the Spot Stars pill to calculate an NPF Rule shutter speed that would render the stars as supersharp pinpoints. Nikon D5 with a Nikon 14-24mm f/2.8 lens. 10 seconds, f/2.8, ISO 12,800.

Determine Hyperfocal Distance

Of all the ways to focus in the dark, using hyperfocus is the hardest to master and the most surefire to work in every situation. Because of the latter, learning the technique is worth the investment.

The calculations for determining a correct hyperfocal distance are too complex to tackle in the field with pencil and paper, so a microchip is necessary. PhotoPills will do all that math for you and report the data in a table or in a streamlined chart, depending on which format makes more sense to you.

Even with that assistance, hyperfocus is a complex concept that is also incredibly abstract. PhotoPills makes it easier to understand and to apply by making the information concrete: Using AR, it can overlay the hyperfocal distance, as well as the near and far focal planes, onto the scene you’re standing in front of. You still need to measure in the real world to be sure of accurate results, but seeing that display goes a long, long way to understanding how this technique will help you nail focus and maximize depth of field.

In Big Bend National Park, PhotoPills Augmented Reality gave me a preview of how I could use hyperfocus to get the foreground brush and the background stars all sharp, even at f/4. Nikon D3s with a Nikon 14-24mm f/2.8 lens, light painted with a Coast HP7R flashlight. 92 stacked frames shot at 25 seconds, f/4, ISO 5000.

Figure Out Pano Panel Widths

If you photograph Milky Way panoramas, or if you’ve investigated how to, then you’re aware that the frames need to overlap by about one-third to one-half.

When actually shooting, many photographers guess that third or half, or they eyeball something in the scene to approximate how far to pivot the camera from one frame to the next. But some photographers like to be more precise and overlap by an exact increment, using degree measurements etched into their tripod-head bases.

In order to do that, you need to know how many degrees wide your frame is, which is based on the size of the camera sensor and the focal length of the lens. This requires referencing manufacturer data, and—once again—running calculations.

The PhotoPills FoV (field of view) feature can do that all for you. Just enter your camera and lens models, and the app will pull the pertinent numbers out of its database and tell you how many degrees wide your frame is. Divide by 2 or 3, and you know exactly how many degrees to rotate your camera between pano panels.

For this Milky Way pano at California’s Mono Lake, I used PhotoPills to determine that the ideal rotation for my camera between frames would be about 35 degrees (75 divided by 2, rounded). Nikon D5 with a Nikon 14-24mm f/2.8 lens. Sky: 6 stitched frames shot at 15 seconds, f/2.8, ISO 12,800. Foreground: 6 stitched frames shot at 30 seconds, f/2.8, ISO 12,800.

Plan for a Meteor Shower

To photograph a meteor shower successfully, you need a lot of info to help plan when to be outside: dates of the shower, the date and time of peak activity, the moon phase, when the moon rises and sets, twilight times, etc. It’s also helpful to know the shower’s radiant—that is, the point in the sky where the meteors appear to originate.

I’m sure you’ve seen the pattern by now, but I’ll write this anyway: PhotoPills has all that info. You can view a year-by-year chart of all the Class I, II, III and IV meteor showers for the rest of this century and beyond. The chart and the more detailed info pages that follow include all the info mentioned above—plus more, including easy-to-read bar graphs depicting how good each shower will be for photography.

As for the Planner and that stellar AR feature I keep mentioning, they also work with meteor showers. View all the above info on the map from home, or stand in the place you want to shoot, and you can see where the radiant will be at any time.

This year the Eta Aquariids and Gemenids were predicted to be the best for photography. We can see this quickly by viewing the “energy bar” to the left of the shower name.

Wrapping Up

So there you go, a long list of tasks that PhotoPills can help you with when photographing at night. The app does more too, including a whole host of cool things for daytime photographers. Moreover, it does most of these things without needing an active cell or Wi-Fi connection.

By the way, we teach all of this—almost the whole app, in fact—on our PhotoPills Bootcamp workshops. Our next of those will be at Bryce Canyon National Park at the end of this month, and a couple of spots recently opened. If you want to learn all the ways that PhotoPills can help you become a better photographer, sign up now!

Also keep your eye on this blog. All of the National Parks at Night instructors use PhotoPills, and it’s inevitable that we’ll write about the app in this space from time to time. We will certainly cover some of the above features in more detail in the future.

How have you used PhotoPills to create better night photography? We’d love to see those images. Feel free to post them in comments section or on our Facebook page, or tag us (@nationalparksatnight) on Instagram. Be sure to tell the story of how you used the app to scout the shot!

Chris Nicholson is a partner and workshop leader with National Parks at Night, and author of Photographing National Parks (Sidelight Books, 2015). Learn more about national parks as photography destinations, subscribe to Chris' free e-newsletter, and more at www.PhotographingNationalParks.com.

UPCOMING WORKSHOPS FROM NATIONAL PARKS AT NIGHT

Great Balls of Fire, Part 1: Using PhotoPills to Scout Meteor Showers

If you want to photograph meteor showers, 2020 is your year.

Why? Doesn’t each calendar comprise the same meteor showers? Don’t the Quadrantids happen every winter, and Eta Aquariids every spring, and the Delta Aquariids each summer and the Leonids each fall?

Yes, they do. But not every meteor-shower photography opportunity is created equal. The variable is a rather large obstacle in the night sky: the moon. The brighter it is, the fewer meteors we can see, and thus the fewer meteors we can photograph. In short, a new moon usually makes for a better experience when shooting shooting stars.

That brings us back to why 2020 is such a fine year for doing this: Of the nine major meteor showers, three will peak during a new moon, including the busiest shower of them all, the Geminids in December. The same conditions will be available for the Leonids in November, as well as the Lyrids … this week!

(The summer Perseids won’t be too shabby either. They’ll happen under a 44.7 percent moon, but with a few hours before the waning gibbous rising, they should be spectacular nonetheless.)

This is why we’re bringing you our three-part definitive guide to photographing meteor showers:

  1. Using PhotoPills to Scout Meteor Showers,” by Chris Nicholson

  2. How to Photograph a Meteor Shower,” by Matt Hill

  3. How to Process a Meteor Shower Radiant,” by Matt Hill

Moreover, all of this, plus a guide to gear and a guide to shoot locations, is contained in our brand new PDF e-guide, Great Balls of Fire: A Guide to Photographing Meteor Showers. To download the whole e-guide, click here:


Using PhotoPills to Scout Meteor Showers

Can you plan meteor shower photography without PhotoPills? Sure! But why would you, when the app makes planning a lot more convenient and a lot more precise?

The Meteor Showers feature is one of the newest in PhotoPills. It does an excellent job of collating the myriad and complex data points required to plan and execute a good meteor shower shoot:

  • dates of meteor showers and their peaks

  • the location of the shower radiant (where the meteors appear to originate in the sky)

  • the number of meteors per hour

  • the moon phase

Moreover, PhotoPills gives you all this information accurate to any position on earth, for any meteor shower until 2032. (If you’re planning shoots further than that, kudos for your enthusiasm and confidence.)

To walk through the different settings and how to use them to plan a meteor shower shoot, we’re going to pretend to go back in time.

On August 12, 2017, my fellow NPAN instructor Matt Hill, along with a group of our workshop attendees, hiked into Great Sand Dunes National Park with the goal of creating a night-long image stack of the Perseids streaking over the landscape. The photograph he created (Figure 1) was so on-point that it’s become our go-to example of how to shoot meteors. (In fact, it’s the image he’ll use to demonstrate how to photograph and process a meteor shower image in the next two blog posts in this series.)

PhotoPills released their Meteor Showers feature just last fall. But we can look back in time (the app’s pertinent data is retroactive to 2010) to see how he would have used PhotoPills to plan this shot.

Figure 1: Great Sand Dunes National Park, Colorado. Nikon D750 with a Zeiss Distagon 15mm f/2.8 lens. 17 images at 22 seconds, f/2.8, ISO 6400, plus a single foreground exposure at 382 seconds, ISO 2000 for the landscape after moonrise. © 2017 Matt Hill.

Working in PhotoPills

First things always come first: Open the app, then tap Meteor Showers (Figure 2). The pill opens and presents you with the data for any meteor shower activity today. That’s fine if you’re shooting tonight, but if you’re scouting for a shoot in the future, you can navigate to any shower of any year over a two-decade period by tapping on Calendar (Figure 3).

You can select the year by tapping at the top—in this case, to go back in time, I tap 2019 to move the timeline to the right, then I tap 2018 to move it again, and finally I tap 2017.

Figure 2.

Figure 3.

The view that comes up lists the nine major meteor showers along with lots of condensed information:

  • dates the showers are active

  • dates they peak

  • diagram of the constellation each shower appears to radiate from

  • the “quality” of each shower for your shoot location (based on moonlight, position of the radiant, etc.)

  • number of meteors you can expect to see per hour

  • illumination percentage of the moon

For example, in Figure 4, for the 2017 Perseids we can see the following: It radiated from Perseus, had a below-average quality, lasted from July 17 to August 24, peaked on August 12 (the night Matt was shooting—yay, Matt!), had an expected density of 33.8 meteors per hour, and was happening under a 70.2 percent moon.

Figure 4.

The next step is to dive deeper into the data by tapping “Perseids” (Figure 5). There you can see all the info above, plus some more, such as the fact that the meteors originated from the Swift-Tuttle comet.

Figure 5.

When you tap the arrow next to “Peak at your location,” you’ll open the Info screen, where you’ll see a host of other information that will affect how and when you choose to shoot, such as the times for sunset, moonset, and visibility and orientation of the galactic core.

Perhaps upon seeing this information you’re curious if the nights before or after would be better for the shoot. At the top (Figure 6), tapping < and > brings you backward and forward one day at a time, and all the pertinent data changes. To change by minutes or hours, swipe inside the box between those arrows.

Figure 6.

However, there’s one problem with all the info you’ve seen in these screen shots so far. It’s not for Great Sand Dunes National Park. Rather, it’s information for shooting in Charlotte, North Carolina, where I’m sitting as I write this blog post. That doesn’t do me much good for planning a shot 2,200 miles away in southern Colorado.

Fortunately, there’s a way to change that:

  1. Tap Settings at the top right, then tap on the GPS coordinates (which, by default, should indicate your precise spot on the globe at the moment you tap).

  2. From there you can enter the coordinates of your shoot location (if you know them), or enter the name or address of the location in the search field at the top. (If you can’t enter text, disable the Autoupdate switch in that dialog.)

  3. Select the correct option displayed below the search box (Figure 7).

  4. Tap Done (on an iOS device) or the back-arrow (on an Android).

Figure 7.

Now all the data will reflect the chosen shoot location rather than your current position.

So, time-traveling with Matt we can now see (Figure 8) that:

  • The sun will set at 7:58 p.m.

  • The moon will rise at 11:03 p.m.

  • The galactic core will be visible from 9:37 p.m. to 1:42 a.m..

  • The shower will peak at 11:04 p.m. with 36.9 meteors per hour.

  • At that time, he can expect to actually see 7.5 of those meteors per hour.

  • The shower will be radiating from an azimuth of 31.6 degrees and an elevation of 21.7 degrees.

  • Minor remainders from other meteor showers (e.g., the Delta Aquarids, which are past peak) might show up.

Figure 8.

Also on the Info screen is a graph with a horizontal line and two curves that dip above and below (Figure 9). The horizontal line indicates the horizon, the blue curve indicates the moon and the gray curve indicates the meteor shower radiant. The curves indicate how far above or below the horizon the moon and radiant will be at any given time (indicated at the bottom of the graph). The background of the graph is gray, with darker gray indicating twilight and black indicating dark hours. For ideal shooting conditions, look for a time during darkness when the moon is below the horizon and the radiant above.

Figure 9.

At the bottom of the graph is a gray bar chart that combines the data about light conditions (moon and sun visibility) with the expected rate of meteors (Figure 10). This identifies the times when you’re most likely to see the most shooting stars. It’s essentially a curve indicating how good the show will be at different times of night—the higher the gray, the better. In Matt’s case, we can see that the best window to photograph the most meteors in the darkest conditions was between 9:30 and 11 p.m.

Figure 10.

Swiping the graph will change the time of day, and in the section below you can see how the radiant’s azimuth and elevation change, as well as the expected rate of visible meteors.

Putting the Data to Use

All of that data sounds wonderful, right? Well … you can be forgiven if you’re thinking, “Yeah, but that’s a lot of numbers to sort through.” You’re right. And, in fact, there are even more numbers and technical names for them that I didn’t even mention.

So why is PhotoPills so great for planning a meteor shower shoot? Because it will instantly turn all those numbers into intuitive visual aids, either right on the scene in front of you, for scouting in the field, or right on a map, for scouting at home.

Scouting in the Field

For pretty much every PhotoPills feature I employ, the most powerful tool within that feature is Augmented Reality (AR), which uses your device’s camera to project a map of celestial events right onto the scene in front of you. This allows you to stand in the spot you want to shoot at night and see exactly, for example, where the moon will rise on the horizon, where the Milky Way will tilt across the landscape, and yes, where stars will shoot out of the sky.

During the end of the day, when Matt could still see where he was walking and setting up the camera, he would have used PhotoPills to see exactly where the radiant of Perseids would be at the time he wanted to shoot (Figure 11).

Using that visual information on your device’s display is invaluable for deciding where to set up your tripod, where to point your camera, what lens to use, and how to compose your photograph. In the figure, you can see that the Perseids radiant would rise above the horizon at about 9:30 p.m. and track in an arc above the distant mountains. You can also see that the radiant is aligning nicely with the Milky Way—so, bonus!

Figure 11.

Doing this is easy. From the Meteor Showers Info screen, tap AR at the bottom (Figure 12). This will engage your device’s camera. PhotoPills uses the device’s location and compass information to know where you’re pointing, and will lay the sky map right on top of what you’re looking at. In this case, part of what it shows you will be the meteor shower.

Figure 12.

When you open the AR view, it will default to the current date and time. To see what will happen later, just drag your finger on the screen. You’ll see the sky map move across the scene as you go forward and back by minutes and hours. If you want to go forward a full day, just tap the right of the screen; to go back a day, tap on the left.

As you turn and move your device around the scene, watch the display. Look for the heavy line that indicates the path of the radiant through the sky, with points along the line indicating the time the radiant will appear in different places. Also look for the icon with the meteor shower’s name. This icon will tell you precisely where the radiant will be at the time indicated at the top left of the AR screen.

Back in 2017, all Matt would have needed to do was find the Perseids on the sky map, drag the icon to where he wanted to see the radiant in his composition, note what time it would be there (a little before 11 p.m., in Figure 11) and how it would move through the scene, then set up and shoot.

Scouting from Home

Planning a shot when you’re on location looks easy enough, right? But what if you want to plan ahead of time, when you’re still at home day-dreaming about night-shooting a meteor shower?

That’s when you want to work in the PhotoPills map—or in, as they call it, the Planner pill.

To open this feature, start at the main screen and tap on the very first option, which is labeled Planner (Figure 13).

Figure 13.

Locate and tap on the Settings button (Figure 14). Here you can enable and disable different layers of information, including for the sun, twilight, Milky Way and so on. For this example, I’ve turned off everything except the Moon and Meteor Shower layers. To return to the map, tap Done (iOS) or the back-arrow (Android).

Figure 14.

To make your map show your desired shoot location, tap Load at the bottom, then enter your spot in the text box (in this case, Great Sand Dunes, Figure 15). Tap on the location name in the search results, and PhotoPills will bring you there on the map. Now you can pinch, zoom, drag and swipe to get to the exact spots you’d like to scout. Press and hold where you’d like to stand for your photo, and PhotoPills will drop a red pin. That pin will then become the center point for all your moon and meteor data.

Figure 15.

In Figure 16, you can see all that information in graphic form. The teal and purple lines show where the moon will rise and set, respectively. The straight gray line shows the meteor shower’s radiant position at the chosen time. The gray, curved, dotted line shows how the radiant will move throughout the night in relative position to the ground.

Figure 16.

In order to save that work for future reference (including once you finally get into the field to shoot):

  1. Tap Save at the bottom.

  2. Tap Plan.

  3. Tap New Plan.

  4. Type a name for your plan.

  5. Tap Enter.

Now you can call up that plan by name whenever you’d like to reference it—such as when you find a time machine to return to good ol’ 2017.

Executing the Shoot

That’s how we can use PhotoPills to plan a meteor shower shoot. Tomorrow, Matt will discuss how he executed the rest! And then afterward, he’ll show how he process it. Stay tuned. …

Now move on to “Part 2: How to Photograph a Meteor Shower.” And be sure to download the e-book, Great Balls of Fire: A Guide to Photographing Meteor Showers.

Chris Nicholson is a partner and workshop leader with National Parks at Night, and author of Photographing National Parks (Sidelight Books, 2015). Learn more about national parks as photography destinations, subscribe to Chris' free e-newsletter, and more at www.PhotographingNationalParks.com.

UPCOMING WORKSHOPS FROM NATIONAL PARKS AT NIGHT

NPF: The New Rule for Shooting the Sharpest Stars in the Sky

Kareem (@wildnkrazykid) searching for the sharpest stars in the sky. Nikon Z 6 with Irix 15mm f/2.4 lens. 20 seconds, f/2.4, ISO 16,000.

In this golden age of night photography that we live in, the quest for the sharpest stars seems to be the most elusive. But it’s certainly an achievable goal, and we’re here to help you reach it — to reach for the stars, you might say.

Sharp stars can mean two things: Focus and proper exposure. We discussed the multiple ways you can master focus in Chris Nicholson’s article “Staying Sharp.” Today we are going to take a deep dive into working out the best exposure for your camera and lens combination to create tack-sharp stars that don’t trail.

The 600/500/400/250/200 Rules

When I first started shooting digital night photography a decade ago, we used a simple rule to figure out the best shutter speed for star point photography. That was the 600 Rule. Divide 600 by the focal length of your lens, and the result was your maximum shutter speed for achieving pinpoint stars. For example:

600 / 20mm lens = 30 seconds.

This seemed to work fine, but for those of us who were making prints bigger than 8.5x11 inches, we were noticing that those stars weren’t as round as they should be. In reality, they were tiny lines.

So we adapted the rule to 500:

500 / 20mm = 25 seconds

The 500 Rule became the standard for many night photographers and worked fairly well with larger prints and cameras under 20 megapixels. However, as cameras increased the millions of pixels they put into their sensors and with the variety of different size sensors, we needed to adapt again. Over the last 4 to 5 years we have been using the 400 Rule for full-frame cameras under 30 megapixels, the 250 Rule for APS-C sensors and the 200 Rule for Micro Four Thirds. (For an explanation of why this all works, see Lance’s two-part blog post “What’s the Longest Usable Shutter Speed for Astro-landscape?”)

400 / 20mm = 20 seconds

250 / 20mm  = 12.5 seconds

200 / 20mm = 10 seconds

These results were more accurate than the previous 500/600 rules and were customized to our sensor sizes. However, if you were to zoom in to 100 percent, or get close to a large print, you would definitely still see slight movement in those luminous points in the sky.

Add to the equation that higher-megapixel cameras (40-plus megapixels) were actually doing a decent job at higher ISOs, which meant our images were showing more detail than ever before. More detail means that trailing stars become more noticeable.

Not to mention that those “rules” are just guidelines to get you in the right ballpark for shutter speed. Other factors affect how quickly stars begin to trail, including declination (i.e., your place on the globe) and which compass horizon you’re facing. The point is (see what I did there? point?), if you want to be precise about getting sharp star points, there’s a lot that goes into figuring that out.

A Modern Solution for a Modern Problem

A couple of years ago, Frédéric Michaud—a French photographer and amateur astronomer—devised the ultimate formula for the Astronomical Society of Le Havre. That formula is called the NPF Rule. Don’t bother trying to decipher the acronym; the letters aren’t initials, they’re variables:

N = aperture
P = pixel pitch
F = focal length

I’ll be honest—the formula is a bit complex. Besides the focal length of your lens, it also takes into account the camera’s megapixels, physical size of the sensor, aperture, pixel pitch and the minimal declination of the stars in your frame.

This is a lot to figure out in the field, and the cheat sheets aren’t small. To take a look at Frédéric’s formula, visit the Astronomical Society’s website (or Google’s English translation).

Fortunately for night photographers, there’s a simple way to apply this complex concept: I am happy to report that our friends at PhotoPills have incorporated the NPF Rule into their app, under the Spot Stars section.

Below is what the PhotoPills calculator looks like, followed by the five easy steps to figure out the best shutter speed for sharp stars.

When you open PhotoPills, the Spot Stars module is located near the bottom, so scroll down and tap.

Input your information and PhotoPills will do the NPF Rule calculations for you,

Here’s how to use it:

  1. Select your camera in the upper right corner. PhotoPills uses this to determine some of the necessary numbers to plug into the NPF Rule algorithm, such as using the sensor size and megapixels to figure out the pixel pitch.

  2. Choose the focal length of the lens (the one written on the lens, not the full-frame equivalent).

  3. Input the aperture you’d like to use. We typically choose an aperture one-third to 1 stop less than wide open. For example, for a f/1.4 lens we’d shoot at f/1.8 or f/2.

  4. For declination, tap the AR (Augmented Reality) button on the lower left corner and angle/aim the AR to the area in the sky you’d like to compose around. Note that at the bottom of your screen PhotoPills will now show your maximum exposure in landscape and portrait modes, as well as your minimum declination.

  5. The final setting to look at is Accuracy (upper right). It should say “Default.” If you keep it at Default, you’ll get a longer shutter speed and be able to use realistic ISOs such as 3200 and 6400. However, if you’re a pixel-peeper and look at the stars at 100 percent, that will result in you still seeing slight movement. You can switch from Default to Accurate and then there will be no trails at all. However, you’ll also be cutting your maximum shutter speed in half. I wouldn’t recommend this unless you are making 17x22 or larger prints—but even then, that results in the negative trade-offs that come with shooting at sky-high ISOs, which are also more prevalent in larger prints. Decisions, decisions.

Old vs. New

Let’s take a look at the old and new math.

Using our beloved Irix 15mm lens on a standard-resolution, full-frame camera, the 400 Rule gives us a 25-second exposure (400 / 15mm = 26.6 seconds).

Using the NPF Rule in PhotoPills, at a declination of 0 and set in Default mode, with the Irix lens at f/2.8 on our new favorite camera, the 24.5-megapixel Nikon Z 6, we get a maximum shutter speed of 17.26 seconds. I’d probably round that out to 15 seconds. (You want to round down, not up, to ensure sharpness.)

However, if we then shifted to Accurate mode, our maximum shutter speed would be 8.63 seconds. I’d round that to 8.

So, using the NPF Rule in Accurate, I’ve lost pretty much 2 stops of light from ye olde 400 Rule and 1 stop of light off the NPF Default mode. On a moonless night we would typically use ISO 6400 under the 400 Rule. Now, with the NPF Rule, we’d have to shoot at ISO 12,800 or 25,600 in order to get perfectly sharp stars. The Nikon Z 6 can handle those ISOs, but not many others can.

Real-World Testing

Theory is nice. But shooting for real is where we really learn some things.

I was out on the sand dunes of Death Valley a few weeks ago, and I brought my new Z 6. Curious about how the bigger sensors and higher-megapixel cameras would perform, I also borrowed the medium format 51.4-megapixel Fujifilm GFX 50R as well as my friend Kareem’s 42-megapixel Sony a7R III.

Fujifilm GFX 50r with 23mm f/4 lens

400 Rule: 400 / 18mm = 22.22 seconds

The 23mm lens is equivalent to an 18mm on a full-frame sensor, so for the 400 Rule this equaled a 22.22 maximum shutter speed. I rounded down to 20 seconds at f/5.6, ISO 6400. The resulting stars are slight dashes—elongated oblongs. They are sharp and skinny, which makes me feel I could live with this. However, if you are shooting with a 50-megapixel camera, then you’re probably making big prints, so maximum sharpness is important.

Full image from Fujifilm GFX 50r with 23mm f/4 lens. 20 seconds, f/5.6, ISO 6400.

100 percent view from Fujifilm GFX 50r. 20 seconds, f/5.6, ISO 6400.

NPF Default = 10.71 seconds

I used 10 seconds, but I was afraid to go any higher than ISO 6400 on the GFX 50r—so I just underexposed. (Not trying for art here, just testing efficacy.) To be honest, I’m seeing only the slightest of movement in the stars, not even oblong, mostly round but some of the brighter ones slightly oval. I’d be happy with these stars, event in a big print.

Full image from Fujifilm GFX 50r. 10 seconds, f/5.6, ISO 6400.

100 percent view from Fujifilm GFX 50r. 10 seconds, f/5.6, ISO 6400.

NPF Accurate = 5.35 seconds

With NPF Accurate, we’re squeezed even further. Again we are still dealing with an underexposed image, but the stars are certainly tack-sharp.

Full image from Fujifilm GFX 50r. 5 seconds, f/5.6, ISO 6400.

100 percent view from Fujifilm GFX 50r. 5 seconds, f/5.6, ISO 6400.

Takeaways: The GFX has the most megapixels of the sub-$5,000 cameras on the market, clocking in at 51.4. The dynamic range and detail are amazing, but the higher ISOs are a struggle. ISO 3200 is workable but 6400 needs some finessing. Match that with their widest lens, for which the fastest aperture is f/4, and it’s a challenge to do any dark sky work with this combo.

Nikon Z 6 with Irix 15mm f/2.4 lens

400 Rule: 400 / 15mm = 26.66 seconds

Here was my first shot using the 400 Rule, which gave me a 25-second maximum shutter speed. This forced me to use a wide-open aperture of f/2.4 and an ISO of 12,800. It looks good in standard view in Lightroom, and if posted to social media there would be no issues. However, the 100 percent crop definitely show the stars as small lines.

Full image from Nikon Z 6 with Irix 15mm f/2.4 lens. 25 seconds, f/2.4, ISO 12,800.

100 percent view from Z 6. 25 seconds, f/2.4, ISO 12,800.

NPF Default = 17.26 seconds

The stars are definitely rounder, a little oblong, but I would find this result totally acceptable.

Full image from Z 6. 15 seconds, f/2.4, ISO 12,800.

100 percent view from Z 6. 15 seconds, f/2.4, ISO 12,800.

All that disturbs me is the coma distortion that is affecting the brighter stars. Most lenses display some coma at their widest aperture, mainly near the edges of the frame and in brighter stars. With the Irix, this can be minimized by stopping down to f/2.8 or f/3.5.

Note the distortion in the brighter stars—they look like UFOs with a bright line intersecting them. This is called “coma’ and is found in many lenses. You can correct for coma by closing down your lens 1 to 3 stops.

NPF Accurate = 8.63 seconds

The NPF Accurate exposure was for 8 seconds, so I had to push my ISO up to 32,000 to get a good histogram. The stars are definitely rounder and less oblong, but it is a challenge to live in those higher ISOs. The coma is also still prevalent.

Full image from Z 6. 8 seconds, f/2.4, ISO 32,000.

100 percent view from Z 6. 8 seconds, f/2.4, ISO 32,000.

Takeaways: I’m starting to feel that I can live with the Default NPF setting in PhotoPills, which is still pushing cameras into the ISOs of 12,800 and higher. The Z 6 handles those higher ISOs very well, but I barely got the right exposure in the sky and the foreground is suffering. Blending a longer foreground exposure would be key to balancing the overall image (such as Tim did for his Bryce Canyon photo in last week’s post).

Sony a7R III with 16-35mm f/2.8 lens

400 Rule: 400 / 19mm = 21.05 seconds

I stopped down the lens to f/4 and the shutter speed to 20 seconds for our 400 Rule shot. The Sony a7R III does an excellent job at ISO 6400 and the Big Dipper looks very sharp. Looking west (left) I do notice the stars are becoming oblong.

Full image from Sony a7R III with 16-35mm f/2.8 lens. 20 seconds, f/4, ISO 6400.

100 percent view from a7R III. 20 seconds, f/4, ISO 6400.

NPF Default = 11.75 seconds

Rounding down the NPF Default to 10 seconds yields excellent results. Only a few bright stars to the far left look oval, and this is being nitpicky.

Full image from a7R III. 10 seconds, f/4, ISO 6400.

100 percent view from a7R III. 10 seconds, f/4, ISO 6400.

NPF Accurate = 5.88 seconds

We rounded up the NPF Accurate shutter speed to 6 seconds and the stars are wonderfully round. I don’t see any distortion at all.

Full image from a7R III. 6 seconds, f/2.8, ISO 25,600.

100 percent view from a7R III. 6 seconds, f/2.8, ISO 25,600.

Takeaways: I was very impressed with how the higher-megapixel Sony handled ISO 6400, and the 16-35mm lens did a superb job resolving sharp, round stars. In my testing, ISO 12,800 is also easily attainable with the a7R III, whereas ISO 25,600 is the breaking point for me, as a layer of grainy noise covers the whole image. This is still a very admirable result for a camera that gives loads of detail.

Final Thoughts

If you are a star-point seeker then you’ll definitely want to start using the NPF Rule in your workflow. I’ll be switching over from the 400 Rule to the NPF Rule at the Default setting in PhotoPills. If the shot is an absolute beauty—a 5-star shot (so to speak) that I know I’ll want to print—then I’ll use the NPF Accurate mode.

Either way, with an f/2.8 lens we will be using an ISO from 6400 to 25,600, which isn’t ideal for any camera. Don’t get me wrong, there are certainly a few cameras that handle these higher ISOs admirably, but for the best print quality we always want lower ISOs.

Because of that reality, I’ll also start committing to shooting multiple frames of a star-point scene that I can blend in post-production to reduce noise. This requires using Starry Landscape Stacker (SLS), a Mac-only software application that does an excellent job of reducing high ISO noise while keeping stars sharp. Sequator is the PC equivalent. Look for our in-depth reviews of these excellent pieces of software soon.

For the test photos above, the foregrounds were all very dark due to the moonless night and the fact that the area we were shooting was too large to paint with light. In these scenarios, I’d also advise taking an additional exposure between 3 to 5 stops brighter than your sky exposure, perhaps with LENR turned on. This will provide more detail and information in the foreground, which can be blended into the stacked SLS or Sequator image.

Applying the NPF Rule

Now here is the hardest part about new knowledge: Do you use it?

It’s up to you. We just want you to realize that star point photography is a constant balance, wherein you want to weigh the trade-offs of noise at higher ISOs versus slightly trailing stars. Understanding how your gear performs and then deciding which sacrifices to make in the field will help you create the best possible image based on the specific conditions you are shooting in.

Run some tests so that you know your personal tolerance for star sharpness versus how your camera performs at higher ISOs, then apply the 400 Rule or NPF Rule as needed while you #seizethenight!

Note: If you want to take a deeper look at some of the other “night testing” you can perform on your camera, check out Gabe’s latest video with B&H that takes a deep dive into recently released full-frame mirrorless cameras.

Gabriel Biderman is a partner and workshop leader with National Parks at Night. He is a Brooklyn-based fine art and travel photographer, and author of Night Photography: From Snapshots to Great Shots (Peachpit, 2014). During the daytime hours you'll often find Gabe at one of many photo events around the world working for B&H Photo’s road marketing team. See his portfolio and workshop lineup at www.ruinism.com.

UPCOMING WORKSHOPS FROM NATIONAL PARKS AT NIGHT

Five Questions: Light Painting Headlights, Moonrises and Sunsets, Auroras and More

You ask questions, we give answers. (When we’re not shooting. Which is why we don’t do this feature more often.)

This installment of our “Five Questions” series features inquiries about light painting headlights, tripods, open hours for national parks, moonrises at sunset and lens choices for aurora.

If you have any questions you would like to throw our way, please contact us anytime. Questions could be about gear, national parks or other photo locations, post-processing techniques, field etiquette, or anything else related to night photography. #SeizeTheNight!

1. Light Painting Headlights

Pickup in Nelson Ghost Town, Nevada. © Tim Cooper. Nikon D4, Nikon 24-70mm f/2.8 lens. 3 minutes, f/8, ISO 100.

Q: When light painting old cars/trucks at night, how do you get the headlights to look like they are on? I have an old tractor in a field that I would like to practice on. — Brien R.

A: We love light painting, especially old cars! Who doesn’t?

Light painting the headlights is a tricky but rewarding thing to practice.

If the headlights have the glass still intact, use a very low-power light source (e.g., a Maglite or a Coast G5). Stand about 2 to 3 feet from the headlight, but to the side so you aren’t blocking the camera. Shine the flashlight into the headlight briefly—1 to 3 seconds is generally enough. Then walk over to the next headlight and do the same.

Here’s a key to this working: Stay invisible. Be careful and use your body to block the light source (i.e., the bulb) from being seen by the camera—we want to capture only the light reflecting from the headlights. I also advise dressing all in black, including black gloves. Sometimes the light bouncing off the headlights can freeze your hand or face in the frame, and you end up being ghosted in the picture. If that is the case, you’ll need to move farther out of the scene and then snoot your flashlight with a long tube— think PVC or a paper towel core. This will give you a more precise paintbrush to place the light.

Finally practice, practice, practice! And then feel free to share your results with us. — Gabriel

2. Lance’s Tripod

Q: I’m trying to figure out which tripod Lance showed in your CreativeLive class. I went back and watched the class again and figured out that it may be a Manfrotto 190 carbon fiber with a leveling center column. Can you please confirm this? Also, for a tripod this size would you still suggest that setup or has something else come out that you like better? Finally, which ball head would you suggest for this combo? — Marc S.

A: You are correct that I was using the Manfrotto 190 with a leveling head in the video. The head is great, but only for panoramas. It’s unnecessary otherwise.

If I were to buy today, I’d go with the Manfrotto 190go! Carbon Fiber M-Series Tripod with MHXP RO-BHQ2 XPRO Ball Head RC2 Kit. I like the twist locks better than the flip locks, which can pinch if you are not careful. However, these days I’m mostly using my Gitzo Series 2 Traveler Carbon Fiber Tripod with Center Ball Head.

Several of us at National Parks at Night are big fans of the Acratech GP-ss Ballhead With Lever Clamp. It is designed for compact travel tripods. It’s not quite as compact as the Gitzo head, but is easier to work with and the lever clamp is awesome. — Lance

3. Hours at National Parks and Monuments

Arch Rock, Valley of Fire. © 2014 Matt Hill. Nikon D750, Nikon 14-24mm f/2.8 lens at 14mm. 30 seconds, f/2.8, ISO 500.

Q: Thank you for your recent article on whether light painting is allowed in national parks. However, it seems there is an even more important issue, which is if visitors are actually allowed to enter certain parks at night. My wife and I visited a number of national parks and monuments in recent years, but in places like Valley of Fire, Hovenweep or National Bridges we were told by rangers that we’d be in trouble if we were seen out there at night. On the other hand I have seen plenty of photos taken by the National Parks at Night team or other professionals at exactly these places. Are there different rules for the average photographer? — Lambert

A: Most of the 400-plus National Park Service units are open 24 hours to all visitors—including Natural Bridges National Monument, so I’m not sure why that ranger told you otherwise. In fact, night skies are part of how Natural Bridges actively entices people to visit. It’s also a feature that Hovenweep plays up, though only some sections of the park are open at night.

All of the national parks are open 24 hours per day, except Petrified Forest, but you can get a camping permit to stay overnight, or pay for a Special Use Permit to shoot after hours. Some of the national seashores are closed at night unless you have a camping or special use permit. National wildlife refuges are mostly closed at night, but those are units of U.S. Fish and Wildlife, not the NPS.

The Oliver Cabin is one of the many wonderful night photography subjects in Great Smoky Mountains National Parks’ Cades Cove region. Cades Cove is closed to vehicles at night, but you can walk or bike the 11-mile loop road all night if you’d like. © 2017 Chris Nicholson. Nikon D3s, 17-35mm f/2.8 lens, light painted with a Coast HP7R flashlight. 30 seconds, f/5.6, ISO 3200.

However, note that even if a park is open at night, there’s a chance that certain features are closed. In addition to Hovenweep, this is also the case at Mesa Verde National Park, which closes access to the ruins after sundown. Another example is Great Smoky Mountains National Park (where we’re hosting a workshop this April): Cades Cove, an amazing place to shoot; it is closed to motor vehicles at night, yet remains open to foot traffic.

As for Valley of Fire, that’s a state park, and as with any state land is run under local regulations that the NPS guidelines don’t affect. For night access to Valley of Fire, you need either a permit or to be camping in the park. (Or you to be on our workshop this April, which happens to have one spot remaining.)

No matter where you’re going to shoot at night, we always recommend checking the hours and letting the rangers (or other appropriate authorities) know what you’ll be up to. Not because you necessarily need permission to engage in night photography on public lands, but because it sometimes makes their jobs easier if they know you’ll be out there. Not to mention that they might share some valuable local knowledge about the location. — Chris

4. Aurora Lenses

Aurora over Westfjords, Iceland. © 2012 Lance Keimig. Canon 5D Mark II, Nikon 20mm f/3.5 lens. 15 seconds, f/5.6 ISO 3200.

Q: I’ll be traveling to Iceland in March to shoot auroras. Which lens would you recommend between a Sigma 20mm f/1.4 and a Sigma 14mm f/1.8? Or is there another lens you’d recommend instead? I’m shooting with a Sony a7R III. — Jeff

A: Congrats on your Iceland trip! Our No. 1 bit of advice is to get off of the main ring road and explore the random back roads to avoid the crowds. It can be busy over there!

As for your lens question, the wider-aperture model will probably be more useful, but it’s always good to have options. If the sky really lights up, you’ll want the widest lens you can get, but the 14mm is crazy wide for general shooting. Also, you don’t necessarily need superfast lenses—with a good aurora, you will probably be stopping down a few stops anyway.

For more advice on shooting the northern lights, see our two blog posts “Capturing Clouds of Light: How to Photograph the Aurora Borealis.” and “Northern Exposure: 8 Illuminating tips for Photographing Auroras.” — Lance

5. Moonrises at Sunset

Day before full moon, Death Valley National Park. © 2005 Tim Cooper. Canon 1Ds, 16-35mm lens at 31mm. 4 seconds, f/8, ISO 100.

Q: We learned from PhotoPills that sunsets can be spectacular when the moonrise and sunset occur within an hour of each other. But the moon rises in the east and the sun sets in the west, so we’re stumped. Any ideas? — Barbara E.

A: I suggesting thinking about it this way: What will be illuminated from the west when you’re facing east, with a great view of the moon rising behind it? The idea isn’t to shoot the sun and moon together, but rather to shoot the full moon rising among beautifully sunlit scenery or among the delicate light of a just-set sun.

The other advantage to this scenario is that the brightness of sunset balances well with the moon, which equalizes the intensities to get it all in one shot (as opposed to having to HDR the scene, which is so often the need when trying to shoot the moon over a landscape).

For a crispy moon, keep those exposure times short—don’t be afraid to ramp up your ISO to keep things sharp. Ideally, you want a big ol’ moon coming just off the horizon with gentle, ruddy sunlight kissing your subjects.

Grab your phone and scout with PhotoPills! Use it to see just where that moon will peek up to be sure you will see it during that sweet spot of sunset with the moon on the horizon.

And please send us photos of your success! — Matt

Chris Nicholson is a partner and workshop leader with National Parks at Night, and author of Photographing National Parks (Sidelight Books, 2015). Learn more about national parks as photography destinations, subscribe to Chris' free e-newsletter, and more at www.PhotographingNationalParks.com.

UPCOMING WORKSHOPS FROM NATIONAL PARKS AT NIGHT