Great Balls of Fire, Part 1: Using PhotoPills to Scout Meteor Showers

If you want to photograph meteor showers, 2020 is your year.

Why? Doesn’t each calendar comprise the same meteor showers? Don’t the Quadrantids happen every winter, and Eta Aquariids every spring, and the Delta Aquariids each summer and the Leonids each fall?

Yes, they do. But not every meteor-shower photography opportunity is created equal. The variable is a rather large obstacle in the night sky: the moon. The brighter it is, the fewer meteors we can see, and thus the fewer meteors we can photograph. In short, a new moon usually makes for a better experience when shooting shooting stars.

That brings us back to why 2020 is such a fine year for doing this: Of the nine major meteor showers, three will peak during a new moon, including the busiest shower of them all, the Geminids in December. The same conditions will be available for the Leonids in November, as well as the Lyrids … this week!

(The summer Perseids won’t be too shabby either. They’ll happen under a 44.7 percent moon, but with a few hours before the waning gibbous rising, they should be spectacular nonetheless.)

This is why we’re bringing you our three-part definitive guide to photographing meteor showers:

  1. β€œUsing PhotoPills to Scout Meteor Showers,” by Chris Nicholson

  2. β€œHow to Photograph a Meteor Shower,” by Matt Hill

  3. β€œHow to Process a Meteor Shower Radiant,” by Matt Hill

Moreover, all of this, plus a guide to gear and a guide to shoot locations, is contained in our brand new PDF e-guide, Great Balls of Fire: A Guide to Photographing Meteor Showers. To download the whole e-guide, click here:


Using PhotoPills to Scout Meteor Showers

Can you plan meteor shower photography without PhotoPills? Sure! But why would you, when the app makes planning a lot more convenient and a lot more precise?

The Meteor Showers feature is one of the newest in PhotoPills. It does an excellent job of collating the myriad and complex data points required to plan and execute a good meteor shower shoot:

  • dates of meteor showers and their peaks

  • the location of the shower radiant (where the meteors appear to originate in the sky)

  • the number of meteors per hour

  • the moon phase

Moreover, PhotoPills gives you all this information accurate to any position on earth, for any meteor shower until 2032. (If you’re planning shoots further than that, kudos for your enthusiasm and confidence.)

To walk through the different settings and how to use them to plan a meteor shower shoot, we’re going to pretend to go back in time.

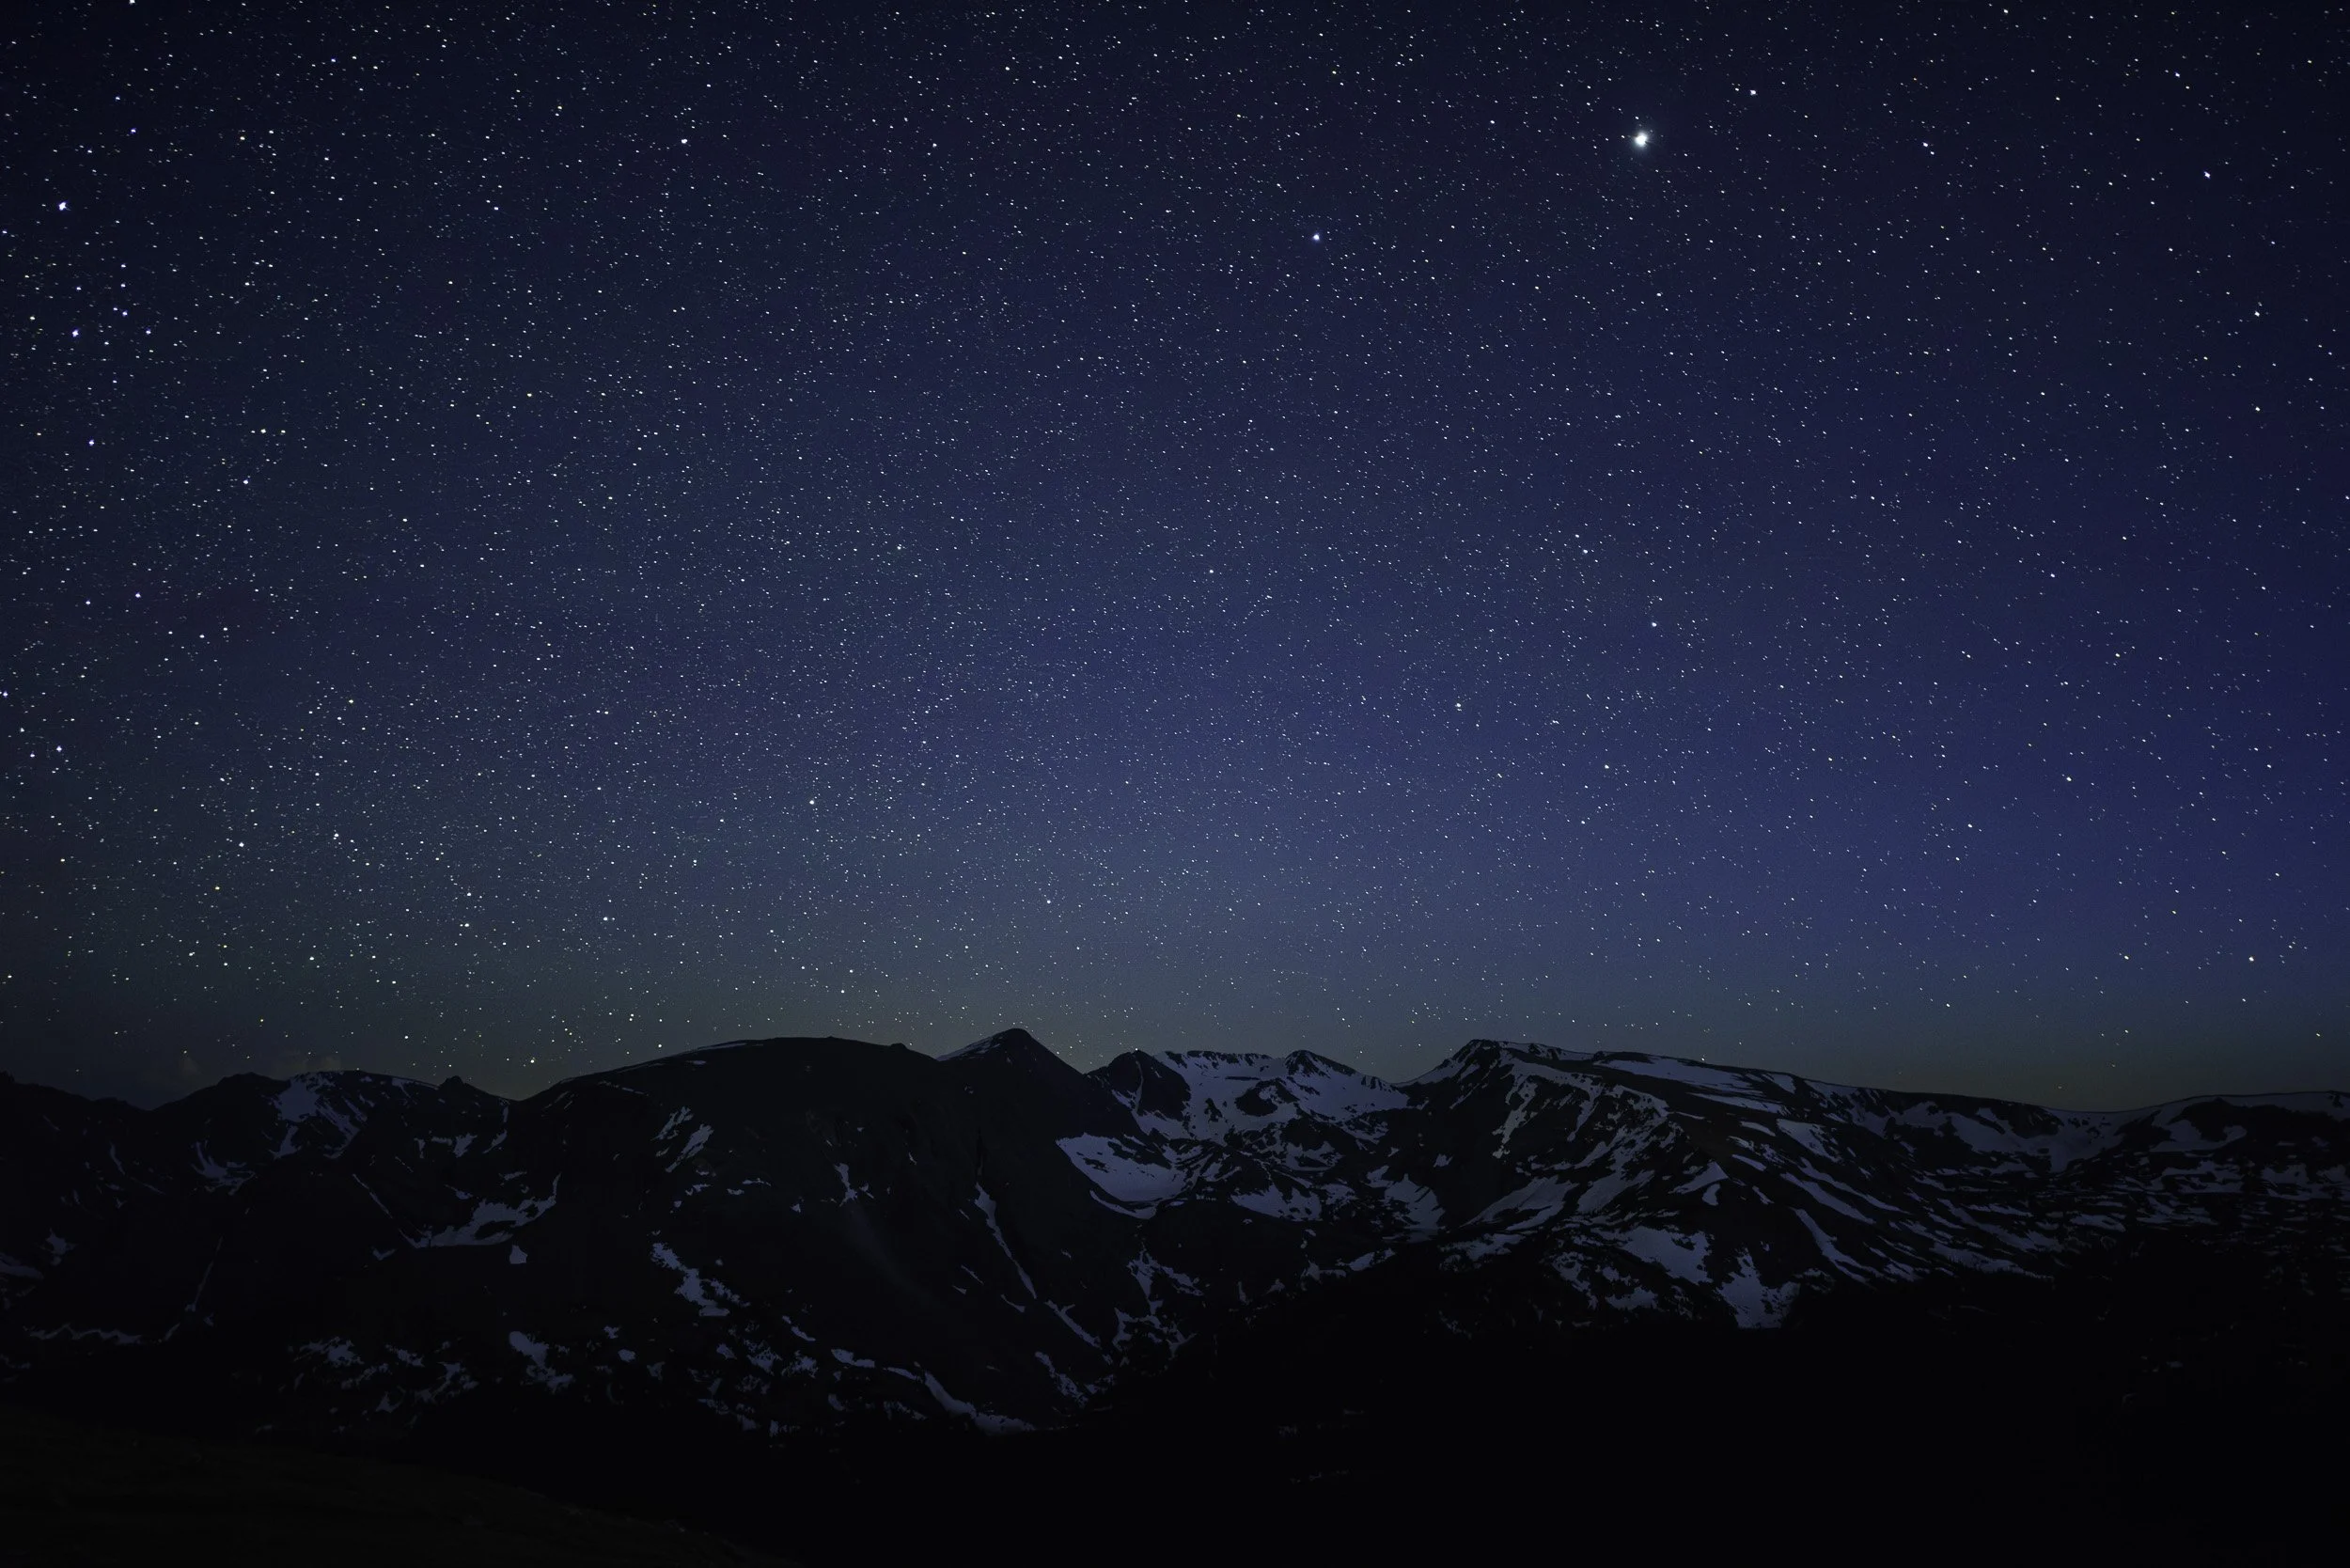
On August 12, 2017, my fellow NPAN instructor Matt Hill, along with a group of our workshop attendees, hiked into Great Sand Dunes National Park with the goal of creating a night-long image stack of the Perseids streaking over the landscape. The photograph he created (Figure 1) was so on-point that it’s become our go-to example of how to shoot meteors. (In fact, it’s the image he’ll use to demonstrate how to photograph and process a meteor shower image in the next two blog posts in this series.)

PhotoPills released their Meteor Showers feature just last fall. But we can look back in time (the app’s pertinent data is retroactive to 2010) to see how he would have used PhotoPills to plan this shot.

Figure 1: Great Sand Dunes National Park, Colorado. Nikon D750 with a Zeiss Distagon 15mm f/2.8 lens. 17 images at 22 seconds, f/2.8, ISO 6400, plus a single foreground exposure at 382 seconds, ISO 2000 for the landscape after moonrise. Β© 2017 Matt Hill.

Working in PhotoPills

First things always come first: Open the app, then tap Meteor Showers (Figure 2). The pill opens and presents you with the data for any meteor shower activity today. That’s fine if you’re shooting tonight, but if you’re scouting for a shoot in the future, you can navigate to any shower of any year over a two-decade period by tapping on Calendar (Figure 3).

You can select the year by tapping at the topβ€”in this case, to go back in time, I tap 2019 to move the timeline to the right, then I tap 2018 to move it again, and finally I tap 2017.

Figure 2.

Figure 3.

The view that comes up lists the nine major meteor showers along with lots of condensed information:

  • dates the showers are active

  • dates they peak

  • diagram of the constellation each shower appears to radiate from

  • the β€œquality” of each shower for your shoot location (based on moonlight, position of the radiant, etc.)

  • number of meteors you can expect to see per hour

  • illumination percentage of the moon

For example, in Figure 4, for the 2017 Perseids we can see the following: It radiated from Perseus, had a below-average quality, lasted from July 17 to August 24, peaked on August 12 (the night Matt was shootingβ€”yay, Matt!), had an expected density of 33.8 meteors per hour, and was happening under a 70.2 percent moon.

Figure 4.

The next step is to dive deeper into the data by tapping β€œPerseids” (Figure 5). There you can see all the info above, plus some more, such as the fact that the meteors originated from the Swift-Tuttle comet.

Figure 5.

When you tap the arrow next to β€œPeak at your location,” you’ll open the Info screen, where you’ll see a host of other information that will affect how and when you choose to shoot, such as the times for sunset, moonset, and visibility and orientation of the galactic core.

Perhaps upon seeing this information you’re curious if the nights before or after would be better for the shoot. At the top (Figure 6), tapping < and > brings you backward and forward one day at a time, and all the pertinent data changes. To change by minutes or hours, swipe inside the box between those arrows.

Figure 6.

However, there’s one problem with all the info you’ve seen in these screen shots so far. It’s not for Great Sand Dunes National Park. Rather, it’s information for shooting in Charlotte, North Carolina, where I’m sitting as I write this blog post. That doesn’t do me much good for planning a shot 2,200 miles away in southern Colorado.

Fortunately, there’s a way to change that:

  1. Tap Settings at the top right, then tap on the GPS coordinates (which, by default, should indicate your precise spot on the globe at the moment you tap).

  2. From there you can enter the coordinates of your shoot location (if you know them), or enter the name or address of the location in the search field at the top. (If you can’t enter text, disable the Autoupdate switch in that dialog.)

  3. Select the correct option displayed below the search box (Figure 7).

  4. Tap Done (on an iOS device) or the back-arrow (on an Android).

Figure 7.

Now all the data will reflect the chosen shoot location rather than your current position.

So, time-traveling with Matt we can now see (Figure 8) that:

  • The sun will set at 7:58 p.m.

  • The moon will rise at 11:03 p.m.

  • The galactic core will be visible from 9:37 p.m. to 1:42 a.m..

  • The shower will peak at 11:04 p.m. with 36.9 meteors per hour.

  • At that time, he can expect to actually see 7.5 of those meteors per hour.

  • The shower will be radiating from an azimuth of 31.6 degrees and an elevation of 21.7 degrees.

  • Minor remainders from other meteor showers (e.g., the Delta Aquarids, which are past peak) might show up.

Figure 8.

Also on the Info screen is a graph with a horizontal line and two curves that dip above and below (Figure 9). The horizontal line indicates the horizon, the blue curve indicates the moon and the gray curve indicates the meteor shower radiant. The curves indicate how far above or below the horizon the moon and radiant will be at any given time (indicated at the bottom of the graph). The background of the graph is gray, with darker gray indicating twilight and black indicating dark hours. For ideal shooting conditions, look for a time during darkness when the moon is below the horizon and the radiant above.

Figure 9.

At the bottom of the graph is a gray bar chart that combines the data about light conditions (moon and sun visibility) with the expected rate of meteors (Figure 10). This identifies the times when you’re most likely to see the most shooting stars. It’s essentially a curve indicating how good the show will be at different times of nightβ€”the higher the gray, the better. In Matt’s case, we can see that the best window to photograph the most meteors in the darkest conditions was between 9:30 and 11 p.m.

Figure 10.

Swiping the graph will change the time of day, and in the section below you can see how the radiant’s azimuth and elevation change, as well as the expected rate of visible meteors.

Putting the Data to Use

All of that data sounds wonderful, right? Well … you can be forgiven if you’re thinking, β€œYeah, but that’s a lot of numbers to sort through.” You’re right. And, in fact, there are even more numbers and technical names for them that I didn’t even mention.

So why is PhotoPills so great for planning a meteor shower shoot? Because it will instantly turn all those numbers into intuitive visual aids, either right on the scene in front of you, for scouting in the field, or right on a map, for scouting at home.

Scouting in the Field

For pretty much every PhotoPills feature I employ, the most powerful tool within that feature is Augmented Reality (AR), which uses your device’s camera to project a map of celestial events right onto the scene in front of you. This allows you to stand in the spot you want to shoot at night and see exactly, for example, where the moon will rise on the horizon, where the Milky Way will tilt across the landscape, and yes, where stars will shoot out of the sky.

During the end of the day, when Matt could still see where he was walking and setting up the camera, he would have used PhotoPills to see exactly where the radiant of Perseids would be at the time he wanted to shoot (Figure 11).

Using that visual information on your device’s display is invaluable for deciding where to set up your tripod, where to point your camera, what lens to use, and how to compose your photograph. In the figure, you can see that the Perseids radiant would rise above the horizon at about 9:30 p.m. and track in an arc above the distant mountains. You can also see that the radiant is aligning nicely with the Milky Wayβ€”so, bonus!

Figure 11.

Doing this is easy. From the Meteor Showers Info screen, tap AR at the bottom (Figure 12). This will engage your device’s camera. PhotoPills uses the device’s location and compass information to know where you’re pointing, and will lay the sky map right on top of what you’re looking at. In this case, part of what it shows you will be the meteor shower.

Figure 12.

When you open the AR view, it will default to the current date and time. To see what will happen later, just drag your finger on the screen. You’ll see the sky map move across the scene as you go forward and back by minutes and hours. If you want to go forward a full day, just tap the right of the screen; to go back a day, tap on the left.

As you turn and move your device around the scene, watch the display. Look for the heavy line that indicates the path of the radiant through the sky, with points along the line indicating the time the radiant will appear in different places. Also look for the icon with the meteor shower’s name. This icon will tell you precisely where the radiant will be at the time indicated at the top left of the AR screen.

Back in 2017, all Matt would have needed to do was find the Perseids on the sky map, drag the icon to where he wanted to see the radiant in his composition, note what time it would be there (a little before 11 p.m., in Figure 11) and how it would move through the scene, then set up and shoot.

Scouting from Home

Planning a shot when you’re on location looks easy enough, right? But what if you want to plan ahead of time, when you’re still at home day-dreaming about night-shooting a meteor shower?

That’s when you want to work in the PhotoPills mapβ€”or in, as they call it, the Planner pill.

To open this feature, start at the main screen and tap on the very first option, which is labeled Planner (Figure 13).

Figure 13.

Locate and tap on the Settings button (Figure 14). Here you can enable and disable different layers of information, including for the sun, twilight, Milky Way and so on. For this example, I’ve turned off everything except the Moon and Meteor Shower layers. To return to the map, tap Done (iOS) or the back-arrow (Android).

Figure 14.

To make your map show your desired shoot location, tap Load at the bottom, then enter your spot in the text box (in this case, Great Sand Dunes, Figure 15). Tap on the location name in the search results, and PhotoPills will bring you there on the map. Now you can pinch, zoom, drag and swipe to get to the exact spots you’d like to scout. Press and hold where you’d like to stand for your photo, and PhotoPills will drop a red pin. That pin will then become the center point for all your moon and meteor data.

Figure 15.

In Figure 16, you can see all that information in graphic form. The teal and purple lines show where the moon will rise and set, respectively. The straight gray line shows the meteor shower’s radiant position at the chosen time. The gray, curved, dotted line shows how the radiant will move throughout the night in relative position to the ground.

Figure 16.

In order to save that work for future reference (including once you finally get into the field to shoot):

  1. Tap Save at the bottom.

  2. Tap Plan.

  3. Tap New Plan.

  4. Type a name for your plan.

  5. Tap Enter.

Now you can call up that plan by name whenever you’d like to reference itβ€”such as when you find a time machine to return to good ol’ 2017.

Executing the Shoot

That’s how we can use PhotoPills to plan a meteor shower shoot. Tomorrow, Matt will discuss how he executed the rest! And then afterward, he’ll show how he process it. Stay tuned. …

Now move on to β€œPart 2: How to Photograph a Meteor Shower.” And be sure to download the e-book, Great Balls of Fire: A Guide to Photographing Meteor Showers.
Chris Nicholson is a partner and workshop leader with National Parks at Night, and author of Photographing National Parks (Sidelight Books, 2015). Learn more about national parks as photography destinations, subscribe to Chris' free e-newsletter, and more at www.PhotographingNationalParks.com.

UPCOMING WORKSHOPS FROM NATIONAL PARKS AT NIGHT

Living Room Long Exposures: Seizing the Night at Home

A few weeks ago I returned from our Lofoten workshop to a totally different world.

Upon arriving back in NYC, I passed the β€œtemperature test” but was asked to go into 14 days of self-quarantine. While two weeks indoors might cause us to go stir-crazy, I always try to look on the positive side of things. So I decided to use my time to count my hats and to work on a ton of other home-based projects.

By nature, I like to live creatively. I need to take pictures, preferably ones that bend time, and I was getting antsy with this much time on my hands. What could I create in an 800-square-foot apartment? Let me preface my answer by mentioning the following limitations:

  • My view out the window is of South Brooklyn.

  • I have no official studio space.

  • I live with my wife Nancy and Theo the Cat.

I thought of what great artists have done indoors. There was Sugimoto’s brilliantly inspiring Theater series for which he photographed old-school movie houses using one long exposure for the duration of the film (Figure 1). And dreams came alive in Steve Harper’s beautiful time-filled 4.5-hour self-portrait while sleeping (Figure 2).

Figure 1. β€œRadio City Music Hall, New York, 1978.” Hiroshi Sugimoto.

Figure 2. β€œSelf Asleep.” Steve Harper, 1984.

Sufficiently motivated, I started writing down ideas and a shot list.

My self-quarantine took place mainly in our living roomβ€”which is 300 square feet and filled to the brim with β€œstuff.” Yet, I sat there calmly with the lights out and enjoyed watching the twilight shine through the windows, its cool blue light crawling across our warm-toned walls. I binge-watched some TV and thought about how long an exposure would be required to light the room with a 50-inch TV. And, of course, I wondered what I would look like to a camera while sleeping and dreaming for 4.5 hours.

How Long Can You Go?

That was obviously the first question I wanted to answer.

I slept on the couch for a good portion of my self-quarantined return. This actually provided the best space for me to work on those β€œsleeping selfie” shots. I treated it just like any other long exposure:

Step 1. I left the lights on to finesse the composition and focus, and then left the camera in manual focus.

Figure 3. Testing the focus and composition. Nikon D750 with an Irix 15mm f/2.4 lens. 8 seconds, f/11, ISO 320.

ο»ΏStep 2. I turned off the lights and did a high ISO test shot at 30 seconds, f/5.6, ISO 6400. This allowed me to check for extraneous light sources spilling into the image.

Figure 4. Note the light coming from another room as well as the light spots on the bed coming from the window curtain not being completely closed. Nikon D750 with an Irix 15mm f/2.4 lens. 30 seconds, f/5.6, ISO 6400.

Step 3. The previous test shot was still very dark, so I increased my ISO by one stop and opened my aperture by two stops for the final test: 30 seconds, f/2.8, ISO 12800.

Figure 5. Nikon D750 with an Irix 15mm f/2.4 lens. 30 seconds, f/2.8, ISO 12800.

ο»ΏStep 4. That looked good, so using the Six-Stop Rule, I knew an equivalent long exposure would be 30 minutes, f/2.8, ISO 200. But 30 minutes wasn’t enough for me. I wanted one hour, plus a little more depth of field. So I took away two stops of light by closing down my aperture to f/5.6. I then extended my shutter speed to 60 minutes and raised my ISO to 400.

Step 5. For the final shot it was also very important to turn on the in-camera Long Exposure Noise Reduction (LENR). My apartment runs about 70 degrees F and any exposures over 6 minutes start to show the red, blue and green confetti noise in the image. LENR removes the noise, but also requires the equivalent amount of time to process in-camera. So my 1-hour exposure with LENR actually took 2 hours to complete. Fortunately I was using the Tether Tools Case Relay, which lets you connect to any USB power pack. I used the 10,000-mAh Rock Solid, which lasted another 6 hours!

Figure 6. The final shot. Nikon D750 with an Irix 15mm f/2.4 lens. 1 hour, f/5.6, ISO 400.

However, while shooting longer exposures, I made a very unfortunate discovery with both my Nikon D750 and Z 6. The LENR wasn’t effective with shutter speeds over 1 hour at 70 F. Even with LENR turned on, the D750 showed a ton of noise at 3 hours and the Z 6 started to show noise at 2 hours.

Figure 7. Zoomed-in view of the of the D750 3-hour exposure, with long exposure noise (left). (Click to expand the image and see the noise.)

Figure 8. Zoomed-in view of the of the Z 6 2-hour exposure, with long exposure noise. (Click to expand the image and see the noise.)

(Not to be daunted, I know of one type of camera that does not suffer from any type of long exposure noise: film cameras! So I ran another long exposure with film, and can hardly wait to develop it.)

Living Room Light Painting

Another fun technique that is easy to practice in your living room is light painting. Sure, most of us don’t have mountains or sand dunes right outside our window that we can paint, but there are plenty of objects inside that can help us sharpen our lighting skills.

The Door

The first thing I noticed was my door. In my previous sleeping photos, I loved the glow through the door frame and wanted to explore that visual. But shooting only a dark door wouldn’t be enough. So, light painting to the rescue!

One of the first lessons we teach in light painting is to paint the subject from an oblique angle. This sidelighting can bring out wonderful texture in any surfaces, including walls and doors.

I stood on my ottoman and closed my hand over the head of my Coast HP5R flashlight to create a small snoot. This created unique beams that reminded me of light streaming through half-open blinds.

The rest of the room was dark, and my exposure was based on just the light painting. I used the T (Time) mode on the Z 6, pressed the trigger on my Vello Shutterboss II to start the exposure, did my light painting, and pressed the trigger again to close the exposure. I could have used Bulb mode instead, but I generally default to T for something as easy as this.

The fun thing with the door project was creating a slightly different pattern each time (Figures 9 and 10). Which one do you prefer?

Figure 9. Nikon Z 6 with a Nikon Z 24-70mm f/4 lens, lit with a Coast HP5R. 25 seconds, f/8, ISO 1600.

Figure 10. Nikon Z 6 with a Nikon Z 24-70mm f/4 lens, lit with a Coast HP5R. 37 seconds, f/8, ISO 1600.

The Leica

The next challenge for a light painting subject was my classic camera collection. I used my macro lens, got in tight and decided to use a soft style of light painting. I darkened the room and shined my flashlight though a Lastolite Halo 2-Stop Diffuser. The Halo is a great portable way to take a small light source that typically produces hard shadows and turn it into a big (32 inches, in this case) light source that creates a much softer light.

Product photography usually requires even illumination with multiple lights so you can easily β€œsee the product.” I achieved this effect with one diffused flashlight and a long exposure. During shutter speeds of 10 to 20 seconds, I started my light painting from the side but then moved the light near to straight-on.

Figure 11. Nikon Z 6 with a Tamron 90mm f/2.8 macro lens, lit with a Coast HP5R through a Lastolite Halo 2-Stop Diffuser. 20 seconds, f/5.6, ISO 320.

Figure 12. Nikon Z 6 with a Tamron 90mm macro lens, lit with a Coast HP5R through a Lastolite Halo 2-Stop Diffuser. 15 seconds, f/11, ISO 800.

You can see different effects of experimenting with how long I held the light at different angles. Figures 11 and 12 were shot in a completely dark room. I noticed that the light was spilling onto my white wall and thus creating a brighter background than I wanted. So for the last shot (Figure 13), I moved back a bit and angled the light source down so there was minimal spill, thus creating a darker background.

Figure 13. Nikon Z 6 with Nikon Z 6 with a Tamron 90mm macro lens, lit with a Coast HP5R through a Lastolite Halo 2-Stop Diffuser. 10 seconds, f/11, ISO 800.

The Don

Obviously, we at NPAN are big fans of night portraits. This is something that, with a willing partner, you can practice in a darkened room at home. In my case, my partner wasn’t as willing, so I did the next best thing: I practiced with a wooden Don Quixote.

For this shot, I wanted to move away from the product photography style and go back to creating dramatic lighting. I chose my Mini Magliteο»Ώ, which has a warm-toned xenon bulb that emits a low 14 lumens. Direct light allowed me to work close to the figure and create more contrast.

I rolled a thick piece of paper around the head of the Maglite. This makeshift snoot helped me create a tight beam so that I could be very specific with where I placed the light, as I wanted to ensure it wouldn’t spill on the table or background.

Figure 14. Test shotβ€”no light painting, just ambient exposure. Nikon Z 6 with a Tamron 90mm f/2.8 macro lens. 4 seconds, f/11, ISO 800.

Figure 15. Final shotβ€”with all the ambient light turned off, the light painting creates the drama. Nikon Z 6 with a Tamron 90mm f/2.8 macro lens, lit with a Mini Maglite. 5 seconds, f/11, ISO 800.]

Multiple Exposures vs. Long Exposures

Multiple exposures have been trending lately. Multiple-moods portraits seem to encapsulate our feelings in these anxious times.

I’m multiple-exposure curious. I used to do it in the darkroom, but now mirrorless cameras make it so easy to do in-camera. You take a picture, the LCD shows the overlay, and then you take another. This allows you to best align your images in-camera.

Call me old school, but I prefer doing it this way: Turn out all the lights and shoot one long exposure, then move about the scene and pop a flash when you’re wherever you want to appear. This freezes yourself in the frame multiple times.

I set about this challenge, and after several tries I started honing in on the proper timing and power of the flash. I directed myself into three different positions and popped a handheld Profoto A1 each time. The overall exposure was 80 seconds and the power level of the flash was 7.5.

One of the tricks to pulling this off was ensuring that the A1 only helped the photo, and didn’t hurt it with its lit digital back. I had to run around while being careful not to shine the digital read-out light toward the camera, which would have caused a light streak in the scene. Needless to say it was a frantic 80 seconds, especially with changing hats for every pop of the flash!

Figure 16. Nikon Z 6 with a Nikon Z 24-70 f/4 lens, lit with a Profoto A1. 82 seconds, f/8, ISO 50.

I also tried using the camera’s multiple exposure mode, which did make for a more relaxed experience. I set my camera to Time mode and clicked the shutter open. I walked into the scene, assumed position and popped the flash. Then I walked back to the camera, stopped the exposure, reviewed the image, switched hats and started the second shot.

Multiple exposure mode is often for two shots being combined, but most cameras will let you do more than that. Be careful in how you layer together your composition, so as not to converge your figures or your lighting.

Figure 17. Nikon Z 6 with a Nikon Z 24-70 f/4 lens, lit with a Profoto A1. In-camera triple exposure set to β€œaverage,” each shot at 30 seconds, f/8, ISO 50.

Comparing the shots, we can see it’s possible to get similar results with each technique. The overall exposure in the first is brighter because more ambient light filtered into the room during the longer exposure. Which do you like better?

Ending on a Fun Note

This last shot was my ode to Sugimoto’s theater series with the updated β€œstay at home and binge” twist. The only light source in the room is the TV, which was showing an episode of Schitt’s Creek. Theo the Cat jumped into the scene and held still for the 8-second exposureβ€”a true night photographer’s pet!

Figure 18. Theo the Cat. Nikon Z 6 with an Irix 15mm f/2.4 lens. 8 seconds, f/13, ISO 1250.

Are you looking at your living room a little differently now? Why don’t you give it a try? We challenge you, our community, to experiment with some indoor long exposures. Limit yourself to one room in your house. Turn off the lights and let your creativity guide you in the dark.

Then, share the photos with us! Last week we launched β€œThe Night Crew Image Review,” a free livestream program on our YouTube channel, which will run every Thursday at 8 p.m. ET. We’re giving you a 10-day deadline. Work on those indoor long exposures and submit them to us at npan.co/imagereview by noon ET on April 16. Tune in that night to see what you and others created, and we’ll offer some tips at the same time.

Gabriel Biderman is a partner and workshop leader with National Parks at Night. He is a Brooklyn-based fine art and travel photographer, and author of Night Photography: From Snapshots to Great Shots (Peachpit, 2014). During the daytime hours you'll often find Gabe at one of many photo events around the world working for B&H Photo’s road marketing team. See his portfolio and workshop lineup at www.ruinism.com.

UPCOMING WORKSHOPS FROM NATIONAL PARKS AT NIGHT

Cleaning the Clutter: How to Get Your Lightroom Catalog in Tiptop Shape

Clean and organized. Some people are and some people are, well, less so. When it comes to Adobe Lightroom however, we all benefit from a clean, well-organized catalog. In fact, cleaning up Lightroom is one of the most common topics we’re asked about on our workshops and in our one-on-one Tutoring sessions.

In this post, I will share three tips on decluttering this very important part of our digital lives.

Tip 1: Use Reject Flags to Remove Unwanted Images

Get rid of those files you’ll never use and do it quickly with Reject flags. Lightroom has the capacity to keep track of thousands and thousands of images. In fact, I’ve not heard of an upper usable limit, but I have noticed that when my catalog neared 50,000 images it started to slow down a bit. Cleaning out the dead weight couldn’t hurt, right?

Here’s a method that will help you sail through your images and quickly mark them for deletion:

  1. Open Lightroom and enter the Library Module.

  2. From the menu choose Photo > Auto Advance (Auto Advance is engaged when there is a check mark next to it). You can also do this by engaging your Caps Lock key.

  3. Find a folder that contains images you would like to cull. Click on the first image and then press your space bar to magnify the image to fill the screen (this puts you into Loupe view).

  4. Now, if you want to keep this image, simply hit the right arrow on the keyboard to advance to the next image. To mark the image as rejected, you can go up to the Menu and choose Photo >  Set Flag > Rejected (Figure 1), or press X. This will set the flag on the image as rejected, and because you have Auto Advance enabled, Lightroom will automatically advance to the next image!

Figure 1. Rejecting an image.

Once you are finished working through that folder, it’s time to actually delete the images:

  1. Return to the Grid mode by pressing G.

  2. The keyboard combination to Delete Rejected Photos on a Mac is Command + Delete, and on a PC is Control + Backspace. Click whichever is pertinent.

  3. Lightroom will ask you to confirm (Figure 2). Click Delete from Disc to permanently delete the images from your computer as well to remove them from your Lightroom Catalog.

Figure 2. Deleting flagged images from the catalog and disk.

Deleting images one at a time takes a lot of time. By using Reject flags and then the Delete Rejected Photos feature, you’ll save a ton of time, thus freeing up more time for you to sift through more images.

Further Tips

  • You can do this whole process of adding Reject flags to the images while working in the Grid view as well.

  • If you accidentally flag an image as rejected, simply click on the image again and press U to unflag it.

  • Conversely, pressing P will flag an image as simply β€œflagged.” Many of us think of this as a Pick flag. This can be an additional marker on your image along with stars and color labels.

Tip 2: Optimize Your Catalog

Your Lightroom catalog is a database. Databases, like your teeth, need maintenance and occasional care. If uncared for, like your teeth, they will no longer perform the job we ask of them without being painful to use.

Begin by backing up your catalog on a regular basis. This could be once per week or once every two weeks or so. Remember this backs up only your Lightroom Catalog (the database of the location of your images and all the metadata and edits you’ve performed on them). This does not back up your actual photographs. To ensure your images are backed up, you must take the separate step of backing up the drive(s) where your images are stored.

Here are the steps to determine when your catalog will be automatically backed up:

  1. From the menu on a Mac, choose Lightroom Classic > Catalog Settings, or on a PC choose Edit > Catalog Settings.

  2. Click on the General tab.

  3. In the Backup section, choose your frequency preference in the dropdown menu (Figure 3). I choose β€œEvery time Lightroom exits.” This setting gives me the option to back up or skip each time I close the program.

Figure 3. Setting backup preferences.

When I quit Lightroom, I see the dialog in Figure 4, which tells me the backup preference that I set earlier. Then it’s time to make some additional choices. Notice that I check both boxes outlined in red. Test Integrity will ensure my catalog is healthy, and Optimize Catalog will keep my catalog lean. This way, by taking the time to back up my catalog, I’m simultaneously repairing it and making it run more efficiently.

Figure 4. Backup options.

Further Tips

  • Both the Test Integrity and the Optimize options are sticky, which means once you check the boxes they will still be checked every time you back up, until you uncheck them. (And vice versa.) So if you check the boxes today and then back up, next week when you go to back up again, the boxes will already be checked for you. Awesome, right?

  • There is no need to have a zillion backups of your catalog. I recommend periodically going to the Backups folder and deleting older backups. I typically keep one or two. The Backups folder can be found by navigating to the General tab of Catalog Settings (directions above) and clicking the Show button (Figure 5). This will take you to the folder on your hard drive where your backups are stored. Enter the folder and delete any subfolders for older backups that you no longer want to keep.

Figure 5. Navigating to the location of your backups.

Tip 3: Organize by Using Smart Collections

I know, I know, the topic of organizing your Lightroom catalog could easily fill a small book. (Or it could even fill a 5.5-hour video dedicated to the Library and Develop modules 😎). For now, I’d like to show you just one of the myriad tools you can use to ensure that your images are always easy to find. That tool is Smart Collections.

The more information you put into an image, the easier it is to find. For example, all imported image files already contain EXIF data from your camera that lists aperture, shutter speed, focal length, ISO, lens model, etc. This embedded information makes it easy to search for, say, all images shot with a Nikon Z 6 set at ISO 6400. You could further narrow the results by searching for all images shot with a Nikon Z 6 set at ISO 6400 using a focal length of 14mm.

That is incredibly powerful. But EXIF is only one part of an image’s metadata. The color labels, stars and flags we add to help us organize our catalogs are also metadata. Develop settings we applyβ€”such as Exposure, White Balance and Dehazeβ€”are also recorded as metadata. The keywords we apply to images? Metadata.

So we start off with searchable metadata in the form of EXIF data from our camera. But we can also apply metadata after the images have been imported.

Again: The more information (data) we apply to an image, the easier it is to find. How so? Smart collections.

Think of a smart collection as a really smart, saved search. In the above example we wanted to search for all images shot with a Nikon Z 6 set at ISO 6400 using a focal length of 14mm. Great. We could do that with Library Filter. But if you did this through a smart collection, Lightroom would immediately find those images and gather them up in one location for you to view at any time. It doesn’t move your images. It just creates another β€œlocation” to view the images that meet those criteria, no matter how many different folders the images live in.

The smart collection doesn’t stop there, though. It continually monitors your whole catalog and updates the collection whenever a new image meets those same criteria (Nikon Z 6, ISO 6400, 14mm focal length). You don’t need to anything. The next time you import an image you shot with a Z 6 at ISO 6400 and 14mm, that image will automatically appear in that smart collection.

Creating a Smart Collection

The Collections panel sits just below your Folders panel in Lightroom’s Library module (Figure 6).

Figure 6. Creating a smart collection.

Here’s how to create a smart collection:

  1. Click on the plus sign in the upper right corner of the Smart Collection panel to reveal the actions shown in Figure 7.

  2. Choose Create Smart Collection. You will see the dialog that allows you to set the criteria the smart collection will search for (Figure 8).

  3. Start at the top by giving your new smart collection a name. (Ignore the Inside a Collection Set option for now.)

  4. Keep Match set to β€œall.”

  5. The large area on the bottom of the dialog contains the rules you will set up for the smart collection. Notice that by default the first rule is sets Rating as β€œis greater than or equal to.” Clicking on one of the dots to the right sets the star rating it will search for. So if you click the fourth dot, this smart collection will collect all of the images in your Library that are marked 4 stars or above.

  6. Click Create and you’ve just made your first smart collection!

Figure 7. Collection panel actions.

Figure 8. Creating a smart collection.

Putting Smart Collections to Practical Use

Now let’s make a smart collection that will help keep your catalog organized.

  1. Click the plus sign to create a new smart collection.

  2. Name this collection β€œWithout Keywords.”

  3. Click the arrows next to Rating and instead choose Other Metadata > Keywords (Figure 9).

  4. Click the arrows next to β€œis greater or equal” and instead choose β€œare empty” (Figure 10).

  5. Click create.

Figure 9. Choosing a criterion for a smart collection.

Figure 10. Refining the options for a criterion.

Now you have a smart collection that shows every image that needs to have keywords applied. Click on any image, apply a keyword, and that image will automatically disappear from the smart collection. Why? Because now that the image has a keyword, it no longer fits the criterion.

Creating this particular smart collection is a great way to begin organizing your entire Library, because it can be very difficult to find images that lack keywords!

Smart collections are extremely powerful. As you can see from the screenshot in Figure 9 above, there are an enormous amount of criteria you can use to build your smart collections. And you are not limited to just one choice. By clicking on the plus sign to the right of your first rule, you can continue to add additional rules. As long Match is set to β€œall,” an image would need to meet all of the criteria to show up in the smart collection. Figure 11 shows a screenshot of the smart collection we talked about earlier (Nikon Z 6, ISO 6400, 14mm focal length).

Figure 11. A smart collection that collates all images shot with a Nikon Z 6 at ISO 6400 with a focal length of 14mm.

Spend some time thinking about how you want to find and organize your Library. Poke around in the choices for ideas for new collections. Before you know it you’ll be creating smart collections that will keep your Library perfectly organized!

Some Sample Smart Collections

Here are a few ideas to get you started:

Make a collection of your favorite photos that are marked with 5 stars.

Make a collection of your favorite photos that are marked with 5 stars.

Make a collection that shows all of your images that don’t have stars.

How about one to show your favorite family photos?

Or your favorite vacation photos?

Further Tips

  • Organize your smart collections by creating collection sets. Think of these as folders to store your individual collections in.

  • In the Collections panel, collections appear in alphanumeric order from top to bottom with the collection sets coming first. If you want to have something appear at the top, use a space or underscore before the title to force Lightroom to move it up there.

  • You can edit a smart collection anytime by double-clicking on the gear icon that appears on your smart collection icon.

Wrapping Up

There you go, three tips to help you clean your Lightroom catalog! It might take some time and dedication to get this done, but the investment will pay off later when you’ll be running a lean, efficient database of images.

Do you have any of your own tips for how you like to clean up your Lightroom catalog? Share them in the comments below or on our Facebook page!

Want some help getting your Lightroom catalog organized? National Parks at Night offers one-on-one tutoring, so we can work with you remotely! See our Tutoring page for more information.

Tim Cooper is a partner and workshop leader with National Parks at Night. Learn more techniques from his book The Magic of Light Painting, available from Peachpit.

UPCOMING WORKSHOPS FROM NATIONAL PARKS AT NIGHT

How I Got the Shot: Ubehebe Crater at Death Valley National Park

Ubehebe Crater, Death Valley National Park. Nikon D5 with a Nikon 14-24mm f/2.8 lens at 24mm. 11 stitched frames photographed at 10 seconds, f/5.6, ISO 2500.

The Location

Ubehebe Crater could be the most underrated natural feature in Death Valley National Park. Lots of folks know about Badwater Basin, where hexagonal formations rise from the salt flats; and Mesquite Flat Dunes, where sand rises and dips in patterns that lead toward desert-mountain backgrounds; and Racetrack Playa, where rocks appear to sail across the dried, cracked mud.

Figure 1. Look out!

All those things are well-renowned, and they should be. But I’m continually bemused at how few people know about Ubehebe, a half-mile-wide, 600-foot-deep volcanic crater. Why? Because it’s amazing!

Standing at the edge (carefully, Figure 1) reveals a beautiful, mesmerizing landscape. Standing at the bottom is awe-inspiring, as you look up and marvel at the power of nature to blast such a massive amount of earth over an area of 6 square miles.

It’s also a fun place to hike, as immediately to the south sit a few more smaller craters. You can hike along the rims or to the bottoms and explore the wonders of geology and wilderness.

However, one thing that Ubehebe Crater is not? Easy to photograph. The main attraction is the main crater, and it’s a pretty massive subject.

The first time I photographed it, in 2017 (Figure 2), I used a Nikon 14-24mm lens at its widest zoom, which was OK, but I could barely fit the whole crater in the frame. Moreover, at that wide a focal length you really need foreground material to help create a sense of depth in the composition, and the crater rim offers very little of that.

In 2018 I got to try shooting the crater with the rectilinear Irix 11mm lens (Figure 3). That allowed me to get the whole crater into a 35mm frame, and some wild clouds helped add a special dynamic to the scene, but I still wasn’t thrilled with the photo. I visited again in 2019, and didn’t even bother shooting. I was completely out of ideas for how to make the scene work in a photograph.

Figure 2. Nikon D3s with a Nikon 14-24mm f/2.8 lens. 1/1250, f/8, ISO 400.

Figure 3. Nikon D5 with an Irix 11mm f/4 lens. Three blended exposures of 1/640, 1/1250 and 1/2500, at f/8, ISO 100.

Another challenge to photographing the crater is that its sharp angle of decline prevents sunlight from fully illuminating the interior unless the sun is relatively high in the sky. So on a bright day, you need to choose between harsh light at midday or big shadows earlier or later. You might think that overcast conditions are the answer, but I’ve tried that too. Flat light wipes out all depth and diminishes the warm-toned hues on the eastern flank that are such a crucial part of the crater’s aesthetics.

Honestly, as much as I love Ubehebe Crater, by early 2019 I’d just about given up trying to make a photograph of it that I like.

The Aha Moment

Then in February 2020 I was back at Death Valley for National Parks at Night’s very first Alumni Excursion, a 5-night, 6-day photography jaunt through this amazing place. Toward the end of the workshop, we made a day and night trip to Racetrack Playa, and on the way we stopped at Ubehebe Crater.

I was leading this workshop with Lance Keimig and Matt Hill, and Matt had never been to the crater before. As most people do, he loved it. And he said, β€œOn the way back tonight it’d be awesome to shoot a moonlit pano of this.”

Aha! That was the answer. I knew it right away. I had to get this image.

So, we scouted. Matt went off to explore his idea for the photograph, and I went off to explore mine. I hiked along the northern rim to find an angle where I could get a good vantage point over the crater with the snowy peaks of Hunter Mountain in the background. I made a quick auto-pano using my cell phone, just to make sure the composition would work the way I wanted (Figure 4). Then I checked PhotoPills to confirm a suspicion: That evening, I could shoot the full moon drifting through background of the scene. That was my shot. It was scouted and ready to be executed hours later, in the dark of the California desert.

Figure 4. A daylight test pano from my scouted spot, using my Google Pixel 3a.

The Shoot

Unfortunately, the Racetrack is hard to leave, and we stayed late. By the time we returned to Ubehebe, the moon had drifted way out of the scene. But it was still high, and delicately sidelighting the crater, and that was beautiful.

The hour was lateβ€”well after midnight on what had been a long day at the end of an adventure-filled weekβ€”and I was exhausted. But I was also determined. I was getting this image.

With my eyes half closed, I carried my tripod, Nikon D5 and two lenses one-quarter mile to my spot. I set up, tested each lens, and decided the Nikon 14-24mm (zoomed all the way to 24mm) was my best option for creating the image I had in my mind.

The first key to shooting a pano is to level the entire setup. I own a Gitzo GSLVLS Leveling head, but unfortunately didn’t have it with me. So I needed to level manually. That required three steps:

  1. leveling my tripod legs by using the bubble level on the top as a guide (Figure 5, left, bottom circle)

  2. leveling my ball head by using its bubble level the same as above (Figure 5, left, top circle)

  3. using the in-camera Virtual Horizon to ensure that all the leveling was correct by panning the setup left to right and back again and watching to see that the camera stayed level across the scene (Figure 5, right)

Figure 5. Perfectly level in every way.

I fired off a couple of test photos to nail down an exposure. The NPF Rule told me I could shoot as long as 10 seconds before the stars began to trail. That was easy under moonlight, as I could achieve that shutter speed at ISO 640 with the lens wide open. However, I unconditionally trust the ISOs of the D5, so I pushed to ISO 2500, which allowed me to close the aperture to f/5.6 and really take advantage of the best sharpness levels of the lens.

I was finally ready to shoot. I started with the camera panned far to the left, way past where I needed it for the final composition, to give myself flexibility to crop in later. I shot the first frame. Using the engraved degree markings on the bottom of my Really Right Stuff BH-55 ball head, I rotated the camera 15 degrees to the right, then shot again. (That’s really more overlap than I needed, but I always prefer to have more than less.) I repeated this nine times, until I was shooting far right of my composition, for a total of 11 frames.

The Post-Production

The only change I wanted to make before assembling the pano was to apply lens corrections. This is best practice when making panos (particularly at night), so that any natural vignetting of the lens is removed. Otherwise, the color and brightness of the sky can fluctuate across the final panorama.

In Lightroom, I selected all 11 images in Grid view (Figure 6), then clicked to the Develop module. At the bottom right, I toggled the switch next to the Sync button to enable Auto Sync (Figure 7). Then I opened the Lens Corrections panel, then checked the boxes to turn on Remove Chromatic Aberration and Enable Profile Corrections. Then I went back to the bottom right and turned off Auto Sync.

Figure 6.

Figure 7.

To start the stitch, with the 11 frames still selected, in the menu I chose Photo > Photo Merge > Merge to Panorama. In the resulting dialog (Figure 8), I selected Spherical for the Projection, because it created the look I had in mind more closely than Cylindrical. I choose not to use Boundary Warp, Fill Edges, Auto Crop or Auto Settings, because I prefer to perform those tasks manually and deliberately. I did, however, click on Create Stack, because I like my multi-frame images to be neatly organized in the Lightroom catalog.

Figure 8.

I clicked Merge, and Lightroom did a great job stitching the 11 frames.

I switched to the Basic panel to apply some basic edits to Whites and Clarity, to make the overall image β€œpop” a little, then I manually made my crop to hone in on the elements I felt were most important to the composition (Figure 9).

Figure 9.

I felt the sky and stars needed even more punch, so I used the Graduated Filter tool to create a mask over the top half of the frame. I wanted the changes to affect only the sky, and not the mountains, so I enabled Range Mask and chose Color. Using the Color Range Selector (the eyedropper) to sample the blue sky, then used the Amount slider to tweak the selection. When I was happy with my mask (Figure 10), I made minor adjustments to Contrast, Highlights, Shadows, Blacks, Texture, Clarity and Sharpnessβ€”all to add just a little extra β€œoomph” to the sky, to make it appear in the image how it looked to me in person.

Figure 10.

Because the moon was off camera-right, the right side of the sky was noticeably brighter. To tone that down a bit, I created another mask in the same way as above, but instead of the top of the frame, I targeted the right (Figure 11). I then brought up Dehaze a bit to increase the local contrast of that portion of the frame, making it appear a little darker, and massaged the mask a bit to ensure a transition that looks natural.

Figure 11.

Wrapping Up

The final image. Ubehebe Crater, Death Valley National Park. Nikon D5 with a Nikon 14-24mm lens at 24mm. 11 stitched frames photographed at 10 seconds, f/5.6, ISO 2500.

That’s how I finally, after four tries, made an image of Ubehebe Crater that I’m happy with.

The 3-year process from first visit to final image reinforced three ideas:

  1. Revisiting locations almost always leads to making better photographs.

  2. ο»ΏPhotographing at night almost always allows for a unique way of photographing a scene.

  3. Creative breakthroughs can come from listening to what others think. I love teamwork and collaboration! (Thank you, Matt!)

Am I now done with Ubehebe? No way! On my hike back to the car that night, I thought of another idea, and I’m confident it will work. Stay tuned. Some night I’ll shoot that idea too.

Chris Nicholson is a partner and workshop leader with National Parks at Night, and author of Photographing National Parks (Sidelight Books, 2015). Learn more about national parks as photography destinations, subscribe to Chris' free e-newsletter, and more at www.PhotographingNationalParks.com.

UPCOMING WORKSHOPS FROM NATIONAL PARKS AT NIGHT

Five Field Tips to Make Night Photography Go a Little Smoother

We’ve said night photography is fun. We’ve never said it’s easy.

We all encounter challenges that we need to overcome in order to get the shot. This is true even when working with other night photographers, but it’s especially true when we’re shooting alone.

Every photographer has their solutions to these little (or sometimes big) problems, which help us be more productive in the field at night. Below, each of the five National Parks at Night instructors offers one tip to work just a little smoother, a little better, a little more efficiently in the dark.

Lay Your Flashlight in Your Light Painting Spot

by Gabriel Biderman

When I first started light painting I was incredibly frustrated with the inconsistencies of my painting from shot to shot. The problem was that I would try a lighting strategy, then walk back to the camera to see how I did, then walk back out into the scene and try againβ€”always from a slightly different spot! Why? Because it was dark and I couldn’t see exactly where I’d been standing before. That meant that the angle and distance would change as I went back and forth between my camera and my approximate painting location.

The first solution I came up with was marking my spot in the dirt or putting a rock there, so I’d know where I’d been standing. However, there aren’t rocks or etchable dirt at every location, and again, it was dark, so the mark could be hard to find.

Eventually I realized that there was another good marker that I always have with me: a flashlight. Now when I’m done testing some light painting, I place my flashlight on the ground at my feet, and my spot is easy to find again!

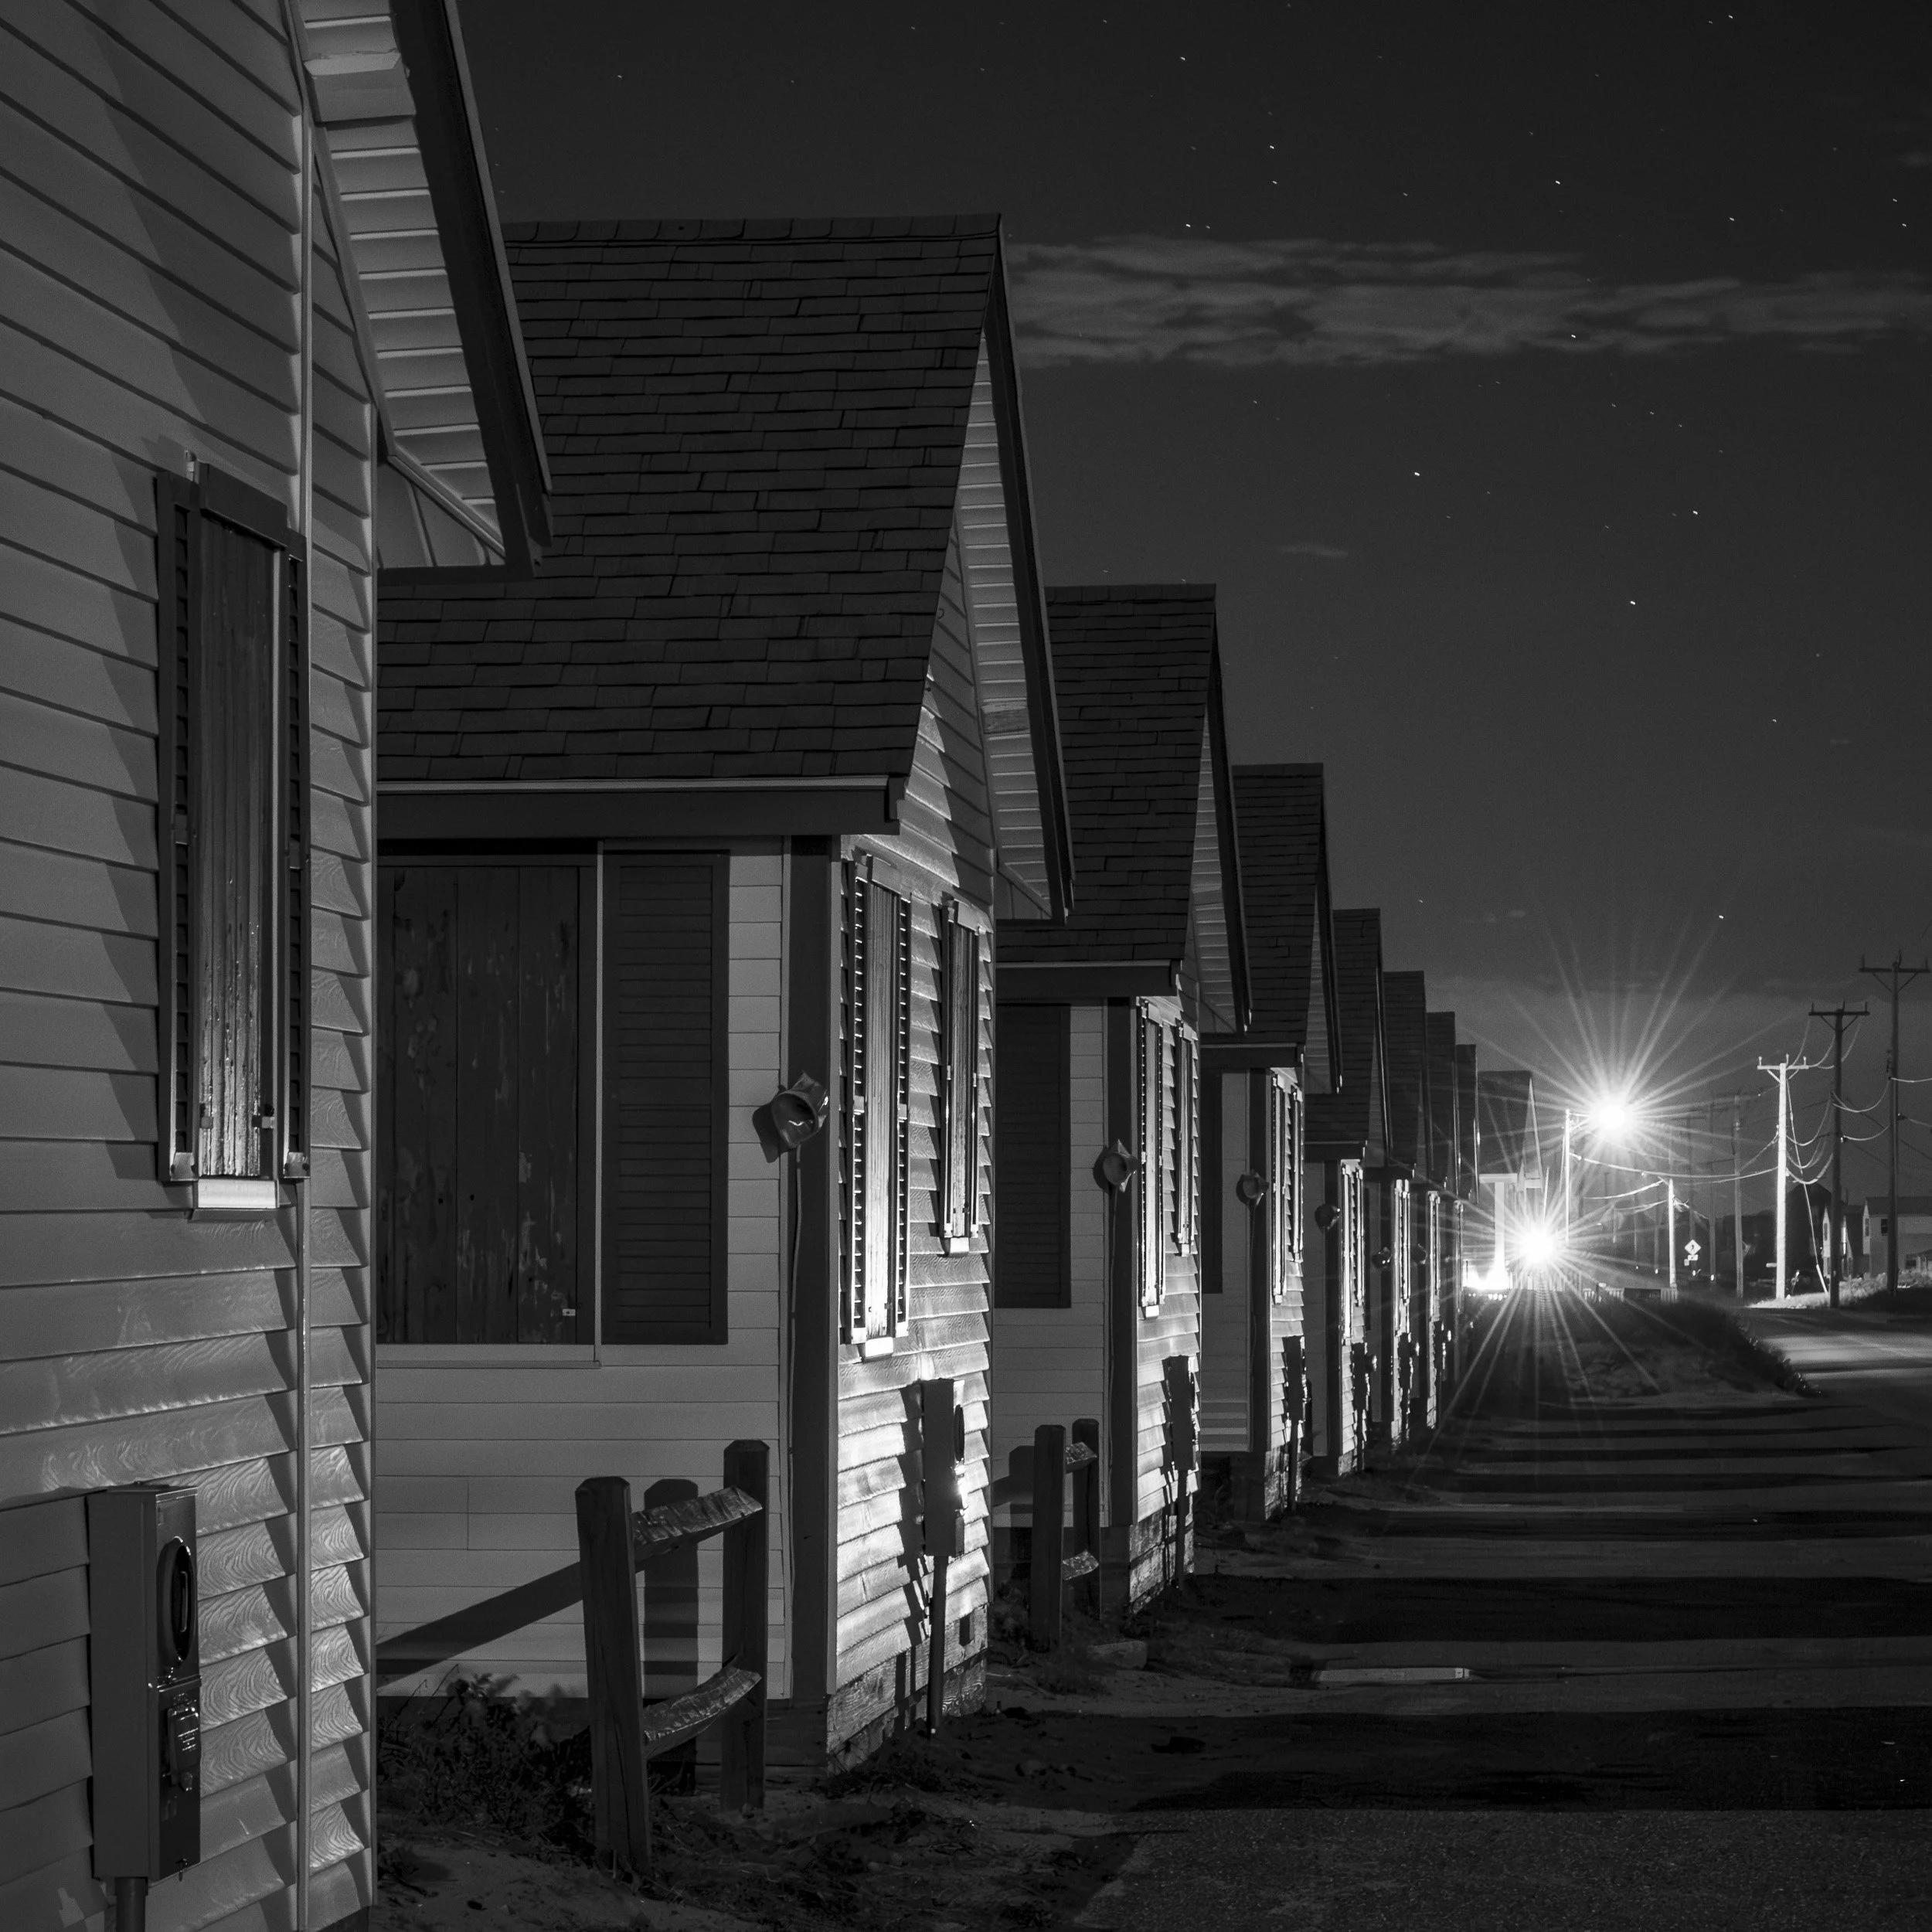
When working on this image in Cape Hatteras National Seashore, I put my flashlight on the ground to mark the spot I was light painting from, so I could easily return after checking the image on the camera’s LCD. You can see the beam shining along the grass from where it was laying.

Of course, this works only if my spot is not in the frame, otherwise the camera will record the flashlight during the rest of the exposure. Also, if the exposure is still running, then I make sure to put the flashlight on the ground facing away from the scene, so as not to spill in more light than I want.

Now I can always find my exact place to repeat the lighting process after reviewing my image. This has been incredibly helpful when I am photographing alone and has helped me nail my light painting more quickly and more efficiently.

Set Up a Custom Menu

by Tim Cooper

As we all know, night photography can pose many challenges. For this reason it’s important to eliminate as many issues as we can so we can focus our efforts on the actual photography. One challenge to overcome is working with our camera in the dark. By being very familiar with our camera’s controls, we can easily make adjustments, focus and shoot without the constant need for turning on our flashlights or fumbling around while wasting otherwise productive time.

That’s easy enough (with practice) when we’re talking about buttons and dialsβ€”the controls that are on the camera body. But many features live deep in the camera’s menu system. Scouring the extensive menus for a particular function while in the field can be frustrating. It’s also avoidable.

I save a lot of time in the field by setting up a custom menu in my camera. Most modern cameras allow this, specifically so you can collect your most oft-used functions into one easily accessible place. In the following video, I’ll show you how to do just that!

Use a Low-Powered Light For Seeing

by Lance Keimig

If you’ve been on a workshop with me, you might have been gently chastised for using your 2 million-lumen flashlight to adjust your camera settings. Overly bright flashlights wipe out your hard-won night vision, making it difficult to visualize your surroundings without the light. And in a workshop environment, using a flashlight that’s brighter than necessary often causes unwanted light pollution in other people’s images.

Red lights cause similar but often more serious problems, because even at very low levels they bleed profusely into the shadow areas of everyone’s images. Red lights also diminish depth perception, making accidents much more likely on uneven ground, especially in red-rock environments.

To avoid all these issues, I use a flashlight in the field as little as possible (except for when light painting), and when I do, I use the dimmest in my arsenal. That way I can get a little extra light in extra-dark situations without ruining my night vision or other people’s photographs.

Using a bright flashlight (left) just to check camera settings is overkillβ€”it will ruin your night vision, not to mention the exposures of others who may be working around you. A lower-powered light (right) is a more subtle option that is less likely to cause unintended consequences.

My favorite for this purpose is the Coast G9, which Coast has been gifting to our domestic workshop attendees for the past couple of years. This small and relatively dim flashlight can be easily dimmed even further by removing the head and placing a couple of layers of tissue or toilet paper in front of the bulb. (If you want to get fancy and warm up the color temperature, add a piece of CTO or warming gel at the same time.)

This 2-minute hack will provide you with a light that will be just bright enough to navigate a dark path, to find that spare battery in your camera bag, or anything else that requires just a touch of illumination.

Protect Yourself and Your Bag With a Blanket

by Matt Hill

One thing I’ve found I just couldn’t live without is something I didn’t even buy for myself. I didn’t know how much I needed it until after I received it as a gift! (Thanks, D&E!) I’m referring to the Matador Pocket Blanket.

Sometimes the ground is … well, dirty. And during a long exposure I might want to just stretch out and gaze lovingly at the stars. Or I might even want toβ€”gasp!β€”put down my camera bag without getting it muddy or sandy. This super-thin blanket packs to 4-by-3 inches, so stowing it in my bag is easy, yet it unfolds to a surprising 63-by-44. I can use the hidden corner stakes to anchor it in place, and when it’s time to fold the blanket, a stitched line pattern reminds me of the perfect way to make it tiny once again.

I love this blanket so much that when I misplaced it, I bought another. And then I found the original. So now I have two. Which makes me twice as happy.

Use an LED to Find Your Tripod

by Chris Nicholson

A lot of night photography involves long exposures. And not just long exposures, but looooonnnnnnggggg exposures. Leaving the shutter open for an hour or more is not unusual. During those times, I often wander away from the camera, whether to explore, to return to a warm location, or even to shoot with a second setup somewhere else. The problem is that sometimes it’s hard to find that camera again in the dark.

Of course, I could probably locate the camera more often than not by just waving a high-powered flashlight around. But that would likely ruin my exposure (especially if I inadvertently shined the light directly into the lens), not to mention ruin the work of anyone I might be out shooting with.

The solution I use most often is to put a tiny light right on the tripodβ€”something bright enough for me to see in the dark, but not bright enough to affect exposure. And to be safe, I point that light away from the scene.

Even a tiny LED can be seen from pretty far away in the dark, making it easy to find a tripod that’s supporting a long exposure.

What kind of light? I use the flashing LED on my geotracker. It’s a piece of gear I always have with me on a shoot. It usually hangs off my belt loop or my backpack strap. But it also hangs nicely on the hook below my ball head.

Contrary to what a non-night person might assume, that LED is incredibly easy to see in dark conditions. In 2017 I was shooting at the Racetrack Playa in Death Valley National Park. It was way too cold to stay out with the camera during a one-hour exposure, so we walked back to the Jeepβ€”one mile away! Even from there, I could faintly discern that tiny LED flashing in perfect darkness across the flats. Found my camera right away.

Wrapping Up

There you have itβ€”five tips for working just a little easier in the dark!

How about you? What are some hacks that you’ve found useful for making the night photography experience just a little simpler or a little more enjoyable? Feel free to share in the comments below or on our Facebook page.

Chris Nicholson is a partner and workshop leader with National Parks at Night, and author of Photographing National Parks (Sidelight Books, 2015). Learn more about national parks as photography destinations, subscribe to Chris' free e-newsletter, and more at www.PhotographingNationalParks.com.

UPCOMING WORKSHOPS FROM NATIONAL PARKS AT NIGHT