collaboration

How to Stand Out in a Crowd (of other Night Photographers)

You’ve made it. You’re in that *special* place in your dream wilderness area. Darkness is upon you, the stars are doing that winky, twinkly thing. And that amazing monument of nature is laid out in front of you. … And then so are a dozen or more other people.

When you’re shooting in a crowd, how do you make an image that doesn’t look the same as those of the photographers around you?

It’s a question we get often on our workshops. And here is how we encourage our attendees (and ourselves!) to frame for personal and visual success. In other words, here are some tips for how to stand out among a crowd of other night photographers.

You’re Special

First, consider this: None of us sees things the same way. So, relax. Trust the aspirations that got you into photography in the first place.

All of the instructors here at National Parks at Night have seen this over and over, even when it’s just us out shooting for fun. And we are surprised and delighted over and over again when our workshop participants (and we!) make startlingly different images from the same location.

So believe in your instincts. Believe in your eye. Let it take you to the right spot and let yourself see what it shows you.

Cooperate & Collaborate

If you read our blog on the regular, you’ve seen examples of the power of many photographers working to make an image together. Here are some examples:

To properly light some scenes, it’s fantastic to have one person operating the cameras, and others out in front or to the sides carefully constructing a story of light and shadow with light painting, light writing and more.

It’s fun. And if you swap places, everyone gets a turn directing the lighting, running cameras and making light in all the right places.

On top of that, you can make friends with like-minded people this way. Not only do you encourage sharing the space and respect, but you could also gain a shooting partner!

‘When everybody zigs, zag’

Although Marty Neumeier’s advice comes from a book for marketing professionals, it applies to all walks of life.

Differentiation is what makes someone or something stand out in a sea of similarity. It requires awareness of what others are doing paired with finding a place, voice or meaning that others are ignoring.

A very simple way to apply this is to look at what lens everyone else is using and then use a different one.

For example, when Gabe and I were at Devils Tower National Monument and everyone had their ultrawide lens on, I switched to my Nikon 70-200mm f/2.8 and pushed in on the rock formation.

My zag. Nikon D750, Nikon 70-200mm f/2.8. 271 seconds, f/2.8 ISO, 800.

What most others were capturing. Not a single other person did that. And the image I made feels very personal and powerful. One may argue that the insanely colorful sky glow was worth shooting. Right on—I agree. I shot both! And I believe the tight shot on the tower has power and emotion that the wide shot cannot provide. Nikon D750, Zeiss 15mm Distagon f/2.8. 30 seconds, f/2.8, ISO 3200.

Try a Different Angle

Often, it looks like there is one obvious, reallllly great spot to shoot from. You may label it as “ideal.”

But walk around. Go low. Go high. Go vertical or horizontal. Go around the back. Turn around 180 degrees.

Remember, in the northern hemisphere, star circles are to the north and the Milky Way is to the south. Work your way around something and capture both opportunities.

Around the backside of the ruins, I found this. Nikon D750, Zeiss Distagon 15mm f/2.8. 25 seconds, f/2.8, ISO 6400.

And most people chose this view. Nikon D750, Zeiss Distagon 15mm f/2.8. 322 seconds, f/2.8, ISO 400.

Walk away—Wipe the slate clean—Do something unexpected

My favorite example of this is is when I was scouting Capitol Reef National Park with Gabe and Chris. Gabe was way off to the left. Chris was somewhere off to the right. And frankly, I wasn’t having such a good night. I wasn’t feeling it.

So I walked back to the car and said, “Well, let’s get some frames in. I drove umpteen hours to be here. Just do the work, and good things will happen.”

Then, being me, I just kind of noticed how shiny our car was. And then how the stars reflected perfectly off the hood.

“Can I get stars off our car hood?” Nikon D750, Zeiss Distagon 15mm f/2.8. 120 seconds, f/3.2, ISO 400.

Honestly, after I saw this photo come up on the LCD, it changed my entire mood. I went from “Meh” to “Let’s do this!” in one frame. Then I went back and found these scenes:

That’s more like it. Nikon D750, Zeiss Distagon 15mm f/2.8. 723 seconds, f/3.5, ISO 100.

Foreground for the win. Nikon D750, Zeiss Distagon 15mm f/2.8. 240 seconds, f/4.0, ISO 400

Plan to be Different

If you are a plan-ahead kind of person (or want to develop the habit) pull out PhotoPills and do some virtual scouting. Or use Google Earth and Google Images or Instagram to familiarize yourself with how others captured a particular scene.

You may spot an opportunity at the edge of their frame that piques your interest and stirs your creativity. Or, even while going to find the spot they shot from, you may see something they didn’t see.

Get Meta—Photograph the Photographers

I absolutely love showing our human relationship to the natural environment.

More often than not, I step back a little, set up my camera to make photos of the people working the scene, and set my intervalometer to run continuously.

From a time-lapse sequence I ran while working on light painting with some workshop attendees. Nikon D750, Nikon 70-200mm f/2.8. 13 seconds, f/2.8, ISO 6400.

By doing this, I:

1) get amazing time-lapses

2) always get something I could not have planned or directed

Another thing you can do is ask a fellow photographer nearby to pose for a portrait. Wouldn’t you want a photo of you doing what you love, where you love doing it? Imagine their delight (and yours).

Workshop student Susan making a pass with a light wand behind our model. Nikon D750, Nikon 105mm f/1.4. 8 seconds, f/4, ISO 200.

Use Hikers and Headlamps as an Advantage

When I see other park visitors moving into my scene, I ask myself, “How can I make this work for my image?” Some people turn off the camera when it happens, but I love when strollers-by wear headlamps and wave flashlights around.

I’ll time my shots to incorporate these “human car trails” with glee and determination. I like to wait it out until they traverse my entire scene.Fuji X-T1, 7artisans 7.5mm f/2.8 Fisheye. 800 seconds, f/2.8, ISO 100.

It’s Just a Jump to the Left …

We all do the Time Warp when we’re out making night photography. Collecting all those photons on a sensor is truly a remarkable thing. We’re lucky we have to tools, the time and the opportunity to do it.

I hope my suggestions help you get more out of crowded situations, and make you feel like a winner when being creative in those wild, starry places.

Matt Hill is a partner and workshop leader with National Parks at Night. See more about his photography, art, workshops and writing at MattHillArt.com. Follow Matt on Twitter Instagram Facebook.

UPCOMING WORKSHOPS FROM NATIONAL PARKS AT NIGHT

Collaborate & Create: Making Better Night Photographs by Working Together

What is the best way to master a skill? Typically the first steps are to study the subject and then gain comfort applying that knowledge to real-world experience. However, there is a missing X-factor that can lead us down so many different paths of knowledge. That is collaboration.

We at National Parks at Night have been preaching the importance of collaboration since Day 1. Our whole business model is dependent upon it, as is the experience we offer. We almost always provide two instructors to lead a workshop and try to mix up different combinations that will each yield a unique vibe to the overall experience. We encourage our students to work together and each take turns directing or light painting. A new aspect that we have been experimenting with, and that came together quite spontaneously, is working on a larger-scale collaboration. See our recent post about how our first Joshua Tree workshop did panoramic light painting as a group.

When I taught my first workshop many years ago, part of my proposal was that I co-teach the workshop with Tim Cooper. Tim is not only a good friend, but someone whose photography knowledge and general demeanor I respect very much. We each had different strengths that complemented one another, and not only did the students gain a wealth of knowledge from the workshop, but Tim and I also inspired each other.

You gain knowledge from each experience—good or bad. If you study and learn from that, better photographs aren’t far away.

Night photography can very much be a solo effort, whether that means you are shooting alone or going with a group to the same location and just splitting up to hone those night visions. I think this is a very common and old-school approach. With astro-landscape we are looking for strong foregrounds or landscapes, and then framing them creatively against the backdrop of the night sky. We are also seeing more and more people add the human element to their night photography, and that of course is a collaboration.

Personal Collaborations

I remember the first portrait I took of my then-hopeful girlfriend, now wife, Nancy. She knew I was a budding B&W photographer and asked if I could take some portraits of her prior to attending a big fashion event in San Francisco.

At the time, I was doing a lot of portrait work but obviously had little “fashion photography sense.” An early and continual inspiration was Duane Michaels, who created wonderful storyboard fantasies about human interactions. I had recently purchased the Lubitel twin lens camera, a fantastically plastic version of the Rolliflex. You could easily do multiple exposures by just cocking the shutter without forwarding the film. So I asked Nancy to strike three different poses within the boundaries I set. Let’s just say that everything clicked and we have been collaborating ever since.

Another great collaboration, also from the SF film days, was with good friends Peter and Jen. We used to plan shoots every month—Jen would bring a variety of props, costumes and ideas, and Peter and I would set up the shoot.

My favorite experience that came out of our many shoots was the “Angel in the Subway.” We scouted that location and were aware of when it was safe to walk on the tracks. We knew we had to work quickly because the authorities could kick us out at any time. The whole shoot lasted around 10 to 15 minutes and the resulting image became our holiday card for years to come!

When I moved to New York City, I helped start a couple of photo meetup groups that would either schedule early morning shoots or impromptu one-night gallery shows. It was a ton of fun, but it was mainly a bunch of us sharing our individual visions. When I was introduced to Matt Hill and we discovered our passion for night photography was mutual, sharing and collaborating started moving furiously forward!

Matt and I immediately started shooting and experimenting with bending time! We asked “What if” a lot and re-approached our styles of night photography with childlike eyes. Several wonderful projects were born out of our continual collaborations—my favorites are our yearly workshops on Bannerman Island, Matt’s time-bending night paper portraits, and of course National Parks at Night, which was concocted one evening when we were both sitting under the stars as our cameras were ripping long exposures.

Coaching Collaboration

How do you teach collaboration? Because it either works or it doesn’t. You can really sync with some people and might have to just walk away from others. But I strongly feel that you gain knowledge from each experience—good or bad. If you study and learn from that, better photographs aren’t far away.

Bouncing ideas off of each other prior to getting out in the field is a great first step to see if you gel. Like-minded people aren’t always the best collaborators—ideally we want to complement each other and bring a unique idea, question or solution to the table.

We like to arrive to our locations during the day—either a couple of hours before sunset or during midday. We use that time to scout the locations and really walk around the scene to figure out the shot. We are often drawn to the obvious, but more dramatic possibilities might be just around the bend.

For example, at the last night at our second Joshua Tree workshop, we invited anyone who wanted to collaborate on a group shot to meet Lance and I at 10:30 p.m. Most of the class joined and we divided the group into two. We chose locations and set a 20-minute time limit for each group to shoot at one location and then switch to shoot the other.

Below, Lance and I share both teams’ behind-the-scenes process and the images that came out of this.

Two Cars

Gabe: Our first subject was two cars hidden behind some rocks. Without setting up our tripods we walked around the scene. The point of view seemed pretty obvious and could have been captured with a superwide-angle lens. However, I wanted to tell the story of how these cars were nestled under the rock hill and under the night sky. I suggested a four- to five-shot panorama that would encapsulate the location with minimal distortion from a wide-angle lens.

I zoomed my Nikon 14-24mm lens to 24mm, leveled my tripod and head with a panoramic level base, and took some quick test shots to see if it would work. We tried compositions that included the moon, but decided to exclude it as it detracted from the real story.

Collaborating in Joshua Tree National Park. Photos by Susan Wales.

Sandra and Beth experimented with some subtle light painting to open up shadow separation. We decided to go for a more natural-light approach rather than adding light for surreal effect. Susan, who was taking some amazing night portraits, captured some great behind-the-scenes photos of the shoot, and Robin set up next to me so we could have two points of view for the panoramic scene.

We did three to four takes where I was calling out when we were open so our light painters could time their lighting accordingly. We did two takes and kept things simple. I was pretty pleased with our results.

Another Two Cars

Lance: Somehow when the group split up to do the collaborative shots, everyone fell along gender lines, and Gabe, ladies’ man that he is, ended up working with the women. The men’s group consisted of Klaus, Rick, Terry, Steve and Hadley.

The guys decided right away that they wanted to do something different from the previous week’s workshop attendees, who had created the panorama of the ranch. Everyone was drawn to the cars, and we walked around checking out the various wrecks looking for our shot. We agreed upon the Plymouth and the Dodge, both of which were mid-1940s cars facing in opposite directions.

Klaus was elected to direct this image, and he framed it fairly tight, as a straight-forward composition facing west. The moon was high in the sky and casting shadows on the foreground. We decided to let the moon do most of the work. Terry took on the task of lighting the interiors, with a short string of warm-white LED Christmas lights on the front seat of each car.

Klaus used his previous experience photographing in junkyards to expertly light the headlights of the Dodge, and Steve raked a light against the back end of the Plymouth and then softly filled in the shadows on the back ends of both vehicles with reflected incandescent light. The warm color balance of the added light contrasted nicely with the naturally cool moonlight, and set the mood perfectly.

Three Cars

Gabe: Our next collaborative challenge was a cluster of three rusted-out cars. As we walked around the scene the moon was shining from one side, and as obvious a shot it was, we quickly assessed that the light was just to direct and flat. However, when we walked 180 degrees to the other side, the moon created a nice backlight and gave us lots of shadows on the front to be creative with while light painting.

Sandra loves abandoned old cars and started talking about how she saw the shot. It is always good to have a director who oversees the collaboration, so we gave Sandra the reins.

Photos by Susan Wales.

Photos by Susan Wales.

After setting up at a low angle and firing off a couple of test shots, with Beth confirming focus and composition, we were ready to practice painting. We knew we had to paint from both the right and the left of the cars. We used the same flashlight and Sandra directed how the light was falling so we could adjust our angles and timing. We also saw a need for a little backlight between the cars to separate them a bit more, so I jumped in and lit from a low angle so the flashlight wouldn’t be seen by the camera.

Because the light painting was a bit complex with three people working from three different angles, Sandra was only exposing for the light painting, reviewing the image and then giving us feedback. The overall exposure was 2 minutes but we were generally done with the painting in half that time. This let us repeat our motions and save time so that the final exposure was pretty much spot-on!

Two Cars and A Boulder

Lance: We chose two other cars that were spaced a little further apart, and we used a similar plan of attack. For this, Hadley was the director, and he set up his camera in what we determined to be the best spot to show these cars in the context of their final resting places. Vince also joined us for this second image.

This second shot minimized the moon shadows, but emphasized the location and the way that the cars were situated in the landscape. Everyone took turns lighting the various parts of the scene, and we ended up with a photograph that had a similar mood and feel to the first. The two work nicely together side by side.

The collaborative process was fun, and everyone got something out of the experience. I always encourage collaboration, but such collaborations tend to be smaller groups—pairs or trios. In this case, the seven of us managed to work together and all find a way to contribute. These shots were relatively simple and contained within a small area, but the seven of us managed to work together and all find a way to contribute. At the end, we even made a group portrait to commemorate the occasion!

Joshua Tree light painting Group No. 2.

Final Thoughts

Collaboration is definitely at the forefront of my mind right now. We at National Parks at Night have been excited with our early experiments during the workshops and we can’t wait to see how that continues to grow. On a personal level, I want to engage and work with more artists and opposites to see what new creative paths can be explored!

Gabriel Biderman is a partner and workshop leader with National Parks at Night, a Brooklyn-based fine art and travel photographer, and author of Night Photography: From Snapshots to Great Shots (Peachpit, 2014). During the daytime hours you'll often find Gabe at one of many photo events around the world working for B&H Photo’s road marketing team. See his portfolio and workshop lineup at www.ruinism.com.

UPCOMING WORKSHOPS FROM NATIONAL PARKS AT NIGHT

How We Got the Shot: Teamwork at Desert Queen Ranch in Joshua Tree NP

Desert Queen Ranch panorama, as team-photographed by our workshop, April 25, 2017. Photograph by Deane Hall, Jeannine Henebry, Romit Maity, Kurt O’Hare, Priscilla Spencer, Lance Keimig and Chris Nicholson.

If you’ve read our blog in the past, you may have seen our series “How I Got the Shot.” This time we’re doing something similar, but a little different: How We Got the Shot. It’s about how a group of workshop students came together to collaborate on a night image that took a lot of planning, communication and teamwork.

The Location

This week we completed our first workshop of 2017, at California’s Joshua Tree National Park. On the last night of the workshop, we were granted special access to Desert Queen Ranch (otherwise known as Keys Ranch), a spot that’s usually locked off from park visitors. The only way to see the site is to attend a group tour. Night access is rare, but we were able to bring our workshop photographers to the ranch through a partnership with Desert Institute, the educational outreach program at Joshua Tree.

Desert Queen Ranch is a goldmine for photographers ...

The ranch sits in a rocky canyon in the Mojave Desert. From 1910 to 1969 it was home to Bill Keys, who, along with his wife Frances, raised a family there and lived off the scarce resources of the environment.

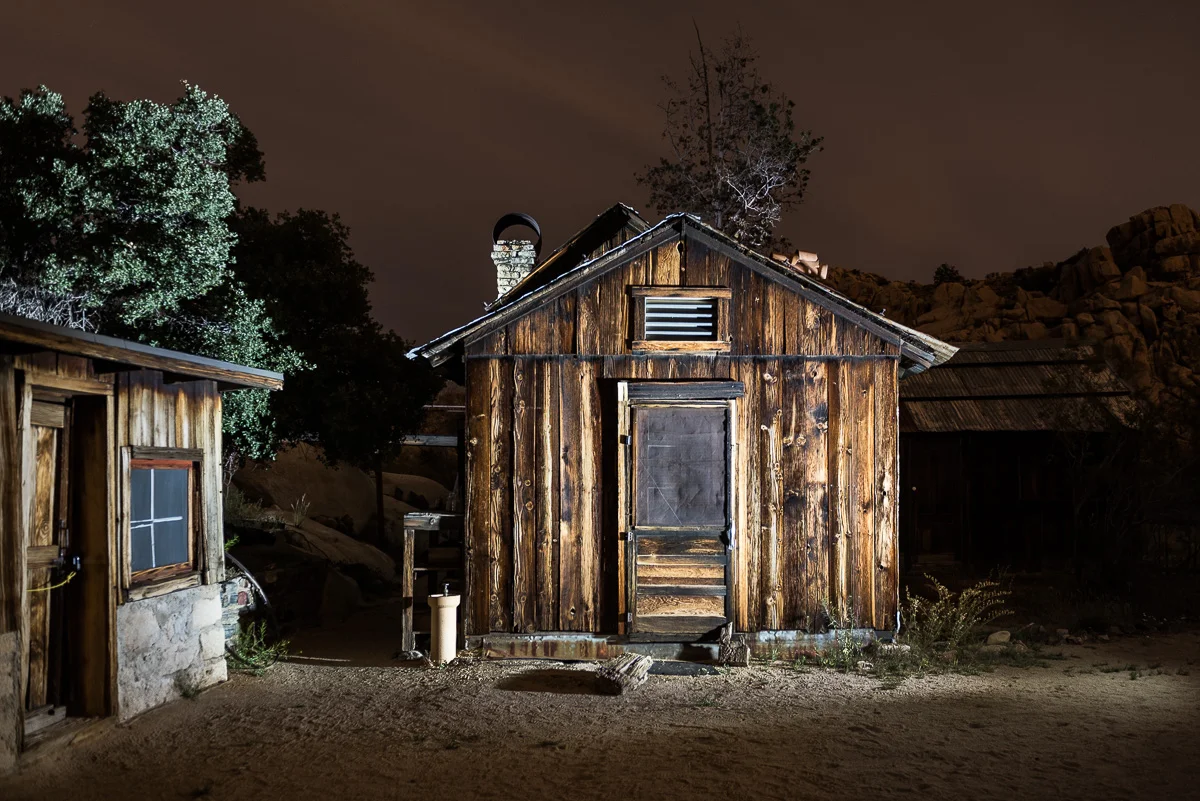
Today the ranch is preserved as a National Historic Register Site. It’s a goldmine for photographers, offering subjects such as the small-frame clapboard buildings, old cars in disrepair, mining and ranching equipment, hand-hewn wood fencing, and more. There’s also the same subjects you find in the rest of the park, including rock formations, lizards and snakes, cacti, and Joshua trees and other yuccas.

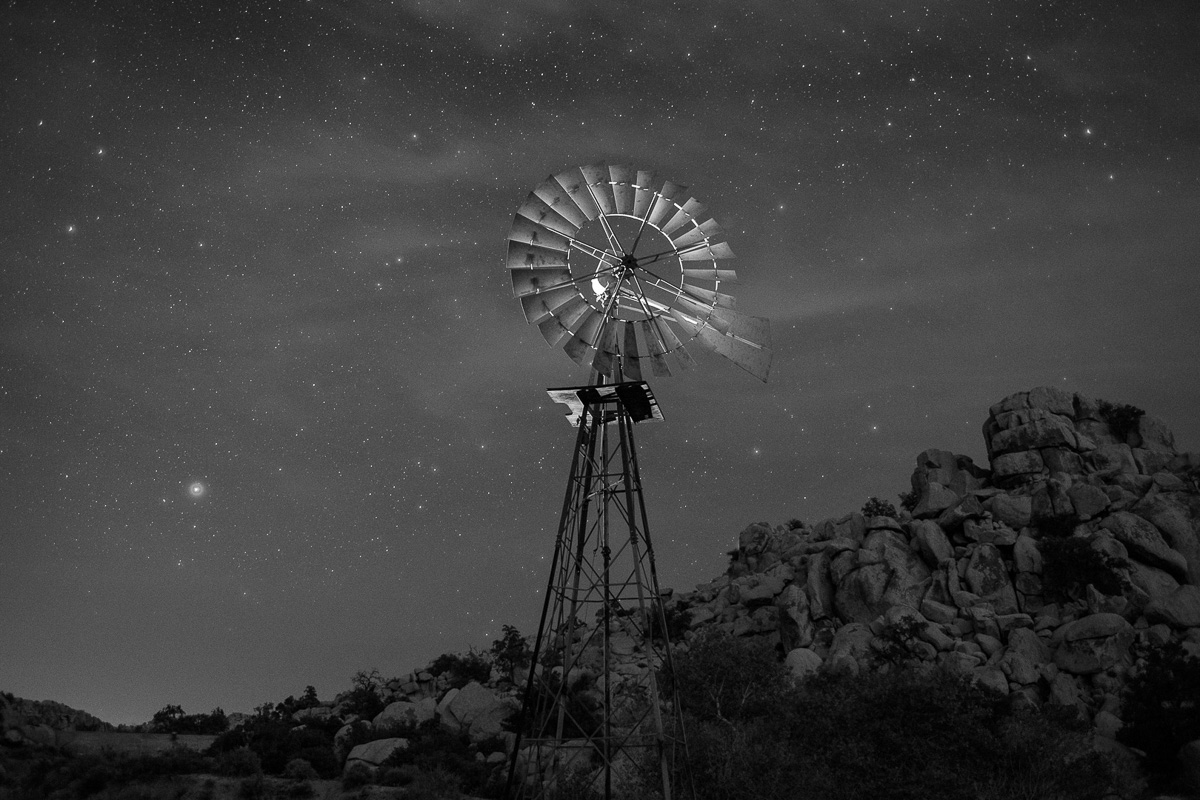
To give you a sense of the photography opportunities at the ranch, here are some other images by our group from that evening:

The Photographers

Seven photographers at our Joshua Tree workshop (five attendees and two instructors) contributed to making the final image:

The Planning

We arrived at Keys Ranch with our Desert Institute guides shortly before sunset, which gave our photographers time to scout ideas for compositions. One of the more popular subjects was an old, rusting Jeep in the center of the site. As dusk began to darken into night, we noticed that by standing to the west of the Jeep, you get a nice side-to-side view of the ranch structures, including the house, old store, Jeep, windmill, water tank and workshop building.

We immediately knew the scene would make a great panorama, but would be quite a project that could be accomplished only by a good number of us pulling together to contribute. About two-thirds of the workshop was excited by the idea, so we regathered at 11 p.m. to see if we could pull it off—hopefully with the Milky Way rising over the ridge that flanked the eastern edge of the ranch.

Because we didn’t have time for every photographer participating to shoot their own frames, we decided we would do one setup and execution, and we’d all share the RAW files to edit in our own ways. To provide the best image quality for everyone to start with, we chose to use a Nikon D5.

When the time came to start working on the photo, we carefully staked a spot for the tripod. We opted to use my Gitzo 3541LS, as it’s strong and steady, and we could rely on it to stay put during all the movements we’d be putting the ball head through. Using the bubble level on the tripod, followed by using the bubble level on the ball head, we were able to perfectly level the setup within a couple of minutes.

The scene stretched from left to right by about 160 degrees from the tripod mark. (In Figure 1, you can see how wide an area we needed to cover.) We couldn’t back up much because of a fence behind us, so we needed to use a wide angle lens—specifically, the Nikon 14-24mm f/2.8, one of the sharpest tools in the night-photography shed.

Figure 1. Satellite image of our pano subjects at Desert Queen Ranch, showing how wide the scene is from camera position. Map data © Google.

Figure 1. Satellite image of our pano subjects at Desert Queen Ranch, showing how wide the scene is from camera position. Map data © Google.

Setting the zoom for 24mm framed the scene segments perfectly, but gave us an exposure problem: If we wanted to keep the stars as points, rather than having them begin to trail, then we would be limited to a shutter speed of 15 seconds.

We agreed that a 20-second exposure would be better because it would give us 33 percent more time to light-paint, and would give us one-third of a stop more light to help fill in foreground detail. Using the 400 Rule, we knew that maintaining star points during 20-second exposures would require a focal length of 20mm or wider.

So we set the zoom at 20mm and mounted the camera vertically (which is best for most pano-stitching applications). This setup offered approximately a 60-degree horizontal angle of view within each vertical frame.

The next step was figuring out how much to overlap the frames. The more you overlap, the more information you have for the pano-stitching software to do its job well—overlapping by at least one-third is recommended. We prudently decided to overlap by half, which gave us a 30-degree horizontal change between frames. By using the degree marks on the base of the ball head, we panned the camera in 30-degree increments and determined we would need to shoot five frames to cover the scene from left to right.

The Lighting

We could have photographed the ranch without lighting it, but what fun would that have been? Besides, the low light on the foreground would have obscured the detail of all the interesting objects in front of us. So we decided to light-paint what we believed were the most important and interesting elements: the store, the house, the tree behind the house, the Jeep, the windmill, the water tower and the workshop building—all with 20-second exposures.

Teamwork was clearly required to pull this off.

Priscilla has a film-lighting background, and she shared that expertise to help place two panel lights on the largest subjects: the store and house (Figure 2), and the workshop (Figure 3). For the former we used Priscilla’s Vidpro LED Light Kit, and for the latter we used NPAN’s brand new Luxli Viola 5" Multi-Color LED light panel (which we used for different setups all week, and we loved it!).

Priscilla also stood by the panel on the far left of the image, because she needed to redirect its light mid-exposure. We used in-camera dodging by moving blackwrap in and out of the light to soften the shadow, thereby reducing the illumination on the ground during the exposure.

Figure 2. Vidpro LED Light Kit illuminating the house and store at the far left of our intended pano. This is the setup that Priscilla adeptly modified by moving blackwrap mid-exposure. We weren't concerned about hiding this light source (you can see it in Figures 5 and 8), because we knew it would be cropped out of the final stitched image.

Figure 3. The Luxli Viola LED panel light placed on the far right of the image is perched on a fence post. The only part of it visible to the camera is an LED on the back, which Lance covered with a piece of black gaffer tape so it wouldn't show in the final photograph. So even though the panel is technically in-frame, it disappears into the shadows.

Jeannine and Romit stood to camera-right, about 20 and 30 feet away, respectively. Jeannine light-painted the water tower, while Romit light-painted the Jeep.

Deane and Kurt worked in the background, in-frame, but behind objects so the camera couldn’t see their flashlights. Deane was positioned about center-frame, behind a bush, while light-painting the side of the house. Kurt was positioned toward frame-right, between some tall bushes, light-painting the windmill.

Everyone used incandescent flashlights to provide warm light to the warm-toned subjects. And because the final image would be composed of five stitched frames with overlapping elements, everyone had to repeat the light painting the same way multiple times.

As for the ambient illumination on the ridge, that was thoughtfully provided by clouds diffracting light pollution from Palm Springs. The clouds in the east weren’t as helpful, as they blocked our view of the Milky Way (though you can still discern it if you look closely at the final image). On the other hand, thin and broken clouds can add a good deal of visual interest to a starry sky, and they did exactly that for our composition.

The Shoot

When we were finally ready to execute, we all got into position for our roles. Lance observed the light painting from near the camera to watch for any mistakes that needed to be fixed. (There weren’t any—go team!) I operated the camera, using a Vello FreeWave wireless remote shutter release; I didn’t want to have to touch or even approach the tripod unnecessarily, to avoid the possibility of bumping it in the dark, which would have required us to re-set everything we’d done to that point.

We began by shooting from the right, primarily because that’s the direction the camera was pointing when we were ready to start. I fired the remote release, waited to hear the click of the shutter opening, then called out for the others to begin light-painting. When each 20-second exposure ended, I rotated the camera 30 degrees to the left (again using the markings on the ball head), then repeated the process four times. You can see the resulting images in Figure 5.

Figure 5. The five frames, before processing. All exposed at 20 seconds, f/3.2, ISO 6400. Nikon D5 with a Nikon 14-24mm f/2.8.

We reviewed the photos and everything looked exactly as we’d hoped. But we always say: Once you get the shot right, shoot another just in case. So we re-shot all five frames, and then wrapped the production.

Post-Processing

Back at the hotel at 2:30 a.m., we imported all the images into Lightroom. We made minor adjustments to one frame, then synced the edits to the other four frames so that each had the same adjustments applied.

Perhaps the most important edit we made in Lightroom is a necessity any time you’re stitching a pano: In the Lens Corrections panel, we selected “Enable Profile Corrections.” This removed lens vignetting and corrected barrel distortion (see Figure 6), both of which make it much easier for the software to stitch the images together, and also make for a better final image.

Figure 6. Before applying lens profile corrections (left) and after (right).

We then selected all five frames in Lightroom and clicked PhotoPhotomergePanorama. Lightroom usually does an amazing job with stitching a pano, but in this case we thought the results looked a little too distorted.

Photoshop’s Photomerge feature has a few more options, so we decided to try that instead. Again with the five frames selected, we clicked PhotoEdit InMerge to Panorama in Photoshop. We tried the Perspective, Cylindrical and Spherical options, but weren’t thrilled with those results either (particularly Perspective—see Figure 7).

Figure 7. Not the result we were looking for. Sometimes pano-stitch settings fail, and we just have to start over, making new choices.

Figure 7. Not the result we were looking for. Sometimes pano-stitch settings fail, and we just have to start over, making new choices.

What did succeed was Photoshop’s Auto option for merging, which is what ultimately produced a result we could work with (Figure 8). This proves the theory that software is pretty smart these days, so always consider trying “auto” first.

Figure 8. The uncropped stitched pano, right out of Photoshop.

Back in Lightroom, we made a few more edits. We cropped out the waste (this is expected—it’s why you should always shoot a pano with extra room on all sides, knowing that you’ll need to crop off artifacts). We brought the Whites up a bit to fill out the histogram. Then we nudged down the Blacks and nudged up the Shadows, which is a nice trick to make an image pop. We increased Clarity a little, and Vibrance a tad.

Those were all the global adjustments we made, which resulted in the image in Figure 9. It was looking pretty good, but there was still more work to do.

Figure 9. Minor global adjustments improved the overall image.

To begin the local adjustments, we immediately cloned out the plane near the center. (No need for editorial integrity—we just pretend that we shot the sequence two minutes earlier.)

To improve the sky, we added a Graduated Filter to the top of the frame, then used the Brush to mask around the ridge. We reduced the Exposure of the sky just a smidgen, and brought up Highlights and Clarity a touch to make the stars shine a little brighter (Figure 10).

Figure 10. The sky pops a little more after making some tweaks with the Graduated Filter tool.

We made some more local adjustments to even out the exposure, reducing the brightness and highlights of the workshop building at the right of the frame, reducing the brightness of the panel-lit ground on the left, and increasing the brightness and saturation (just a bit) of the Jeep (Figure 11).

Figure 11. Local adjustments to slightly darken the ground at left and the structure and ground at right, and to lighten the Jeep in center.

Finally, we pursued the curiosity of one workshop attendee who wondered what the photo would look like if we made adjustments to create more of a “nighttime feel.” To achieve that effect we dropped the White Balance temperature more toward blue, lowered Exposure by one-quarter of a stop, reduced Shadows, and dropped Saturation to -30. You can see the result in Figure 12.

Figure 12. A more night-feel approach to the editing.

The night approach looked great, but we decided that we liked our original take better. So we reverted to the first approach, which really shows the light painting that emphasizes the important elements of the composition. Figure 13 is the final version.

Figure 13. The final image.

Final Notes

Though we all made the photo together, the edited final version in this blog post is from my computer. There are many, many ways to edit digital images, dependent on different artistic preferences. I very much hope that Deane, Jeannine, Romit, Kurt and Priscilla will edit the RAW files as they like and post their final results in the Comments section.

Also, none of this would have been possible if the Desert Institute hadn’t partnered with our workshop and arranged for the special access to this very special space. With heartfelt thanks, we recognize Kevin Wong for his assistance at every stage of planning, and Julianne Koza and Lew Kingman for guiding us to and around Keys Ranch that magical evening.

Chris Nicholson, author of Photographing National Parks (Sidelight Books, 2015), is a partner and workshop leader with National Parks at Night. Learn more about national parks as photography destinations, subscribe to Chris' free e-newsletter, and more at www.PhotographingNationalParks.com.

UPCOMING WORKSHOPS FROM NATIONAL PARKS AT NIGHT