If you’re a regular reader of our blog, then a couple of weeks ago you may have caught the post announcing our involvement with the annual Grand Canyon Sky Party. We’re really revved up about this. It’s an opportunity for our night photography program to be integrated into a dark-sky festival at one of the country’s—nix that, one of the world’s—grandest national parks.
The Grand Canyon Star Party is an event that no night-loving parks buff should miss. But it’s not the only event of its kind. The National Park Service (NPS) is dedicated to preserving night skies and to letting people know about it. Want evidence?
Exhibit A: the NPS Night Skies webpage.
Exhibit B: the wide range of parks and rangers that commissioned artist and astronomer Tyler Nordgren to produce the “Half the Park is After Dark” poster series
Exhibit C: the commitment that’s led to an ever-growing number of units being designated as Dark Sky Parks by the International Dark Sky Association
Exhibit D: the night sky festivals that so many NPS units host each year
That last point is the point of this post. All year long the parks host events all across the continent. Below are many of the noteworthy ones coming up in the next several months, including a couple in Canada.

Petrified Forest National Park. NPS Photo/Jake Holgerson.
Petrified Forest National Park
Arizona, June 21
ranger- and astronomer-led programs
ancient solar petroglyph viewing at Puerco Pueblo
Yosemite National Park
California, June 22-23
public telescope sharing
group camping
night-photography shoots
Grand Canyon National Park. Fujifilm X-T2. 30 seconds, f/4, ISO 6400. © 2018 Gabriel Biderman.
Grand Canyon National Park
Arizona, June 22-29
held on both the North Rim and South Rim
constellation tours
daily presentations at the visitor center
a night photography talk and two night photography walks by National Parks at Night partners and instructors Gabriel Biderman and Chris Nicholson!
Bryce Canyon National Park
Utah, June 26-29
Bryce Canyon Astronomy Festival
led by Bryce Canyon's Astronomy Rangers and local astronomical societies
keynote speaker: Dr. Amber Straughn, associate director of astrophysics science at NASA
model rocket assembly and launches
Black Canyon of the Gunnison National Park
Colorado, June 26-29
Black Canyon Astronomy Festival
guest speakers
astronomy activities
held on the South Rim of the canyon
Craters of the Moon National Monument & Preserve
Idaho, June 28-29 & September 27-28
Craters of the Moon Star Party
run by the Idaho Falls Astronomical Society
telescopes available for viewing star and planets

Badlands National Park. NPS/Gary Joseph Cohen.
Badlands National Park
South Dakota, July 5-7
evening presentations with special guest speakers
nightly telescope viewing sponsored by the NPS Night Sky Program and Celestron
Harpers Ferry National Historic Park
West Virginia, July 12
Harpers Ferry Night Sky Festival
guest speaker and kids program
stargazing activities after dusk at the Murphy-Chambers Farm
Ochoco National Forest
Oregon, July 30-August 4
guest speakers, including NASA Solar System Ambassador Greg Cermak
observing programs for every level, from binocular to beginner to intermediate to advance to photographer (yes, in that order)
many, many programs
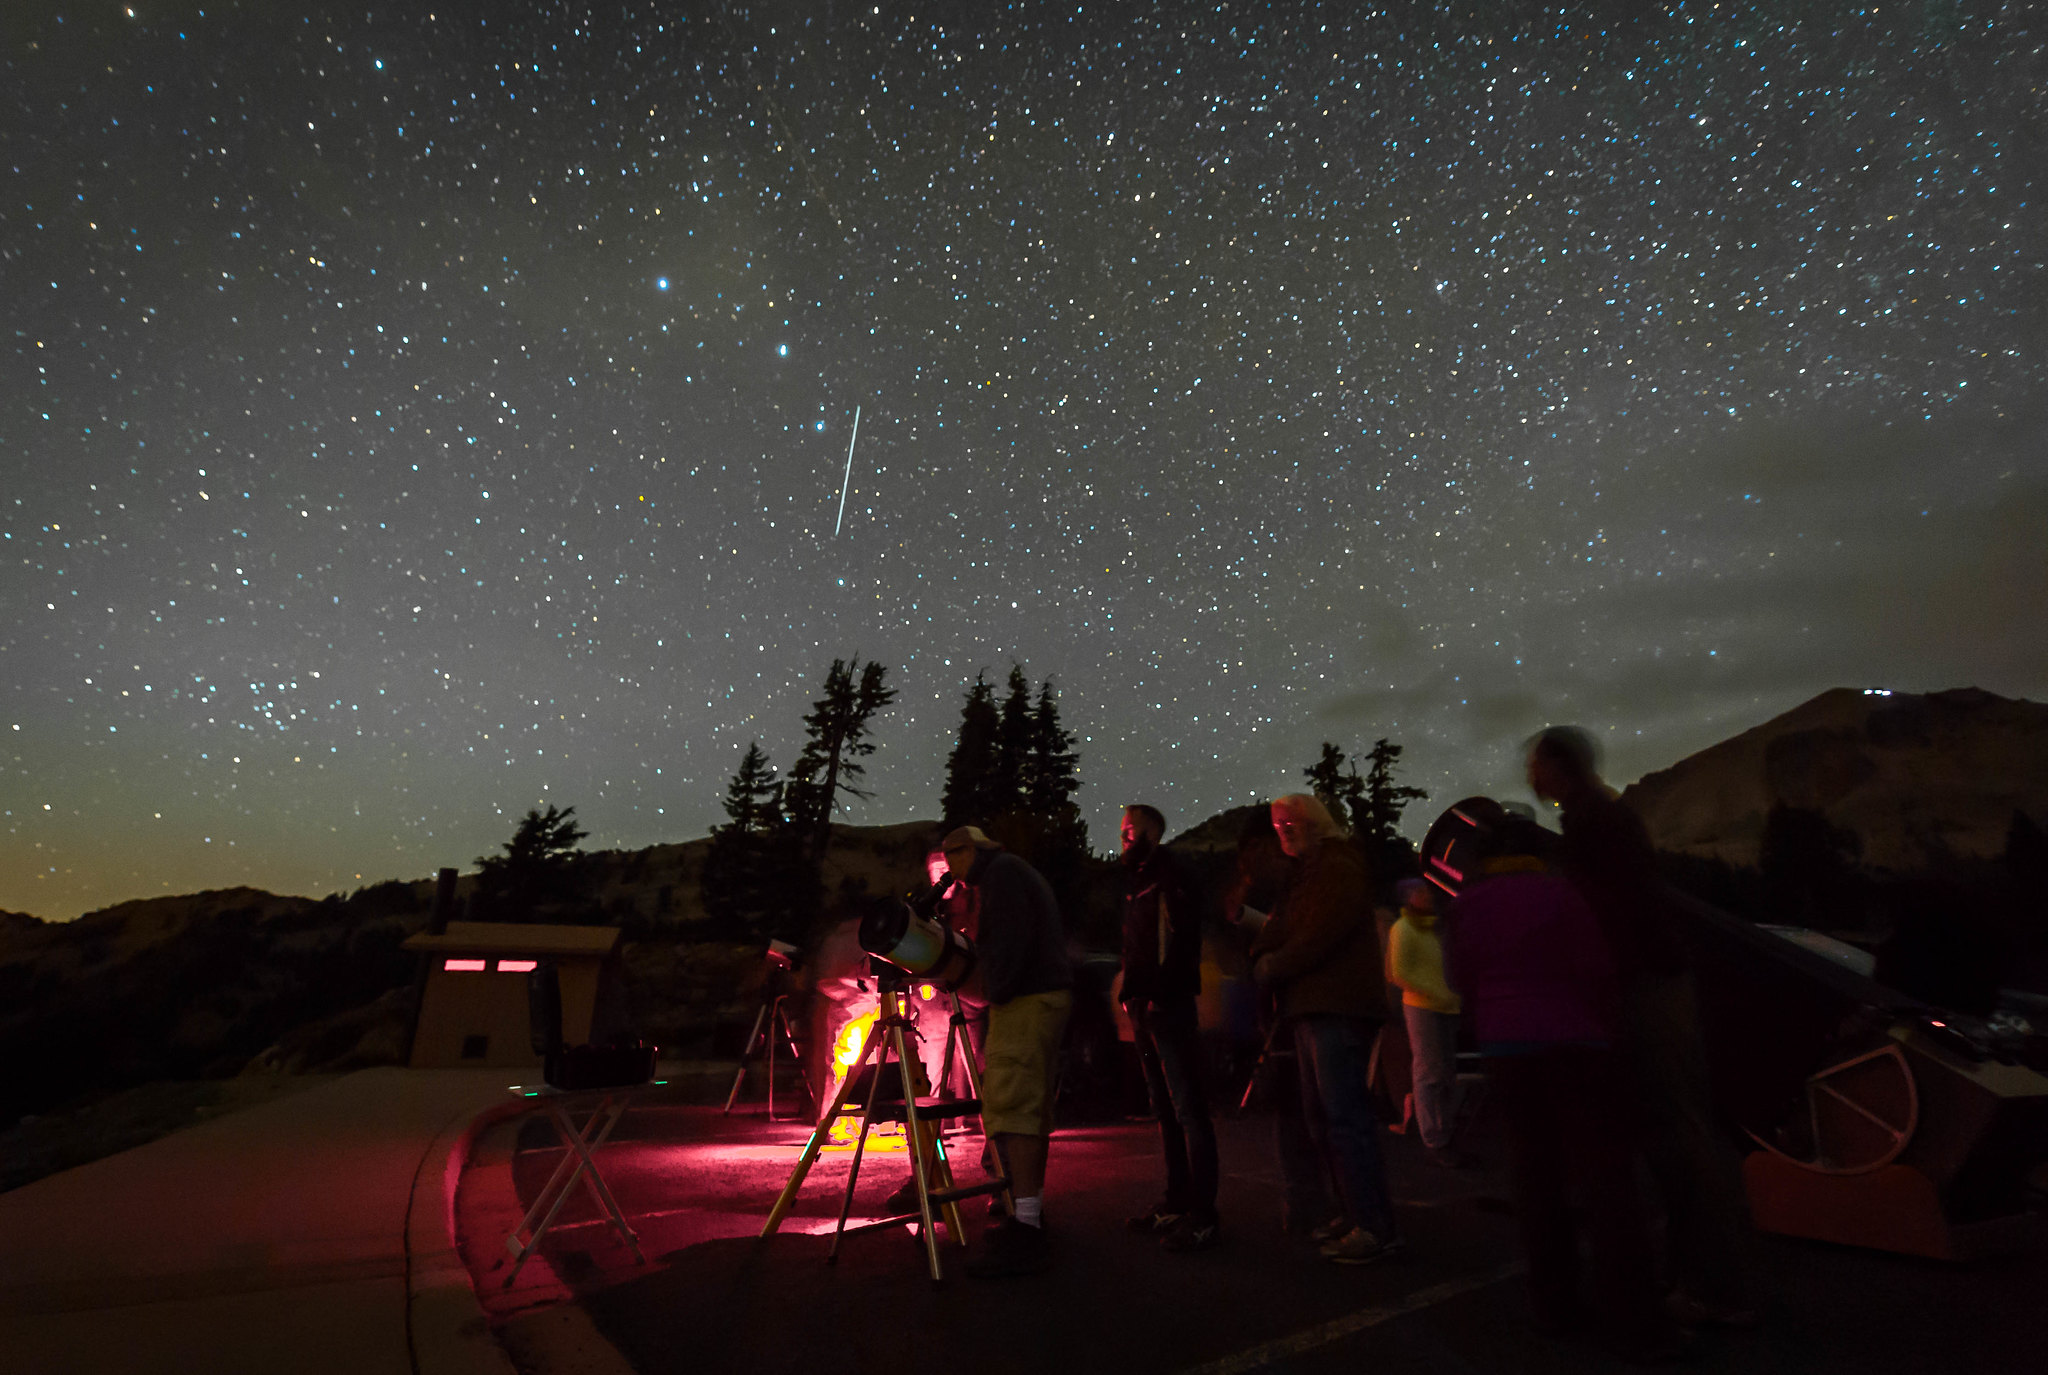
Lassen Volcanic National Park Dark Sky Festival. Photo by NPS/Alison Taggart-Barone.
Lassen Volcanic National Park
California, August 2-3
nightly constellation tours and stargazing
discussions and demonstrations by National Park Dark Sky rangers, NASA, the International Dark Sky Association, StarChazerz and the Astronomical Society of Nevada
Shenandoah National Park
Virginia, August 9-11
ranger talks and programs
guest presentations ranging from topics such as space weather, space travel and our future in space
Wood Buffalo National Park
Alberta and Northwest Territories, Canada, August 22-25
presentations by Bob McDonald, host of CBC Radio's Quirks & Quarks, and Wilfred Buck, a science facilitator for the Manitoba First Nations Education Resource Centre
fire circle and drumming
aurora and astrophotography workshop
Sequoia and Kings Canyon National Parks
California, August 23-24
Sequoia and Kings Canyon National Parks Dark Sky Festival
takes place in various locations, including the Foothills, Mineral King, Giant Forest, Lodgepole, Grant Grove and Cedar Grove, as well as Lake Kaweah in Three Rivers
over 50 programs, including tours, stargazing, guest speakers, movies, musical performances and more
Hopewell Furnace National Historic Site
Pennsylvania, August 24
organized by the ChesMont Astronomical Society
presentations, kids activities, telescope demonstrations and door prizes
Kejimkujik National Park
Nova Scotia, Canada, August 24-25
Canada’s only Dark Sky Preserve
presented in partnership with the Royal Astronomical Society of Canada
Theodore Roosevelt National Park
North Dakota, August 30-September 1
Dakota Nights Astronomy Festival
rocket building and launching
half-mile Solar System Hike
stargazing and telescopes
Chaco Canyon National Historical Park. Nikon D5 with a Nikon 24-70mm f/2.8 lens, light painted with a Coast HP7R flashlight and a Luxli Viola panel light. 10.5 minutes, f/11, ISO 100. © 2018 Chris Nicholson.
Chaco Canyon National Historical Park
New Mexico, September 20-22
sun and night-sky viewing through telescopes
learn about celestial alignments in the park’s ancestral Puebloan great houses
guided hikes
Joshua Tree National Park
California, September 21
held primarily at Sky’s the Limit Nature Center and Observatory
viewing through at least 20 telescopes
astronomy lectures
Katahdin Woods and Waters National Monument
Maine, September 21
campfire chat with hot cocoa and s’mores
science lessons
astronomy presentations
Acadia National Park. Nikon D3s with a Nikon 28-70mm f/2.8 lens. 20 seconds, f/8, ISO 3200. © 2017 Chris Nicholson.
Acadia National Park
Maine, September 25-29
internationally recognized speakers
poster artwork contest
events and workshops for everyone from families to the serious amateur astronomers
Great Basin National Park
Nevada, September 26-28
daytime and evening telescope viewing
ranger talent show of astronomy-themed acts
night sky photography workshop by the Dark Rangers
Capitol Reef National Park. Nikon D750 with a Zeiss 15mm Distagon f/2.8 lens. 30 seconds, f/2.8, ISO 3200. © 2016 Matt Hill.
Capitol Reef National Park
Utah, September 27-28
a dark-sky run/walk
constellation tours
Cedar Breaks and Grand Canyon-Parashant National Monuments
Utah, September 27-29
night hikes
star parties in various regional parks and places
Jasper National Park
Alberta, Canada, October 18-27
keynote speaker: Jad Abumrad, creator and host of Radiolab
VIP stargazing reception
stargazing along the shores of Lake Annette
“Science for Breakfast” with Nick Pope, former head of the British government's UFO project
Other Opportunities
These aren’t the only opportunities to celebrate the night skies of the national parks. The above represents the larger events and the annual events—at least the ones that we know of at press time. (Blog time? Press-Enter time?)
In the 400-plus units of the park system, there’s often something going on involving night. Ranger-led walks. Telescope parties. Meteor-shower viewing. Moonlight strolls. And so on. To find an event in a park near you, or in a park near where you’re traveling, go to the NPS’ Event Calendar page and do a search for “night,” or “stars,” etc.
Moreover, if you live outside North America or you’re traveling internationally, you can look for night programs all over the world, such as the Exmoor (National Park) Dark Sky Festival in England, the Mayo Dark Sky Festival in Ireland and the Queensland Astrofest in Australia.
Really, there’s a whole world of seizing the night to be had. So … go seize!


