How I Got the Shot: Milky Way and Planets in Lassen Volcanic

Looking across Cinder Cone to the Milky Way, Mars, Saturn and Jupiter. Β© 2018 Lance Keimig.

Last summer Chris and I had a chance to spend a few days in Lassen Volcanic National Park in Northern California. Lassen is one of the least known and least visited parks in the West, but it had been on both our radars for a long time. As the more popular parks like Joshua Tree and Yosemite become increasingly crowded, hidden jewels like Lassen Volcanic provide tremendous opportunities for photographers––or for anyone who wants to explore the wonder of our public lands without being overwhelmed by other tourists.

Lassen peak from Cinder Cone at Sunset. iPhone 6S+.

The Location

Roughly an hour east of Redding, California, Lassen is remote and far from the state’s major cities, which probably explains its relative obscurity. It certainly isn’t because the park doesn’t have much to offerβ€”quite the contrary. In some ways, the park typifies the High Sierra landscape: rocky, mountainous terrain, rivers, lakes, wildlife, fragrant Jeffrey pines, hot days, cool nights, and clear, crisp air. Add some recently erupting volcanoes to the mix, and perhaps you can start to appreciate what makes this park special.

All four of the major types of volcano are present in the park. Lassen Peak, which the park is named after, is the southernmost active volcano in the Cascade Range. It is a lava dome, and is the largest of this type anywhere in the world. Lassen Peak last erupted between 1915 and 1918. The park also contains composite and shield volcanoes, as well as cinder cone. In today’s post, I’m going to write about the appropriately (if unimaginatively) named Cinder Cone volcano.

Cinder Cone from the Butte Lake Campground trailhead. iPhone 6S+.

Nestled in the northeast corner of the park, far from the main visitor center, accommodations and other infrastructure, many visitors to Lassen Volcanic never get to see Cinder Cone. It’s the youngest volcano in the park, formed only 350 years ago!

Getting to the top of the cone is one of the more challenging hikes in the park, but the solitude and the views of Lassen Peak, nearby Butte Lake and the Painted Dunes below are well worth the effort. Cinder Cone has a relatively rare feature in that it contains two concentric craters, making it twice as photogenic as your ordinary volcano!

Nikon D750, Irix 15mm f/2.4 lens. A 10-frame panorama. All exposures 8 seconds, f/3.2, ISO 100.

The Experience

We arrived late in the afternoon and made the 1.5-mile hike to the base of Cinder Cone from the trailhead at Butte Lake Campground. It was slow going, having to trudge through the forest over the loose, sandy volcanic soil, but when we rounded a bend and first saw the cone appear before us we quickened our pace at the excitement.

The sun was sinking quickly as we began our ascent. Chris was determined to get to the top before the sun set, and we were literally racing the shadow up the side of the mountain. It’s a testament to how challenging the climb was that the shadow was at many times moving faster than we were. During one of our frequent stops to catch our breath, Chris said that we were experiencing β€œType 2 fun.” Apparently, misery that is remembered nostalgically is what makes for Type 2 fun. It’s only in hindsight that you realize you were having a good time. It was worth every minute of the effort, and I was happy to be sharing the experience with Chris as his determination to beat the sun to the top kept me going.

Type 2 Fun. Chris racing the sun to the top of Cinder Cone. Nikon D750, 24-120mm f/4 lens at 110mm. 1/60, f/7.1, ISO 100.

When we finally reached the summit, the scene before us was extraordinary. We were surrounded by an awesome panoramic view on all sides, staring across a 1,000-foot-wide double crater with Lassen Peak to the southwest, Butte Lake to the northeast, and the Painted Dunes to the south.

Our excitement led to newfound energies that had us circling the rim of both the outer and inner craters, but not quite enough energy or madness to descend into the inner crater, knowing we’d have to come back up at some point. The local terrain was spartan, with only a few trees and colorful low flowers dotting the landscape. We spent about an hour and a half alone on the summit, exploring, photographing and waiting for darkness.

The Painted Dunes at sunset from Cinder Cone. Nikon D750, 24-120mm f/4 lens at 34mm. 1/25 second, f/8, ISO 400.

The Night

We knew that once darkness set, we would have a spectacular view of the Milky Way, and that a rare planetary alignment we had witnessed earlier in the trip would present us with a unique opportunity to make a great image.

We were there in early July. Mars was approaching opposition, the point where Earth is exactly between our red neighbor and the Sun. Mars was approximately 40 million miles away from us, compared to its normal average distance of 140 million miles. It was five times brighter than usual and was the brightest object in the sky after the sun and moon. Jupiter and Saturn were not to be left out, as they had just passed their own oppositions.

All of this meant that if Earth was almost directly between the sun and planets, the planets would appear relatively close to each other in the sky. Of course, early July around the new moon is a great time to view the Milky Way too. The best time of year to view the galactic core is when it is at opposition. Can you guess where this is all headed?

β€œAs astronomical twilight faded the scene before us made our hearts race with excitement. It was incredible.”

We positioned ourselves on the northwest side of the crater so that we could look across it to see the Milky Way and planets rise as the sky darkened. We had a pretty good idea of where the core and planets would appear based on experience and our previous nights photographing in the park. Despite having a good idea of what was coming, as astronomical twilight faded the scene before us made our hearts race with excitement. It was incredible.

As the objects in the night sky brightened, the landscape before us darkened dramatically, and we wondered if we would be able to capture both the crater in front of us and the celestial glory above. We were constrained by the requirement to keep our exposures short enough to maintain the stars as points rather than trails, aperture-limited by comatic aberration, and ISO-limited by high ISO noise.

Of course there are several ways to deal with the differing exposures for ground and sky in astro-landscape photography. One could compromise and have an underexposed foreground and an overexposed sky and make the best of it, or make separate exposures for each at different settings and combine them during post-processing. Because we are masochists, we decided to light paint the 1,000 feet of crater during our 20-second exposure.

The Shoot

Chris and I both follow a similar procedure when we make night photographs. Every image is made by following the same basic steps. They are:

  1. compose

  2. focus

  3. calculate exposure

  4. determine lighting

  5. tweak and repeat

In this case, the composition was fairly straightforward. We knew we wanted the crater in the foreground and Milky Way above it. We aligned ourselves, and set up our cameras about 40 or 50 feet apart. Because the scene was so large, the distance between us made for only a slight variation in the foreground of our compositions.

A few test shots to get the lines right, and it was time to focus. I was using the Irix 15mm f/2.4 lens, which has a convenient and accurate detent at infinity. There was nothing closer than about 50 feet in my foreground, so I knew that I could safely focus at infinity without worrying about anything being soft. I rotated the lens until I felt the detent, and that was it for step 2.

On to exposure. There was no moon yet (it wouldn’t rise for another couple of hours), and only a little light pollution on the horizon from the resort towns surrounding Lake Almanor to the southeast. The standard astro-landscape (ALP) exposure of 20 seconds, f/2.8, ISO 6400 would be about right. I chose to close down one-third of a stop to f/3.2 because I wanted to minimize coma in the bright planets, which were close to the left and right edges of my frame. To compensate, I increased the shutter speed by one-third of a stop to 25 seconds, and made a test.

Test image looking across Cinder Cone to the Milky Way, Mars, Saturn and Jupiter. Nikon D750, Irix 15mm f/2.4 lens. 25 seconds, f/3.2, ISO 6400.

Every ALP exposure is a compromise. The Earth’s rotation limits shutter speed because of the need to maintain star points. The limit is based on sensor size, focal length and the cardinal direction your camera is facing. Increase your shutter speed, and risk star trails instead of points. Open up your aperture to maximum, and risk coma and softness at the edges of the frame, as well as potential depth of field issues with foreground objects. Raise your ISO and the noise increases, especially in the underexposed shadow area common in the foregrounds of ALP images. It’s up to the photographer to decide which variable to compromise based on experience, equipment, taste and how the final image will be displayed. But I digressβ€”on to the lighting.

The final image. Looking across Cinder Cone to the Milky Way, Mars, Saturn and Jupiter. Nikon D750, Irix 15mm f/2.4 lens. 25 seconds, f.3.2, ISO 6400. Lighting with two Luxli Violas at 3200 K and 100 percent brightness for the entire exposure. Mars on the left, Jupiter on the right. Saturn is hard to make out because it is right in front of the galactic core.

We really didn’t know if it was going to work or not, but there was nothing else to do but try it. We both had Luxli Violas, and the same idea. Usually we set these lights at 1 percent brightness for ALP images, and sometimes even that is too much. We are not usually trying to light the better part of a square mile in 20 seconds.

We set the color temperature to 3200 K and the brightness to 100 percent, opened the shutters, and walked quickly away from the cameras holding the lights toward the crater but tilted upward so that the foregrounds would not be overly bright. The technique worked remarkably well, and after a few adjustments we felt like we had it in the bag.

Wrapping Up

As we approach Thanksgiving and I look back at the images I made this year, this may well be my favorite from 2018. It’s a unique photograph made in an amazing location, collaborating with a great friend. It took some determination to make it happen, along with the good fortune of being in the right place at the right time. #ISO6400andBeThere

Note: Lance will be back at Lassen Volcanic National Park, this time with Gabe, for our 2019 night photography workshop. Click here for more information.

Lance Keimig is a partner and workshop leader with National Parks at Night. He has been photographing at night for 30 years, and is the author of Night Photography and Light Painting: Finding Your Way in the Dark (Focal Press, 2015). Learn more about his images and workshops at www.thenightskye.com.

UPCOMING WORKSHOPS FROM NATIONAL PARKS AT NIGHT

Long Nights on Long Island: Wrapping our First Summit

On November 2 to 4, 2018, National Parks at Night hosted our very first Night Photography Summit. It was a remarkable success, and we are delighted.

Thank you to all the eager photographers who attended. Most were from Long Island and New York City. But not all! We had attendees com all the way from California and even Belgium!

We partnered with Rafael Pons, The Bard of PhotoPills. Rafael was on-hand during the entire event to coach people on how to use PhotoPills to plan for their shoots, and also how to use some of the incredibly versatile tools contained within that awesome little yellow app.

We also partnered with the Photographic Federation of Long Island, a federation of camera clubs spanning the region, to promote and host the event. PFLI generously helped us choose a proper venue, work with local authorities to obtain permissions for the night photography mini-workshops, and even shuttle students back and forth from the parking lots in the evenings. Best of all, they were shooting alongside us every night. :-)

Our lovely and generous sponsors were also on hand to support our passion for night photography education.

  • B&H Photo brought all kinds of tempting gear (and some very special promotions during the event). And, of course, they also brought Zaza candies and supercool buttons and stickers. ;-)

  • BenQ brought their line of photographic displays, as well as knowledgeable imaging experts to talk about how seeing your images at their best on a BenQ display is a final step for serious photographers around the world.

  • Bay Photo Lab sent an envelope full of gift certificates for free prints to give away at the end of each day.

And then the education. ... Wow, what a full offering. We did our very best to fill up the attendees’ heads with useful tips and inspiration, and we answered every single question. Here was the conference schedule:

Day 1

One of my favorite moments each day was Gabe’s early- morning group stretching sessions, with β€œseize the night” chants (below). It really put us in a mindset for success, right down to the last person. (Thanks, Gabe.)

IMG_5828.JPG

The first day, we talked through some favorite images with Chris, Gabe, Lance and Matt:

One of our cherished (and proven) mantras is that it’s possible to make a good night photograph under any conditions. To that end, Gabe and Lance inspired the crowd with a presentation titled β€œHow to Nail a Night Photoβ€”Anytime, Anywhere.”

Rafael then stepped onto stage, connected his phone to the projector and proved that PhotoPills is not only the right choice for the night photographer, but that there is β€œa pill for every pain you have.” His presentation, β€œPhotoPills: A World of Possibilities on your Hand” had something for everyone.

Then Chris and Matt took the stage to present, β€œ10 Steps to Mastering Light Painting,” during which they walked the audience through, step by step, the successful ways you can apply light painting to tell your stories with photography at night.

Rounding out Day 1 was an enthusiastic Q&A session with all four NPAN instructors and Rafael. We had to save some questions for the next day!

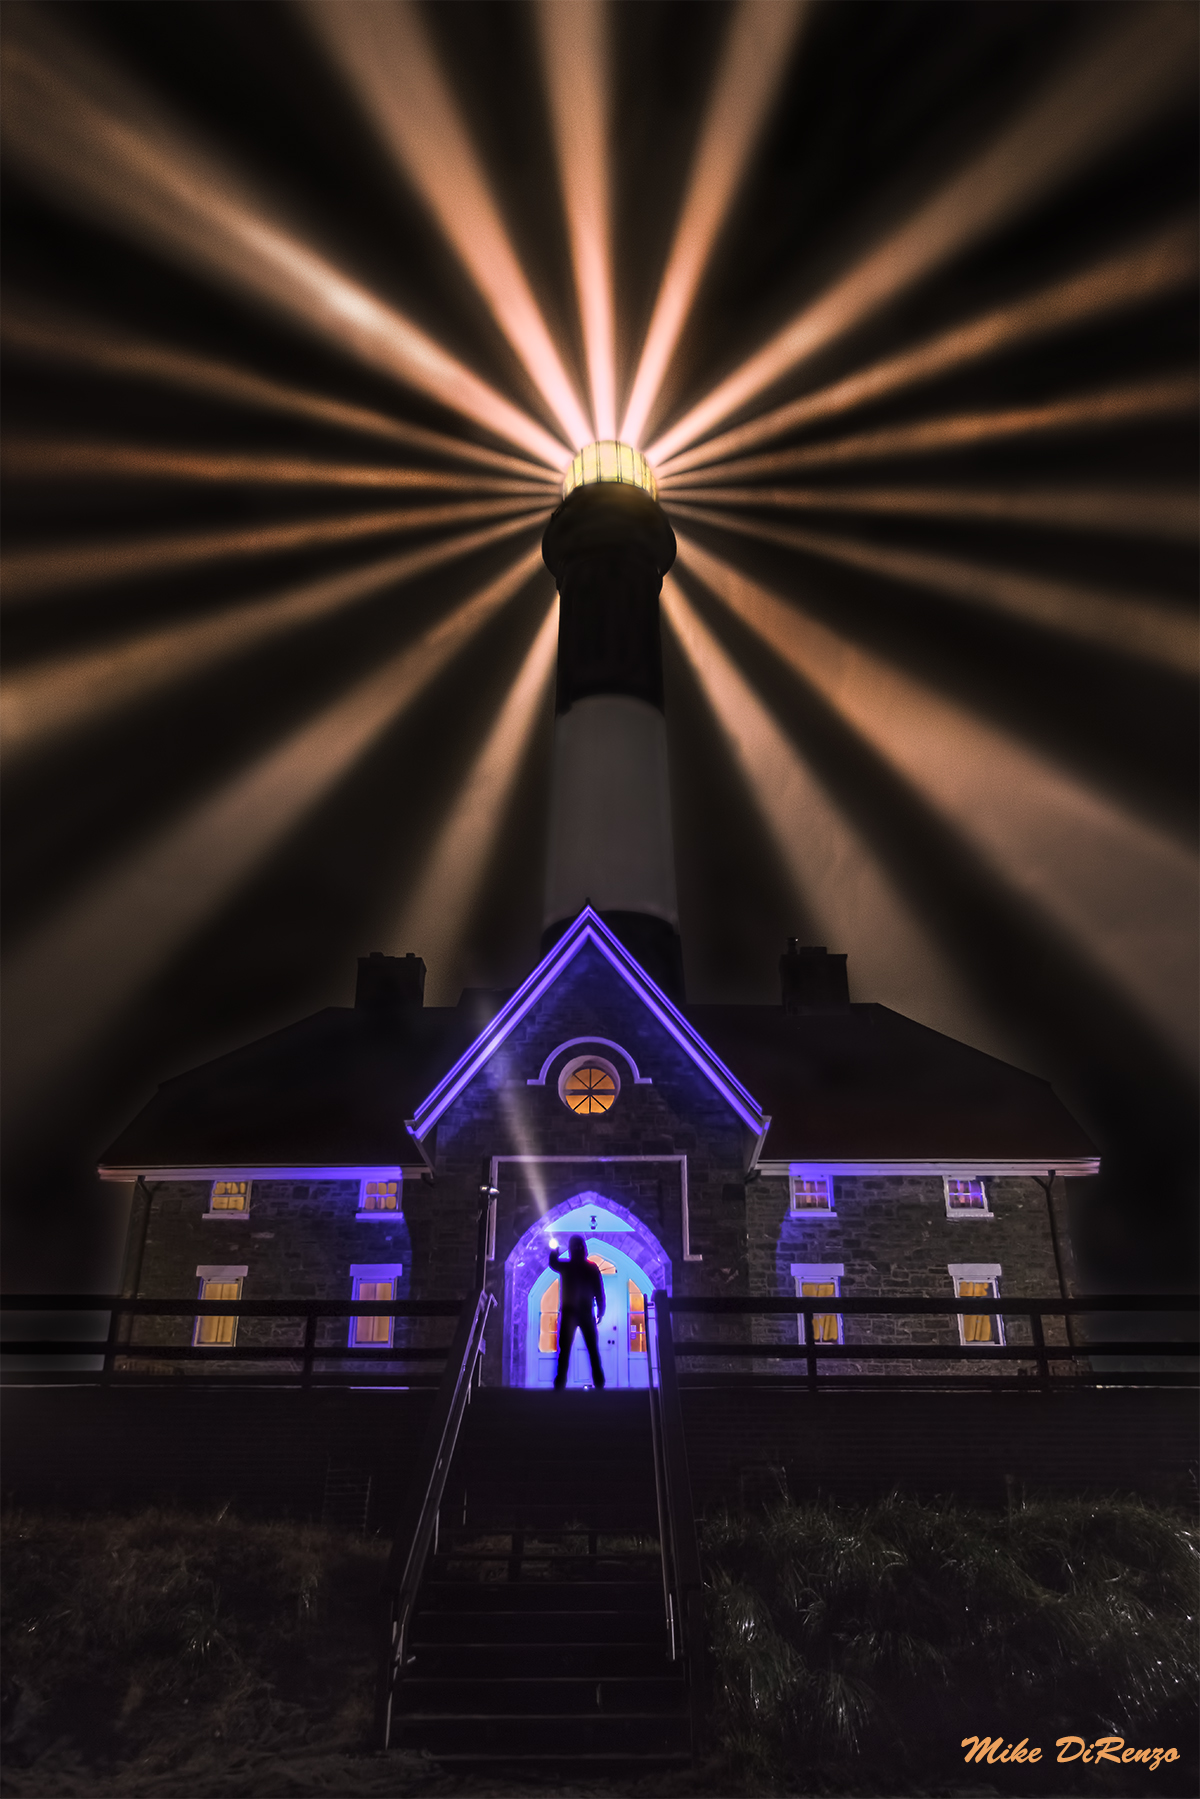
That evening our first group of intrepid night photographers braved drizzle, clouds and fog to photograph the iconic Fire Island Lighthouse. Proving our point that bad weather makes for great night photography, Gabe made this image during a demonstration:

Day 2

On Day 2, after our inspiring stretches and chants, Gabe and Matt opened up Lightroom and showed a live demo, β€œAfter the Shutter Closes: Processing the Night.” Each spent a good amount of time working through RAW images to bring out the very best in them.

Rafael once again showed us the magic on his phone with β€œPlanning Star Trails and the Milky Way with PhotoPills” (below), which was full of fantastic questions (and answers)β€”not to mention a whole lot of people using their phones and tablets during the presentation to see that magic happen under their own fingertips.

After lunch, Lance and Chris returned to present β€œPhotographing Lighthouses, the Sentinels of the Seas” (below). Truly germane to the work later that evening, they presented how to go about photographing lighthouses, including many techniques for planning and success.

We had one more group Q&A to cover anything at all. And we did. Love that part. Excellent attendees.

Our second and final night out started with a huddle at the base of the lighthouse.

_MHA3274.jpg

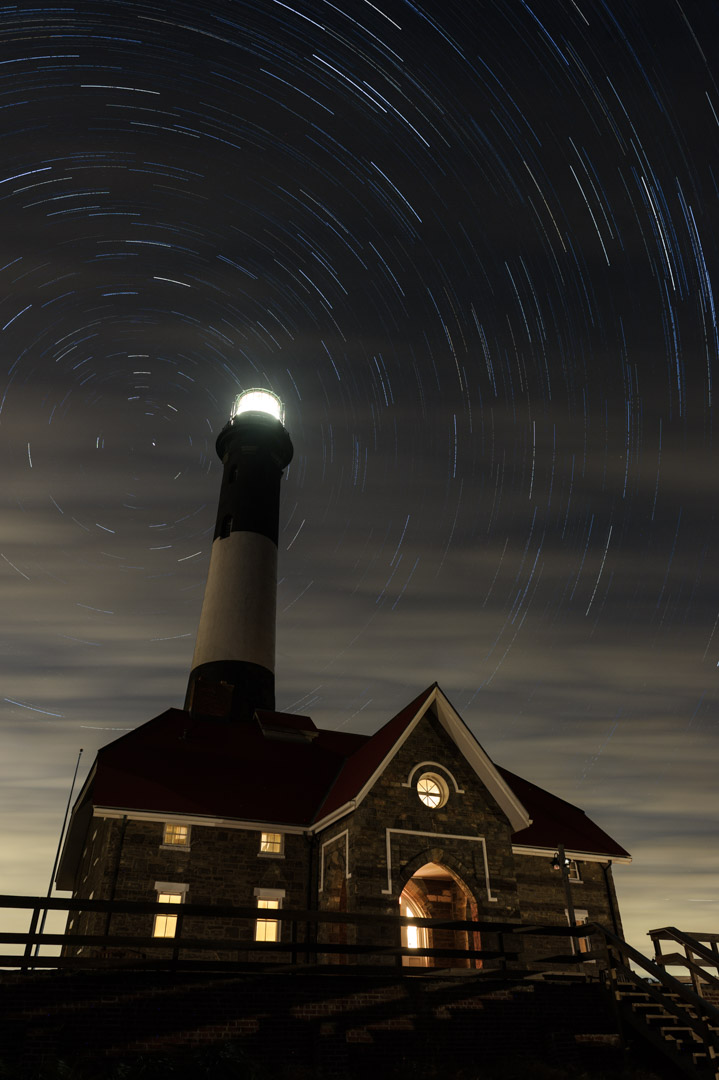
After a confab about the plan for the evening, we headed to the northern end of the beach to look south for a half-hour glimpse of the galactic core of the Milky Way creeping to the right of the lighthouse.

After this, we broke up into three groups and worked on Low-level Landscape Lighting (LLL), star stacking and long exposures. The night was clear, brisk and a little windy. But everyone walked away with images to be proud of!

Day 3

Our final day began with a deep exploration of some of our favorites places with Chris and Lance, in β€œA Daydreamer’s Guide to Night in the National Parks.” Covering 32 NPS locations, and rich with photographic examples, we saw many people wildly taking notes about their next dream destinations for night photography. (Hint, we have some spots open for 2019 workshops!)

Lastly, we spent a few hours on image review. We dipped into Lightroom and gave feedback and instruction to attending students on images shot during the conference and at other times. Always a good way to wrap up, with clear ideas on how to grow and improve.

With gladness in our hearts, and stars in our eyes, we called the Summit to a close. It was three days (and two nights) of sharing, learning and growing.

We’re so delighted that you like what we do. Thank you for supporting us as we share what we love with you. Our success is your success.

We can’t wait to do this all over again with the crew of photographers on Long Island and PFLI. #gratitude

Note: Want to see us come to your area? We’re considering taking this show on the road. Do you run a regional camera club federation, or even a really strong, passionate group that wants to collaborate and host an experience like this near you? Drop us a line and let us know.

Matt Hill is a partner and workshop leader with National Parks at Night. See more about his photography, art, workshops and writing at MattHillArt.com. Follow Matt on Twitter Instagram Facebook.

UPCOMING WORKSHOPS FROM NATIONAL PARKS AT NIGHT

Our Students' Work, From the Redwood Forests to the Gulf Stream Waters

Happy Anniversary Biscayne and Redwood national parks! We were so very thrilled and honored to be part of your 50th-year celebrations.

We obviously love going to all the parks, but when we can work closely with the rangers and officials that help run these amazing places, it makes the experience even more worthwhile.  In 2018 we formed a very strong relationship with both the aforementioned parks. We were so excited to take our students there for workshops earlier in the year as well as keep the communications building to create a cross-country β€œFrom the Redwood Forests to the Gulf Stream Waters” celebration. It was absolutely wonderful to see the friends we made this year, in addition to meeting more creative lovers of the parks during the festivities.

A very big thank you goes out to Bay Photo Lab, which believed in our students’ work and printed a combined show of 42 night photographs, twice, so we that we could have the focal point of the celebrations be a gallery show at both parks.

Biscayne

Our opening weekend at Biscayne had a ton of activities. We kicked things off Friday night, when 30 people joined us for a scenic boat ride to Boca Chita. We disembarked and had time to scout and explore the many vantage points on the island. At the end of civil twilight we gathered our group, plus two law enforcement park rangers joined us and were excited to see what we were creating.

I had prepared a special β€œBirthday Wish” (below) on the Fotorgear Magilite, which is an LED light stick that you can program with an endless amount of colors, shapes and art and then β€œwalk the image” into the scene.

That is always a perfect example of how we can write anything with light. From there we broke into smaller groups and did night portraits and light paintingβ€”all in all, seizing the night!

Saturday was a full day at the park. We were very excited to see our dear friend, National Park Patch Lady (below), who led a sunrise photo shoot, scavenger hunt and Biscayne quiz. Lots of fun Biscayne and national park stickers were finding their way to knowledgeable park goers. There was also a variety of ranger talks spearheaded by Ranger Gary Bremen.

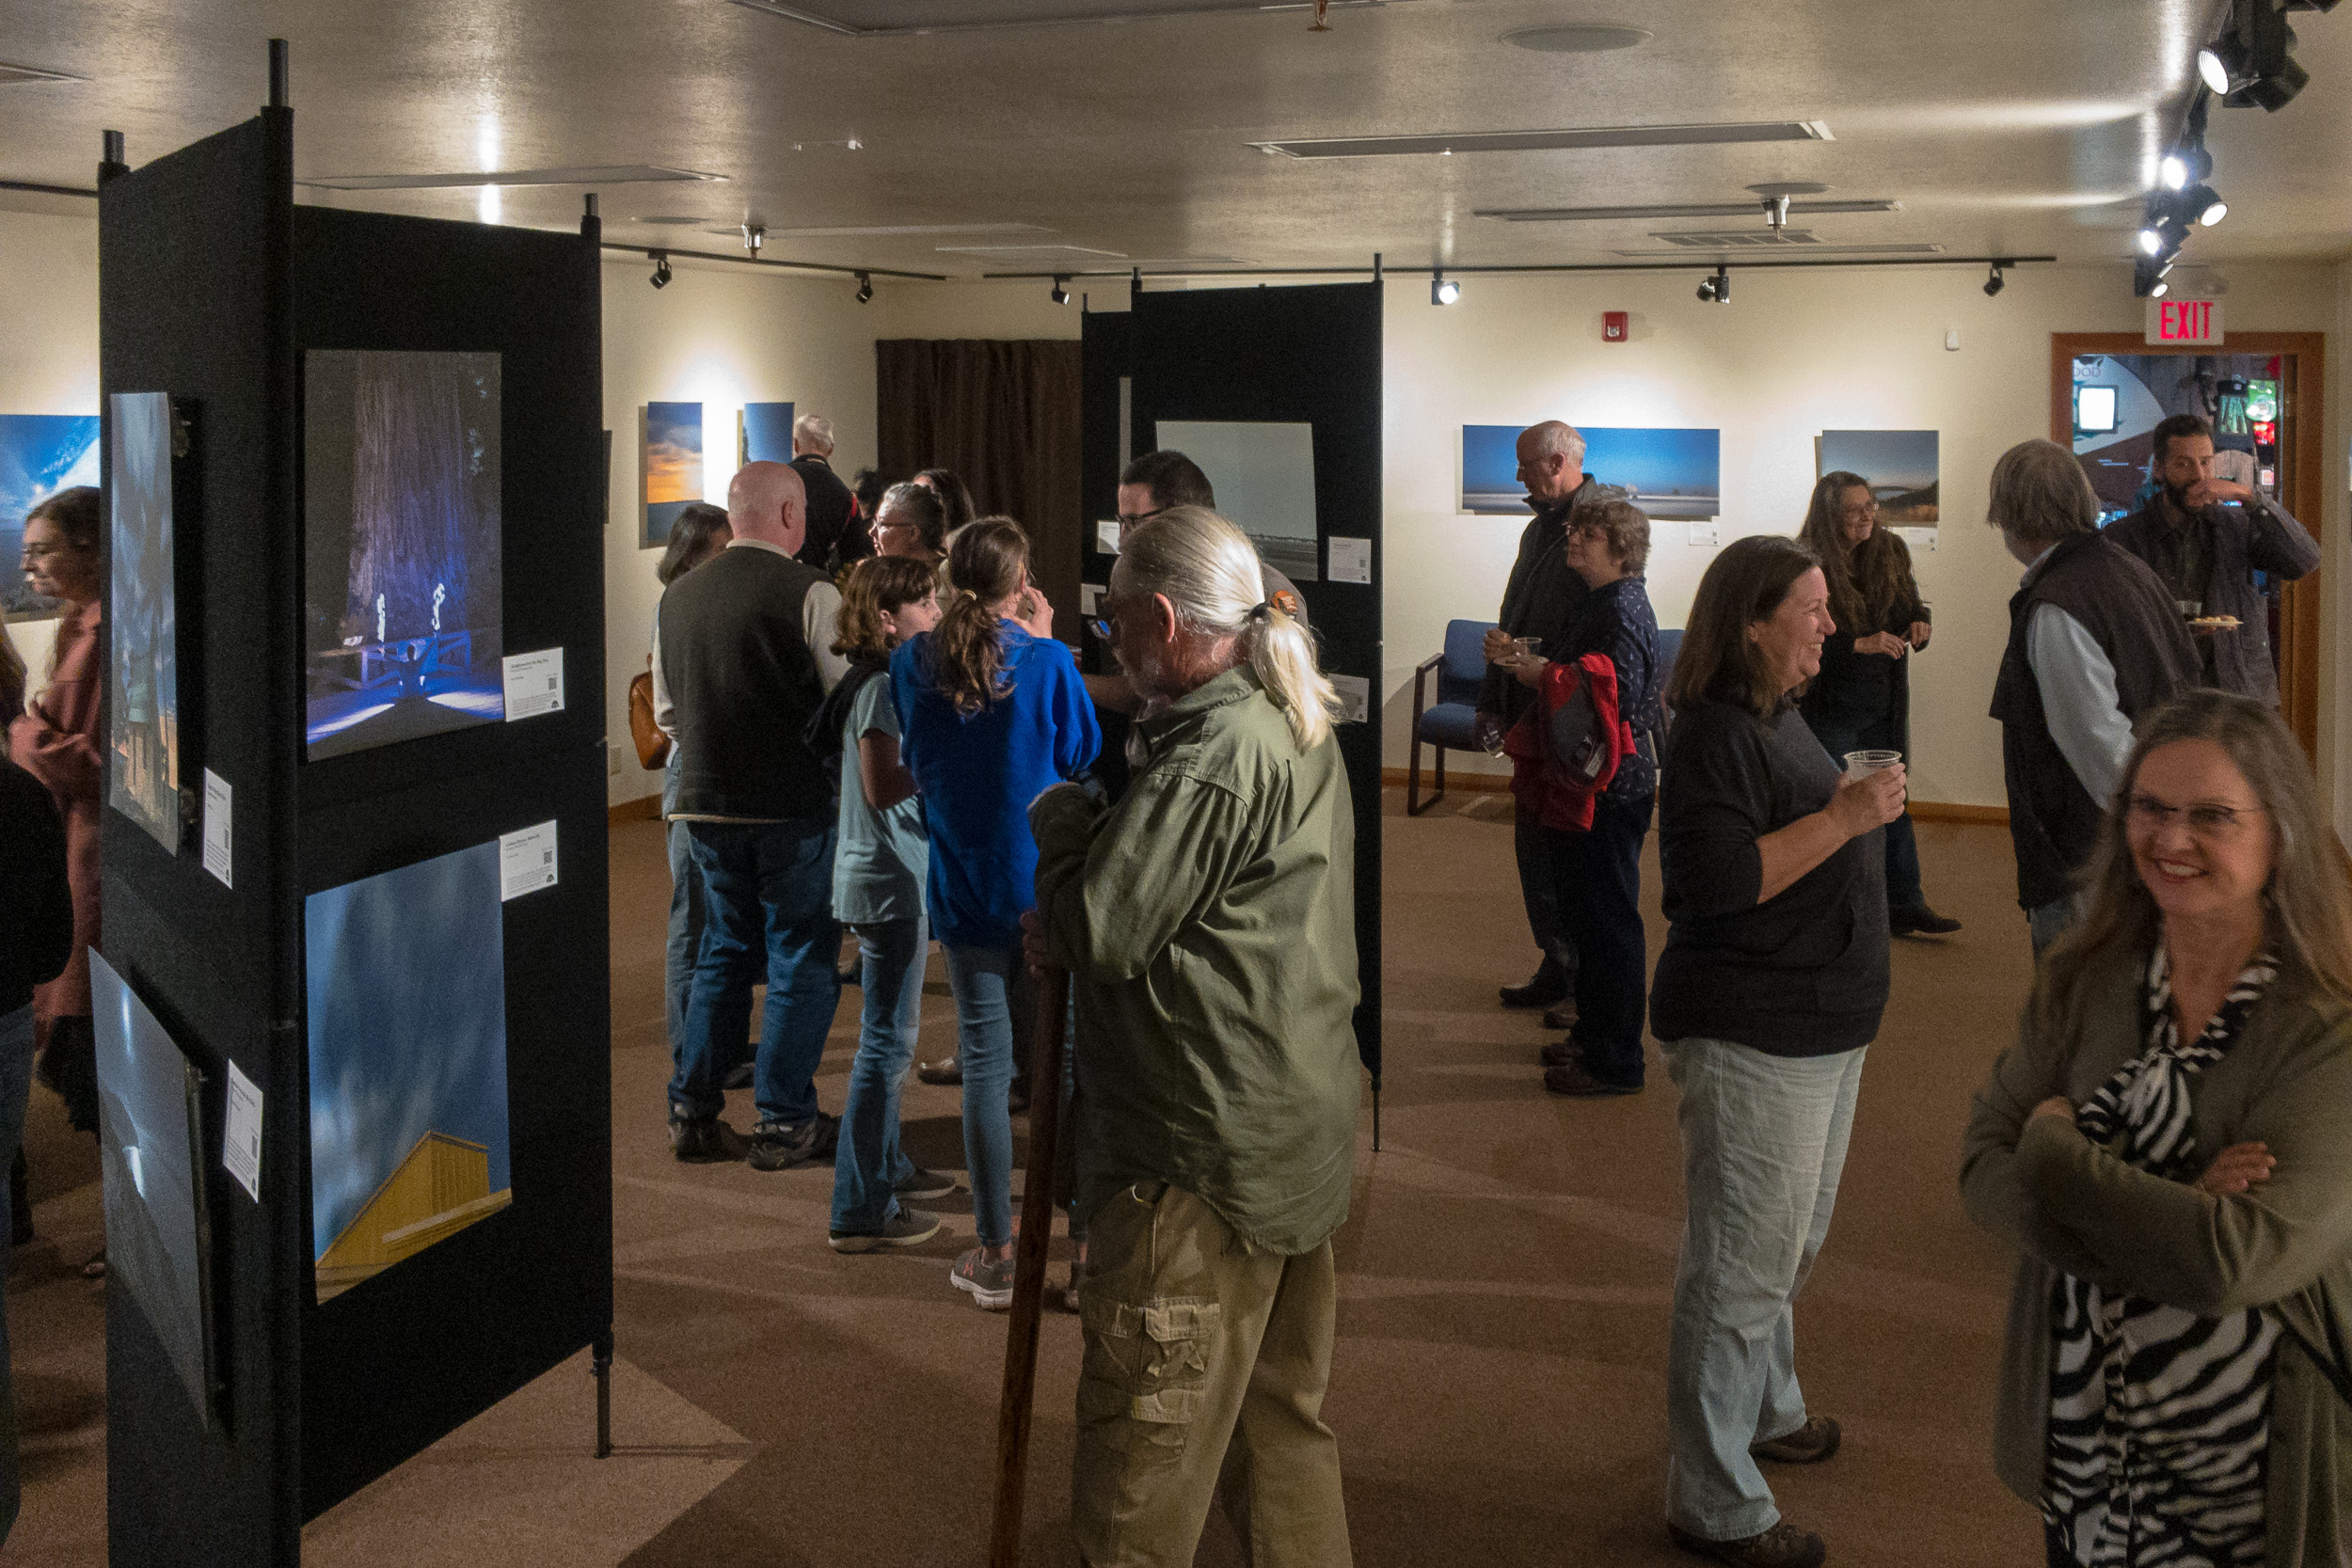
That kept most people busy until we kicked off the gallery opening and official party. We had live music (below) and over 100 people came to enjoy our images and share stories about Biscayne as we sipped wine and (of course) gobbled up birthday cake. We were also honored to have in attendance Lloyd Miller, who was instrumental in saving and creating Biscayne National Park half a century ago.

That night we led another walk around Convoy Point (below) and the visitor center, and we were thrilled to be joined by a student from each of the Biscayne and Redwood workshops, in a truly wonderful weekend of celebration!

Redwood

by Lance Keimig

That very same weekend we made a return visit to Redwood National and State Parks to help celebrate their 50th anniversary with an exhibit of student and instructor photographs from our June workshop, which will be on display at the Hiouchi Visitor Center in the park until January 2019.

The β€œFrom the Redwood Forests to the Gulf Stream Waters” exhibit opened on Friday, October 19, and was attended by the park staff, as well as members of the Save the Redwoods League, Redwood Parks Conservancy and the local community. About 50 people attended the opening during the course of the too-short evening. A highlight of the reception was ranger Michael Glore leading a singalong of Woodie Guthrie’s, β€œThis Land is Your Land” (below), which alone was worth the trip to California.

In addition to the exhibit reception, and a gallery talk led by Chris and I the following day, we also taught a one-night mini-workshop for the local community on Saturday, October 20. We had a small group of eager students and a great night in the redwoods at Jedediah State Park, photographing along the banks of the Smith River.

We’d like to offer our thanks and congratulations to Michael, Chief Interpretive Ranger Candace Tinkler and Biscayne’s Ranger Gary for all of their hard work in putting together the events around the anniversary. It was a dream come true for National Parks at Night to collaborate with the parks in this way, and we hope to do more of these types of projects in the future.

Prints for Parks

Bay Photo was more than just a sponsorβ€”they made the events possible. The prints for both the Redwood exhibit and the concurrent one at Biscayne were made with Bay’s patented Xpozer systemο»Ώ, our new favorite way to display our work.

All of the images from the exhibits are available for purchase at our online gallery, with all profits going to benefit both Redwood and Biscayne.

Bay is a great partner to work with and they have stepped up in a big way to support both the parks and National Parks at Night.

One final note is that under Candace’s leadership, Redwood National and State Parks is pursuing dark sky certification from the International Dark Sky Association, and plans to hold more dark sky events in the future. We look forward to seizing the night with them more in the years to come.

Reminder: The exhibits are up in both parks until January 13; check visitors hours to see when you can view the prints. Or, you can support the parks by purchasing one of the prints at our online gallery.

Gabriel Biderman is a partner and workshop leader with National Parks at Night. He is a Brooklyn-based fine art and travel photographer, and author of Night Photography: From Snapshots to Great Shots (Peachpit, 2014). During the daytime hours you'll often find Gabe at one of many photo events around the world working for B&H Photo’s road marketing team. See his portfolio and workshop lineup at www.ruinism.com.

UPCOMING WORKSHOPS FROM NATIONAL PARKS AT NIGHT

Five Questions: Yes, Light Painting is Allowed in National Parks, and More

You ask questions, we give answers. (For the record, we do other things too. And we assume you do as well. But we all love night photography, so here we go.)

This installment of our β€œFive Questions” series features inquiries about light painting in national parks (hint: yes), focusing at night, an amazing national park in Utah, better batteries for the Luxli Viola, and the direction of star trails.

If you have any questions you would like to throw our way, please contact us anytime. Questions could be about gear, national parks or other photo locations, post-processing techniques, field etiquette, or anything else related to night photography. #SeizeTheNight!

1. Yes, Light Painting is Allowed in National Parks

A great example of low-level lighting: In Joshua Tree National Park, Arch Rock, at 30 feet high, was light-painted by just three battery-operated votive candles. Illumination barely visible to the naked eye even from close-up. Six stitched frames sh…

A great example of low-level lighting: In Joshua Tree National Park, Arch Rock, at 30 feet high, was light-painted by just three battery-operated votive candles. Illumination barely visible to the naked eye even from close-up. Six stitched frames shot with a Nikon D750 and a Tamron 15-30mm f/2.8 lens at 15mm Photo Β© 2017 Lance Keimig.

Q: I saw an article online that said light painting is no longer allowed in national parks. Is this true? β€” Pretty Much Everyone Who Has Emailed or Spoken to Us in the Last 18 Months

A: The headline of that article misled the reality of the situation. About 18 months later we still get this question, so let’s set the record straight.

First of all, it is true that a few National Park Service units have gotten hesitant about light painting. However, as far as we are aware, this has happened at only five NPS unitsβ€”out of about 420. So to insinuate that night photography is being hampered at all national parks is a massive overstatement.

It should also be noted that of those five units, four (Arches National Park, Canyonlands National Park, Natural Bridges National Monument and Hovenweep National Monument) are administered by the same office, so it’s mostly just one rule that’s affecting a few places. It’s not like a bunch of parks have independently decided they don’t like night photography. In fact, we find that almost every park we visit loves the night, loves night photography, and encourages visitors to enjoy the darkness of the parkness either without or with a camera.

Those four Utah NPS units acted with exactly that feeling in mind. Michael Hill, who works in the district, and with whom we have communicated, is very clear that they felt light painting β€œconfuses visitors” and they leave because of this confusion. We get that, and we are respectful of it.

However, that rule has been amended. As of earlier this year, those Utah parks allow Low-level Landscape Lightning (LLL), which is essentially very low levels of light that build up over the course of a long exposure.

In Lassen Volcanic National Park, Lance and I used a pair of Luxli Viola panel lights to illuminate Cinder Cone, which is approximately 1,000 feet in diameter. We were relatively far away from our giant subject with relatively dim illumination. We could barely see where the light was hitting, but over the course of a 15-second exposure at a high ISO, that little bit of light was enough to do the job. Nikon D5 and 14-24mm f/2.8 lens. 15 seconds, f/3.2, ISO 6400. Photo Β© 2018 Chris Nicholson.

For example, at our workshops we often employ LLL by using a Luxli Viola set to 1 percent brightness. That gentle glow is barely visible to the naked eye, but is extraordinary for cameras at high ISOs. That works out very well, and we cannot imagine that it would ruin the experience of any non-photographer who might happen to be there too. (For the record, usually no one else is there. We find it rare to encounter anyone else out at 1 a.m. other thanβ€”seldom but occasionallyβ€”other night photographers.)

In the case of the Utah parks, how low is acceptably β€œlow-level”? Good follow-up question. When in Canyonlands last month, I asked a ranger, and he admitted the threshold is a bit subjective. He added that as long as the light isn’t disturbing wildlife or interfering with the enjoyment of other park visitors, then it’s probably OK. For commercial groups, the permit regulations stipulate that waving flashlights around is a no-no, but low-level static lighting is fine.

(Note: Since publication, this rule has since been amended again. As of 2020, no light paintingβ€”not even LLLβ€”is permitted in the four Utah parks mentioned above. In 2021, Capitol Reef also prohibited light painting, bringing the total to six National Park Service units doing so.)

So, that’s the scoop with that set of four Utah units. The fifth unit in question is Grand Teton National Park in the beautiful state of Wyoming.

Grand Teton is an interesting case, because the park’s concern appears to really be in regard to shining artificial light on wildlife. We’re on board with whatever helps in that regard. Of course we don’t want to use flashlights for β€œspotting” wildlife, which in hunting is known as β€œjacklighting.” As people who use the parks for artistic inspiration and growth, we also have a responsibility to respect and preserve the natural environment, and that includes not disturbing the animals that call those places home.

There are many ways to photograph Grand Teton National Park in low light without light paintingβ€”such as by moonlight. Nikon D3 and 28-70mm f/2.8 lens. 1/50, f/ 4, ISO 400. Photo Β© 2012 Chris Nicholson.

That said, Grand Teton curbing light painting is a curious decision, as the park has a highway that runs right through it, along with plenty of private property that people drive on. Cars have headlights. There’s also an international airport that’s in park boundaries, and airplanes have lights too. The however-many cars and planes in the park each night illuminate far more than a few photographers’ flashlights do. So we’re not sure why photographers are the ones getting their lights extinguished. (We’ve heard of at least one photographer who light-painted by β€œaccidentally” sweeping his flashlight across the scene. Perhaps that kind of behavior has something to do with photographers being mistrusted there.)

Regardless of our personal feelings about any of this, National Parks at Night always preaches respect for the land, and that means respect for the park regulations, for equal access for all visitors, and for the rights of animals not to be blinded with sun-guns.

To that end, on our workshops we are very clear that if someone from outside our group approaches with a light on or wants to walk where we are shooting, they have a right to do so. If they want to linger in the same place we’re shooting, they have a right to that too. We should all share the space, and we should all share the darkness. If what we as photographers are doing will disrupt another visitor’s enjoyment of the park, we can find another way or another moment to do it.

Let’s end with this thought: Rather than making negative assumptions and predictions based on some (very few) new obstacles at a tiny minority of parks, we instead implore our fellow night photographers to ensure this does not become an actual issue anywhere else.

How? By being responsible with our practices. That could be by employing LLL lighting techniques, or by light painting at a location only when alone or with other night photographers, or by shooting just the dark skies. Whatever works for you in the moment.

And finally, by encouraging other night photographers to do the same. β€” Chris

2. Focusing from Foreground to Infinity

Pemaquid Point, Maine, sharp from front to back after focusing to a hyperfocal distance of 18 feet. Nikon D750, Sigma 24mm f/4 lens. 488 seconds, f/3.5, ISO 800.

Q: On a recent night shoot at the Devils Garden in Utah, I was really disappointed in the fuzziness (not in good focus) of the rocks in the foreground of my shots. I may just have screwed up the focus on infinity, and I should have zoomed in on the first few shots to ensure clarity. Should I have focused on infinity and assured/assumed that the depth of field would maintain focus throughout the range, or should I have focused on a hyperfocal distance to ensure the full range of focus, which would have included my foreground rocks and out to infinity? β€” Michael D.

A: Anytime you have foreground subject matter, hyperfocal (providing it is done accurately) is the way to go. It’s a technique that is designed to maximize the available depth of field rather than focusing at infinity and sacrificing sharpness in your foreground.

To learn more about that technique, read my 2016 blog post β€œUse Hyperfocal Distance to Maximize Depth of Field at Night.” Then follow that up with a post that Chris wrote, β€œStaying Sharp: 8 Ways to Focus in the Dark.” β€” Lance

3. Capitol Reef Night Programs

The night skies of Capitol Reef National Park are worth a trip. Nikon D750, Zeiss 15mm Distagon f/2.8 lens. 154 seconds, f/4, ISO 100. Photo Β© 2016 Matt Hill.

Q: I would love to go to Capitol Reef National Park to see the stars. Are there any nighttime programs available? β€” Nancy

A: There certainly are! Capitol Reef is an awesome place to view and photograph night skiesβ€”and they know it, and they’re happy to help you enjoy what they have.

Check the Ranger Programs resource on the park website. They recommend the following special programs (check at the visitor center for schedules and meeting points):

  • guided hikesβ€”60 to 90 minutes

  • star programsβ€”tour the night sky in a gold-tier International Dark Sky Park

  • full moon walks

Have fun, send pictures! β€” Matt

4. Superpowering the Luxli Viola

Q: I was first introduced to Matt and Chris through a seminar held at B&H Photo in New York City. I proceeded to order the Luxli Viola LED light and am looking forward to working with it. I recall a reference to a better battery to use with the Viola than the one that comes with it (due to the short life of the battery), but I can’t find it in my notes. Please help me find the best battery for this kit. β€” Debi F.

A: First, I wouldn’t say the Viola’s battery has a short life. In fact, Chris claims to recharge his only every couple of months or so. That’s because he shoots mostly still photos, and he uses it only at night when very little power is needed to light a scene.

But if your usage drains your Viola faster than you prefer, you can get more run time by using the Watson NP-F550 replacement battery, which from my experience is very reliable.

If you want even longer run time for other applicationsβ€”say, if you’re shooting video, when you’d probably leave the light on for hours at a time at full powerβ€”you can get the even larger Watson NP-F770 battery. That should about double your run time.

If you want to spend a little more, the Sony versions of the NP-F battery are supposedly the best to be found. β€” Matt

5. Stars Trailing in Different Directions

Sotheast view in Sedona, Arizona. Nikon D4s, 14-24mm f/2.8 lens. 4 minutes, f/4, ISO 200. Photo Β© Tim Cooper.

Q: In Tim’s recent blog post β€œMaking the Move to Manual White Balance,” I can’t figure out how, in the last pair of photos outside Sedona, he managed to get the stars moving other than in concentric circles. Were some of them mirror-imaged to fill in areas where there was too much light, to let the stars show through? Thank you for satisfying my curiosity! β€” Marilyn O.

A: No mirror-imaging involved or required! Star trails move in different directions, angles and arcs depending on which direction you’re facing.

  • You get concentric rings from star trails only when you are shooting due north.  

  • When you are shooting east, they move from upper right to lower left.    

  • When you are facing west, stars move from upper left to lower right.

  • When facing due south, the stars go nearly horizontal across your frame.

For the image in question, I was facing southeast, so you are seeing the divergence of the east and south views.  If I had turned right a little bit more (south), I would have ended up with nearly all horizontal trails. If I had turned a little more to the left (east), the trails would have moved from upper right to lower left. I shot this photo with a very wide 14mm lensβ€”so wide that I actually captured a little of both views! β€” Tim

Chris Nicholson is a partner and workshop leader with National Parks at Night, and author of Photographing National Parks (Sidelight Books, 2015). Learn more about national parks as photography destinations, subscribe to Chris' free e-newsletter, and more at www.PhotographingNationalParks.com.

UPCOMING WORKSHOPS FROM NATIONAL PARKS AT NIGHT

Working in (and with) the Dead of Nightβ€”Photographing in Cemeteries

Burrishoole Abbey, County Mayo, Ireland, 2009. This image was made while leading a photo tour of western Ireland. The headstone was illuminated from the left with a Surefire G2 flashlight, and minimum aperture was chosen to maximize depth of field with the longer focal length. The underexposed background has just enough information to provide context, and the moon rising in the distance provides an additional counterpoint to the foreground subject. Canon 5D, Canon 28-135mm lens at 70mm. 13 seconds, f/32, ISO 100.

Wherever I travel, somehow I end up in graveyards. Ireland, Japan, Cuba, Texas …

It’s not that I’m preoccupied with death, but just that I find cemeteries to be interesting places reflective of culture, and most importantly, the residents usually don’t complain about trespassers. Oddly enough, Matt Hill and I first met in a cemetery while photographing the Headless Horseman in 2010! What better place to do some night photography in late October?

If you are lucky enough to live in a place with an intriguing graveyard, I recommend that you give it a try––but you might want to take a friend, especially if you are wary of headless horsemen or things that go bump in the night.

In the paragraphs that follow, I’ll offer some guidelines and suggestions for night photography in cemeteries. Be sure to pay attention to the image captions, as they contain all of the technical details and explanations of the illustrations.

Challenges and Opportunities

Aside from the creepy factor, there are no particular peculiarities to night photography in a cemetery any more than in our more usual nocturnal haunts. The terrain and lighting can vary from one to the next just as it can in any environment. Making successful images in a graveyard is dependent on finding an interesting subject and combining it with interesting light, whether you find that light or create it yourself. If you are fortunate enough to have a little fog as well, then you really can’t go wrong.

These two images were made on the same foggy night in May 2016. The cool-toned image is dominated by backlighting with a Coast HP5R LED flashlight supplemented by moonlight. Nikon D750, Nikon 24-120mm f/4 lens at 24mm. 30 seconds, f/5.6, ISO 800.

The warm-toned image is dominated by light from fog-diffused high pressure sodium vapor streetlights, with a key light on the cross from a Coast HP5R flashlight to camera right. Note that the 90-degree sidelighting exaggerates the texture in the cross, creating strong contrast in an otherwise soft scene. Nikon D750, Nikon 24-120mm f/4 lens at 50mm. 10 seconds, f/5.6, ISO 1600.

Conditions and opportunities in large urban graveyards might be very different from small rural ones, with the urban options being relatively unaffected by moonlight due to streetlight, while lighting in more remote cemeteries may be totally dependent on the phase of the moon. Just as with any other landscape, graveyards can be photographed in starlight, moonlight, streetlight, with light painting, or any combination of light sources.

If you’ve read many of my previous articles, you know that I like to revisit locations over time in different conditions (see β€œRevisiting Locations Can Lead to Seeing with New Eyes”). The two images below were made in the ghost town of Terlingua outside Big Bend National Parkβ€”the first under a full moon in 2007 and the second nine years later under a new moon. I tried as best as I could to recreate the composition from memory in the later shot, but the conditions were so different that the resulting images look like they were made in different places altogether.

I’d be hard-pressed to pick a favorite between the two, as I like them both. They are just different. Of course it’s more difficult to work in starlight, and we’re faced with the usual challenges of bumping up against the limits of our equipment with noise from high ISOs, short exposure times to preserve star points, and shallow depth of field from wide apertures; therefore, compromises will have to be made on a case-by-case basis to get the best results. Foregrounds are more dependent on light painting and will usually be underexposed in the absence of added light.

These two images were made nine years apart at the same location. The 2007 image was shot during a full moon at Dia de los Muertos, when candles illuminated many of the grave sites. The orange glow is from one such candle. There was no added light painting. Canon 5D and an adapted Nikon 28mm f/3.5 PC lens. 5 minutes, f/8, ISO 200.

The 2016 image was shot on a moonless night with fast-moving clouds in April, with Coast HP5R backlighting from camera left and a brief pop of bounced light in front of the fence with the same light source. Atmospheric conditions and added lighting make these two images of the same subject completely different. Nikon D750, Nikon 24-120mm f/4 lens at 24mm. 30 seconds, f/4.5, ISO 6400.

Modern vs. Historic

Every boneyard is different, and reflects the spirit(s) of the people buried there. The old cemetery at Terlingua is full of mostly Mexican and Mexican-American miners, many of whom died as a result of breathing the toxic mercury vapors that were part of the smelting process at the nearby cinnabar mine at Villa de la Mina. The humble wooden crosses lean in all different directions, and the place seems abandoned and forgotten except at Dia de los Muertos on November 1, when elaborate decorations festoon the graveyard and many of the graves are adorned with little skulls made of sugar.

Jacob Taylor has resided at Sleepy Hollow in Concord, Massachusetts, since 1767. The image was made in 2010 with a Surefire G2 flashlight from slightly above the stone, flagged with black mat board so the camera didn’t see the light. The three headstones in the middleground were lit with the same light source, but indirectly. I bounced the light off of a 12-inch Wescott reflector from behind the central stone. The shallow depth of field and strong vignetting also help to isolate the primary subject. Canon 5D Mark II, Canon 50mm f/1.4 lens. 3 minutes, f/4, 100 ISO.

Jacob Taylor is buried in the Sleepy Hollow cemetery in Concord, Massachusetts. Many of the graves there date to the late 17th and 18th centuries, and the elaborately hand-carved tombstones chronicle the evolution of styles and trends in funerary art during the Colonial period of U.S. history.

The modern side of a different Sleepy Hollow Cemetery in Tarrytown, New York, dates from the first half of the 20th century and contains large family crypts and mausoleums of wealthy industrialists. The image below is the Rockefeller family mausoleum, which reflects the wealth and power its residents. The Sleepy Hollow in Tarrytown is the final resting place of Washington Irving, the author of The Legend of Sleepy Hollow and the tale of the previously mentioned truncated equestrian. More on him in a minute.

The Rockefeller Crypt at Sleepy Hollow in Tarrytown cost $2 million to construct in 1920. That would be about $22.5 million in today’s dollar. That’s a lot of money to house the family after they are dead and gone, but when your name is Rockefeller, you can afford it. Shot in 2012, with varying cloud cover reflecting mixed streetlighting from Tarrytown and the Tappan Zee Bridge, the combination of which is responsible for the color in the sky. The monument was lit from left, right and low to the ground with a Surefire G2 incandescent flashlight for three of the four minutes during the exposure. Canon 5D Mark II and an adapted Nikon 28mm f/3.5 PC lens. 4 minutes, f/8, ISO 100, with a second, shorter exposure for the moon.

Lighting

Take advantage of multiple mixed lighting sources rather than trying to fight them. Burial Hill in Plymouth, Massachusetts, is a fantastic example of a graveyard that beckons photographers to explore the grounds and very old headstones. Many of the Mayflower Pilgrims and their descendants are buried here, and the varied terrain, the large, ornate stones, and especially the variety of light all make for great photo opportunities. There are no lights in the graveyard proper, but it is in the heart of downtown Plymouth and is surrounded by the lights of the small city of 60,000.

Burial Hill in Plymouth, Massachusetts, is one of my favorite cemeteries. This image, made on top of the hill, shows trees lit by the sodium vapor lights of town, but the top of the hill is relatively dark except for some moonlight. The headstones were backlit with a Coast HP7R LED flashlight, with a little β€œghosting.” Image made in 2014. Canon 5D Mark II and an adapted Nikon 28mm f/3.5 PC lens. 4 minutes, f/5.6, ISO 100.

As is often the case with light painting, sidelighting and backlighting are particularly effective techniques to show the engraved text on gravestones. Mary Meriam and the cheerful winged skull that adorns her gravestone have resided six feet under in Concord since 1693, but despite the many years that have passed, both the ornaments and text on the remarkably well-preserved stone are easy to read, made more so by the strong sidelighting. The key to using this technique effectively is to balance the ratio of added to ambient light in such a way that it draws attention to the stone, but still gives enough exposure to the background to provide context.

This image was made in 2010 with an LED flashlight from camera right and slightly above, just out of frame. I held the light even with the edge of the stone to emphasize the deep and well-preserved engraving. I also swept the light across the ground behind the stone to help separate the middleground and background. Canon 5D Mark II and Canon 50mm f/1.4 lens. 2 minutes, f/5.6, ISO 100.

Models

Sometimes the best models are the dead ones. I’ve had the good fortune to both photograph and teach workshops at the Sleepy Hollow Cemetery in Tarrytown at the invitation of the cemetery director.

It was at the first of these workshops that Matt and I first met while coaxing the elusive Headless Horseman into posing for our students. Aside from the issues of ectoplasm not usually registering on sensors or film, the transient and transparent nature of ectoplasmic beings, and their generally unpleasant temperament, Matt and I have been able to document his regal countenance on multiple occasions. We eventually figured out that the promise of a fresh pumpkin (or a six-pack of Captain Lawrence IPA) was all it took to get him and his noble steed to stand still for a few minutes while we fiddled with lights and made a few exposures.

All kidding aside, adding models to your graveyard images is a great way to add some life to the scene. Costuming appropriate to the locale is important, and lighting the figure separately from the background is key. Flash is usually easier to control, and also works well for animate or semi-animate objects that tend to move during long exposures. Combining a long exposure for the overall scene with a burst of light from a strobe can be used to great effect. Backlighting is a great way to separate a dark figure from a dark background, just as silhouetting your model against an open sky may also be. Lighting from below is a way to make anyone look scary.

Hugh Francis is the official Headless Horseman of both Tarrytown and Sleepy Hollow, New York. He’s held that unusual position for many years. Outside of the Halloween season, he maintains a farm in upstate New York where he cares for retired New York City police horses, which he recruits to accompany him when he goes out to search for his head. These images were made between 2011 and 2014.

Lighting by Matt with a Profoto AcuteB with a Magnum Reflector and grid on a stand with a small softbox directly behind the horse, and I used a Surefire G2 incandescent flashlight for fill from camera right. Canon 5D Mark II and an adapted Olympus Zuiko Shift 35mm f/2.8 lens. 30 seconds, f/5.6, ISO 1600.

Lighting by Matt with a Profoto AcuteB bare-bulb directly below the horse and rider, and I used a snooted Surefire G2 incandescent flashlight for the cross edge lighting from camera right. Canon 5D Mark II and an adapted Nikon 20mm f/3.5 lens. 30 seconds, f/5.6, ISO 1600.

Lighting by Matt with a Profoto AcuteB on a stand with a small softbox directly behind the horse, and I used a Surefire G2 incandescent flashlight for fill from camera left. Canon 5D Mark II and an adapted Nikon 20mm f/3.5 lens. 4 seconds, f/5.6, ISO 1600.

Access

There are a few logistical considerations that should be addressed.

Many cemeteries are officially closed at night, and some have fences to keep photographers and teenagers out, and the spooks in. It’s usually the larger historic cemeteries that are restricted. Sleepy Hollow in New York is one such place, while the smaller but equally compelling Sleepy Hollow in Massachusetts is wide open 24/7.

Do your homework and make a few calls if you want to go through the gate rather than climb over the fence and take a chance on getting kicked out, arrested or buried alive. It may be possible to gain access with the promise of sharing your images, or by simply showing some examples of what you would like to do.

Remember, asking to take pictures in a graveyard at night might seem a little out of the ordinary, so having a way to show that you’re not a weirdo can be helpful.

Safety

Perhaps the most likely thing to go bump in the night when photographing is graveyards is your head or camera hitting a gravestone after tripping over other stones or the precariously low fences sometimes placed around family burial plots. Take a partner with you, or go alone if you dareβ€”but just for peace of mind, this kind of activity is better with a friend.

Have a Grave Time!

Opportunities abound for photographing in cemeteries at night, and it’s good fun too. Just be sure to get permission, as they tend to be busier this time of year with ghost hunters, teenagers and disgruntled spirits, and the police make frequent patrols in many places. Take a friend or two to keep you company and to help with the lighting.

We’d love to see whatever you come up with, so please post in the Comments section, to our Facebook page, or to Instagram and tag us (@nationalparksatnight).

Be careful out there, and Happy Halloween!

Hugh trying to figure out where to pour his beer after a hard night’s work, 2016. Coast HP5R flashlight from camera left. Hugh’s dark cape is severely underexposed, but that seems to be the least of his worries. This was a quick grab shot at the end of a long night and we were all having a good laugh at his expense. Hugh is a true gentleman, and a very good sport. Nikon D750, Nikon 24-120mm f/4 lens at 27mm. 8 seconds, f/4.5 at ISO 800.

Lance Keimig is a partner and workshop leader with National Parks at Night. He has been photographing at night for 30 years, and is the author of Night Photography and Light Painting: Finding Your Way in the Dark (Focal Press, 2015). Learn more about his images and workshops at www.thenightskye.com.

UPCOMING WORKSHOPS FROM NATIONAL PARKS AT NIGHT