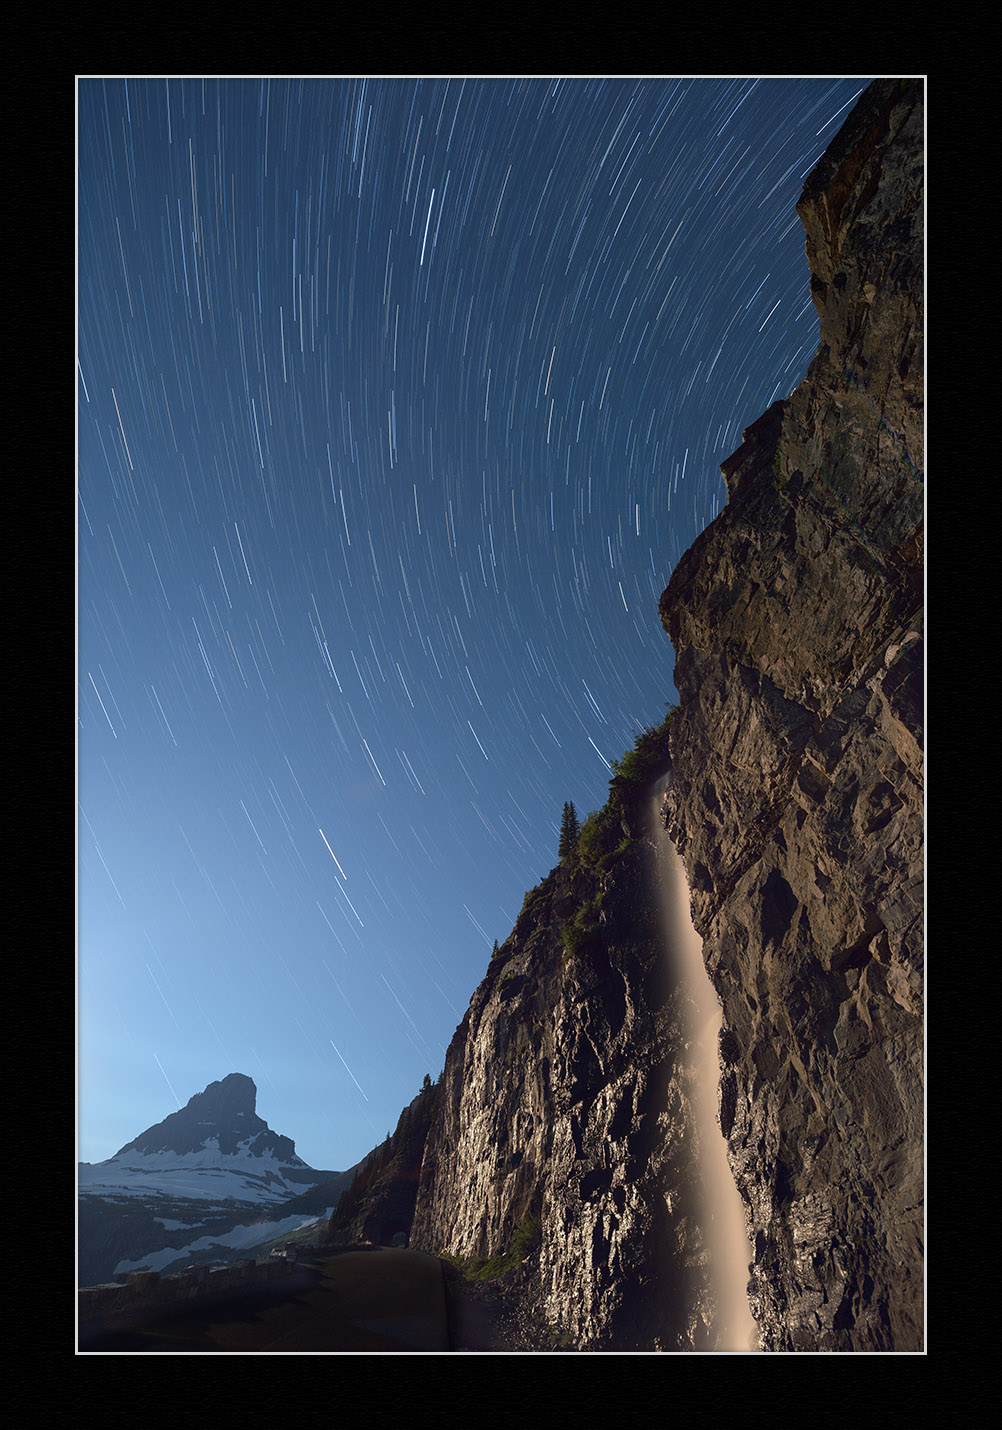
How I Got the Shot: Waterfall and Clements Mountain in Glacier National Park

β€œClements Mountain, Star Trails, Waterfall.” Β© Tim Cooper.

β€œClements Mountain, Star Trails, Waterfall.” Β© Tim Cooper.

The Location

I am fortunate to live in Montana. It’s a beautiful state filled with wonderful people and fantastic landscapes. My β€œbackyard” is Glacier National Park. Glacier is truly one of America’s great alpine experiencesβ€”from gorgeous glaciated peaks to alpine meadows carpeted with wildflowers to the host of wildlife visible on a near daily basis. I take every chance I can to get up to the park.

Early last summer I made this image while scouting for our upcoming National Parks at Night workshops in August and September. (While the first week of this workshop is already filled, the second week still has some spots available. Check out our workshop page for more information.)

Luck vs. Planning

When it comes to photography, I always give luck a little credit. Did the clouds cover the sky? Or did they add a nice accent? Did it rain on the night I had planned to shoot? There are so many small blessings that are easy to overlook.

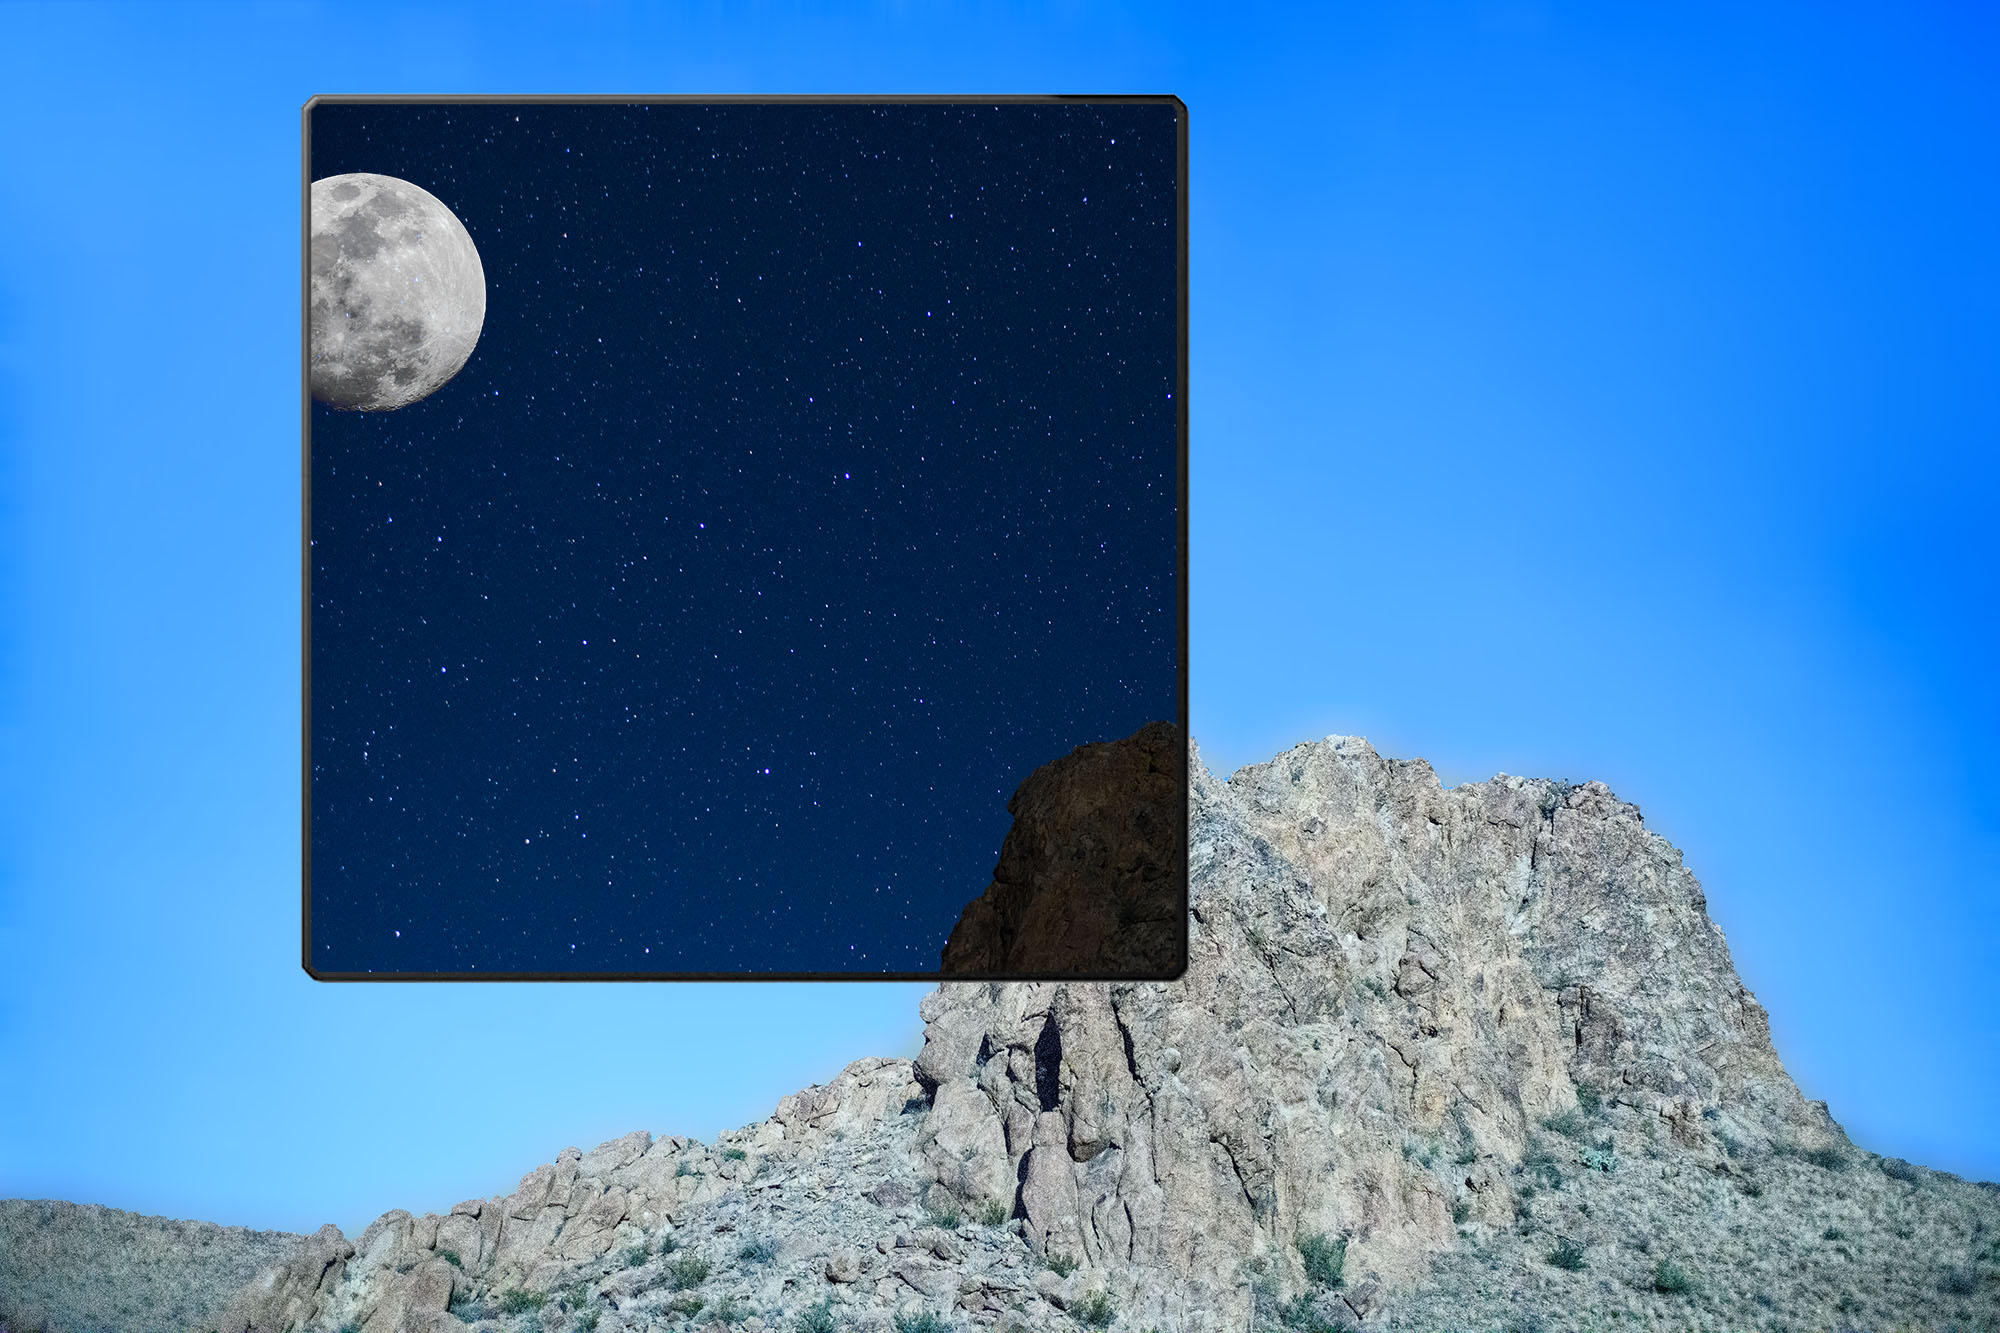
Luck, however, is no substitute for planning. If you read this blog often then you have seen us discuss many times the importance of planning a night shoot. My familiarity with Glacier helped enormously with planning this shot. I already knew the location of the waterfall and exactly where I wanted the moon to be so that it would backlight the water. It was just a simple matter of using the indispensable phone app, PhotoPills, to determine when the moon would reach the necessary spot in the sky (see Figure 1).

Figure 1. The zoomed-out and zoomed-in views of the shoot location, as seen in PhotoPills’' Planner mode. The blue lines told me where the moon would be at different times of the night, which told me when to shoot for the effect I wanted.

The Exposure

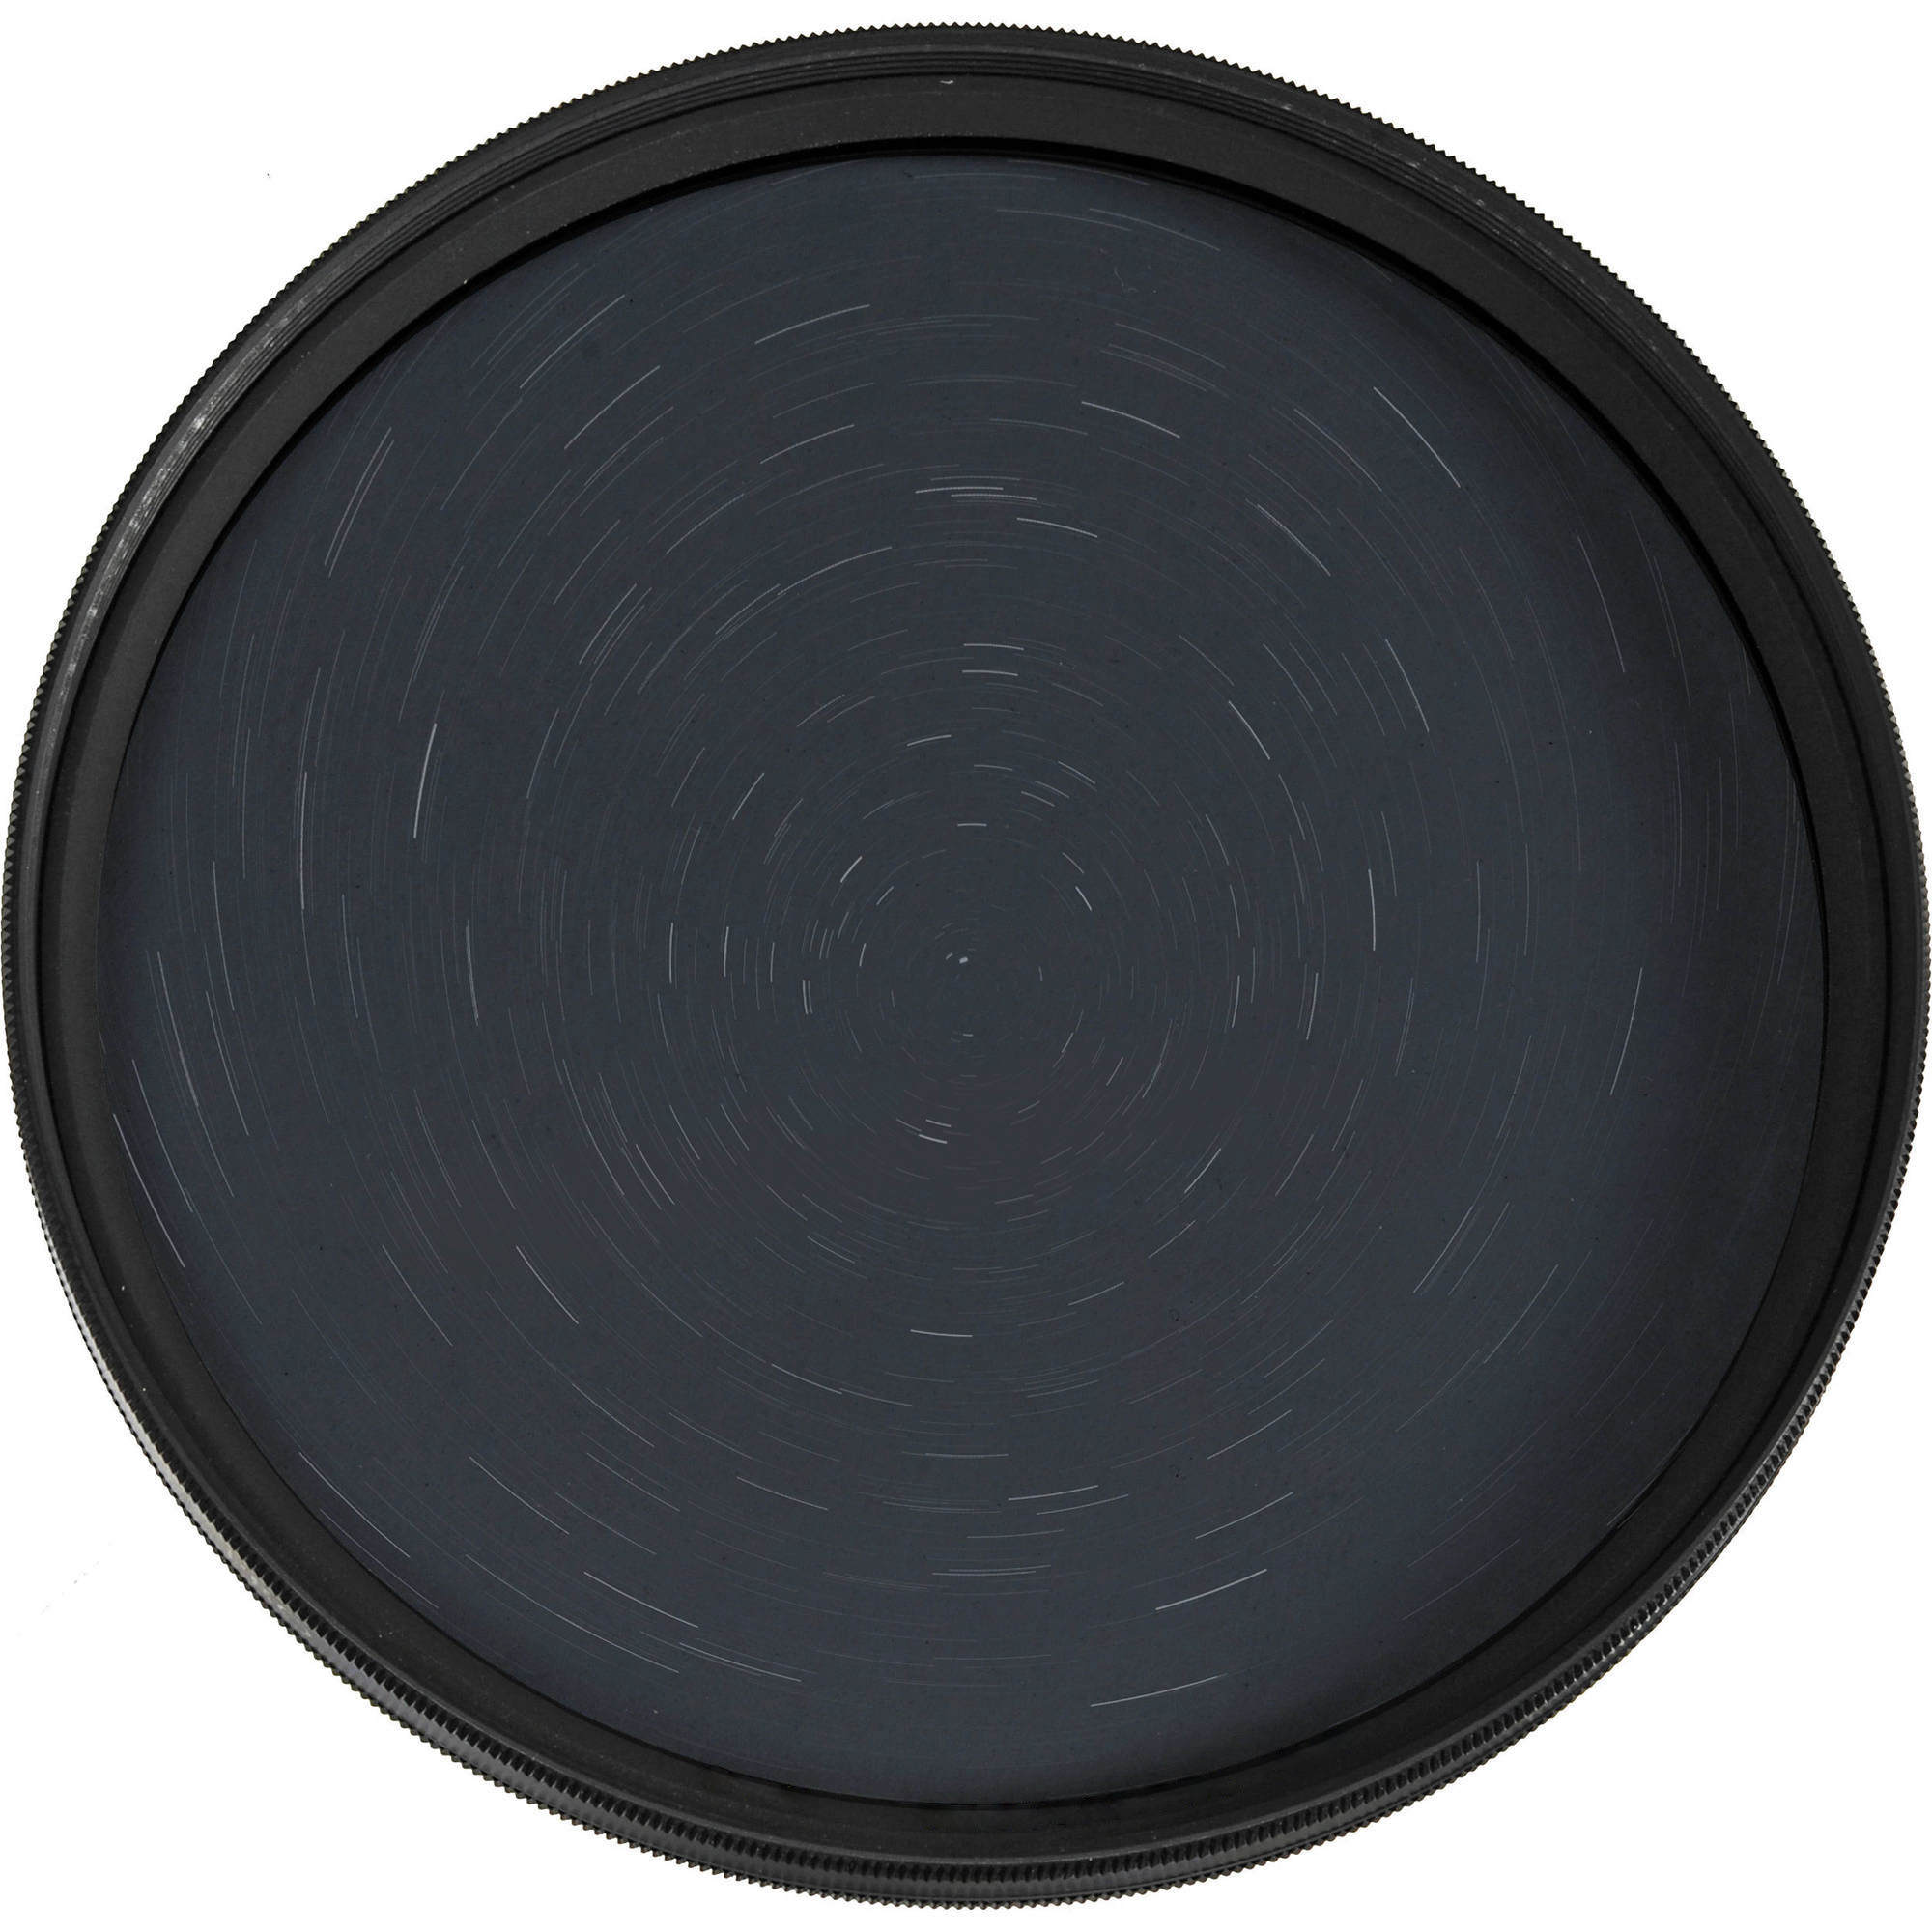
I wanted to use the moon to illuminate the falls, but I also envisioned star trails rather than star points in my image. To create the effect of star trails, you have to make a very long exposureβ€”15 minutes, 30 minutes, an hour or even longer. This makes the stars appear as if they are trailing through the sky. Another method to create these trails is to break up the exposure time into shorter chunks, and then stack the resulting set of images in post-production. This is especially helpful under bright moon situations or when you want to light paint.

Using multiple short exposures was my plan for this setup. The first step was to calculate an exposure using a high ISO test (i.e., the 6 Stop Rule). Setting my Nikon D4s to ISO 3200 and f/4, my final test shot (Figure 2) was exposed for 30 seconds.

Figure 2. Test shot at 30 seconds, f/4, ISO 3200.

The Shoot

Typically night photographers use an ISO of 6400 for test shots because, according to that 6 Stop Rule, we know that an exposure time of X seconds at ISO 6400 equals X minutes at ISO 100. This is a very handy little trick for calculating long exposures easily.

Because my successful test exposure was 30 seconds at ISO 3200, which equals 15 seconds at ISO 6400, then my long low-ISO exposure would be 15 minutes at ISO 100. Orβ€”to shorten things up a bitβ€”8 minutes at ISO 200. Using this exposure, I could shoot multiple frames at 8 minutes and blend them later in post using the star-stacking technique.

This evening, however, I either miscalculated or mistakenly set my camera wrong. My final exposures (Figure 3) ended up being shot at 5 minutes, f/4, ISO 100. That’s about two stops underexposed!

Figure 3.

I didn’t notice that at the time. I finished shooting and had to leave immediately, so there was no time to reshoot the frames. I was destined to have to fix it later in post.

Post-Processing

After downloading my images, the first post-processing edit was adjusting the Exposure slider to account for the underexposure out in the field. After increasing the exposure, the final set of images looked like this:

Figure 4.

The next step was to blend all the frames together to create the star trail effect. I began by selecting all of the images in Lightroom. Next, from the menu I selected Photo > Edit In > Open as Layers in Photoshop. This opens all of the images into Photoshop as layers within one file.

Once the file opened, I clicked on the top layer, held down the Shift key, then clicked on the bottom layer. This selects all of the layers in the file.

Next, in the Blending Mode drop-down list (circled in red in Figure 5), I selected Lighten (Figure 6).

Figure 5.

Figure 6.

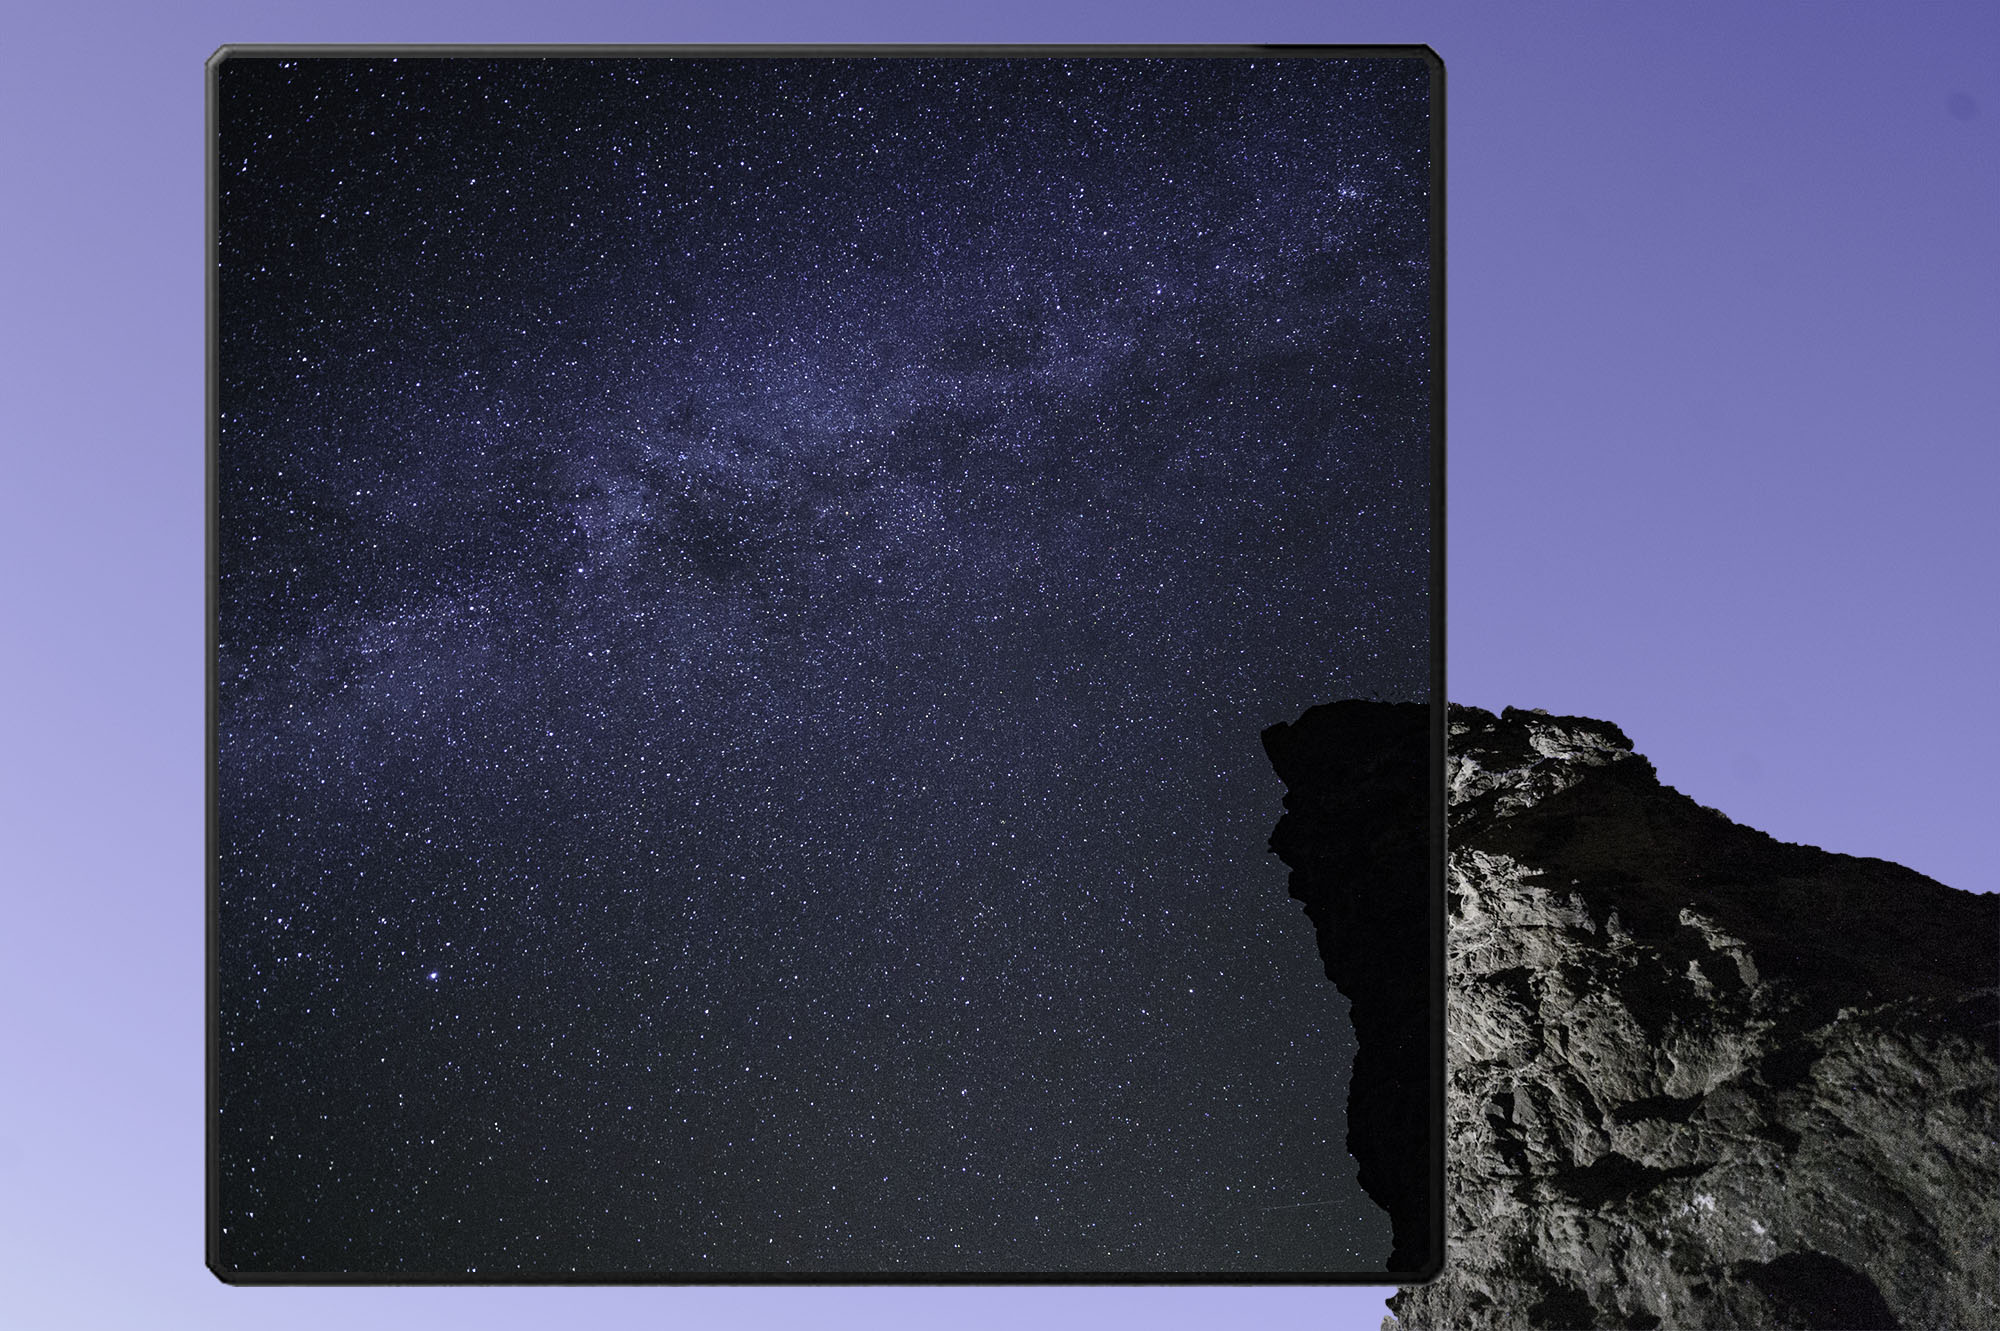
This blending mode allows the brightest part of each layer to show through on the final image, which in this case creates the effect of the stars trailing across the sky. Figure 7 shows the result of blending the images with this technique.

Figure 7.

Did you notice the multiple car headlights that showed up after blending the layers? They were in the first, second and last photo frames (Figure 8). Because using the Lighten mode reveals the brightest parts of each layer, all the headlights showed up after blending.

Figure 8.

So, the next step was to remove the unwanted car lights. One of the benefits of stacking frames rather than taking one long exposure is that you can use layer masks to remove unwanted artifacts that show up in just a few frames rather than overwhelming an entire final photo. To do this, I clicked on the first layer that contained headlights to select it. Then at the bottom of the Layers palette I clicked on the Add a Mask icon (Figure 9).

Figure 9.

Figure 10.

Next I selected the paintbrush tool and chose black as my foreground color. Then I just painted on the mask over the area I wanted to remove. Notice in Figure 10 how I painted over the tunnel where the car headlights appeared. Also notice the corresponding black area on the white mask thumbnail, indicating the shape and location of the mask.

I followed the same steps for the other two layers with the artifact, painting out the headlights further up the road. Figure 11 shows the three masks with black painted on them covering up all of the headlights that exist on the different layers.

Figure 11.

Figure 12.

Finally, I wanted to separate the cool tones of the sky from the foreground waterfall. I clicked on the bottom layer, chose the Quick Select tool and then selected the foreground waterfall and cliff face (Figure 12).

Then I created a Color Balance layer by choosing Layer > New Adjustment Layer > Color Balance. Adding some warmth via the Red and Yellow sliders started to really separate the warm colors in the foreground from the cool colors of the background.

Figure 13 shows the final image.

Figure 13. Five stacked frames, each shot at 5 minutes, f/4, ISO 100 with a Nikon D4s and Nikkor 14-24mm f/2.8 lens zoomed out to 14mm.

While this may sound like a lot of work, after a little practice in Photoshop, you’ll find that completing these types of images takes no time at all!

Tim Cooper is a partner and workshop leader with National Parks at Night. Learn more techniques from his book The Magic of Light Painting, available from Peachpit.

UPCOMING WORKSHOPS FROM NATIONAL PARKS AT NIGHT

The Night Photography Game-Changer: Day for Night Filters Now Available

At first glance, the National Parks at Night mission might appear to be solely about venturing into parks in the dark to teach night photography. But our broader mission is much … well, broader. It’s about pushing the envelope for the entire world of night photography.

To that end, we’ve been quietly working hard for the past 14 months to develop our first tangible productβ€”a set of tools that will at once help established night photographers expand their creative potential and give new night photographers an easier way into the niche.

And finally, we are very proud and excited to announce the National Parks at Night β€œDay For Night Filters.”

prodcut 5.jpg

This is a toolkit of seven classes of filtersβ€”available individually, in sets or in one comprehensive packageβ€”designed to allow certain types of night photography to be executed even when conditions aren’t right for traditional approaches to shooting in the dark.

The idea behind the filters is born from the old-time filming technique of β€œday for night”—essentially, using daytime light conditions to produce a nighttime look. But while the film crews of yesteryear generally accomplished this effect simply by underexposing, this toolkit goes a step further.

How The Filters Work

All our filters feature a neutral density (ND) base layer, which is then etched to produce different common astro-landscape looks when photographing a daylight scene. The etched portions allow daylight in while the ND portions keep other areas dark. The combination allows for a wide range of effects, from star points to star trails to the Milky Way and even auroras! Plus much, much more.

The ND portions, however, are not completely neutralβ€”they have a cool-toned coating (mired-blue, for the tech-minded reader) that produces a truer β€œnighttime” look. Conversely, the etched portions of the filters have a mix of warming tones. This DualTemp (patent pending) combination of these two color-correcting filter technologies produces images that look exactly as if they were photographed at night.

The Toolkit

Our initial rollout is a selection of filters crafted to reproduce the most popular night photography scenarios, as detailed below.

(Unless otherwise noted, all filters are available in rectangular format in sizes 85mm, 100mm and 165mm.)

Star Points Filter

The most basic of our Day For Night Filters is the β€œStar Point,” which allows you to photograph β€œunder a night sky” no matter what time of day you’re shooting. The neutral density overlay is pocked with tiny pits, each a different size with subtle variations in color temperature, all of which combine to create a highly realistic starry sky effect when shot with daylight color temperatures.

The Star Points kit includes three filters with different densities of stars, for maximum creative leeway.

Star Trails Filter

Sometimes stationary stars aren’t enough. Enter our β€œStar Trails” filter, which allows you to create the illusion of bending time, even with considerably short exposures.

These filters come in different star densities (low-density for fewer star trails, high-density for more), and also come in different trail lengths (4mm, 16mm and 32mm) to mimic various long-exposure times. The entire set will allow for maximum creativity, giving the option to swap in different effects for different scenes.

Star Circles Filter

One of the coolest tricks to round out the night photographer’s repertoire is the ability to produce star circles by pointing north on a clear night and opening the shutter for a good hour or more. But now you can create the same effect pointing in any direction (opening up many more possible compositions), and in much less time!

Our β€œStar Circles” filters come in two varieties:

Rectangular, which offers a fixed set of star circles that can be positioned to suit the composition by moving the filter up or down in the holder.

Circular, which features a rotating ring that makes the star trails shorter or longer.

Milky Way Filter

Perhaps the most popular night photography achievement of the past decade is the ability to capture the dense cluster of stars of the Milky Way. But even though modern camera technology has put our galaxy in reach of shutterbugs throughout the solar system, photographing it still comes with challengesβ€”namely, having to wait for the right time of year to view it, the right time of night for it to appear over the horizon, and its propensity to hardly ever be hovering in a compositionally pleasing place in the scene.

All those issues are solved by using our β€œMilky Way” filter. It comes in a standard rectangular format, which enables you to place the galactic core anywhere you want in the sky of your composition, and you can then adjust the angle of the core by rotating your filter holder.

Moon Phases Filter Kit

Normally, if you have a solid idea of how you want the moon to look in a scene, you need to do a lot of planning to make it happen. Earth’s only satellite floats all over the night sky, and its particular phases appear only once per month.

All these challenges dissipate once you begin using our β€œMoon” filters. A set of 10 filters allows you to add the moon to any scene, in any way you want. The entire β€œMoon Phases” kit features the moon in three different sizes (grande, venti and trenta) and four different phases (full, quarter, crescent and new).

Moon filters can be used alone for a clean-sky effect, or stacked with Star Point filters for a combined, starry sky effect.

Aurora Filter

We almost didn’t manufacture this filter because of the technical complications first in manipulating the necessary technology, and then in actually constructing the glass. But to be honest, it’s the filter we’re most excited about: the β€œAurora.”

Until now, photographing auroras has been the playground only of those willing to travel to far-flung polar regions, such as the popular photography destinations of Iceland, Norway and Red Dog Mine, Alaska. But if you want to shoot the northern lights from your own back yard, then this filter is all you need.

Our Aurora filters come in two varieties:

Rectangular, which offers a fixed aurora that can be positioned to suit the composition by moving the filter up or down in the holder.

Circular, which features a rotating ring that changes the shape of the aurora!

(If you live in the Southern Hemisphere, please be sure to order the β€œSouthern Lights” filter for the most accurate results.)

BONUS! β€” The Keimig Firework Filter

For a limited time only, free with any purchase of three or more filters is an out-of-the box idea from National Parks at Night partner and instructor Lance Keimig, whose motto is, β€œThere’s no night landscape that doesn’t look better with fireworks!”

The β€œKeimig Firework Filter” is rectangular, making it positionable so that you can place the firework where it serves the composition best. Now any day (or night) can be the 4th of July or New Year’s.

(Coming this December, be sure to look out for our β€œKeimig Kristmas Lights” filter set, which will accomplish similar results. Decorate the rim of the Grand Canyon!)

Filters That Solve Problems

We’re confident that our Day For Night filters will solve many of the entry barriers to nocturnal photography, and will also help ease the burdens of experienced night photographers. Quite simply, night photography is hard, and these filters make it easier.

  • No more need to wait for Milky Way season.

  • No more need to travel to aurora β€œdestinations.”

  • No more in-the-dark focusing hassles.

  • No more looking for something to do during crazy-long exposures.

  • Get to sleep at a reasonable hour.

How to Purchase

All of our Day for Night filters are being carried exclusively by B&H Photo in New York City, as well as the camera department of the General Store in Bodie, California, and are available for purchase immediately. Please click the button below to order.

Get Creative!

The only thing that excites us more than developing and releasing these filters is that now we get to see what you do with them. We encourage you to get out into the field, use these great new night photography tools, and share your images in the comments section.

Seize the night! (Or day!)

Chris Nicholson is a partner and workshop leader with National Parks at Night, and author of Photographing National Parks (Sidelight Books, 2015). Learn more about national parks as photography destinations, subscribe to Chris' free e-newsletter, and more at www.PhotographingNationalParks.com.

UPCOMING WORKSHOPS FROM NATIONAL PARKS AT NIGHT

Shooting for the Moon: How to Photograph Earth's Little Cousin

Humankind has been fascinated with the moon since the birth of photography. One of the first things that was attempted during the daguerreotype days was to try to record the moon in all its detail. John Williams Draper was the first to successfully mount a camera box onto a handmade telescope and track a full moon for 20 minutes using a heliosat.

Oldest surviving image of the moon. John Williams Draper, 1840.

That print from 1840 has unfortunately sustained extensive damage and now looks like a bubbly surreal etching. But this effort kick-started astrophotography, and we have many remaining images of our satellite from that early era. The first detailed images are credited to John Adams Whipple, who starting in 1849made daguerreotypes of the moon using the telescope at the Harvard College Observatory in Cambridge, Massachusetts. Other early successes include an image by Henry Draper (John’s son), shot from Hastings-on-Hudson, New York, in 1863.

"View of the Moon,” by John Adams Whipple, 1852.

β€œPhoto of the Moon,” by Henry Draper, 1863.

Modern Moon Photography

Photographically speaking, the moon is closer than ever before, so how can we improve our moon shots before we start colonizing?

The three things to consider when shooting the moon are:

  1. the phase (as it relates to brightness)
  2. cycle (angle)
  3. elevation (how high is the moon in the sky?)

Also remember that moonlight is actually sunlight reflecting off a gray surfaceβ€”so it’s pretty bright. Most of the time the tricky part is that the moon is brighter than the rest of the scene. For this blog post, we will focus on shooting the moon while it is full and most luminous.

Exposure

The Looney 11 Rule continues to be a great starting point for figuring out the correct exposure for a craterlicious moon. The rule is:

For astronomical pictures of the moon’s surface, set your aperture to f/11 and match the shutter speed to your ISO.

For example: 1/125, f/11, ISO 100.

However, please rememberβ€”and I can’t stress this enoughβ€”that the formula above does not always give you an exact correct exposure, but rather a starting point. Use the formula to get an exposure that will likely be close, and then adjust to precision using your histogram as a guide.

Gear

One challenge to consider is that ideally you need a long lens to focus in and get close to the moon. How many of you have taken pictures of a little while circle in the sky? Minimally, I’d use a lens that can get to 300mm, but the closer the better!

We were very fortunate at our β€œBlue Supermoon” workshop in Biscayne National Park in January, as Nikon sent us their majestic telescope of a lens, the 800mm f/5.6. This is currently Nikon’s longest lens. The 800mm generally attracts the high-end market of wildlife and sports photographers, but for shooting the moon, nothing else of this quality gets you closer. The lens comes with a matched 1.25X teleconverter that, when mounted, makes this a 1000mm lens!

We still didn’t think that was close enough, so we attached the lens to Nikon’s top APS-C camera, the D500. The crop sensor on the D500 turned our 1000mm lens into a 1500mm! Talk about extreme close-up!

The moon photographed at a focal length of 100mm.

… 300mm.

… 1200mm.

… 1500mm.

The challenge we encountered with the 1500mm-equivalent lens is that it was very big and heavy. We mounted it to a Wimberley Gimbal head on a Gitzo mountaineer tripod. This allowed us more precise control so that we could easily track the moon, as the magnification caused it to be out of the frame in just about a minute. Even mounted on this rig the lens would easily shake in the breeze, so later in the evening we added a second tripod (a Gitzo 3543) under the lens hood for two-point contact and stability.

Henry Draper’s setup in 1863 versus ours in 2018.

Freezing the Action

Which brings me to the next factor when photographing the moon: If you are shooting handheld or with a large lens (400mm or longer), then your shutter speed should match your focal length. We found the shutter speed of 1/1000 to be acceptable for our setup, which (per the Looney 11 Rule) meant we had to boost our ISO to 1000.

Craterlicious moon, Biscayne National Park. Nikon D500 with a Nikkor 800mm f/5.6. 1/1000, f/11, ISO 1000.

Find a Foreground

If you want to level up your moon game, the next challenge is finding a foreground for the moon to intersect or play against. This will give more context and tell a better story about your lunar experience.

In order to do this you’ll need to do some planning. The best tool to help with this is the PhotoPills app. You can go into the Planner mode, drop your pin anywhere in the world and see where and when the sun and moon will rise and set in that exact location on any day of the year.

When I was scouting to shoot a supermoon in late 2016 (below), using PhotoPills I could see the time and path of where the moon would rise. I was interested in having it intersect with an icon of New York City. So I dropped my pin at various positions until I found the best pier at South Street Seaport to see the moon rise through the Brooklyn, Manhattan and Williamsburg bridges.

I needed a 3-minute window for the supermoon to shine through the clouds and bridges, a juxtaposition of time and place that required some serious planning with the PhotoPills app. Nikon D750 with a Tamron 150-600mm f/5-6.3 lens set to 370mm. 1/2, f/11, ISO 400.

In the PhotoPills Planner mode we can see the color code of the tableβ€”light blue means moonrise, which was going to happen at 5:14 p.m. that evening (November 11). I set the pin to where I would stand and the light blue line showed the path (azimuth) of the moon from that point. (See Figure 1, below.)

Figure 1.

Figure 2.

You can use the touchscreen on your phone or tablet to move the bottom time bar back and forth to see how the path of the moon (or sun) will change throughout the day. (Figure 2.)

Shoot During Twilight

Shooting the full moon is usually most effective the day before it’s 100 percent full. That’s when the moon will be rising just before sunset, allowing you to shoot it approximately 30 minutes prior to sunset and into civil twilight. This gives you more time to photograph the moon in better and more balanced light. (For more about working at this time of day, see Tim’s excellent blog post β€œOut of the Blue: The Importance of Twilight to the Night Photographer.”)

The next full moon we will encounter will be next Saturday, March 31 (which, incidentally, will be our second blue moon of the year). According to PhotoPills, at my home in New York City that day the moon will rise at 7:38 p.m. and the sun will set at 7:20 p.m. Civil twilight will be from 7:20 p.m. to 7:48 p.m. This would give us only 10 minutes to shoot the moon during ideal light, all during civil twilight.

However, the day before (Friday, March 30), the moon will rise at 6:31 p.m., the sun will set at 7:19 p.m. and civil twilight will end at 7:46 p.m. This will give us over an hour of shooting the moonβ€”during golden hour, sunset and then blue hour. The moon will also be higher in the sky, providing more opportunities to play it against any interesting foregrounds.

This image was taken during  golden hour, providing the opportunity for a rich and balanced exposure. Sony RX100 set at 92mm. 1/60, f/10, ISO 125.

I was able to just eke out this shot of the full moon and get some detail in the buildings during nautical twilight. Fuji X-Pro1 with a Fuji 55-200mm f/3.5-4.8 lens set at 200mm. 1/250, f/8, ISO 400.

Wrapping Up

We hope these tips have inspired you to incorporate the craterlicious moon more into your night work! We’d love to see what you do. As you photograph the full moon March 30 and other months, please post your images in the comments section.

Gabriel Biderman is a partner and workshop leader with National Parks at Night. He is a Brooklyn-based fine art and travel photographer, and author of Night Photography: From Snapshots to Great Shots (Peachpit, 2014). During the daytime hours you'll often find Gabe at one of many photo events around the world working for B&H Photo’s road marketing team. See his portfolio and workshop lineup at www.ruinism.com.

UPCOMING WORKSHOPS FROM NATIONAL PARKS AT NIGHT

How I Got the Shot: Heather Whatever at Rockaway Beach

Heather Whatever at Rockaway Beach. Β© Matt Hill.

The early fall evening at Rockaway Beach seemed to echo the buzz of relaxing sun revelers and carousers. We approached the shore with Heather Whatever, a local burlesque performer in NYC, and chatted about how β€œat least this time it’ll be warmer. …” (Last time Heather had collaborated with us, she’d been knee-deep in the fresh-fallen snow of a private backyard in Brooklyn. This time was downright balmy.)

The Goal: Bake more art for my series Night Paper (note: link NSFW).

The Method: Combine long exposure, flash and a flashlight to make a kinetic night portrait.

The Aesthetic: brilliant white hand-cut paper fashions, including a mask and body piece, along with Heather’s natural beauty (and crazy cool enthusiasm).

Night Portraiting

There are a dozens and dozens of ways to make portraits at night. During the course of developing my artistic voice for Night Paper, I zeroed in on tactics and methods that helped me solve the question I had.

What question, you may ask? How can I make a portrait that dilates time, adds overt and subtle surreal elements, yet retains identifiable elements of classic portraiture?

It’s crucial to have a mission. Once you have that, you can begin to make decisions about what you’re going to do to reach the goal.

The Shoot

Our first location was the stone jetty.

I established a baseline exposure using the high ISO test. I wanted to retain the highlights in the shoreline buildings at the bottom right, plus nab some of those stars peeking out.

Once I got that, I pulled out a pair of speedlights that mount in a portable beauty dish, and added the diffusion sock over the end. I mounted the setup on a light stand and placed it about 4 feet away to the left and about 4 feet above Heather.

I grabbed my trusty Sekonic L-308 flash meter and adjusted the output to match my ambient exposure. Essentially, that means turning the power of both speedlights up or down until the aperture/ISO combination matched the f/stop set on my camera.

I then moved my attention away from technical matters and focused on Heather’s costume and pose, and on connecting with her to start a portrait session.

In beauty lighting, I prefer the face to turn toward the light source. I find the shadows to be complimentary. The shadows create structure and depth, especially on rounded contours such as the thigh, cheekbone and jaw. It’s not a rule, but it’s where I start, and I experiment from there.

We achieved the shot I loved most from this scene. It satisfies my mission:

  • It looks like a human.

  • It’s well exposed.

  • There are elements that show the passing of time (stars, soft surf, edge blur from behind).

  • The outfit adds the surreal what-is-going-on-here? component.

17 seconds, f/4, ISO 200. Nikon D750, Zeiss 15mm Distagon f/2.8 lens.

I usually shoot two to three scenes during every night portrait session. Our second location that night resulted in another series that I adore. Because the haze was coming in and there was a lack of distant lights, I ramped up my exposure to 49 seconds. I added a 65-degree long-throw reflector to the flashes and a grid to eliminate light spill.

Every instance you see where Heather is β€œfrozen” was created with flash. The rest of the effect is a result of the following: During the open shutter, I walked into the edge of the surf at left and cupped my hand around the end of my Coast HP7R flashlight to create a snoot that I could open and close by squeezing and un-squeezing my hand. I pulsed that beam of light on Heather as she frolicked in the breaking waves.

It was completely unknown what would happen. Except the magic that did.

Success! Very surreal, with recognizable human elements.

Wrapping Up

I hope you try your hand at telling stories with people at night via portraiture. Admittedly, it requires mastery of separate practices in night photography, and a willingness to work with people. But if you choose to climb that mountain, it’s worth the effort. Your art will amaze you.

For further perusal …

And finally: Want some hands-on instruction and immediate feedback for doing this kind of creative work? Join me on the 2018 Night Portraiture Workshops with National Parks at Night.

Matt Hill is a partner and workshop leader with National Parks at Night. See more about his photography, art, workshops and writing at MattHillArt.com. Follow Matt on Twitter Instagram Facebook.

UPCOMING WORKSHOPS FROM NATIONAL PARKS AT NIGHT

Advanced Light Painting: Balancing Ambient and Added Light to Achieve Your Objective

Light painting can be fun, creative and rewarding, but also one of the most challenging aspects of night photography. Carefully crafted light painting can make the difference between a boring and a spectacular image. The range of tools and techniques we have at our disposal make for unlimited possibilities. Effects can range from subtle (from simply filling in shadows to manage contrast and exposure) to dramatic and bold (highlighting a subject in a way that only light can do).

The full moon is rising behind the vertical car. The bus has a Luxli Constructor light on medium power inside at ground level and facing toward the back of the bus. The car in the foreground does not have any added light. The backlighting from the moon created strong shadows and a glow in the sky around the car. All three variations 20 seconds, f/6.3, ISO 3200 with a Nikon D750 and Irix 15mm f/2.4 lens.

Even a quick pass of a Surefire P6 from camera-left was too much light because of the high ISO.

In the final version, I bounced the light from a Surefire P6 off my hand held over my head while standing about 6 feet to the left of the camera. It was enough to subtly light the car in the foreground while preserving the shadows and overall feel of the image.

The first step to light painting is to figure out what you want to light, and what you are trying to achieve by lighting it.

Once you have that down, the next step is to determine the amount, color and quality of light required. There are lots of decisions to be made, and the answers are different for every image and every situation:

  • Are you lighting multiple objects or multiple surfaces?
  • Do you need to illuminate from multiple positions?
  • Do you want soft, diffuse light or contrasty directional light?
  • Should you use light that matches or contrasts the color of the existing light?

The remainder of this article assumes that you have gotten to this point, and are ready to take it to the next step.

The last-quarter moon was just rising behind camera to the right. Lit with a Surefire P9 incandescent flashlight from the left and right sides at oblique angles. It was a challenge to light both sides of this large building in 30 seconds, but it was freezing cold so I ran from side to side to do the lighting to keep warm. You can see that I overlit the right side and the underside of the top of the building. The background was too dark. 30 seconds, f/8, ISO 800. Canon 6D and Nikkor 28mm f/3.5 PC lens.

After several attempts, I conceded that I would need to use a longer shutter speed, both to add more exposure to the background and to do a better job at the lighting. The light painting is more evenly distributed, and I added light to the foreground. Additionally, the longer exposure opened up the inside of the store, which is lit by vintage, very orange Edison bulbs that have been burning continuously for decades. 75 seconds, f/8, ISO 800. Canon 6D and Nikkor 28mm f/3.5 PC lens.

Controlling the Look

Learning to control lighting ratios between the existing light and whatever light you bring to the party is one of the most powerful ways that you can influence the overall look of your images.

If you are not sure what I mean, think of it in terms of a rudimentary on-camera flash. If you use flash on a point-and-shoot camera, or even a DSLR in β€œP” mode indoors at night, you’ll end up with a foreground that is properly exposed, and a background that is likely to be dark and underexposed. You can adjust the flash compensation to reduce the amount of flash relative to the existing light for a better balanced overall exposure. Another way to achieve the same end would be to increase the exposure time to increase the background exposure.

β€œThe more light you add to your subject relative to the ambient light, the more your illuminated subject will stand out from the background.”

We can do that same thing in the field with light painting. But it takes a bit of work, and a clear idea of what we want to say with our images.

It’s all about the context. If your added light is two or three stops darker than the existing light, it will be barely noticeable. If it is two or three stops brighter, the more pronounced and dramatic it will be.

In the simplest terms, the more light you add to your subject relative to the ambient light, the more your illuminated subject will stand out from the background. Within the parameters of a workable exposure, exactly how much light to add compared with the ambient light is a matter of taste, and is one of the ways a night photographer can style their images.


Case Study: Mono Lake Series

The exposure for all five images is 20 seconds, f/4, ISO 12800, and they were shot with a Canon 6D and Nikkor 28mm f/3.5 PC lens. Starlight conditions with practically no light pollution.

Starlight only.

Very low power, broad-beam LED flashlight from camera-right for 2 seconds.

Bright LED flashlight from camera-left for shortest possible time. The brightness of the light meant that I had to use it like a flash by waving it in and out of the scene as quickly as possible. It was impossible to control the light with any consistency.

Very low power, broad-beam LED flashlight from camera-left and right for 3 seconds from each side. I liked the look, but wanted to try a warm light that would contrast the cool, blue sky.

Very low-power, incandescent flashlight from camera-left and right for 1 second from each side. This light was brighter, and therefore harder to control at ISO 12800. It was also less diffuse, which made it difficult to light the formation with just a single 1-second pass of the light from each side, but it was my preferred result.


Arriving at a Ratio

How, though, do you decide how much light to add in comparison with your ambient exposure?

There are two main ways to vary the lighting ratio:

  1. Just as in the flash example above, you could increase or decrease the amount of added light. This can be achieved with a brighter or dimmer light source, or by using a continuous light for a longer or shorter period of time, or by popping a flash once or multiple times.
  2. Extend or shorten the exposure time. Assuming that you used the same amount of light painting, the length of the shutter speed would affect only the ambient exposure. (Whereas changing either the ISO or the aperture would affect both the existing and added light. Our goal is to separate the ambient and added light, not to adjust them proportionally.)

To summarize, you change the lighting ratio by increasing or decreasing the amount of added light, or lengthening or shortening the overall exposure time without changing the added light. Use whichever method works better for each particular shot.

Controlling the Light

You can control how much light you add in different ways depending on the painting tool you’re using:

  • If you are using flash, or a variable brightness continuous light source such as our beloved Luxli Viola, you can increase or decrease the intensity.
  • With a flash, you could also use multiple pops of light, and each additional fire doubles the amount of light on your subject.
  • If you are using a flashlight, then you can increase or decrease the amount of time you employ it to light your subject, provided that time fits within your exposure length. (Increasing the exposure time without altering the added light painting will reduce the ratioβ€”and therefore the impactβ€”of the light painting. Reducing the exposure time without altering the light painting will make the light painting stand out more.)
  • In some situations, of course, you may need to adjust both the added light and the exposure time to find the right combination.
  • One other way to modify your light painting is to increase or decrease the distance between your light source and your subject, keeping the Inverse Square Law in mind. The Inverse Square Law essentially states that doubling the light-source-to-subject distance results in one-quarter of the light reaching the subject.

Case Study: Trona Series

From my β€œLoos With Views” series. A nearly full moon, with light pollution from Trona and Ridgecrest in the background.

The first attempt. 30 seconds, f/4, ISO 800. Canon 5D Mark II with an Olympus Zuiko Shift 35mm f/2.8 lens. Incandescent flashlight from the right, and inside the loo. I considered this to be overlit.

The second attempt. 30 seconds, f/4, ISO 800. Canon 5D Mark II with an Olympus Zuiko Shift 35mm f/2.8 lens. Incandescent flashlight reflected off my hand from camera-left, and LED bounced off the back wall of the structure. The LED was too harsh, and I didn’t want to see the signage on the front.

The third attempt. 30 seconds, f/4, ISO 800. Canon 5D Mark II with an Olympus Zuiko Shift 35mm f/2.8 lens. Better-controlled LED bounced off the back wall of the structure, and no light on the front.

The final attempt. 10 minutes, f/4, ISO 100. Canon 5D Mark II with an Olympus Zuiko Shift 35mm f/2.8 lens. A few seconds from camera-far-left with a Surefire P6 incandescent flashlight to show texture in the structure. I used the same light for a few seconds inside the loo, bounced off the front wall. The light on the rock and the vent pipe was ambient that accumulated during the long exposure. The color of the sky is so different due to the combination of the long exposure and the moonlight’s effect on the white balance.


Complications

Other constraints (such as shooting at high ISOs to avoid star trails) may come into play, and these can complicate things further.

A common scenario when light painting at high ISOs to preserve star points is that a light source may be so bright that a fraction of a second is all that is required to light a scene, making it next to impossible to control the light well. Reducing the camera exposure would have a negative impact on the stars, and would also even further reduce the amount of time available to get into position and execute the lighting.

In that case, using a dimmer light source is the best option. If the location is treacherous and getting into position takes some time, two good strategies are setting a delay on the exposure or triggering the shutter remotely once you get into position.

Conversely, when working under the light of a full moon, a longer duration of light painting is a good way to increase the added-to-existing light ratio. In urban environments with a lot of ambient light and relatively short exposure times, utilizing a brighter light source might be the best approach.

But It’s Really Not Complicated

In any case, some thoughtful examination of the situation and available options will go a long way toward achieving the desired look.

If after reading this you are thinking about going back to daytime photography, please know that these decisions and tactics are really not that complicated. I don’t know anyone who does mathematical calculations in the field to figure out their light paintingβ€”at least no one who has done it more than once!

Like everything related to night photography, it’s a mΓ©lange of art and science that can be mastered only by trial and error, accumulating knowledge and experience along the way.

Lance Keimig is a partner and workshop leader with National Parks at Night. He has been photographing at night for 30 years, and is the author of Night Photography and Light Painting: Finding Your Way in the Dark (Focal Press, 2015). Learn more about his images and workshops at www.thenightskye.com.

UPCOMING WORKSHOPS FROM NATIONAL PARKS AT NIGHT