How I Got the Shot

How We Got the Shot: Light Painting the Upright Stone in Iceland

Nikon D750, Sigma 24mm f/1.4 Art lens. 73 seconds, f/8, ISO 200.

One of my favorite moments of our recently completed Westfjords of Iceland photo tour was working with three of our travelers on a joint light painting image one night while we were waiting for the aurora to appear. (The aurora did eventually appear, and in a big way!)

We were positioned high on a hill with 360-degree views in order to be able to see and photograph the aurora no matter where it appeared in the sky. The weather was perfect, the sky mercifully clear, and the vistas magnificent. The group was excited with anticipation as the KP index of 5 was a good sign that the sky would put on a good show for us.

There was a large upright stone, about 5 feet high, perched neatly near the edge of the hill. It reminded me of an image by the Czech photographer Jan Pohribny titled โ€œPositive Energy Emitterโ€ (Figure 1). Pohribnyโ€™s photo was of an ancient standing stone at twilight, and he had circled the stone with a red light held overhead and also pointed down at the ground to create the โ€œenergy vibrationsโ€ implied in the title.

Normal
0


false
false
false

EN-US
X-NONE
X-NONE


Figure 1. โ€œPositive Energy Emitter," 1992 Jan Pohribnรฝ. From the series New Stone Age.
 <w:LatentStyles DefLockedState="false" DefUnhideWhenUsed="tโ€ฆ

Figure 1. โ€œPositive Energy Emitter," 1992 Jan Pohribnรฝ. From the series New Stone Age.

I thought that this would be the perfect opportunity to attempt an homage. My thought was that the stone before us could be a beacon to summon the aurora, as well as a tribute to an early light painting innovator.

After my standard procedure of framing the composition, focusing and determining the ambient exposure, I made my initial attempt at creating the rings of light around the stone (Figure 2).

Figure 2. Initial experimentation. Nikon D750, Sigma 24mm f/1.4 Art lens. 30 seconds, f/16, ISO 100.

First I set up a Luxli Constructor Large Block Bi-Color LED Light on the ground pointed at the stone, set on low power at 3200 Kโ€“โ€“partly to illuminate the stone, and partly so I could see to move around without tripping over the other rocks on the ground.

I also used a short section of frosted plastic tube that I had removed from a collapsible light sword from Light Painting Brushes, and fixed it to my Coast HP5R flashlight on low power, which created a DIY light wand. I wasnโ€™t satisfied with the look I was getting with the wand, so Erika, one of the workshop attendees, suggested using a different Light Painting Brushes tool that she had, a purple translucent light writer (Figure 3).

Figure 3. Second attempt. Nikon D750, Sigma 24mm f/1.4 Art lens. 30 seconds, f/13, ISO 100.

We liked the look with the translucent light writer better, but since there was still a lot of light in the sky, we were limited to a 30-second exposure at ISO 100 and f/11. Because the ground around the standing stone was covered with rocks of various sizes, it wasnโ€™t possible to move around very quickly in order to create the desired light writing effect in such a short time. We could make only a few revolutions during the half-minute exposure. But I knew that as the sky got darker, we would be able to extend the exposure time and create more light rings.

Meanwhile, Erikaโ€™s husband Dan suggested adding another element to the image using shadow painting rather than light painting. His idea was to project a hand shadow onto the rock by placing his hand between the rock and a light source. We loved the idea, and the initial result reminded us of pictographs found in ancient rock art sites around the world.

The first attempt was encouraging, so we made a few refinements until we came up with an iteration we all liked. I also added some illumination to the foreground by sweeping a flashlight low to the ground on the left and right sides to fill in the shadows and reveal some detail (Figure 4).

Figure 4. Third attempt. Nikon D750, Sigma 24mm f/1.4 Art lens. 30 seconds, f/11, ISO 100.

By this time, things were getting complicated, as Erika was making the rings around the stone, Dan was holding his hand in position for the shadow, and I was lighting the ground and creating the hand shadow, which took precise alignment of Danโ€™s hand and the flashlight. Each of us had our cameras set up and were shooting side by side.

Fortunately, Steve, another participant, was available to assist us by opening all the shutters, which gave us time to get into position before the exposures started. We made one more frame just as the aurora was starting to appear in another part of the sky, and that frame was exactly the vision we were working toward (Figure 5). So we called it a wrap, and repositioned ourselves to photograph the aurora.

Figure 5. Final image. Nikon D750, Sigma 24mm f/1.4 Art lens. 73 seconds, f/8, ISO 200.

So many elements came together to make this image succeed:

  • the references to ancient cultures associated with mystery and spiritualityโ€“โ€“the standing stones of neolithic cultures in Europe, and the pictographs reminiscent of Native American Kokopelli
  • the ritual of light painting and the call to the gods asking for the aurora to bless us with its magical presence
  • and most importantly, the collaborative spirit that we shared to create the image, which made this special moment a highlight of our trip to the magical place that are the Westfjords of Iceland

Thank you Erika, Dan and Steve. It was an honor sharing this experience with you!

Lance Keimig is a partner and workshop leader with National Parks at Night. He has been photographing at night for 30 years, and is the author of Night Photography and Light Painting: Finding Your Way in the Dark (Focal Press, 2015). Learn more about his images and workshops at www.thenightskye.com.

UPCOMING WORKSHOPS FROM NATIONAL PARKS AT NIGHT

How I Got The Shot: Star Stacks and Sea Stacks in Olympic National Park

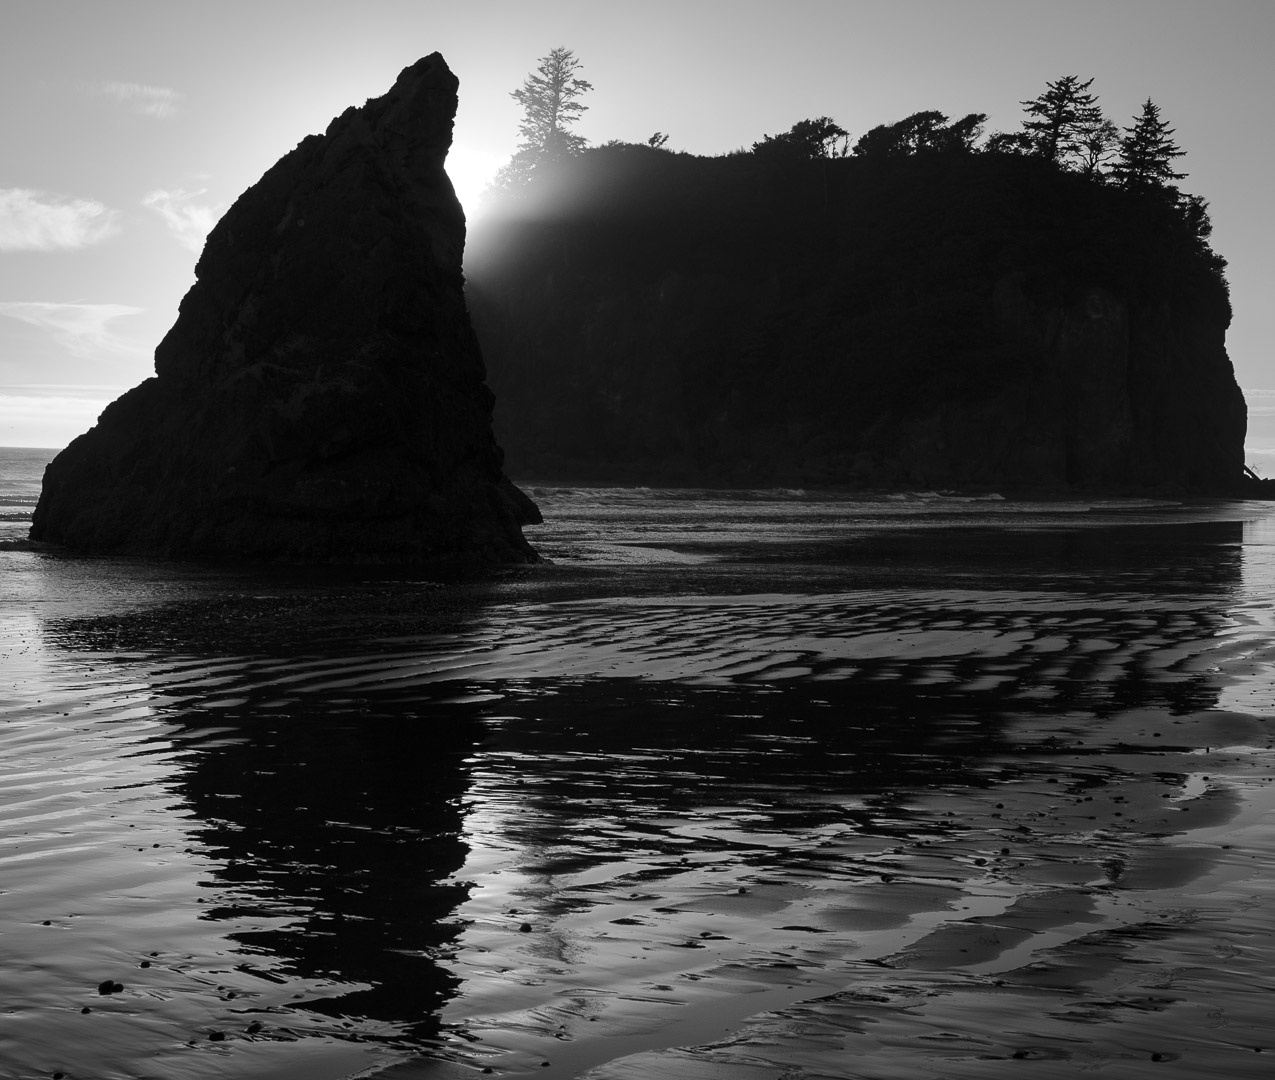
Sea Stack at Ruby Beach, Olympic National Park. Nikon D3s, Nikkor 17-35mm f/2.8. 120 stacked exposures shot at 20 seconds, f/2.8, ISO 1600. Light-painted with a Coast HP7R flashlight. ยฉ 2016 Chris Nicholson.

The Location

Itโ€™s hard for me to choose a โ€œfavoriteโ€ national park, because itโ€™s like trying pick a favorite item from a buffet of candy and ice creams. But Olympic National Park would certainly be near be near the tippy-top of my list, if not the cherry at the very top.

Not only is Olympic simply beautiful, but its three distinct ecosystemsโ€”mountain, rain forest and coastโ€”all present unique photography opportunities. You could literally be shooting an entirely different scene and genre from one hour to the next.

My favorite of those ecosystems? Thatโ€™s an easier question to answer: the coast. I grew up in New England only a mile from the shore, so my affinity for the water is strong. And my favorite spot on the Olympic coast to photograph? Ruby Beach.

Ruby Beach is a stunning stretch of coastline ... flanked by high cliffs, lined with hundreds of ancient, massive driftwood logs, divided by Cedar Creek, and punctuated by picturesque sea stacks amid the crashing Pacific waves.

During my four visits and shoots at Olympic National Park, Iโ€™ve shot at Ruby Beach in three of them. When I visit the park again this September to prepare for the two workshops weโ€™re hosting there, Iโ€™m certain to shoot at Ruby again.

Ruby Beach is a stunning stretch of coastline that is a perfect location for photographing sunsets, in sunset light, on overcast days (tide pools!) and, of course, at night. The shore is flanked by high cliffs, lined with hundreds of ancient, massive driftwood logs, divided by Cedar Creek, and punctuated by picturesque sea stacks amid the crashing Pacific waves.

(Shameless plug: Iโ€™d be happy to personally show you around Ruby Beach this September, when Matt Hill and I run our two workshops there. A couple of seats are still open for each weekโ€”September 17 to 22 and September 24 to 29โ€”so sign up today!)

Here are a few of photos to give a sense of what Ruby Beach looks and feels like:

The Setup

On a July afternoon in 2016 I scouted Ruby Beach for a night shoot, and planned three setups for once the sky grew dark. I knew I would have a good view of the Milky Way, and intended to frame it with sea stacks in two of the setups, but also wanted to rip one long exposure to capture some southern star trails.

One thing I kept in mind while scouting is something that can be important when working around the coast: Changing tides affect the appearance of the shoreline. To get a good idea of what the water levels would look like once shooting at night, I used the Tide Graph Pro app. I looked up the tide chart for that date (see Figure 1), noticed where the water level would be during my nighttime shoot (about 9 pm. to 1 a.m.), found a corresponding tide level during daylight (about 1 p.m.), and visited at that time for scouting. This way I didnโ€™t have to imagine what the water would look like laterโ€”I knew exactly.

Figure 1. Tide Graph Pro showed me that the tide level during my shoot would be at about 1 foot above the zero tide height. I saw that the water would be at about 1 foot also around 1 p.m., so that is when I did my daytime scouting.

Incidentally, knowing the tides is important for safety too, especially in Olympic National Park, where many headlands are impassable at high tide. You donโ€™t want to venture around a promontory at low tide and get trapped a few hours later when the water floods your trail back.

The Gear

Ruby Beach is certainly not a long hike from the carโ€”itโ€™s only about a half-mile round-tripโ€”but because I was working on a beach, I didnโ€™t want to be burdened with a heavy bag that Iโ€™d be tempted to put down in the sand during my several planned hours out. So I left some of my gear in the car and brought along a one-camera, two-lens, one-tripod kit:

The Exposure

For the star trail photo, I chose a single sea stack about halfway between Cedar Creek and Abbey Island, and once set up I started to โ€œwork the sceneโ€โ€”i.e., I shot from several different angles, some without light painting, some with varying approaches to light painting, some including the Milky Way, some including reflections in the sand as the tide receded. You can see a couple of the variations in Figures 2 and 3.

Figure 2. My first composition included the reflection in the wet sand, which is how I visualized the photo during my daytime scouting, an approach I abandoned while adjusting the composition.

Figure 3. My second attempt at a composition included a little of the Milky Way to the left. I also tried scraping the wet, pebbly shore with some light painting to emphasize the texture of the wavy sand.

I ultimately chose an angle that allowed me to get a little of the Milky Way behind the sea stack. I didnโ€™t like the position of the galactic core in the frame, but figured that as it moved over the next hour or so, it would eventually be in a spot I did like. This led me to a key decision in how I approached the exposure: I chose to create my star trails using a long series of short exposures that I would later stack in post-production.

I could have created the star trails using one very long exposure, but there are drawbacks to that approach, including a significant drain on the camera battery, along with the introduction of long-exposure noise, which would be particularly problematic in warm midsummer temperatures. So instead I opted for โ€œstar stacking.โ€ Star stacking is a post-processing technique for creating star trails that solves many of the image-quality issues inherent in night photography. (I will likely write more about all of that in a future blog post, so please stayed tuned for a year or two.)

Star stacking involves shooting multiple frames of the scene that are later layered together in Photoshop in a way that combines the stars into the same trails they would have made in a long exposure. You can do this with shutter speeds of any length. For example, if you wanted to create one-hour star trails, you could star-stack 12 5-minute exposures, or 30 2-minute exposures, or 60 1-minutes exposures, or so on.

Star stacking is a post-processing technique for creating star trails that solves many of the image-quality issues inherent in night photography.

For this photo, I shot 120 20-second exposures, giving me the equivalent of 40 minutes of star trails. Shooting that many frames meant Iโ€™d have more work to do later in Lightroom and Photoshop, but there was a reason I chose this approach, and it goes back to the decision about the Milky Way. I wanted to be able to pick out of my sequence one frame in which I liked the position of the galactic core, and I wanted that frame to have crisp star points.

I had my lens zoomed to 19mm, and using the 400 Rule, I knew that my shutter speed could be no longer than 20 seconds before the stars would start to blur. Therefore, I set my shutter speed to 20 seconds, and calculated that I would need 120 frames to produce my 40-minute star trails.

I set my aperture to f/2.8, and I used hyperfocal distance to ensure that both the sea stack and the stars would be in focus. I set the ISO to 1600, which could normally be quite low for star points, except that the moon was close to risingโ€”not close enough for its light to be seen by the naked eye, but close enough to brighten the sky a bit during a long exposure. Shooting at f/2.8, I would have plenty of stars to trail, so I wasnโ€™t concerned about them being a little dim, and because I would be light painting the sea stack, I wasnโ€™t concerned about lacking shadow detail.

The last piece of the puzzle was the light painting. The sea stack was too prominent in the frame to use as a silhouetteโ€”half the composition would have been pure black. So I wanted to light paint the rock in a way that would bring out its texture and color. I experimented with different angles and determined the best option was lighting from the right, standing as close to a 90-degree angle to the sea stack as I could without stepping into the waves. (See Figure 4.)

Figure 4. A self-portrait of me light painting the sea stack.

I also experimented with different flashlights and chose my Coast HP7R, because its wide, crisp edge-to-edge beam allowed me to evenly paint the entire sea stack from a relatively close distance without having to move the light. Figure 5 is the painting approach I settled on.

Figure 5. The final approach to the light painting, after trying several variations.

The Shoot

Once my exposure and light painting strategies were set, all I needed to do was execute the sequence. Because I was shooting 20-second exposures, I didnโ€™t need an intervalometer, so I simplified matters by using a wired remote shutter release that I could lock (specifically, the Nikon MC-30A). The camera was set in Continuous shooting mode, so all I needed to do was push the button on the remote, set the lock, and let the camera do its thing 120 times.

During the first exposure, I did the light painting that I had already practiced. The remaining 119 frames have just a silhouetted sea stack. I went for a walk and enjoyed a quiet night on the coast under the dark skies of Olympic National Park.

Figure 6. The entire 120-frame sequence in Lightroom.

The Post-Production

The star-stack process is actually pretty simple for such a powerful technique.

After dumping the cards into Lightroom, I looked at the images and decided not to make any adjustments other than adding a standard touch of Vibrance and Clarity, and (this is important) in the Len Corrections panel I turned on Remove Chromatic Aberration and Enable Profile Corrections. I made those adjustments to one file, then selected the entire sequence and clicked the Sync button to apply those changes to all the highlighted files.

With the entire sequence still selected, I went to the menu and chose Photo โ€“ Edit In โ€“ Open as Layers in Photoshop. This maneuver created a new file by making a layer out of each of the selected frames of the sequence I had shot on the beach. (See Figure 7.) Because I initiated this process for over a gigabyte of collective data, once the computer was working I went to the kitchen and made a sandwich and a cup of coffee. My computer is no slouch, but it still needed a good 20 minutes to complete the job.

Figure 7. Each frame of the sequence was imported to Photoshop as individuals layers in one file.

The next step was to select all the layers (Figure 8), which can be done either by shift-clicking the first and last layers, or by pressing Control+Option+A (Mac) or Control+Alt+A (PC).

Figure 8. All layers selected.

Then, using the drop-down menu at the top of the Layers panel, I changed the blend mode to โ€œLighten.โ€ (Figure 9.) The Lighten mode essentially looks at the layers as a pile of aligned images, searching through each of them pixel by pixel. It searches for the lightest pixel in each pixel pile, then brings that lightest pixel to the top. In the case of stars that are moving against a dark sky, that means the star point in each layer is brought forward, thus creating the trails. (Note to astronomers: Of course we know that itโ€™s actually the Earth moving, not the stars, but itโ€™s easier to explain this way, so please bear with me.)

Also, because I light-painted the sea stack in that one frame but left it silhouetted in the others, the sea stack is also brought forward. No masking neededโ€”it happens automatically.

Figure 9.

Thatโ€™s a sort-of technical explanation of how the Lighten mode works behind the scenes. What I see on-screen is some nifty magic of star trails appearing where before there were only star points and dark sky. (See Figure 10.) It looks pretty much the same as if Iโ€™d shot the 40-minute exposure, except it has no long exposure noise, and my camera battery didnโ€™t have the life sucked out of it.

The Cleanup

The keen observer will note that while shooting those 120 frames, some planes flew through my composition, and they impolitely neglected to turn their lights off before doing so. Some photographers like to keep plane trails in their photos. Iโ€™m not one of those photographers. Getting rid of them is a simple matter of masking or cloning them out of the layers they appear in.

I also wasnโ€™t crazy about the bright star trail in the upper right corner of the composition. Itโ€™s the brightest and thickest trail, and itโ€™s right in the corner, where it draws attention far away from where I want attention drawn. So I masked it out.

One more bit of cleanup I did was in the lower right corner of the composition, where you can see a big blotch of light that was caused by a moving star being distorted in the reflections on the sand. That was relatively easy to mask out as well.

Figure 10. The artifacts from stacking that I masked out of the layers in Photoshop.

Figure 10. The artifacts from stacking that I masked out of the layers in Photoshop.

The Save

The final decision in creating a star stack is whether to save the layered PSD file. If I had shot the sequence using fewer longer exposures (for example, eight 5-minute exposures), then saving the layers file may have been feasible, and it would have come with the benefit of being able to make adjustments to the individual layers in the future. But I didnโ€™t do thatโ€”I used 120 short exposures to create this stack, and if I saved that as a PSDโ€”well, I wouldnโ€™t be able to, because it would have resulted in an 8 GB file, which is too gigantic for the PSD format.

Rather, I would have had to save it as a PSB, which is Adobeโ€™s large document format. But I still would have ended up with a giant file that I donโ€™t want to deal with reserving space for or having to open again. So instead, I flattened the image and saved it as a 70 MB PSD, which while not as flexible for future edits, is much easier to maintain. Should I ever want to approach this image differently, I can always recreate it from the sequence filesโ€”and enjoy another sandwich and cup of coffee while doing so.

Once the star-stacked photo was saved and back in the Lightroom catalog, I made some minor adjustments to Clarity and Vibrance to optimize the look of the stars, and that was thatโ€”star trails over Ruby Beach.

Figure 11. The final image.

And what about that star-point Milky Way photo I wanted to pull out of the sequence? Well, I didnโ€™t like the position of our galaxy in any of those 120 frames. So after I wrapped the star stack sequence, I reframed my composition and shot Figure 12 instead.

Figure 12. The Milky Way over Ruby Beach in Olympic National Park. ยฉ 2016 Chris Nicholson.

Speaking of the Milky Way, can you see it in the star trail photo (Figure 11)? Itโ€™s to the left of the sea stack, and you can discern it by the telltale cluster of denser star trails. It looks like a streaky cloud of light. Thatโ€™s what our galaxy looks like in a long exposure!

Note: If youโ€™re interested in joining NPAN instructors Chris Nicholson and Matt Hill in Olympic National Park, there are only a few spots left, so sign up today! Weโ€™re offering two weeks in this amazing national park: September 17 to 22 and September 24 to 29.

Chris Nicholson is a partner and workshop leader with National Parks at Night, and author of Photographing National Parks (Sidelight Books, 2015). Learn more about national parks as photography destinations, subscribe to Chris' free e-newsletter, and more at www.PhotographingNationalParks.com.

UPCOMING WORKSHOPS FROM NATIONAL PARKS AT NIGHT

How We Got the Shot: Teamwork at Desert Queen Ranch in Joshua Tree NP

Desert Queen Ranch panorama, as team-photographed by our workshop, April 25, 2017. Photograph by Deane Hall, Jeannine Henebry, Romit Maity, Kurt Oโ€™Hare, Priscilla Spencer, Lance Keimig and Chris Nicholson.

If youโ€™ve read our blog in the past, you may have seen our series โ€œHow I Got the Shot.โ€ This time weโ€™re doing something similar, but a little different: How We Got the Shot. Itโ€™s about how a group of workshop students came together to collaborate on a night image that took a lot of planning, communication and teamwork.

The Location

This week we completed our first workshop of 2017, at Californiaโ€™s Joshua Tree National Park. On the last night of the workshop, we were granted special access to Desert Queen Ranch (otherwise known as Keys Ranch), a spot thatโ€™s usually locked off from park visitors. The only way to see the site is to attend a group tour. Night access is rare, but we were able to bring our workshop photographers to the ranch through a partnership with Desert Institute, the educational outreach program at Joshua Tree.

Desert Queen Ranch is a goldmine for photographers ...

The ranch sits in a rocky canyon in the Mojave Desert. From 1910 to 1969 it was home to Bill Keys, who, along with his wife Frances, raised a family there and lived off the scarce resources of the environment.

Today the ranch is preserved as a National Historic Register Site. Itโ€™s a goldmine for photographers, offering subjects such as the small-frame clapboard buildings, old cars in disrepair, mining and ranching equipment, hand-hewn wood fencing, and more. Thereโ€™s also the same subjects you find in the rest of the park, including rock formations, lizards and snakes, cacti, and Joshua trees and other yuccas.

To give you a sense of the photography opportunities at the ranch, here are some other images by our group from that evening:

The Photographers

Seven photographers at our Joshua Tree workshop (five attendees and two instructors) contributed to making the final image:

The Planning

We arrived at Keys Ranch with our Desert Institute guides shortly before sunset, which gave our photographers time to scout ideas for compositions. One of the more popular subjects was an old, rusting Jeep in the center of the site. As dusk began to darken into night, we noticed that by standing to the west of the Jeep, you get a nice side-to-side view of the ranch structures, including the house, old store, Jeep, windmill, water tank and workshop building.

We immediately knew the scene would make a great panorama, but would be quite a project that could be accomplished only by a good number of us pulling together to contribute. About two-thirds of the workshop was excited by the idea, so we regathered at 11 p.m. to see if we could pull it offโ€”hopefully with the Milky Way rising over the ridge that flanked the eastern edge of the ranch.

Because we didnโ€™t have time for every photographer participating to shoot their own frames, we decided we would do one setup and execution, and weโ€™d all share the RAW files to edit in our own ways. To provide the best image quality for everyone to start with, we chose to use a Nikon D5.

When the time came to start working on the photo, we carefully staked a spot for the tripod. We opted to use my Gitzo 3541LS, as itโ€™s strong and steady, and we could rely on it to stay put during all the movements weโ€™d be putting the ball head through. Using the bubble level on the tripod, followed by using the bubble level on the ball head, we were able to perfectly level the setup within a couple of minutes.

The scene stretched from left to right by about 160 degrees from the tripod mark. (In Figure 1, you can see how wide an area we needed to cover.) We couldnโ€™t back up much because of a fence behind us, so we needed to use a wide angle lensโ€”specifically, the Nikon 14-24mm f/2.8, one of the sharpest tools in the night-photography shed.

Figure 1. Satellite image of our pano subjects at Desert Queen Ranch, showing how wide the scene is from camera position. Map data ยฉ Google.

Figure 1. Satellite image of our pano subjects at Desert Queen Ranch, showing how wide the scene is from camera position. Map data ยฉ Google.

Setting the zoom for 24mm framed the scene segments perfectly, but gave us an exposure problem: If we wanted to keep the stars as points, rather than having them begin to trail, then we would be limited to a shutter speed of 15 seconds.

We agreed that a 20-second exposure would be better because it would give us 33 percent more time to light-paint, and would give us one-third of a stop more light to help fill in foreground detail. Using the 400 Rule, we knew that maintaining star points during 20-second exposures would require a focal length of 20mm or wider.

So we set the zoom at 20mm and mounted the camera vertically (which is best for most pano-stitching applications). This setup offered approximately a 60-degree horizontal angle of view within each vertical frame.

The next step was figuring out how much to overlap the frames. The more you overlap, the more information you have for the pano-stitching software to do its job wellโ€”overlapping by at least one-third is recommended. We prudently decided to overlap by half, which gave us a 30-degree horizontal change between frames. By using the degree marks on the base of the ball head, we panned the camera in 30-degree increments and determined we would need to shoot five frames to cover the scene from left to right.

The Lighting

We could have photographed the ranch without lighting it, but what fun would that have been? Besides, the low light on the foreground would have obscured the detail of all the interesting objects in front of us. So we decided to light-paint what we believed were the most important and interesting elements: the store, the house, the tree behind the house, the Jeep, the windmill, the water tower and the workshop buildingโ€”all with 20-second exposures.

Teamwork was clearly required to pull this off.

Priscilla has a film-lighting background, and she shared that expertise to help place two panel lights on the largest subjects: the store and house (Figure 2), and the workshop (Figure 3). For the former we used Priscillaโ€™s Vidpro LED Light Kit, and for the latter we used NPANโ€™s brand new Luxli Viola 5" Multi-Color LED light panel (which we used for different setups all week, and we loved it!).

Priscilla also stood by the panel on the far left of the image, because she needed to redirect its light mid-exposure. We used in-camera dodging by moving blackwrap in and out of the light to soften the shadow, thereby reducing the illumination on the ground during the exposure.

Figure 2. Vidpro LED Light Kit illuminating the house and store at the far left of our intended pano. This is the setup that Priscilla adeptly modified by moving blackwrap mid-exposure. We weren't concerned about hiding this light source (you can see it in Figures 5 and 8), because we knew it would be cropped out of the final stitched image.

Figure 3. The Luxli Viola LED panel light placed on the far right of the image is perched on a fence post. The only part of it visible to the camera is an LED on the back, which Lance covered with a piece of black gaffer tape so it wouldn't show in the final photograph. So even though the panel is technically in-frame, it disappears into the shadows.

Jeannine and Romit stood to camera-right, about 20 and 30 feet away, respectively. Jeannine light-painted the water tower, while Romit light-painted the Jeep.

Deane and Kurt worked in the background, in-frame, but behind objects so the camera couldnโ€™t see their flashlights. Deane was positioned about center-frame, behind a bush, while light-painting the side of the house. Kurt was positioned toward frame-right, between some tall bushes, light-painting the windmill.

Everyone used incandescent flashlights to provide warm light to the warm-toned subjects. And because the final image would be composed of five stitched frames with overlapping elements, everyone had to repeat the light painting the same way multiple times.

As for the ambient illumination on the ridge, that was thoughtfully provided by clouds diffracting light pollution from Palm Springs. The clouds in the east werenโ€™t as helpful, as they blocked our view of the Milky Way (though you can still discern it if you look closely at the final image). On the other hand, thin and broken clouds can add a good deal of visual interest to a starry sky, and they did exactly that for our composition.

The Shoot

When we were finally ready to execute, we all got into position for our roles. Lance observed the light painting from near the camera to watch for any mistakes that needed to be fixed. (There werenโ€™t anyโ€”go team!) I operated the camera, using a Vello FreeWave wireless remote shutter release; I didnโ€™t want to have to touch or even approach the tripod unnecessarily, to avoid the possibility of bumping it in the dark, which would have required us to re-set everything weโ€™d done to that point.

We began by shooting from the right, primarily because thatโ€™s the direction the camera was pointing when we were ready to start. I fired the remote release, waited to hear the click of the shutter opening, then called out for the others to begin light-painting. When each 20-second exposure ended, I rotated the camera 30 degrees to the left (again using the markings on the ball head), then repeated the process four times. You can see the resulting images in Figure 5.

Figure 5. The five frames, before processing. All exposed at 20 seconds, f/3.2, ISO 6400. Nikon D5 with a Nikon 14-24mm f/2.8.

We reviewed the photos and everything looked exactly as weโ€™d hoped. But we always say: Once you get the shot right, shoot another just in case. So we re-shot all five frames, and then wrapped the production.

Post-Processing

Back at the hotel at 2:30 a.m., we imported all the images into Lightroom. We made minor adjustments to one frame, then synced the edits to the other four frames so that each had the same adjustments applied.

Perhaps the most important edit we made in Lightroom is a necessity any time youโ€™re stitching a pano: In the Lens Corrections panel, we selected โ€œEnable Profile Corrections.โ€ This removed lens vignetting and corrected barrel distortion (see Figure 6), both of which make it much easier for the software to stitch the images together, and also make for a better final image.

Figure 6. Before applying lens profile corrections (left) and after (right).

We then selected all five frames in Lightroom and clicked Photoโ€“Photomergeโ€“Panorama. Lightroom usually does an amazing job with stitching a pano, but in this case we thought the results looked a little too distorted.

Photoshopโ€™s Photomerge feature has a few more options, so we decided to try that instead. Again with the five frames selected, we clicked Photoโ€“Edit Inโ€“Merge to Panorama in Photoshop. We tried the Perspective, Cylindrical and Spherical options, but werenโ€™t thrilled with those results either (particularly Perspectiveโ€”see Figure 7).

Figure 7. Not the result we were looking for. Sometimes pano-stitch settings fail, and we just have to start over, making new choices.

Figure 7. Not the result we were looking for. Sometimes pano-stitch settings fail, and we just have to start over, making new choices.

What did succeed was Photoshopโ€™s Auto option for merging, which is what ultimately produced a result we could work with (Figure 8). This proves the theory that software is pretty smart these days, so always consider trying โ€œautoโ€ first.

Figure 8. The uncropped stitched pano, right out of Photoshop.

Back in Lightroom, we made a few more edits. We cropped out the waste (this is expectedโ€”itโ€™s why you should always shoot a pano with extra room on all sides, knowing that youโ€™ll need to crop off artifacts). We brought the Whites up a bit to fill out the histogram. Then we nudged down the Blacks and nudged up the Shadows, which is a nice trick to make an image pop. We increased Clarity a little, and Vibrance a tad.

Those were all the global adjustments we made, which resulted in the image in Figure 9. It was looking pretty good, but there was still more work to do.

Figure 9. Minor global adjustments improved the overall image.

To begin the local adjustments, we immediately cloned out the plane near the center. (No need for editorial integrityโ€”we just pretend that we shot the sequence two minutes earlier.)

To improve the sky, we added a Graduated Filter to the top of the frame, then used the Brush to mask around the ridge. We reduced the Exposure of the sky just a smidgen, and brought up Highlights and Clarity a touch to make the stars shine a little brighter (Figure 10).

Figure 10. The sky pops a little more after making some tweaks with the Graduated Filter tool.

We made some more local adjustments to even out the exposure, reducing the brightness and highlights of the workshop building at the right of the frame, reducing the brightness of the panel-lit ground on the left, and increasing the brightness and saturation (just a bit) of the Jeep (Figure 11).

Figure 11. Local adjustments to slightly darken the ground at left and the structure and ground at right, and to lighten the Jeep in center.

Finally, we pursued the curiosity of one workshop attendee who wondered what the photo would look like if we made adjustments to create more of a โ€œnighttime feel.โ€ To achieve that effect we dropped the White Balance temperature more toward blue, lowered Exposure by one-quarter of a stop, reduced Shadows, and dropped Saturation to -30. You can see the result in Figure 12.

Figure 12. A more night-feel approach to the editing.

The night approach looked great, but we decided that we liked our original take better. So we reverted to the first approach, which really shows the light painting that emphasizes the important elements of the composition. Figure 13 is the final version.

Figure 13. The final image.

Final Notes

Though we all made the photo together, the edited final version in this blog post is from my computer. There are many, many ways to edit digital images, dependent on different artistic preferences. I very much hope that Deane, Jeannine, Romit, Kurt and Priscilla will edit the RAW files as they like and post their final results in the Comments section.

Also, none of this would have been possible if the Desert Institute hadnโ€™t partnered with our workshop and arranged for the special access to this very special space. With heartfelt thanks, we recognize Kevin Wong for his assistance at every stage of planning, and Julianne Koza and Lew Kingman for guiding us to and around Keys Ranch that magical evening.

Chris Nicholson, author of Photographing National Parks (Sidelight Books, 2015), is a partner and workshop leader with National Parks at Night. Learn more about national parks as photography destinations, subscribe to Chris' free e-newsletter, and more at www.PhotographingNationalParks.com.

UPCOMING WORKSHOPS FROM NATIONAL PARKS AT NIGHT

How I Got the Shot: Bryce Canyon National Park with Chris and Gabe

Light painting on the Navajo Loop Trail in Bryce Canyon National Park. 30 seconds, f/4, ISO 400. Nikon D750 with a Zeiss Distagon 15mm f/2.8 lens.

While shooting in Utah during National Parks Week in 2016, I made this image in cooperation with Gabe Biderman and Chris Nicholson. Wanna learn how? Read on.

The Location

First off, letโ€™s establish that Bryce Canyon is beautiful. The hoodoos rock me. Itโ€™s also at a pretty high altitude. Consider that if you hike down into the canyonโ€”you must also hike back up!

Top that off with something unique to our visit: One small leg of the loop trail was not open, forcing us to go the long way around to get to the hoodoos. Of course that meant we had to go all the way back around to get back up. Talk about a workout carrying 35 pounds of photo gear on my back. Iโ€™m savage with myself that wayโ€”I never want to miss a shot because I left something in the car. (Hint: Do what I say and not what I do if you value your enjoyment.)

Anyway, on to how I โ€œmade the sausage.โ€

Working the Scene

The final image, above, is a combination of ambient illumination by a full moon in a clear sky, complemented by light painting by Gabe and Chris within the lens frame, and light painting by me to camera-right.

I saw the photo as I was gasping my way up the canyon. (I am not as fit as I could be ๐Ÿ˜Š). To compensate, I was playing a game with myself: Walk until completely out of breath, plant the tripod and take a photo on the spot, no matter the view. It kept my mind off my physical condition โ€ฆ for 30 to 120 seconds at a time, anyway.

Figure 1 is an example of one of those shots. Meh. So is Figure 2. Less meh.

Figure 1. 30 seconds, f/4, ISO 400. Nikon D750 with a Zeiss Distagon 15mm f/2.8 lens.

Figure 1. 30 seconds, f/4, ISO 400. Nikon D750 with a Zeiss Distagon 15mm f/2.8 lens.

Figure 2. 30 seconds, f/4, ISO 400. Nikon D750 with a Zeiss Distagon 15mm f/2.8 lens.

Figure 2. 30 seconds, f/4, ISO 400. Nikon D750 with a Zeiss Distagon 15mm f/2.8 lens.

But when I stopped to make a photo of Chris making a photo (how meta), I started to think about how I love making night portraits. This photo is Figure 3, in which you can also see Gabeโ€™s flashlight in the distance. He was working on a masterpiece of light painting.

Figure 3. 30 seconds, f/4, ISO 400. Nikon D750 with a Zeiss Distagon 15mm f/2.8 lens.

Figure 3. 30 seconds, f/4, ISO 400. Nikon D750 with a Zeiss Distagon 15mm f/2.8 lens.

As it happened, I had a burst of energy and my next pit stop to breathe was above Gabeโ€™s position. See Figure 4.

Figure 4. 30 seconds, f/4, ISO 400. Nikon D750 with a Zeiss Distagon 15mm f/2.8 lens.

Figure 4. 30 seconds, f/4, ISO 400. Nikon D750 with a Zeiss Distagon 15mm f/2.8 lens.

As I observed Gabe light-painting and working on his image, I was struck with the thought, โ€œThis is the moment. People in a place I love doing the thing I love. Perfect moment for a portrait.โ€

I asked Gabe and Chris if they would indulge me, and somehow they seemed more than happy to stop climbing out of the canyon for a few minutes. We nailed it on the first shot, because Gabe had already been practicing for his photo, painting to the right. So I piggybacked on his hard work a bit. I asked Chris to paint the trees, and added my own twist by running to camera right and light-painting Gabe and Chris with short bursts of my flashlight (Figure 5). I took care not to sweep my flashlight, because I wanted a pool of light in the middle, with dark edges to the illumination.

Figure 5. Chris (left) is lighting the tree, and the arrows show where Gabe and I are light-painting.

Figure 5. Chris (left) is lighting the tree, and the arrows show where Gabe and I are light-painting.

Mission accomplished!

Figure 6, the final photo. 30 seconds, f/4, ISO 400. Nikon D750 with a Zeiss Distagon 15mm f/2.8 lens.

Figure 6, the final photo. 30 seconds, f/4, ISO 400. Nikon D750 with a Zeiss Distagon 15mm f/2.8 lens.

Details

Here are some more before/after details to spot how we added to the scene:

Figure 7. Painting distant hoodoo.

Figure 8. Light-painting trees takes more time since they are not reflective, but rather dark to begin with.

Figure 9. Gabeโ€™s gentle painting of the canyon wall to his right.

Figure 10. Detail with and without Chris in frame.

Matt Hill is a partner and workshop leader with National Parks at Night. See more about his photography, art, workshops and writing at MattHillArt.com. Follow Matt on Twitter Instagram Facebook.

UPCOMING WORKSHOPS FROM NATIONAL PARKS AT NIGHT

How I Got the Shot: Walkway to the Stars at Dry Tortugas National Park

Star stack over the moat wall at Florida's Dry Tortugas National Park. ยฉ 2016 Gabriel Biderman.

The Location

Last year, an amazing time-lapse video brought awareness to one of the most remote national parks in our country, Dry Tortugas. Three days after I watched that stunning piece, I was invited to come down and create my interpretation of the largest masonry structure in the Americas, under the night skies, all while doing prep work for our workshop in Dry Tortugas this coming July.

Dry Tortugas takes some effort to get to: Go as far south as you can in the continental U.S., then turn right and go 70 miles out into the sea. The fastest boat gets you there in just over two hours. As I walked around the deck of the boat, all I could see was an endless horizon in every direction. It was like looking at an infinite blank canvas, which can be thrilling and definitely a little daunting. Eventually a small red dot on the horizon turned into a larger box, then a brick rectangle, until โ€ฆ it finally became Fort Jefferson looming ominous above us.

I had a good eight hours to scout the fortress, which encompasses the whole island. I was immediately drawn to the walkway, which creates a moat around most of this engineering marvel. The fortโ€™s overall shape is hexagonal. I was paying attention to a few things as I made my way around the six-angled pathway. First, I noticed that at each turn, and at a low enough angle, the road seemed to meet the horizon.

This emphasized an infinite passage to the sky.

OK, I like that.

The next thing that came immediately to my mind: Does one of these paths point directly north? If we can blend that straight line to meet an epic circular star trail, I think we have a winner!

Lighting and Conditions

In an ideal world I would have planned this shoot around a new to half moon. It was summer and Milky Way season, plus the fort offers so many light painting opportunities. But the only time we could coordinate my visit was around a full moon, so I had to embrace the idea of lots of light. Fortunately the sky was clear except for some clouds that hovered over the far horizon.

Gear

Because I had only one night to scout, I brought a bunch of gear, including two rigs so that I could stay as productive as possible on a short summer night. The gear I used for this shoot was:

Test Shots

I always take two to 10 high ISO test shots to confirm focus, composition and exposure. Even though it was bright out with the full moon, our eyes adjust and see better than our viewfinder or LCD screen.

The first test shot (Figure 1) of 6 seconds, f/5.6, ISO 6400 was taken at a focal length of 24mm. The histogram showed that it was an average exposure with very little dark shadows and bright highlights.

Figure 1

The composition wasnโ€™t doing it for me. My main subject was the path, and it was not being given its due with that framing. I moved the rig to the middle of the walkway and went a little widerโ€”from 24mm to 20mm for the second shot (Figure 2).

Figure 2

Still needed some finesse. So I closed all the legs to the tripod and shot lower and wider, going from 20mm to 14mm. I was also observant of keeping the camera very levelโ€”I didnโ€™t want to distort or have converging lines in the fort by pointing at an oblique angle. I also wanted to include lots of stars and sky. Figure 3 is one of my few shots where the horizon is practically in the middle, but the strong foreground of the path plays nicely against the open sky.

Figure 3

I was almost there. Before I commit to an hour-plus exposure, it is very important to patrol those composition borders and make sure everything is there for a reason. I felt the entry point of the walkway was a little off. I wanted it to be coming in from both of the lower corners, so that path would fill the bottom of the frame and then fade off to infinity (Figure 4).

Figure 4

Using the Six-Stop Rule, I lowered my ISO from 6400 to 100 and then added the six stops to my shutter speedโ€”which turned 6 seconds into 6 minutes. However, the air temperature was about 75 F, too hot to rip a 6-minute exposure without inducing long-exposure noise. I felt safer using an ISO of 200 and a shutter speed of 3 minutes.

But something was nagging me: That histogram was too average.

I was about to create a dramatic 1- to 2-hour stack of exposures, and I didnโ€™t want it to be average-looking. So I shaved about one-third of a stop off the shutter speed, and set a final exposure of 2 minutes, f/5.6, ISO 250.

I set the camera to Bulb, turned off my LENR and set my Vello Shutterboss to 2 minutes, with a 1-second interval between shots, and an infinite number of frames. I set the timer on my phone and then went to the top of the fort to continue photographing with my other rig for a couple of hours.

Putting it Together in Lightroom and Photoshop

I ended up with 60 2-minute exposures that I was going to stack to create a 2-hour star trail. The exposure was similar across the 60 images, so in Lightroom I worked on one image, making simple Lens Profile corrections and slight adjustments to the Exposure (-45), Clarity and Vibrance settings, and then synced those adjustments to the other 59 images.

Then I selected all 60 frames and went to Photoโ€“Edit Inโ€“Open as Layers in Photoshop (Figure 5).

Figure 5

Depending on how big your file sizes are and how juiced your computer is, this can open in 1 to 2 minutes or 1 to 2 hours. (I recently stacked 600 shots and it took my poor MacBook Air close to 4 hours. Guess who is upgrading their travel computer!)

When my Dry Tortugas image opened in Photoshop, I selected all the layers and changed the blend mode to Lighten. And voila, all the stars connected to create a nice long star trail.

However, the caveat with this post-processing technique is that the Lighten blend mode also stacks any other highlights in the sceneโ€”such as, in this case, the white clouds. Photoshop blended all the clouds into one, which was a bit too much for my liking. (Figure 6).

Figure 6

I turned different layers on and off to find the clouds that I didnโ€™t want in the scene. I unfortunately identified that the first 45 images had clouds cutting right through the middle of the star trail. My two options were to go in and touch up 45 layers, or cut them out completely and go with a shorter star trail. I choose the latter strategy, keeping the last 15 layers and settling for a 30-minute trail with fewer clouds. The remaining first layer had two small clouds that I wanted to remove, so I added a layer mask and used a black brush to paint them out (Figure 7).

Figure 7

Once I finished editing in Photoshop, I flattened the layers to keep the file size from exploding, and then did final cropping, sharpening and touch-up in Lightroom (Figure 8).

Figure 8: Here is the difference between the fully stacked image (right) and one edited down to remove the intrusive clouds.

I do love the blue and green colors in the scene, but to heighten the drama and stay true to how old this building is, I converted the photo to black and white in Silver Efex Pro 2.

Which do you preferโ€”the color or B&W? Feel free to add your thoughts in the comments section below.

Be one of the few people to experience Dry Tortugas and Fort Jefferson at night during our upcoming workshop in July. See our Dry Tortugas National Park page for more information.

Gabriel Biderman is a Brooklyn-based fine art and travel photographer, and author of Night Photography: From Snapshots to Great Shots (Peachpit, 2014). During the daytime hours you'll often find Gabe at one of many photo events around the world working for B&H Photoโ€™s road marketing team. See his portfolio and workshop lineup at www.ruinism.com.

UPCOMING WORKSHOPS FROM NATIONAL PARKS AT NIGHT