Casting Out Shadows: When HDR is the Right Choice for a Night Scene

The acronym HDR stands for High Dynamic Range. The term can refer to a computer program, or a photograph that has been processed by an HDR program, or the technique of taking multiple photographs with the intention of blending them together in an HDR program.
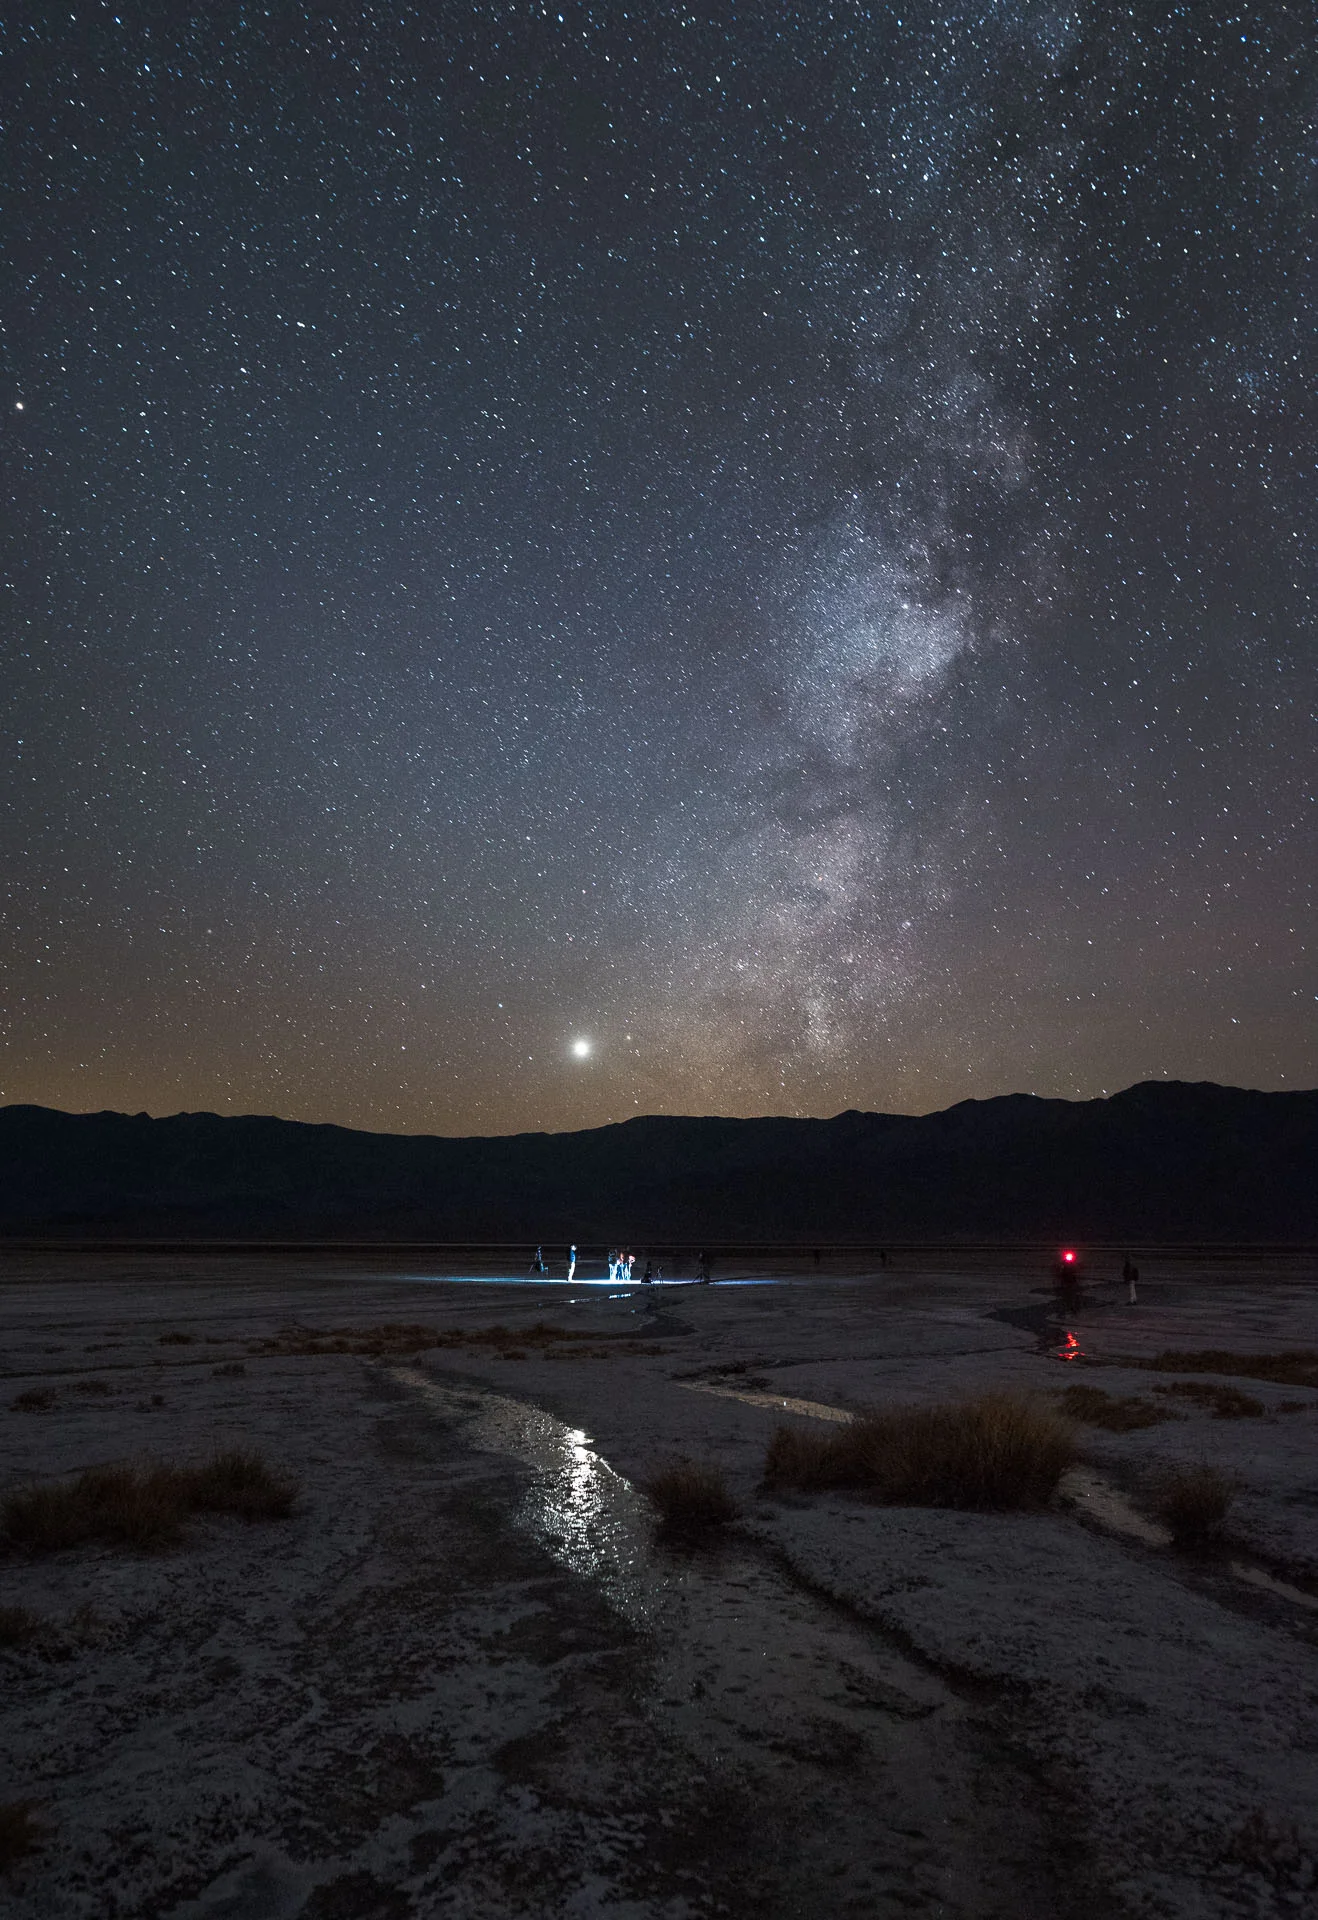
Let’s begin with the phrase β€œdynamic range.” Dynamic range refers to the amount of separation between the brightest and darkest parts of a scene. A scene low in dynamic range has a limited range of brightness tones (as seen below).

Example of a low dynamic range photo, from Death Valley National Park.

Example of a low dynamic range photo, from Death Valley National Park.

On the other hand, a scene such as this Moraine Lake photograph (below) contains a large range of brightness values. This huge difference between values is what makes a scene high in dynamic range. (β€œHigh contrast” is another phrase used to describe such a scene.)

Example of a high dynamic range photo., of Moraine Lake in Canada'a Banff National Park.

Example of a high dynamic range photo., of Moraine Lake in Canada'a Banff National Park.

The problem, of course, is that even the best cameras cannot capture a scene with an extreme amount of dynamic range. In the example of the Moraine Lake photo, to reveal the detail in all of the tones, I made five different exposures of the scene by using different shutter speeds (1/125, 1/60, 1/30, 1/15 and 1/8β€”all at f/11) and blended them together in an HDR program called PhotoMatix.

Final image created by blending five different exposures.

Final image created by blending five different exposures.

Night Applications

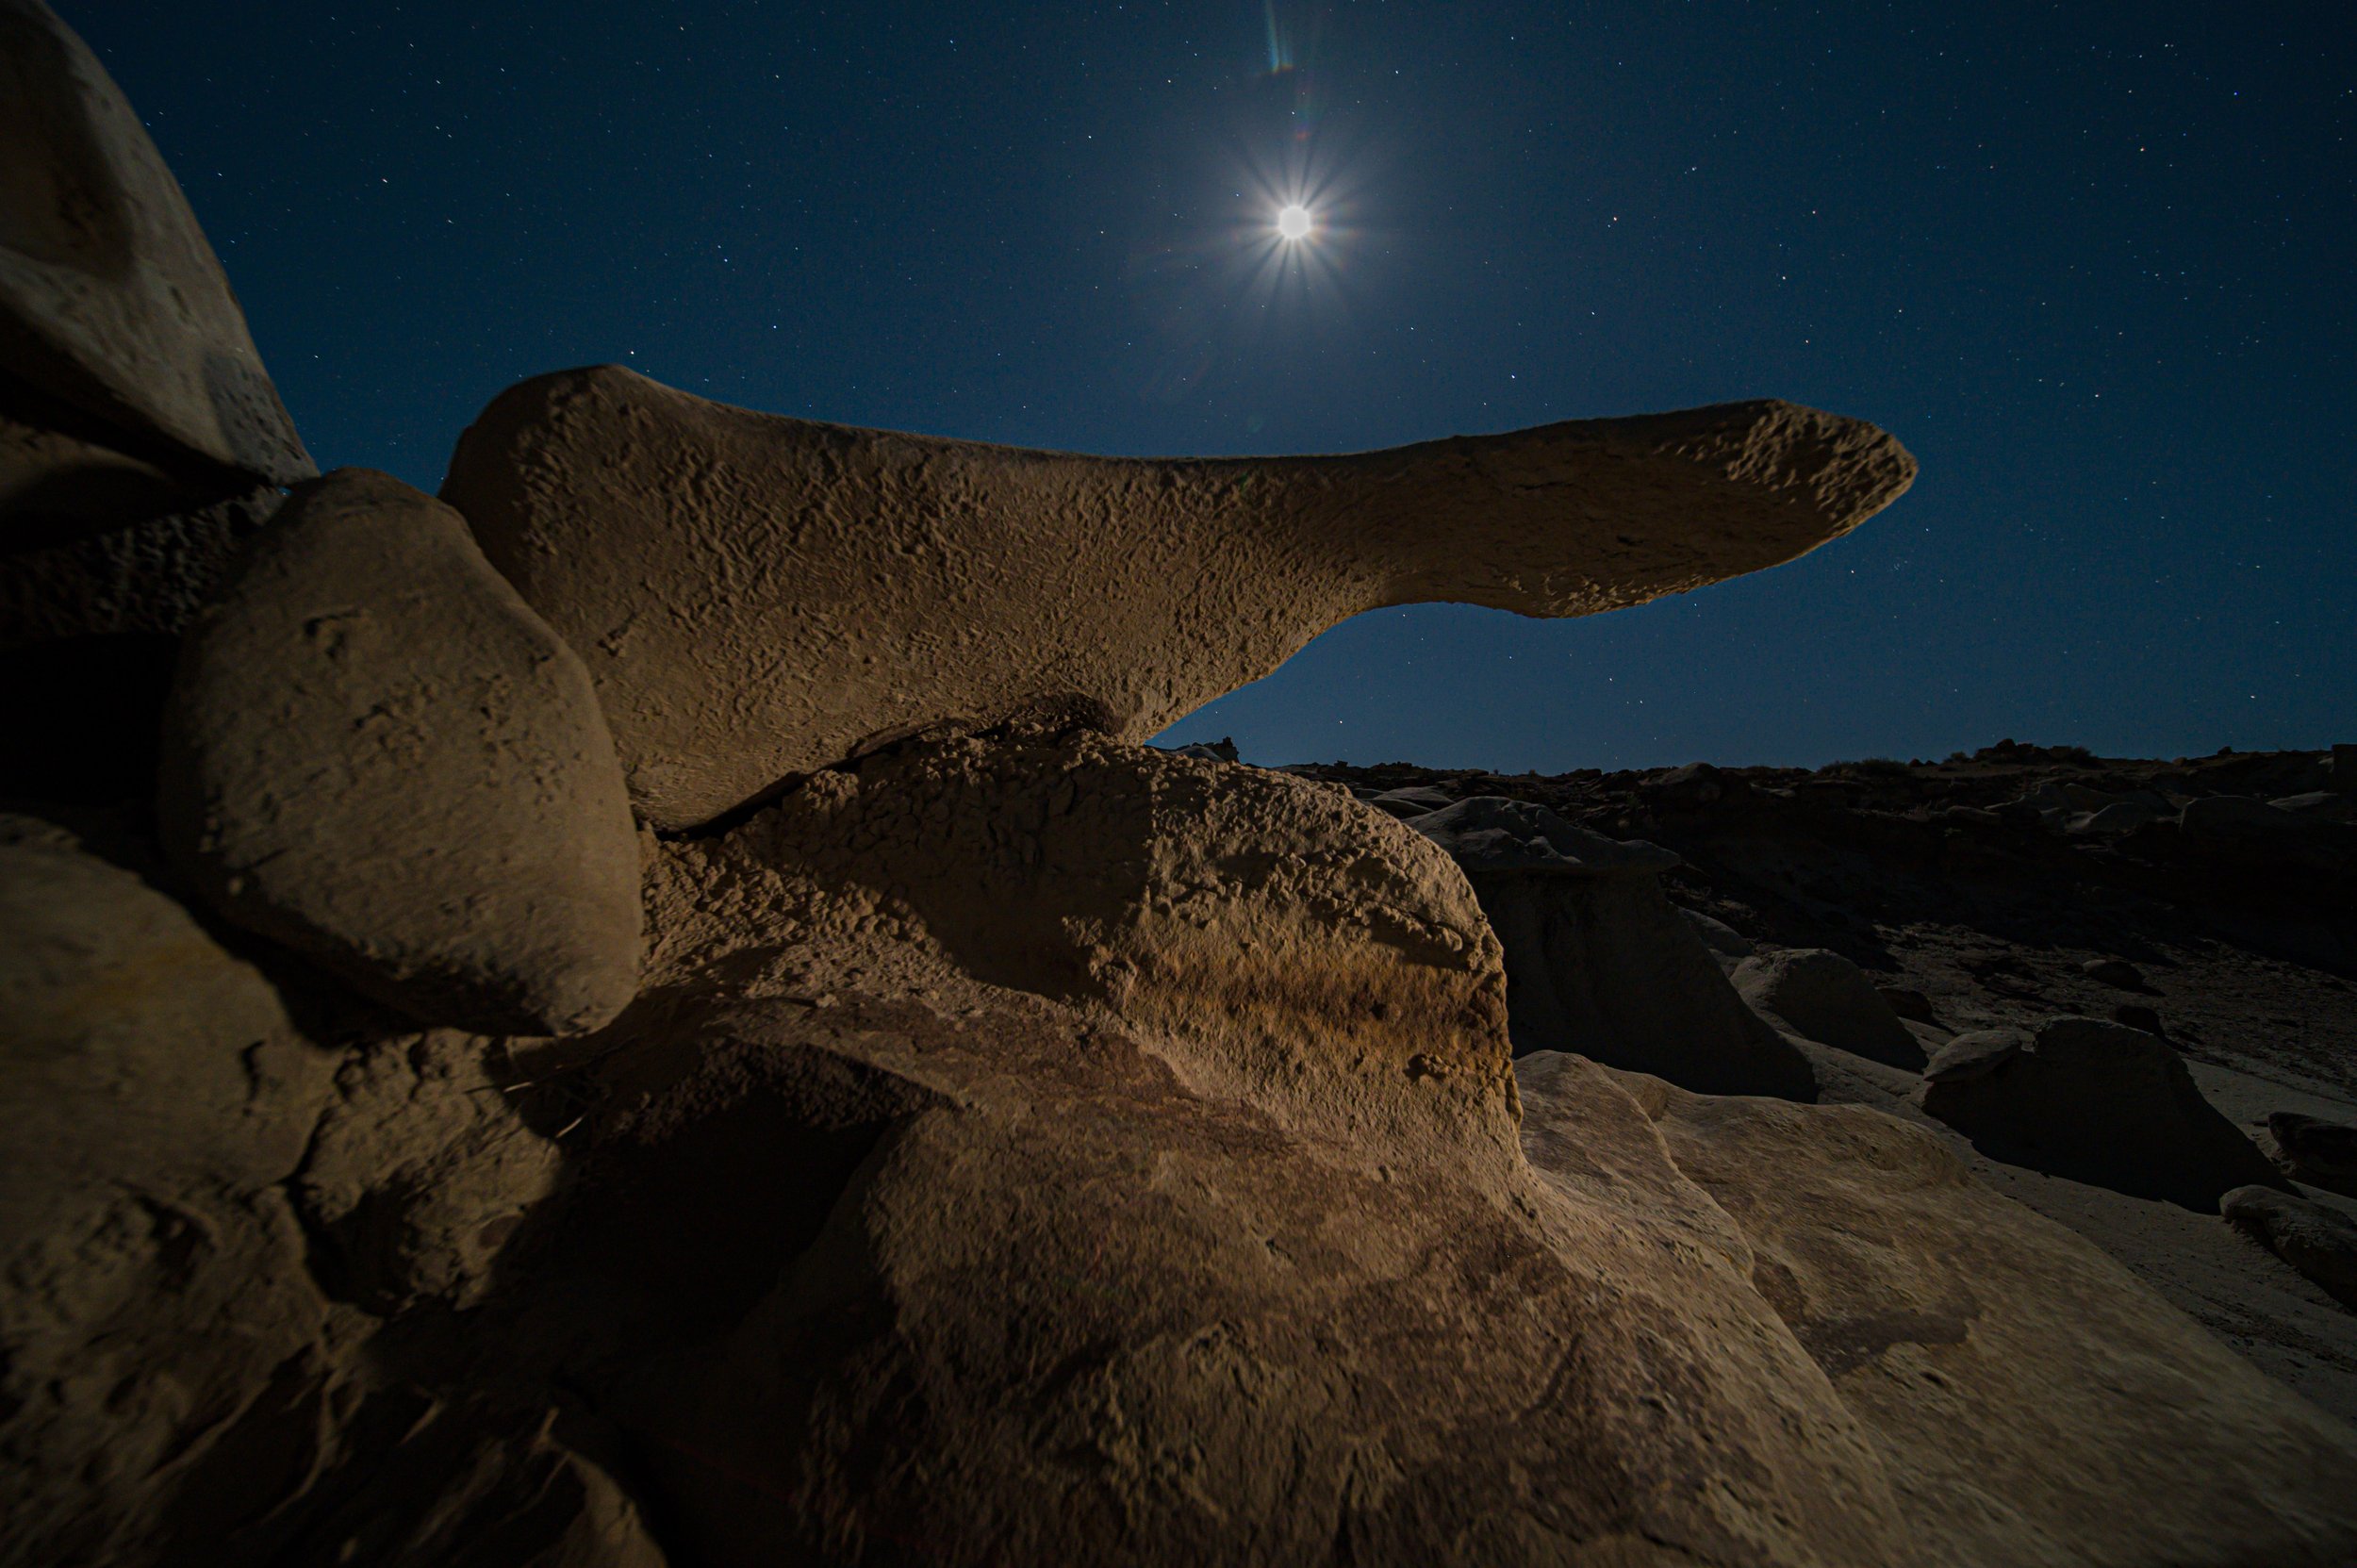
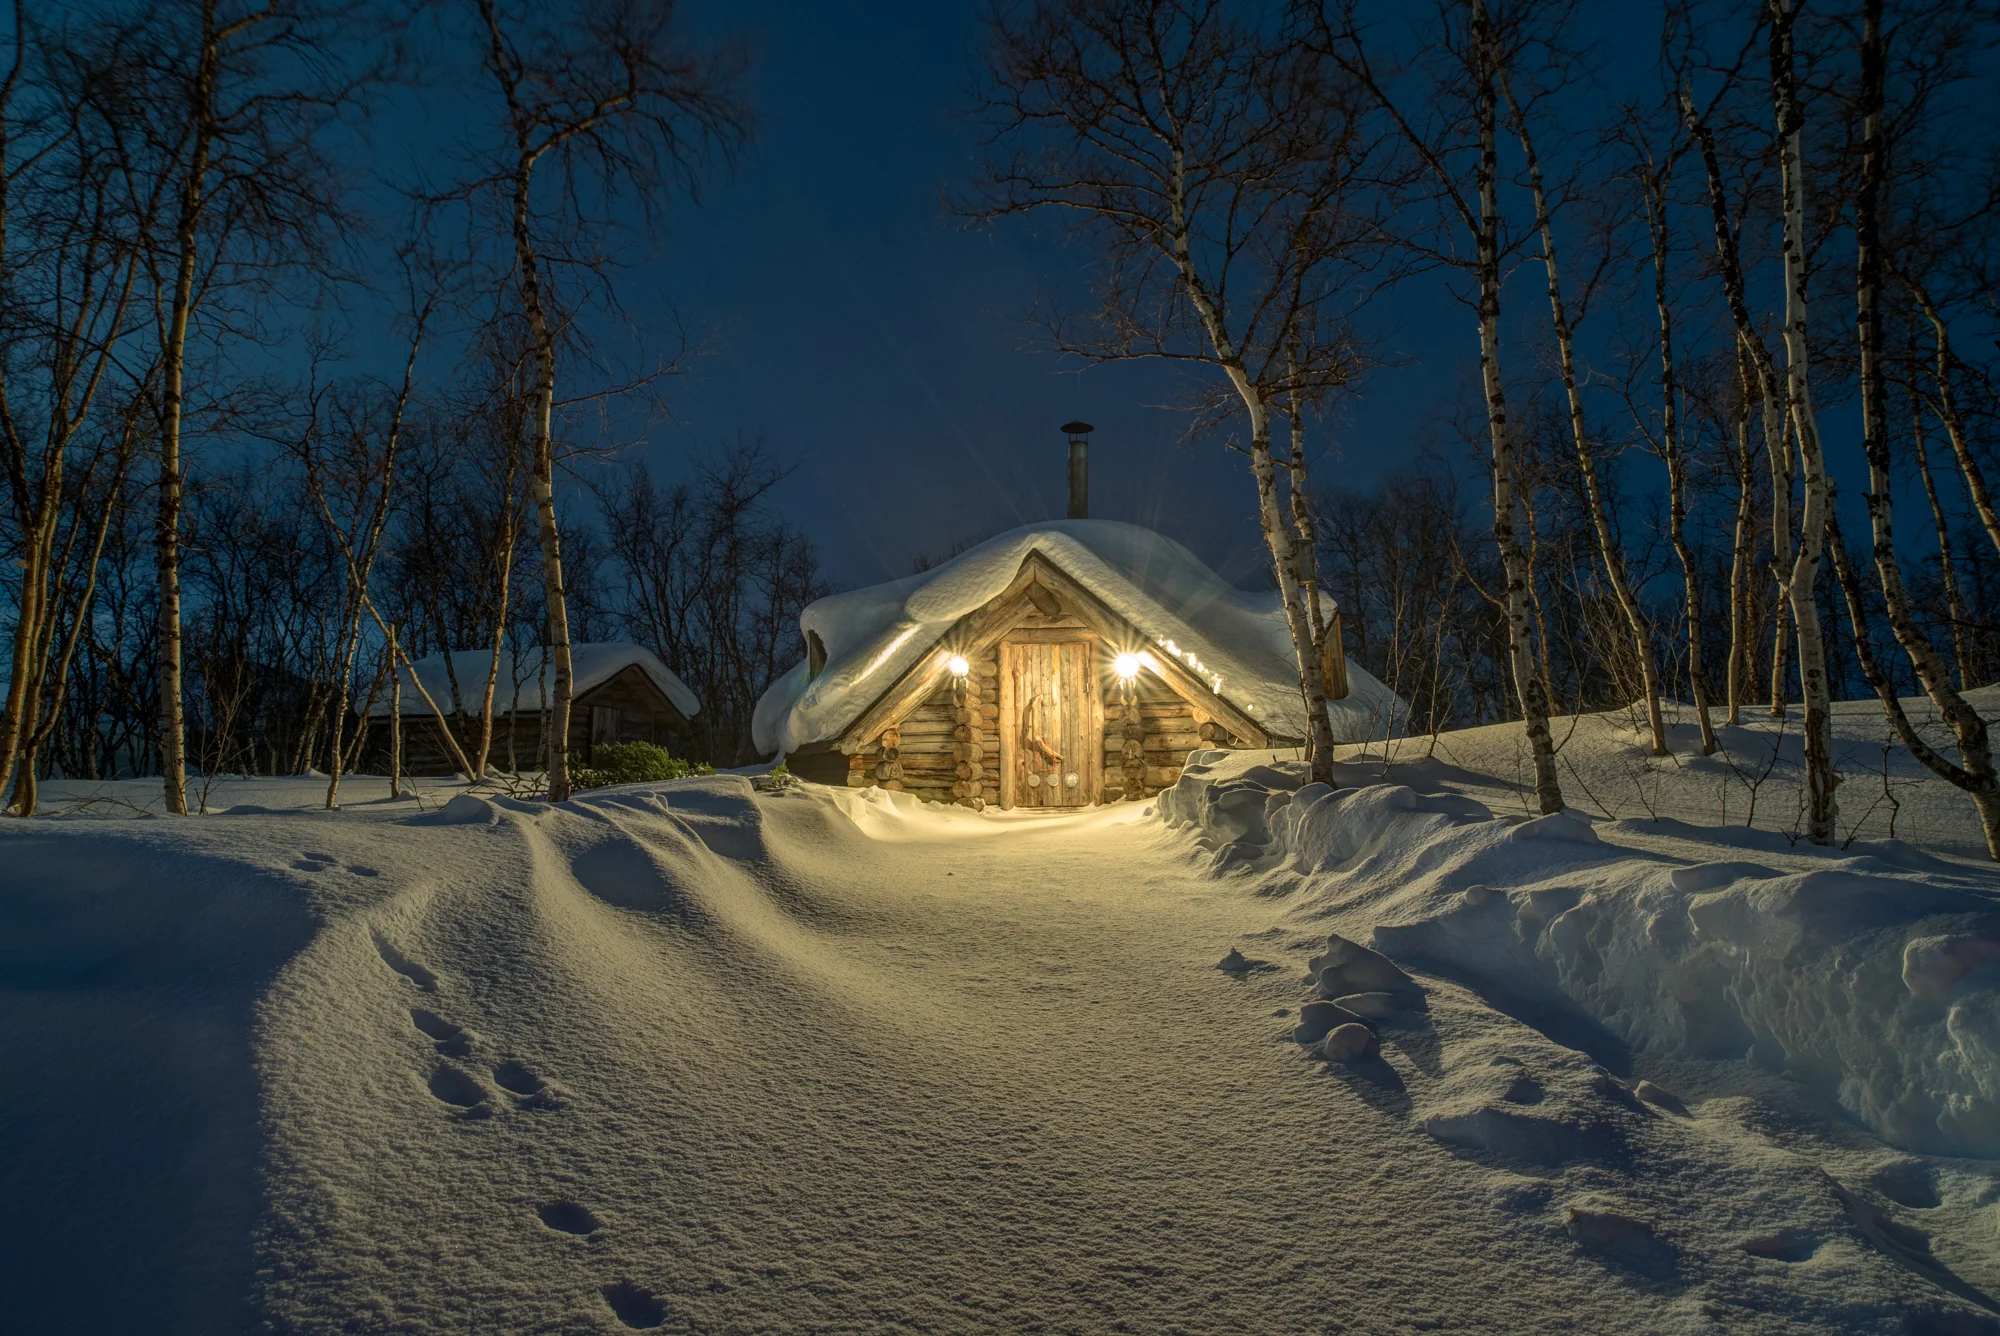
While HDR is a common technique in daytime photography, the definition of high contrast certainly describes many nighttime scenarios. Not all night scenes are high in contrast, though. A landscape illuminated by a full moon, for example, can be fairly low in dynamic range.

Low-contrast scene illuminated by the full moon, in Zion National Park.

Low-contrast scene illuminated by the full moon, in Zion National Park.

But any scene that contains deep shadows and very bright highlights is a candidate for the HDR processβ€”even if it's after dark. This scenario is especially common at night when we mix deep shadows and man-made light sources, such as city lights or car trails.

High-contrast scene mixing Las Vegas city lights and deep shadows.

High-contrast scene mixing Las Vegas city lights and deep shadows.

Below is a final image I made in Las Vegas after shooting three separate exposures of 1 second, 2 seconds and 4 seconds (all at f/11) and blending them together in PhotoMatix. This process reveals details in the dark shadows while allowing the city lights to retain texture while remaining bright.

Final image after HDR treatment.

Final image after HDR treatment.

Cuyahoga Case Study

I don’t use the HDR process for every nighttime image, but when confronted with deep shadows, bright city lights or brightly lit buildings, I’ll certainly consider it. This is exactly what happened to me while scouting and shooting for our upcoming night photography adventure workshop in Cuyahoga Valley National Park. I wanted to take a picture of the rail crossing and station at Boston Mill. In order to capture detail in the "Boston Mill" sign on the depot, I had to use an exposure of 8 seconds, f/8 at ISO 100.

At Cuyahoga Valley, an exposure of 8 seconds, f/8 at ISO 100 recorded detail in the highlights.

At Cuyahoga Valley, an exposure of 8 seconds, f/8 at ISO 100 recorded detail in the highlights.

However, this exposure left the sky and foreground very dark. Therefore, it was time for HDR. I needed to create a few more exposures that were brighter so I could get some detail in the darker areas of the image. Varying only the shutter speed to alter exposures left my f-stop constant, which in turn created the same amount of depth of field in each image.

Exposures of 15 seconds at f/8, 30 seconds at f/8, and 1 minute at f/8.

After viewing the histogram of the 1-minute exposure, I decided that the shadows had received enough light, and I didn’t need to open them up any more. Later, I took all four exposures and blended them together in PhotoMatix.

HDR blend of the four exposures.

HDR blend of the four exposures.

Blending the images together kept the highlight detail of the Boston Mill sign intact while brightening up the shadow portions of the image.

At this point I had all the exposures necessary to reveal the desired detail, but I had not captured the car trails that I was hoping for. Leaving my camera in position, I waited for more traffic and made a few more exposures. To create the final image (below), I used Photoshop to add a few more exposures with car trails to the HDR blended image above.

The final image of the HDR frame (four exposures combined) layered with car-trail exposures.

The final image of the HDR frame (four exposures combined) layered with car-trail exposures.

When making images at night, we’re faced with all sorts of challenges. In the case of the Boston Mill shot, the difficulty lay in the extreme contrast between the lit sign, the dark foreground and even darker sky. By taking multiple exposures and blending them together in HDR I was able to control that high contrast.

Like with any photography discipline, a firm grasp of the basics and being familiar with your gear will carry you through many situations. Knowing a few cool techniques like HDR, however, can greatly expand the possibilities.

For more information about shooting and processing HDR images, check out Tim Cooper’s books The Realistic HDR Image and HDR Photography: From Snapshots to Great Shots. If you are interested in using Tim’s HDR program of choice, click for a 15% discount on PhotoMatix.

UPCOMING WORKSHOPS FROM NATIONAL PARKS AT NIGHT

Be Out in the Cold: Why Winter is Great for Night Photography

'Tis the season to photograph at night!

There is a reason we call it a winter wonderland. Snow can cover the world as we know it and turn it into something white, pure and surreal.

Most of us dread snow, as it can become a deterrent to get from point A to B. But remember, it was only a few years ago that we would dream of winter weather cancelling our schools so we could stay home and create people, igloos and all sorts of fantastical things in the snow and ice. There has been a recent uptick in ice castles made by farmers, ski resorts and cold-region locals who for one or two months during the winter open these spectacular ice worlds that are often lit up at night!

So as we get ready to celebrate the longest night of the year, I wanted to share some tips to hopefully inspire you to bundle up and create some wonderful winter wonderland images.

This was taken of a kota, or warm hut, in the Lapland region of Finland. I passed by this perfect scene a few times, but when I saw the animal’s footprint in the fresh snow I ran and grabbed the gear. I shot at a low angle to emphasize the footprint…

This was taken of a kota, or warm hut, in the Lapland region of Finland. I passed by this perfect scene a few times, but when I saw the animal’s footprint in the fresh snow I ran and grabbed the gear. I shot at a low angle to emphasize the footprint and make the hut seem a little larger than life.

1. Find a new way to photograph the holiday lights

If you drive or walk around your neighborhood, you’ll see lots of outdoor lights covering the many streets and houses. These can be fairly simple to photograph, especially when they are also under the streetlights, but try to find a new way to interpret them.

With your camera on a tripod, zoom your lens during the exposure to add motion, or perhaps go in close for a detail shot that throws the rest of the scene out of focus. The holiday lights that hang across the streets look better when we have car trails going through them. Places like Rockefeller Square in New York City can be difficult to shoot because of the mass amounts of peopleβ€”good luck setting up a tripod! Look instead for quieter, neighborhood scenes that also epitomize the holiday cheer.

In an age when people can certainly overdo the holiday lights, I really was drawn to the simplicity of the paper bag luminarias that this house put out. I shot low and angled myself so the full moon was casting the dramatic shadow of the trees towar…

In an age when people can certainly overdo the holiday lights, I really was drawn to the simplicity of the paper bag luminarias that this house put out. I shot low and angled myself so the full moon was casting the dramatic shadow of the trees toward me.)

2. Get out there and play in the snow!

I still act like a kid when I see snowflakes falling. I can’t sled as fast as I used to but the snow adds such an added dimension to both day and night imagesβ€”you have to shoot it!

Obviously be careful with your gear if you are shooting while it is snowing. Either have an umbrella or a camera/lens wrap with you to protect your equipment from getting too wet.

A few ideas:

  • If the snow isn’t blowing too badly, shoot under an awning of a house that offers protection. Set up a time-lapse that shows the snow accumulating around the environs.
  • Try to freeze the snow with flash as well as play with shorter exposures like 1/4-second to 2 seconds to create more confetti-like snow.
  • Once the snow stops falling, head out to the park ASAP to try to capture some pristine snow -covered scenes. That fresh snow can add white-sand-dune-like surreality to an otherwise normal place. Shoot at a low angle to emphasize that rolling blanket of snow.
  • Look for animal or human footprints and compose them to tell more of a story.
  • Remember to overexpose by 1 to 1 1/2 stops to properly capture the white snowβ€”otherwise our camera meters will turn the snow gray.
One of my all-time favorite snow scenes. Shot with a point-and-shoot camera as I came out of the subway in NYC. I stayed under the awning and leaned against the wall, turning myself into a tripod. I put the camera on burst mode and shot exposures be…

One of my all-time favorite snow scenes. Shot with a point-and-shoot camera as I came out of the subway in NYC. I stayed under the awning and leaned against the wall, turning myself into a tripod. I put the camera on burst mode and shot exposures between 1/4-second and 1 second. Of the 50-plus frames I took, 6 or 7 were sharp enough to use, with this one being the winner. The person and the umbrella became the final pieces to the composition.

3. Be more productive

The biggest reason I love the winter is because I can start shooting night scenes earlier and still go to bed at a reasonable time! With the sun setting around 5 p.m. for most of the continental United States, you can skip out of work early and do a quick 1- to 2-hour shoot and still be home for dinner with the family!

Or plan longer/weekend shoots with friends where you can really take advantage of the time. If you are comfortable with your night skills, bring two kits and be incredibly productive in the field! The ultimate would be to visit Alaska between December and February and have 20 hours of night photography per day!

I went out to Central Park with Chris Nicholson last year after the NYC blizzard. It was hard to find many snow scenes that weren’t walked through but I loved this classic shot of the San Remo building reinterpreted with the trodden snow, blowing cl…

I went out to Central Park with Chris Nicholson last year after the NYC blizzard. It was hard to find many snow scenes that weren’t walked through but I loved this classic shot of the San Remo building reinterpreted with the trodden snow, blowing clouds and city night lights. And we were both home in plenty of time to get a full night's sleep!

4. Keep warm and safe

The No. 1 reason most people don’t like to photograph in the winter is the cold. Add the cooler nighttime temperatures and you have nixed probably 80 percent of photographers, if not more.

But shooting in winter doesn’t need to be a physically miserable experience. Bundle up with layers, and wear wool instead of cotton.  The former will wick the sweat off your body. I’m a big fan of Smartwool products, especially for socks and a base layer.

Also, protect extremities like your feet and fingersβ€”they get colder first. We just started using these amazing new Vallerret photography gloves. They are made in Norway and have a pocket to place hand warmers to ensure you can keep on clicking no matter what the temperature!

Whatever gloves you use, bring several hand warmers that you can put inside for added warmth.

Boots that have a great tread are also important. You don’t want to slip on ice and take a spill. Walk carefully and use your tripod as a walking stick if need beβ€”without the camera on it of course! And if you’ll be working around a lot of ice, Chris Nicholson swears by Ice Trekkers to keep you on your feet and your gear off the ground.

5. Experience the northern lights!

Summers have lighting storms and tumultuous thunderstorms, but the most spiritual and jaw-dropping weather phenomenon to photograph are the aurora borealis, or northern lights. It’s definitely on most people’s β€œbucket list,” and rightly so!

However, the northern lights are difficult to predict and of course generally located in the colder regions of the Arctic Circle. Alaska is probably the easiest location for most Americans to find the phenomenon, but you’ll still want to travel a good distance from Anchorage to really experience them at their best.

I’m a big fan of the northern Scandinavian region that includes Norway, Sweden and Finland. The fjords and Lofoten Islands in Norway offer incredible landscapes and water for the northern lights to reflect and bounce off. Don’t forget the trending glass igloos where you can stay indoors and watch the dancing green fairies in the comfort of your bed all night long!

Iceland is a close second and definitely has plenty of epic landscapes, but because it is located on the Gulf Stream, a lot of weather and clouds can cover the night skies. The Arctic Circle has fewer weather patterns and offers a reliable amount of crisp and clear nights throughout the winter months.

A big misnomer about the auroras is that they can be photographed only during a new moon. In reality, the lights are definitely bright enough to shoot and see under a full moon, plus you get the benefit of the moon lighting your foreground! If you shoot the auroras only under a new moon, you will have a lot of the same shotsβ€”silhouetted foregrounds and vibrant northern lights. I’d rather shoot during a partial moonβ€”so I get some silhouettes, some light painting and some moonlit scenes at different times of the night.

The full moon rising with the aurora borealis dancing all around itβ€”proof that you can shoot the northern lights during a full moon. β€˜Nuff said.

The full moon rising with the aurora borealis dancing all around itβ€”proof that you can shoot the northern lights during a full moon. β€˜Nuff said.

So throw another log on the fire and layer up for a productive winter wonderland. And remember, there’s a bonus; This is the best season to enjoy a cup of hot chocolate after a long night out exploring!

Gabriel Biderman is a Brooklyn-based fine art and travel photographer, and author of Night Photography: From Snapshots to Great Shots (Peachpit, 2014). During the daytime hours you'll often find Gabe at one of many photo events around the world working for B&H Photo’s road marketing team. See his portfolio and workshop lineup at www.ruinism.com.

UPCOMING WORKSHOPS FROM NATIONAL PARKS AT NIGHT

Any Time of Year, A Great Idea: Giving Back to America's Best Idea

2016 was a great year for the national parks. The centennial really put the parks back into the minds of Americans, resulting in increased visitation and awareness. For more information, see the State of Utah's β€œMighty 5” national television ads promoting their national parks, or the Suburu β€œWhat We Leave Behind” ad campaign, or the REI β€œCentennial Adventure” outreach, or the explosion of the Chimani park-guide apps, or the yearlong coverage of parks by National Geographic, or the serial β€œOn the Trail” features on "CBS Sunday Morning," or the sudden popularity of the TV show β€œRock the Park.” Et al.

So I’m intrigued to see what 2017 brings. Will interest in the parks remain at these levels, or diminish as the glow of the centennial subsides?

And what will the ramifications be? This year’s record attendance also produced some wears and tears, something the parks already had enough of before. The uptick in visitor fees may help pay for some of that maintenance and facilities backlog, but will next year’s probable downtick create an even greater shortfall for an already cash-strapped park system?

Who wouldn't want to help protect a view over heaven? Olympic National Park, Β© 2016 Chris Nicholson.

Who wouldn't want to help protect a view over heaven? Olympic National Park, Β© 2016 Chris Nicholson.

Another thought, which despite first appearance, I promise is related to the first: As national park photographers, as nature photographers, we sure do owe something to these wonderful places. They are our subject, our inspiration, our muse. As such, we should feel proud of them. We should feel protective of them. And we should feel an obligation to leave them better places than we found them, to ensure that they can be our muse again, and that they can inspire future generations of artists in our stead.

But how can we do this, aside from leaving only footprints (and hopefully not even those)?

Well, there certainly are means to do so. So as the old year winds down and we enter this season of giving and of giving back, I made a list of ways that we, as photographers, as lovers of these landscapes and wildernesses (and, of course, the pristine night skies that canopy them), can help support the national parks now and for the years and decades to come.

One way is to support the organizations dedicated to the cause of preserving these wild spaces. That support could be financial, but it could also be time volunteered, or it could be the creation of intellectual property (e.g., in our case, photography). Here are a few organizations to consider:

National Park Foundation

Chartered by Congress in 1967, the National Park Foundation is the official charitable partner of the National Park Service. The foundation raises private funds to support conservation and preservation efforts, to spread the word about the parks, and to inspire young Americans to learn to love these lands too. They also have a great free email newsletter that features articles about the parks. www.nationalparks.org

National Parks Conservation Association

These folks have been at it for a while, long enough to start getting ready to celebrate their own centennial. Founded in 1919, the National Parks Conservation Association (NPCA) has been a strong and independent voice supporting our country’s greatest idea. Their efforts range from in-park support to legal defenses to assist public lands to lobbying for pro-parks policy and legislation in Washington, D.C.  They also publish the excellent National Parks magazine, a subscription to which is a benefit of becoming a member. www.npca.org

NPCA volunteers work to remove fencing near the western entrance of Yellowstone National Park to allow pronghorn antelope to reestablish historic migration routes. Photo courtesy of the National Park Conservation Association.

NPCA volunteers work to remove fencing near the western entrance of Yellowstone National Park to allow pronghorn antelope to reestablish historic migration routes. Photo courtesy of the National Park Conservation Association.

National Park Trust

The National Park Trust is dedicated to land acquisition and preservation, along with conservation projects in 45,000 acres of public lands in 33 states. Perhaps more importantly, they also work to cultivate a love of the parks in the youngest generation, through two national youth programs, the Buddy Bison school program and Kids to Parks Dayβ€”because, as they say, β€œkids need parks and parks need kids.” www.parktrust.org

In Texas' Big Thicket National Preserve, Ranger Alex Halbrook leads and teaches school children who are part of the NPT's Buddy Bison program. The educational outreach program provides parks, wilderness and STEM opportunities to K8 kids in more than…

In Texas' Big Thicket National Preserve, Ranger Alex Halbrook leads and teaches school children who are part of the NPT's Buddy Bison program. The educational outreach program provides parks, wilderness and STEM opportunities to K8 kids in more than 60 schools across the U.S. Photo courtesy of the National Park Trust.

Sierra Club

Founded by noted naturalist (and meme star) John Muir, and staunchly supported by Ansel Adams, the Sierra Club is certainly one of the oldest (perhaps the oldest) group supporting the preservation of the wild. They also claim to be the nation’s largest grassroots environmental organization, with 2.4 million members and supporters. They help protect over 250 million acres of wilderness, host over 20,000 outings and events per year, and their reach and government lobbying power is well respected. www.sierraclub.org

Friends of Parks Associations

Most (if not all) of the parks are associated with a local organization that supports that specific park. These tend to be the groups that benefit from merchandise sales at the park gift shops, and the ones that get their hands dirty helping to blaze trails, or restore plantlife environments, and so on. Examples include the Yellowstone Forever, Conservancy of Cuyahoga Valley National Park and Friends of Big Bend National Park. If you live near a national park, or frequent a specific one, orhave an affinity for a specific park for whatever reason, these micro-organizations are a great place to start helping. For info on the many that exist, see the Friends Group Directory collated by the National Park Service.

Volunteers help with plantings at Glacier National Park. NPS photo by Jacob W. Frank.

Volunteers help with plantings at Glacier National Park. NPS photo by Jacob W. Frank.

Also, keep in mind that another way to help all or any of these organizations is to spread the word about them. These days we all have our own media reach, so can share the links and stories of these groups on Facebook, Twitter, etc.

Congress

On the federal level, national parks have been underfunded for yearsβ€”the reported maintenance and repair backlog is about $12 billion. Not only does that endanger the parks we have, but is also a good argument for not creating new parks, which is an unfortunate side effect.

How can you help with this, other than donating time and money to those organizations that try to help fill in the financial gaps? Write to your Congressperson to encourage the restoration of lost funding. Despite the massive list of deferred maintenance, in the first half of this decade the National Park Service budget was reduced by 12 percent, or $364 million. That’s understandable during cash-strapped economic periods, but surely in better times we, as a country, can start finding ways to recommit to this important shared resource.

(Along the same lines, the NPCA offers a "Guide for Meeting With Legislators," should you be fortunate enough to do so.)

Annual Pass

Buy an American the Beautiful pass even if you don't need it. If you travel to the parks a lot, the pass is a no-brainerβ€”you’ll pay it off in about 3-4 visits. For one year, the pass garners you free entry to all national parks, national monuments, national historic sites, national wildlife refuges, national forests and grasslands, and all units managed by the Bureau of Land Management, Bureau of Reclamation and U.S. Army Corps of Engineers. That’s a lot of places. But even if you visit just one park per year, buying an annual pass contributes directly to the system, helping to support something you obviously care about.

Photography

Finally, you can consider donating photos or photography to the park. Anyone reading this knows the value of a good photograph. If donating your work is not your thing for business reasons, I totally understand that. But if you’re the type of photographer who picks, say, one organization to help out, then a park foundation or association is a worthy one to consider. A place like Yellowstone doesn’t need the photo help, but smaller parks with minimal budgets, staff and infrastructure may appreciate the gesture, as would nonprofits that genuinely try to reserve their cash for their causes.

I read something recently that encouraged people to think of the parks not as "federal lands," but rather as shared resources, as national treasures. I further that sentiment by suggesting that because we co-own these places, we're all responsible for helping to sustain them.

Chris Nicholson is the author of Photographing National Parks (Sidelight Books, 2015). Learn more about national parks as photography destinations, subscribe to Chris' free e-newsletter, and more at www.PhotographingNationalParks.com.

UPCOMING WORKSHOPS FROM NATIONAL PARKS AT NIGHT

Recapping Our Final Workshops of 2016: Arches and Death Valley

Winding down 2016 also means that National Parks at Night is winding down its first year. (Which seems odd, because we're already working on our third year.) Part of that winding down was running our final two workshops of 2016, at Arches National Park in Utah and Death Valley National Park in California.

Both workshops were a lot of fun and productive, with pristine night skies and beautiful scenery. Check out below for some details.


Arches National Park

November 15-19, 2016,
by Matt Hill

Fifteen creative souls joined Tim Cooper and I in Utah at Arches National Park. With experience levels ranging from first-time night photography shooters to advanced artisans of the night, they all tackled the iconic Arches landscapes with enthusiasm and great cheer.

The workshop started directly after the supermoon, giving us more and more access to darkness and Milky Way as the workshop proceeded, while still giving some stunning lighting from the waning full moon.

We visited many of the breathtaking vistas in Arches: Park Avenue, Balanced Rock, The Windows, North/South Arch, Turret Arch, Double Arch, Landscape Arch, Pine Tree Arch and the coveted (and often crowded) Delicate Arch.

The weather played niceβ€”it was warmer than expected during the beginning of the workshop. And we had clear skies most nights, except for some pesky clouds here and there. But what's night photography without a little adversity, right?

The students were eager to hone their skills for star point and Milky Way shots, for light panting, and for star trails and star stacking. We covered all those topics and then worked on combining them, in groups and individually. We're certainly proud of our students' accomplishments, and from what we heard at the end of the workshop, so are they. Mission accomplished!

One of our favorite moments in the workshop is always the group show at the end. Everyone gets to see how they and their peers have grown during the workshop. Here is a look at their wonderful work as a video (slideshow available on the workshop page for larger views of the photos). Enjoy!


Death Valley National Park

November 15-19, 2016,
by Lance Keimig

Death Valley is one of the most famous, but least known of our National Parks. It’s famous for being the hottest place on Earth, for having the lowest elevation in the U.S., and of course for the colorful name that leads one to think of a dying man lost in the desert sun, crawling across the desert in search of water only to find mirages, cacti and rattlesnakes.

Death Valley is not so well known simply because of the sheer scale of the park, and the incredible diversity of flora, fauna, geology and weather to be found there. Most people visit for a few days or a week, which is barely enough time to scratch the surface of this incredible wilderness in the Great Basin near the California-Nevada border.

I’ve been visiting Death Valley regularly for the last six or seven years, and have taught a couple of night photography workshops there before, but still have much to learn about and see in the largest of our national parks.

Using my Coast Portland focusing light on the Death Valley salt pans a couple of nights before the workshop began. Also note my Manfrotto Series 1 Traveler tripod, my Nikon D750 and Peak Design Everyday Backpack. Four sponsors in one photo, totally …

Using my Coast Portland focusing light on the Death Valley salt pans a couple of nights before the workshop began. Also note my Manfrotto Series 1 Traveler tripod, my Nikon D750 and Peak Design Everyday Backpack. Four sponsors in one photo, totally unplanned! See, we really do use this stuff! Photo by Chris Nicholson.

Fellow instructor Chris Nicholson spent a couple of days with me a year ago during my previous Death Valley workshop, but this was our first time teaching together. We arrived a few days early to scout locations, to get acclimated and to plan our strategy for the week. We feel that those few days before a workshop spent in a park are always critical to making the experience as good as it can be for the participants. It gives us a chance to get into the groove of working together and also to match the rhythm of place itself. Of course, this little bit of extra time is our opportunity to shoot for ourselves, and we did just that.

As with most of our workshops, we had a mixture of alumni and new faces, advanced photographers and novices. What was rather unusual was that we had only three women out of 15 participants. It was, however, a great group and everyone got along well and worked together to make the most of our experiences in the park.

We had planned for this workshop to begin right after the full moon so that we had bright moonlight at the beginning and increasingly dark skies toward the end as our group became more confident.

On the first night of the workshop, we hiked into a canyon to photograph the enormous Natural Bridge, which was a great place to start. It also worked out to be a fitting consolation prize for one of our group who had wanted to attend the Arches workshop but couldn’t sign up before it sold out!

After a few hours in the canyon, we ventured out into Badwater Basin for wide-open skies with salt flats in the foreground and mountains on the horizon. Recent rains had dissolved most of the famed geometric patterns in the salt pans, but new ones had already begun to form, and we spent time seeking them out.

We had planned to visit the Mesquite Sand Dunes on the second night, but the wind kicked up and made it impossible to go out to the dunes. Instead, we followed the Badlands Loop trail into the canyon below Zabriskie Point, and the group worked collaboratively to great success on light painting images. In the end the change of plans worked out perfectly. Chris and I had scouted off-the-beaten-path access to the dunes, but despite that, there had still been quite a few footprintsβ€”the No. 1 enemy of the photographer working with a sandy landscape. But the wind that blew in on the second night cleaned the dunes of every single footprint and dissipated by the next morning, leaving us pristine dunes to photograph on the third night. We couldn’t help but leave a few footprints behind, but did our best to walk in each other’s tracks.

On the fourth night, we traveled just outside park boundaries to Rhyolite ghost town, just across the border in Nevada. Rhyolite is always a great location for workshops, as the remaining buildings are scattered over a large area, making it easy for the group to spread out and keep out of each other’s way. After making what I think is the best workshop group photo ever (above), we broke up into small groups, and happily spent the night among the ruins.

On or last day, we had our final presentations (below) and then a group lunch at the Furnace Creek Inn. That night, we went to the flats south of Salt Creek, which was a similar location to Badwater, but with some spots of shallow water that could be framed to reflect the starry sky.

By this time of the week the sky was completely dark, as there was no sign of the moon until quite late. Despite it being November, we were still able to photograph the tail of the Milky Way, which was a highlight for many in the group. Later we went to the Furnace Creek area to photograph the surrounds in the soft glow of the lights of the village reflected off of the landscapeβ€”an eerie scene that makes this one of my favorite places to photograph in the park.

There are many great locations that we didn’t get toβ€”Racetrack Playa, the charcoal kilns, Ubehebe Crater and the higher elevations in the western side of the park. Somehow, I’m sure that most of our group will find their way back to Death Valley again someday to further their explorations.

Death Valley National Park Night Photography Workshop Student Slideshow ** This slideshow showcases the work of 15 students with a wide range of experience in night photography as they learned more about shooting the night sky and stunning landscapes of Arches National Park in Utah.


Thank you to the perk providers

We owe a special thanks to our partners for how they helped the attendees of both workshops, supporting our mission to share and capture the beauty of national parks (at night!). Nikon sent a generous loaner package of gear for attendees to use, including D5's, D750's, D810A's and lenses ranging from the 10.5mm to the 16mm to the 20mm to the 14-24mm (all among our very favorites for night-sky work).

Coast Portland generously supplied flashlights for all attendees to own and love. X-Rite supplied an i1 Display Pro to profile and calibrate our teaching laptops and projectors. Digital Silver Imaging provided a set of sample prints of NPAN instructor photos for students to view. TetherTools sent along a Case Relay System which Matt used to capture many timelapses and star stacks. And Manfrotto was along too, supporting all of the instructors' cameras.

Nikon D5, D750, D810A and D500 bodies, plus AF fisheye-Nikkor 16mm f/2.8d, AF DX fisheye-Nikkor 10.5mm f/2.8, AF-S Nikkor 14-24mm f/2.8g ED, PC-E Nikkor 24mm f/3.5d ED, AF-S Nikkor 24mm f/1.4g ED, and AF-S Nikkor 20mm f/1.8g ED

Tim and Matt a full of glee at Double Arch

Chris using his Coast HP7R to focus on some rock formations in Death Valley's Furnace Creek area. Shooting with a Nikon F5 on his Gitzo 3541L tripodS.

Matt rocking a Coast HP7R and a Peak Design Everyday Backpack 30L on the trail to Landscape Arch.

See more about Matt's photography, art, workshops and writing at MattHillArt.com. Follow Matt on Twitter Instagram Facebook.

UPCOMING WORKSHOPS FROM NATIONAL PARKS AT NIGHT

'Tis the Season to be Gifting: Our Guide for Night Photographers

Well, the holidays are upon us. How can I tell? I’ve eaten turkey-based foodtstuff six days in a row.

With that in mind (the holidays, not turkey), I and my National Parks at Night partners started thinking about things we’d like as gifts. … Oops, I mean things that other night photographers might like as gifts.

So we put together a list of great products related to photography, the night sky and the national parks, then thought about why we love these items. Then we wrote it all up and published it as our very first "National Parks at Night Holiday Gift Guide."

This Gift Guide is our gift to you. We’re providing it as a free downloadable PDF ebook, so you can read it and reference it on any device, anytime, anywhere. Inside you’ll find products from major brands such as Nikon, Manfrotto and Apple, along with great little finds from smaller companies and startups. You can download it here:

Download 2016 Holiday Gift Guide

Feel free to share the guide, too. Blog it. Tweet it. Facebook it. Email it to a friend. Print some copies and stand in Times Square shouting, "Hear ye hear ye read all about it! Amazing gifts for night photographers!" Holidays are for happiness, so spread the cheer.

If you prefer to read the guide in our blog, that's okay too; we're also publishing it right here, below. (Though, we will say the ebook version looks cooler. It has a lot more pictures, plus it contains two discount codes that don't appear anywhere else online, including this website.)

We hope that perusing the items in the guide will inspire you to give some great gifts to the night photographers in your life. And if you’d like to give us one or two of these things, we won't argue!


2016 Holiday Gift Guide

Raindrops on roses, whiskers on kittens, bright copper kettlesβ€”none of these are likely on the holiday wish-lists of night photographers. Why? Because those don’t help us shoot in the dark. (Though we might welcome warm woolen mittens.)

However, the photography industry is full of products that do help us, or that we covet at least for the fun of owning and using them. In one way or another, all help us make better photos, and all help us have more fun in the dark.

If you’re searching for the perfect gift for the nocturnal photographer in your life, then we’re here to help. The following includes a few of our favorite things for seizing the night.

β€”Gabe, Tim, Matt, Lance & Chris

p.s. β€” If you decide to purchase any of the items in this gift guide, please consider using the links included, as many help earn a small commission that supports the National Parks at Night workshop program.

Apple

iPad Mini 4

A tablet is one of the most useful ancillary tools in modern photography. The iPad Mini 4 is certainly among the best in the category, and easy to carry in a camera bag. Use it for apps that help you scout national park locationsβ€”such as Chimani, Photo Pills or Photographer’s Ephemeris. Or use it for apps that help you produce better night photographyβ€”such as Tack Sharp or even Adobe Photoshop Lightroom. Also use it for keeping up with emails, making photo notes on-site, or carrying your portfolio of fantastic night images everywhere you go.

B&H Photo Video Pro Audio

Gift Card

We promise youβ€”if you want to let the photographer decide, there’s no gift card they’d rather have than one from the mothership of all camera stores, B&H. Cards are available in varying amounts, can be used online or in-store, and they fit perfectly in a stocking.

Coast Portland

HP7R

Hands-down, our favorite flashlight for light painting. The HP7R outputs up to 300 lumens of bright light in a perfectly even beam, allowing for smooth painting of objects near or far, and features three power modes and a slide focus for honing or broadening the illumination. It can be powered by either alkaline or lithium batteries, and rechargeables can be recharged right inside the casing using the included micro USB connector. Moreover, the HP7R is impact- and weather-resistant and comes with a lifetime warranty.

(For a 25% discount available only through National Parks at Night, use the code β€œPARKSATNIGHT.”)

CreativeLive

Night Photography Week Online Course

CreativeLive offers some of the very best photography education on the internet, and our favorite (though we admit bias) is the Night Photography Week bundle we created with them in 2016. From the entire National Parks at Night crew, learn about gear, scouting, astrolandscapes, light painting, night portraiture and more. The course comprises nearly 18 hours of instruction in 82 class segments, plus bonus materials that include information on camera and light-painting gear, lists of apps to help with location scouting and night photography, and articles about topics such as camera settings and the 400 Rule.

Digital Silver Imaging

Museum-Quality Print

The end product of successful photography is a beautiful print, but in this busy modern age too few of us have time to dedicate to our digital darkroom. So the perfect gift for the photographer in your life could be a top-notch print of his or her work. Digital Silver Imaging is the place to get it. DSI combines the best of digital technology and chemical-based silver printing to create works of stunning quality. The proof is in the print, or in the clienteleβ€”regular DSI customers include museums, collectors and photographers with a discerning eye for perfection.

(For a 15% discount available only through National Parks at Night, use the code β€œNPAN16.”)

Gitzo

GH3382QD Series 3 Center Ball Head

For the past couple of years Gitzo had been promising an A-grade ball head, and then they delivered an A+ instead. The GH3382QD Arca-type compatible head is low-profile, low-weight and can hold a 40-pound camera/lens combo with no creep or fuss. Moreover, loosen the screw-knob lock and due to the tungsten disulfide coating, the ball moves 360 degrees as smooth as silk.

Intervalock

Intervalock

If you’re tired of your intervalometer dangling from your tripod, blowing in the wind, shaking your camera and ruining your long exposures, the most elegant solution we’ve seen is the Intervalock. Secured to a tripod leg by a Velcro strap, this portable pocket will keep almost any model of intervalometer still and accessible.

Light Painting Brushes

Deluxe Starter Kit

Light Painting Brushes offers a comprehensive set of unique light-writing tools that is sure to stir the creative juices of any night photographer. Their Deluxe Starter Kit includes universal flashlight connectors, along with tools for creating light orbs, light sculptures, light graffiti and anything else you can imagine.

Lonely Speck

SharpStar2

One of the challenges of photographing astrolandscapes is focusing on the sky in the dark. That’s where Sharpstar2 saves the day (er, the night). Based on astronomy technology, this special filter uses a Bahtinov Mask to help you achieve perfect focus on the stars. Simply verify the focus pattern in your camera’s Live View, and sharpness is assured.

(For a 10% discount available only through National Parks at Night, use the code β€œNPAN10.”)

Manfrotto

190go!

Night photographers need support that is strong and stable, as well as easy to use in the dark. We also like a lack of weight, particularly because we’re often carrying two tripods into the field for multiple long-exposure setups. The Manfrotto 190go! exceeds all these needs as the perfect tripod for either a primary or secondary support system (or both!). It closes down to less than 18 inches and is available in aluminum and superlight carbon fiber versions. Plus, to create an all-in-one night photography support solution, add an Easy Link attachment to hold a focusing light.

Mappinners

National Parks Scratch Off Travel Map

For the national parks buff, little is more satisfying than tracking where you’ve explored. Mappinners helps with its National Parks Scratch Off Travel Map. This 36x24-inch awesome wall decoration features scratch-off spots for all 59 U.S. national parks, so you can track your footsteps across the country’s greatest natural spaces.

National Park Service

Annual Pass

We photographers love to visit national parks, and for good reason: They contain some of the most wonderful wildernesses in all of the land, ready for our cameras and creative minds. But gosh, those entrance fees can add up. That’s why a National Park Service annual pass is an ideal complement to any photographer’s pocket. For just $80 (or $20 for seniorsβ€”lifetime!), the holder can enter any NPS unit for free.

National Parks at Night

Photography Books

Four of the National Parks at Night instructors have written definitive guides to popular photography subjects, all of which make excellent gifts. Moreover, the complete set can keep the photographer in your life well informed and educated about topics ranging from national park locations to how to shoot in the dark.

2017 Night Photography Calendar

We’ve compiled a ton of information useful to night photographersβ€”including the dates of new and full moons, national park night-sky festivals, celestial and astronomical events, astronomy holidays (yep), as well as inspirational quotes about the night skyβ€”and combined it with some of our favorite national parks night photographs. The result? β€œSeize the Night,” our very first wall calendar!

Nikon

D750

Put simply, you can’t get a better camera for night photography, particularly at this price point. At under $2,000, the Nikon D750 has everything a night photographer could want in a body right now: It has low noise at high ISOs, ISO invariance, ability to pull tremendous detail out of underexposed images, and a T (time) setting on the shutter speed dial, as well as being lightweight and compact. But really, it’s all about the image quality, and the D750 outshines all the other options under the stars. To level up the gift, add one of the best lenses for seizing the night, the Nikkor 14-24mm f/2.8.

Palette

Aluminum Professional Control Surface Kit

There are the usual ways of manipulating adjustment controls in Lightroom and Photoshopβ€”a mouse or a touchpad (ack!) to name the very most common two. Both can be tedious. But you know what’s a lot easier? Using the sliders, dials and buttons provided with a Palette Aluminum Professional Control Surface Kit. Assign each tool to whatever adjustment you want, and digital editing gets much more intuitive. Other size kits are available, and the module configuration is completely customizable. Palette also works with Illustrator, After Effects, InDesign, Premiere Pro and Final Cut Pro.

Peak Design

Everyday Backpack

For spacious and convenient storage in a robust yet exquisite design, look no further. The Everyday Backpack, available in two sizes, holds just about anything you need when venturing into the field or into the office. It’s adaptable, partly due to moveable dividers, and partly due to the integration of Peak Design’s Capture Clip points that allow you to quickly attach or detach cameras or accessories. And while it’s great at holding whatever you need it to, the MagLatch clasp and the dual side-loading, weatherproof, zippered access points facilitate getting those things in and out quickly. Also, look into the optional Field Pouch, a perfect size for storing light-painting tools.

Tether Tools

Case Relay Camera Power System

Long night exposures can deplete a camera battery pretty quickly. The best power-loss prevention is a hearty external battery. Tether Tools offers an ideal solution with its Case Relay, a light and portable setup that, when combined with their rechargeable 10,000-mAh Rock Solid External Battery Pack, can keep you powered-up all night.

Tyler Nordgren

Stars Above, Earth Below: A Guide to Astronomy in the National Parks

Tyler Nordgrenβ€”an astronomer, astronomy professor and avid night photographer based in Californiaβ€”offers a fresh perspective on our favorite topic: the night skies of the national parks. In Stars Above, Earth Below: A Guide to Astronomy in the National Parks, Nordgren touches on many of the night-sky wonders we encounter in our most precious spaces, helping us better understand what we’re so passionate about photographing. Also check out Nordgren’s series of β€œHalf the Park is After Dark” posters from his dark-sky awareness campaign with the National Park Service.

Vallerret

Trigger Mitt

Night photographers often find themselves in finger-numbing conditions, so yes, those warm woolen mittens we mentioned earlier really would be handy. But even better is the Trigger Mitt, a set of gloves designed specifically for photographers working in cold conditions (like, ya know, night). More accurately a half-glove, half-mitten, the Trigger Mitt is designed to keep unused photo fingers together and warm, while allowing the thumb and pointer to move freely. A thin but comfy layer of insulation keeps the Mitts more pliable than the ski gloves that so many photographers use, ensuring that you maintain a great feel for your camera.

Vello

Shutterboss II

An intervalometer is practically required gear for the night photographerβ€”so important that it’s even a good idea to carry an extra. The Shutterboss II is one of our most preferred. The backlit display is easy to read at night, making it simple to configure for continuous shooting, self-timer, long time exposures and interval shooting.

Xβ€’Rite

i1Display Pro

Once the photos are home in the computer, we want them to look rightβ€”and helping us do that is X-Rite. The i1Display Pro works with all modern monitors, ensuring color accuracy throughout your entire workflow, from screen to print or projector. Features include Advanced Filter and Optical Systems, and an ambient meter that can adjust your display output in changing light conditions.

For more information about gear mentioned in this post:

Chris Nicholson is the author of Photographing National Parks (Sidelight Books, 2015). Learn more about national parks as photography destinations, subscribe to Chris' free e-newsletter, and more at www.PhotographingNationalParks.com.

Upcoming workshops from National Parks at Night