Photographic Foreknowledge: Planning Your Shots in National Parks

Visiting our National Parks with a little foreknowledge is the best way to ensure your chances of coming home with great photographs. Being in the right place at the right time is rarely an accident. Foreknowledge is also the recipe for making your images stand out from the millions of other photos taken in these dramatic locations.

Photographers should take the time to do some β€œvirtual” scouting. Begin with a Google search of the name of the park you are planning to visit. At the top of the resulting screen you’ll find filters to adjust what content is displayed on the page. Click on β€œImages” to be rewarded with a page full of photos in and around the park.

While not all of the photos will be masterpieces, they will give you a great idea of the locations of the more popular viewpoints and places of interest. Clicking on an image opens it to a larger view and supplies the link to the image. You’ll often find the name of the location or feature right here. If not, click on the link to discover more information about the image.

Take some time with this process and create a list of all possible locations you’d like to visit. Some of the places you may want to shoot might be inconvenient, closed for the season or farther than you would like hike.

Next, find a map! Google Maps is a great resource, as are the official National Park maps that can be found at www.nps.gov. Once you locate the desired sights on the map, you can better assess the best time of day or night to be there. Knowing the exact direction you want to face makes it easier to find south-facing mountains for star trails around the North Star, east-facing objects for sunrise, and west-facing scenes for sunset.

Making a list of possible scenes and locating them on the map is the least anyone should do before visiting a national park for photography. For those who leave nothing to chance, there are plenty of websites, computer applications and smartphone apps that can assist in exact sun angles and rise and set times, direction of moon rises and even when it will rise above a land formation. A couple of my favorites are PhotoPills and Google Earth.

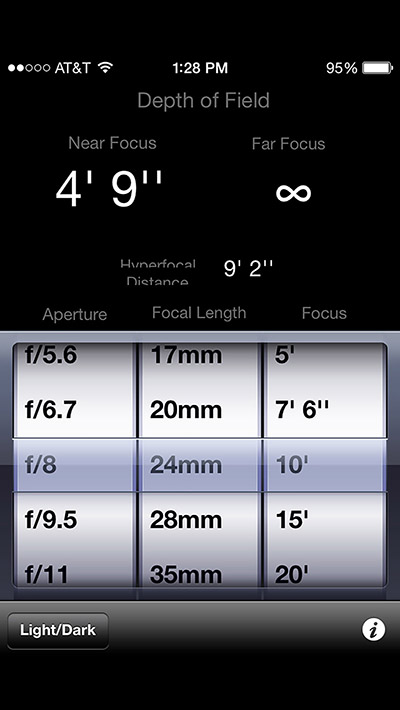
PhotoPills is a great iPhone app that can do just about everything β€” planning your Milky Way shots, calculating depth of field, discovering the start time of astronomical twilight, or even discovering exactly when and where the moon will rise over the nearby peaks. It’s a must-have for any photographer who uses an iPhone. By phone app standards it’s a bit pricey ($9.99), but well worth every penny.

Google Earth is another indispensable, content-rich application for your computer and iOS or Android phone. Using Google Earth you can get an excellent lay of the land you plan to visit. By using the controls in the upper right, you can not only zoom in and around but also tilt to get a reasonable idea of the land formations.

For those looking for a less technical experience, Sun Seeker, Night Sky and Moon Seeker are three apps that are quite useful … and free!

Learn more techniques from Tim Cooper’s book The Magic of Light Painting, available from Peachpit.

Upcoming workshops from National Parks at Night

National Parks at Night’s First Official Event is Going to be EPIC!

We are very excited to be hosting our first gathering of all five NPAN instructors on March 16 at the B&H Event Space from 1-5 p.m. and 7-9 p.m.: "Night Photography Panel and Night Walk With National Parks at Night Sponsored by Nikon."

Chris, Lance, Matt, Tim and I have been building the foundation of NPAN for nearly a year, and this is one of the events that we wanted to share with you from the beginning!

This will not be your typical seminar. Each one of us will spend about 30 minutes discussing a specific topic about night photography, and then we will open the floor for an hour to answer your questions in a no-holds-barred panel discussion.

It would be crazy to get us all together and not do any hands-on instruction, so after we’ve filled you full of words and visions we will take it to the streets … or at least to Brooklyn Bridge Park!

That’s right, starting at 7 p.m. we will set up five shooting stations for you to try out different night photography techniques at one of the most scenic spots to photograph in New York City.

We’d like to give a big shout out to Nikon for sponsoring this event. We are all big fans of their cameras and glass, and Nikon will join us at Brooklyn Bridge Park where you’ll be able to try out a selection of their gear.

Need a better tripod to steady those long exposures? Manfrotto will be there too, and they’ll have loaner tripods for you to use during our night walk.

This lectures and discussion panel booked to capacity in just a few days, but that doesn't mean you can't be part of it! You can still get on the wait list by arriving at the Event Space 15-30 minutes beforehand. And if you can’t attend, you can still watch laterβ€”B&H will be recording the β€œclassroom” aspect of the day and publishing it to their YouTube channel later.

As for the night portion, as of last night the Event Space is taking registrations for that separately, and as of right now there are still slots available. Check out "Night Photography Photo Walk With National Parks at Night" for more information and to register. I recommend signing up immediately, because this will book up fast too!

Seize the Night!

Gabriel Biderman is a Brooklyn-based fine art and travel photographer, and author of Night Photography: From Snapshots to Great Shots (Peachpit, 2014). During the daytime hours you'll often find Gabe at one of many photo events around the world working for B&H Photo’s road marketing team. See his portfolio and workshop lineup at www.ruinism.com.

UPCOMING WORKSHOPS FROM NATIONAL PARKS AT NIGHT

Experimenting with Uncommon Light Sources in Night Photography

One of the joys we have as night photographers is having extra time to make more deliberate choices about lighting for our imagery. Our common tools include flashlights, speedlites and larger flashes. But it certainly isn't limited to the usual, right?

Let's explore some alternate lighting experiments I've conducted:

Adjacent to Sand Arch in Arches National Park, Utah Β© Matt Hill

The above image combines me choosing to record another photographer's light painting while adding my own twist: toy LED "Rocket Copters." I had thrown them in my bag, knowing that I would be able to make some UFO-like descending lights.

Central Park in January Β© Matt Hill

Point light sources, such as battery-operated Christmas lights, are often used to make glowing orbs, but they are also fun to drag along the ground to illuminate and write with light simultaneously. This aided this photo in becoming an obvious long exposure. Without it, the only clue was the rising fog in the rear left.

Toy sword inside crashed plane in northern Arizona. 

At a trade show in Las Vegas, someone left a toy sword in our booth that lit up green. The kid in me was like, "YEAH!" The photographer in me was like, "I'm gonna use that for tonight's shoot." And I did.

Toys with cheap, colored LEDs in them can sit well in small places and provide that perfect color glow to make a scene.

Arches National Park Β© Matt Hill

A tablet is also a gorgeous source of light, with both very consistent and controllable output. On my iPad mini I have an app called Rave Magnet. It cycles through all chroma as you wave it around, making beautiful color gradients. The effect is excellent for light writing and painting.

Downtown Denver

Sometimes the tools you have can be repurposed. The above was my two flashlights in plastic bags, dragged along underwater.

This was the most exercise I'd gotten in weeks. My friend and I threw this light back and forth for eight minutes while the camera popped off sequential exposures. Stacked in post.

Have fun. Look at the world of light-emitting objects in a new way: How can I make cool new photos with that?

See more about Matt's photography, art, workshops and writing at MattHillArt.com. Follow Matt on Twitter Instagram Facebook.

Upcoming workshops from National Parks at Night

Use Hyperfocal Distance to Maximize Depth of Field at Night

Hyperfocal focusing is a time-tested technique for maximizing depth of field, which is especially useful with the wide apertures used in astro-landscape photography. Pre-focusing using the hyperfocal distance (HFD) also has the added advantages of ensuring accurate focus in extreme low-light situations, and of negating the need to refocus between every shot.

The hyperfocal distance is the nearest pointβ€”for any given focal length, aperture and camera formatβ€”that will keep infinity in acceptably sharp focus.

For every lens there is an exact point of focus, and an area in front of and behind the focal point, that is reasonably or acceptably in focus. Sharpness falls off gradually as you move farther away from the focal point, until the image is noticeably out of focus. This zone of focus is what we know of as depth of field.

When a lens is focused at the hyperfocal point, the depth of field extends from half of that distance to infinity. For example, if the hyperfocal distance for your lens/aperture/camera combination is 30 feet, then your depth of field extends from half of that distanceβ€”or 15 feetβ€”to infinity.

Most prime lenses have a depth of field (DOF) scale that allows you to pre-focus to the hyperfocal distance. The scale combines the use of distance markings with pairs of numbers representing the f-numbers of the lens, one on either side of the mark representing the focal point. By lining up the infinity symbol on the distance scale with the outer number representing your working aperture, you are focusing the lens to the hyperfocal distance!

This manual focus Olympus Zuiko Shift 35mm lens shows the depth of field scale, and is set to the hyperfocal distance for f/22. By placing the infinity mark just inside the right-hand 22 on the DOF scale, the HFD is set. The actual focal point is a …

This manual focus Olympus Zuiko Shift 35mm lens shows the depth of field scale, and is set to the hyperfocal distance for f/22. By placing the infinity mark just inside the right-hand 22 on the DOF scale, the HFD is set. The actual focal point is a little more than 7 feet, and the depth of field extends from about 4 feet to infinity. The HFD increases as the aperture diameter is increased, and depth of field increases as the aperture gets smaller.

The near distance in the depth of field will be indicated by the inside number or colored line on the DOF scale. The scale provides only an approximation of the true DOF, and for this reason, it’s a good idea to use the HFD for the aperture one stop larger than your working aperture. In other words, if you are shooting at f/4, focus to the HFD for f/2.8, which ensures that infinity will be perfectly sharp, thereby giving you a comfortable margin of error.

Zoom lenses do not have DOF scales, because the DOF changes with the focal length as the lens is zoomed in and out. But if your lens does not have a depth of field or distance scale, you can still use hyperfocal focusing by employing one of the many smartphone apps designed for this purpose. The one shown here is called Tack Sharp, and is easy-to-use, highly customizable, and accurate.

Tack Sharp

Tack Sharp

Once you determine the appropriate HFD, walk off the distance from the camera by counting your steps and place a flashlight on the ground pointed back toward the camera. Focus on the light, and now you’re focused at the HFD. The average adult stride is about three feet, so if your HFD is 30 feet, start at the camera, and walk ten steps into the shot, and that’s where you place the light to focus on.

Don’t worry if your measurement isn’t completely accurate; this is one of the reasons for calculating the hyperfocal distance conservatively by closing down the lens an extra stop. A laser measuring device can also be used to more accurately measure the hyperfocal distance. After HFD is achieved, the focus ring on the lens can then be secured with tape, ensuring the lens will remain properly focused all night. Of course, if you change apertures, your HFD will change, and you will need to refocus.

If this all sounds confusing, rest assured that once you have your lens focused at the HFD, you can leave it there as long as you use the same aperture. Those with low vision or who have difficulty focusing at night should consider pre-focusing their lenses before dark.

Lance Keimig has been photographing at night for 30 years, and is the author of Night Photography and Light Painting: Finding Your Way in the Dark (Focal Press, 2015). Learn more about his images and workshops at www.thenightskye.com.

Upcoming workshops from National Parks at Night