TIP: If you're reading this via email, try using a Web Browser for the best experience.
What do you do when you want just that perfect night sky?
Know your light sources and their color temperatures (in Kelvin). See below.
Know the feeling you want to evoke in the viewer.
Set the white balance on your camera manually.
Shoot RAW.
Process to taste later if the photo doesn't really match your expectations.
With a little knowledge in-hand, you can shoot it right, in-camera. Keep in mind, I'm not going to offer some dogma about the "right" settings. It's not that simple. There are no rules. But a little knowledge goes a long way. So let's get on with it.
Here is a cheat sheet on understanding Kelvin:
If you set your camera to 5500 K (Daylight), you'd see any light source mentioned in the chart above rendered in colors similar to what is shown in the first column. If you want a warm light to be warm, or a cool light to be cool, play it safe and shoot at the Daylight setting.
If you set your camera's white balance to 3200 K and you have a tungsten light source in your scene (or you're illuminating it), it will render as neutral. Read on for more about this. …
Make it look cool like the night
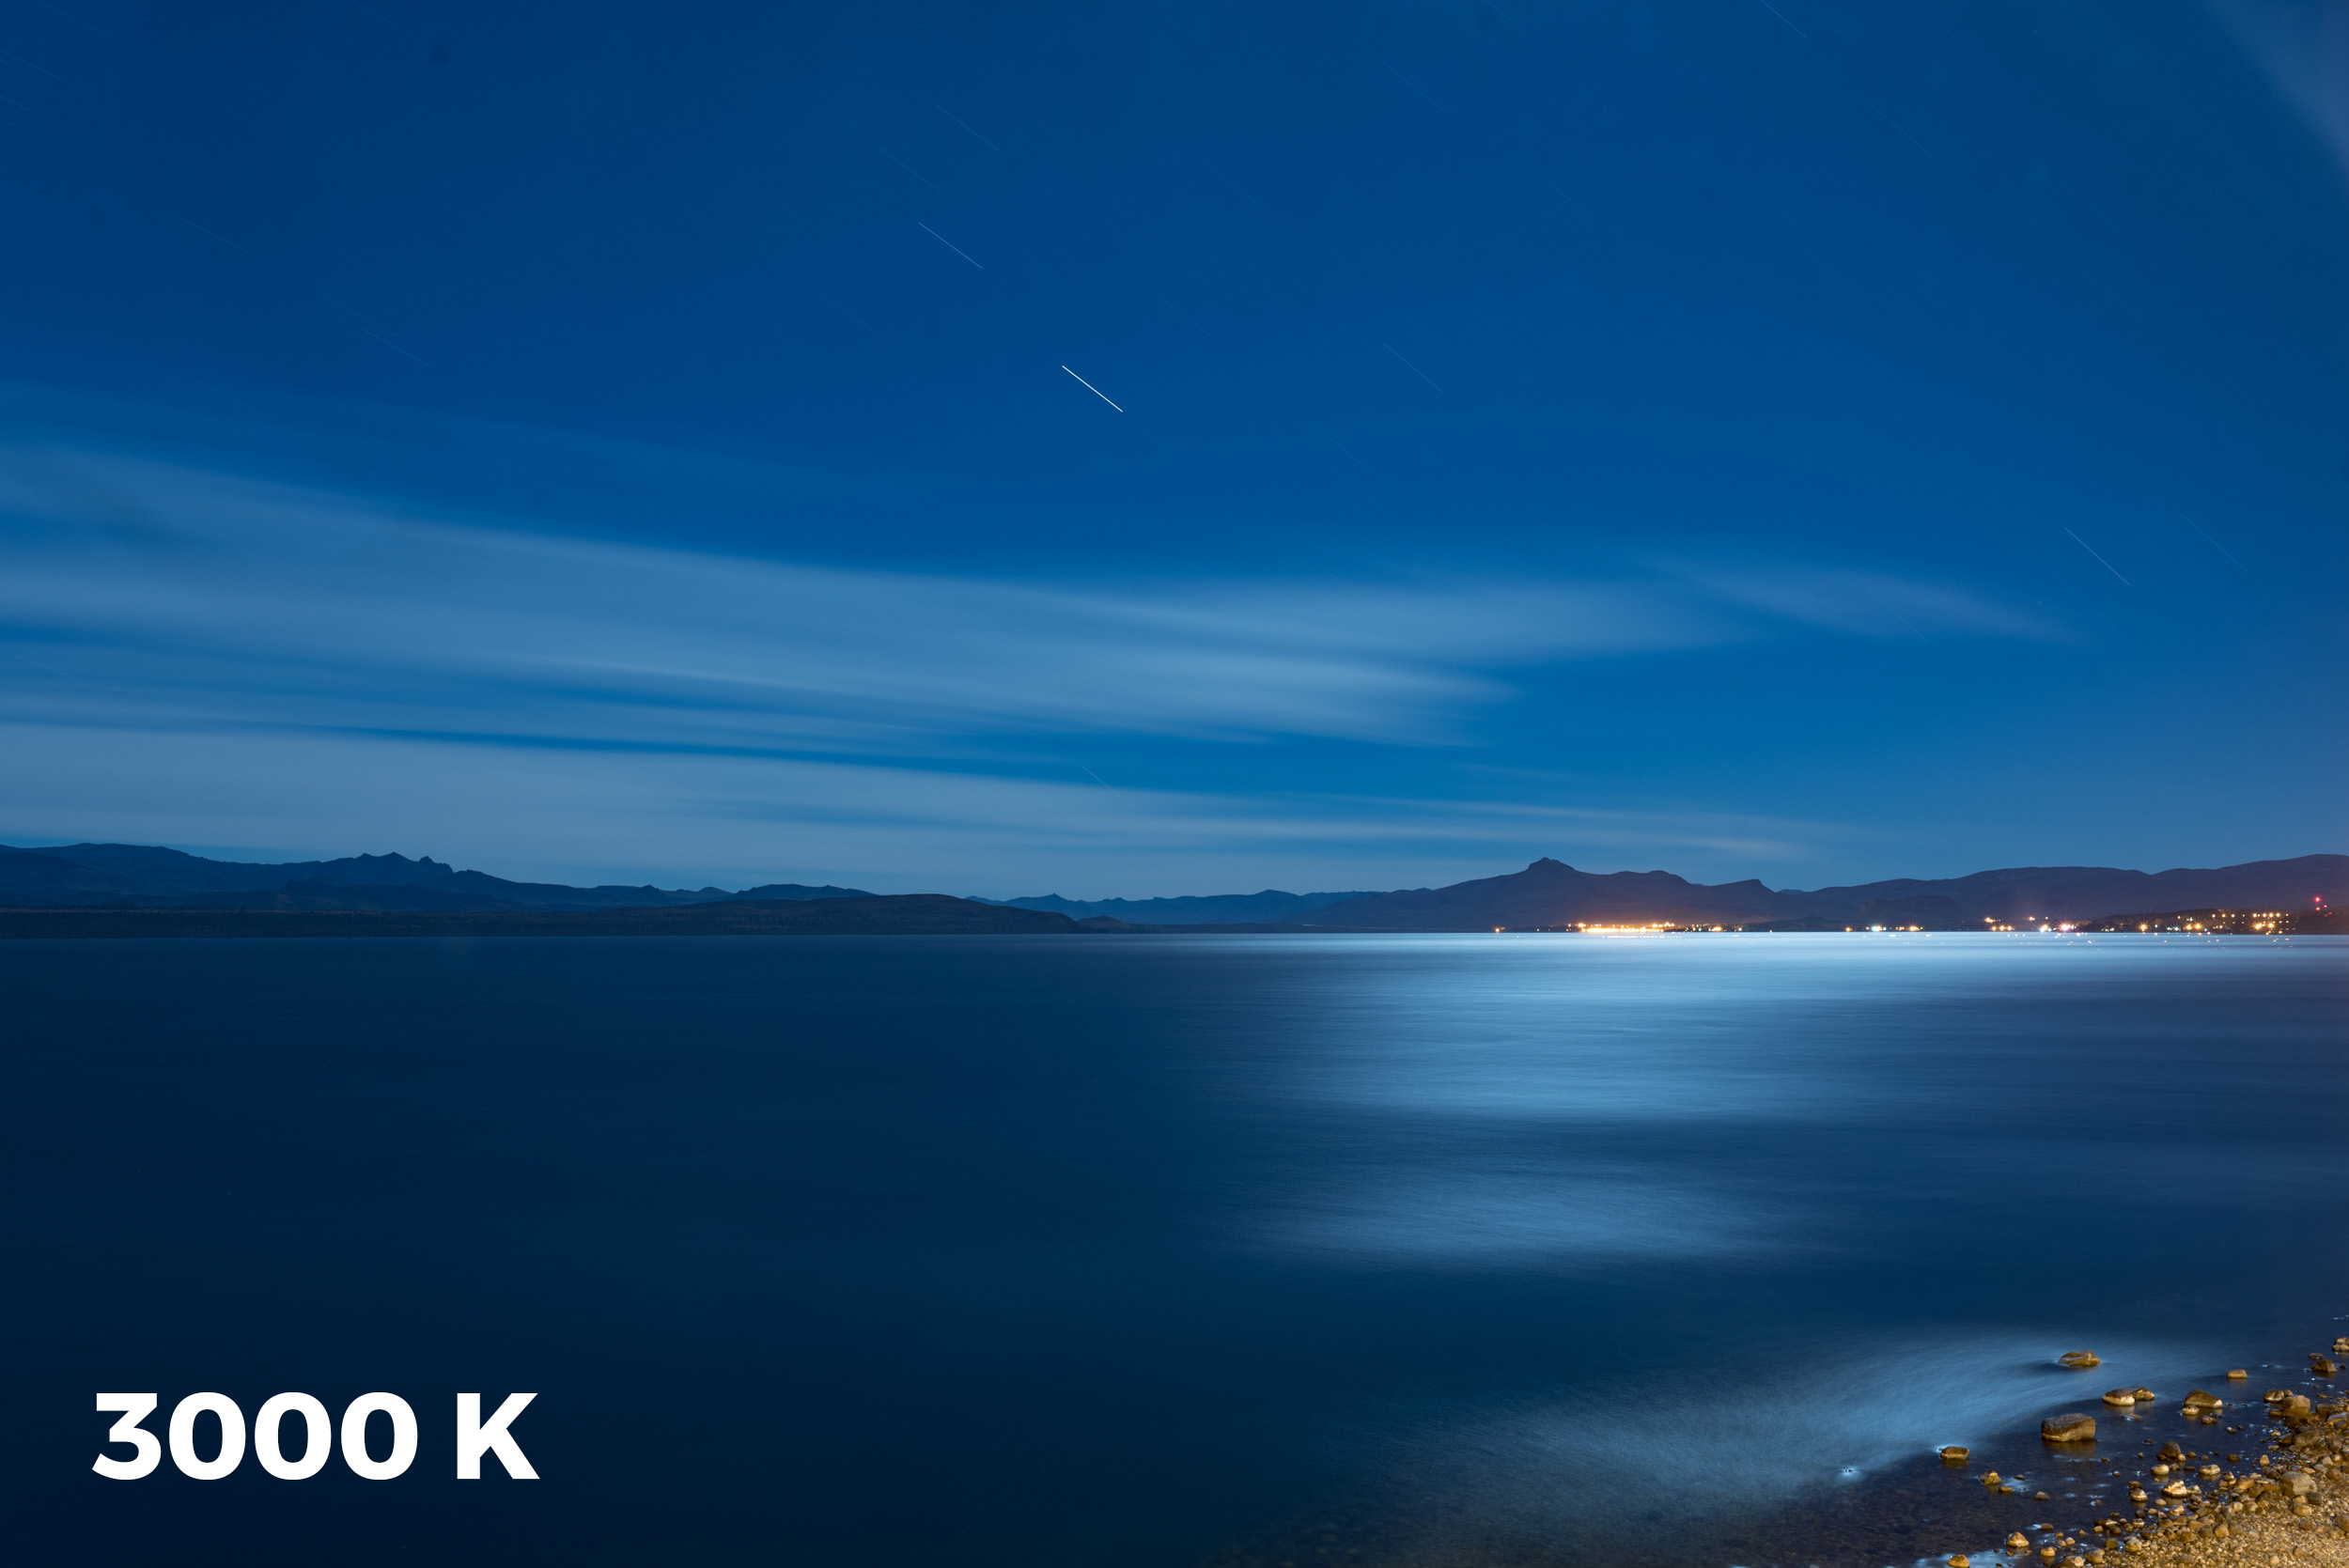
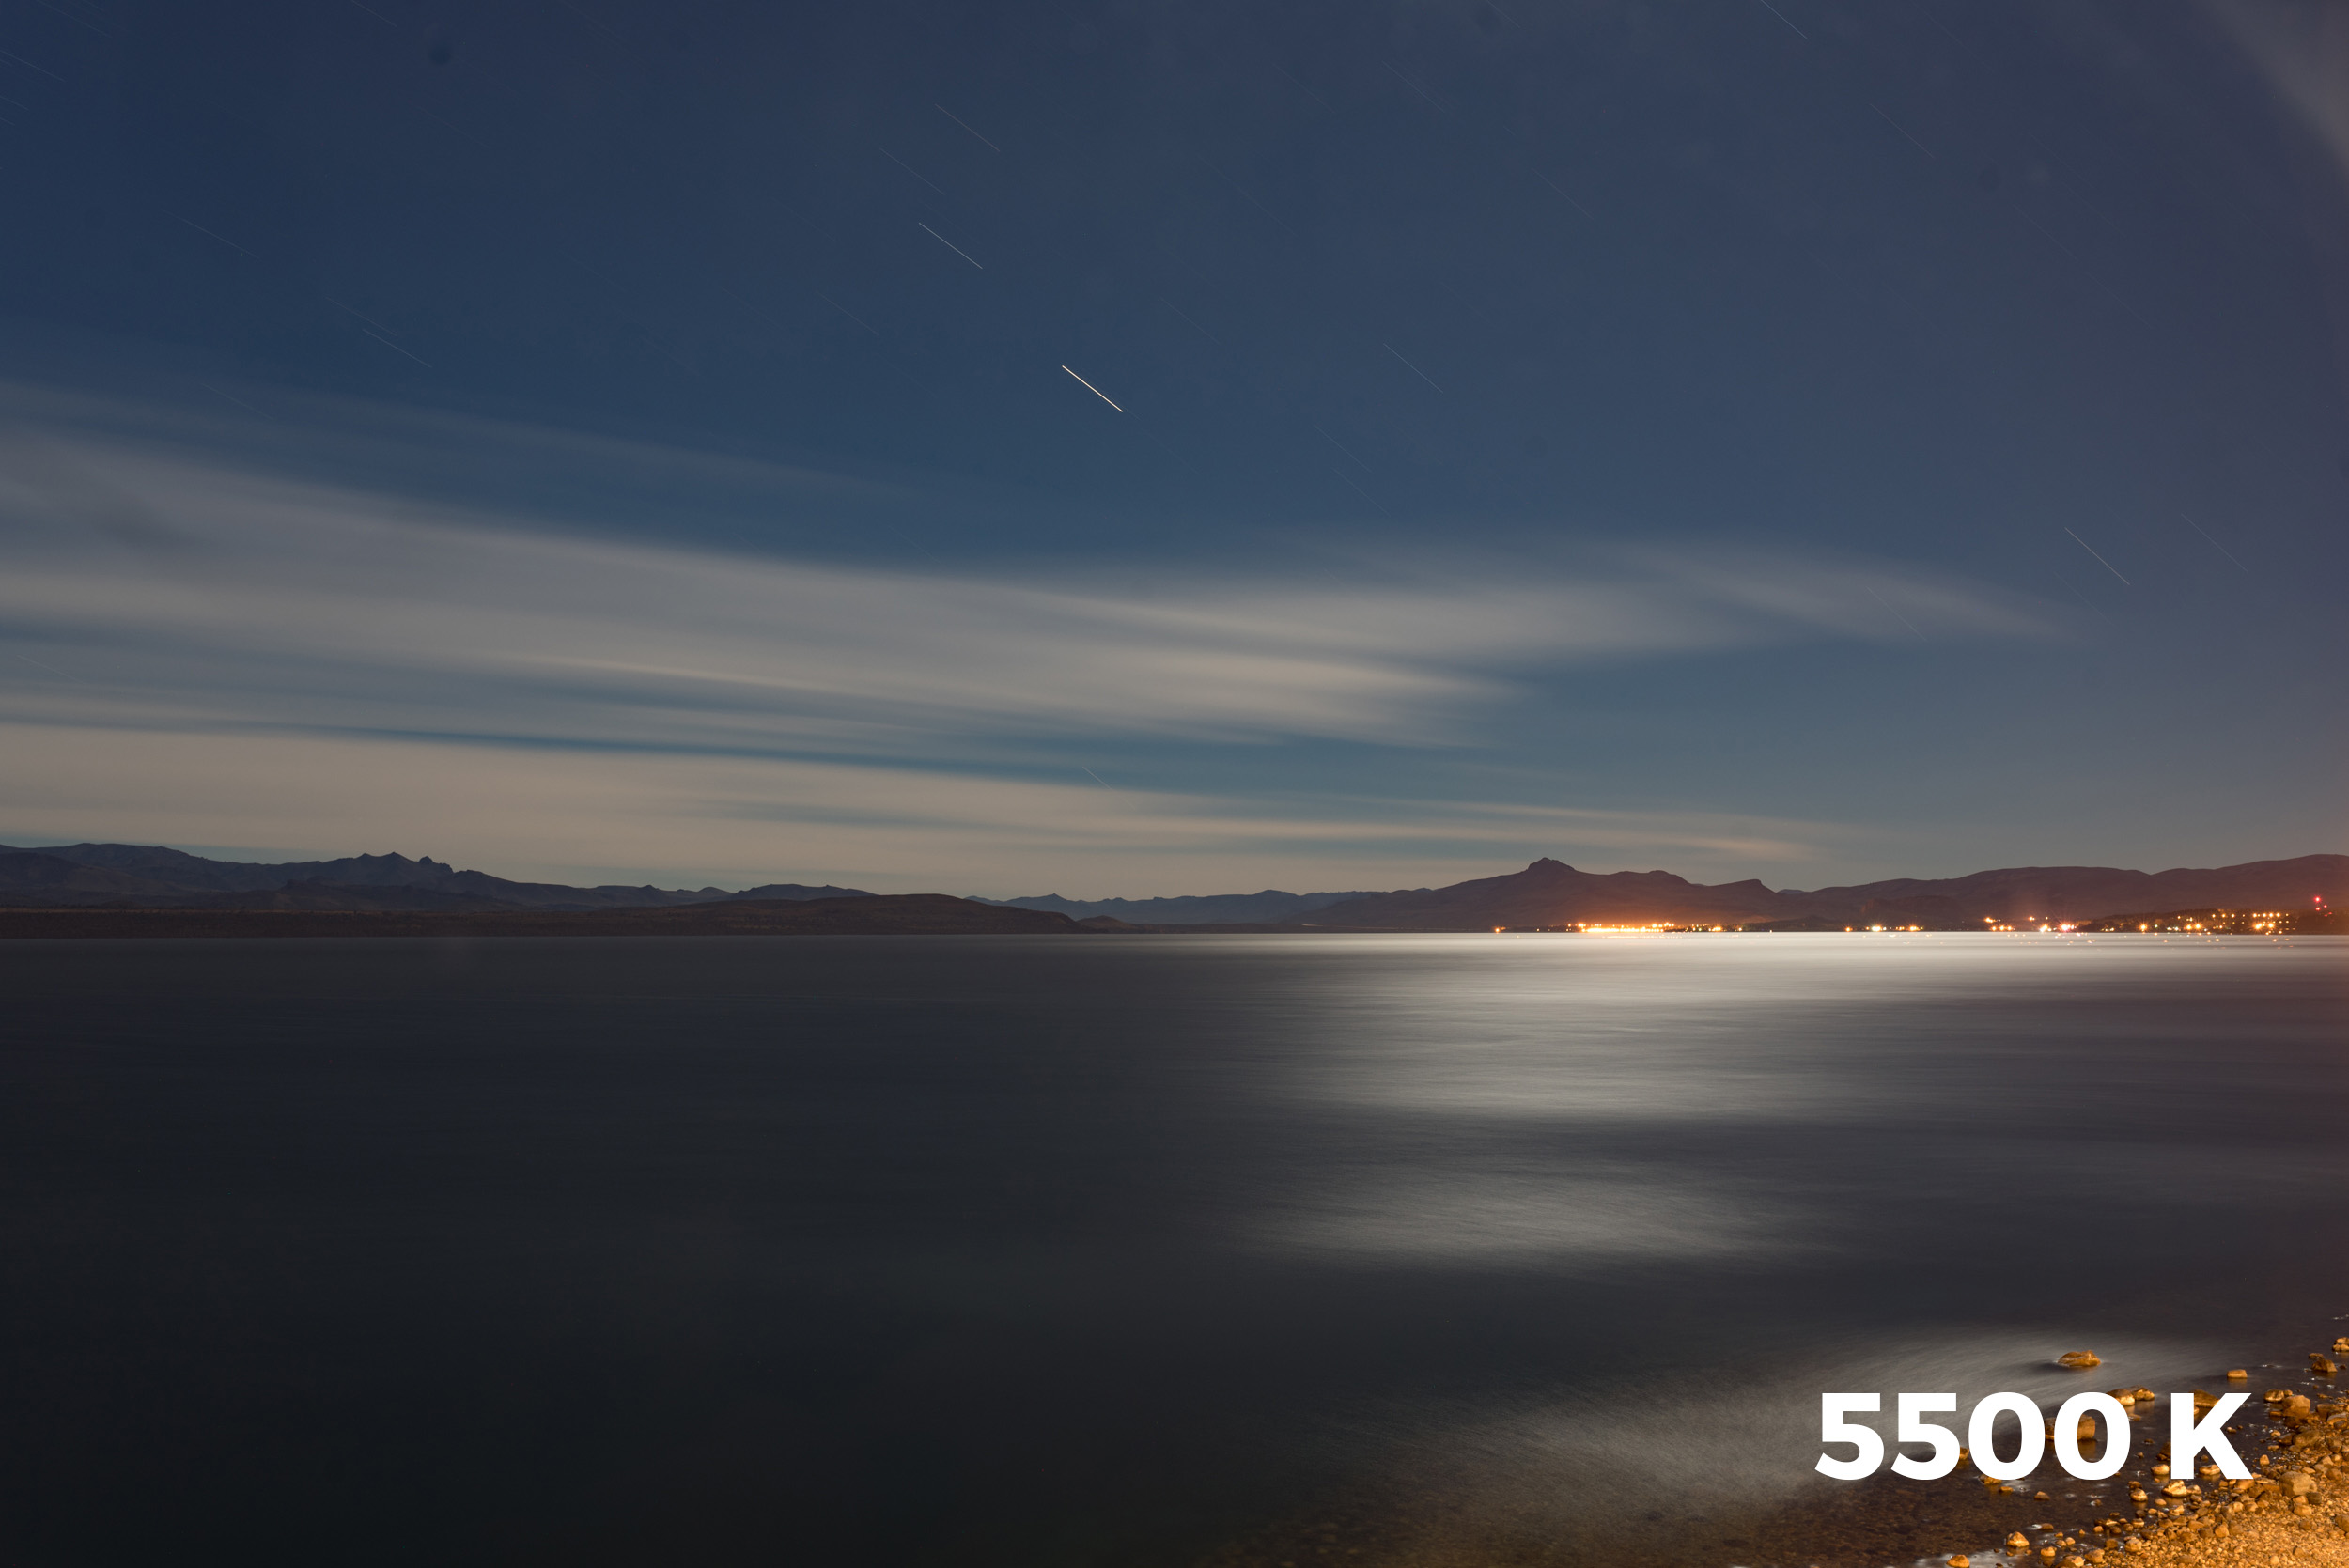
In the above comparison (shot at Nahuel Huapi National Park in Barlichoe, Argentina), the very cool 3000 K white balance in full moonlight (left) makes it look distinctly like a night photograph, but a neutral 5500 K white balance (right) looks dull and lacks emotional qualities.
This works well when you're away from city lights. There were some sodium vapor lights in the above image that added an orange glow, but when I shot at 3000 K, the glow was much less noticeable.
Set it to Tungsten (3200 K)
If the above is too radical for your image, shoot at 3200 K or the Tungsten/Incandescent setting. This works well with moonlight, which is really just sunlight bouncing off a big, grey rock in space. So by choosing a cooler setting for "daylight at night," you'll be accessing that visual knowledge we all have of how the night should look to us. But did you know we can't see colors so well at night and we bias toward blue?
It's worth noting that Adobe Lightroom's native Tungsten setting is 2850 K, not 3200 K. Check out the subtle difference it makes in this photo from Capitol Reef National Park.:
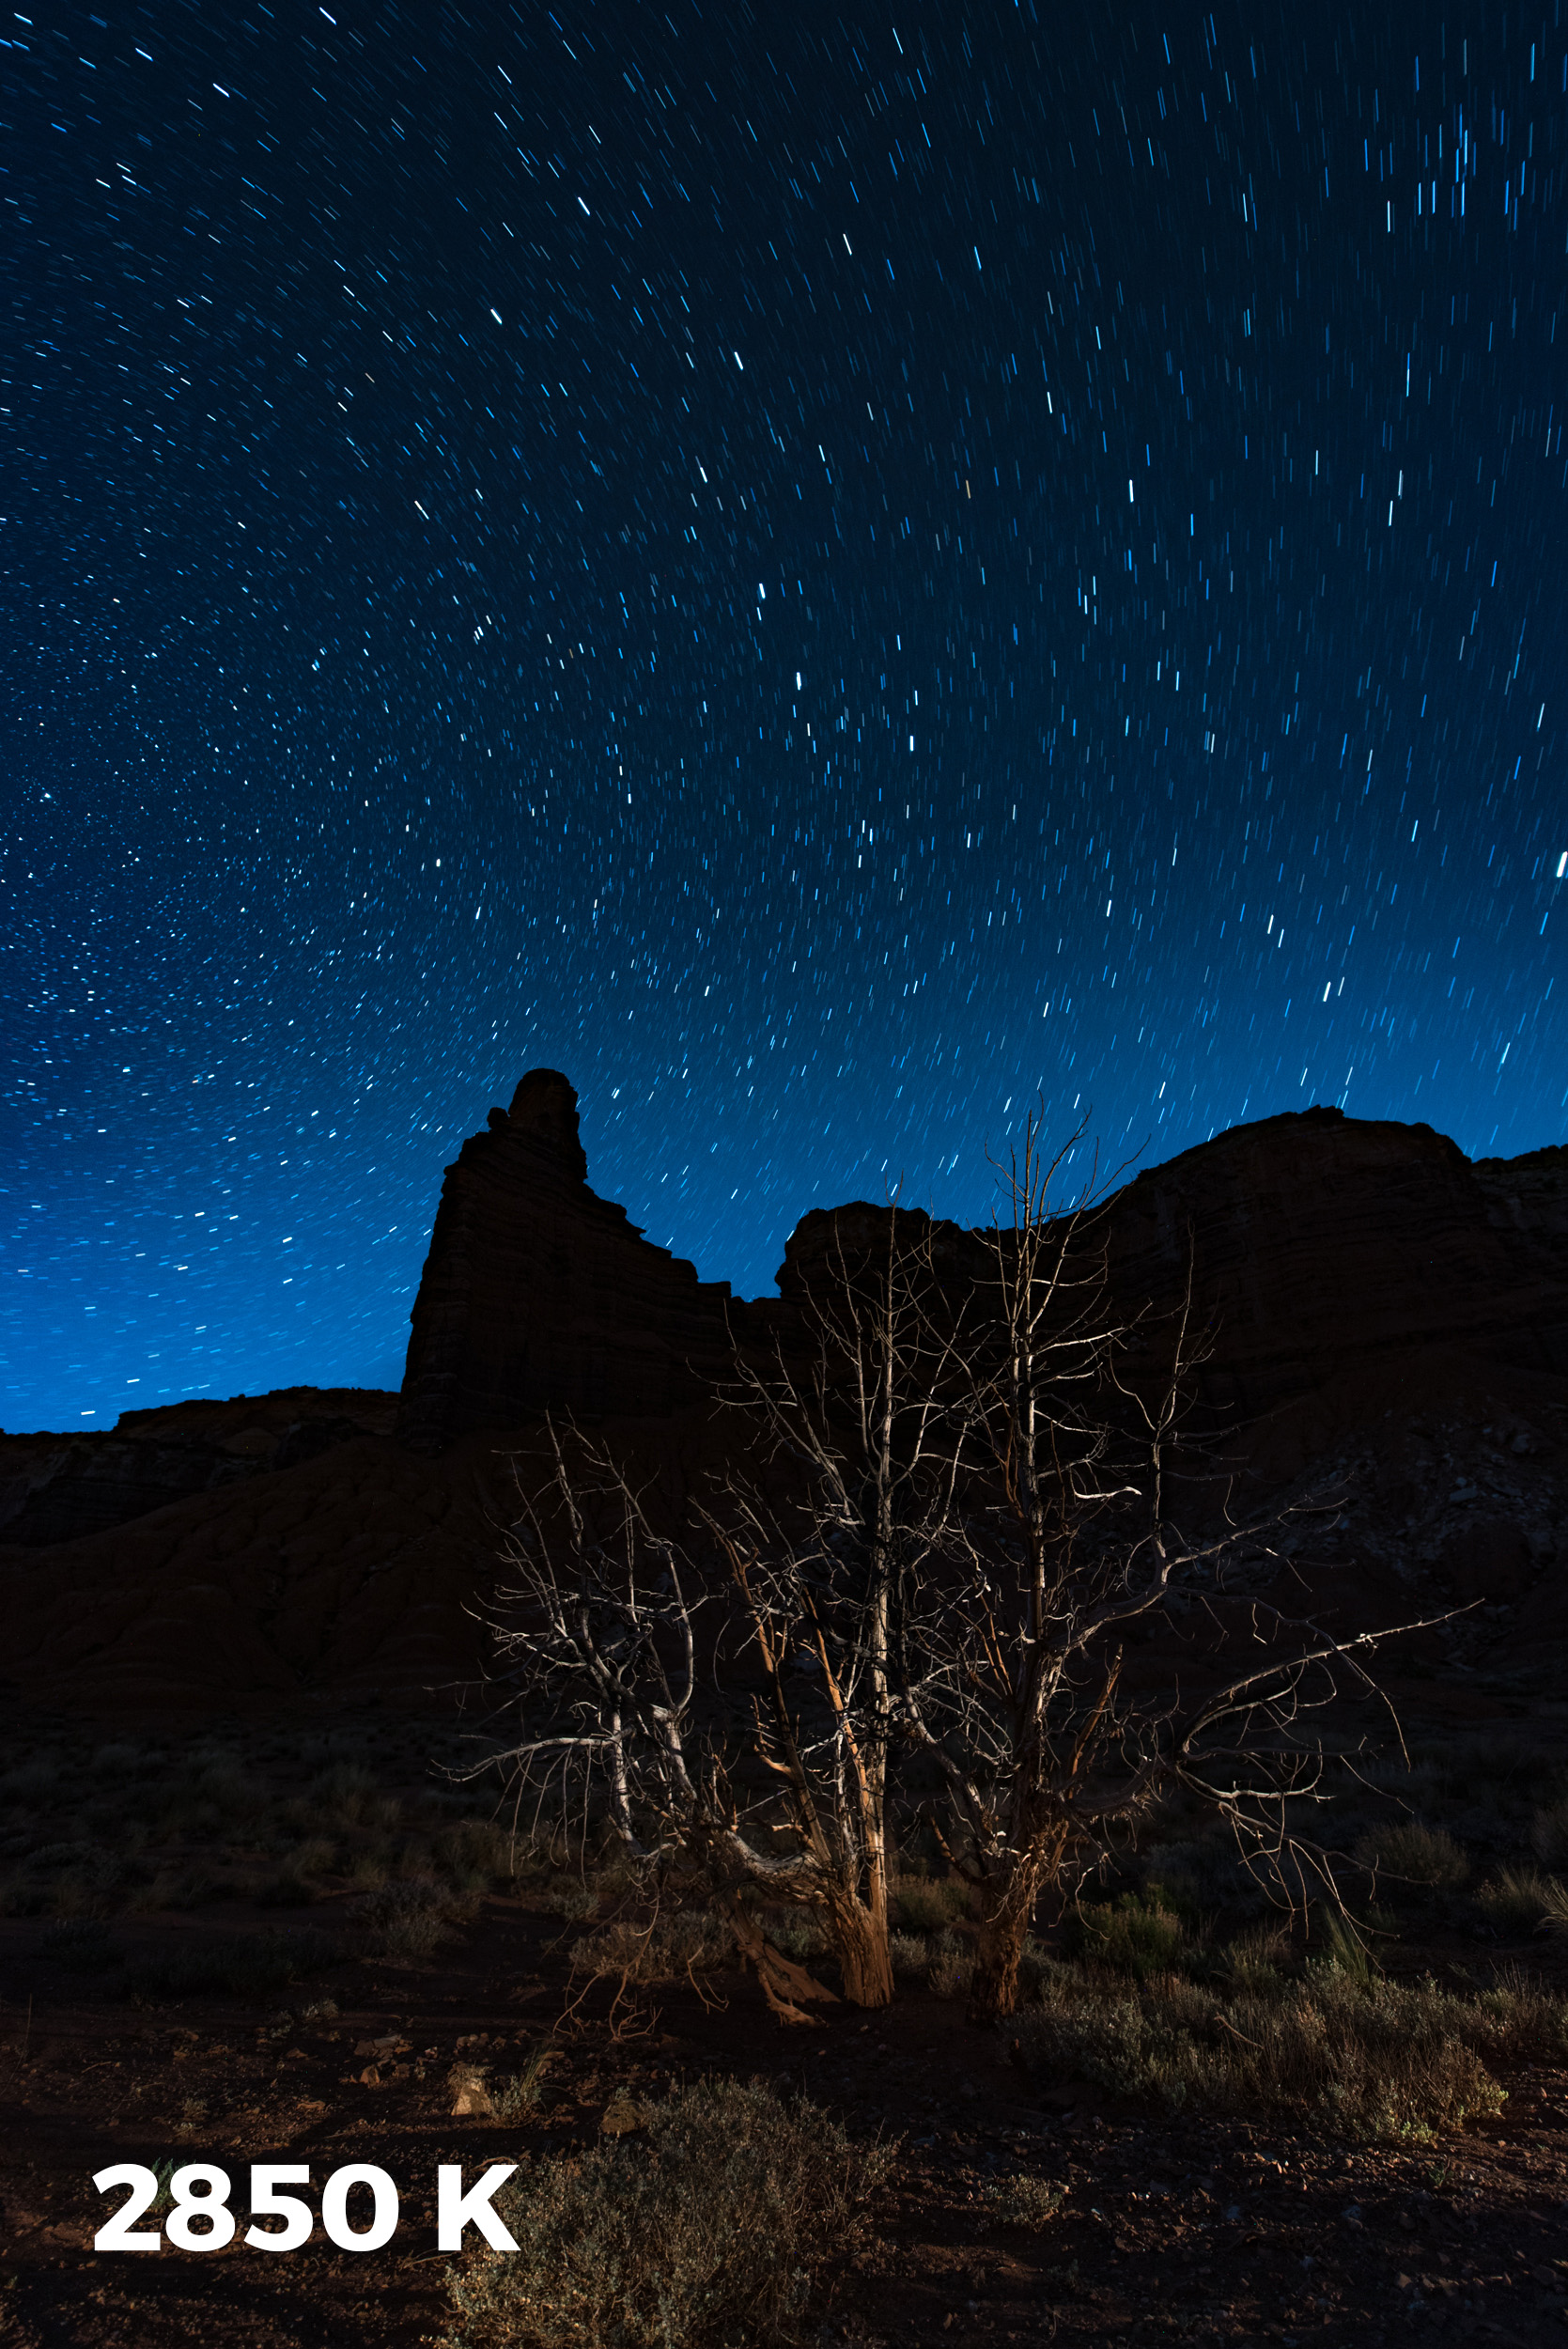
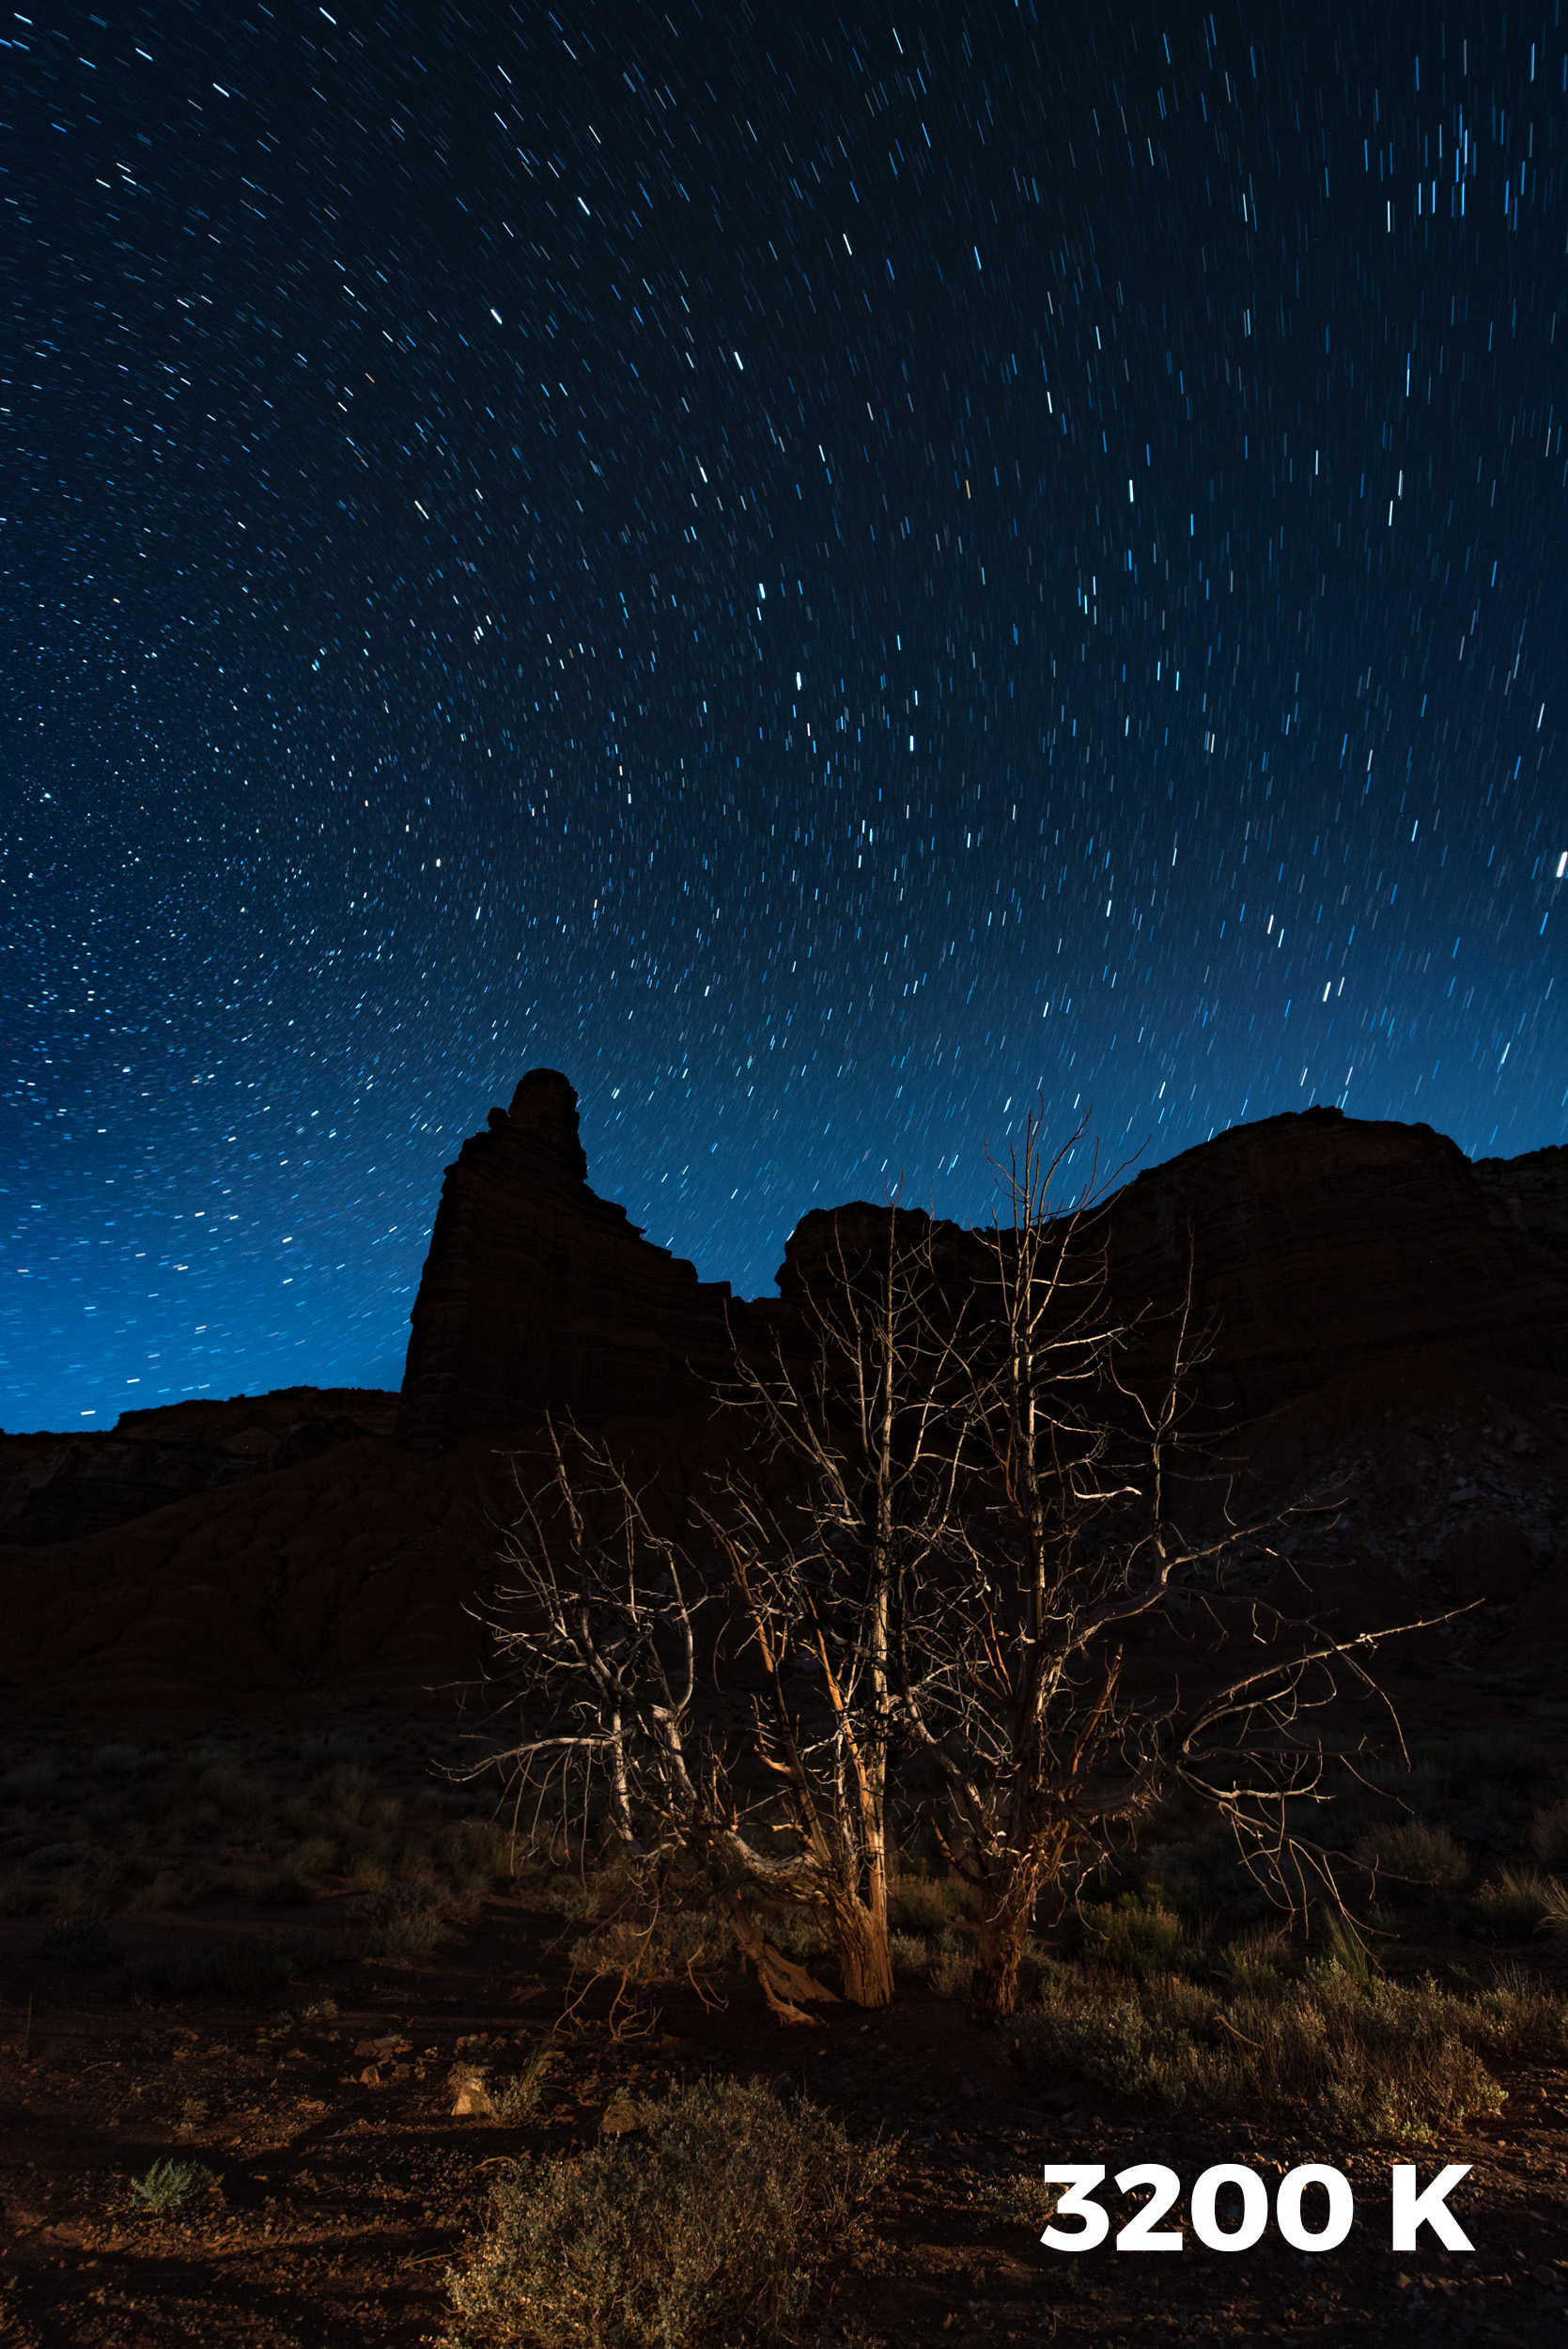
Personally, I like the skies in the 2850 K shot better (left), but the foreground in the 3200 K better (right). Adding a color temperature gradient to slightly cool the sky would solve that in post-processing.
Shooting in Urban/Suburban areas
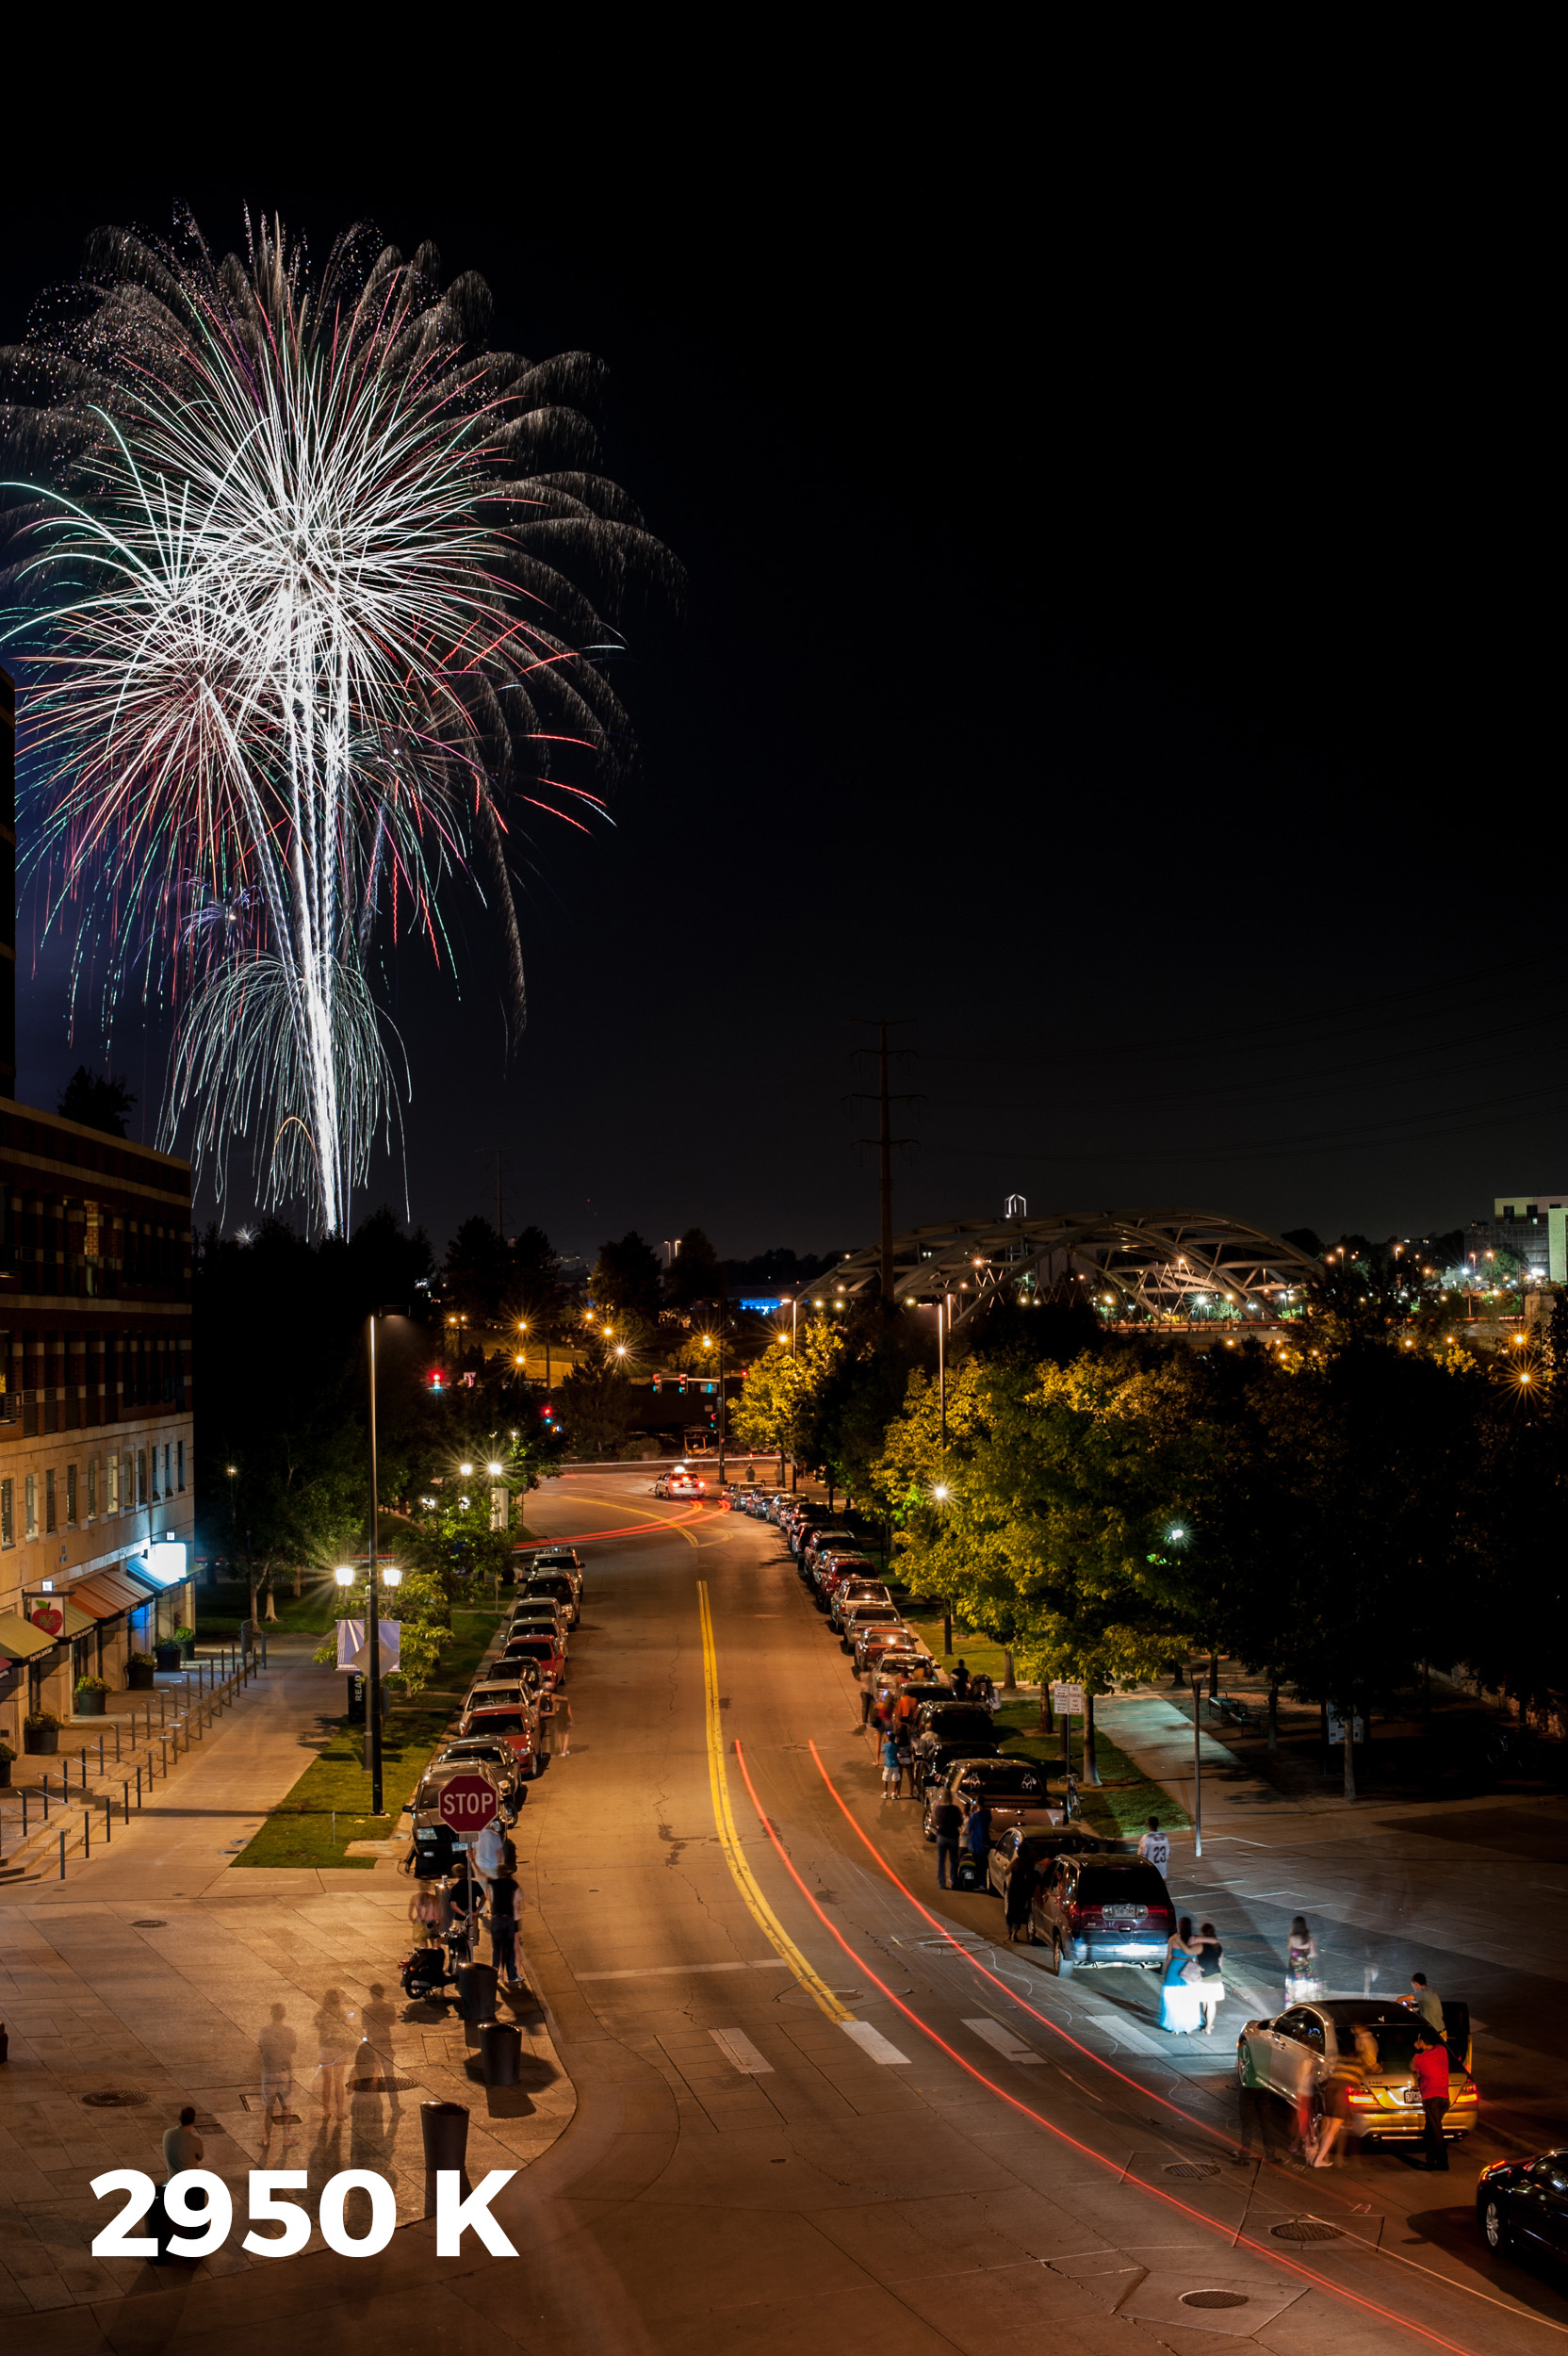
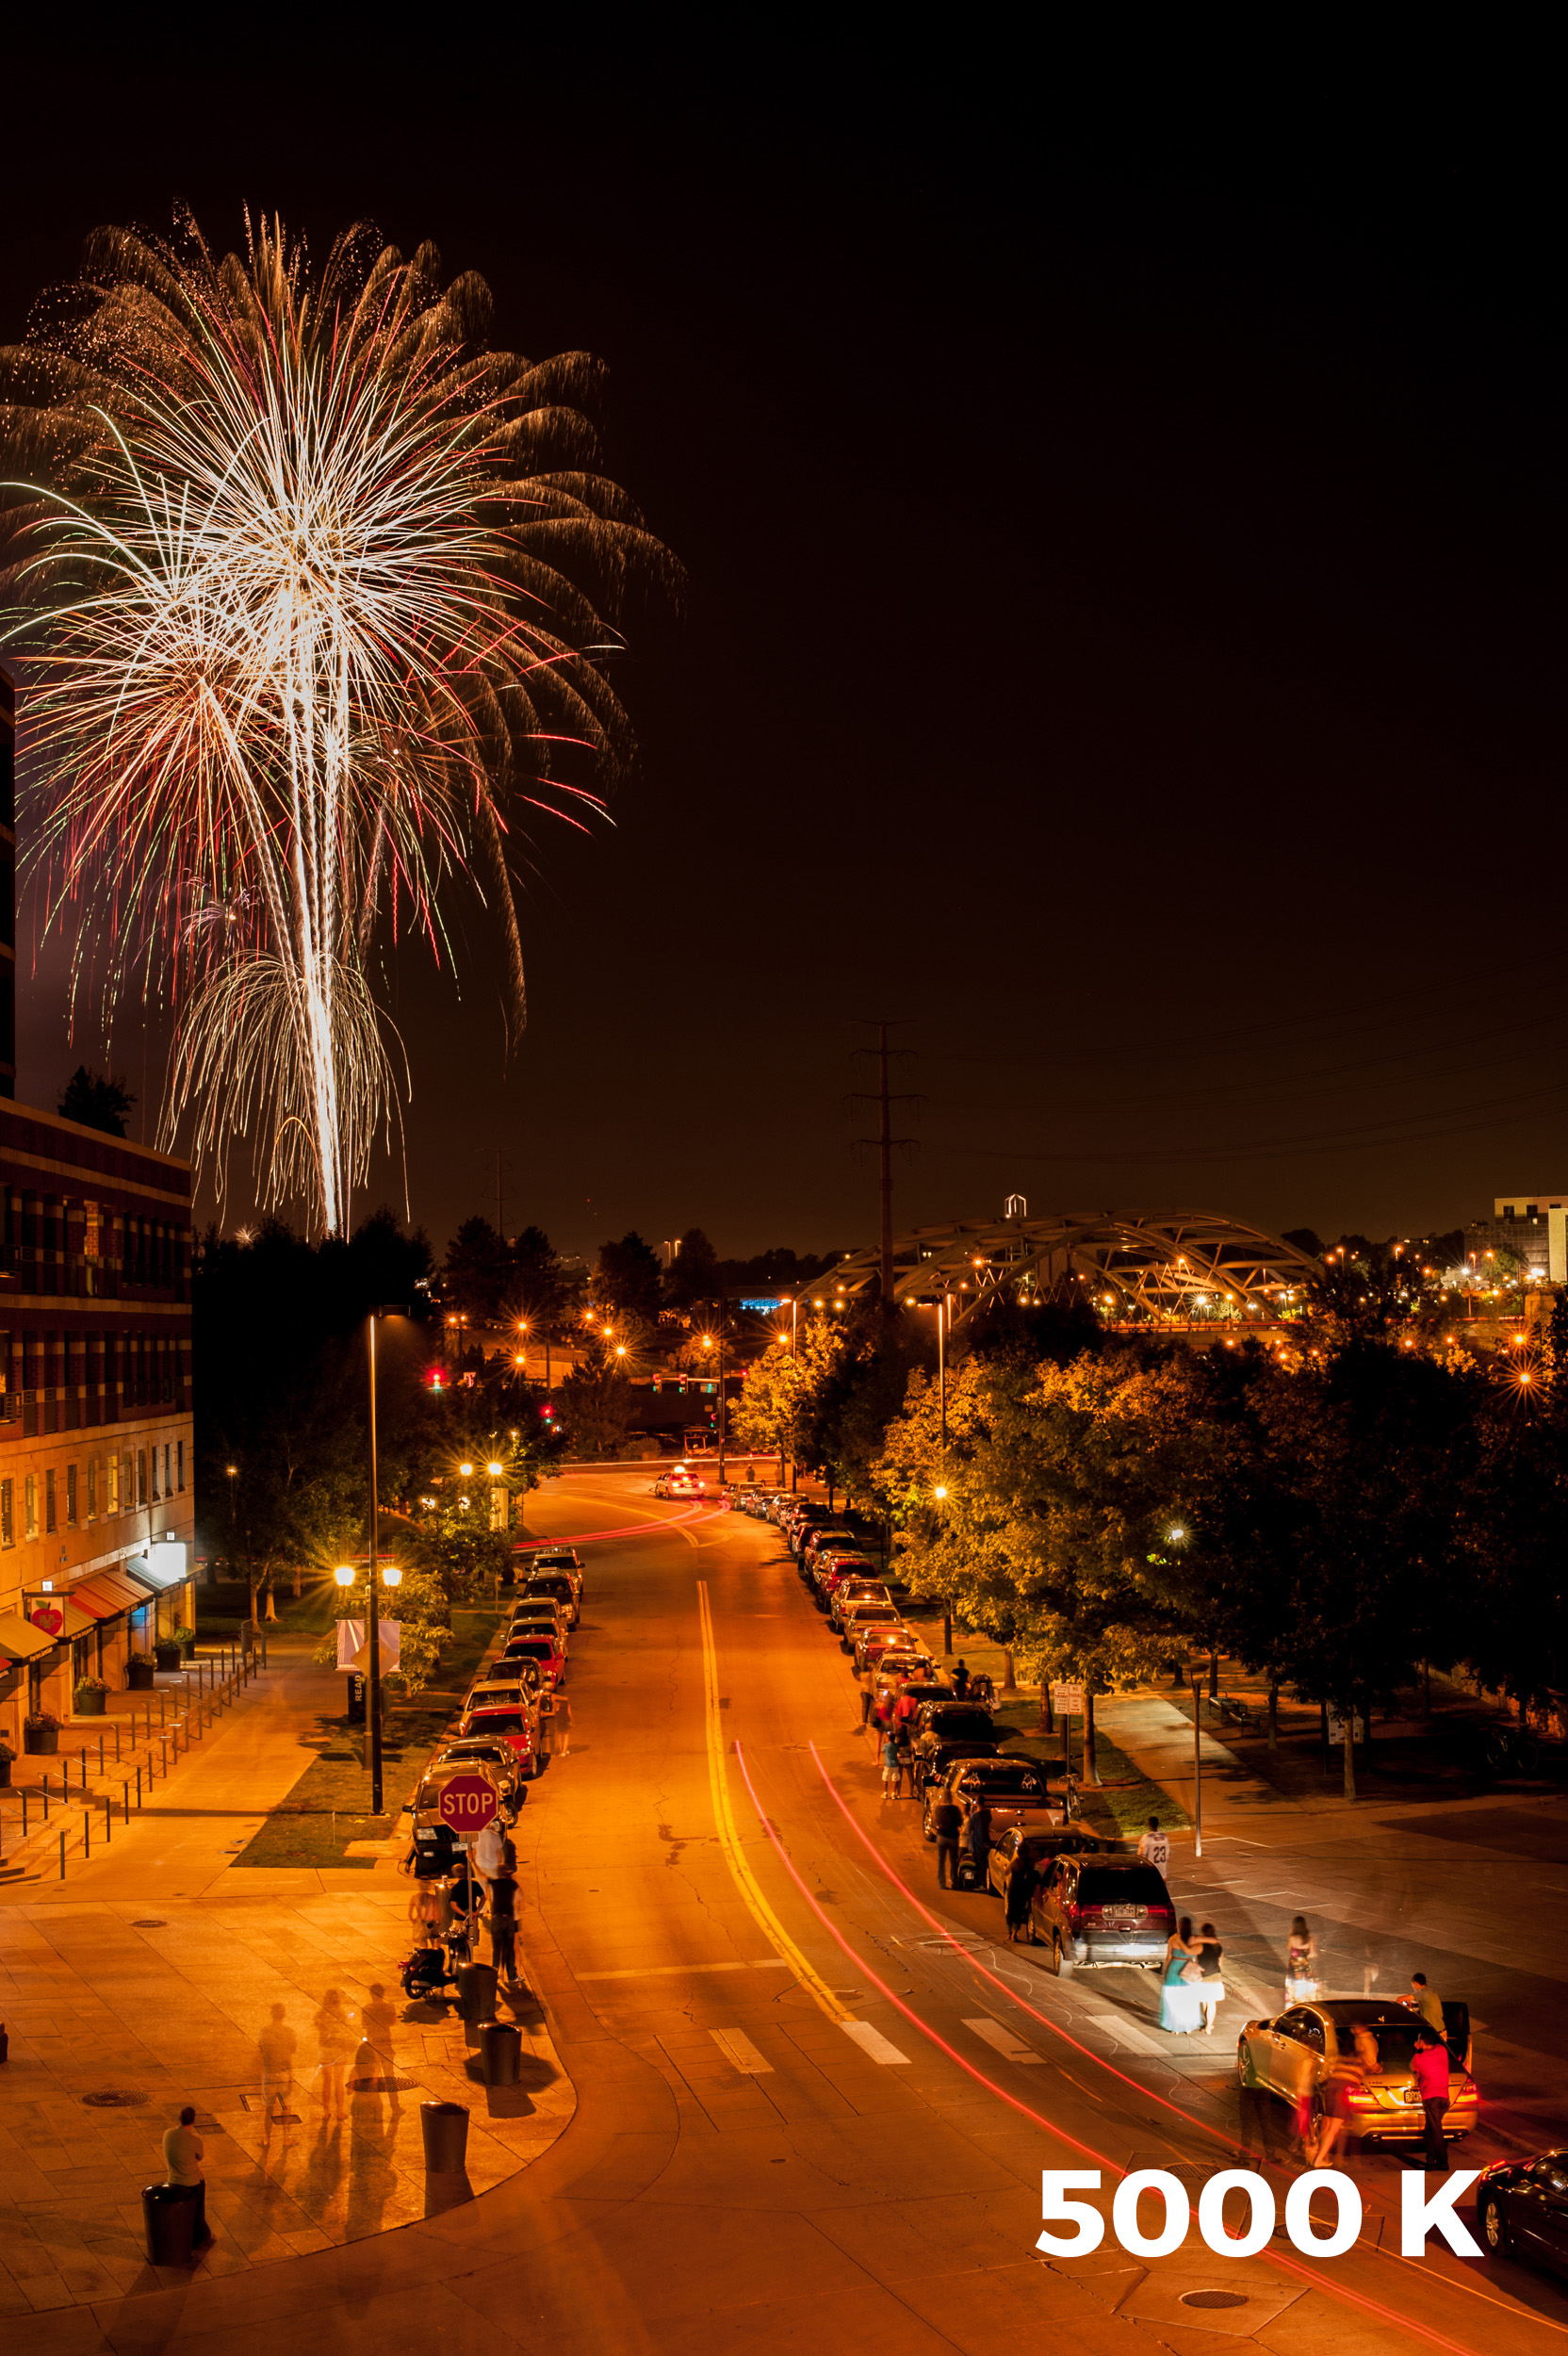
This is a little bit of a dilemma, because there are so many different light sources in inhabited areas. Here is an example where I shot fireworks in Denver (2950 K on the left, 5000 K on the right):
Making the Milky Way POP
When the moon is hiding around the other side of the Earth, and you can see the galactic center of the Milky Way, you want those colors to jump off the screen or print, right? To encourage those delicate colors to emerge like a flower opening up, set your white balance to 3900 K (right, versus 3200 K on the left).
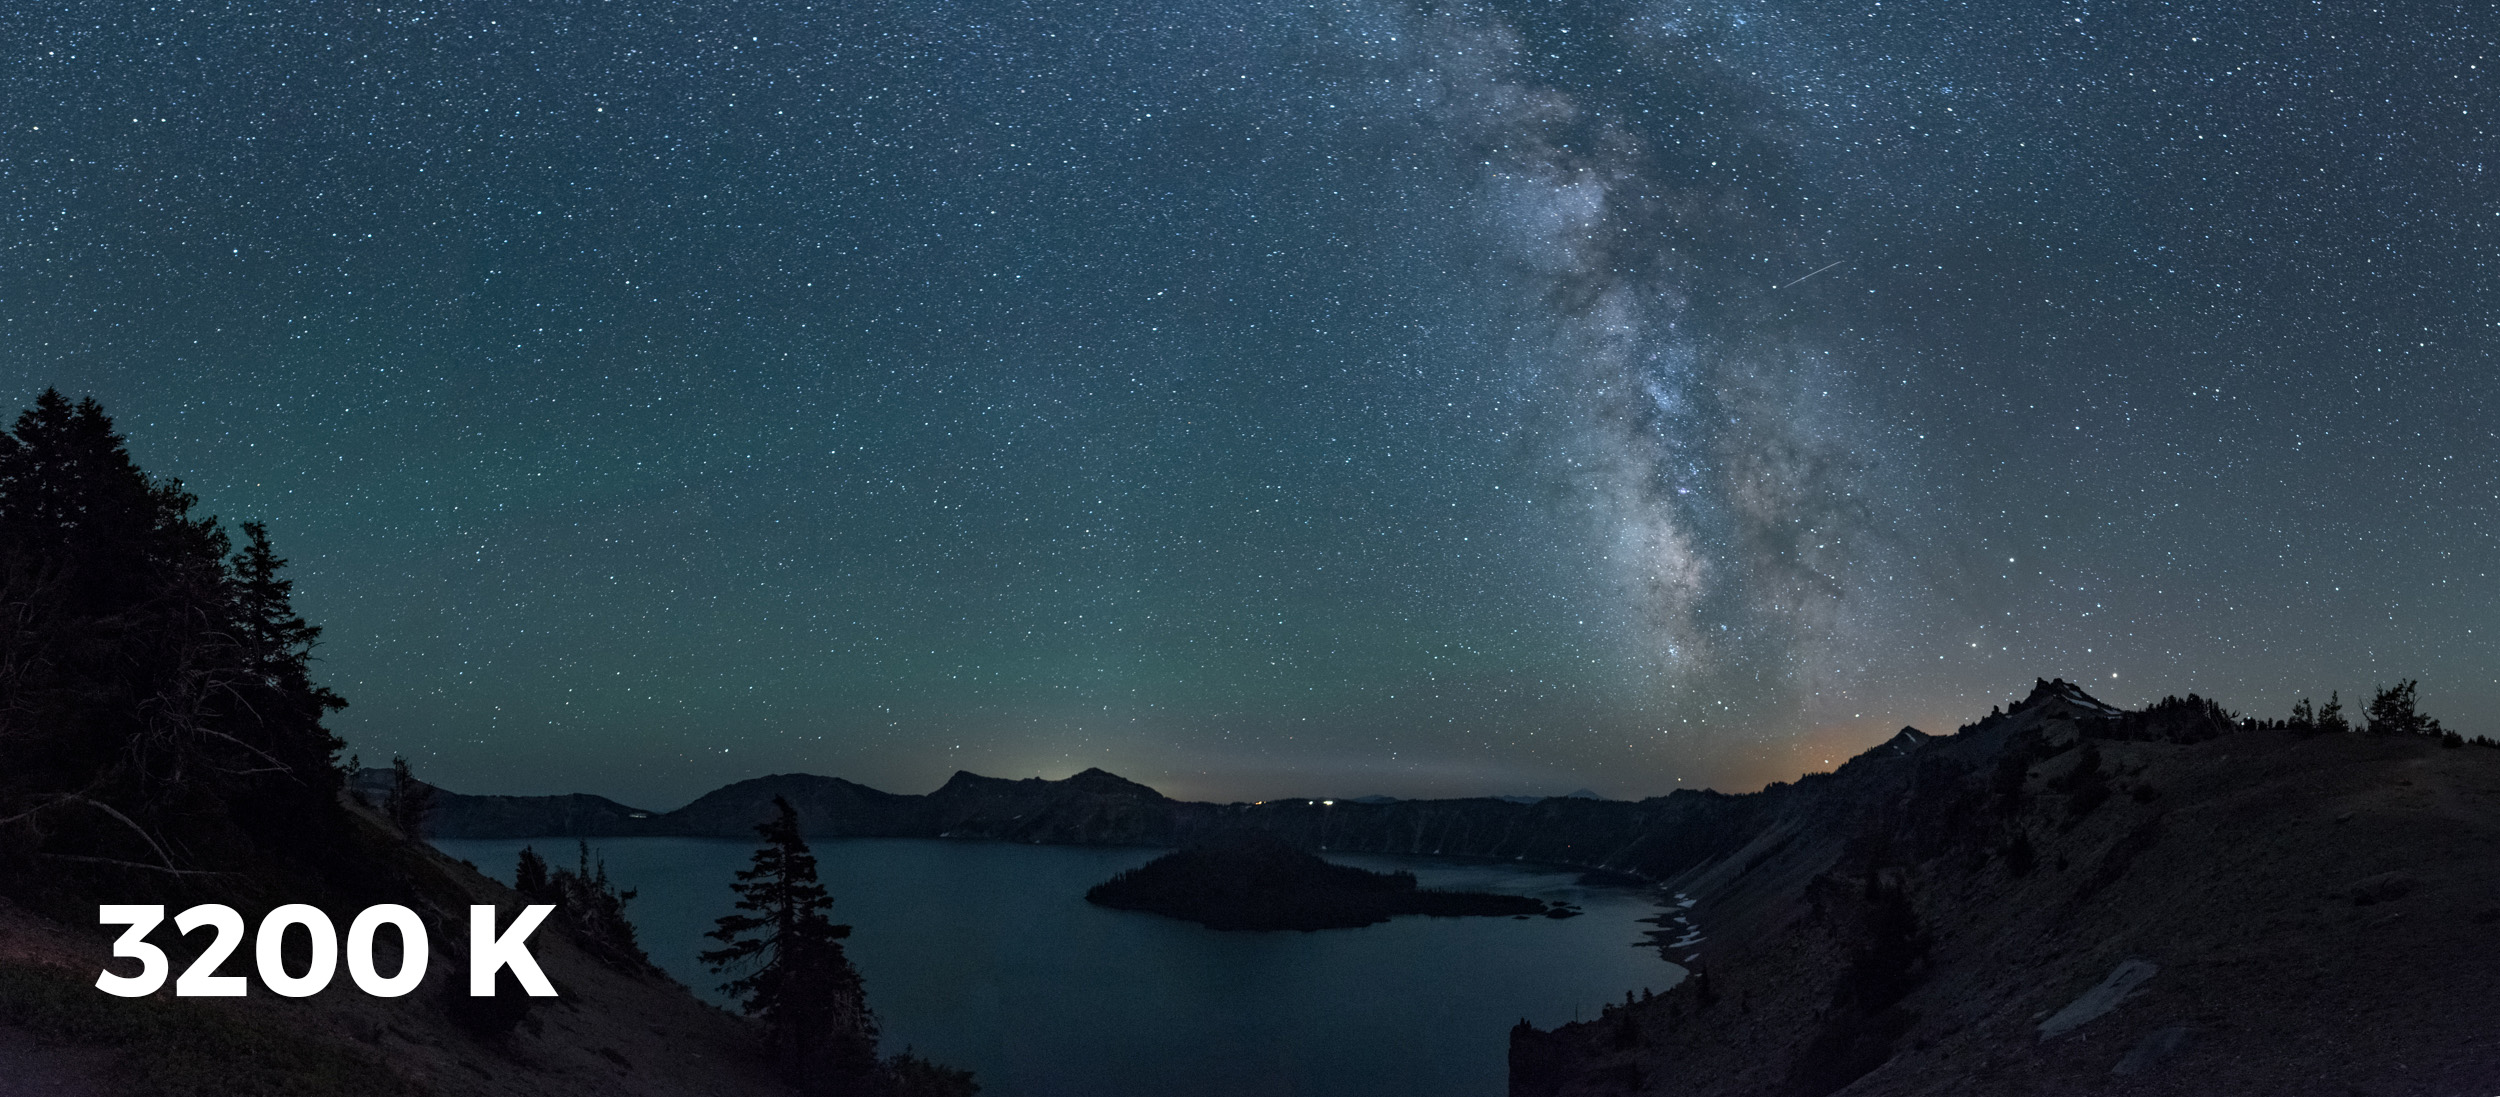
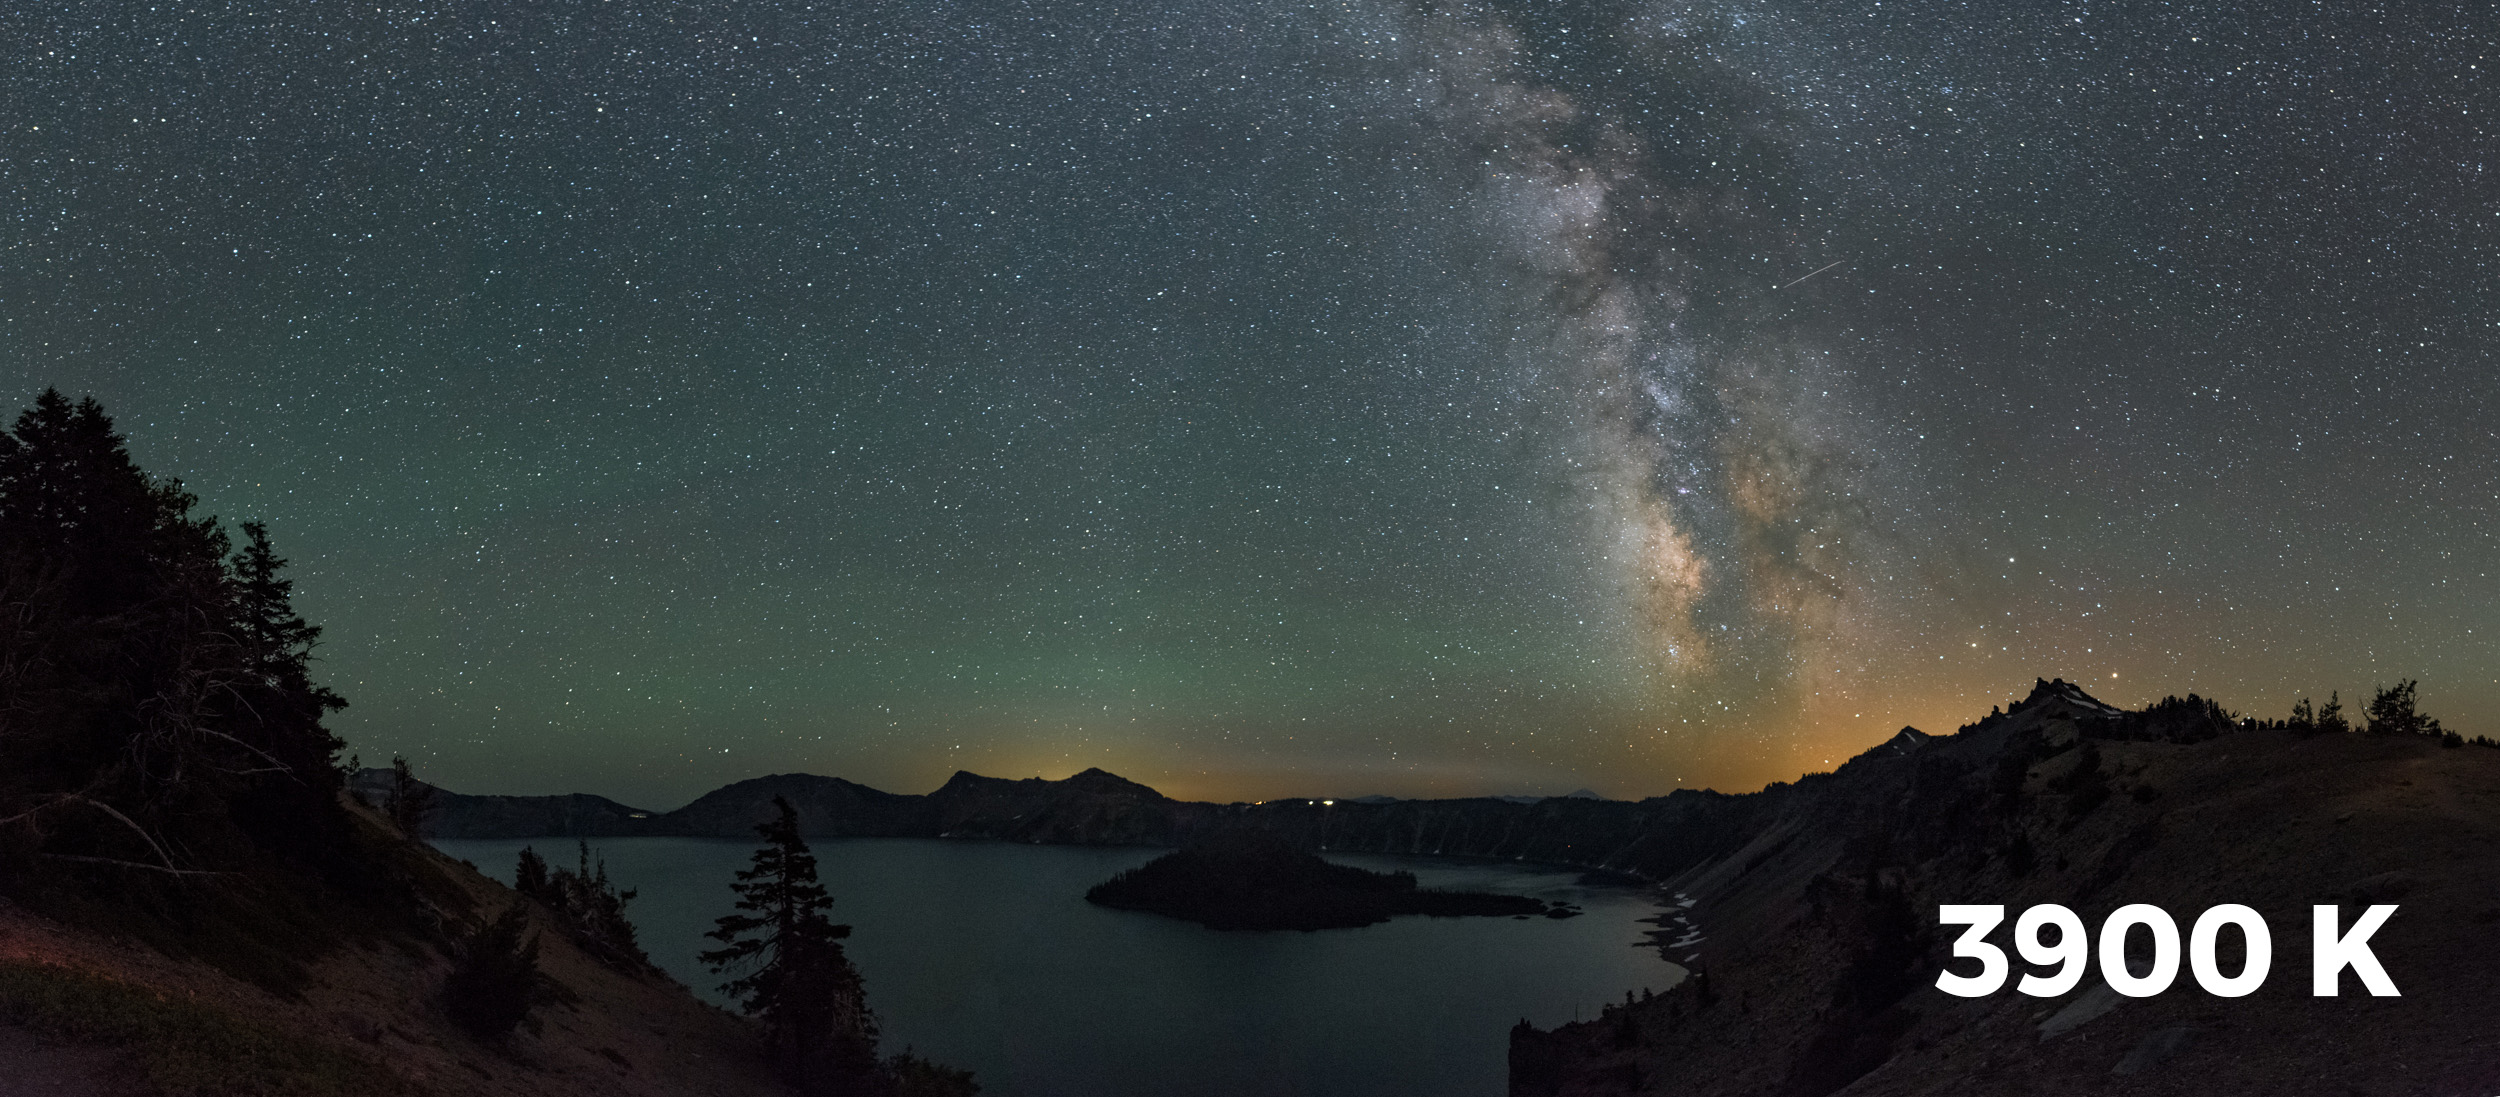
Making that change in the above photo (from Crater Lake National Park), you can see the Milky Way colors jump right out at you, and the green airglow becomes much more noticeable. (The orange glow is from a nearby forest fire over the edge the caldera. We were not in any danger.)
Wrapup
Once you start thinking in terms of what you want your photos to feel like and surveying the light sources in the sky—whether natural or otherwise—you'll start to master choosing a white balance that makes your vision of the night come to life.
Honestly, just don't fret about it. Enjoy your quiet creative time. And always shoot RAW with a manual white balance. You can adjust files you shot in RAW no matter the color balance you set in the field. But isn't it fun to nail it when you're on the scene?
Seize the night (skies)!


