Oreos and More: 16 Ways to Celebrate the 50th Anniversary of the Moon Landing

β€œHouston, Tranquility Base here. The Eagle has landed.”
— Neil Armstrong

It’s here. The Big 5-0. Fifty years since a person first touched a world beyond our home.

I don’t remember this happening. I was still a year and a half fromβ€”as my grandfather would sayβ€”being even a twinkle in my parents’ eyes. I wouldn’t be born until the latter half of 1971, and I’d grow up in a world where humankind had already made a giant leap toward the stars.

Yet here I am, in 2019, marveling that this ever happened and celebrating that it did.

How am I celebrating? Well, mostly by conversing with my 6-year-old daughter about it. Last night we talked about Neil Armstrong, Buzz Aldrin and Michael Collins, and we looked at pictures of the lander and the rover and the rigid U.S. flag.

And now I remember that β€œmoon” was one of her first words, and how she would delight at seeing it in the night skies of Astoria, Queens, where she lived her first few years, and how when she was 3 she would love to say, β€œLook, the moon is a crescent, like a croissant!” And how she, even more than me, will grow up thinking that not walking on the moon is just a faint remnant of history.

Before going to bed, she asked if she would ever get to walk on the moon too, and I said maybe. Then I changed my answer. β€œYes,” I said, β€œif you want to walk on the moon, then I’m sure you’ll find a way.”

She willβ€”she’s that kind of kidβ€”determined, unburdened by the nuisance of obstacles. Kind of like that trio of moonwalkers 50 years ago, and kind of like the thousands and thousands of scientists and technicians who helped lift them to the beyond.

Then she asked, β€œDaddy, can we do it together?”

Gosh, I hope so.


16 Ways to Celebrate

Not many things are celebrated by a majority of the world at once. The moon landing was one of the few, and its semicentennial also will be recognized globally. You won’t be able to escape it on the news todayβ€”heck, you can’t even escape it on our blog.

If you can’t beat a party, then you might as well join one. What can you do to be festive today? Below are 16 ideas.

1. Eat Some Oreos

Nabisco recently released limited edition Marshmallow Moon Oreo Cookies. Not only are they as yummy as the rest of the best Oreos, but the package glows in the dark! In stores nowβ€”if you can still find them.

(Might we also suggest Milky Way and Mars bars? Moon pies? Tang?)

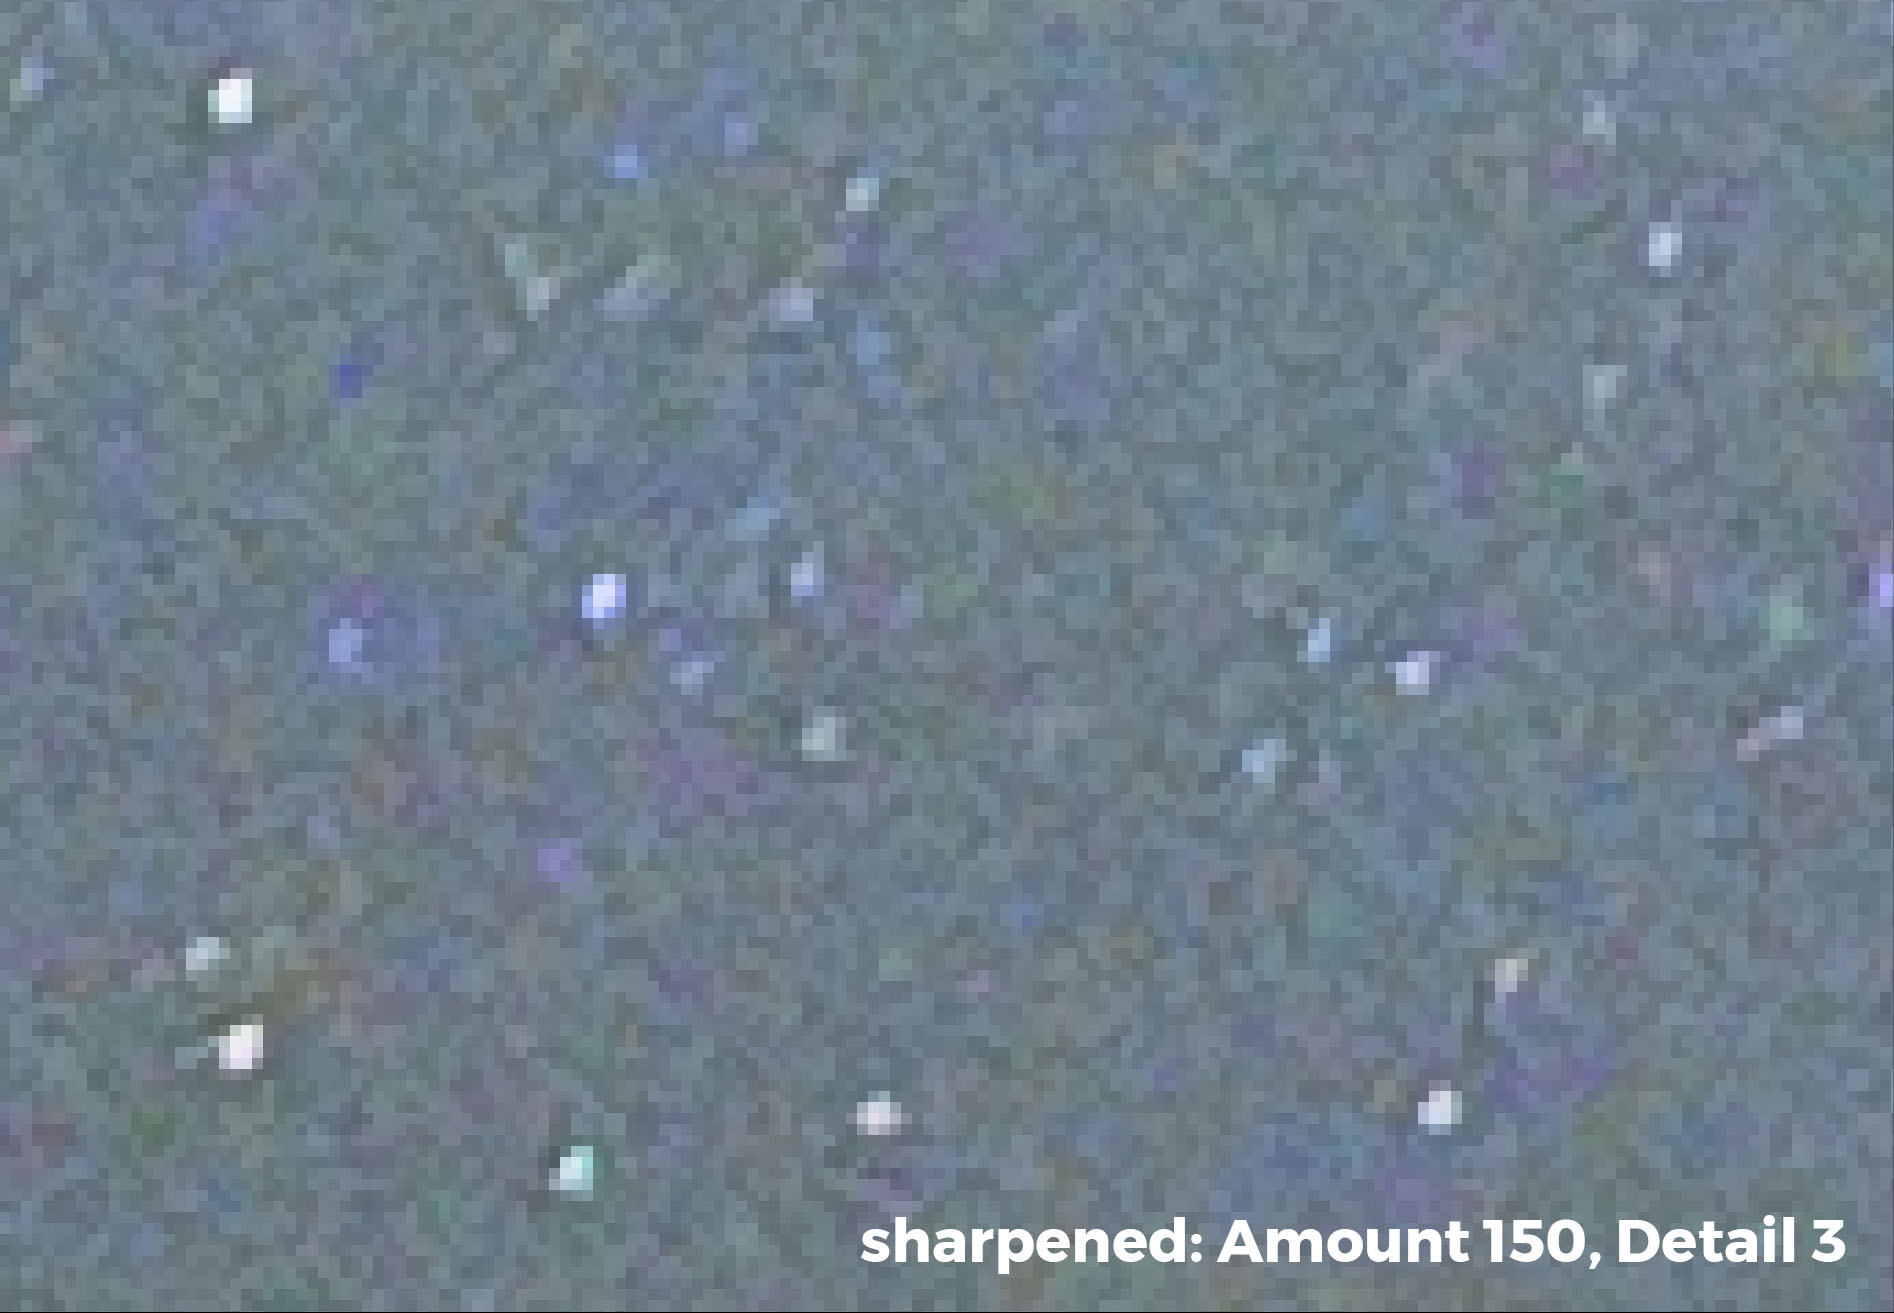
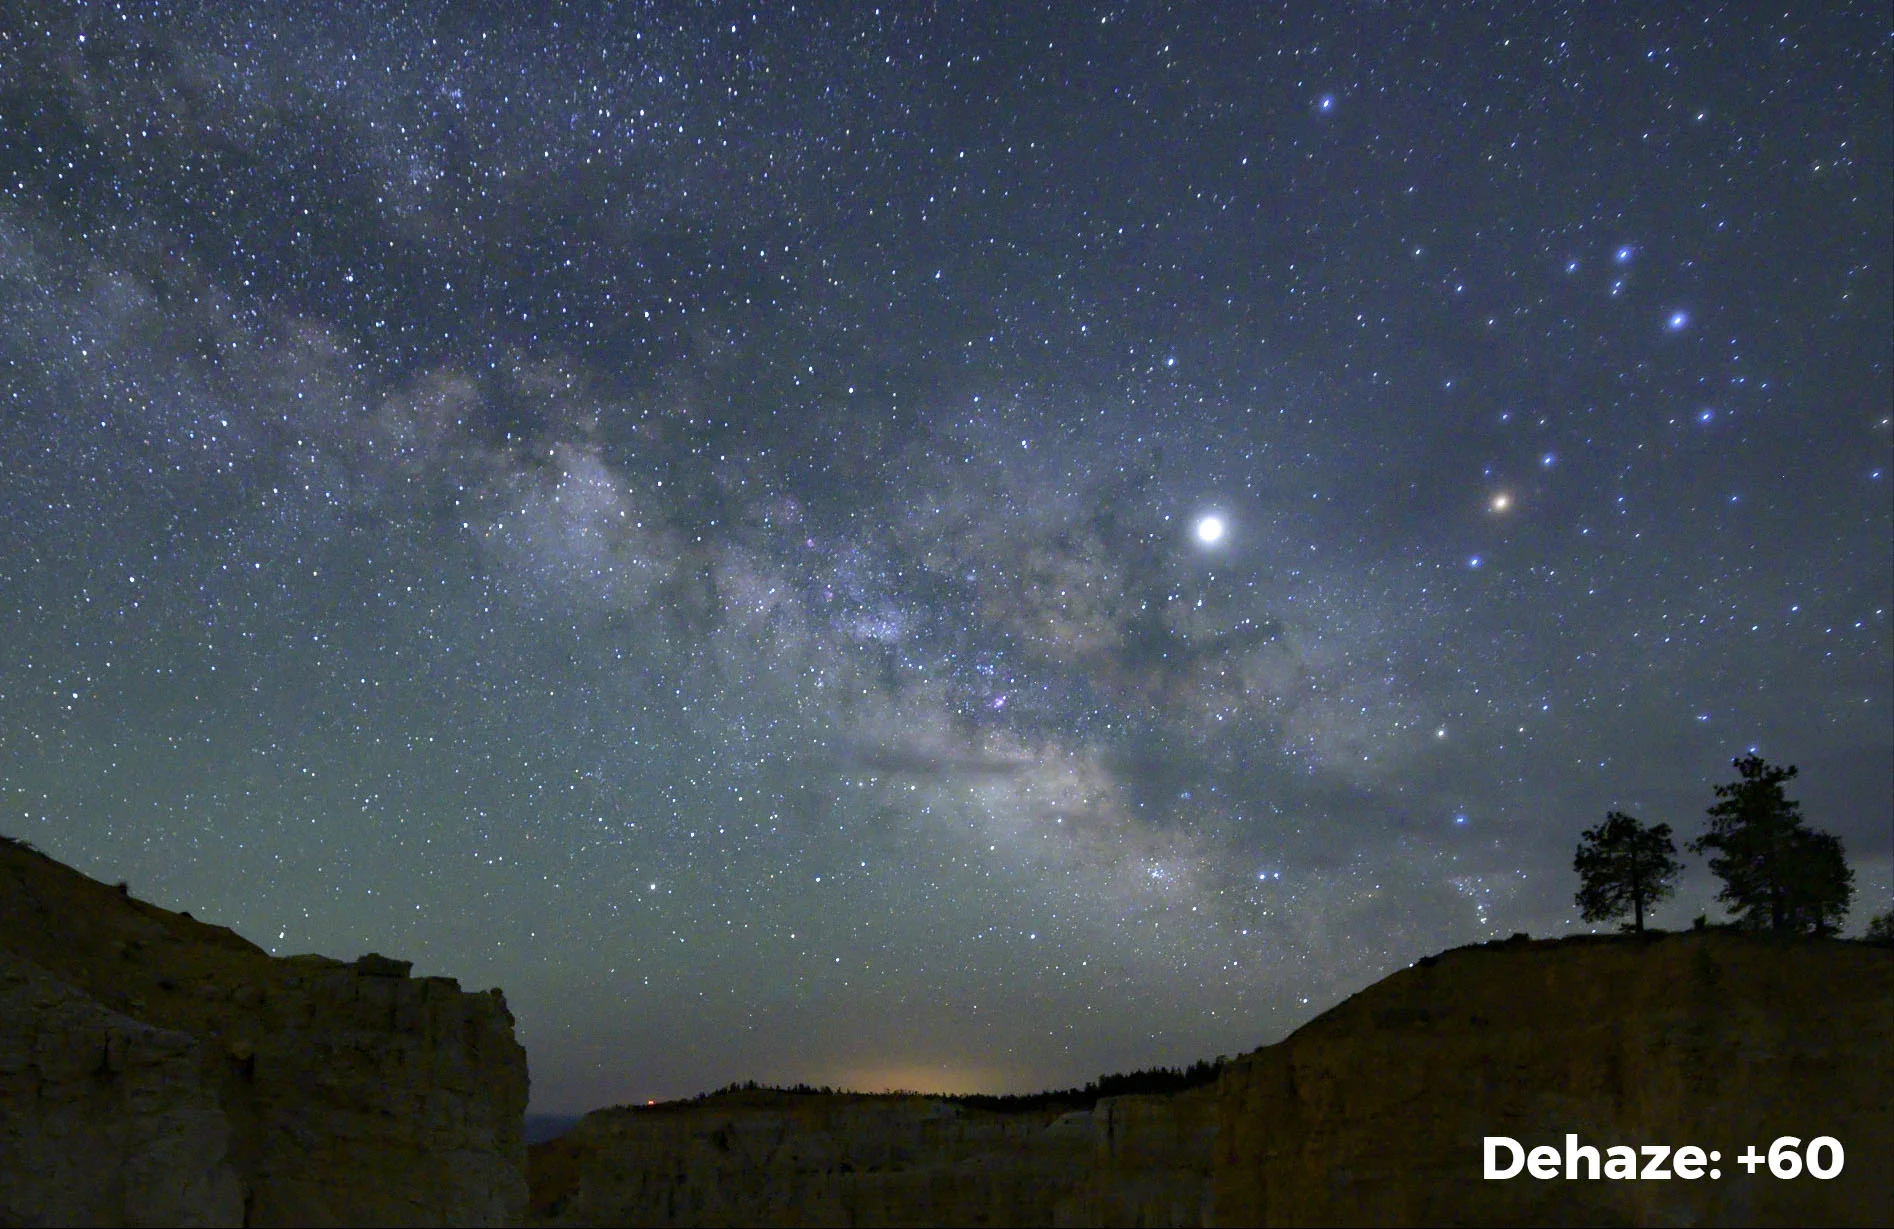
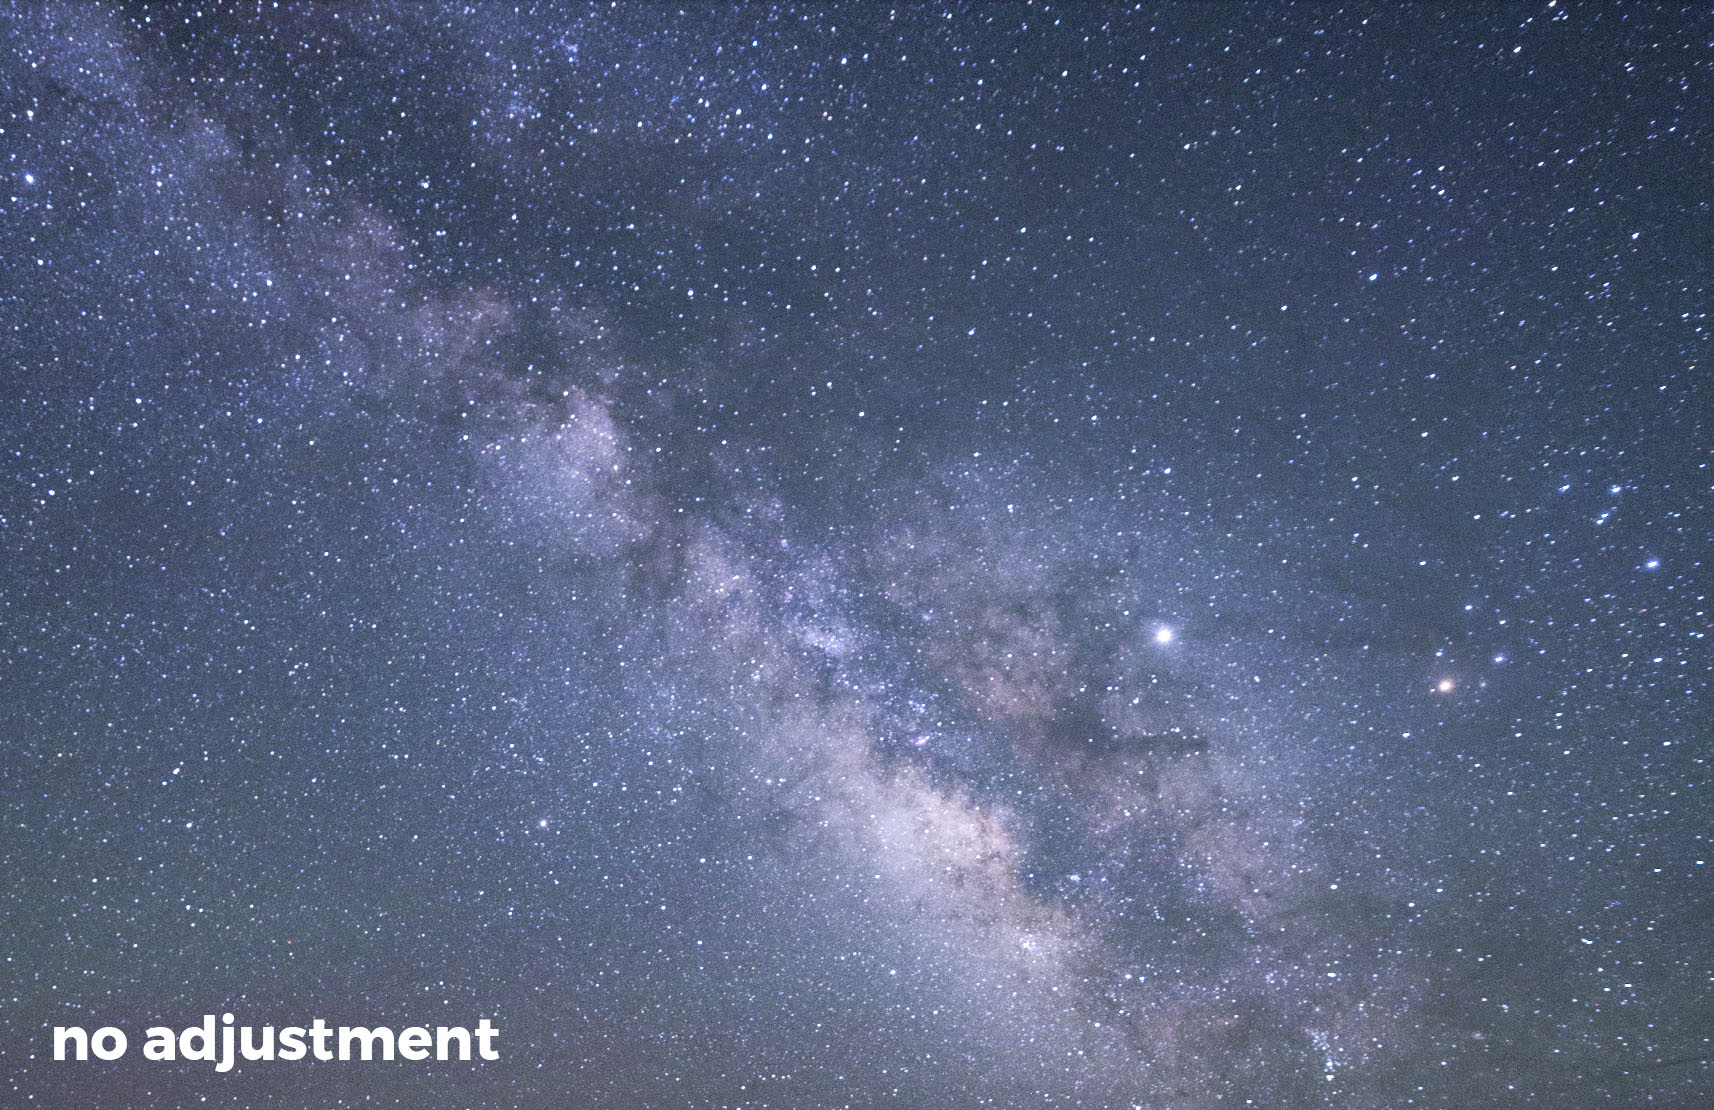
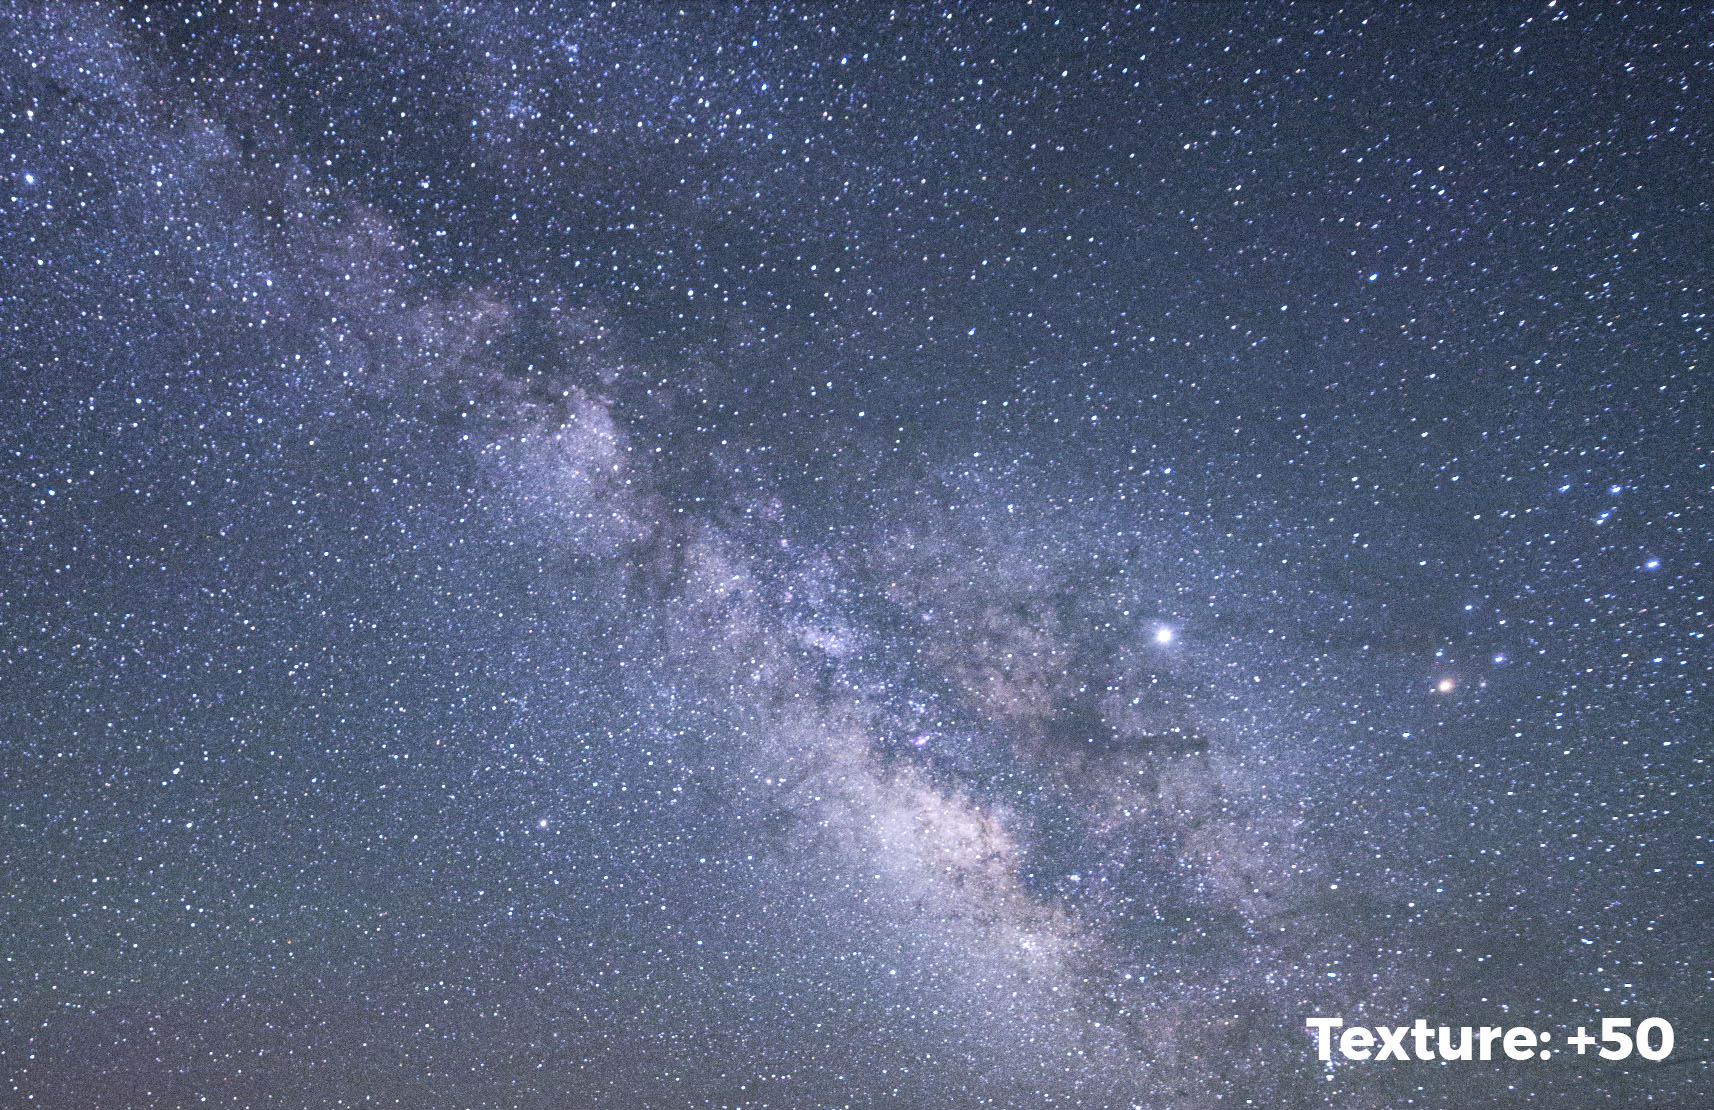
2. Explain Dynamic Range

Moon-landing conspiracy theorists point to many pieces of evidence that a half-century ago NASA produced nothing more than a big show on a sound stage. One of their Exhibits A is that no stars appear in the sky in Buzz and Neil’s photographs from the surface. So for fun, go find a moon-landing denier and explain that the reason no stars appear is because film couldn’t handle the vastly different exposures of the bright surface of the moon and the darkness of space in one perfectly exposed frame. (Lunar module payload didn’t have space for split-ND filters. Duh.)

3. Watch the Movie

Whether on TV, or at a movie or IMAX theater, watch Apollo 11, the full-length documentary released earlier this year. It’s back in theaters this weekend, is streamable on multiple platforms (Amazon, Google Play, YouTube, et al.), and will be broadcast on CNN twice this evening.

4. Read About a Progmatic Woman

You may have seen this in 2015, but it’s worth a revisit. Check out Wired magazine’s profile of Margaret Hamilton, who, working in β€œa man’s field,” came to be instrumental in leading the development of the software that powered the Apollo missions. She was such a pioneer in coding that she even co-coined the term β€œsoftware engineer.” See β€œHer Code Got Humans on the Moonβ€”And Invented Software Itself.”

5. Shoot with Neil & Buzz

The New York Times put together an outstanding interactive digital walk-through of the moon landing, along with photographs the astronauts made both on the surface and on the flights to and fro. It’s hard to describe this experienceβ€”you’ll need to check it out yourself. See β€œApollo 11: As They Shot It.”

β€œNeil, this is Houston. Did you get the Hasselblad magazine?

Roger, Houston. … We’re in the process of using up what film we have. We’ve probably got another half an hour’s worth of picture-taking.”

6. Relive the Landing in 3D

Go to your local bookstore and buy Mission Moon 3D: A New Perspective on the Space Race by David Eicher, editor of Astronomy Magazine. The book features stereoscopic versions of famous and lesser-known photographs of the 1960s space race, lending unique visual access to one of the greatest stories of the 20th century. 3D viewing glasses included.

7. Listen to Brian May

On January 1 of this year, the legendary Queen guitarist released a composition called β€œNew Horizons.” The song is really a celebration of the titular NASA space probe that buzzed a Kuiper belt object, but we’re including it here because May, also an astrophysicist, designed the 3D viewer that comes with the book mentioned in the previous paragraph. Yes, really. Plus, the song could have easily been about flying to the moon for the first time, right?

8. Also Listen to Pink Floyd

Because now that I’m mentioning it, Dark Side of the Moon will be in your head. Also, it’s where Michael Collins spent half his time 50 years ago today, while he circled over his moonbound friends. (β€œThere is no dark side of the moon, really. Matter of fact, it’s all dark.”)

9. Immerse Yourself in The Atlantic

If you’re not tired of reading (thank goodness, that means you’re still reading this post), then click over to the website for The Atlantic and peruse their 14-article series reflecting on the lunar landing, titled β€œThey Went to the Moon.” Pieces include:

  • β€œWhat Is the Apollo 11 Landing Site Like Now?”

  • β€œYour Smart Toaster Can’t Hold a Candle to the Apollo Computer”

  • β€œThe Most Compelling Photo of the Moon Landing”

10. See What Neil Armstrong Saw

Using NAC images, moon topography, trajectory data and all sorts of other neat technology, the Lunar Reconnaissance Orbiter Camera folks created a video simulation of what Armstrong saw when the lunar lander was lunar-landing. Check it out on the Arizona State University website.

11. Mail a Letter

Head to the post office (before noonβ€”today’s Saturday!) to buy some First Moon Landing commemorative stamps, and use one to send a letter to somebody who’d like to receive a letter from you. Better yet, make it a postcard and tell them you’re vacationing on the shores of the Sea of Tranquility.

12. Watch a Monument Prepare for Liftoff

If you’re in Washington, D.C., head to the National Mall for the National Air and Space Museum’s β€œApollo 50: Go for the Moon” show, which will culminate with an image of the mission’s full-scale, 363-foot Saturn V rocket projected on the Washington Monument.

13. Build Your Own Lunar Lander

Seriously! Lego lets you do it, and the job entails just 1,087 pieces. (If you count only 1,086, watch where you step with bare feet.) The NASA Apollo 11 Lunar Lander kit will set you back only $100. Think that’s a lot? NASA spent $240 million on each of theirs. Kit includes Lego Neil and Lego Buzz.

14. Build Your Own Moon!

Four Point Puzzles produced a beautiful 1,000-piece, two-foot circular puzzle of the full moon based on the highest-resolution photo NASA has made to date. (We encourage Four Point to make an easier version based on a waning crescent.)

15. Attend an Event

The U.S. is celebrating the moon landing anniversary everywhere (except the moon, ironically). If you’re interested in learning more about this historic moment, or seeing if you can score some green cheese, look for an event near you. (Know that today is not your last chanceβ€”many of these programs run longer into the year.) NASA and Space.com are here to help, with a list of ongoing events and exhibits, from Houston to Cape Canaveral, from the mountains to the prairies, from sea to shining sea.

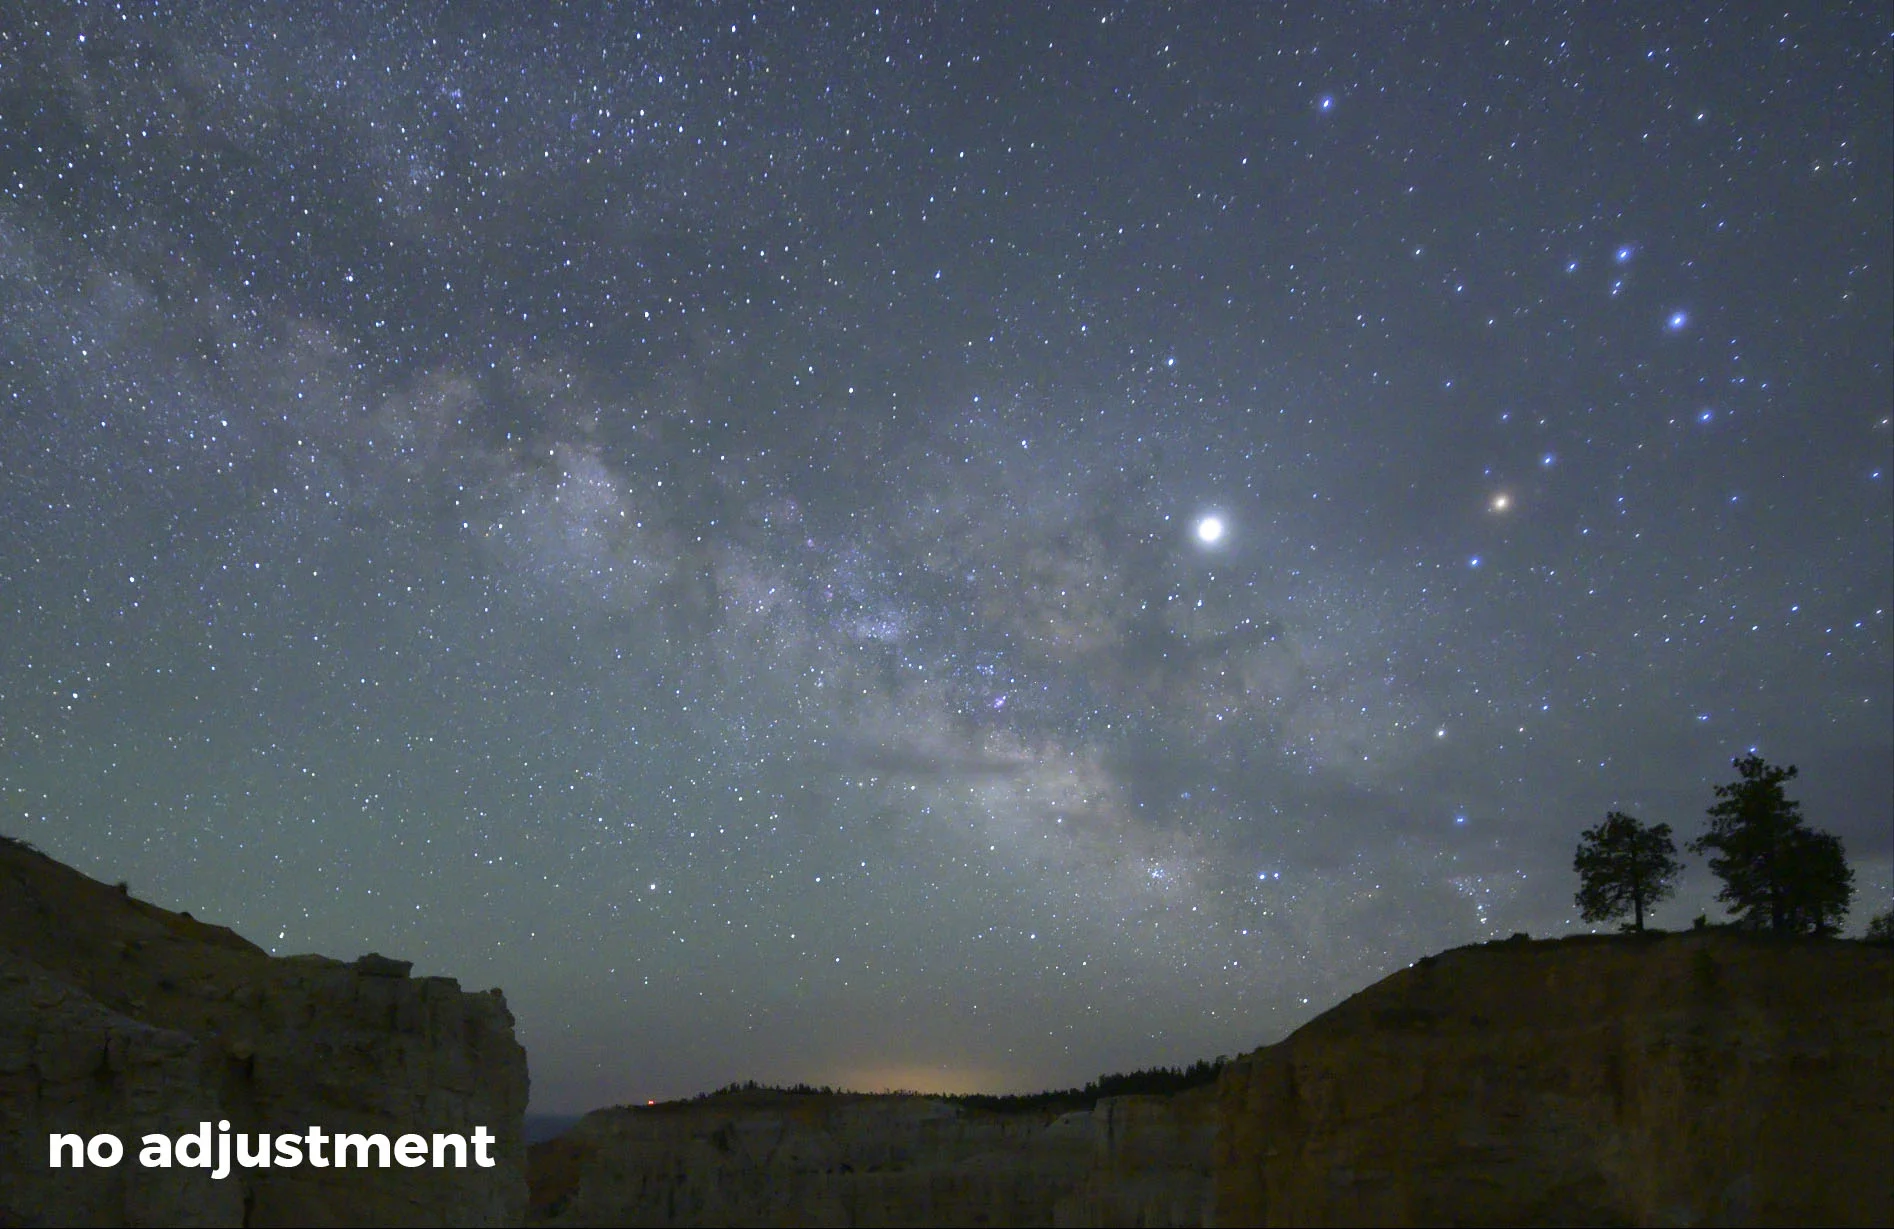
16. Finally, Photograph the Moon

Last, but absolutely not least, get outside with your camera tonight and photograph that big gray ball in the sky. Want some help? See our blog posts:

Your Turn!

How will you be observing or celebrating the 50th anniversary of the first manned moon landing? Share in the Comments section below or on our Facebook page. We’re all in this together. Party on.

Chris Nicholson is a partner and workshop leader with National Parks at Night, and author of Photographing National Parks (Sidelight Books, 2015). Learn more about national parks as photography destinations, subscribe to Chris' free e-newsletter, and more at www.PhotographingNationalParks.com.

UPCOMING WORKSHOPS FROM NATIONAL PARKS AT NIGHT

Five Questions: Very Large Files, Pollution Filters, Fuji lenses and More

This installment of our β€œFive Questions” series features inquiries about large image files, light pollution filters, lenses for Fuji, organizing files in Lightroom and old Canon cameras..

If you have any questions you would like to throw our way, please contact us anytime. Questions could be about gear, national parks or other photo locations, post-processing techniques, field etiquette, or anything else related to night photography. #SeizeTheNight!


1. Giant Files Missing from Lightroom

A 4 GB, 38-layer PSB file from Matt. Files this big don’t show up in the Lightroom catalog.

Q: I have run into an issue with large file sizes when image stacking. In Lightroom, after I choose Open as Layers in Photoshop, the final layered file is greater than 2 GB. I saved it in PSB large document format. The file was saved to the disk, but is not showing up in my Lightroom catalog like PSD files do, nor does it show up in the Import window in Lightroom. It looks like Lightroom cannot see the file at all. So I tried flattening the file, but then I got a moirΓ© pattern in the image. Have you seen this before? What is your process for saving and working with very large Photoshop files? β€” Craig

A: That is correctβ€”for some reason, Adobe hasn’t allowed Lightroom to see PSB files. So your options are to either work with that file only in Photoshop, or to flatten it so it saves as a smaller PSD file.

But yes, flattening can occasionally create its own challenges. We have seen that moirΓ© issue with stacked photos before. It happens sometimes, but not others, and we haven’t been able to identify a pattern of when or why. We’ve asked others who are Adobe-knowledgeable, and haven’t found an answerβ€”but we’ll keep trying! What I can tell you is that the moirΓ© seems to happen more often when working with images from higher-resolution cameras, and that sizing down the image a little before flattening seems to help. β€” Chris

2. Filtering Light Pollution

Light pollution from Miami over Everglades National Park. Nikon D3s, Nikon 17-24mm f/2.8. 20 seconds, f/2.8, ISO 6400. Β© 2013 Chris Nicholson.

Q: Do you use light pollution filters of any kind? I don’t remember any of you mentioning them, and I don’t see them in your gear list. Are they just a scam? It seems like such a filter would help when you can’t get to a dark sky area. β€” Brien

A: Night sky filters mostly help with color shifts from light pollution, and can increase contrast in the sky. We’ve tried a couple of them, but have not tested them scientifically––yet. There will be a blog post comparing them for effectiveness before too long.

That said, I think the general consensus is these filters they can improve skies somewhat, but probably don’t provide $250 to $300 worth of improvement, which is what they tend to cost. I wouldn’t call them scams, but I also probably wouldn’t call them a great investment if resources are limited.

If you decide to try one, please let us know what you think by sharing in the Comments section or on our Facebook page. β€” Lance

3. Night Lenses for Fuji

Q: I own a Fuji X-T2 and have a 14mm f/2.8 lens. I notice that at least one of you has posted photos using an X-T2 with their 10-24mm f/4 lens. These photos look great. I have been looking at that lens and/or the Fuji 16mm f/1.4 to get a stop or two of additional light, given that the tests I see appear to indicate the corners are much softer at f/1.4, better at f/2 and pretty good at f/2.8. My interest in the 10-24mm is the flexibility and range down to 10mm, but I am concerned about the stops of light I would give up. What is your experience with these lenses, and do you think I should instead look more deeply at a Samyang or Rokinon 12mm or 10mm? β€” Larry G.

fuji lenses.jpg

A: Several of us have been shooting with Fujifilm since the X system came out, and our two favorite lenses for the night are the Fuji 10-24mm f/4 and the 16mm f/1.4.

The 10-24mm gives an excellent zoom range that’s good for including lots of night sky. The f/4 does limit light, which makes it challenging for Milky Way shots, but if you were to shoot at ISO 6400 or 12,800 and use Starry Landscape Stacker, then you could get away with it. However, the 16mm f/1.4 would be our preferred Milky Way lens for Fujiβ€”it’s an excellent focal length and you can shoot wide open or stop down to f/2 without a worry.

That being said, if I were to buy into the Fujifilm lens system now, I’d have to give their new 8-16mm f/2.8 lens some serious consideration. It’s wider, faster and heavier than the 10-24mm, but the f/2.8 aperture gives it the versatility to shoot in any day or night situation.

On the higher end of tried-and-tested night lenses, I’d also recommend:

For budget and manual focus lenses:

  • I’m not a fan of the Rokinon/Samyang lensesβ€”I’ve had too many with soft, out-of-focus edges. (Though I might try Samyang’s new 10mm f/2.8.)

  • Matt and I both own the inexpensive 7Artisans lensesβ€”the 12mm f/2.8 is pretty good and Matt really likes his 7.5mm f/2.8 fisheye.

Finally, with adapters, any lens can be at your disposal:

  • Our favorite night lens is the Irix 15mm f/2.4 that comes in Canon, Nikon and Pentax mounts. It’s manual focus with a click stop at true infinity, it has hyperfocus markings, and you can lock your focus. It comes in two versions: Firefly and Blackstone. Optically they’re the same, but the Firefly is polycarbonate and the Blackstone is magnesium alloy. The former is lighter, and is best for hikers and photographers who are otherwise weight-conscious; the latter is more rugged, made for extreme situations, and has engraved fluorescent markings that are easy to read at night. β€” Gabriel

4. Organizing Photos in Lightroom

Q: I really want to move into Lightroom, but I do not organize my images by date. It just won’t work for me because I really want to group photos by place and such so I can look at a β€œplace” together with all times I’ve been there. I know that’s what collections are for, but I cannot even begin to fathom reorganizing everything into dates and collections. Can I use Lightroom that way? β€” Therese I.

A: You’re in luck, because the Lightroom engineers designed the catalog to be pliable enough to use in whatever way feels comfortable to individual photographers. So when organizing photos, do whatever makes sense to you.

There are two strategies I see most often:

  • Organize into folders by date, and use keywords, collections, etc., to catalog and find them. This is what I do. That works very well for the way I think, because I have a very good memory for datesβ€”show me an image of mine and I can tell you the month and year I shot it. A folder in my catalog might be β€œ2016-05-20_Acadia.” So I do have location info in the folder name, but it’s only secondary. However, this approach doesn’t necessarily work so well for a fair number of other people whose brains don’t categorize information the same way mine does. Many other folks tend to …

  • Organize images into folders by region, country, city, etc. So there might be a folder structure of United States -> Southwest -> Arizona -> Grand Canyon. Using this strategy, you could still search by date, as that info is built into the metadata.

Really, it just comes down to which way your brain tracks these things better. Like I said, I’m in Group 1, as are Gabe, Matt and Lance. Tim is in Group 2. Lightroom is flexible enough to make your own system within the confines of the software. The important thing is to pick a strategy that is easy enough to implement while effective enough to be useful, and then to be diligent about sticking with the procedure you choose so that you can always find your images quickly and effortlessly. β€” Chris

5. Old Canon vs. New Anything

1561852319_1346734.jpg

Q: What is your thought on the Canon XSi for landscape and night photography? I was thinking of upgrading to a their DLSR cameras, but was wondering if a Nikon camera would be a better option. β€” Nichole P.

A: The Canon XSi is more or less an entry level camera from 2008, and, to put it mildly, would be a subpar choice for night photography. We recommend a current camera that is at least one notch up from entry level.

To an extent, it matters what kind of photography you’d like to do. If you want to photograph the Milky Way, then the above recommendation is a minimum, and we’d encourage you to step up to a full-frame camera like the Canon 6D Mark II, or even the original 6D (which you could get on eBay for about $500) if you are on a tight budget. Over at Nikon, the D750 is an outstanding value, or the D5500 or D5600 would be OK.

Most importantly, I recommend buying a current generation camera. Even with lower-priced models, current cameras are far superior to those that were made even just a few years ago. β€” Lance

Chris Nicholson is a partner and workshop leader with National Parks at Night, and author of Photographing National Parks (Sidelight Books, 2015). Learn more about national parks as photography destinations, subscribe to Chris' free e-newsletter, and more at www.PhotographingNationalParks.com.

UPCOMING WORKSHOPS FROM NATIONAL PARKS AT NIGHT

Sliding Into Sharper Skies: Lightroom Brings Texture to Night Photography

Lightroom’s new Texture slider.

Back in May, Adobe introduced a new slider to the Presence area within the Basic panel in Lightroom’s Develop module. This new tool was originally intended to be a β€œsmoothing” slider that would soften skin texture somewhat more naturally than the Clarity slider does. But during development, the engineers found that while it was great at smoothing skin tones, it could also be used to add texture to our photographs.

Thus, the new Texture slider is aptly named. It really does enhance texture in our images! But as with all new photography tools, we wanted to push its limits and see what else it can do, particularly for night photography. As it turns out, when paired with the Dehaze slider, Texture can really enhance the look of our night photographs.

For those of you looking for a quick read, that about sums it up. By adding in a fair amount of Dehaze and a little Texture, your night skies will come alive! In the example below, Dehaze was set to +44 and Texture to +5. These are by no means default settings, as each camera produces different files and each scene requires its own approach. This does, however, give you starting point.

For those of you looking for a deeper understanding, read on.

A Deeper Understanding

The general effect of the Texture slider is somewhere between Clarity and Sharpening. To fully understand how this slider works, let’s take a look at all the sliders that enhance detail and contrast in our images: Sharpening, Texture, Clarity and Dehaze. We’ll begin with Sharpening.

Understanding Sharpening

Each of the aforementioned sliders, in essence, increases contrast. It’s the areas they increase contrast in that separates them from one another. Sharpening, on one end of the scale, adds contrast at the pixel level. Dehaze, at the other end, is much broader in its application of contrast. Let me show you what I mean.

Sharpening increases apparent sharpness by finding an edge, and then darkening one side and lightening the other. This increases contrast around that edge, making it appear sharper. The images below show an unsharpened enlargement (11:1) of a night sky, and the same section after adding Sharpening. Notice how the stars appear to have a dark ring around them? This is the contrast being added by the sharpening slider.

Also notice that even the pixels in the sky without stars have been sharpened. This look is what makes an over-sharpened image look β€œfalse.” Lowering the value of the Detail slider can correct this negative effect. The images below show the sky sharpened with Amount at 150 and Detail at 25, and the same image with the Detail slider lowered to 2.

Finally, let’s look at the real comparison. The images below are completely unsharpened and then sharpened with Amount at 150 and Detail at 3.

As you can see, the adjusted image has an increased apparent sharpness in the stars without appearing to be over-sharpened in the surrounding sky.

Of course, you would never want to sharpen your images at a magnification of 11:1. And the slider settings presented are not what I would necessarily suggest. These magnifications and settings were used to better help you understand the concept of sharpening. Sharpening should be done at magnifications of 1:1 or 1:2. Experiment with each magnification to suit your taste. Likewise, experiment with your sharpening sliders, keeping your Amount higher and Detail lower.

Note: The other sliders in the Sharpening box are Radius and Masking. The Radius slider controls how large the β€œhalo” around the edge becomes. A higher Radius equals a thicker halo ring; a lower Radius setting creates a more natural look (a setting of 1.0 could be your benchmark). Adobe defines Masking as: β€œControls an edge mask. With a setting of zero (0), everything in the image receives the same amount of sharpening. With a setting of 100, sharpening is mostly restricted to those areas near the strongest edges.” So increasing your Masking slider relegates the sharpening to only the areas with well-defined edgesβ€”which is typically the place we want the sharpening to effect.

Congratulations! You’ve made it through it a quick primer on Sharpening. The reason I dove a little deep here is that a basic understanding of Sharpening helps create a better understanding of the other contrast controlsβ€”Texture, Clarity and Dehaze.

Understanding Dehaze

Now, let’s jump to the other end of the spectrum with Dehaze. While Sharpening adds contrast on the pixel level, Dehaze increases contrast across your image on a much broader scale. The following images are at a 4:1 magnification. We see a comparison of no contrast controls applied, versus the Amount slider in Sharpening increased to the maximum of 150, versus Dehaze set to +100. (Again, these adjustments are not recommendations, but rather exaggerations to show the effect.)

Contrast added with Sharpening.

Contrast added with Dehaze.

Below, let’s look at those two contrast adjustments side by sideβ€”Sharpening at 150 and Dehaze increased to the maximum of +100.

The Dehaze slider is actually increasing contrast between the sky glow and foreground. Compared to Sharpening, notice how Dehaze makes the foreground darker and the sky glow brighter. This makes the foreground and sky more separate from one another (i.e., there’s more contrast between them).

You can also see how Sharpening actually brightens the foreground and adds texture throughout. It does not, however, significantly separate the sky glow from the foreground.

Below is another example, comparing the image straight from the camera with a version with Dehaze set to +60.

This really shows how Dehaze darkens the sky around the Milky Way. Again, this is a broader application of contrast as opposed to Sharpening’s more localized approach to separating individual stars from their surroundings. For our night skies, the Dehaze slider can be simply magic. (See more on this in my 2018 blog post β€œDehaze: The Night Photographer's Secret Weapon.”)

Note: Along with an increase in contrast, the Dehaze slider also significantly increases contrast and somewhat darkens the whole image. After pumping up Dehaze, it’s not uncommon for me to decrease the blue saturation and increase Exposure.

So What About the Texture Slider?

The Texture and Clarity sliders fall between Sharpening and Dehaze. The breakdown of the different sliders looks like this:

  • Sharpening. Pixel-level addition to contrast around the edges. No real increase in saturation. Can increase grain and noise in the image.

  • Texture. Edge contrast added on a broader scale than Sharpening. Increases the apparent texture without the amplification of grain or noise that is sometimes accompanied with Sharpening. No noticeable saturation increase. The net effect is one of increased sharpness.

  • Clarity. Contrast added throughout the image on a broader scale than Texture. Looks more like an increase using the Dehaze slider but with slight sharping of the edges and no noticeable increase in saturation. The net effect is one of increased local contrast.

  • Dehaze. Adds contrast and saturation across a broader area of the image. Virtually no sharpening effect added. Separates especially well in brighter, low-contrast areas. This is why it works so well on our night skies.

  • Contrast. The broadest application of contrast. Also adds saturation. It does not take into account bright areas or dark areas, nor does it control edges. It’s the bludgeon of contrast controls with a very heavy-handed effect. Consider this to be an image-wide increase in contrast.

So the Texture slider is really like a less focused Sharpening slider. It creates edge sharpness without increasing noise and grain. You can see the effect here:

Used in combination with the Dehaze slider, Texture can produce night skies that are both crisp and colorful. However, like with the Sharpening slider, you should adjust with a soft hand. Kid gloves. A little goes a long way.

Putting it All Together

The following is a workflow that I used to process a recent image from our Bryce Canyon National Park workshop. Figure 1 shows the image captured with a Luxli Viola at camera left to illuminate the foreground. The Luxli output was balanced to complement the Milky Way in the background. The exposure was 15 seconds, f/2.8, ISO 6400.

Figure 1. Bryce Canyon National Park. Nikon Z 6, Nikon 14-24mm f/2.8 lens at 14mm, light painted with a Luxli Viola. 15 seconds, f/2.8, ISO 6400. Unprocessed.

Figure 2 shows the image after basic Lightroom adjustmentsβ€”I decreased Blacks to -32 and increased Whites to +4.

Figure 2. Blacks -32, Whites +4.

Then, as we see in Figure 3, I added a local adjustment on the foreground using the Adjustment brush and increased the Texture to +45. This increased the sharpness and texture of the hoodoos in the foreground. (This is the type of application that Texture is actually designed forβ€”adjusting actual texture in a surface.)

Figure 3. Local Adjustment of the foreground, Texture +45.

The last adjustment was to the sky only, increasing Dehaze to +30, Exposure to +35 and Texture to +3. Figure 4 shows the final image.

Figure 4. The final image with another local adjustment of the sky: Dehaze +30, Exposure +35,Texture +3.

Everyone will develop their own special recipe of slider settings for their night skies. And indeed these may even change from one scene to the next. The important thing to keep in mind is the effect of these settings. A better understanding of what each slider produces will arm you with the knowledge to craft a truly fine photograph.

Tim Cooper is a partner and workshop leader with National Parks at Night. Learn more techniques from his book The Magic of Light Painting, available from Peachpit.

UPCOMING WORKSHOPS FROM NATIONAL PARKS AT NIGHT

A Star Trek: Reporting Back from our Time at the Grand Canyon Night Sky Festival

One of the things I love about my job is that I get to experience so much of what our national parks offer. From soul-easing sunrises to serene night skies, from windswept desert landscapes to alpine lakes and streamsβ€”I get to see it all and reconnect with the natural beauty we were all born from eons ago.

In addition to all the wilderness it preserves, the institution of the National Park Service offers countless opportunities to engage with these places and to interact with others who enjoy them so passionately. One such opportunity is the Grand Canyon Star Party, the annual festival of night at one of the world’s most famous natural spaces. And last week, National Parks at Night was fortunate and proud to be a part of this stellar event.

A Grand Party

Many national parks organize night sky festivals, but the Grand Canyon puts on one of the biggest. The party lasts eight daysβ€”long enough for us to participate last weekend, come home, write a blog post, and share the news with you today while the event is still going on.

Photographing the Milky Way at Mather Point. Β© 2019 Gabriel Biderman.

Photographing the Milky Way at Mather Point. Β© 2019 Gabriel Biderman.

Ten thousand night sky fans were expected to visit the park this week specifically for the festival, and scores more serendipitously joined the activities when they happened to find themselves in the right place at definitely the right time. Those folks enjoyed (and today are still enjoying):

  • lectures about dark skies, astronomy and nocturnal activities

  • more than 50 telescopes available for viewing planets and galaxies, arranged by the Tucson Amateur Astronomy Association

  • ranger-led constellation walks

  • a general camaraderie among like-minded knights of the night

This year marked the 29th Star Party, and the biggest news of the event (no, it wasn’t that we were there) was this:

On the very first morning the International Dark Sky Association visited to certify the Grand Canyon as an International Dark Sky Parkβ€”the 70th and now the largest park of its kind in the world. It’s an honor that took three years for the park to earn, partly by converting over 5,000 lights to be dark-sky compliantβ€”creating what Forbes Magazine recently dubbed β€œthe $1 million Milky Way.” The retrofitting funds were raised by the Grand Canyon Conservancy, the park’s nonprofit partner.

Introducing: Night Photography!

What was our place in all of this? For two days Gabriel Biderman and I led education aboutβ€”you guessed it!β€”night photography. According to the rangers we worked with, this is the first time the festival has offered a night photography component, and we were thrilled to lead the way.

The Grand Canyon Star Party is broken into two halvesβ€”one on the South Rim, one on the North. We were stationed at the former, working around the primary visitor center.

On our first night, we delivered a presentation titled β€œNight Photography in the National Parks.” The visitor center theater accommodates 233 people, and every chair was occupied. Moreover, we learned afterward that about 325 people were outside the theater watching the large-screen livestream of the talkβ€”for a total of about 550 attendees! That fully reinforced how big an event we were part of. I can’t speak for Gabe, but I know it’s the largest audience I’ve ever spoken to. I’m not sure I could adequately describe how fulfilling it is to be able to share a passion with so many.

Gabe and I posing with our in-house audience.

The talk centered aroundβ€”well, the title says it all. We relayed some of the experiences of the Grand Canyon South Rim workshop that we had just wrapped up a few days before, showing images that we’d created of the canyon under moonlight, in addition to some behind-the-scenes pictures of our workshop attendees enjoying the night. And then we spent half an hour showing our photographs from 29 national parksβ€”from Acadia and Arches to Yellowstone and Zionβ€”sharing stories about the experience of being in these wonderful places at night.

When the talk was over, we signed some books in the back. We usually sell books on our own at events like this, but the Grand Canyon Conservancy asked if they could make the sales. We were more than happy to have them take over. They do great work, and we’re on board with any way we can support them. (If you have a love of, or an interest in, the Grand Canyon, check out what they do at the link above.)

Β© 2019 Cindy Radich.

Β© 2019 Cindy Radich.

Then we met with 60 photographers who were on hand for the free night-photo walk we were leading. Everyone gathered in the theater, where Gabe and I walked them through setting up their cameras for night photography. Then we all walked under the night sky to Mather Point, one of the most stunning vistas in the park and the best spot on the South Rim to view the Milky Way. Everyone was able to create some great images of our galactic core rising over the rimβ€”many of them for the first time! The smiles were so big that we could see them even in the dark.

Day Work

The next day we were up early (well, early for us) so we could set up our table at the festival. The park was kind enough to station us right outside the main visitor center, in the heart of the goings-on. We spent the afternoon (a beautiful, sunny, cloudless, blue-sky day) meeting and greeting fellow photographers and night enthusiasts, talking about the Grand Canyon and other parks, sharing info about our workshop program, and giving out a lot of NPAN stickers to kids and kids-at-heart.

Photo Β© 2019 Jen Bookman.

Photo Β© 2019 Jen Bookman.

Gabe and I with our hard-earned Junior Ranger Night Explorer patches.

Gabe and I with our hard-earned Junior Ranger Night Explorer patches.

(Funny story: We were stationed so much in the middle of the activity that people kept asking us for general information about the Star Partyβ€”what it was, where to be for events, and so on. We were happy to oblige. Late in the day a ranger noted how helpful we’d been, and he thereby awarded us Junior Ranger patches.)

On that second night we led another photo walk, exactly the same as the previous night’s, except this time about 70 photographers partook. Many of them were people we’d met and chatted with during the dayβ€”lots of new friends and smiling faces.

One notable difference between the first- and second-night groups was that more than several of the latter hadn’t come to the festival with the intent of photographing at night, and thus didn’t have tripods. Fortunately for us, Manfrotto has treated us well over the past couple of years, so we had a few extra tripods we could loan outβ€”all from the Traveler series.

Even more than the previous night, people were walking away from Mather Point with the first Milky Way images they’d ever created. And some went even further. One attendee tried his very first Milky Way pano, a couple of more decided to venture into star trails for the first time, and the last photographer standing that night, by the time Gabe and I left, was well into his inaugural run at making a Milky Way time-lapse.

Winding Down

At the end of the two days, Gabe and I were simultaneously wiped out and reinvigorated. Neither of us had ever been involved with an event quite like this, and now we can hardly wait to be involved in one again. We could feel two communities coming togetherβ€”introducing our night photography community to astronomers and avid stargazers, and likewise enjoying being embraced by them in return.

There are so, so many people who love to soothe their souls with sunrises, desert landscapes, and alpine lakes and streamsβ€”and who love to seize the night. And now we’re lucky to be friends with more of them.


Notes

We owed, and conveyed, gratitude to several people for helping us make this happen. But three we’d like to mention here:

  1. Thank you to Rader Lane, the ranger who brought us into the fold and served as our point person on-site. He also spent his morning off from work saving my laptop. Upon leaving the park I left my bag behind in the house. Rader retrieved it and ensured that it found its way to FedEx. If not for him, I wouldn’t have been able to write this postβ€”in more ways than one.

  2. Thank you to Jen Bookman and Cindy Radich, two of our Grand Canyon workshop attendees who stayed for the Star Party and shared their photos with us for this post. It was nice to have personal photographers on hand, and we always enjoy their company.

Chris Nicholson is a partner and workshop leader with National Parks at Night, and author of Photographing National Parks (Sidelight Books, 2015). Learn more about national parks as photography destinations, subscribe to Chris' free e-newsletter, and more at www.PhotographingNationalParks.com.

UPCOMING WORKSHOPS FROM NATIONAL PARKS AT NIGHT

Lost and Found in the California Desert: A Tripod and Ball Head Find Their Way Home

What are the odds?

I’m not generally someone who believes in fate, or that the things that happen to us in life are predetermined. But every once in a while something happens to make me question those beliefs.

I recently had such an experience in the California desert southeast of San Diego. It was, if you will, an anti-Lemony Snicket series of events.

Chris and I recently led two back-to-back workshops for Atlas Obscura in California’s Anza-Borrego Desert to photograph Ricardo Brecedaβ€˜s amazing animal sculptures of mostly extinct creatures that once roamed the area.

Jurassic Park in the Anza-Borrego Desert. Two life-size dinosaurs battle it out underneath the stars. Nikon D750 with an Irix 15mm f/2.4 lens, mounted on a Manfrotto 190go! tripod with an Acratech GPS ball head, light painted with a Luxli Viola. 25 seconds, f/4.5, ISO 4000.

Nearby Anza-Borrego Desert State Park is one of the remotest and hottest places in California, known primarily for spectacular wildflower displays called β€œsuper-blooms” in March and early April after an exceptionally wet winter. The park and the sculptures are the primary attractions of the area. It’s a great location for photographing the Milky Way, as Borrego Springs is an officially designated International Dark Sky Community, and the sculptures are cooperative subjects for light painting.

I had last visited Anza Borrego State Park in 1992β€”before the sculptures dotted the landscapeβ€”so I was eager to explore and to rediscover the area. Chris and I had arrived a couple of days early to scout and shoot for ourselves, and by the end of the first workshop we had been out late photographing for six nights in a row. We were having a blast, but we were tired.

Two bugs in battle. Nikon D750 with an Irix 11mm f/4 lens, light painted with a Luxli Viola. 25 seconds, f/4.5, ISO 6400.

As we were packing up to leave on that sixth night, I set my tripod on the ground to open the rear hatch of our car, and consciously thought that I had to make sure to put the tripod back in the trunk before we left. Somehow, I got distracted, and didn’t. I left my prized Gitzo 2545 Traveler tripod and Acratech GPSS ball head all alone in the desert to fend for themselves. Yes, I know. It was a bone-headed move, and I probably deserved what I got. But it was late, and I was exhausted.

Unfortunately, I didn’t realize my error until the next evening as we were preparing to go out for the night. Once I did realize, we looked everywhere we thought the tripod might be. The car. My room. Chris’ room. Our bags. The meeting space. The hotel lobby (had someone found and returned it?). We even checked the police stationβ€”you know, in case the tripod fell in with the wrong crowd. Finally, the previous night’s events played back in my headβ€”I could see myself putting the tripod down, I could remember making a mental note to pick it up, but I couldn’t recall actually putting it in the car. So we hurried back to our last shoot location, the site of the magnificent gomphotherium.

Of course, it was too late. An entire night and day had passed, and someone had long since discovered and made off with my tripod. It wasn’t in front of the gomphotherium. It wasn’t beside the tortoises. It wasn’t under the camels. It was, quite simply, gone.

Chris standing beside the gomphotherium, an extinct elephant that once roamed Southern California. Nikon D750 with a Sigma 24mm f/1.4 Art lens, light painted with a Coast HP7R. 13 seconds, f/2.2, ISO 6400.

Luckily for me, Chris had a second tripod, and he let me work with it for the second workshop. I wasn’t very happy about the situation, but there wasn’t much point in getting angry or upset. Besides, I had a workshop to teach. It turned out to be a great group, and the skies cooperated with us. The time flew by, and it was time to say goodbye.

Then things got interesting. Thus begins the series of fortunate events!

Our fellow National Parks at Night instructor Gabe Biderman received an email from Acratech asking if one of us had lost a tripod in the desert! We have a partner relationship with Acratech, and Gabe has been our point person for contact with them. It seems that my tripod had been found by another photographer, who also happened to own an Acratech. His name is Aeon Jones. Aeon had been scouting the location for a landscape photography workshop that was part of the Palm Beach Photo Festival when he came across my tripod early in the morningβ€”mere hours after I had left it there.

Poor Little Lost Tripod. Β© 2019 Aeon Jones.

Aeon wanted to get it back to its owner, and thought that perhaps it belonged to someone at the festival, so he carried it around all week hoping someone would recognize it. When no one did, he posted about it to Acratech’s Facebook page. Patty from Acratech saw the post, and wondered if the head had been registered. Aeon sent her the serial number, which showed up in Acratech’s records as having been shipped to NPAN.

By this point, the rest of the NPAN crew had heard my tale of woe, so Gabe already knew that the head was mine. Aeon wanted to be sure the tripod got back to its rightful owner, so, through Patty, he asked for me to confirm some details. I relayed what I knew about the tripod and the location where I lost it. Aeon knew he’d found his guy. He then put the tripod in the mail while he was traveling for a shoot in Moab. I arrived home from my next workshop at Maine Media to find the tripod outside my back door in the rain. The box was dented, soaked and falling apart, but the tripod and head were as good as new.

A bighorn sheep (aka β€œa borrego”) with the moon rising behind it. Nikon D750 with a Tamron 15-30mm f/2.8 lens, light painted with a Coast HP5R. 15 seconds, f/5.6, ISO 6400.

So back to my original question: What are the odds?

First, the tripod needed to be found by someone who 1) realized its value, 2) was honest and wanted to return it to its owner, and 3) had to be resourceful and dedicated in getting it back to me. Thankfully, Aeon was all of those. The odds that the tripod would be discovered by another photographer who also had a tripod with an Acratech head was unlikely, but luckily for me, that’s what happened.

After Aeon posted to Acratech’s Facebook page, Patty had to see the post and reach out to Aeon for the serial number, and that serial number had to have been registered in my name. I admit, I had not registered itβ€”it was Acratech that kept good enough records to track me down. Once Patty discovered the owner, she had to take time out of her schedule to reach out to us, and then to connect Aeon and myself. From there, my tripod’s fate was in the hands of the U.S. Postal Service. The mail carrier left it on my porch in the rain where it could have been stolen while I was in Maine. But it wasn’t.

I have to admit that I never expected to see this tripod again, and I remember saying to Chris that the chances of someone trying to return it as opposed to keeping it or selling it on eBay were next to none. I thought that the chances of someone actually being able to track me down (my name wasn’t on the tripod) were even more remote.

Aeon Jones, you’ve restored this cynical photographer’s faith in humanity, and for that I thank you. I’ll always remember your good deed, and promise to pay it forward every time I get the chance. (I’m in California looking for lost tripods right now.)

By the way, Aeon told his side of the story on his own blog. To Patty, and the fine folks at Acratech: Thank you for maintaining good records, for responding to Aeon’s post, and for making heads so outstanding that another customer would want to make sure I got mine back.

Aeon Jones. You can read his side of the tale on his blog.

Lance Keimig is a partner and workshop leader with National Parks at Night. He has been photographing at night for 30 years, and is the author of Night Photography and Light Painting: Finding Your Way in the Dark (Focal Press, 2015). Learn more about his images and workshops at www.thenightskye.com.

UPCOMING WORKSHOPS FROM NATIONAL PARKS AT NIGHT