Photoshop

We're Going Live! Announcing 4 Online Courses for 2024

We all love being in the field to shoot, but we all also know that opening the shutter is only half the task of creating a great photograph. The other half is processing.

To help with that second half, National Parks at Night periodically offers online post-processing workshops, and today we’re excited to announce the next rounds of those. Moreover, not only are we announcing new sessions for two popular courses we’ve run in the past, but we’re also launching two brand new courses!

The two returning courses are Lightroom Live and Photoshop Live, both of which lead attendees through the basics of mastering these two incredible tools of the digital darkroom. The two new courses take things a few steps further, with Black and White Live and Processing Night Panoramas Live teaching attendees how to master the ins and outs of these specialty areas.

We’ll be hosting all four of these online courses this spring. Each will take place on weekday evenings, two evenings per week, for two weeks—for a total of eight hours of group education over four nights. We also limit each course to 12 attendees, to ensure time for individual attention to questions and answers. Along the same lines, after the course each attendee will be offered a half hour of one-on-one time with an instructor of their choice.

For more information about each of these online workshops, continue reading below. (And in each section, check out our free tip!)

Black and White Live

Black and white imagery has always had an aura of timelessness, drama and sophistication. Using this scheme at night is no different. Since photographers shooting in monochrome cannot lean on color to provide information in any given scene, we are forced to concentrate on other building blocks to evoke emotion, to tell a story or to capture the drama. This four-night online workshop will guide you on the journey through all of that and more.

This course will teach many aspects of the digital black and white process, from tips on capturing the best raw materials in the field to processing with what we consider the best software for the job, Silver Efex Pro.

You’ll also learn what creates a great black and white image, how to understand and control tonal contrast, how to apply local enhancements to create glowing images, and more.

Black and White Tip from Lance

If you’re setting out to create black and white images, learn to see that way in the field. Your camera can help you, as if you set it properly, then it can preview your images in black and white right on the LCD. In the camera settings, change Picture Style (Canon), Picture Control (Nikon) or Creative Style (Sony) to Monochrome or Black and White. This will help you avoid passing up photographing a scene because it lacks interesting color. One example of this would be an urban night scene illuminated exclusively by sodium vapor lights. In color, those scenes are usually quite unappealing, but they often look great as black and white.

Processing Night Panoramas Live

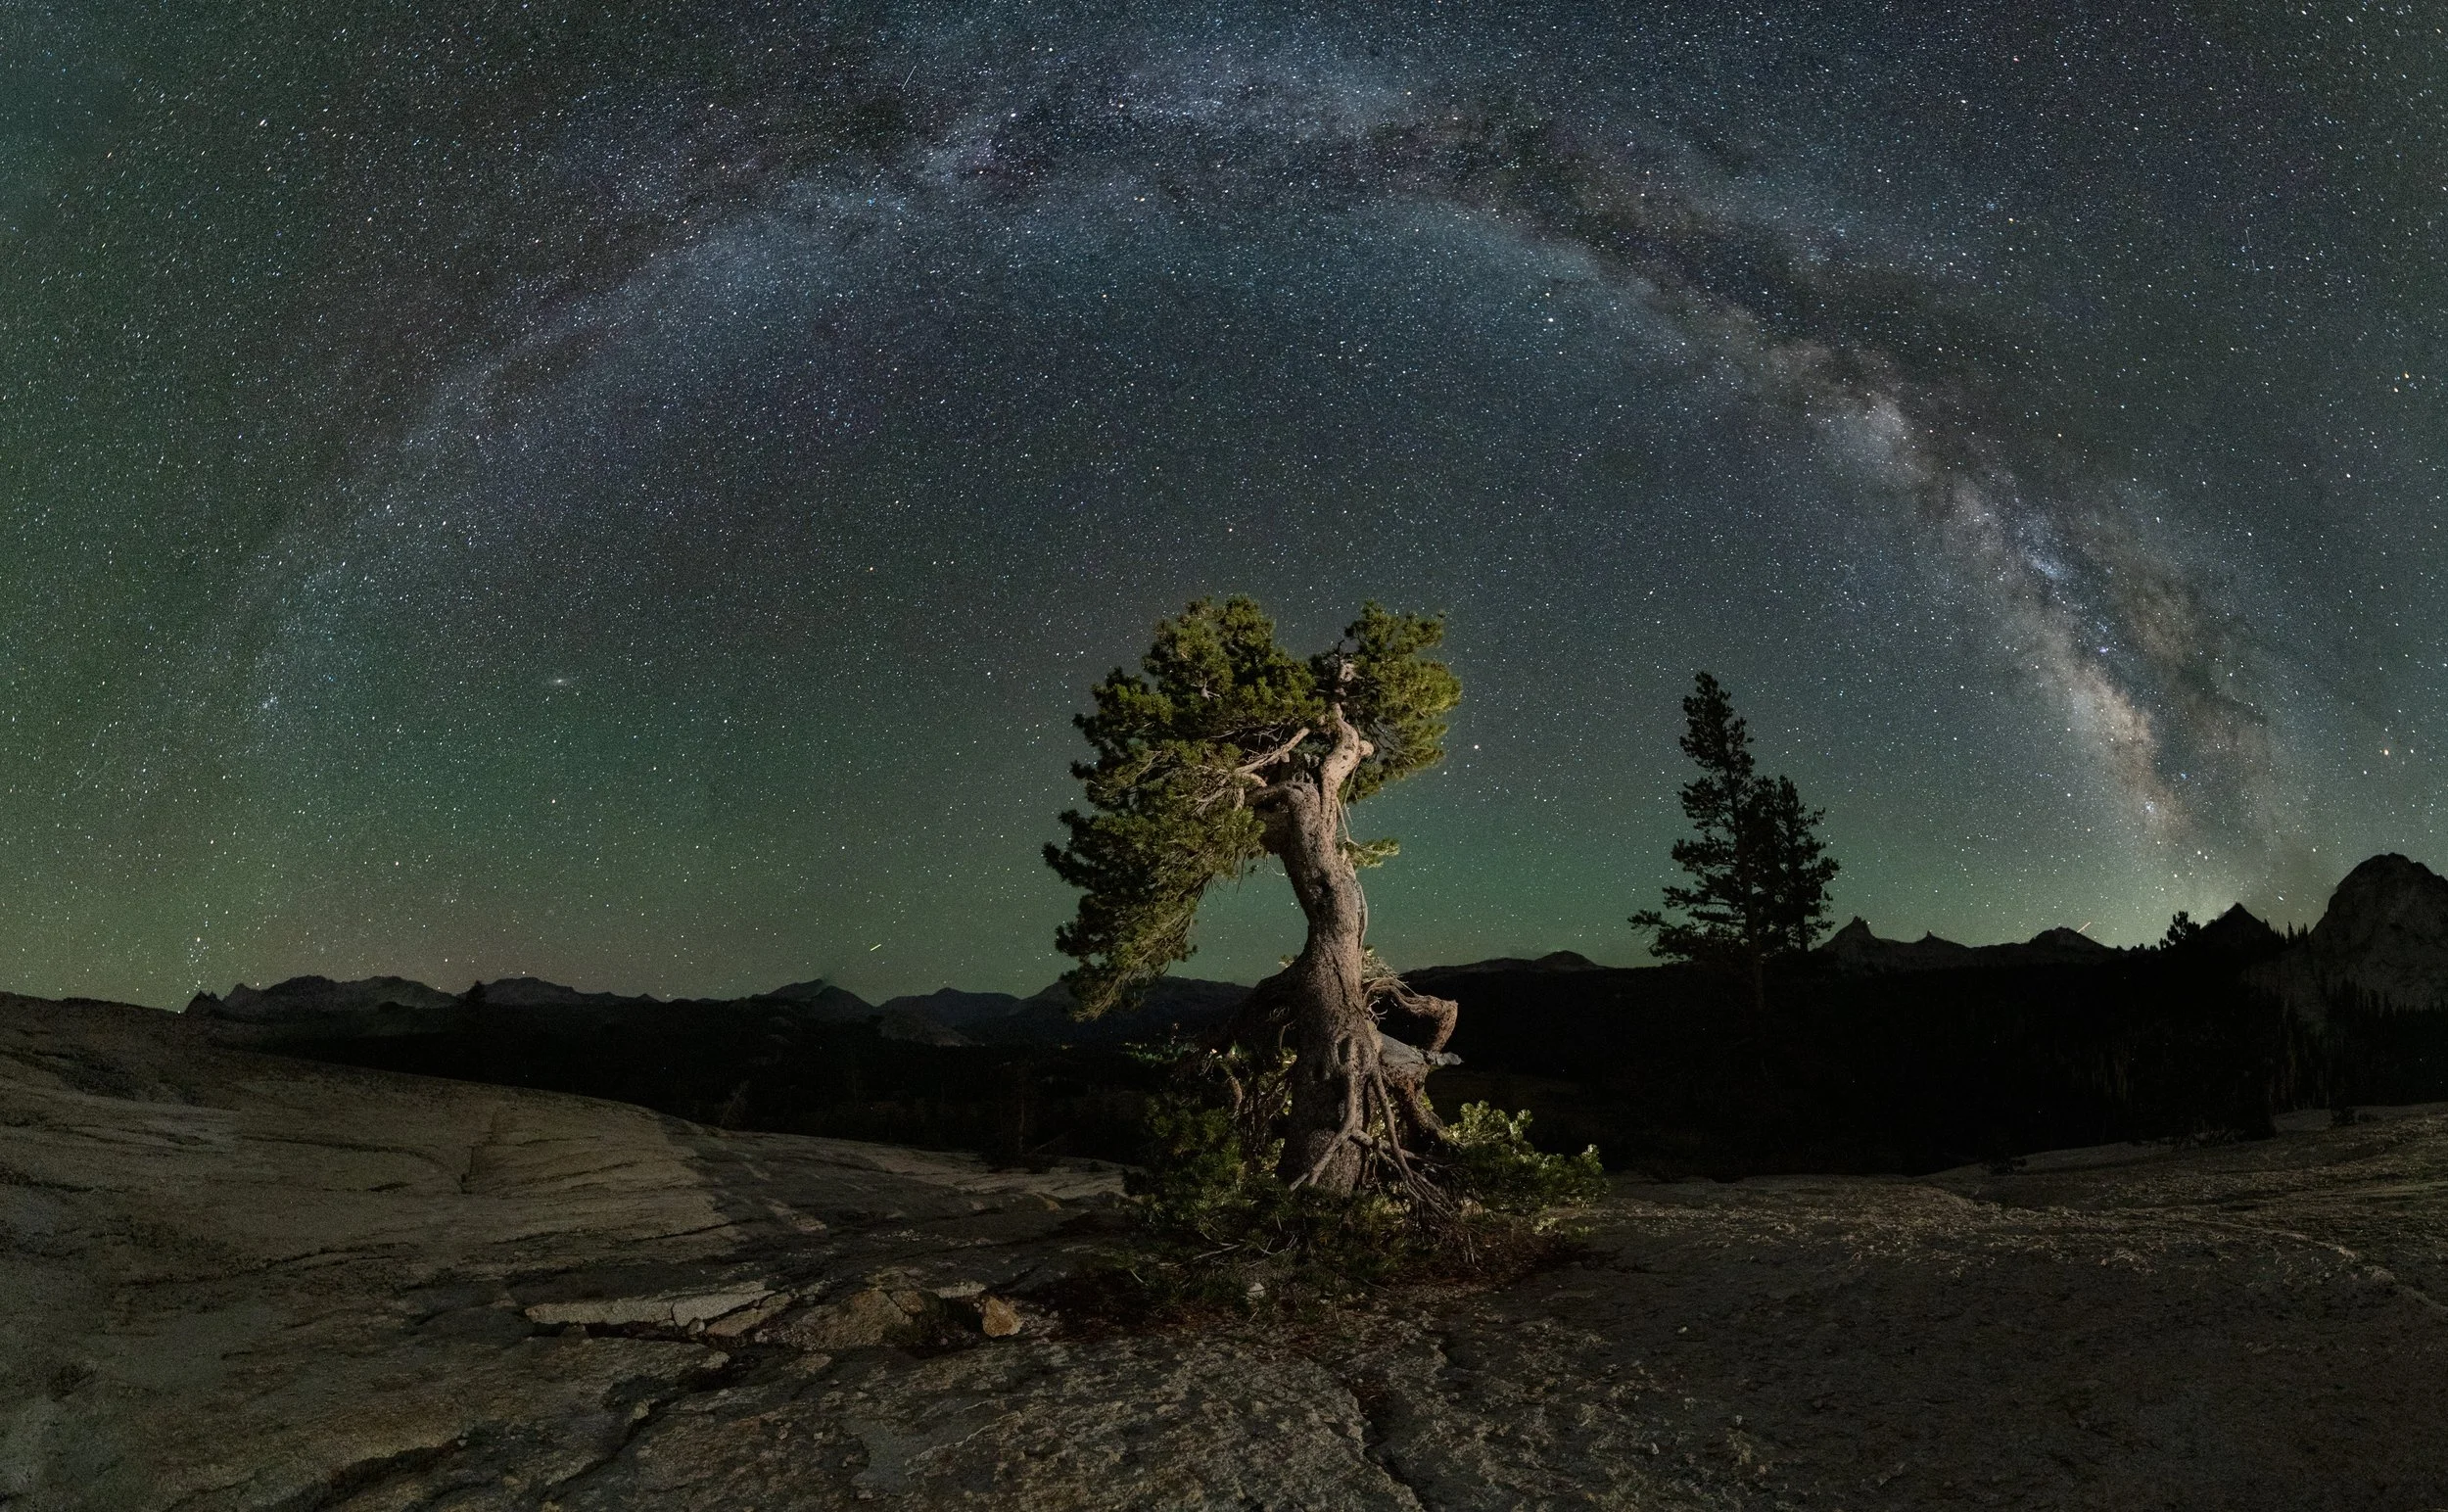
Stitching panoramas can be challenging enough with daytime photographs—the complexity increases even more for images captured at night. If you’ve ever struggled with stitching panorama panels, this is the course for you. We will teach how to process simple and complex night panos in Adobe Lightroom Classic, Photoshop and, most importantly, in PTGUI Pro.

In this online workshop you’ll learn not just how to stitch basic panoramas, but also how to blend twilight and star-point panos in Photohsop and PTGui, how to stitch vertoramas with both star-point and star-trail toppers, how to understand and choose different projections, how to create “tiny planet” photos, and more. The course will also feature a full demonstration of the best stitching software out there, PTGui Pro, with a focus on how to use it for night panos.

Pano Processing Tip from Matt

When stitching a vertorama in PTGUI Pro, be sure to choose among the transverse projection variants. Then click and drag to place the true horizon on the center horizontal line. (If the horizon is behind a landform, align with that instead of the skyline.) Chances are the final result will look just like you envisioned … perhaps better!

Lightroom Live

For 99.9 percent of the photography world, the process of post-production starts with Lightroom. Yet so many photographers feel that they don’t fully understand the software, let alone know enough to wield its full potential.

With a strict focus on the Library and Develop modules, in this online course you'll learn how to add keywords, create collections, globally adjust your images and fine-tune your masterpiece with local adjustment tools.

And as a bonus, you’ll get our video Lightroom: Correcting Your Catalog Chaos.

Lightroom Tip from Gabe

Most of our night skies have atmospheric haze, especially from the horizon to 20 degrees above, which is where the core of the Milky Way tends to reside most of the year. Lightroom’s Dehaze slider was built to cut through haze and provide more separation in the lower-contrast areas of the scene—but it also works wonders on dark night skies! A little Dehaze can go a long way in making your stars and the Milky Way pop. Watch out though, because Dehaze also increases saturation and can make your skies too purple or blue, so be ready for a potential color adjustment afterward.

Photoshop Live

Photoshop is a challenging program to learn on your own. And it’s also massive. But don’t worry—as a night photographer, you don’t need to learn every tool, setting and checkbox in order to harness the program’s power. Having a good foundation of the program and some basic knowledge of key features (as well as intricate knowledge of some subtle features) will help you develop the skills necessary to create advanced night photography composites and finely crafted images.

Our areas of focus will be understanding the architecture of Photoshop, strategies and best practices for using layers, mastering advanced local adjustments, masking, and much more!

Photoshop Tip from Chris

Photoshop has lots of selection tools. Magic Wand. Quick Selection. Object Selection. There’s a tool for selecting the sky, or a subject, or a focus range, or a color range. Which is best? All of them! Each of the selection tools has their pros and cons, and situations where they outperform their counterparts. Therefore, learn how to use each of these tools and practice with them all. You’ll learn the situations that each excels in, and then you’ll always know which to use in different scenarios.

Come Learn With Us Online

Wherever your next passion for learning lies, we hope that one of these online courses can help. For more info on each, click here:

We look forward to seeing you there!

Chris Nicholson is a partner and director of content with National Parks at Night, and author of Photographing National Parks (Sidelight Books, 2015) and Photographing Lighthouses (Sidelight Books, 2024). Learn more about national parks as photography destinations, subscribe to Chris' free e-newsletter, and more at www.PhotographingNationalParks.com.

UPCOMING WORKSHOPS FROM NATIONAL PARKS AT NIGHT

The Night Photographer's Guide to Star Stacking (Part III)

Note: This is the third in a three-part series about creating star trails with the stacking technique. Part I covered how to shoot the raw materials. Part II demonstrated how to edit the individual frames in Lightroom and Photoshop to create the star trail stack. In Part III, below, Tim explains how to clean up artifacts that can occur when combining these images in Photoshop.


This is the third and final installation of our three-part guide to star trail stacking. We hope you have enjoyed the series so far. For those of you who didn’t catch Part I and Part II, we recommend reading those blog posts before you jump in here, so that you are up to speed with the capture and initial processing steps.

This method of creating star trail images is versatile and comes with many advantages, but it can also result in artifacts that need to be corrected in order to create a polished final image—things such as plane trails and stray light, which can appear on individual frames during capture.

Star trails over Animas Forks, Colorado. Nikon Z 6II with a Nikon Z 14-24mm f/2.8 S lens at 15mm. 17 stacked frames shot at 4 minutes, f/2.8, ISO 640.

While the fact that these artifacts exist at all might make you question whether to use this technique to begin with, the opposite is true: These problems can appear in any long exposure of the night sky, and the stacking technique gives you more power to remove them in a way that doesn’t harm your final image.

Indeed, that we can remove common artifacts from individual layers is a great reason to choose the technique of shooting multiple shorter exposures and stacking them together in Photoshop rather than shooting one long exposure.

In This Video

In the following video I’ll cover:

  • exporting your images from Lightroom into Photoshop

  • changing blending modes to create the initial star trail composite

  • identifying and working on individual layers

  • removing plane trails from individual layers using the Spot Healing Brush

  • the difference between layers and masks

  • creating layer masks and using the paintbrush to remove unwanted items that appear on individual frames

  • using selections to remove unwanted items that appear on individual frames

  • streamlining the editing process by grouping layers

  • using color labels to mark important layers

  • when to flatten your image and when to retain the layers

  • creating a composite layer to enable edits that can’t be done to multiple layers

  • renaming your Lightroom files to reflect the file’s status

Your Turn

Have you been creating star trail images using the stacking technique? We’d love to see your photos! Share in the comments below, or on our Facebook page, or on Instagram (tag us @nationalparksatnight #nationalparksatnight #seizethenight).

Tim Cooper is a partner and workshop leader with National Parks at Night. Learn more techniques from his book The Magic of Light Painting, available from Peachpit.

UPCOMING WORKSHOPS FROM NATIONAL PARKS AT NIGHT

A Whole New Bag of Tricks: Check Out the Features in Adobe's Latest Update

Earlier this week Adobe released its latest updates to Lightroom and Photoshop. As happens sometimes, this particular release included some tweaks that are exciting for night photographers.

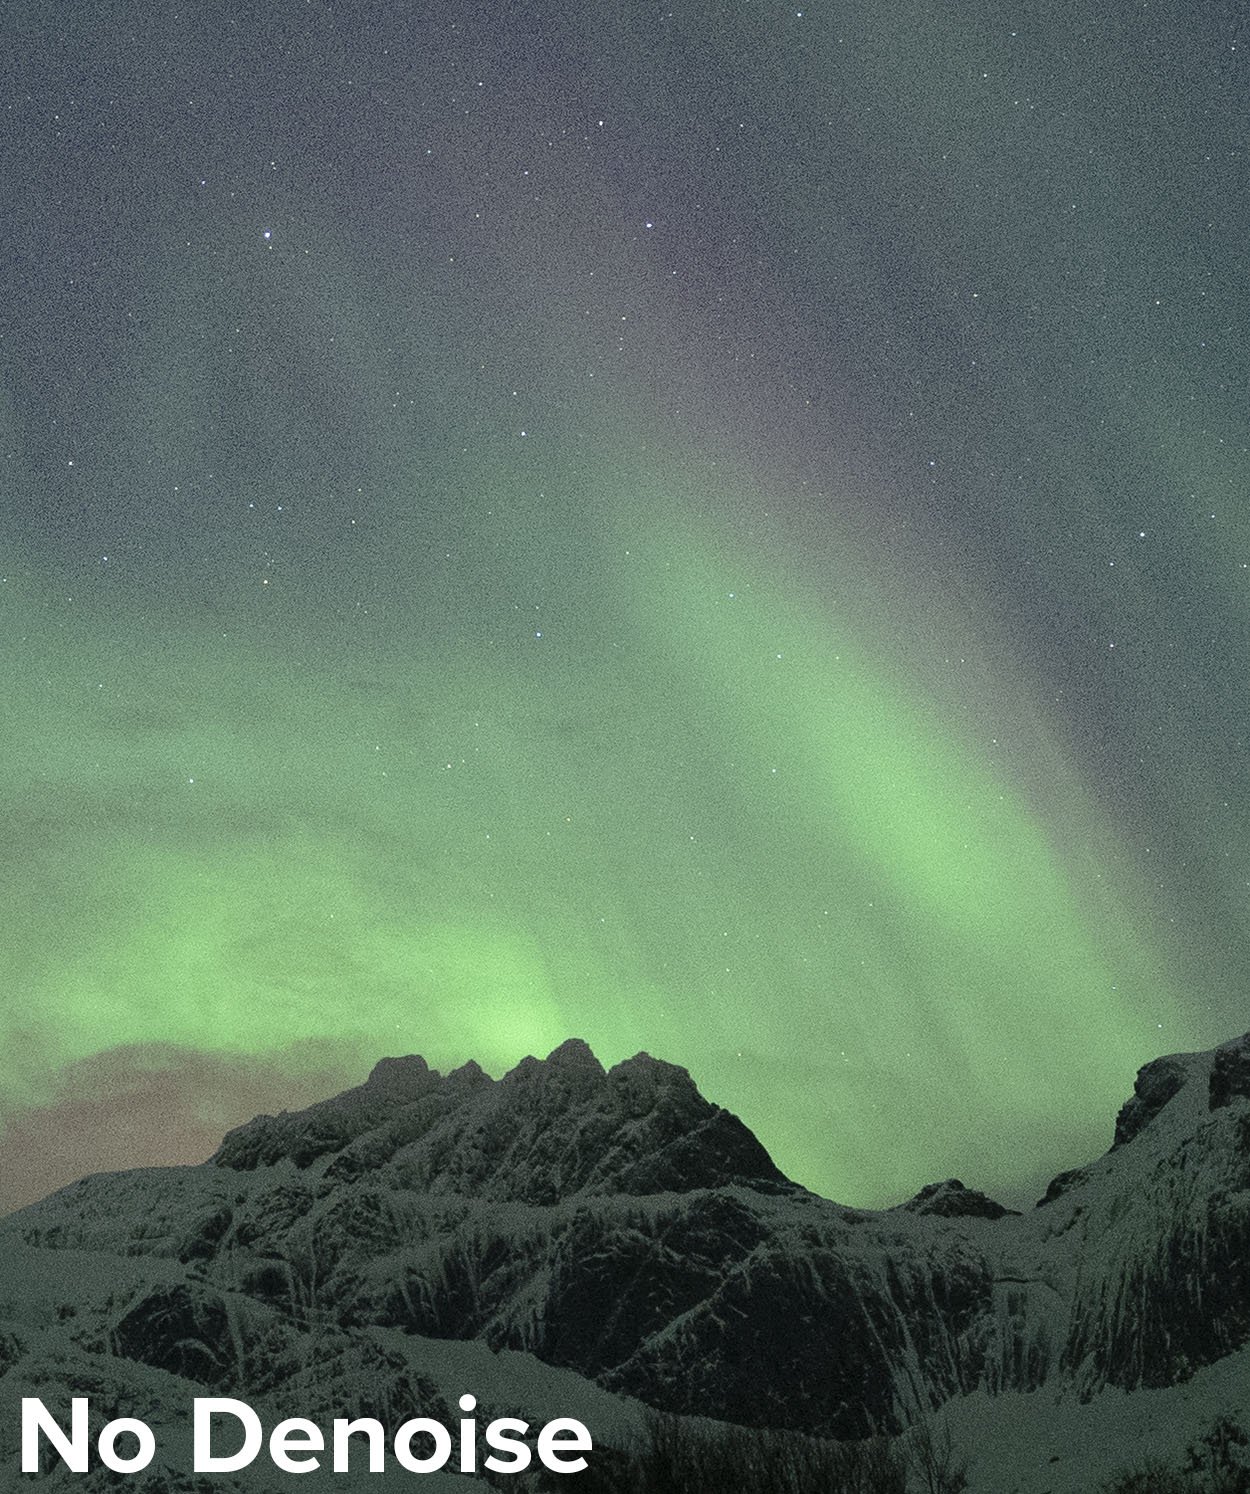
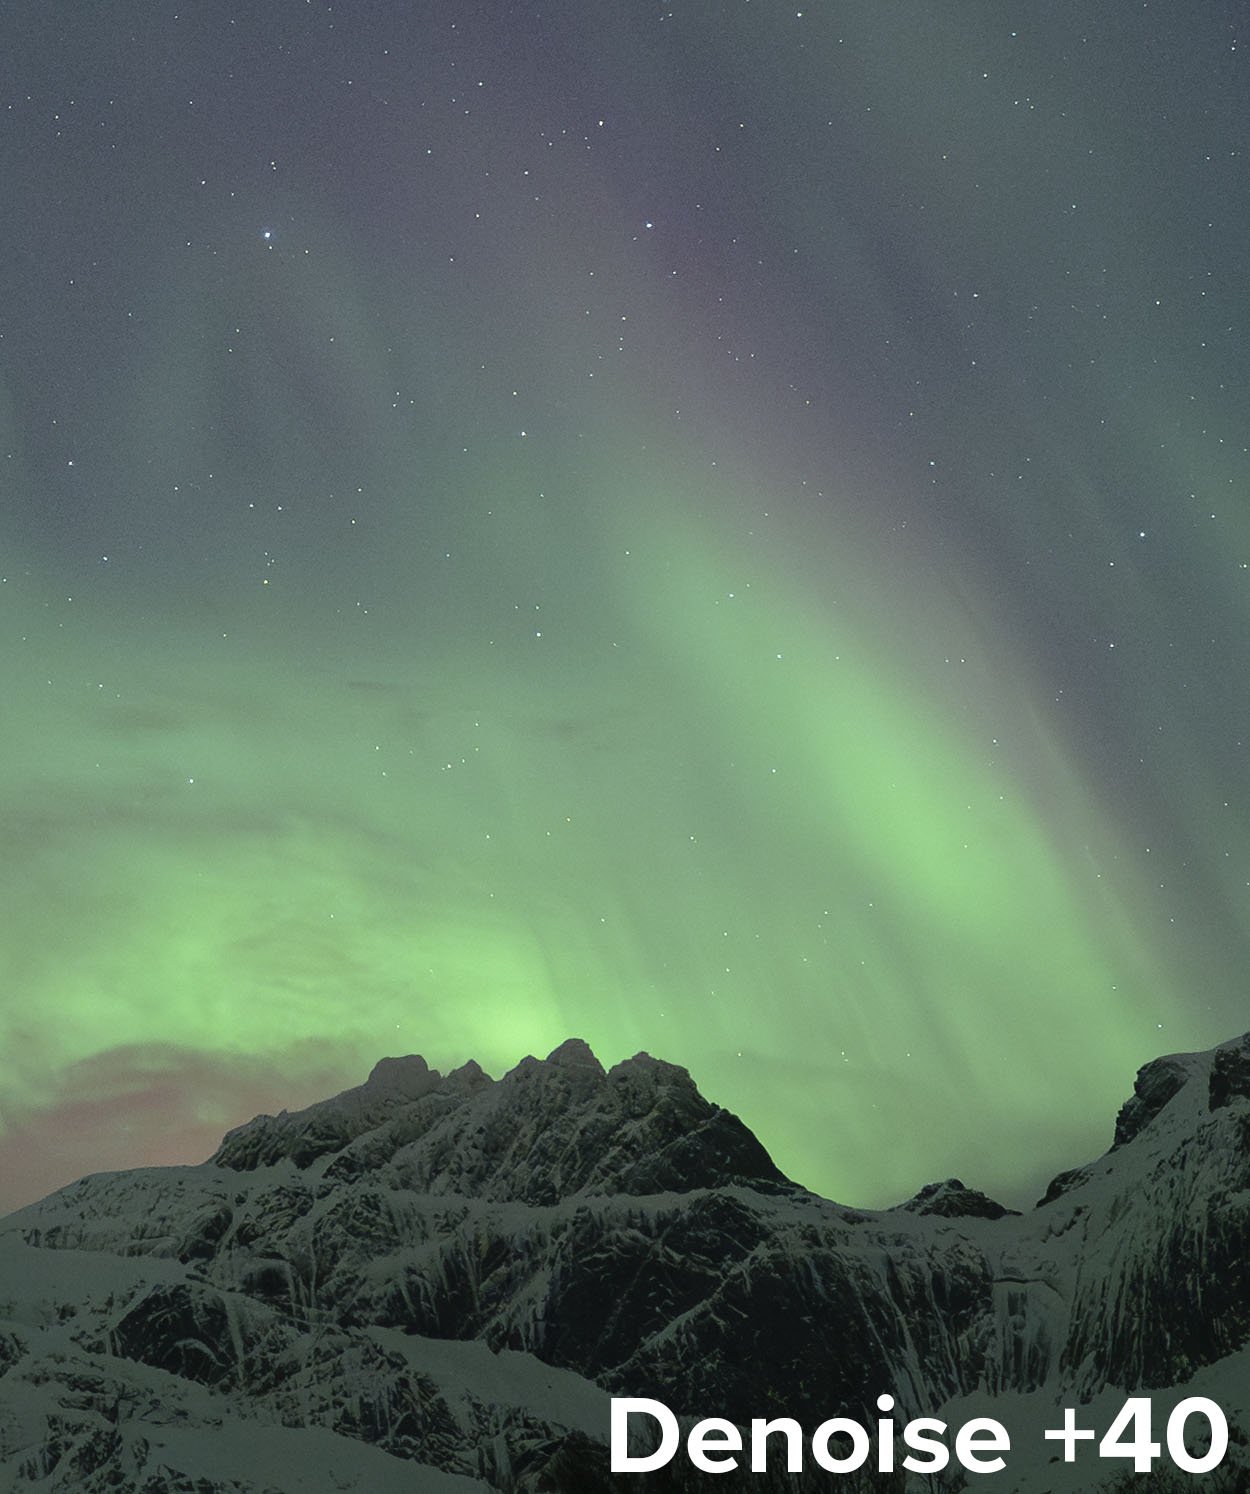
The biggest among those was the introduction of Lightroom’s new AI-based Denoise feature, which is simple to use and amazingly effective. On Tuesday we published a video post that explains the new Denoise feature (see “Cutting Through the Noise: Lightroom Just Made Night Photography Better”). You can see the power of this new tool in these before and after pictures:

But Denoise isn’t the only new thing to be excited about in Lightroom and Photoshop. Several other new features in this release will prove to be a real benefit for the night photography enthusiast. In today’s blog post, I’m sharing a video to show all the new tools and tweaks that you’ll want to look into, as well as some tips on how to use them, including:

  • the new ability to use Lightroom Curves adjustments on a masked selection

  • how to use the targeted adjustment tool to speed up manual changes to Curves

  • the new ability to open multiple images into the same Photoshop file as Smart Object layers (and why you’d want to do that)

  • two examples of using two Smart Object layers for better control when creating a blue hour blend

Check it out below.

Wrapping Up

All in all, it’s a great day to be a night photographer!

What are you most excited about in the latest Adobe updates? What photos are you making with them? Share in the comments below, or on our Facebook page, or on Instagram (tag us @nationalparksatnight #nationalparksatnight #seizethenight).

Tim Cooper is a partner and workshop leader with National Parks at Night. Learn more techniques from his book The Magic of Light Painting, available from Peachpit.

UPCOMING WORKSHOPS FROM NATIONAL PARKS AT NIGHT

Five Questions: Tripod Cleaning, Condensation, Auto ISO and more

We get a lot of questions, we give a lot of answers, and we’re happy to share them all with you.

This installment of our “Five Questions” series features inquiries about keeping your tripod clean, predicting lens condensation, auto ISO, Super Resolution and computer displays.

If you have any questions you would like to throw our way, please contact us anytime. Questions could be about gear, national parks and other photo locations, post-processing techniques, field etiquette, or anything else related to night photography. #SeizeTheNight!


1. Sand & Salt & Tripods

Question:

I’m wondering if I haven’t cleaned or cared for my tripod enough. The lower leg sections have been a bit rough in movement, and although I’ve tried to wipe down or rinse, I do wonder if Moroccan sand, Death Valley dunes, Argentinian salt flats and just plain ol’ dirt is sneaking in. What’s the best way to care for a tripod? — Therese

If you’re shooting in a place like the sand dunes of Morocco, keeping your tripod clean will mean you’ll be keeping your tripod longer.

Answer:

Whenever you bring your tripod to very sandy destinations or submerge the legs in salty water, you should not collapse the legs until you can rinse them with tap water at home or the hotel. Then towel them off and let them air dry completely overnight.

If you needed to collapse your tripod while still in the field, then grit or corrosives may have gotten inside. In that case, try to do a more thorough job rinsing, and perhaps even disassemble the tripod legs and thoroughly rinse them individually.

If you’re in that type of environment for a few days or more, then also give the tripod a full rinse when you come home from your trip. That’s not common practice for most photographers, but it should head off any long-term complications you might otherwise encounter with dust, dirt and salt getting into the locks and inside the legs. — Gabe

2. Condensation Mitigation

Question:

Is there a good method of determining the likelihood of experiencing lens condensation during a night photography session? When (and when not) should I use a lens heater? — Jim B.

The photographic effects of unmitigated condensation.

Answer:

Checking a meteorological site for dew point and expected low temperature is the best way to anticipate a problem with lens condensation. If the expected low temperature is dropping toward the dew point, you will be likely to get moisture on your lens during an evening shoot.

To understand dew point, here is an explanation from the National Weather Service:

“The dew point is the temperature the air needs to be cooled to (at constant pressure) in order to achieve a relative humidity of 100 percent. At this point the air cannot hold more water in the gas form. If the air were to be cooled even more, water vapor would have to come out of the atmosphere in the liquid form, usually as fog or precipitation.”

In short, if the relative humidity is high and the temperature drops, these are the conditions where you are likely to experience condensation.

The best way to prevent condensation on your lenses is to apply your lens heater before condensation starts to form. If you anticipate it to be an issue, put your lens heater on the lens as soon as you take your gear out of the bag, which will ideally prevent the lens from dropping below the dew point. Waiting until after you already see dew on the front element is a recipe for spending most of the evening wiping the lens than shooting with it.

You already have a more high-tech dew solution, but night photographers should know there are also lower-tech alternatives. Simply attaching the lens hood will hold off dew for a while. And we highly recommend our good friend and Night Photo Summit speaker Kevin Adams’ LensMuff (below). It’s an adjustable and effective solution that does not require batteries, but instead relies on economical hand warmers. — Lance

3. Auto ISO a No-Go

Question:

How do I set auto ISO for dusk into night since the exposure changes so much? This also applies to the moonlit skies when the moon when rises or sets during a shoot, changing the ambient light. — Wendy K.

Answer:

I do not use auto ISO for still photography. I’d rather my exposure time (shutter speed) change and not the overall quality of my image (ISO).

However, if we’re talking about making time lapses, that’s another ball of yarn. In that case I might choose auto ISO so that I get more images as it gets darker instead of the fewer that would result from the shutter staying open longer.

If you are serious about day-to-night time lapses (or vice versa), you should consider getting something that does bulb ramping (aka “bramping”), such as the View intervalometer, ElysiaVisuals RamperPro3 Kit or MIOPS Smart+. These take a lot of the guesswork out of the process in lighting conditions that change radically. — Matt

4. When to Sharpen a Supersized Image

Question:

Thank you for the post on Super Resolution. Do you have any suggestions on when to apply sharpening to the original image? Should that be done before upsizing or after? — Kathy E.

Supersizing a Bryce Canyon photograph quadruples its size.

Answer:

When it comes to sharpening, I would always do that last, just like we have always advocated with any post-production process. Lots of things in post-production can change the apparent sharpness of an image, so you want to do those things before sharpening, so that you know how much sharpening you really need.

Likewise, sharpening changes the contrast of pixels at a micro level, and applying changes to those sharpened pixels later can introduce artifacts such as fringing and haloing where there wouldn’t have been any if your order of processing decisions had been different.

Always sharpen last. — Tim

5. Monitors of Mention

Question:

When Chris and Tim did the photo feedback session following their presentation at the Out of Chicago In-Depth conference, they mentioned a monitor brand that they are both happy with. If you would be so kind, please let me know that brand. I may be getting due for a monitor replacement. — Donald

Answer:

Tim and I both use BenQ monitors, in particular the SW2700PT (recently replaced in their lineup with the SW270C), which is designed specifically for photography. It’s a 27-inch display, which is plenty big for photo editing. Also, it covers 99 percent of the Adobe RGB color space, which is excellent for producing accurate color.

Another great feature is this: If you want to dig really deep on color accuracy, you can take advantage of BenQ monitors’ ability to store calibration settings right inside the display. This means you can set the monitor to make the color adjustments that result from your calibration profile, rather than having your computer’s operating system make those adjustments. This is referred to as “hardware calibration,” as opposed to the more commonly used “software calibration.” For more detail, you can read about this on BenQ’s website, but the takeaway is that this approach gives you better color depth, and theoretically means you won’t need to calibrate as often. — Chris

Chris Nicholson is a partner and workshop leader with National Parks at Night, and author of Photographing National Parks (Sidelight Books, 2015). Learn more about national parks as photography destinations, subscribe to Chris' free e-newsletter, and more at www.PhotographingNationalParks.com.

UPCOMING WORKSHOPS FROM NATIONAL PARKS AT NIGHT

How to Plan, Shoot and Edit a Milky Way Arch Panorama (Part II)

Note: This is the second in a two-part series about creating a Milky Way panorama. Part I covered planning and shooting. Below we go over how to put it all together in post.


In last week’s blog post, Matt demonstrated how to create the raw materials for a Milky Way panorama arch. I really enjoyed the post and was glad that he asked me to follow up with a tutorial on processing the frames he captured to stitch the final image.

Computer Software

To create a panorama from multiple images, you’ll need some type of software for your computer. When it comes to software, I like to keep it simple—until I can’t. For me, keeping it simple means working with software I already own and understand. In this case, that means working with Adobe Lightroom Classic and Photoshop. While there are other stitching programs out there, I have always been satisfied with the Adobe products. I already own them, so again, I keep it simple.

In general, both Lightroom and Photoshop are seriously robust and each have their own advantages and disadvantages. When it comes to processing panoramas, both programs work well. Lightroom is the more convenient of the two, and Photoshop offers more options and tends to create more realistic results when you have less-than-perfect captures.

What are less-than-perfect captures? In short, images that the software finds difficult to stitch together. This could be frames taken without a nodal rail or frames that don’t overlap enough, etc. In last week’s article, Matt showed how to create perfect captures that will be easy enough for either program to stitch.

Pre-Stitch Processing

Once you download your images, it’s time to start processing them. If you are planning to stitch (or “merge”) the images together using Lightroom, there’s very little processing that’s necessary beforehand. The reason is that the result of Lightroom’s Merge function is a panorama that is still a RAW file. This means you can do all your processing to the final pano after it’s created, rather than to each individual file before stiching.

Figure 1.

However, there is one exception to that, and that exception is Lens Correction. Why? Because correcting lens quirks will help the rest of the process go better, particularly in regard to vignetting. Removing vignettes will help the exposure look consistent across the whole panorama.

The Lens Correction panel (Figure 1) lives in the Develop module, and it’s the one place you must visit before merging your images into a panorama. Here you can see I’ve checked the Remove Chromatic Aberration box as well as the Enable Profile Corrections box.

Checking both of these boxes tells Lightroom to correct any aberrations associated with that particular lens. At this point Lightroom will typically recognize which lens you’re using and apply the correct profile corrections automatically. However, if you are using a very old lens, or if you’re using a lens brand that’s different than your camera brand, you may need to manually input the type of lens you used. In the example in Figure 1, I had to choose Zeiss from the Make drop-down menu for before Lightroom recognized the lens as the Zeiss Milvus 2.8/15 ZE.

Once you have set the Lens Correction panel on one image, it’s time to sync that change across all the images of that set. From the thumbnails at the bottom of the page, first click on the image with the Lens Corrections. Next, hold down the shift key and click on the last image in that set. This will highlight (select) all of the images in the series. Notice in Figure 2, the cell for the first image I clicked on (the one with the changes) is white, while the remainder of the selected cells are light gray. This means that all the images are selected, but the white image is the “active” image. When we sync, the active image is the one that shares all of its settings with the others.

(If the image with the Lens Corrections is not white, simply click on the correct image. All images will remain selected—you will have just changed the active image.)

Figure 2.

With all of the images selected, click the Sync button (circled in red in Figure 3). (If the Sync button is not available, that means you have only one image selected. Return to the Filmstrip at the bottom and reselect the images.)

Figure 3.

Now, click the Sync button to open the Synchronize Settings dialog (Figure 4).

Figure 4.

Click the Check All button and then finish by clicking the Synchronize button. This will close the box and copy all of the settings from the active image to the selected images.

Figure 5.

Merging Using Lightroom

With all of your images selected and synchronized, it’s time to merge them into a panorama. From the Lightroom menu, choose Photo > Photo Merge > Panorama (Figure 5).

The next thing you’ll see is the Panorama Merge Preview box (Figure 6). The choices here are quite minimal. Projection (Spherical, Cylindrical and Perspective) is what determines the overall shape and look of your image. Simply choose the one that best represents your original vision. Because Matt used a nodal rail when shooting, the difference between Spherical and Cylindrical is nearly impossible to discern. This may not always be the case. Again, just choose the setting that produces a result you like.

Figure 6.

With this image, when I choose Perspective, I get the error “Unable to merge the photos(Figure 7). If you get this error, simply choose another projection. It may or may not work. As I mentioned earlier, while Lightroom’s Merge to Panorama is convenient, it may not work in all circumstances.

Figure 7.

The remaining options are really just that—options. My preferred settings (which appear in Figure 6) are:

  • I keep the Boundary Warp at 0 and I check the Auto Crop box. This keeps Lightroom from stretching the image to fill in blank spaces around the edges, and instead crops out those stray spaces.

  • I keep the Auto Settings box unchecked. This keeps Lightroom from auto-tuning the basic adjustments in the final pano. I prefer to make my own adjustments.

  • I check Create Stack so that the panorama file is stacked with all of its source images in the Library module. This just helps keep things organized.

Click the Merge button at the bottom right of the Panorama Merge Preview dialog to create your panorama. Lightroom will begin merging your images, and you can track its progress in the taskbar in the upper left portion of your screen (Figure 8).

Figure 8.

Once finished, your image will appear back in Lightroom (as a RAW file), all ready for you to apply your favorite Milky Way edits!

Comparing Lenses

As you may remember from last week, Matt shot the raw materials with three lenses—the Zeiss 15mm Distagon f/2.8, Viltrox 20mm f/1.8 and Sigma 35mm f/1.4 Art. Here are those three panos created with Projection set to Spherical.

Figure 9. Nikon Z 6 with a Sigma 35mm f/1.4 Art lens. Multiple stitched frames shot at 8 seconds, f/2.8, ISO 6400.

Figure 10. Nikon Z 6 with a Viltrox 20mm f/1.8 lens. Multiple stitched frames shot at 14 seconds, f/2.8, ISO 6400.

Figure 11. Nikon Z 6 with a Zeiss 15mm Distagon f/2.8 lens. Multiple stitched frames shot at 16 seconds, f/2.8, ISO 6400.

The first thing you might notice is that the panos shot with longer lenses are darker, with fewer stars appearing in the sky. That’s because Matt needed shorter exposure times for the longer lenses, in order keep the stars sharp.

The next thing you’ll notice is that the images from the widest-angle lens—the 15mm (Figure 11)—do not merge well. The sky on the left side of the image appears uneven. Lightroom may sometimes have problems merging panoramas made with superwide-angle lenses.

Merging Using Photoshop

When using a very wide lens, or if you didn’t use a nodal rail—or if Lightroom is having trouble with the pano for any reason, discernible or not—you may have to take your images into Photoshop to do the stitch. The steps are very similar to merging in Lightroom. In fact, the first three steps are exactly the same:

  1. Select first image in the series and go to the Develop module.

  2. Go to the Lens Corrections panel and check Remove Chromatic Aberration and Enable Profile Corrections.

  3. From the thumbnails at the bottom of the page, click on the image with the Lens Corrections (this should already be selected if you were just working on it), hold the shift key and click on the last image in the pano series. With all of the images selected, click the Sync button.

Now we start to detour from the Lightroom pano workflow. Before exporting to Photoshop, you can edit your images before merging. Stick with the big overall changes in the Basic panel, such as White Balance, Color Profile and the fundamental tonal adjustments. Remember you’ll be syncing these changes across all of your images in the set, so don’t make a change that might adversely affect one of the other images.

Once that first frame is suitably adjusted, sync the settings across the whole set in the same way as described above. Then look at each image to ensure that the settings work well with each frame. If they don’t, return to the settings and adjust as needed. Then synchronize them again.

Once all the frames in the set look right, select the whole series by clicking the first and shift-clicking the last. Then, from Lightroom’s menu, choose Photo > Edit In > Merge to Panorama in Photoshop (Figure 12).

Figure 12.

Next you’ll see the Photomerge dialog in Photoshop. Choose Auto from the Layout panel on the left and check Blend Images Together (Figure 13). You don’t need to check Vignette Removal or Geometric Distortion Correction, because you already fixed those issues in Lightroom; you don’t need to check Content Aware Fill Transparent Areas because we’ll tackle that manually later.

Figure 13.

Click OK. Photoshop will now start to create the panorama. This could take a minute or so. For our example, Figure 14 shows the final image that Photoshop creates.

Figure 14.

Next, from the Photoshop menu, choose Layer > Flatten Image.

For the simplest way to wrap up, choose File > Save and then File > Close and your image will return to Lightroom ready for your magic touch in the Develop module. However, if you are even somewhat Photoshop literate, there are some advantages to keeping the file open and continuing to work on it before sending it back to Lightroom. Read on. …

More Photoshop Edits

One of Photoshop’s more powerful features is Content Aware Fill, which is perfect for filling in gaps at pano edges that you would otherwise need to chop off with the Crop tool. In this example I wanted to keep a bit of sky over the Milky Way arch, so I left the blank corners, as seen in Figure 15. Content Aware Fill will help us quickly and intelligently fill in those blanks.

Figure 15.

After I crop the image (as seen above), I choose Layer > Duplicate Layer from the Photoshop menu. This keeps all of my edits on a separate layer and protects my original pano as a background layer.

Next I select the Lasso tool and draw a circle around the area that I want to fill (Figure 16). I don’t want to include too much excess area, but I also don’t want to cut it too close.

Figure 16.

After making the selection, I select Edit > Content Aware Fill, which is where a lot of magic can happen. In the Content Aware Fill dialog, everything masked with green is where Photoshop will look to sample data to fill in the blank area (Figure 17).

Figure 17.

By default, the Subtract paint brush is selected. Simply paint away any areas of green that you feel don’t need to be included in the sample; likewise, you can add to the sample by holding Alt (Windows) or Option (Mac) and painting to add green. Figure 18 shows how I painted away areas not similar to the area I want to fill. For example, I don’t want Photoshop to sample a starry sky when trying to fill foreground rocks. The Preview box on the right foretells the final effect.

Figure 18.

When finished, click OK, which will apply the fill and close the dialog. Figure 19 shows the result. Photoshop has literally made up information (based on the green-masked sample) and filled the blank area.

To continue filling in the corners, I return to the pano copy layer by clicking on it (Figure 19). Again I make a selection and proceed as above until all of the corners are filled. (Remember to return to the Layer 0 Copy layer between edits.)

Figure 19.

Once you are finished, you can flatten the image (Layer > Flatten Image), choose File > Save and then File > Close, and your panorama will return to Lightroom ready for final edits.

In Summary

Both Lightroom and Photoshop can create seamless panoramas of the night sky. Lightroom excels at being simple and convenient when using source images that are easy to merge. Photoshop can be used when images are less than perfect. This includes images made from superwide-angle lenses or frames that don’t overlap as much.

Regardless of which tools you use, making the time investment to learn how to create Milky Way panoramas will open up a whole new area for creativity in night photography.

Whether you’ve been making Milky Way panos for years or will start after reading this post, we’d love to see your images! Please share in the Comments section below or on our Facebook page.

Tim Cooper is a partner and workshop leader with National Parks at Night. Learn more techniques from his book The Magic of Light Painting, available from Peachpit.

UPCOMING WORKSHOPS FROM NATIONAL PARKS AT NIGHT