Once again, we’re ready to take a swing at the questions you pitch. This installment of our “Five Questions” series features inquiries about light painting tools, built-in timers, hot parks, dewy lenses and bright bugs. If that all seems fuzzy, read on and it will all come into focus.
If you have any questions you would like to throw our way, please contact us anytime. Questions could be about gear, national parks or other photo locations, post-processing techniques, field etiquette, or anything else related to night photography. #SeizeTheNight!
1. Shedding Light on Coast
The Twins, Capitol Reef National Park. Nikon D750, Zeiss Distagon 15mm f/2.8, Coast HP7R flashlight. 26 seconds, f/3.2, ISO 6400. © 2018 Matt Hill.
Q: Can you tell me what you like in particular about Coast flashlights? Other than sturdy durability, which seems obvious. Are the beams adjustable? The couple of times I’ve fooled around with light painting, I found it was difficult to be exact with what I had. — Therese I.
A: You hit it the nail on the head. The Coast flashlights feature an adjustable zoom optic. At its widest, it is an even illumination with a crisp edge. This is fantastic for slowly illuminating a large area evenly. At its narrowest, it is very intense with a rapid falloff from center to edge. This is ideal for lighting something distant.
We often add a Light Painting Brushes Universal Connector as a snoot for very small detail work, or we cup our hands around the end and squeeze open a small crack for fine lighting work. On top of that, Coast lights are waterproof and the rechargeable versions have long-lasting batteries you can charge via USB.
The only downside is that the color temperature of Coast lights is kind of cool for night photography work. But a small CTO gel fixes that. Warms it right up. (You can read more about this in Tim Cooper’s blog post “Level Up With Light Painting: Correcting the Color of Your Flashlight.”)
Light painting is part science and part art. Exact is something you obtain only after thousands of hours of practice. And even then it’s generous to call the craft exact. — Matt
2. Built-In Intervalometers
Q. I just got a Fuji X-T2 and I have a question. Do I still need an intervalometer? There’s one built in, so I’m not sure if I need another. — Anne K.
A: Generally speaking, the built-in intervalometers are more complex to use than an external intervalometer. There’s also the issue that in many cameras, the length of the shutter speed is limited (often to a maximum of 30 seconds) with the internal option. Not ideal for long-exposure work.
However, with the X-T2 in particular, I’ve used the built-in intervalometer with star stacks and had no problem. The built-in shutter speeds for that camera (with the latest firmware upgrade) go to 1 minute, 2 minutes, 4 minutes, 8 minutes, 15 minutes! It’s awesome. If you are comfortable with the internal option, then go for it! If not, nothing wrong with using an external option. — Chris & Tim
3. Big Bend in Summer
Agave on the South Rim, Big Bend National Park. Nikon D850, Nikon 14-24mm f/2.8. 2 minutes, f/5, ISO 1000. Light painted with a Coast HP7R. © 2018 Chris Nicholson.
Q: I noticed you haven’t offered a workshop at Big Bend last year or this year. I am headed there this summer in hopes of photographing the Milky Way and other nighttime objects under a new moon sky. Do you not offer workshops there because the location just isn’t that great? I’m wondering if you’d turn me on to any spots that are preferred for astro-landscape photography. — Alison C.
A: It’s not that we don’t offer a workshop in Big Bend, just that we haven’t yet. I can assure you that this Texas park is amazing for photography, day or night.
However, as for your trip, not to dissuade you, but summer is an incredibly uncomfortable time of year to be in Big Bend. There’s always a chance that you’ll catch a break with the weather, but generally summer there is stifling and unbearable. Moreover, that same heat at night will likely create considerable long exposure noise in your Milky Way photos. I’d avoid any exposures over 30 seconds or so (depending on your camera), and I’d certainly use Long Exposure Noise Reduction.
As for locations, probably the best in the park is the South Rim, but I wouldn't advise hiking out there in summer. There are a lot of fantastic spots accessible via the primitive roads, but again, I can’t advise venturing out those ways at this time of year, because of safety in the extreme heat should the car break down or get a flat tire.
However, you can find plenty of great spots to photograph that are closer to the safety of the main roads. I would definitely check out the Chisos Basin and Santa Elena Canyon, and you can find interesting ruins in the surrounding towns that are good for light painting.
No matter where you go, always have a good supply of extra water in the car—not just enough to drink for the shoot duration, but enough to drink in desert heat should you run into car issues. Have I mentioned this place is hot in summer? — Chris
4. Aurora and Condensation
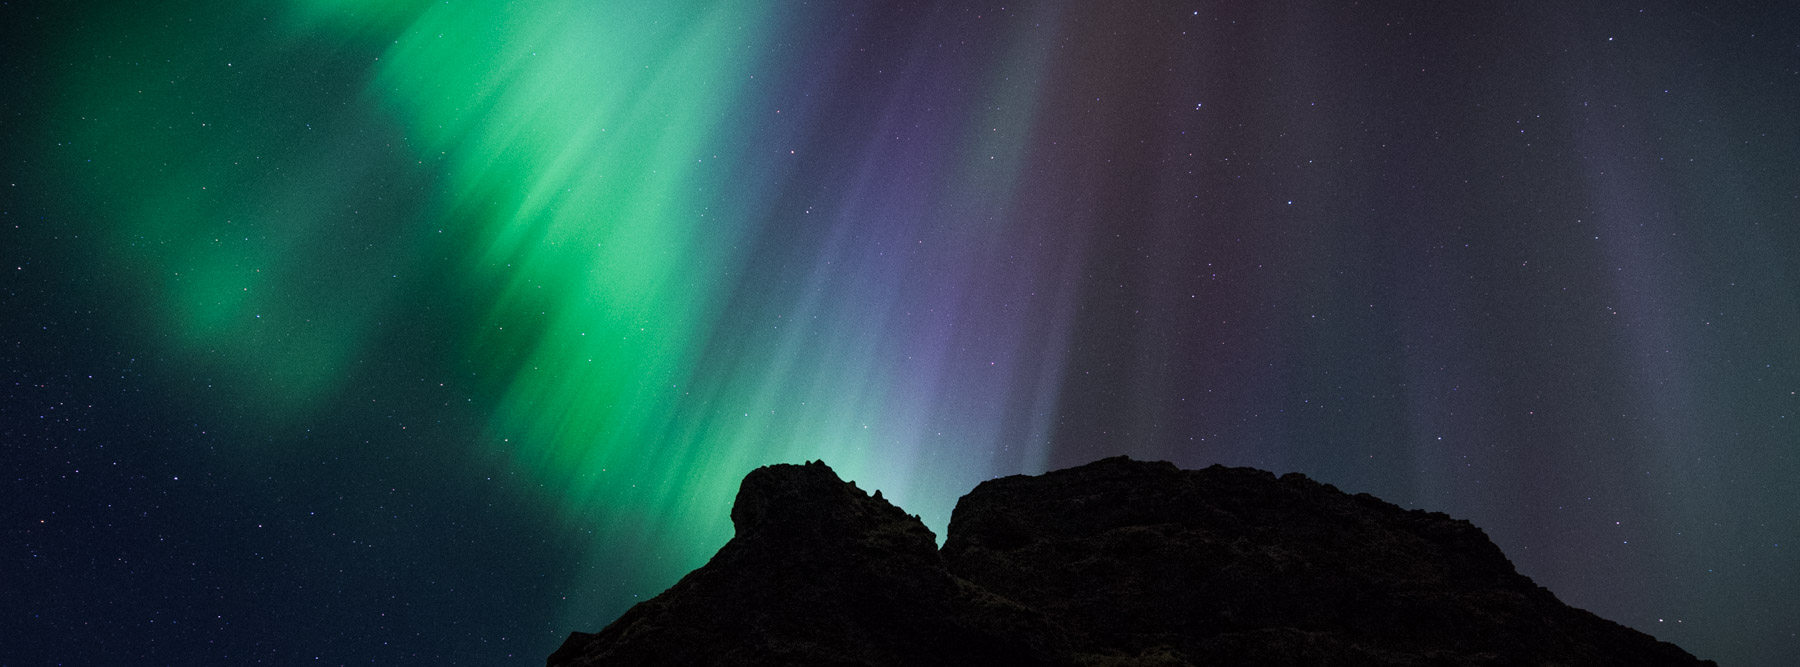
Aurora, Westfjords, Iceland. Nikon D750. © Lance Keimig.
Q: I’ve taken an interest in nighttime photography in Canada to capture the aurora. It appears to my eyes to be just a white glow (only my rods are sensing the light), but when I take the photo, voila, it is green! One of the main problems I’ve had—both in Yellowknife, Northwest Territories, in February (-24 C), and in Ontario in September—is condensation on my lens or filter as the camera cools off. I recently purchased a wrap-around lens heater, and am excited to try it in Ontario this August during the Perseids meteor shower. — Gil J.
A: Yes, faint aurora can be hard to differentiate from plain old clouds sometimes, which is why using an app like Aurora Forecast can give you a heads-up to be on the lookout.
As for lens wraps for condensation, they can make the difference between the end of your night and a killer shot. Once the temperature reaches the dew point, condensation can form quickly. I’ve been in situations where I had to wipe the lens mid-exposure, which can introduce all sorts of problems. For a DIY version, I’ve cut a beer koozie so it can wrap around the lens, and put a chemical hand warmer inside. Sometimes even a hand warmer with a rubber band to hold it to the lens will work in a pinch! — Lance
5. Fireflies
Fireflies in Cuyahoga Valley National Park. Nikon D3s, Nikon 24-70mm f/2.8. 90 seconds, f/2.8, ISO 1600. © 2018 Chris Nicholson.
Q: I have a pressing summer question: How does one photograph fireflies? I’ve seen them and I want to try it! — Susanne H.
A: That’s a fun question, and definitely a fun thing to do. We’re about to start our workshop on the Blue Ridge Parkway, and we’re hoping to see some fireflies on those mountain nights!
I recommend a few strategies:
- Get into into a dark, wooded area, or at the edge of one, that has lots of firefly activity.
- Focus on the closest trees or a solid subject.
- Use a fast telephoto lens, like a 70-200mm f/2.8, so that you can zoom into the area of activity and concentrate a bunch of fireflies in the frame. I was recently trying with a wide-angle lens and didn’t get any good results.
- Shoot wide open to collect all the light.
- To really maximize the effect, shoot a lot of frames and stack them in Photoshop (using the Lighten blend mode, just like we do for star stacking).
Have fun and please share your results in the Comment section! — Gabe


