Iceland

Five Questions: Aurora Noise, Portable Stools, Moving Lightroom and More

Welcome to the 20th installment of our “Five Questions” series. Know what that means? We’re about to answer our 100th question for you!

This installment features inquiries about noise reduction with auroras, internal intervalometers, portable stools, Luxli lights and moving a Lightroom catalog to a new drive.

If you have any questions you would like to throw our way, please contact us anytime. Questions could be about gear, national parks and other photo locations, post-processing techniques, field etiquette, or anything related to night photography. #SeizeTheNight!


1. No Noise in Auroras

Question:

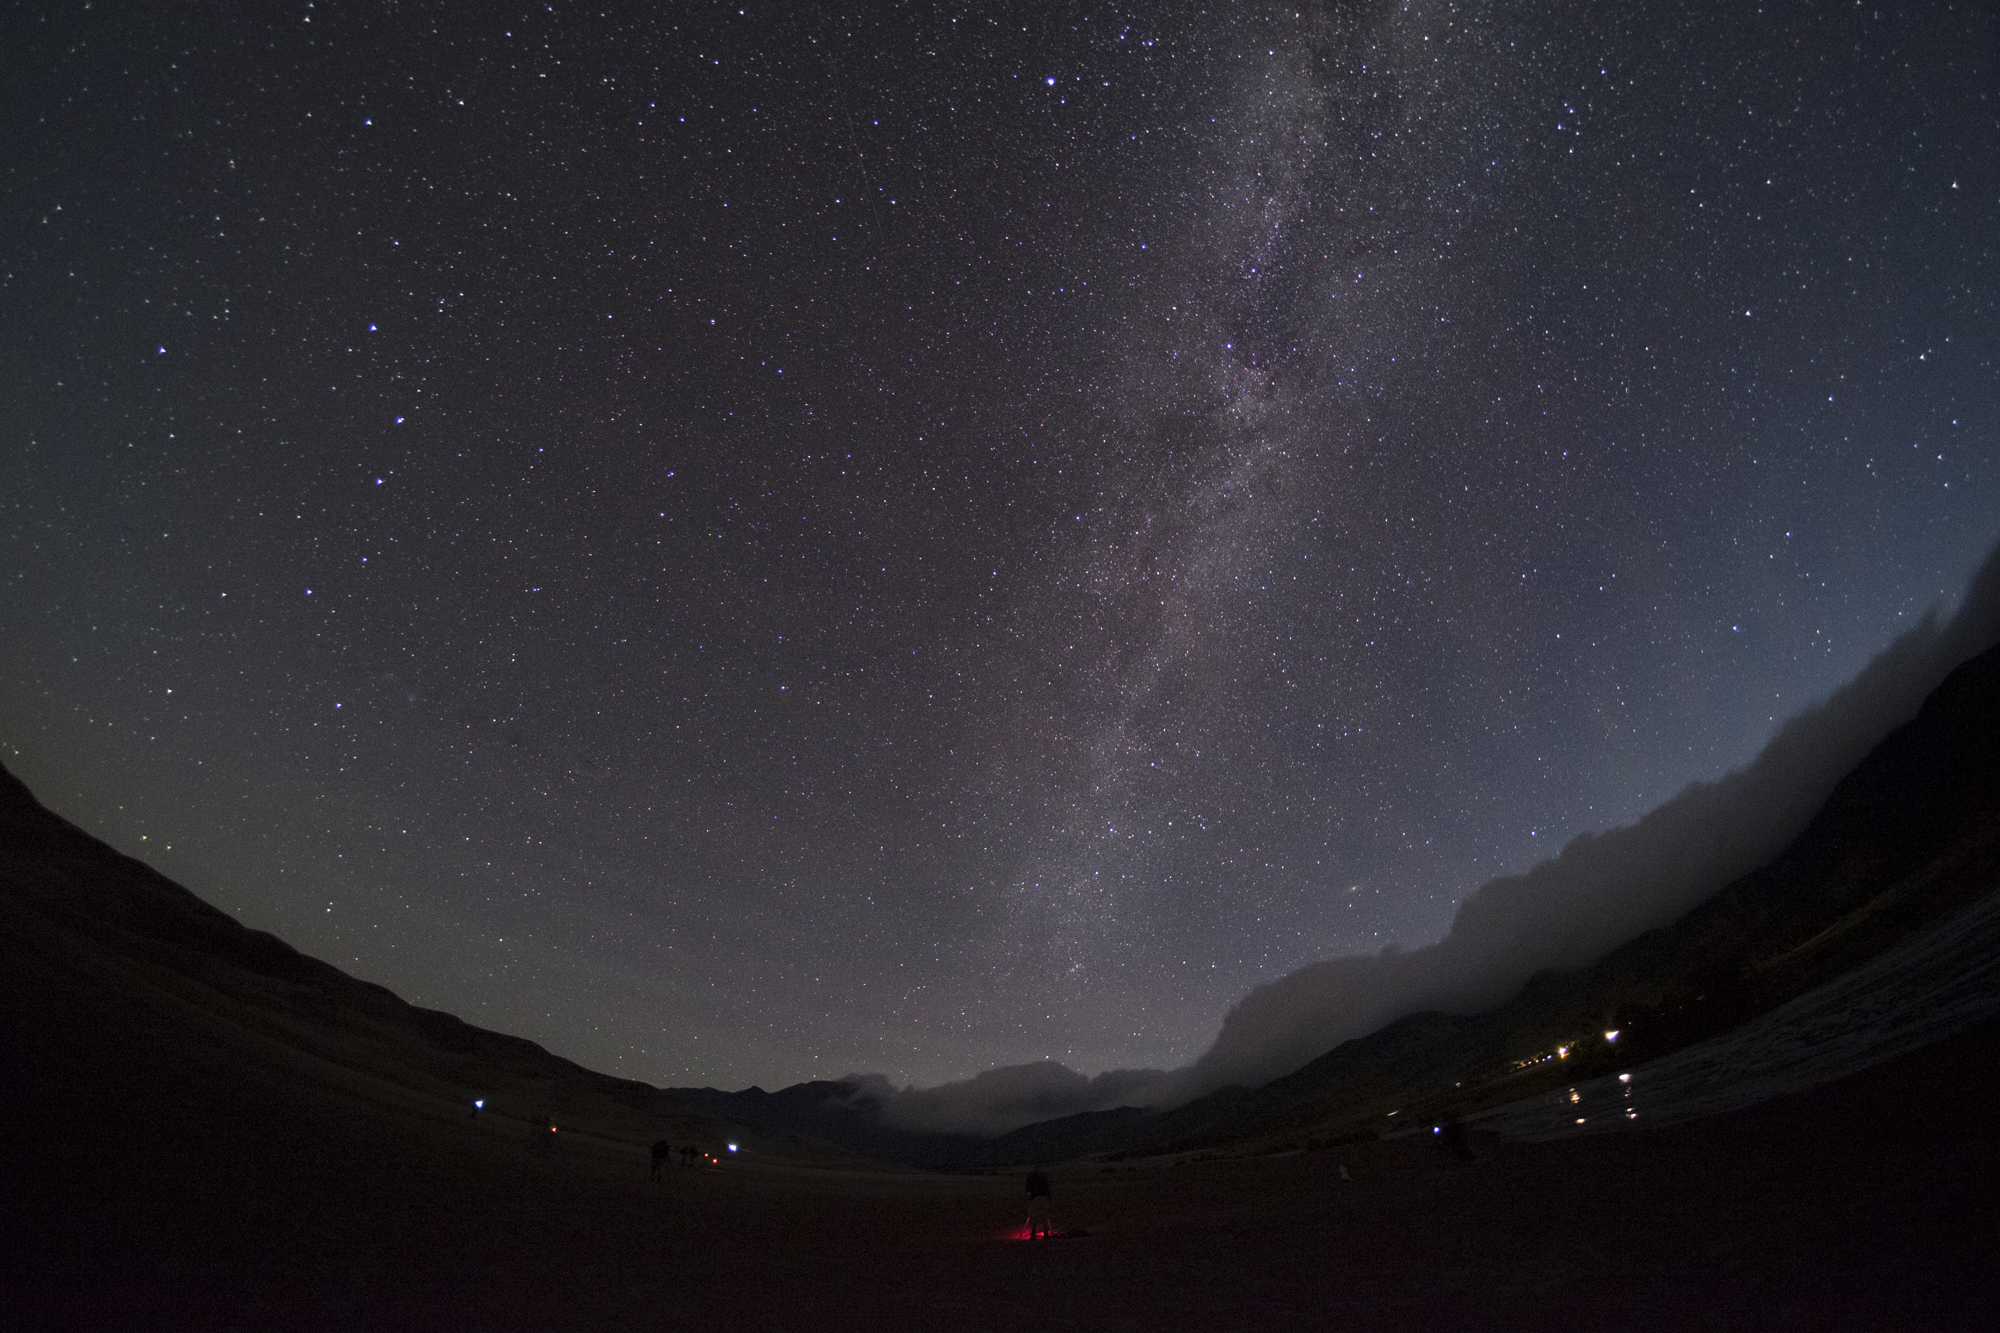
Do you use long exposure noise reduction when shooting auroras? I was trying to shoot some in Minnesota and the person I was with had it enabled in her Canon. — Claron G.

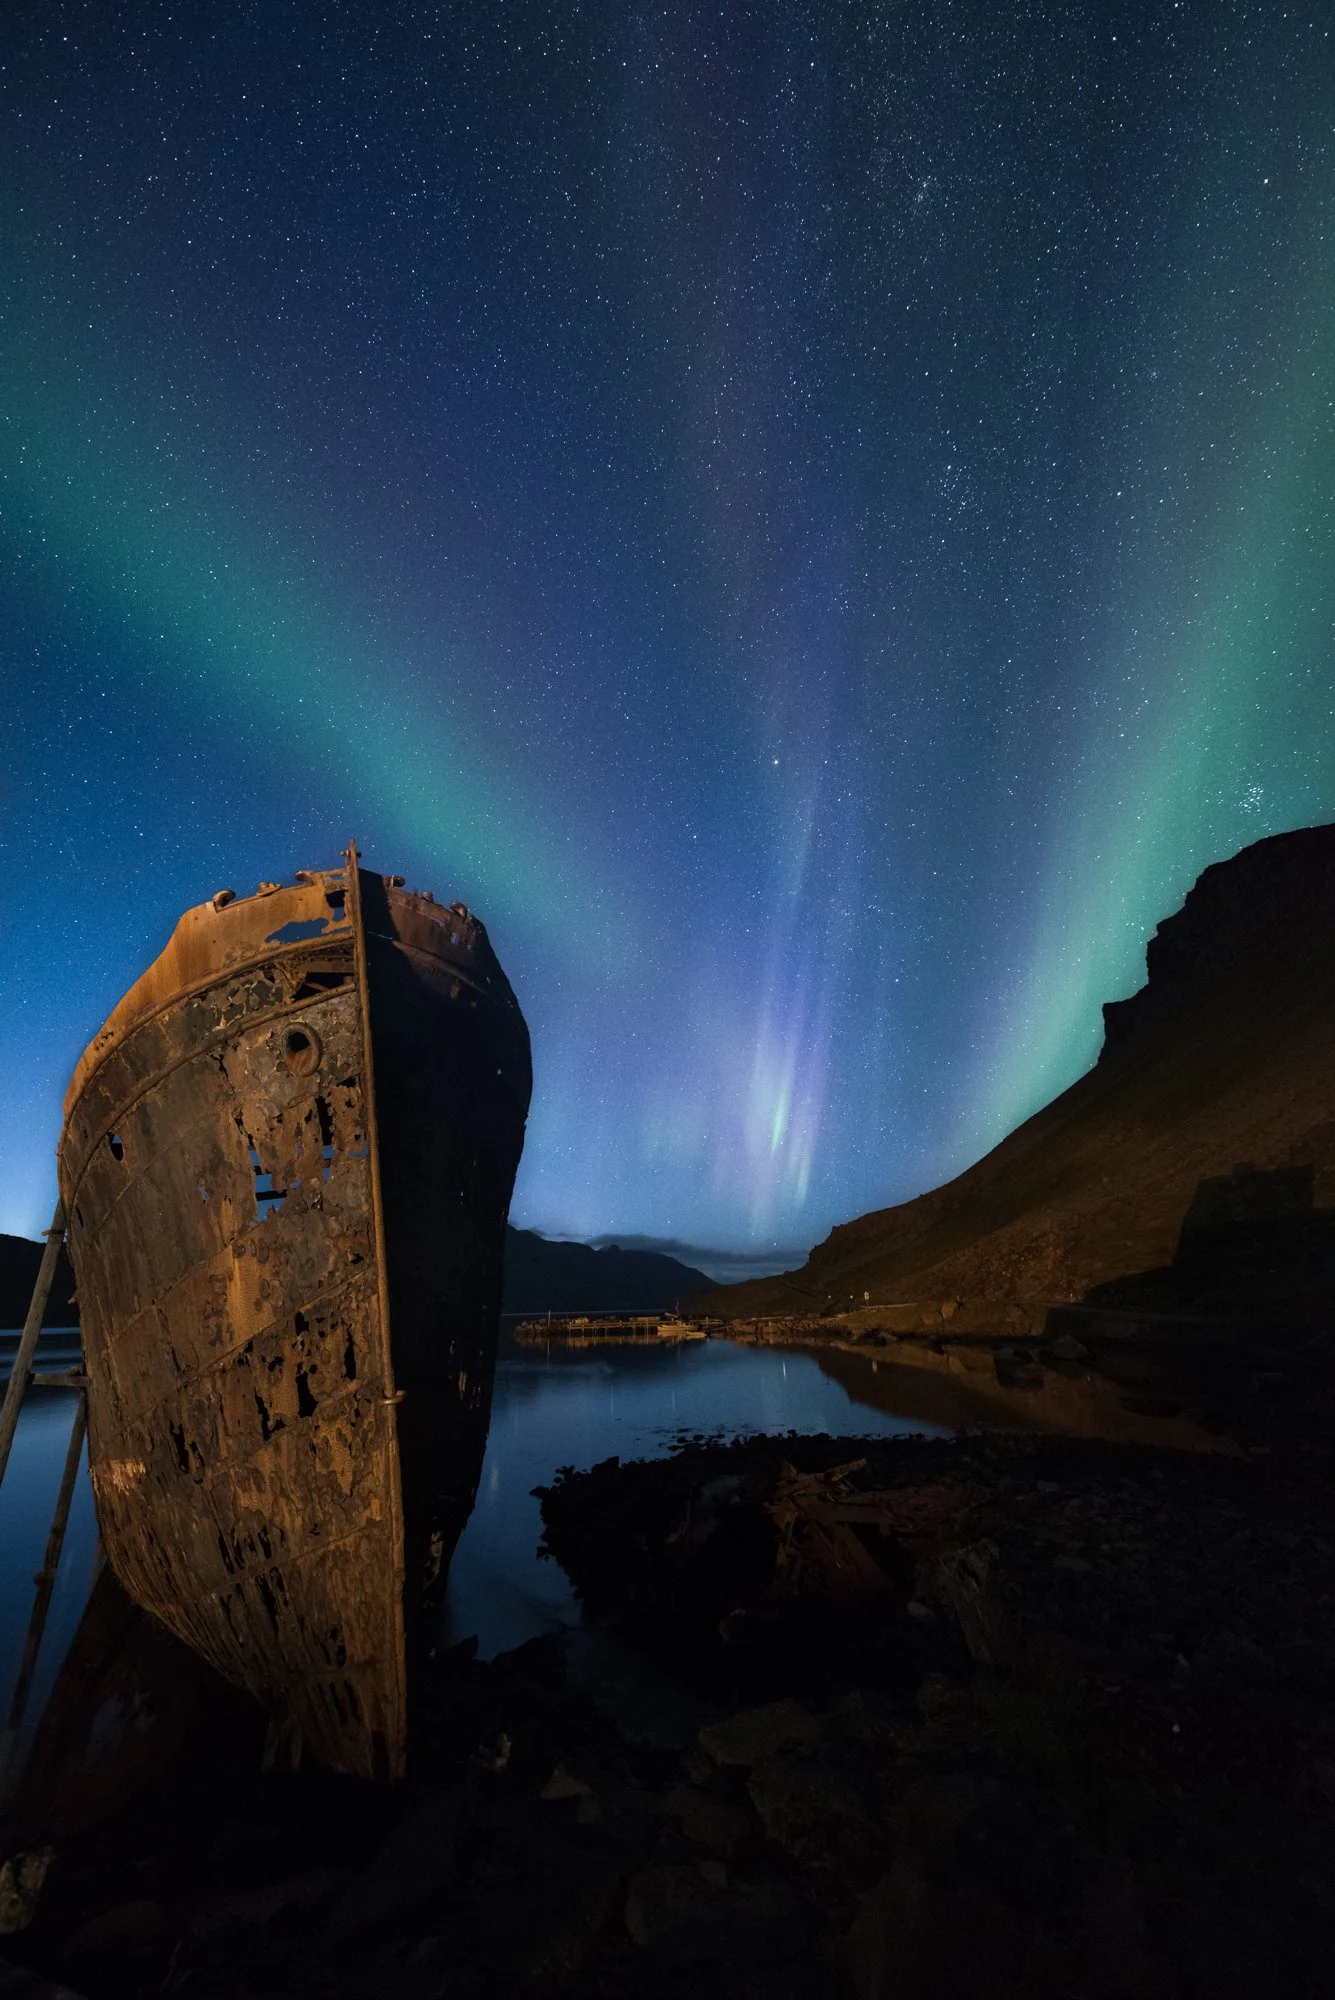
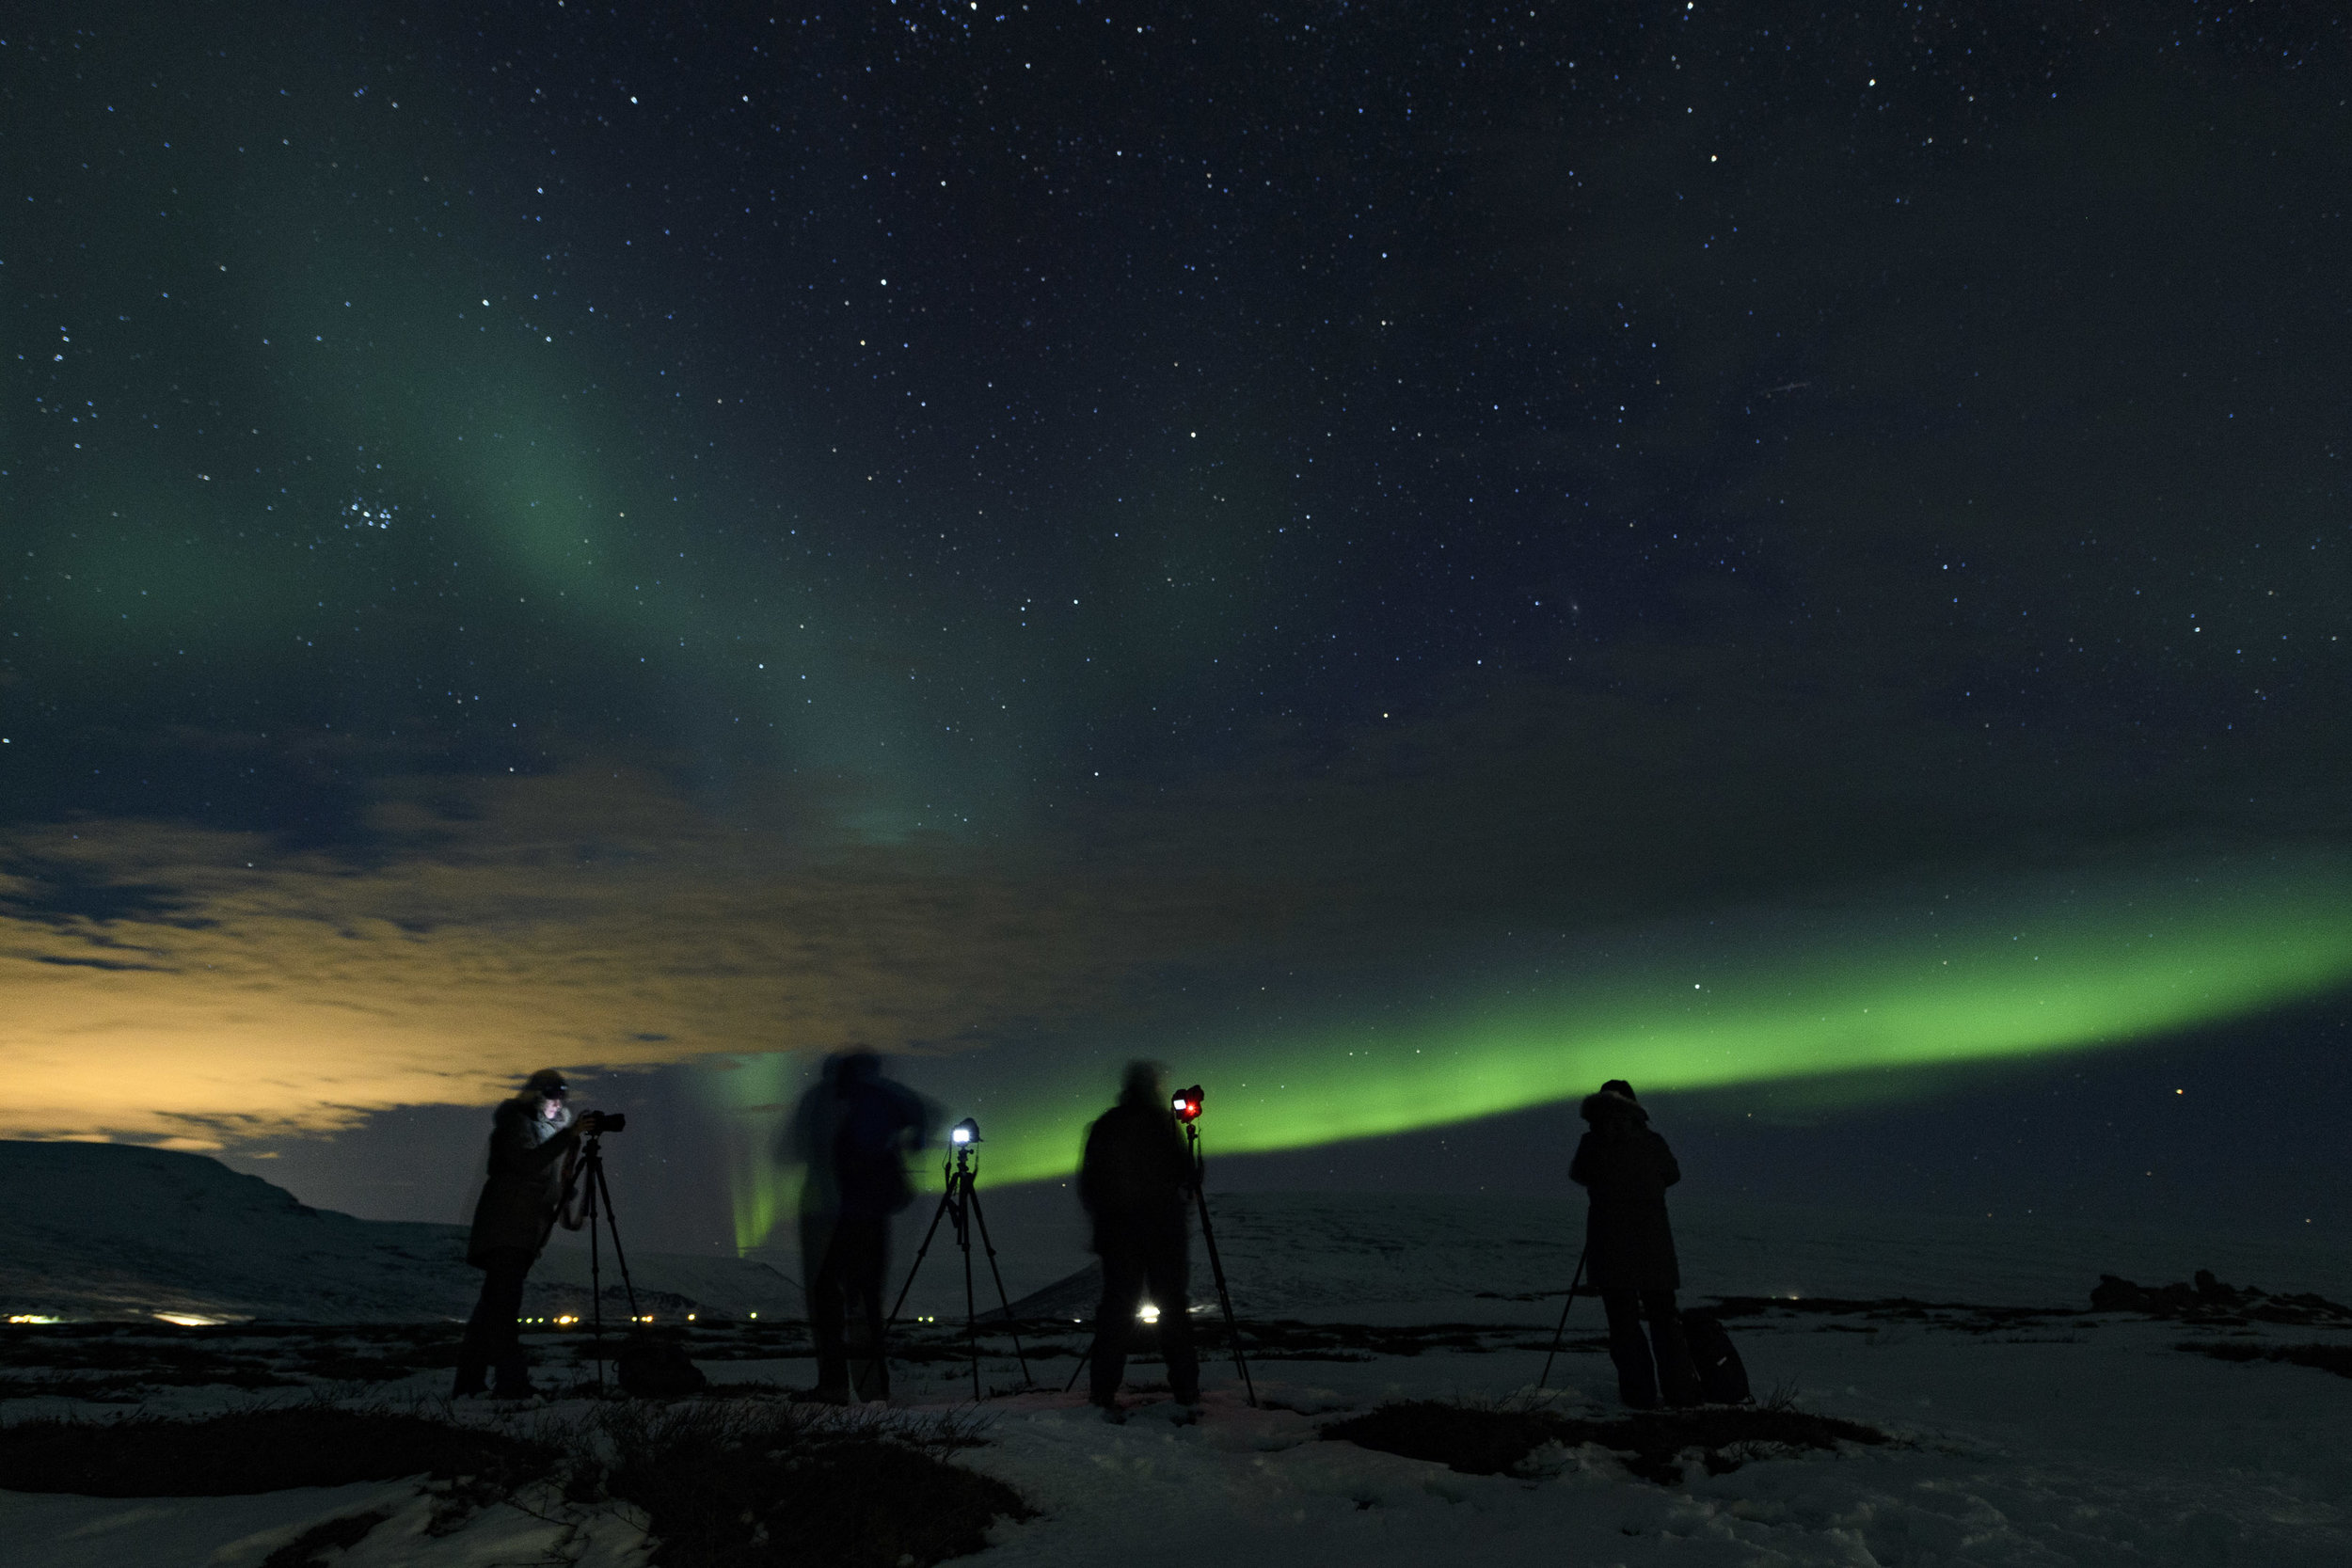
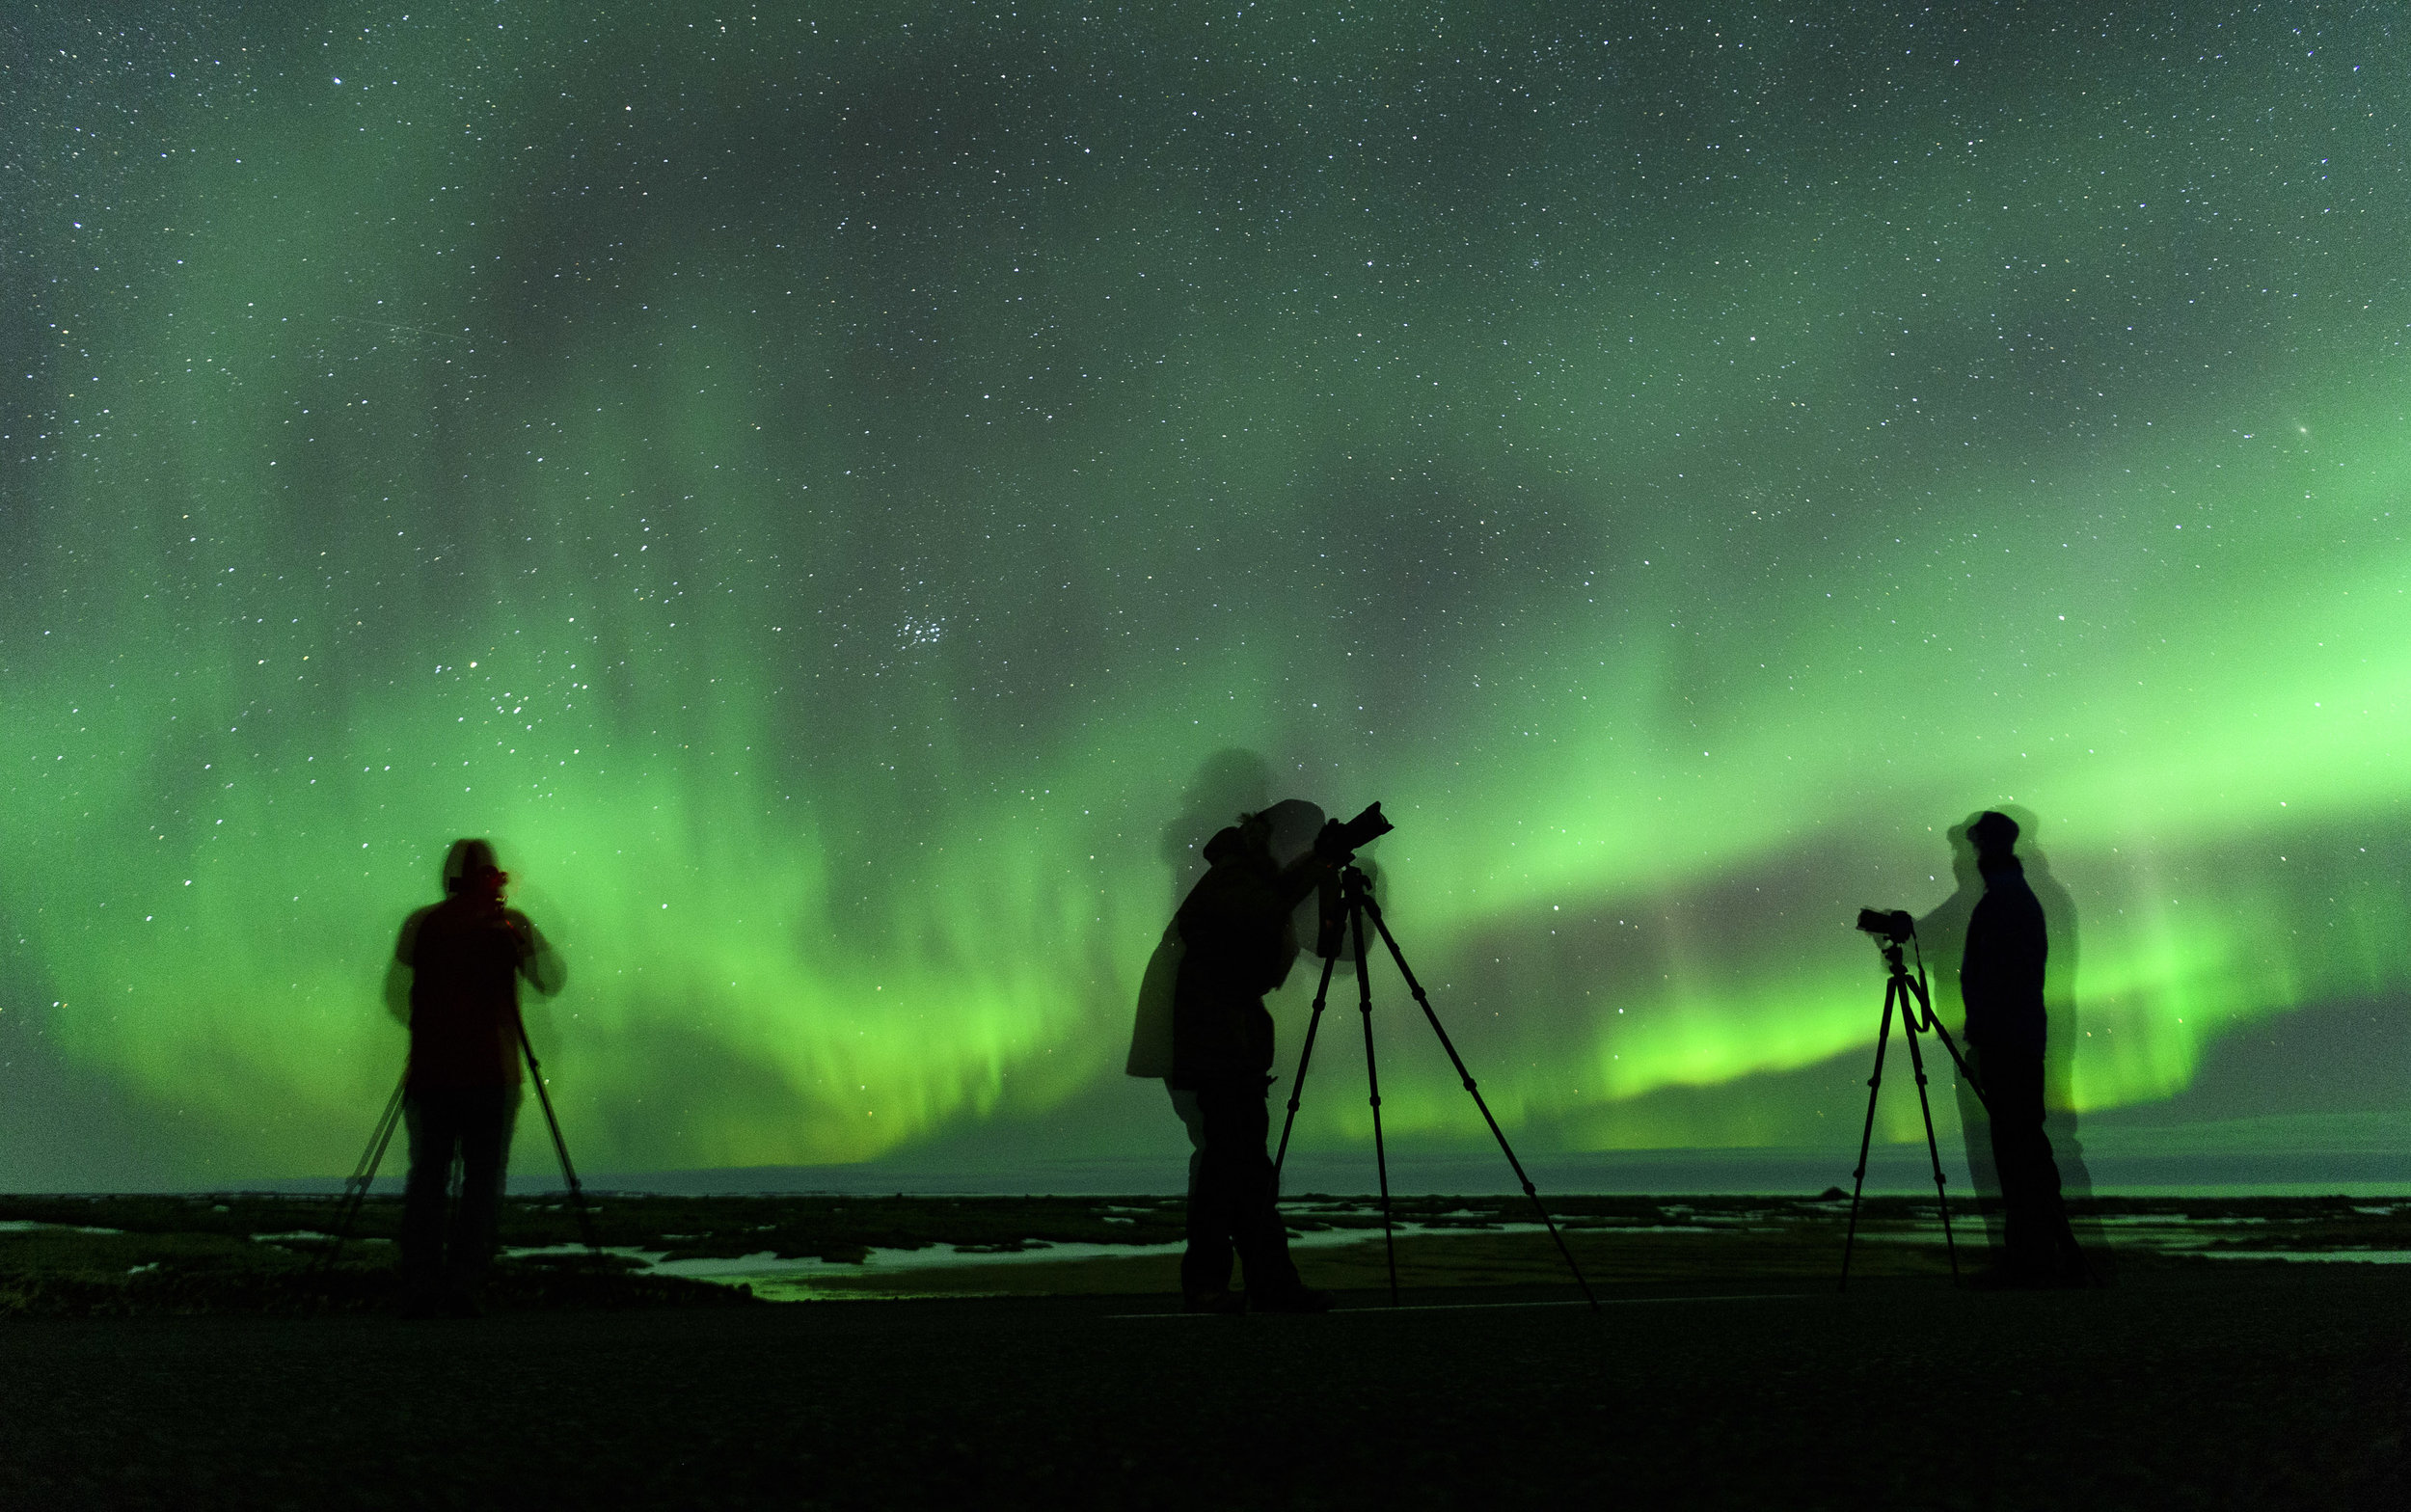
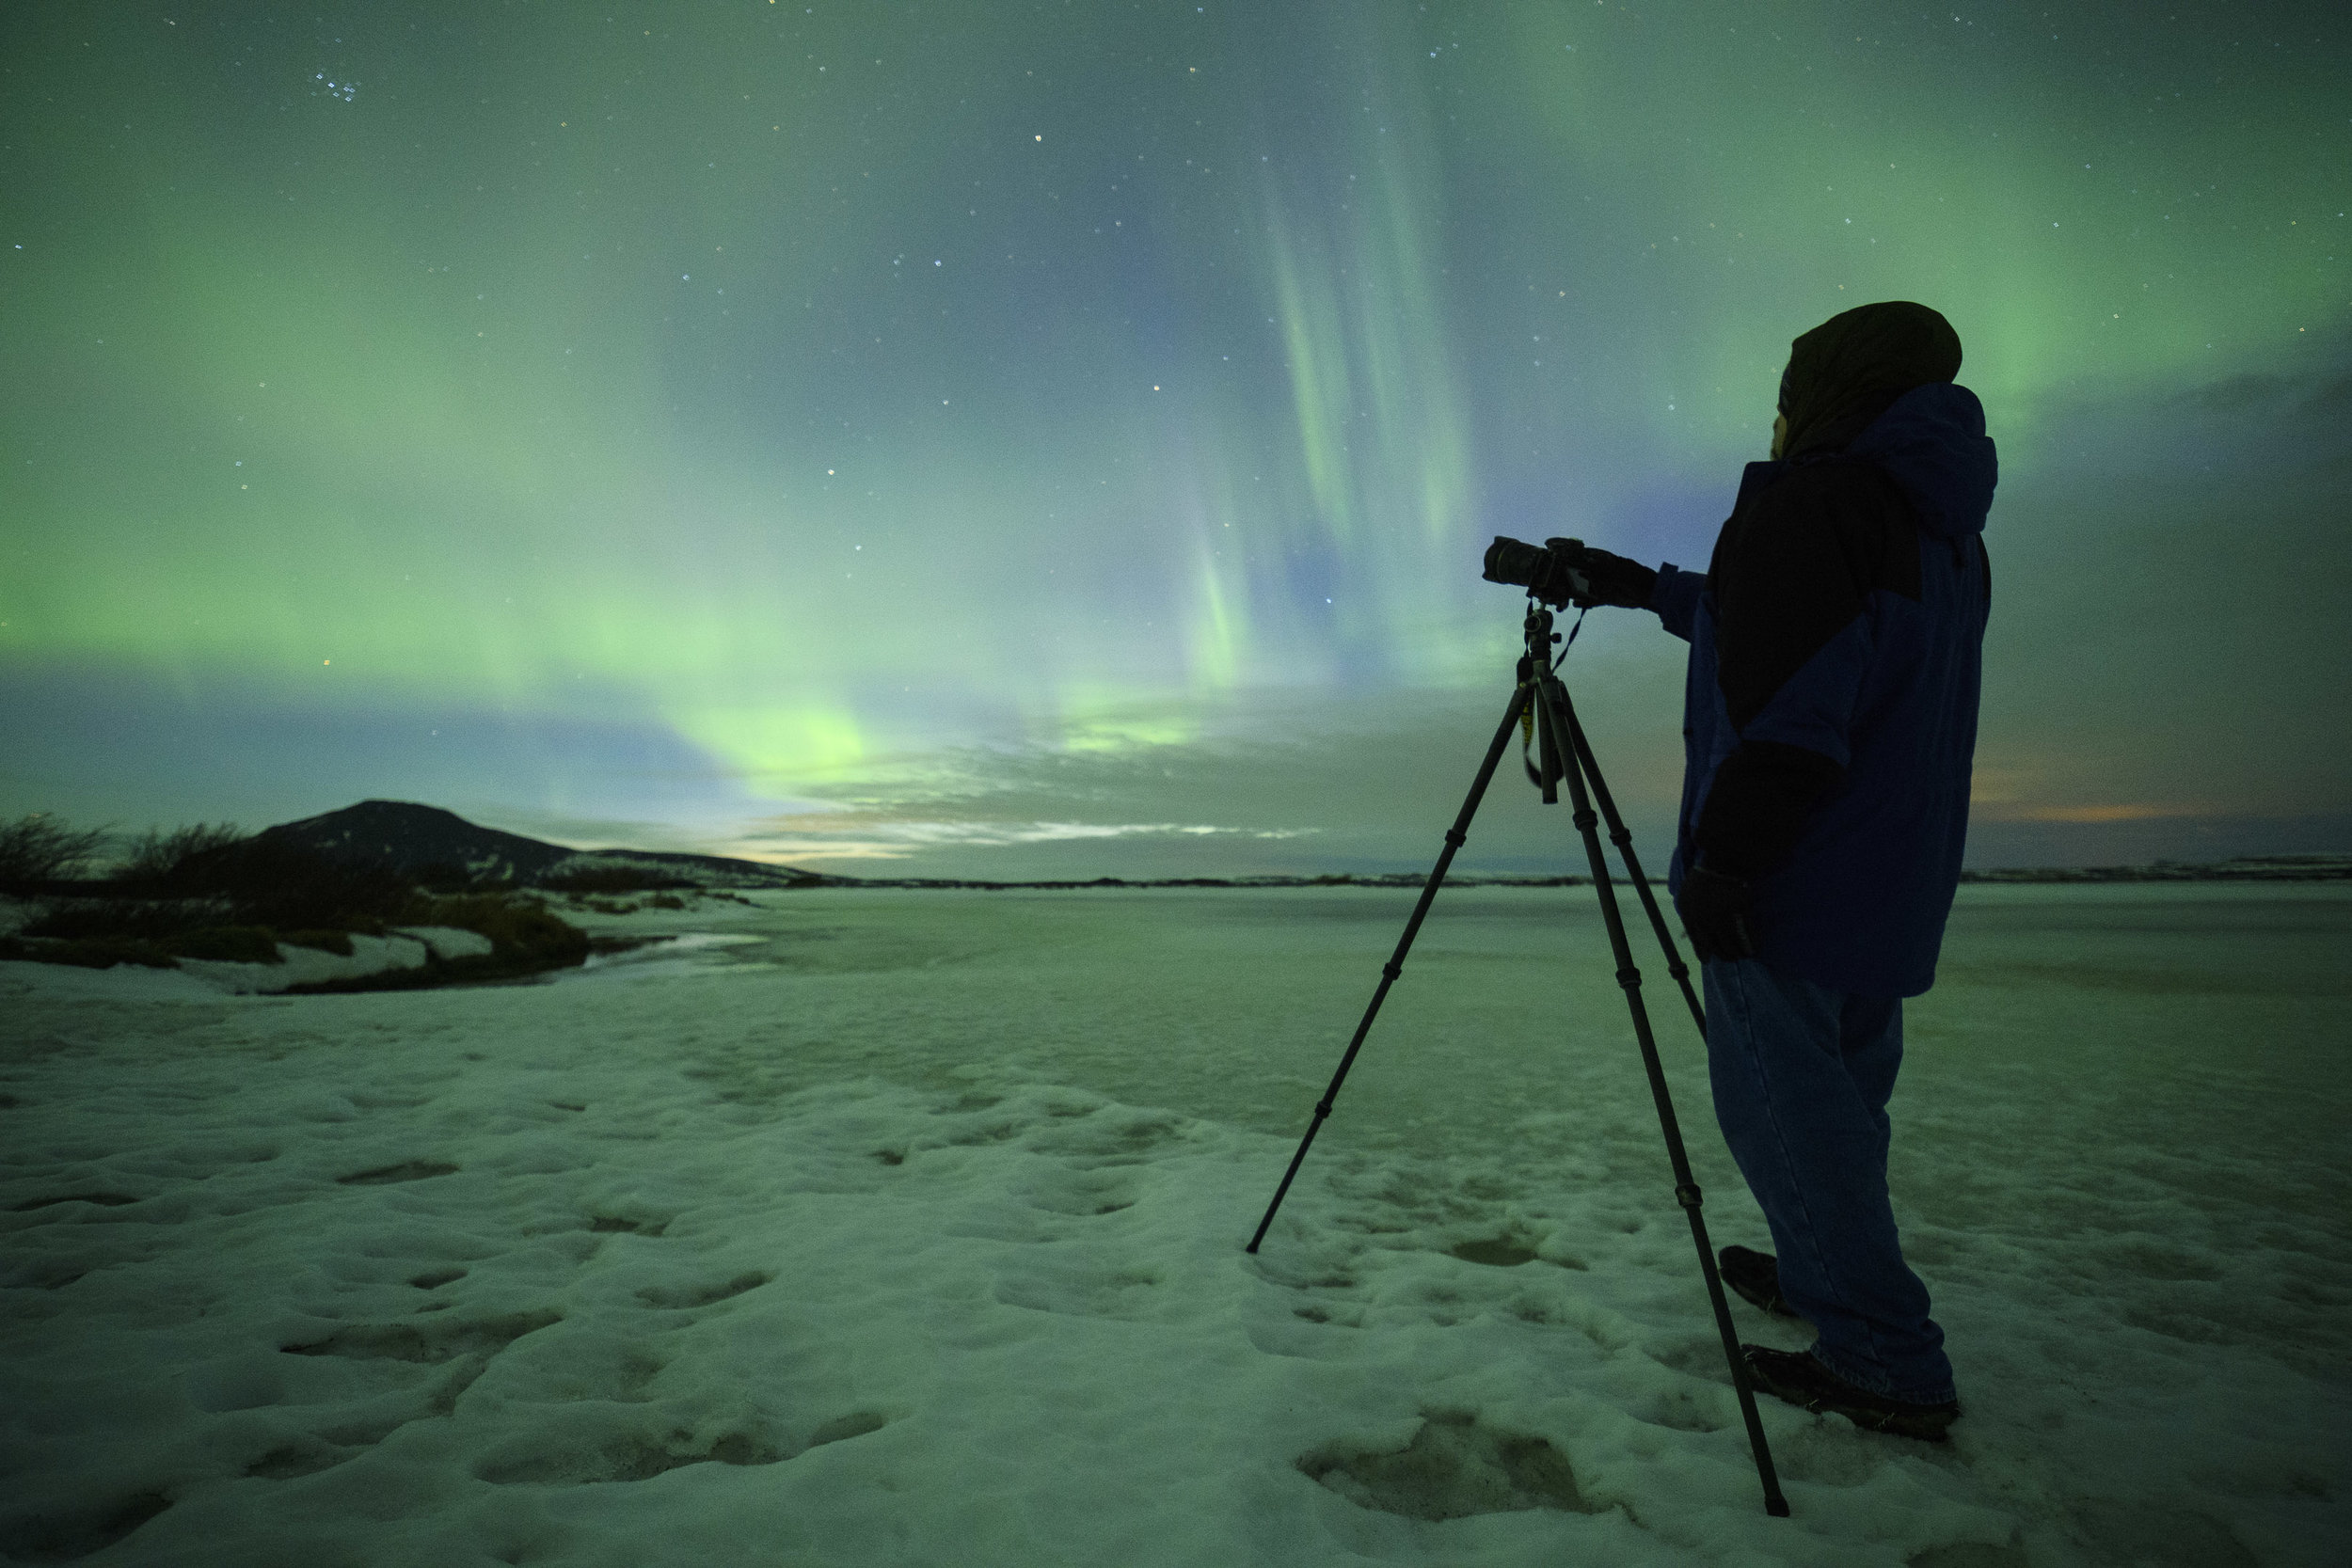
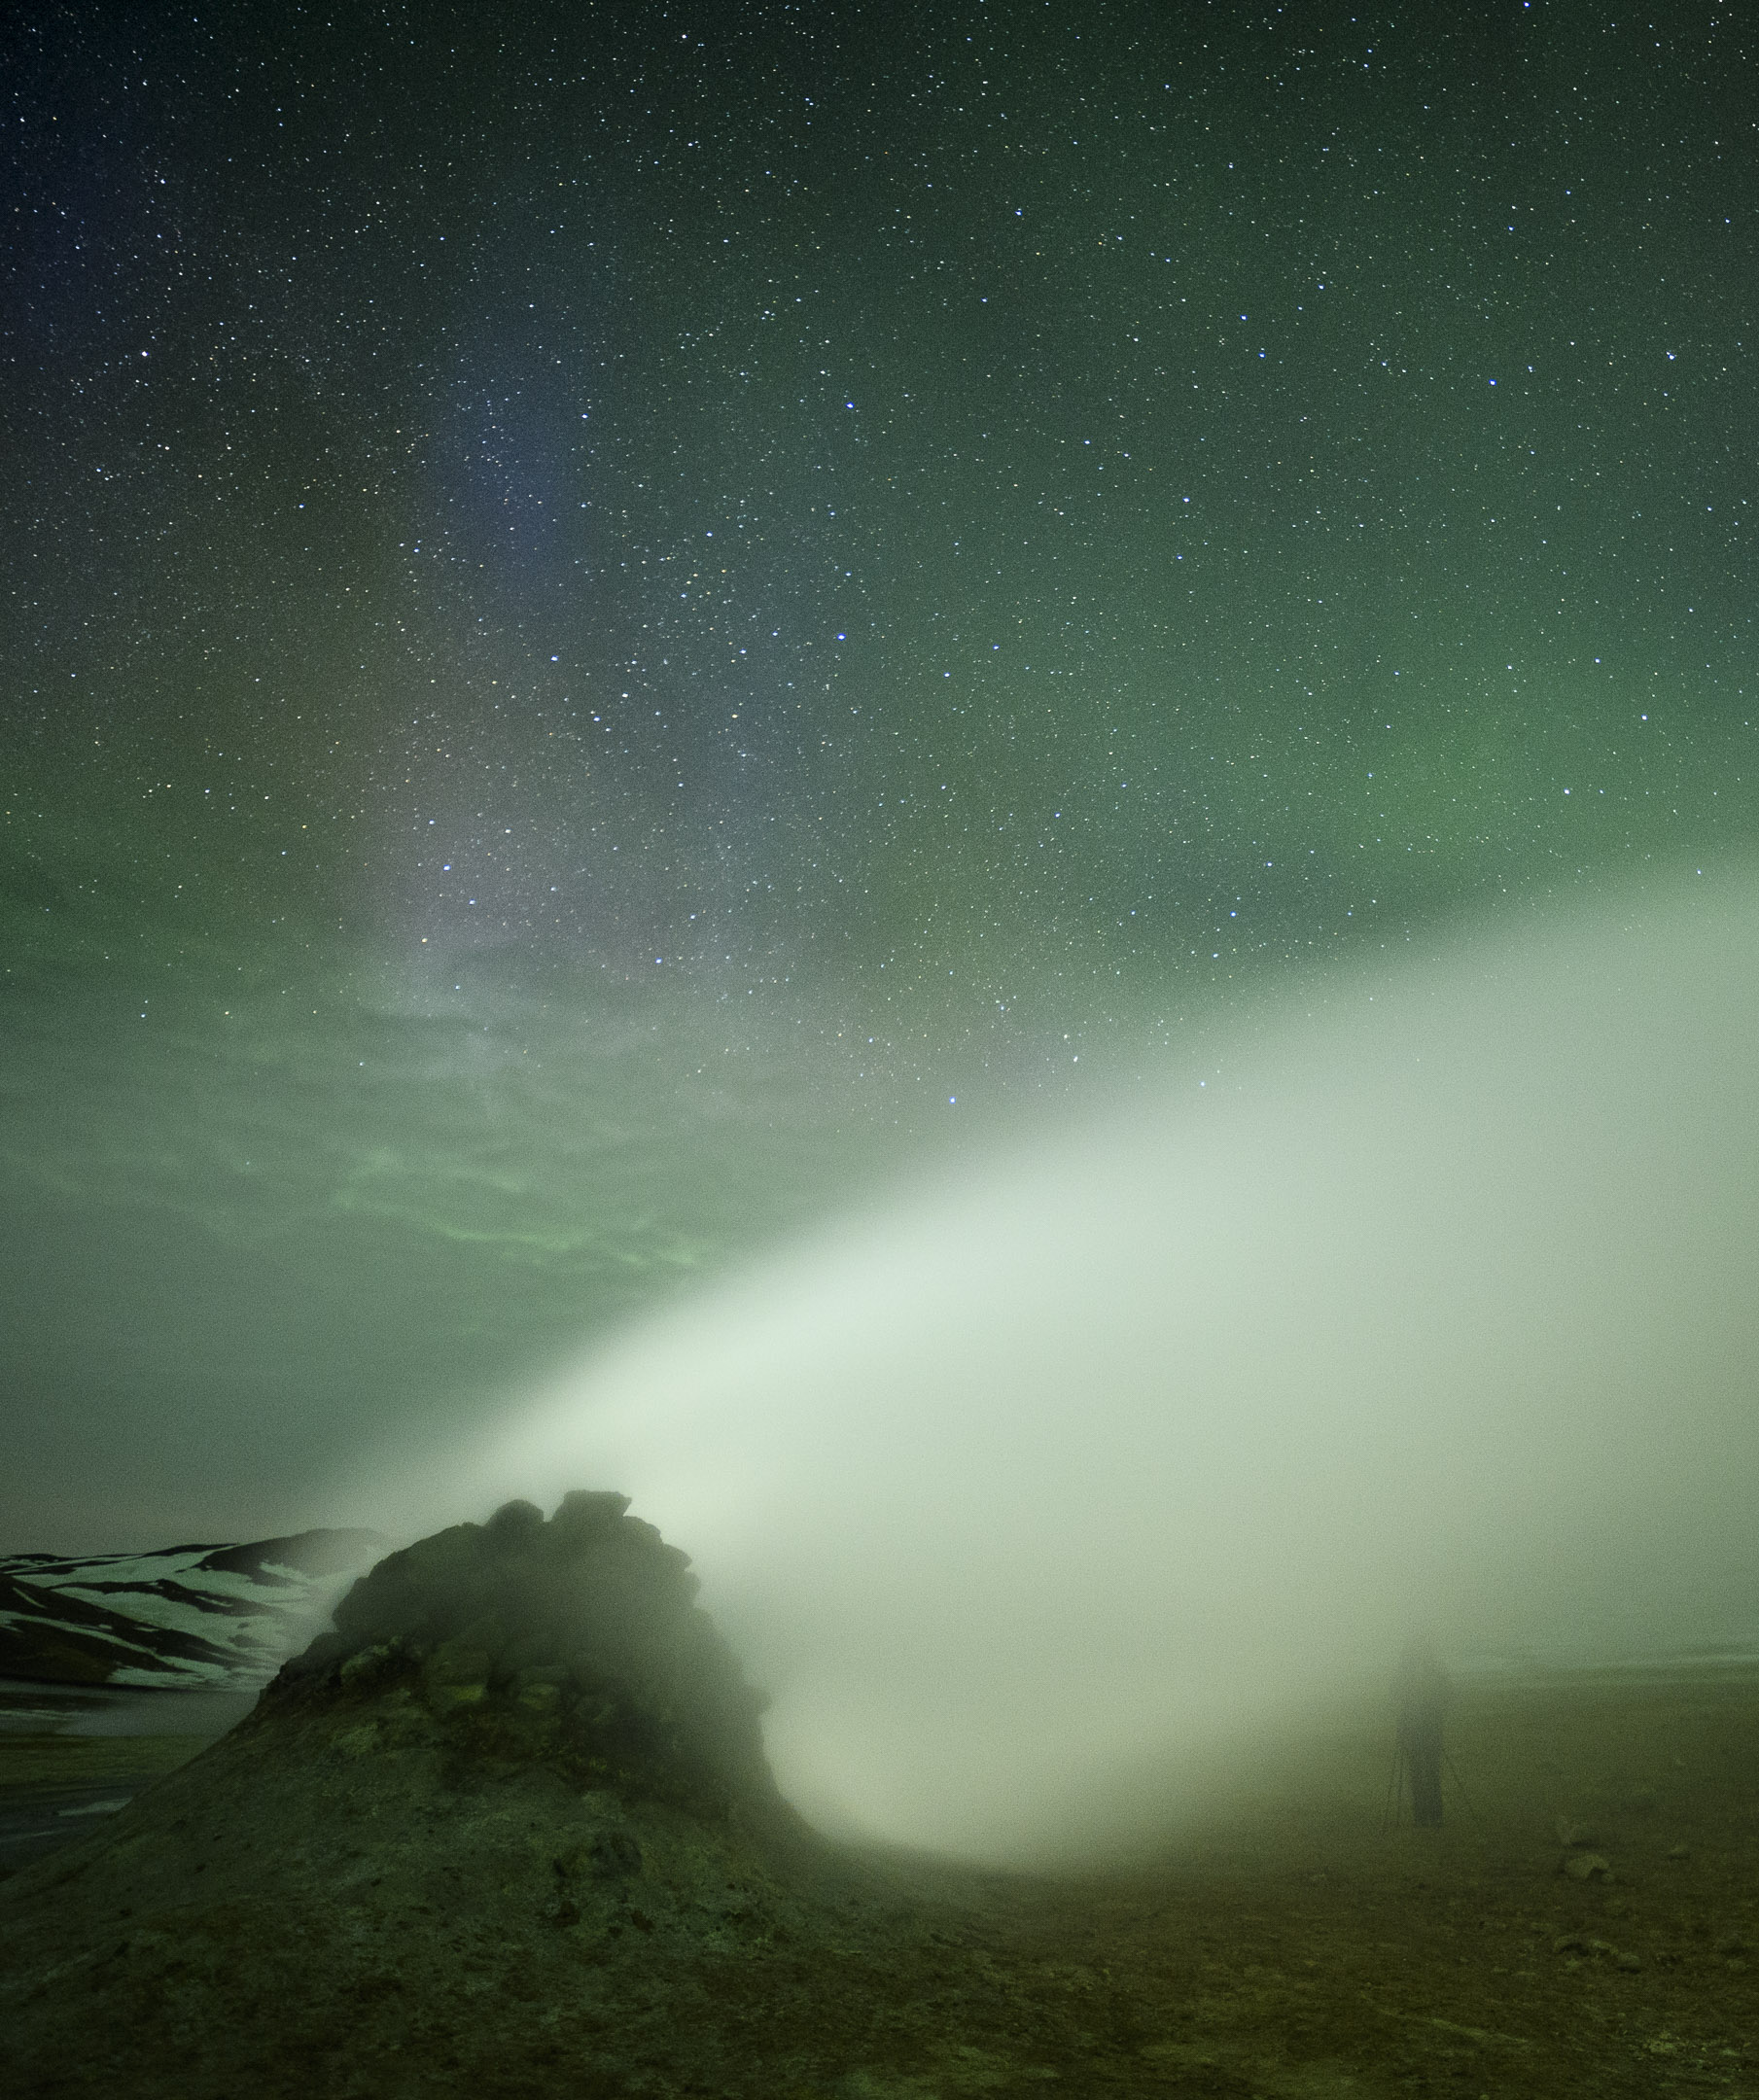
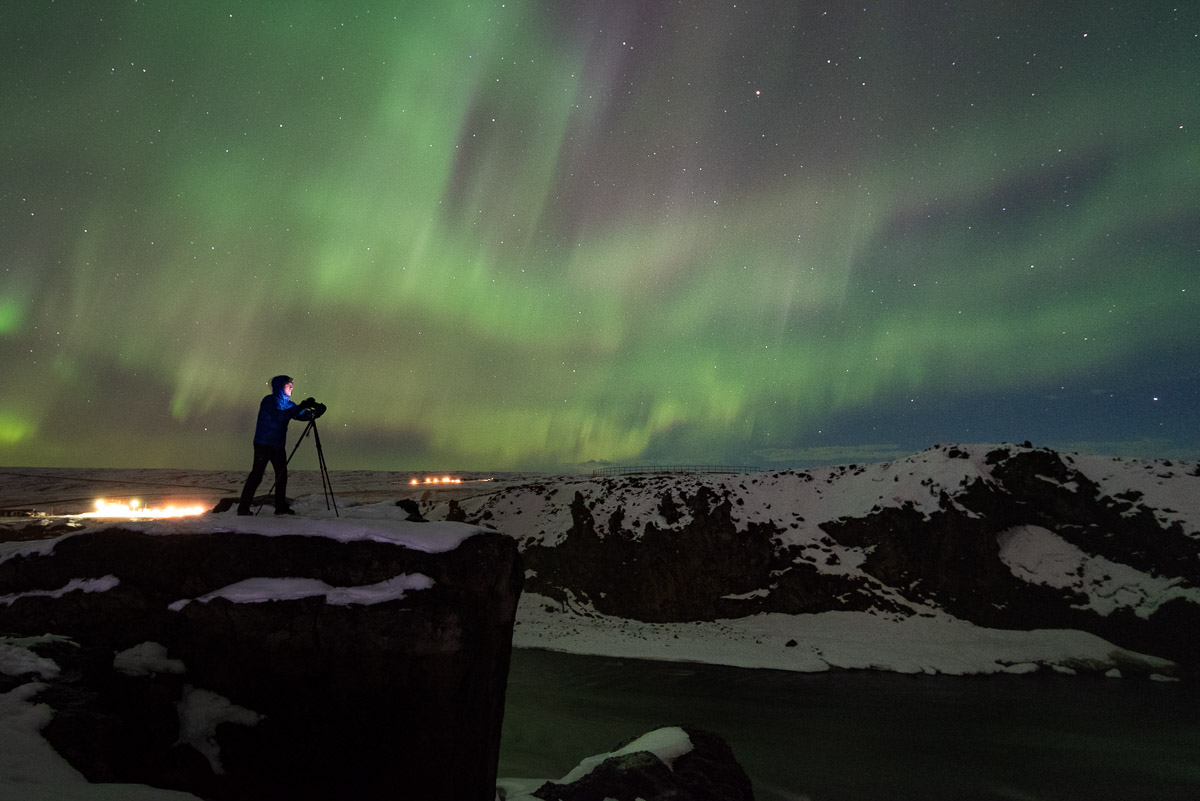
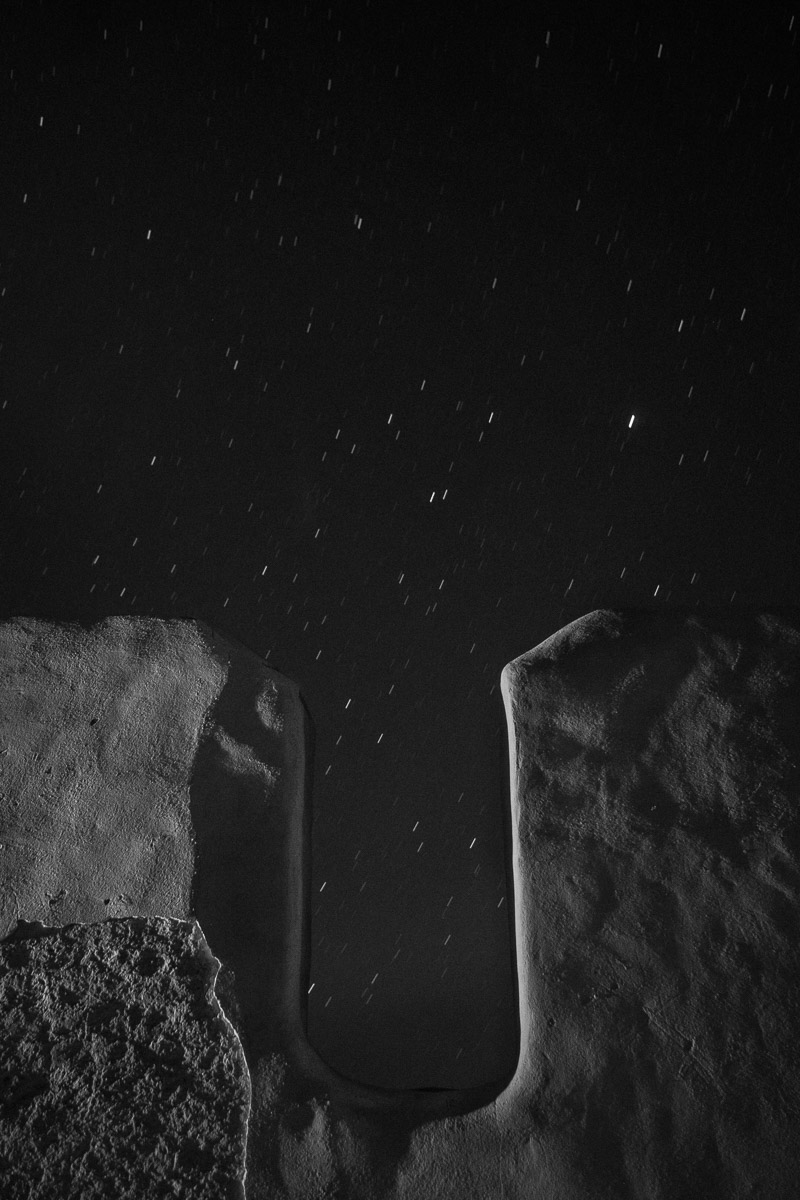
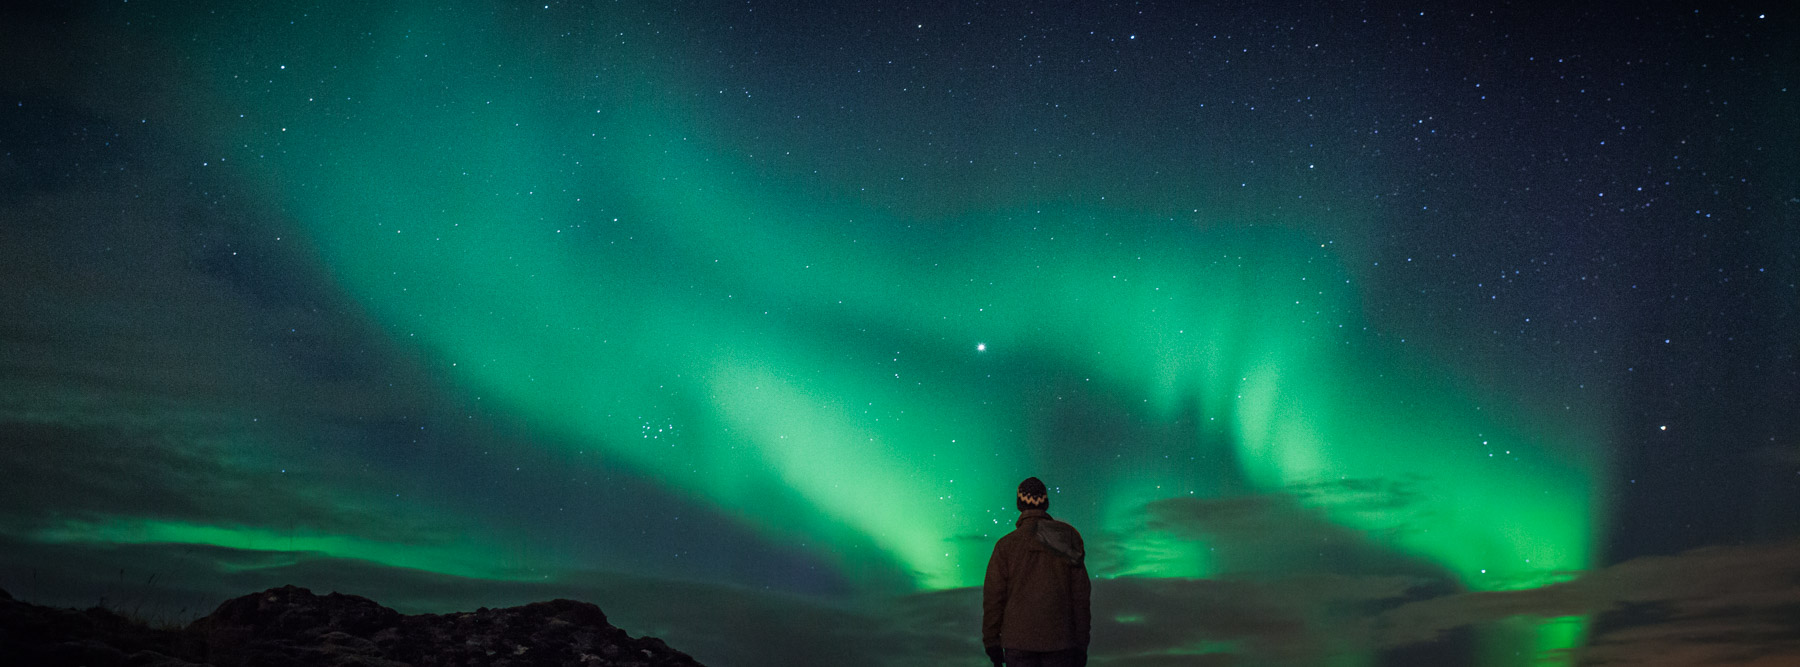
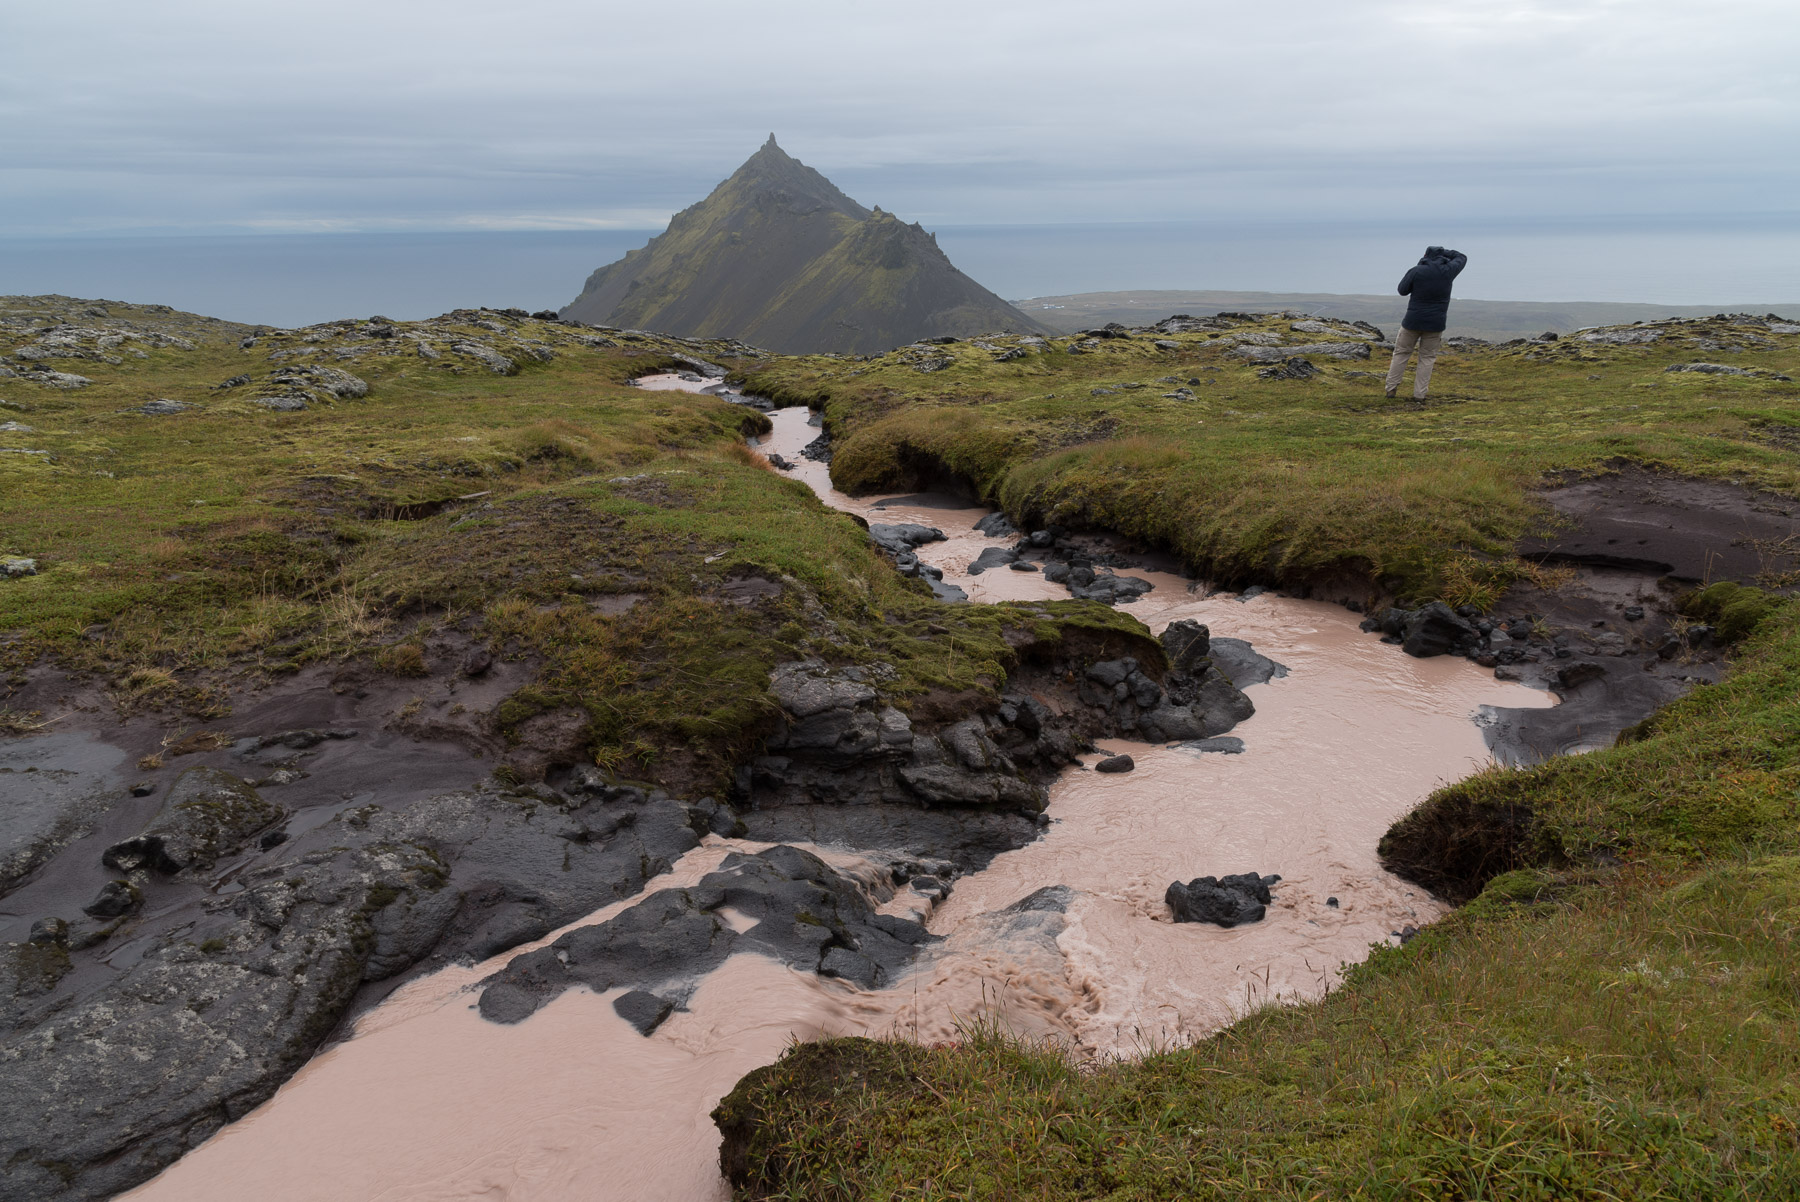
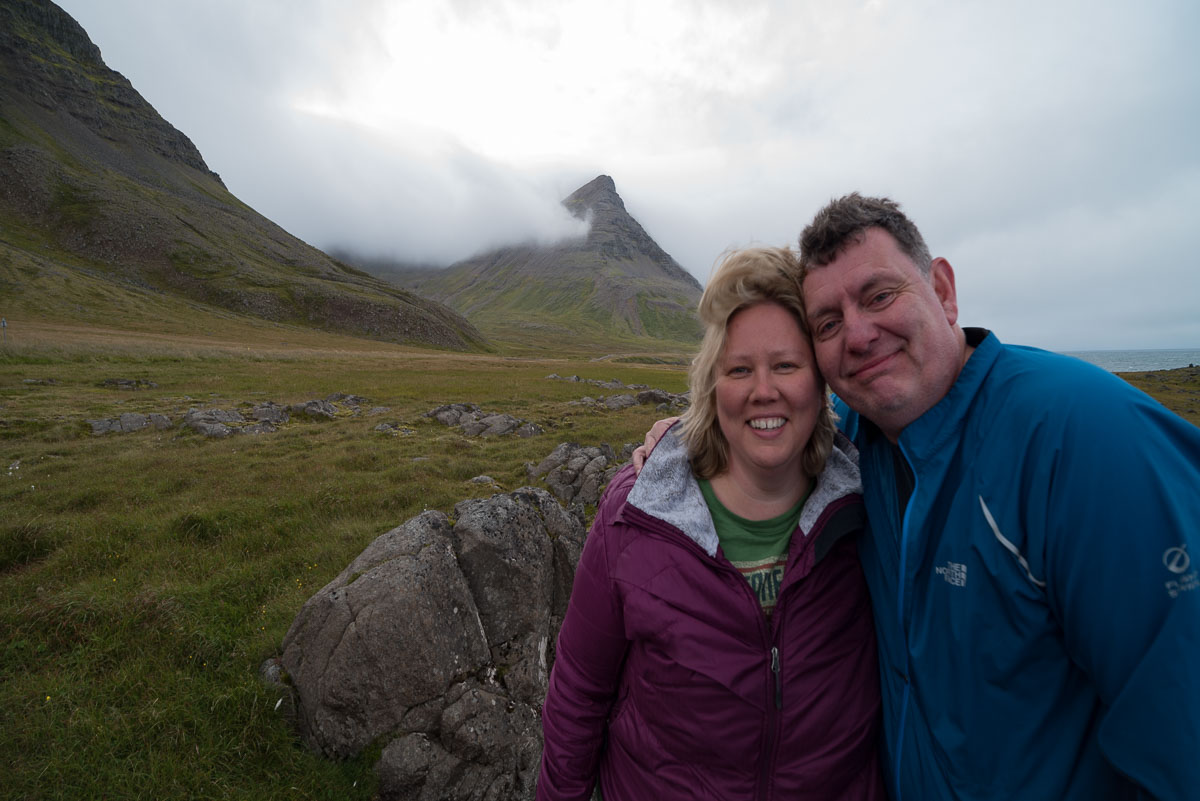
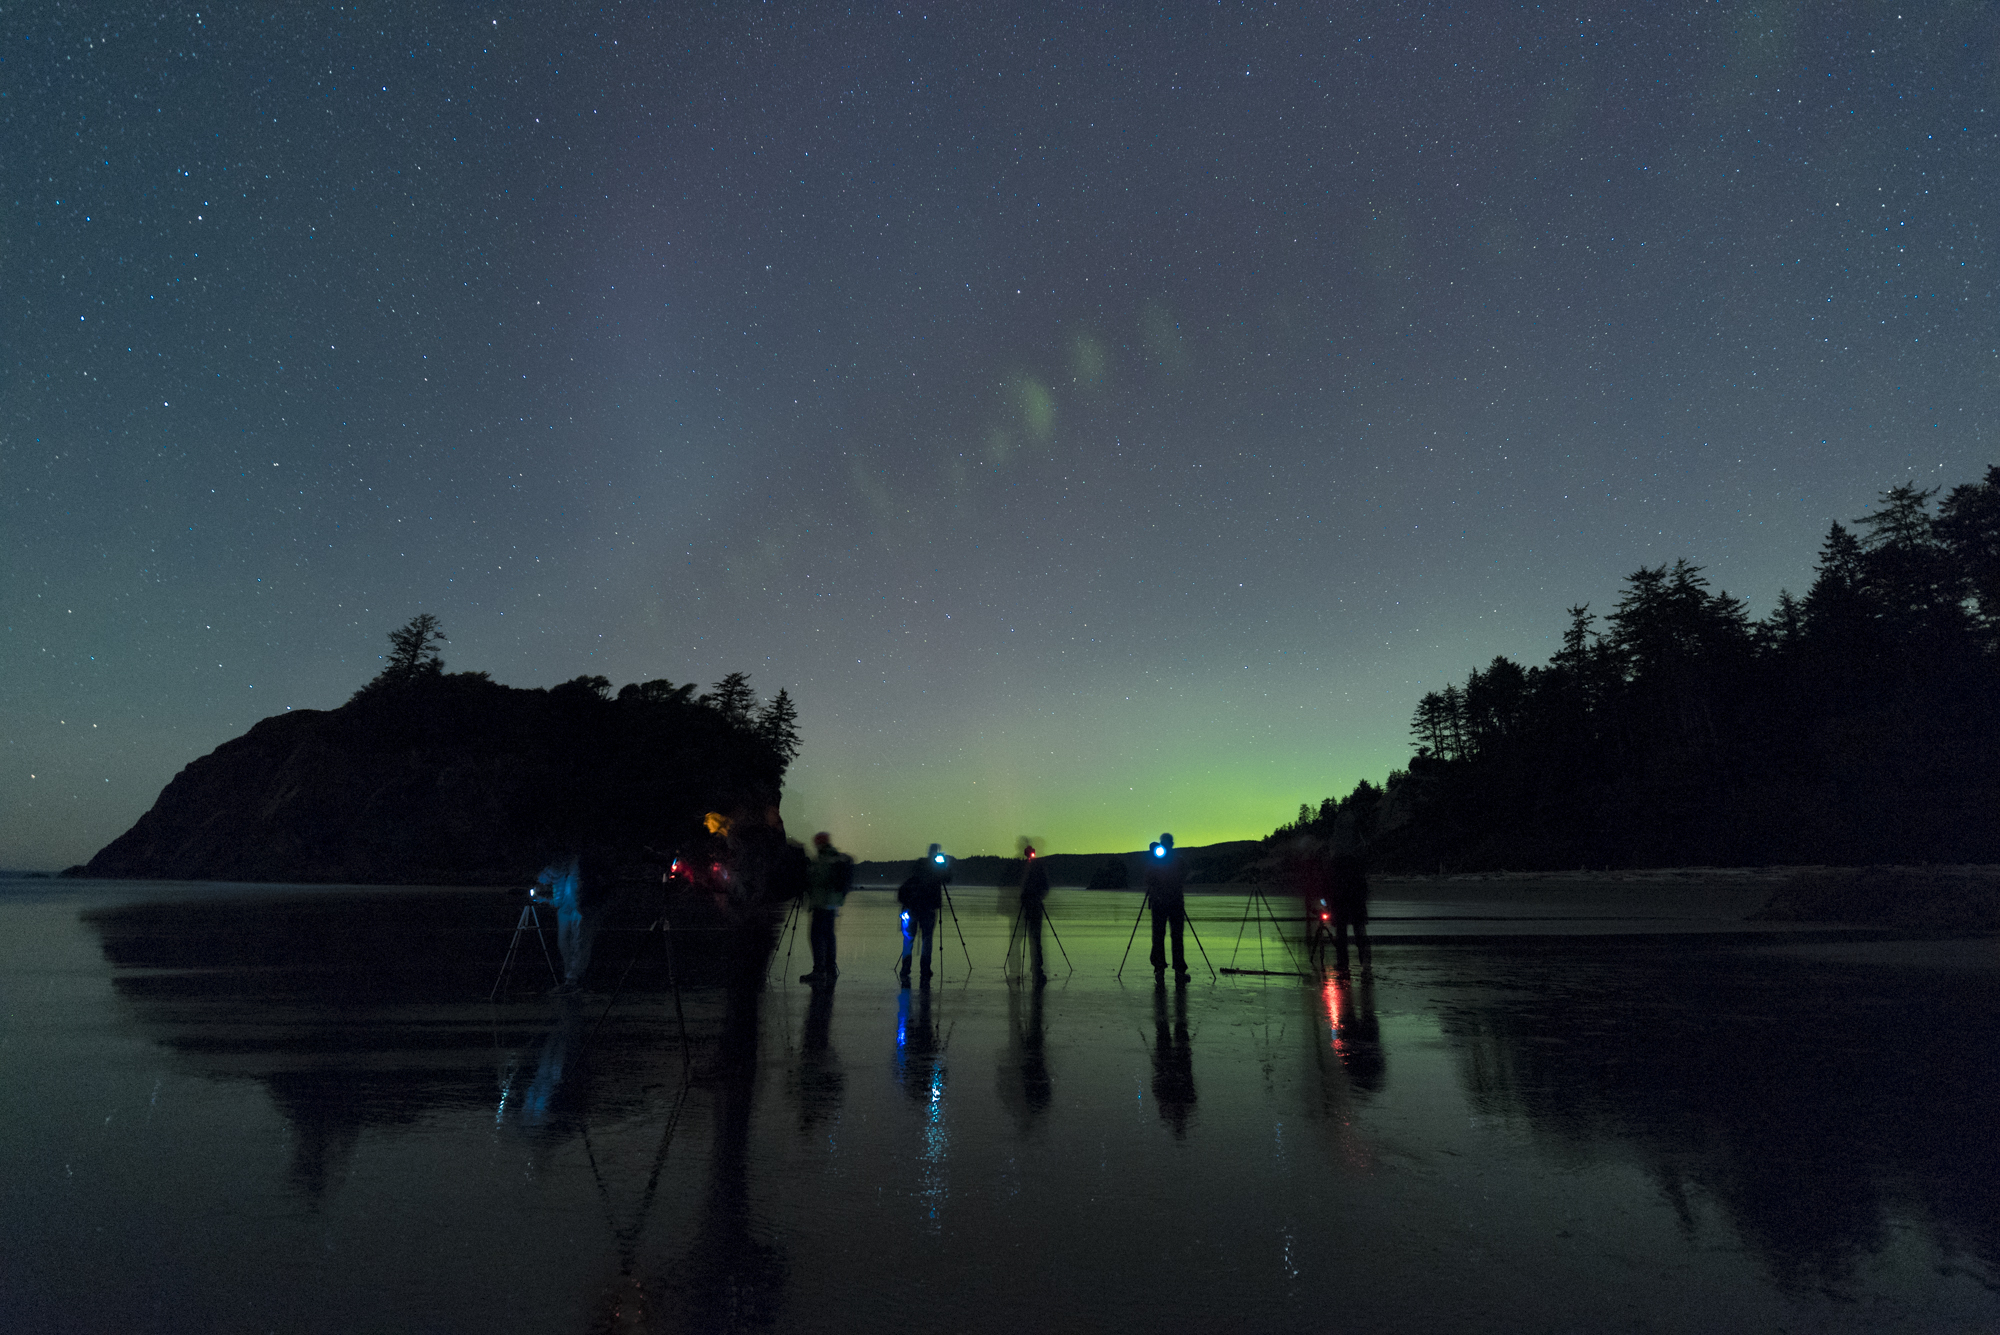
Auroras over Westfjords, Iceland. Nikon D750 with a 14mm lens. 10 seconds, f/2.8, ISO 6400. © Gabriel Biderman.

Answer:

You shouldn’t need long exposure noise reduction (LENR) for shooting auroras in cold temperatures. Your Canon friend was probably taking advantage of Auto LENR, which is a feature available only in Canon cameras.

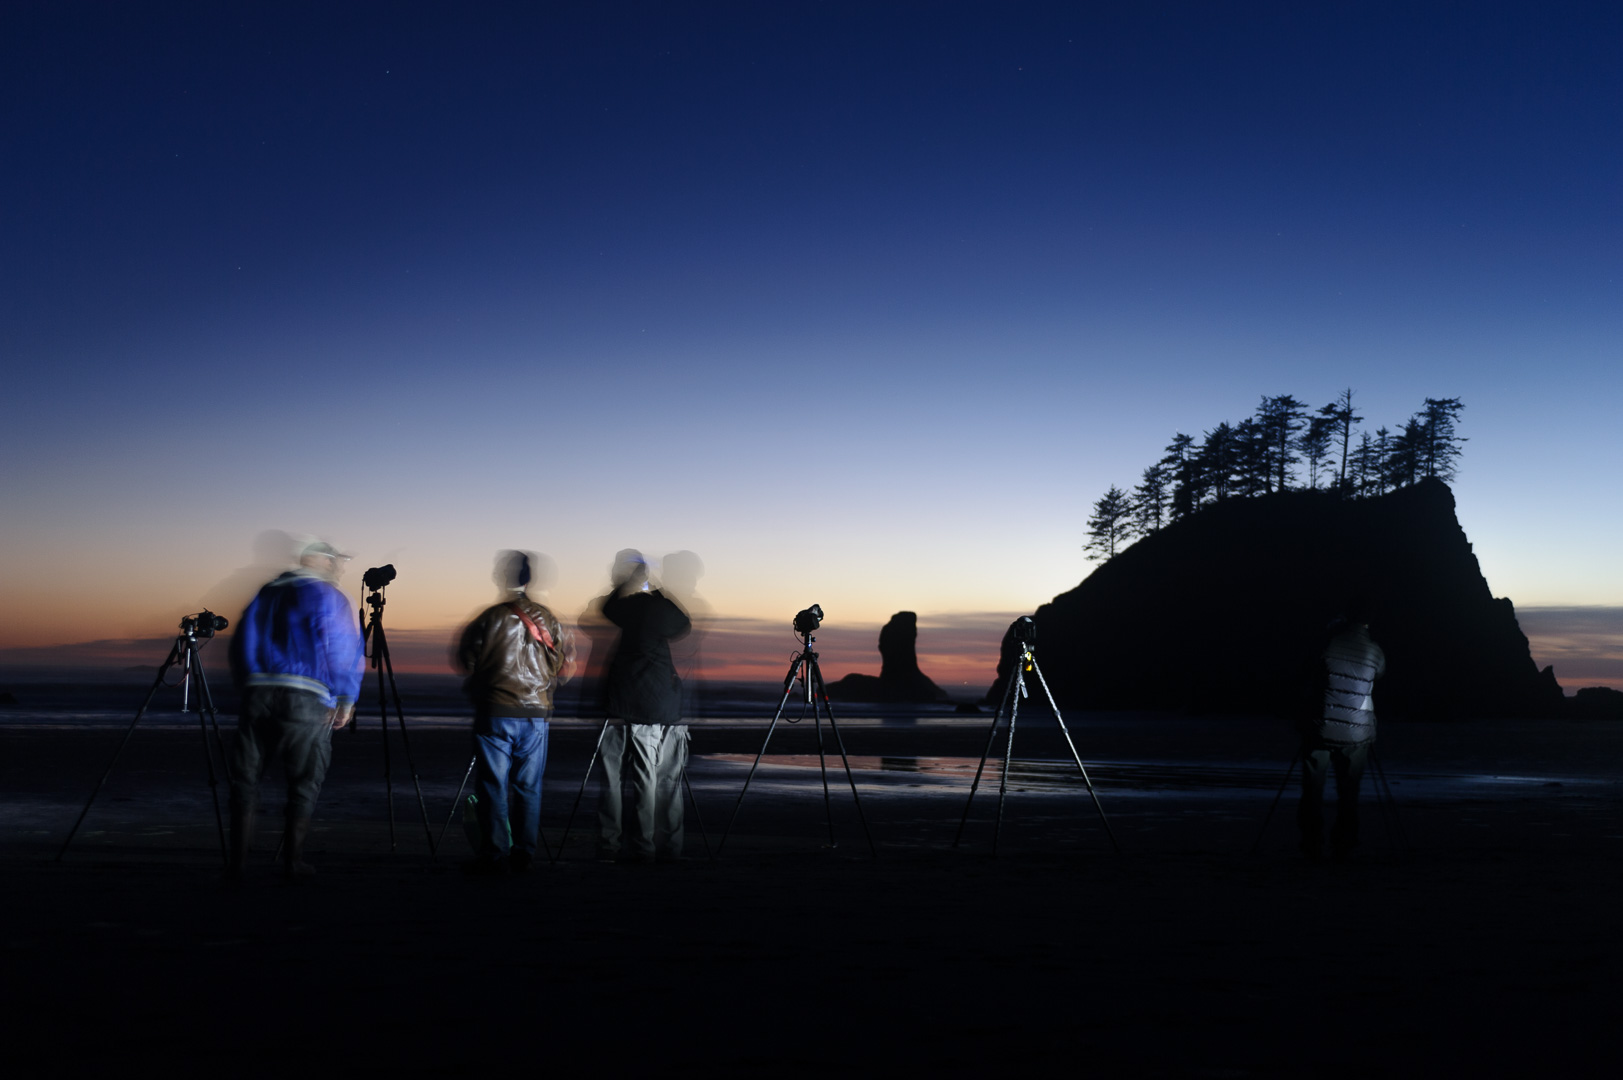
Most high-in-the-sky aurora shots should be exposed for 2 to 8 seconds, otherwise the waves of light can blur together and you lose their interesting shapes. At such short shutter speeds, I wouldn’t be concerned about long exposure noise with any digital camera made in the last 10 years—especially in the cold temperatures we’re usually shooting auroras in. In most cameras, LENR would even slow you down, because you wouldn’t be able to shoot when the noise reduction is processing between exposures. — Gabe

2. Ignoring Internal Intervalometers

Question:

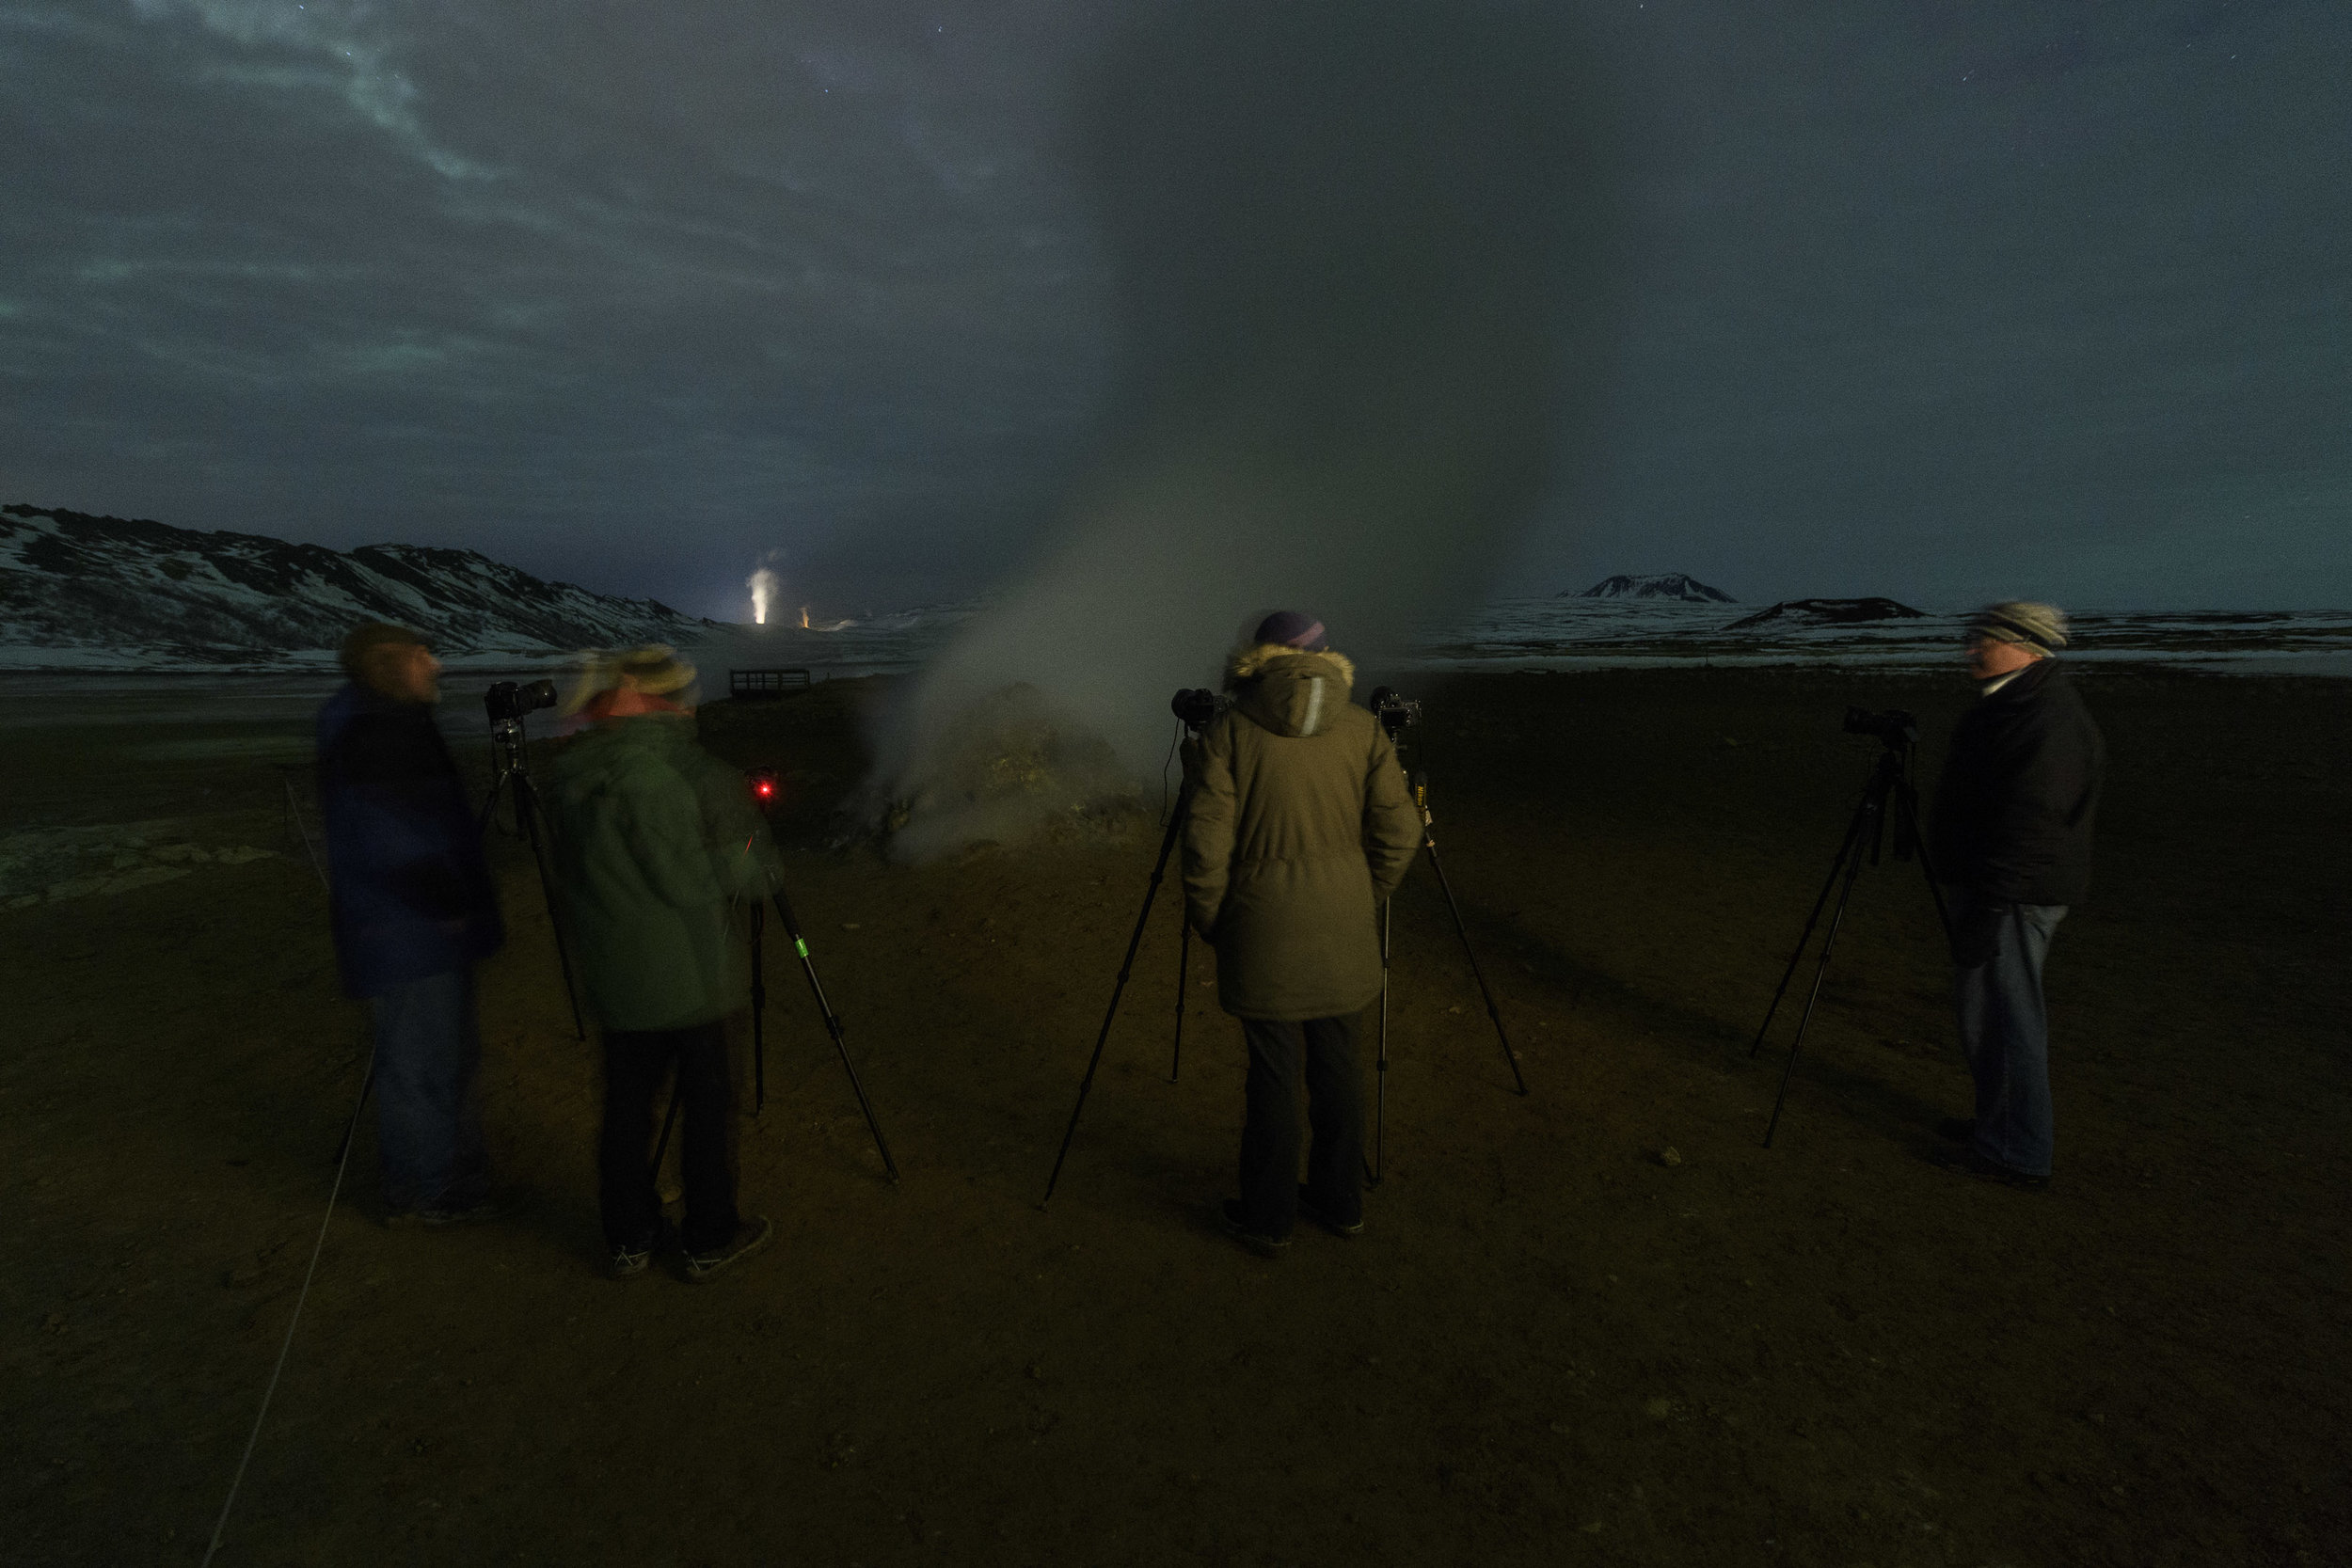
Considering that the prosumer Nikon Z cameras have fairly good built-in intervalometers, why are you still using external intervalometers? Do they add capability or is it just a convenience thing? — Mark K.

Answer:

There are two issues we have with built-in intervalometers. The first is that most—no matter which camera brand—are terribly confusing. Even after using mine regularly I still make mistakes while setting it up.

The second is that even with a built-in intervalometer, you’re limited to the maximum shutter speed of the camera, and many cameras do not provide for timed exposures longer than 30 seconds. This means you can’t shoot a series of 1-, 2- or 4-minute exposures with the built-in intervalometer, but rather need to shoot a huge stack of 30-second exposures. (The Nikon Z 6II does have the ability to shoot at 15 minutes, so that’s a help if you use that particular camera.)

Using an external intervalometer can be inconvenient, but does have some benefits. For example, being able to look at the intervalometer and see where you are in the exposure count, being able to set odd exposure times (e.g., 45 seconds or 2.5 minutes), and being able to set the number of shots at infinity. — Tim

3. Oft-Folding Stool

Question:

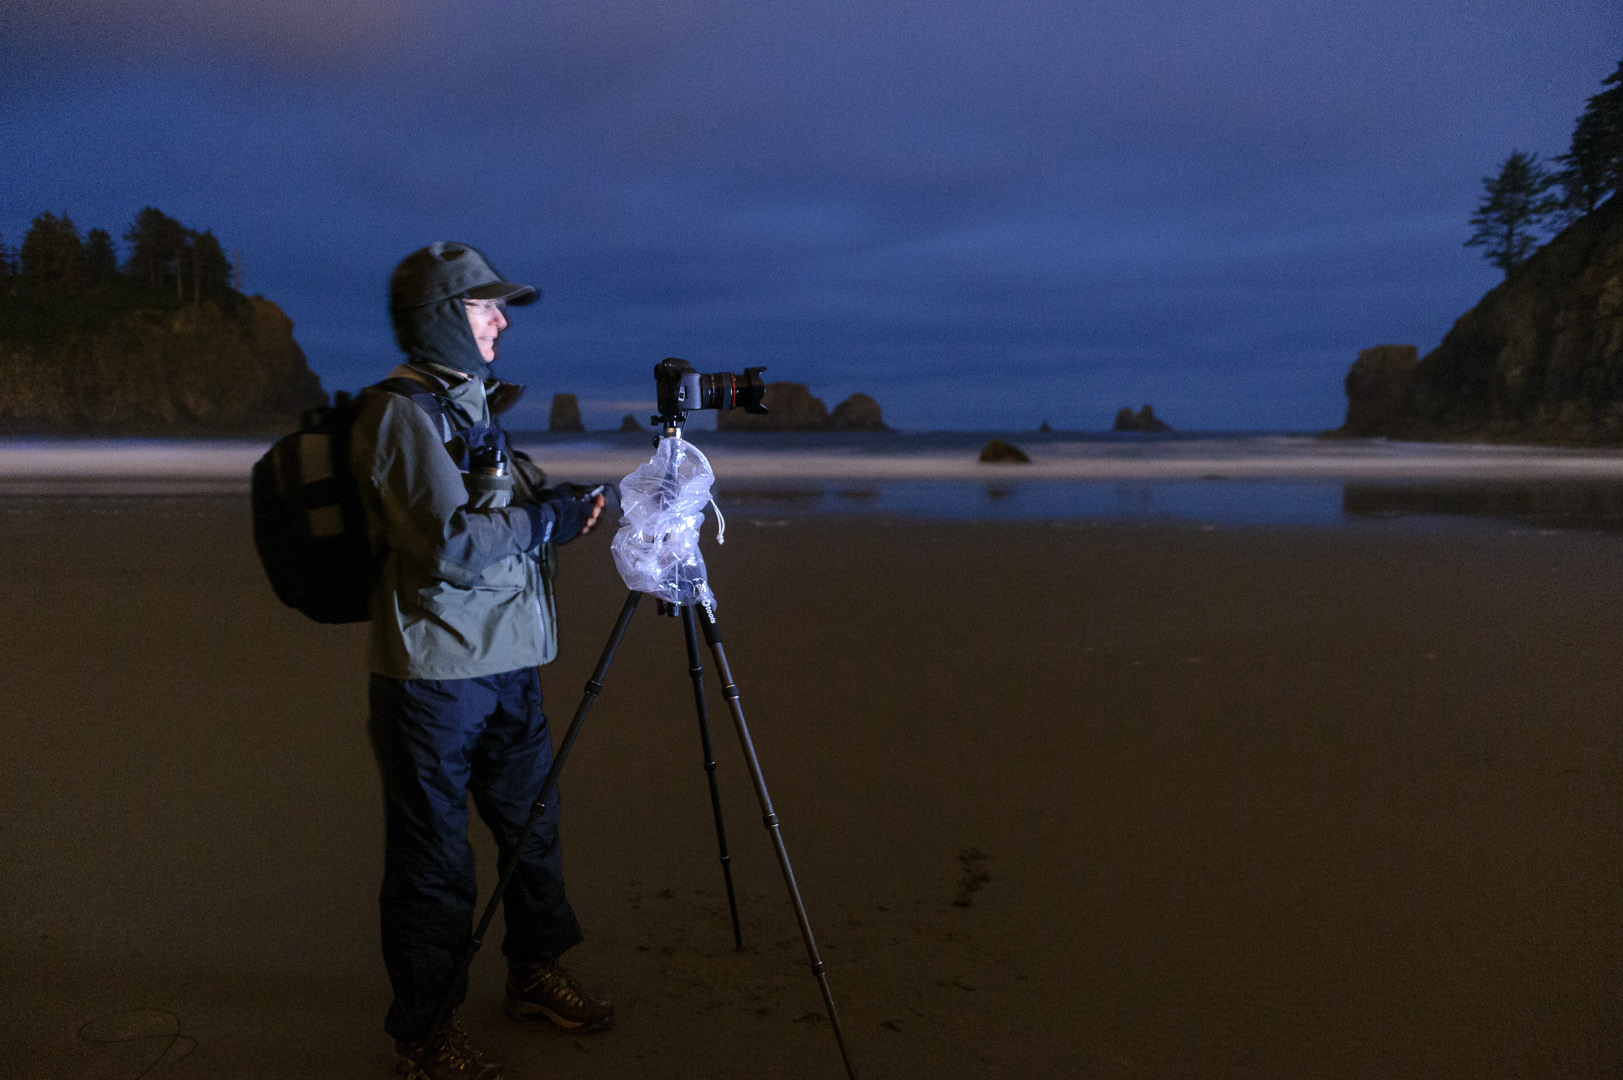
In your e-book about meteor showers you mention the Walkstool Comfort chair. I have a similar (but cheaper) stool that I use when doing macro and insect photography. I find it very comfortable, but very annoying to move. If I pick it up with one hand, holding the camera with the other hand, I can’t move the stool without it collapsing, and then it’s just about impossible to reopen and reposition one-handed. Does the Walkstool have the same issue? — Judy L.

Answer:

Yes, the Walkstool (which I use and own) does collapse when you pick it up. That’s a nice feature for many situations, but I agree that it’s not ideal for the needs you describe. — Matt

4. a Luxli Buffet

Question:

I just went to B&H Photo’s website and looked at lights. There are lots more options than I could have imagined. I remember you mentioning a Viola at one point, but I didn’t catch the other you mentioned. Which lights would you recommend? — Mark K.

Answer:

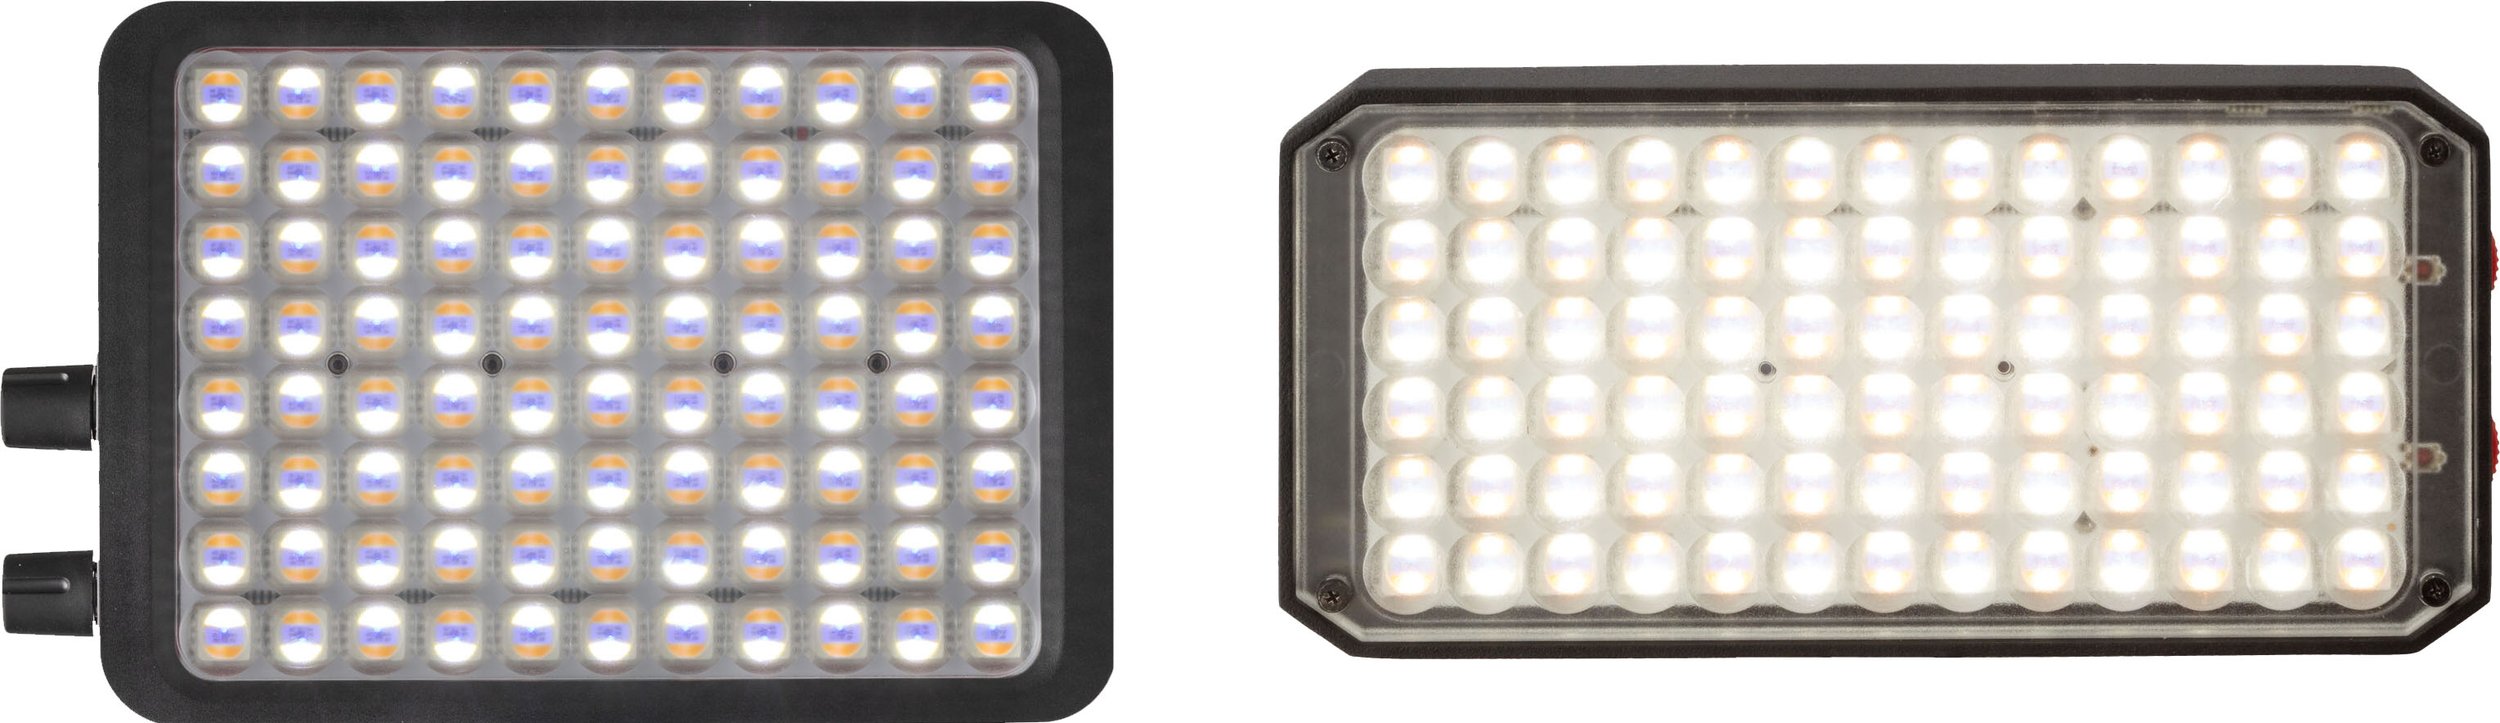
At the moment Luxli has four lights worth considering, and two that we recommend for night work.

In the former category: The Cello and Timpani models are great for what they’re great at, but we don’t suggest them for what we do—both are too bright for most dark-sky night photography.

Which brings us to our favorites: The Viola is the tool we have loved since the very first time we tested one, in early 2017. It gives you accurate control over color temperature and the ability to illuminate a scene at very low power. The relatively new Fiddle has the ability to go dimmer still (to 0.1 percent power, when using the Conductor app), something we take advantage of quite a bit. — Lance

5. Migrating Lightroom Files

Question:

I bought a new 8 TB solid state drive to use for my images and Lightroom catalog, to replace my old 1 TB drive. What’s the best way to transfer all the files and catalog to the new drive without messing up Lightroom? Do I use the Move function within Lightroom or move them in Windows Explorer? I suspect this means I will need to update my preferences in Lightroom so it knows the new location of the catalog and files. — Roy B.

Answer:

As a PC user, you’re in luck, because you can trick Lightroom into seeing your new drive as its normal location.

  1. Close Lighroom (important first step, otherwise you’ll also be copying a lock file, which will give you trouble later).

  2. Copy everything from your old hard drive to your new one.

  3. In Windows, change the drive letter of your new drive to whatever your old one was. (So if your old drive is G, change your new one to G.) You might need to unplug your old drive and reboot the computer in order to have access to the old drive letter.

  4. Open Lightroom again and the catalog should load seamlessly.

The Lightroom program should never even know the difference. It will see everything exactly as it was before, not even knowing that it’s looking at a different physical location for the data. — Chris

Chris Nicholson is a partner and workshop leader with National Parks at Night, and author of Photographing National Parks (Sidelight Books, 2015). Learn more about national parks as photography destinations, subscribe to Chris' free e-newsletter, and more at www.PhotographingNationalParks.com.

UPCOMING WORKSHOPS FROM NATIONAL PARKS AT NIGHT

Tales of Two Photos: Our Favorite Pairs of Images from 2018

For one last moment, as a group, we’re taking time to reflect on the incredible journey we embarked on in 2018. We visited even more destinations and had even more adventures than the previous year.

All in all, it’s a moment where I say, “I am so proud to be doing this with these people.” That not only includes my esteemed National Parks at Night partners and fellow educators, but also the workshop attendees who make this all worth it. Bravo and brava to all of you for inspiring us to be more and to do more every day.

And now, the hardest assignment of them all: The five of us choose only our two favorite images each from the entire year, and tell the stories behind their births.

This is our final look back—and then it’s all 2019, baby!

Gabriel Biderman

Reality is Outside the Skull. Nikon D750, Nikon 14-24mm f/2.8 lens. Light painting exposure: 80 seconds, f/2.8, ISO 1600, painted with a Coast HP5R; star exposure: eight frames at 15 seconds, f/2.8, ISO 10,000 blended in Starry Landscape Stacker.

I love revisiting locations to search for new visions. I’ve been very lucky to travel to one of our favorite dark sky parks, Joshua Tree, for each of the last two years. The first time is always the discovery phase—getting to know the place. You can do all the research prior, but nothing beats being on location, and for Joshua Tree you feel like you are in a Dr. Seuss book.

This year, for me, the park was all about the rocks. On one of our scouts during the day I had discovered this wide-open area that had tons of smaller but randomly wonderful rock formations. I found so many scenes to get lost in! When I happened upon this “skull rock” with its eye open to the southeast, I immediately went to the Night AR in PhotoPills to confirm the orientation of the formation. Indeed, I could see that on that night the core of the Milky Way could be placed inside the “eye of the skull.”

The scene reminded me of the George Orwell quote from 1984: “Reality is inside the skull.” However, in this case the breathtaking reality of the Milky Way is outside and available to all.

It was a very challenging shot because I needed to position the camera about 3 to 4 feet from the skull. Hyperfocusing wasn’t a viable solution because the foreground subject was just too close. I was shooting with my favorite rig: the Nikon D750 and 14-24mm f/2.8 lens at 14mm, low to the ground. After a few test shots it seemed like my best option was to do a focus blend—take one shot focused on the close rock formation and then a second shot with the focus on infinity to keep the stars sharp.

The light painting was added to an exposure of 80 seconds, f/2.8, ISO 1600 with two passes of a Coast HP5R flashlight from an oblique angle. I then refocused and took eight shots for the stars at 15 seconds, f/2.8, ISO 10,000. I stacked those images in Starry Landscape Stacker to get a cleaner, sharper sky with minimal star movement. That result was then blended as masked layers in Photoshop with the light-painted frame. It took a while to finesse this image, and even though I shot it eight months ago, it is an image that I’ve cherished but not shown until recently.

Ironically this image had gotten inside my skull, from original concept, to complex capture and blend, to finally being able to release it to the world. A reminder that a wonderful reality can be found just outside our mind.

Fire Island Lighthouse. Nikon D750, Irix 15mm f/2.4 lens. Multiple exposures at 1/2 second, f/2.4, ISO 6400.

When we were preparing for our New York Night Photography Summit shoot at the Fire Island lighthouse, one of the main questions was, “What if we have bad weather?” The obvious tendency is to get disheartened when you’re expecting stars and then the clouds cover the sky.

However, we love all the challenges of the night. Well, maybe not 60 mph winds mixed with rain, sleet and snow, but there are many opportunities to create unique images in inclement weather. So many that we decided to teach a class on it at the summit, and it totally prepared us for the first night!

When we arrived at Fire Island, our minds were blown—the light precipitation was capturing the light beams and extending them out to the farthest reaches of the ocean. Our previous clear nights of photographing this location were good, but this was awesome! The light beams on a clear night don’t have the added benefit of passing through particles and clouds that reflect the light back. An overcast night is actually the perfect time to shoot a lighthouse, as the beams are truly defined and the lighthouse effect is remarkably enhanced!

On this particular night, everyone who had been so bummed to be shooting in the rain and under the clouds was now elated with this new heightened experience. There wasn’t a bad angle to capture the ever-reaching beams, but this symmetrical angle ended up being my favorite. I worked together with a group of friends to light paint the foreground and to get the timing of the beams down. (I’ll be sharing a more in-depth capture-and-post breakdown of this image in a “How I Got the Shot” blog this winter, so stay tuned.)

In the end, the “bad” conditions were a boon. I’m now excited to go shoot in the fog, snow and overcast conditions more than ever. I hope this inspires you too!

Lance Keimig

Raufarhöfn, Arctic Henge. Nikon D750, Nikon 24-120mm f/4 lens. Lit by four Luxli Viola lights controlled remotely via the Luxli Conductor phone app. 30 seconds, f/4.5, ISO 5000.

For the second year in a row, one of my favorite photographs is from Iceland. Last year’s was a simple image of a familiar place, and what made me choose it was how it transported me back to Djupavik, one of my favorite places on the planet.

This year’s image is a different story altogether. It was made in a place I had never been before, and one that required determination, spontaneity and flexibility on the part of the group I was traveling with, along with a significant amount of expectation management. If you read our 2018 first-half workshop wrap-up, you may remember that our plans in Iceland were derailed by some truly awful weather, and that the group came together with clarity and force to reorganize and change our itinerary midway through the trip.

That change of plans made for some serious logistical hoop-jumping, but in the end it was truly worth the effort as we saw some wonderful aurora, we mostly avoided the horrid weather, and when we did encounter some, we were able to work with it.

Once we had changed course and wandered into uncharted territory in the north of Iceland, we came across images of Arctic Henge in the far northeast of the country. We were intrigued.

The aurora forecast called for a level of 5 Kp, meaning a very high probability of seeing the northern lights. We were starting from 4-plus hours away, but guided by the seemingly boundless spirit of our group, we decided to make the drive and see what this henge thing was all about. Through hour after hour of lonely road, and mile after mile of increasingly overcast skies, our confidence was wavering. But the weather forecast insisted we would have clear skies, so we doggedly soldiered on, despite what our eyes (and windshield wipers) were telling us.

We arrived at the beginning of twilight to find an enormous but only partially finished stone henge. And it was moist. Very moist. The tiny nearby village was shuttered—there were no open shops, hotels or (most importantly for some) bathrooms.

Moreover, there was no clear sky. So we made do, and adjusted our expectations. Out came the Luxli lights, and we made a few images, many of them looking more like a Las Vegas spectacle than a pagan ritual site. As the natural light faded and the sodium vapor lights from the village a few miles away began to lend their orangeness into our images, a magical transformation occurred. The spaceship appeared in the sky above the henge, and a lone alien life form was transported to the surface, conveniently positioned in front of our cameras.

Nah, I’m kidding. Chris walked into the scene and positioned himself in front of the light from the nearest Luxli, and history was made.

Marshall Point Lighthouse, Port Clyde, Maine. Nikon D750, Tamron 15-30mm f/2.8 lens at 15mm. 110 seconds, f/4, ISO 400 for the foreground, plus a second exposure at 20 seconds, f/4, ISO 100 for the lighthouse. Light painted with a Luxli Viola at about 20 percent brightness, swept across the foreground to illuminate the dark rock.

Just like the Arctic Henge image, this one required a bit of luck––being in the right place at the right time. In the opposite of the way that the world conspired against our Iceland group to create a perfect storm of challenges, this night at Marshall Point Lighthouse in Maine presented a perfect storm of photographic opportunities.

I was at the lighthouse with a class from Maine Media Workshops. It’s a place I always bring my classes to when I teach in Maine. Marshall Point is a fixed beam lighthouse, meaning that the light is always on. Not flashing, pulsing, rotating or anything else. It just shines—and oh, does it shine.

A couple of years ago the old incandescent light was replaced with a far brighter and cooler LED light that makes it more difficult to photograph. In order to get a good shot of the Lighthouse without majorly blown highlights, one has to get almost directly below the tower, which obscures the light source from the camera. This is a precarious activity, as it requires crossing a rocky beach that’s covered with slimy, seaweed-encrusted round stones. You have to be there at low tide, and you have to be sure-footed.

Luckily for us, conditions were perfect. The tide was receding, and there was enough moisture in the air to show beams of light around the lighthouse, exaggerated by the shadows of the lighthouse window frames. There was a small tide pool in the foreground where I was able to position myself in such a way to get the lantern room reflected in the water, the tower with its glorious beams, and—the icing on this maritime cake—a lightning storm in the distance seen below the bridge that leads from the shore to the lighthouse. Boom!

I did have to make a second, shorter exposure for the light to complement the longer exposure. The latter allowed enough time to light paint the dark foreground stones, and to capture the rest of the scene and a few bolts of lightning. But the image came together quickly and easily once I found the right spot.

Tim Cooper

Serpent—Borrego Springs. Nikon D4s, 14-24mm f/2.8 lens set at 24mm. Three exposures at 15 seconds, f/4, ISO 6400.

Two years ago, I had never heard of Borrego Springs, California, or of Ricardo Breceda, or of the art he has created. Even after I heard about all of this, I was not prepared for the scope of beauty and sheer volume of the installation. So, I thank the intrepid explorers at Atlas Obscura and our NPAN partner Gabriel Biderman for introducing me to this truly unique collaboration of earth, man and sky.

I was lucky enough to visit the area with 14 curious photographers during our 2018 Ambassador Series workshop with Atlas Obscura titled Dark Skies, Desert Beasts. With over 130 free-standing metal sculptures in the desert surrounding Borrego Springs, it was hard to choose a favorite. But I did really like the serpent.

I chose this as one my favorites for the year for several reasons. The first is that the photograph was a collaborative effort on the part of the workshop participants and myself. Taking turns as director of the shoot and working together on light painting is a great way to learn and use the many hands to help bring a vision to life.

The second reason is the serendipity of the cloud mimicking “smoke” coming from the serpent’s mouth. Sometimes you just get really lucky. I could go back there a hundred times and never see it like this again.

The last reason is the serpent itself. As a lover of light painting, I’m always looking for interesting subjects to illuminate against the night sky. I couldn’t have asked for a more detailed, textured and beautifully sculpted subject. Couple that with the clear dark skies of the desert, and you’ve got a recipe for night of fun!

(FYI, we just announced new dates for another Dark Skies, Desert Beasts workshop with Atlas in 2019.)

Star Trails over Golden Gate Bridge. Fuji X-T2, Fuji XF 10-24mm f/4 lens set at 10mm. Sixty exposures, each 30 seconds, f/4, ISO 200.

San Francisco is set in one of most beautiful locations in this country. The headlands, the bay, the shoreline and the city are all just simply gorgeous. I also really, really like The Bridge. I can’t say why, precisely. Perhaps it’s the engineering. Maybe it's the color. Or most likely a combination of those things plus its location. Whatever the reasons, I can’t go to San Francisco without visiting the headlands and making images of the bridge as the sun goes down.

I can’t count how many times I’ve stood in this spot and contemplated the view as I made image after image. Most of the time, however, I was there only for dusk and blue hour. Rarely did I get a chance to stay well into the night, and when I did the skies were not conducive to star trails.

This night proved to be different. All of the elements came together for a star trail shot. The trick here was to capture the stars without overexposing the city and the bridge. When you give enough exposure to reveal the stars, the bridge and city lights completely blow out. If you limit the exposure to make the city look good, the stars are barely visible. To address this dichotomy, my plan was to break up the exposures into separate ones for the bridge and city lights and ones for the sky and the star stack.

After focusing, I took several test shots and settled on a focal length, composition and initial exposure. I found that using an ISO of 200 for 30 seconds at f/4 produced an exposure that made the stars visible, but overexposed the bridge. A 15-second exposure at the same ISO and aperture retained highlight detail in the bridge and city. I made these two images and proceeded to the next step.

I set the intervalometer on my Fuji X-T2 to shoot 60 images at 30 seconds with a 1-second delay between frames. Once I plunged the shutter, I sat back for half an hour to enjoy the view.

When I returned to the computer, I opened all 60 frames in Photoshop, selected all of the layers and then chose the Lighten blend mode to create the star trails. My next step was to flatten the file to minimize its footprint on the hard drive. I then opened the 15-second exposure and copied it onto a layer in my first file. This darker image allowed me to mask in the properly exposed city lights and bridge while keeping the lighter sky with the stars.

Shooting star trails near cities takes a little planning and some post-processing work, but it’s also a ton of fun. I can’t wait to return to San Francisco this year with Gabriel Biderman to run our Golden Gate National Recreation Area & San Francisco Workshop in November!

Chris Nicholson

Boathouse near Campbeltown, Scotland. Nikon D5, Nikon 24-70mm f/2.8 lens. Light painted with a Luxli Viola. 30 seconds, f/4, ISO 2000.

I’m an ardent believer in the idea that a good photograph should not be just of something, but also about something. And this image is definitely about something important to me.

When I was four years old, I lived in Scotland for about half a year because the U.S. Navy stationed my father at the Royal Air Force Machrihanish base at the tip of the Kintyre peninsula. We lived in nearby Campbeltown, and I still carry a fair number of memories from the experience.

So when National Parks at Night began scheduling a night photography tour of The Hebrides for the spring of 2018, I knew for sure that I wanted to work it. I hadn’t been to Scotland since my family left in 1976, and this was an excellent chance to revisit one of my childhood haunts. So it was that Lance and I jumped over the pond a few days before our tour began and drove up to the Kintyre peninsula.

The couple of days I got to spend in Campbeltown were incredible. I found our old apartment on Queen Street, traced the steps I used to make to the nearby beach, and drove downtown past my old playground and along the fishing port. We stayed overnight at an old captain’s house we found on Airbnb, and that’s where we based our night shoot.

I focused all my attention on this old boathouse. I set up the camera on a jetty, and walked back onto the land atop some rocks to light paint the structure and water with a Luxli Viola. My goal was to mimic the warm tones of the light with the warm twilight sky, and to illuminate the crashing waves just enough to capture some motion and reveal some detail.

I liked the resulting photograph enough so that it truly is one of my favorites of 2018. I like the light, the color, the composition. But the most important part of the image for me is the experience of those two days: reconnecting with memories of my mom, who I talked to several times while strolling the streets, and with memories of my dad, who passed in 2006, and with memories of who I was 42 years ago as a little boy in a faraway land.

Moonlight in Santa Elena Canyon, Big Bend National Park. Nikon D850, Nikon 14-24mm f/2.8 lens at 17mm. 20 seconds, f/2.8, ISO 5000.

If you’ve ever been to Big Bend National Park and photographed Santa Elena Canyon, you know that the light at this amazing location can work well at both ends of the day. You can shoot in the morning when the sunrise light hits the face of the canyon, or you can shoot at the end of the day when the setting sun bounces into the canyon and reflects off the walls. The latter is a more challenging exposure, but often results in more satisfying creative options.

So when I saw in PhotoPills that the moon would be setting behind the canyon during my winter 2018 trip to the park, I had the idea to use that same late-day strategy for shooting there at night—having no idea if it would work well or not.

Well, it worked splendidly. The night was perfectly clear, which allowed for a spectacularly starry sky, and the setting moon did exactly what I was hoping: It bounced into the canyon, lighting up the 1,500-foot cliff face that flanks the Rio Grande.

Shooting from a low angle with a wide lens portrayed the magnitude of Santa Elena’s size. It also—for me, anyway—inspired another adventure. Looking at the moonlight spilling into the canyon, I could imagine the thrill of canoeing the river at night. Next time, perhaps?

Matt Hill

Zig When They Zag. Nikon D500, Nikon 50mm f/1.4G lens. 30 seconds, f/2, ISO 125.

My two favorite images of 2018 reflect my developing tastes in composition and motion. And they both happened at Rocky Mountain National Park.

After hiking up the Tundra Communities Trail, I faced west (to catch my breath). Whilst helping workshop attendees, I saw the switchback leading toward the visitor center in the distance, and my eyes were drawn to the car traffic there.

I popped on my Nikon 50mm f/1.4G lens for a nice composition of thirds that allowed me to pit the energy of the cars passing to and fro against the stars angled almost perpendicular against this zigzag of light. After shooting four frames at 30 seconds each, I knew I had enough car trails to make the stack and moved on to another breathless scene. You know, the air is really thin up there. ;-)

Moonset Over Tyndall Gorge. Nikon D850, Sigma 35mm f/1.4 Art lens. Ten frames at 10 seconds, f/5, ISO 6400.

The second Rocky Mountain image was from the hike down from Emerald Lake during our add-on adventure a few nights later. We got to this spot just in time to see the setting moon scraping across this vast valley and mountain range.

After fiddling with my circular polarizer experiment for a bit, I saw that the moon would soon set in the trees to my right, so I hustled to swap in my Sigma 35mm f/1.4 Art lens, go vertical, level out the Acratech GP-ss head on the leveling base and throw on the nodal rail.

This is a 10-frame pano stitch, with each frame shot at 10 seconds, f/5, ISO 6400, then assembled in Lightroom Classic CC. At the time, I did not see the crazy cool things the clouds were doing. I was, after all, a bit exhausted from the 650-foot-in-1.5-mile ascent at altitude while wearing “the kitchen sink” (my Shimoda 60L backpack full o’ gear). During the edit, I was simply astounded by the soft yet kinetic cloud movements and so darn happy that I’d timed it just right to get the moonset in the tree line.

Your Turn!

Now that you’ve seen our favorite photos from 2018, we’d like to see yours! Join us in the fun and post your favorite night photography image from the past year in the comments section below or on our Facebook page, and tell us a little about it. And if you’re on Instagram, give us a follow. We will soon be announcing a contest of your best night shots of 2018!

Next, start 2019 strong. Put on your mittens (or shorts if you’re in the Southern Hemisphere) and get shooting. Let’s make 2019 the biggest year for night photography yet.

With stars in our eyes and gratitude in our hearts, thank you from the entire National Parks at Night team. Hugs.

Matt Hill is a partner and workshop leader with National Parks at Night. See more about his photography, art, workshops and writing at MattHillArt.com. Follow Matt on Twitter Instagram Facebook.

UPCOMING WORKSHOPS FROM NATIONAL PARKS AT NIGHT

So Far, So Awesome! Recapping Our First Workshops of 2018

It’s hard to believe that the year is almost half over. Our workshop season, however, is just kicking into high gear. Matt and Gabe are leading a group in Capitol Reef National Park, and Chris and I are about to do the same in Redwood National and State Parks. But this week’s post is about celebrating the amazing experiences we had with the attendees of our first six workshops and tours of 2018.

We started the year by visiting one of the lesser-known national parks, Biscayne in Florida, and in the spring we offered our very first night portraiture workshop, in Catskill, New York. For 2018 we added a second international tour, and notched both Iceland and Scotland in our passports before the end of spring. We also partnered with two of our favorite institutions—Rocky Mountain School of Photography and Atlas Obscura—to create two opportunities to seize the night in California.

We’re also working hard on a new series of workshops and programs for 2019, to be announced later this summer. (Want to be among the first to know about them? Be sure you’re on our email list!)

It may sound like we’re tooting our own horn, but what all of this really means is that (as Matt proclaimed in a lecture earlier this year) this is the golden age of night photography. It is not because we are teaching a lot of workshops, but because so many of you are out there photographing at night and continuing to produce so many amazing images.

As we move on with the second half of 2018, let’s see where the first half brought us …

Biscayne National Park

January 29-February 3
By Gabriel Biderman

They said it couldn’t be done—a night photography workshop was impossible at a location that’s 90 percent water. Well, here at National Parks at Night, we love a good challenge and we made the most of the 10 percent of land in Biscayne National Park!

The first night of the workshop was the day before the second blue supermoon of 2018, and we came prepared. Our friends at Nikon shipped us an 800mm lens with a 1.25X teleconverter, which we matched to the D500 with its 1.5X-crop APS-C sensor. With that, we practically lassoed the moon. That “kit” was set up on a Gitzo tripod and students could stick their memory card in the camera and track and capture the moon. The rest of the first night was spent getting our night feet wet with the many subjects to photograph around the Dante Fascall Visitor Center, the only mainland section of the park.

The next two nights we were transported by charter boat to Elliot and Boca Chita keys. Elliott provided a supermoon moonrise, mangroves, dock and other subjects. But Boca Chita is definitely the crown jewel of the location. We literally “lit up” the ornamental Honeywell lighthouse, photographed the Miami skyline, light painted the cutest little chapel, and explored the many views along this picturesque curved key.

We also got to spend an evening at Bill Baggs Cape Florida State Park, which offered spectacular views of off-shore Stilstsville at sunset, which is in the northernmost part of Biscayne National Park. Baggs is also home of the oldest standing structure in greater Miami—the Cape Florida Light, which we were able to wrap lots of star trails around as well as climb up and sing an opera song or two!

Our last night was even more special, as we were able to gain access to Stiltsville, a grouping of wooden stilt houses that are 1 mile from Miami.  The structures are still recovering/rebuilding from Hurricane Irma, but we were able to watch a spectacular moonrise over Leshaw House as well as shoot a few other unique “floating" houses from the dreamlike location of the Baldwin-Sessions house.

Tim and I have taught many workshops, but this was definitely one to remember—from being transported to and from the islands by boat at night, to just the amazing camaraderie that we had with all the students and people who helped make this adventure happen. We want to give a big thank you to Biscayne National Park, Biscayne National Park Institute, Stiltsville Trust and Bill Baggs Cape Florida State Park for helping us put together this amazing experience.

Iceland South Coast

March 12-20
By Lance Keimig

Our first international tour of 2018 was remarkable for two things: some really bad weather, and a truly extraordinary group of travelers.

After an outstanding exploration of the remote Westfjords of Iceland in the late summer of 2017, we scheduled our second Iceland adventure to the more frequently visited south coast. This is where most visitors to Iceland end up, and for good reason. Some of the most spectacular waterfalls, along with the famous glacial lagoons and the ice beach can be found there.

We arrived and spent our first day and night in Reykjavik, and had an amazing meal at the Fish Market with many courses of truly delicious and innovatively prepared seafood dishes. The next day we headed south under sunny skies and spent some time with a friendly herd of Icelandic horses before making our way to Vik.

Alas, then the weather took a turn for the worse, with rain and ferocious winds. Our intrepid group made the best of it and we photographed when and where we could, and we even had an impromptu light painting lesson in the hotel meeting room when it was too wet to go out and photograph.

The nasty weather continued the next day, and the forecast was only getting worse––100 percent chance of nothing but cold, wind and rain for the entire remainder of our trip. Iceland can be like that sometimes, and you do what you can to make the best of it.

I’d never seen it quite that bad before, but we had a hardy group of outside-the-box thinkers who found a solution and presented it to Chris and I. The next thing we knew, we had changed our entire itinerary and were headed to the north coast, where the forecast was not only for clear skies, but also for lots of aurora borealis. Yup, we did it! The entire group agreed, and we changed our plans and our fortunes, and we found some great new locations and made a lot of great photographs.

I won’t ever forget how this group collectively transformed a gloomy experience into a very memorable trip. Don’t be surprised if you see a National Parks at Night trip to North Iceland show up on our website in the next few years. Maybe the weather on that one will lead us back to the south, and we can finish what we started.

Joshua Tree at Night

April 15-20
By Lance Keimig

Our friends at the Rocky Mountain School of Photography invited us to lead another workshop for them in 2018, and Gabe and I did that at Joshua Tree National Park in mid-April.

This was our first chance at the Milky Way for the year, and we planned the workshop to begin at the new moon and progress to nearly the first quarter. Conditions were perfect––cool nights, clear skies and a largely novice group of night photography converts. We had a few welcome NPAN alumni from Zion, Great Sand Dunes and Cape Cod to help lead the newbies on our dessert adventure.

Arch Rock, Hidden Valley and of course Key’s Ranch were highlight locations again this year, and we were happy to be working with the Desert Institute again as our park liaison. After our RMSP workshop, we led a second, one-night outing for the Desert Institute.

In addition to some truly stellar images, one of the memorable aspects of this workshop is that our group was not hesitant to stay out late and wait for the Milky Way to rise over the horizon—which, depending on the location, was not until 1 a.m. or later. Way to go, gang!

Catskills Night Portraiture

April 27-29 (Spring Session)
By Matt Hill

Students, model, Matt and Mabel in our headquarters backyard shortly after a massive thunderstorm.

In April, I hosted our very first night portraiture workshop. It was also the inaugural workshop in the newly renovated teaching space at our headquarters in the village of Catskill, New York.

This workshop was very intimate, catered farm-to-table by a local chef and designed for advanced students who want to make long exposure portraits of people at night.

From Friday afternoon until Sunday afternoon, we worked on lighting, posing and storytelling. Our wonderful local model, Galaexius Quasar, worked with us in studio and on location in the area to bring to life fantastic ideas.

We had challenging weather, but on the first night, that was a real boon. The clouds and misty rain added a moodiness that complemented the scene.

Nikon D750 with a Nikon 105mm f/1.4 lens. 15 seconds, f/4, ISO 200.

The second night brought a very energetic thunderstorm. We decided to stay dry and warm and proceeded to build long exposure portraits in the studio until the weather cleared. After that, we went in the backyard, popped a couple of smoke grenades and made some more magic.

By spending time working on individual skills, both students really leveled up. I’m so happy we did it, and I’m looking forward to the six-person workshop in the fall that I am co-teaching with Tim Cooper.

Dark Skies, Desert Beasts: Borrego Springs, California

May 10-13
By Gabriel Biderman

Dark Skies and Desert Beasts was the official title of our first Ambassador Series workshop with Atlas Obscura. It was held in the dark sky community of Borrego Springs, California, and our focus was the 130-plus surreal sculptures of Ricardo Breceda that created an amazing “Night Sky Museum” with the Milky Way as our backdrop.

For those who are unfamiliar with Atlas Obscura, they have been the go-to online guide to the strange and unusual all over the world for the last 10 years. It was an honor to work with their team, to introduce them to the beauty of the night and to create a unique experience.

Borrego Springs is part of the Sonoran Desert and has been an oasis in the valley for many years—though now more people seek its dark skies than ever before. We enhanced the California vibes even more by staying at an Old West and vintage trailer themed resort!

We spent our afternoons in class, reviewing students’ work and going over the many techniques of night photography. We explored a different section of the Galleta Meadows each night. The variety of sculptures—from the iconic “dragon” serpent that cuts through the main road to the spectacular standoff between the grasshopper and scorpion—were just amazing to aim our lenses toward. But there were so many other beasts to play with too, from dinosaurs and wild horses, to sabertooth tigers, camels, sloths and jeeps driving into the stars!

We scouted each area during the day, and we dropped Google pins and took test shots for sculptures that inspired us so that we could be more productive once the sun set.

Our group of students were amazing and worked so well together, each taking a crack at light painting to reinterpret these pieces of art into something they could call their own.

It was definitely a challenging workshop, operating under little to no moon and maintaining focus on some fairly close subject matter while keeping those background stars sharp!

However, both Tim and I were incredibly impressed with the work that was created and the camaraderie that was forged with all! We had so much fun that we are already planning on a return to Borrego and more collaborations with Atlas. Stay tuned!

Scotland: The Hebrides

May 13-23
By Lance Keimig

Our second international trip of 2018 was to the Isle of Skye, and the Hebridean Isles of Lewis and Harris.

Skye has some of the best landscapes in Europe, and Lewis and Harris are rich in Neolithic archeology. I had been there the year before in March, and things were pretty quiet as you might expect at that time of year. It was immediately apparent that like Iceland, Scotland has seen a major increase in tourism in the last couple of years, and no place in Scotland more than Skye. It was interesting to note that unlike in Iceland, where it seems that much if not most of the tourism centers around photography, that wasn’t the case in Scotland. Some of the locations I’d been visiting for years, often having them to myself, were now absolutely swarming with tourists (and the busy season was only just beginning).

Fortunately, there are still plenty of places to appreciate the spectacular landscapes and appreciate the culture and history of Scotland if you’re willing to come back after dark! That’s what we did!

We had five full days and nights at the wonderful Uig Lodge on the Isle of Lewis. We had some good weather, some mediocre weather, a smashed iPhone (mine) and a real beater of a minibus (thanks, Sixt, but we’ll look elsewhere next time). Again NPAN travelers showed their mettle and faced every challenge head-on to come home with new friends, good memories and great images.

Chris and I took a couple of days before the tour to explore an area in the southwest of Scotland, and he even found the exact apartment in Campbeltown where he had lived for six months as a child while his dad was stationed at the U.S. naval station nearby. National Parks at Night will be leading more tours to some of the other Scottish islands in the future, so stay tuned!

Partner Participation

When we form brand partnerships, we look for the relationship to benefit our workshop attendees too. Nikon, Coast Portland, B&H Photo, Peak Design, Light Painting Brushes, X-Rite, BenQ, Bay Photo, Irix Lenses, Valleret, PhotoPills and Luxli all offered loaner gear, discounts, gifts and other perks at various locations. As always, our gratitude is unending.

Looking Forward

As you can see, it’s been a pretty exciting year so far, with more to come. As of June 22, all of our remaining 2018 workshops are full with the exception of our second week at Glacier National Park led by Tim and myself. You can still sign up for the waitlist for any workshop at no cost and with no risk. If a spot opens up, we’ll invite you to apply.

We’ll be announcing our 2019 workshops and tours in August, first to our esteemed alumni, then to our email subscribers, and then to the general public. We hope to see you out there under the Milky Way!

Lance Keimig is a partner and workshop leader with National Parks at Night. He has been photographing at night for 30 years, and is the author of Night Photography and Light Painting: Finding Your Way in the Dark (Focal Press, 2015). Learn more about his images and workshops at www.thenightskye.com.

UPCOMING WORKSHOPS FROM NATIONAL PARKS AT NIGHT

It's a Wrap! Recapping The Second Half of Our Second Year

Earlier this year we recapped our first three workshops of 2017. Now that the year is nearly over, after finishing our last workshop of the fall just a few weeks ago, we run down how the rest of itinerary went.

Rounding out our second year of workshops was a procession of amazing locations, students and celestial events, including the total solar eclipse, an impregnable fort in the ocean, deep canyons and dark skies, ancient Puebloan ruins, eye-popping aurora borealis, and alien desert landscapes.

Enjoy this review of the highlights. …

Natural Bridges and Hovenweep national monuments

June 21-25, 2017

By Gabriel Biderman

Each year we have partnered with the Rocky Mountain School of Photography to offer a night photography workshop. This year we were very excited to teach for them at one of the darkest sky locations in the United States: Utah’s Natural Bridges National Monument and Hovenweep National Monument.

This was a very challenging workshop, but as with any challenge, if you succeed then it is incredibly rewarding. The biggest hurdle was part of the beauty—both locations are very remote. We based our workshop in the town of Bluff, which was one hour from Natural Bridges and about 50 minutes from Hovenweep. Combine that with a summer Milky Way focus, and we weren’t starting to shoot until 9:30 to 10 p.m. and weren’t calling last shot until 2 or 3 a.m. To everyone’s credit, we were thrilled with each location and got home safely each night!

The first two nights we divided the class in two and had them either climb the 1-mile descent down the slippery rocks and ladders to the majestic Sipapu Bridge or photograph the Milky Way perfectly aligned over the Owachomo Bridge. The third night we explored the smaller canyon that was lined with Indian “castles” and ruins along the edge.

We had stellar Milky Way skies but the challenge again was hot, hot, summer nights. The daytime temperature was 114 F and at night it cooled to a pleasant 85 F. Long exposures without noise reduction were limited to 30 seconds or 1 minute to prevent excessive noise from the heat.

Natural Bridges National Monument. Nikon D750 with a 
 
  Normal
  0


  false
  false
  false
  
  EN-US
  X-NONE
  X-NONE


…

Natural Bridges National Monument. Nikon D750 with a 15mm Zeiss Distagon f/2.8 lens. 75 stacked 1-minute exposures at f/2.8, ISO 6400.

The last night of the workshop we gave the students a choice: Go back to either Hovenweep or Natural Bridges. I led a group to Hovenweep, where we collaborated on a 2-plus-hour star trail, while Matt led a group of daring souls to the edge of Sipapu. Matt asked, “Who wants to do something creatively risky that might not work—but if it does, it will be a shot to remember?" In short, they split into two teams—one for shooting on the canyon rim, and one for safely hiking 600 feet down into the canyon, then hiking through with flashlights for the 45-minute star stack. (See above.)

Dry Tortugas National Park

July 27-30, 2017

By Gabriel Biderman

One of our more adventurous Passport Series workshops of 2017 was in Dry Tortugas National Park, which sits about 70 miles from Key West in the Gulf of Mexico. We were very fortunate to partner with the Key West Art and Historical Society and Dry Tortugas National Park for this immersive experience.

We kicked things off the day before the workshop with Tim and I presenting our favorite night park images at the Night Sky Symposium held at the Florida Keys Eco-Discovery Center. Kelly Clark, cultural resources specialist from Dry Tortugas, led off with an overview of the restoration and upkeep of the massive Fort Jefferson, then two local astronomers gave a very thorough overview of Florida night skies.

The next day we met the entire workshop class and spent the day going over night photography as well as learning the history of Key West with a private tour of the museum at the Art and Historical Society.

That night we put our night photography skills to the test at Fort Martello, where we practiced light painting and tested our high ISOs and long exposure parameters in the hot and humid heat of Florida. Then at midnight we boarded our private boat for a three-day tour. We woke to Fort Jefferson tiny on the horizon. The next two days and nights would be a full-on focus of Dry Tortugas. Most people get to visit this park for only two to three hours when the Yankee Clipper boat brings them in and out. Though the park has room for about 20 people to tent-camp, visitors don’t get access to the inside of Fort Jefferson after sundown. But we did!

We kept cool during the day by snorkeling and swimming, and also used daylight hours to scout for the best compositions. At night we had full access to the fort, and each window and path led us to fantastic nightscape images.

Life on the boat was a little cramped but the crew was amazing and the food top-notch! On our ride back to Key West we all started working on editing our photos for a public presentation at the Art and Historical Society. This turned out to be a huge hit—about 50 people attended. We put all the students’ work together and gave a brief talk about our recent adventures, followed by an hourlong Q&A and a celebratory group dinner.

Follow-up: Key West and Dry Tortugas were hit hard by Hurricane Irma. Fortunately our friends were safe and damage was minimal to their lives. A part of the famous walkway around the moat of Fort Jefferson was broken, so you can no longer walk all the way around—but I guess that makes for new picture opportunities. Stay tuned; we hope to partner with Dry Tortugas and the Key West Art and Historical Society again in the near future.

Great Sand Dunes National Park

August 10-14, 2017

By Matt Hill

Our intrepid group of night photography adventurers joined Lance and I in the mysterious and wildly unpredictable southern oasis of beauty in Colorado. Great Sand Dunes is a rather small park with only one entrance and basically one parking lot from which you can access the dune field and Medano Creek. That is, without renting a 4x4, deflating your tires and driving in the arid backcountry.

This was my fourth visit to Great Sand Dunes, and my second visit during the Perseid Meteor Showers—the very event we came to teach and capture. August is also monsoon season. Yeah. The park is nestled against the Sangre de Cristo Mountains on the east in a valley 50 by 100 miles wide. When a storm rolls through, it can come from practically any direction, including over the 13,000-plus-foot mountains towering over the dunes, which start at about 8,000 feet and rise to over 8,700 feet. Needless to say, we had to roll with whatever the weather threw at us, and boy did it throw.

We began with a night by Medano Creek at the foot of the dunes. The creek was abnormally high from the recent daily afternoon thunderstorms. We witnessed the surreal “surges” that look and sound like rolling waves on the ocean, only they rush downcreek up to 3 inches higher than the normal flow—an odd sight in what otherwise appears to be a strictly dry, desert scene. A couple hours into shooting, a storm front came blowing in from the east over the mountains and whipped sand around madly. So we packed up and headed into Alamosa to finish out night-shooting historic train cars.

Our second evening we planned for an ascent onto the dunes, but heavy clouds helped us choose Plan C instead: a Tibetan Stupa high on the mountainside overlooking the valley a bit north of the park and accessed from a primitive road leading south from quaint Crestone, Colorado. The group spent the evening marveling over the somber beauty of the spiritual space, with the Milky Way arcing overhead and with the view of the valley below.

Our third evening was the big one—the hike up the dunes. The skies played nice and we huffed and puffed our way up the equivalent of 70 flights of stairs on what felt like cane sugar. At 8,000-plus feet! Not for the faint of heart, yet our entire group made the hike (and we’re hella proud of them!). We were rewarded with an amazing view of the Perseids, a lightning storm playing behind the Sangre de Cristo mountains, and the obvious signs of civilized life (read: light pollution) to the south in Alamosa.

Our fourth and final evening included sunset at Zapata Falls overlooking the valley, some far-off storms and a compressed view of the dunes snuggled up to the mountains.

We had a ton of fun playing with light writing, light painting and doing some night portraiture. Everyone got to do some work on their goals and the result was a grand slideshow of our students’ efforts. Bravo and brava to all of our students. This workshop was challenging in so many ways, yet they exceeded, and we are really honored to have had this killer adventure together.

Centennial Valley, J Bar L Ranch & Solar Eclipse

August 17-22, 2017

By Gabriel Biderman

The green and luscious Centennial Valley has miles of big night sky and a population under 100 in the summer. The beauty is eternal, the community kind, and the cowboy hats fit like a fedora! Add to that the first total solar eclipse that any of us on the workshop had ever photographed and you have the makings of an ultimate experience.

Weather is always a factor, and when we landed in Montana, smoke-filled skies burnt our eyes. Montana and much of the rest of the West was experiencing some of the worst forest fires in history. Luckily for us some rain came just in time, right before the workshop kicked off. So we headed south to Exit 0 in high spirits.

Everyone arrived in time for dinner on the first night, created by our Chef Eric, who was catering all our meals from his free-range kitchen. Our first night brought us crisp, clear and star-tactic skies. We strolled down to the river and shot the reflecting and rising Milky Way over the water. We had a very experienced group and everyone experimented a little bit and came away with some spectacular shots.

The daily schedule consisted of breakfast, morning horse rides or nature walks, group lunches, one-on-one sessions with me, down time, a group dinner, and then night shoots. I really enjoyed the bonding aspect of this workshop; everyone had solo or shared a rustic cabins, but were often found hanging out and working together on images or practicing shooting the sun.

Instead of formal classes, I opted for the aforementioned one-hour individual sessions with each participant. This proved to be incredibly successful to further bond us, as well as to help answer attendees’ specific questions and push their visions along. Some people showed portfolios, others went over gear, and some were a combination of all.

Bailey’s beads (aka, the diamond ring effect) during the 2017 total eclipse. 1/15, f/22, ISO 800. © 2017 Gabriel Biderman.

Of course this was all building up to Monday, August 21—the day of the total solar eclipse. We had all been practicing tracking and shooting the sun during the day, which slightly calmed our nerves about how much the sun moves across the frame through telephoto lenses! We pushed the Planner feature of the PhotoPills app to the max to find the perfect location to view the eclipse—a remote, crowd-free place with an interesting landscape. We ended up on a dirt road sandwiched between the Sawtooth Mountains and Beaverhead Mountains. (To read more about how we photographed the eclipse, see our August blog post, “Eclipse Lessons: What We Learned from Our Day in the Sun.”)

All in all, it was an incredibly thrilling workshop and experience. I look forward to more adventures with my friends, and to experiencing the next total eclipse in 2024!

Westfjords of Iceland

August 27-September 5, 2017

By Lance Keimig

Gabe and I led National Parks at Night’s first international trip, to the Westfjords of Iceland at the very end of August and beginning of September. We chose the Westfjords because it is the least visited part of the country, and we chose to go at the end of their short summer because of the possibility of seeing the northern lights without having to suffer the dead of winter.

I think the group would tell you that it was worth every bit of effort to get to that far northwestern corner of the tiny island nation in the North Atlantic. We were fortunate too in that auroras graced us with their amazing presence on multiple nights, including one night when the entire sky glowed green for hours on end. We had chosen a location with panoramic views in all directions to photograph, because at 64 degrees north latitude, an aurora can appear anywhere in the sky––and it did! The lights were so ubiquitous and long-lasting that Gabe even made a series of individual “aurora portraits” of the entire group (see our “group photo”collage, above).

It was unanimous that Djupavik was the group’s favorite location, and it’s ours too. The site of a former herring processing factory, Djupavik was converted into a small hotel in the late 1970s by a couple from Reykjavik with a unique vision, and is now lovingly run by their son-in-law Magnus. There’s little doubt that we’ll be back.

Note: Speaking of going back, we have a few spots remaining in our upcoming March trip to Iceland, which will take us along the south coast to see both some of the best-known waterfalls in the country, and also to some off-the-beaten-path locations that are just as amazing for photography.

Olympic National Park

September 17-22, 2017 and September 24-29, 2017

By Chris Nicholson

If you’ve ever heard me talk about Olympic National Park, then you know it’s one of my favorite places. So it could probably go unsaid that I was very much looking forward to leading a workshop there—to share the experience of Olympic with my co-instructor Matt and with the 18 amazing photographers attending the two back-to-back workshops, many of whom had never been there.

The two workshops were similar, but also varied a bit, as weather and other factors often allow for a fair amount of serendipity.

During the first week we started at Lake Crescent and later Elwah River Valley (which just a few years ago was a lake, until the century-old dam was dismantled to restore historic salmon runs). At the latter, we were able to use information gathered during our daytime scouting with PhotoPills to plan on shooting the Milky Way hovering over the valley with the river leading right to it. It was an amazing scene! On the second night, fog and snow greeted us at Hurricane Ridge, and we used the conditions to create some moody light painting. Later we moved down to sea level, where we shot for the rest of the night at the Port Angeles waterfront.

Then we headed out to the coast to shoot at Ruby Beach on the third night, the Hoh Rain Forest (and Ruby again, as the stars returned) on the fourth, and ended the workshop under beautiful skies at Second Beach.

The second week we changed a few locations. We started at Hurricane Ridge, and on the second night we hiked to Marymere Falls, where we light painted the 90-foot waterfall with a pair of Luxli Viola LED panel lights, with Matt changing the intensity and color temperature remotely via his iPhone. On the way out through the new-growth rainforest, everyone stopped at different points to photograph the majestic trees, before ending the night on the shores of Lake Crescent.

Once on the coast, we started with the hike along Rialto Beach to shoot the entire third night near and at Hole-in-the-Wall. The fourth night we shot at the Hoh Rain Forest and Ruby Beach again, where we got the amazing treat of seeing and photographing an aurora over the sea stacks and coastal cliffs, as bioluminescent plankton lit up the waves beneath. Then we once again ended the workshop at Second Beach, albeit this time in moody fog and mist.

During both workshops we focused primarily on light painting, Milky Way and star trails, and Matt did a fair amount of side instruction for participants who wanted to learn about night portraiture. Over the course of both workshops, Matt and I got to spend 17 days in this amazing place (which we talked about in a video we released shortly afterward). There were a variety of experiences that we won’t soon forget—a sentiment I hope and trust that the attendees share.

Eastern Sierra

October 30-November 4, 2017

By Lance Keimig

Tim and I led the last National Parks at Night workshop of 2017, to California’s Eastern Sierra. Highway 395 stretches across the eastern side of the Sierra Nevada mountains, and passes through some of the best night photography locations in the U.S. This workshop focused on the southern end of the route, where we photographed at the Alabama Hills for three nights, and the Owen’s Valley Radio Observatory and Laws Railroad Museum for one night each. We had hoped to visit the Ancient Bristlecone Pine Forest too, but with temperatures in the single digits at night, the group’s sentiment was a resounding “No!” (A few members of the group also stayed an extra night and followed the Bishop petroglyph trail through the BLM-managed Volcanic Tablelands.)

The arches and rock formations of the Alabama Hills are challenging to photograph and light paint, but our group took to it with aplomb. Lighting the arches well requires some scrambling over steep and uneven surfaces, and in the case of Lathe Arch, wedging yourself and your camera into a narrow crevice to get low enough to have a good angle.

We chose to hold this workshop around the full moon because of the challenging nature of the topography, and because we wanted to emphasize light painting. With so much emphasis on Milky Way photography these days, it was great to get back to our night photography roots and work in bright moonlight for a change.

The sheer scale and number of radio telescopes at the observatory was a treat for all to experience. The Cal Tech staff was generous in giving us access to their facility, and we made the most of it.

Even though we normally scout each location in person and try to plan every detail of our workshops before the attendees arrive, sometimes opportunities appear that are too good to pass up. Such was the case with our surprise visit to the Laws Museum, a place that was unknown to both Tim and I until the signal tower caught our eye as we were passing by on the way to check out the petroglyphs.

Considering the richness and diversity of both the natural and historical sites in the region, a workshop along the northern part of the Highway 395 corridor is sure to follow someday.

Wrapping Up

Last, but always first in our hearts, is a big thank you to the most important people in our program—our participants. The energy and enthusiasm these photographers brought to the workshops cannot be paralleled.

We were thrilled to work with everyone who attended our workshops in 2017, and look forward to all the new places where we’re learning and shooting in 2018. Browse our new adventures here and grab a seat before they sell out.

BenQ sent a SW2700PT 27-inch display to some workshops this year, including Cuyahoga Valley National Park in Ohio (above), for attendees to use for image editing and review.

Secondly, we’d like to thank all our brand partners who helped make the experience that much better for the workshop attendees:

  • Nikon sent some of the best photography gear ever made for students to use for free. The kit they shipped to each workshop included a wide range of cameras, including the D5, D850, D810A, D810, D750 and D500, plus a huge selection of lenses, including the awesome 14-24mm f/2.8, 20mm f/1.8, 28mm f/1.4 and more!
  • Coast gave away HP1 flashlights at our Passport Series events, provided a grand assortment of free loaner lights at all our workshops, and 30 percent discounts for all our participants and followers. (Want to take advantage of that last one? Use code “parksatnight” at www.coastportland.com.)
  • B&H Photo sent along loaner gear such as intervalometers, remote shutter releases and bubble levels.
  • BenQ provided projectors for presentations and the crystal-clear SW2700PT 27-inch display at two of our workshops for attendees to use while editing.
  • Light Painting Brushes provided a Deluxe Starter Kit for attendees to practice light writing.
  • X-Rite supplied an i1Display Pro to profile and calibrate anyone’s laptops and the instructors’ projectors.
  • Bay Photo provided free prints to award to attendees in random drawings, as well as a 25 percent discount to all the students.
  • Peak Design supplied a random giveaway as well, in the form of their Clutch strap.
  • Irix Lenses sent 11mm f/4 and 15mm f/2.4 Blackstone lenses to several workshops for students to borrow and love.
  • Luxli sent their brand new Viola light panels to several workshops as free loaners, prompting all five instructors and scores of students to buy them.

Finally, here’s to you, for reading, subscribing and attending. We appreciate you, and your support. Seize the night, y’all.

Matt Hill is a partner and workshop leader with National Parks at Night. See more about his photography, art, workshops and writing at MattHillArt.com. Follow Matt on Twitter Instagram Facebook.

UPCOMING WORKSHOPS FROM NATIONAL PARKS AT NIGHT

How We Got the Shot: Light Painting the Upright Stone in Iceland

Nikon D750, Sigma 24mm f/1.4 Art lens. 73 seconds, f/8, ISO 200.

One of my favorite moments of our recently completed Westfjords of Iceland photo tour was working with three of our travelers on a joint light painting image one night while we were waiting for the aurora to appear. (The aurora did eventually appear, and in a big way!)

We were positioned high on a hill with 360-degree views in order to be able to see and photograph the aurora no matter where it appeared in the sky. The weather was perfect, the sky mercifully clear, and the vistas magnificent. The group was excited with anticipation as the KP index of 5 was a good sign that the sky would put on a good show for us.

There was a large upright stone, about 5 feet high, perched neatly near the edge of the hill. It reminded me of an image by the Czech photographer Jan Pohribny titled “Positive Energy Emitter” (Figure 1). Pohribny’s photo was of an ancient standing stone at twilight, and he had circled the stone with a red light held overhead and also pointed down at the ground to create the “energy vibrations” implied in the title.

Normal
0


false
false
false

EN-US
X-NONE
X-NONE


Figure 1. “Positive Energy Emitter," 1992 Jan Pohribný. From the series New Stone Age.
 <w:LatentStyles DefLockedState="false" DefUnhideWhenUsed="t…

Figure 1. “Positive Energy Emitter," 1992 Jan Pohribný. From the series New Stone Age.

I thought that this would be the perfect opportunity to attempt an homage. My thought was that the stone before us could be a beacon to summon the aurora, as well as a tribute to an early light painting innovator.

After my standard procedure of framing the composition, focusing and determining the ambient exposure, I made my initial attempt at creating the rings of light around the stone (Figure 2).

Figure 2. Initial experimentation. Nikon D750, Sigma 24mm f/1.4 Art lens. 30 seconds, f/16, ISO 100.

First I set up a Luxli Constructor Large Block Bi-Color LED Light on the ground pointed at the stone, set on low power at 3200 K––partly to illuminate the stone, and partly so I could see to move around without tripping over the other rocks on the ground.

I also used a short section of frosted plastic tube that I had removed from a collapsible light sword from Light Painting Brushes, and fixed it to my Coast HP5R flashlight on low power, which created a DIY light wand. I wasn’t satisfied with the look I was getting with the wand, so Erika, one of the workshop attendees, suggested using a different Light Painting Brushes tool that she had, a purple translucent light writer (Figure 3).

Figure 3. Second attempt. Nikon D750, Sigma 24mm f/1.4 Art lens. 30 seconds, f/13, ISO 100.

We liked the look with the translucent light writer better, but since there was still a lot of light in the sky, we were limited to a 30-second exposure at ISO 100 and f/11. Because the ground around the standing stone was covered with rocks of various sizes, it wasn’t possible to move around very quickly in order to create the desired light writing effect in such a short time. We could make only a few revolutions during the half-minute exposure. But I knew that as the sky got darker, we would be able to extend the exposure time and create more light rings.

Meanwhile, Erika’s husband Dan suggested adding another element to the image using shadow painting rather than light painting. His idea was to project a hand shadow onto the rock by placing his hand between the rock and a light source. We loved the idea, and the initial result reminded us of pictographs found in ancient rock art sites around the world.

The first attempt was encouraging, so we made a few refinements until we came up with an iteration we all liked. I also added some illumination to the foreground by sweeping a flashlight low to the ground on the left and right sides to fill in the shadows and reveal some detail (Figure 4).

Figure 4. Third attempt. Nikon D750, Sigma 24mm f/1.4 Art lens. 30 seconds, f/11, ISO 100.

By this time, things were getting complicated, as Erika was making the rings around the stone, Dan was holding his hand in position for the shadow, and I was lighting the ground and creating the hand shadow, which took precise alignment of Dan’s hand and the flashlight. Each of us had our cameras set up and were shooting side by side.

Fortunately, Steve, another participant, was available to assist us by opening all the shutters, which gave us time to get into position before the exposures started. We made one more frame just as the aurora was starting to appear in another part of the sky, and that frame was exactly the vision we were working toward (Figure 5). So we called it a wrap, and repositioned ourselves to photograph the aurora.

Figure 5. Final image. Nikon D750, Sigma 24mm f/1.4 Art lens. 73 seconds, f/8, ISO 200.

So many elements came together to make this image succeed:

  • the references to ancient cultures associated with mystery and spirituality––the standing stones of neolithic cultures in Europe, and the pictographs reminiscent of Native American Kokopelli
  • the ritual of light painting and the call to the gods asking for the aurora to bless us with its magical presence
  • and most importantly, the collaborative spirit that we shared to create the image, which made this special moment a highlight of our trip to the magical place that are the Westfjords of Iceland

Thank you Erika, Dan and Steve. It was an honor sharing this experience with you!

Lance Keimig is a partner and workshop leader with National Parks at Night. He has been photographing at night for 30 years, and is the author of Night Photography and Light Painting: Finding Your Way in the Dark (Focal Press, 2015). Learn more about his images and workshops at www.thenightskye.com.

UPCOMING WORKSHOPS FROM NATIONAL PARKS AT NIGHT